warning Citroen C4 DAG 2014.5 2.G Owner's Guide
[x] Cancel search | Manufacturer: CITROEN, Model Year: 2014.5, Model line: C4 DAG, Model: Citroen C4 DAG 2014.5 2.GPages: 340, PDF Size: 12.89 MB
Page 89 of 340
55
87ô
C4-2_en_Chap05_visibilite_ed01-2014
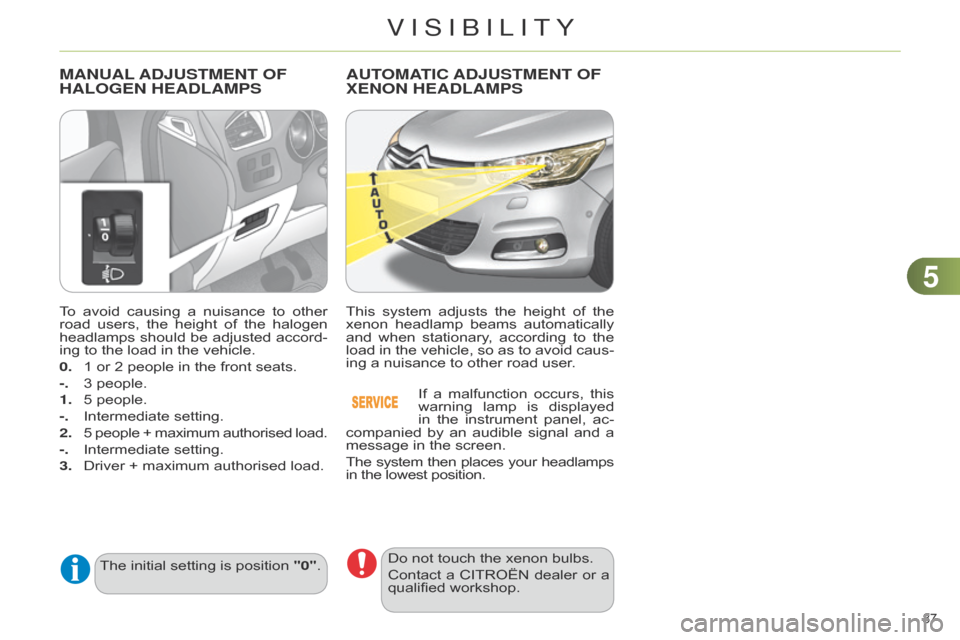
Toô avoidô causing ô a ô nuisance ô to ô other ô road
ô users, ô the ô height ô of ô the ô halogen ô
headlamps
ô
should
ô
be
ô
adjusted
ô
accord
-
ing
ô to ô the ô load ô in ô the ô vehicle.
0.
ô
1
ô or ô 2 ô people ô in ô the ô front ô seats.
-.
ô
3
ô people.
1.
ô
5
ô people.
-.
ô
Intermediate
ô setting.
2.
ô
5
ô
people
ô
+
ô
maximum
ô
authorised
ô
load.
-.
ô
Intermediate
ô setting.
3.
ô
Driver
ô + ô maximum ô authorised ô load.
MANUAL AD j USTMENT OF HALOGEN
HEADLAMPS
Theô initialô settingô isô positionô "0".
AUTOMATIC ADjUSTMENT OF XENON
HEADLAMPS
Thisô system ô adjusts ô the ô height ô of ô the ô xenon
ô headlamp ô beams ô automatically ô
and
ô
when
ô
stationary
, ô
according
ô
to
ô
the
ô
load
ô
in
ô
the
ô
vehicle,
ô
so
ô
as
ô
to
ô
avoid
ô
caus
-
ing
ô a ô nuisance ô to ô other ô road ô user.
If
ô
a
ô
malfunction
ô
occurs,
ô
this
ô
warning
ô
lamp
ô
is
ô
displayed
ô
in
ô
the
ô
instrument
ô
panel,
ô
ac
-
companied
ô
by
ô
an
ô
audible
ô
signal
ô
and
ô
a
ô
message
ô in ô the ô screen.
Theô systemô then ô places ô your ô headlampsô in
ô the ô lowest ô position.
Doô notô touchô theô xenonô bulbs.
Contact ô
a
ô
CITROûN
ô
dealer
ô
or
ô
a
ô
qualified
ô workshop.
VISIBILITY
Page 90 of 340

55
88ô
C4-2_en_Chap05_visibilite_ed01-2014
DIRECTIONAL LIGHTING
Programming
with directional lighting
without directional lighting
When
ô
the
ô
dipped
ô
or
ô
main
ô
beam
ô
head
-
lamps
ô
are
ô
on,
ô
this
ô
function,
ô
allows
ô
the
ô
light
ô
beams
ô
to
ô
better
ô
follow
ô
the
ô
road.
The
ô
use
ô
of
ô
this
ô
function,
ô
coupled
ô
with
ô
the
ô
xenon
ô
headlamps
ô
and
ô
the
ô
corner
-
ing
ô
lighting,
ô
considerably
ô
improves
ô
the
ô quality
ô
of
ô
your
ô
lighting
ô
round
ô
bends.
Operating faultIf
ô
a
ô
fault
ô
occurs,
ô
this
ô
warning
ô
lamp
ô
flashes
ô
in
ô
the
ô
instrument
ô
panel,
ô
accompanied
ô
by
ô
a
ô
mes
-
sage
ô in ô the ô screen.
Contact
ô
a
ô
CITROûN
ô
dealer
ô
or
ô
a
ô
quali
-
fied
ô workshop.
This
ô function ô is ô inactive:
- ô
when
ô stationary ô or ô at ô low ô speeds,
- ô
when
ô reverse ô is ô engaged.
The ô
system
ô
is
ô
activated
ô
or
ô
de
-
activated
ô
in
ô
the
ô
vehicle
ô
configu
-
ration
ô menu.
ô The
ô
system
ô
is
ô
activated
ô
by
ô
de
-
fault.
The
ô
state
ô
of
ô
the
ô
system
ô
stays
ô
in
ô
memoryô on
ô switching ô off ô the ô ignition.
VISIBILITY
Page 93 of 340

55
91ô
C4-2_en_Chap05_visibilite_ed01-2014
Automatic rain sensitive
windscreen wipers
Theô windscreenô wipers ô operate ô automat -
ically, without any action on the part of
the
ô
driver
, ô
if
ô
rain
ô
is
ô
detected
ô
(sensor
ô
be
-
hind
ô
the
ô
rear
ô
view
ô
mirror),
ô
adapting
ô
theirô speed
ô to ô the ô intensity ô of ô the ô rainfall.
Briefly
ô
push
ô
stalk
ô
A
ô
down
-
wards.
The
ô
instruction
ô
is
ô
confirmed
ô
by
ô
a
ô
wiping
ô
cycle,
ô
accompanied
ô
by
ô
illumination
ô
of
ô
this
ô
warning
ô
lamp
ô
in
ô
the
ô
instrument
ô
panel
ô
and
ô
an
ô
activation
ô
message. Switching on
Switching off Operating fault
If
ô
an
ô
automatic
ô
rain
ô
sensitive
ô
wiper
ô
mal
-
function occurs, the wipers will operate
in
ô intermittent ô mode.
Contact
ô
a
ô
CITROûN
ô
dealer
ô
or
ô
a
ô
quali
-
fied
ô workshop.
d
o not cover the rain sensor,
linked
ô
with
ô
the
ô
sunshine
ô
sensor
ô
and
ô
located
ô
in
ô
the
ô
centre
ô
of
ô
the
ô
windscreen
ô
behind
ô
the
ô
rear
ô
view
ô
mirror
.
Switch
ô
of
f ô
the
ô
automatic
ô
rain
ô
sensitive
ô
wipers
ô
when
ô
using
ô
an
ô
automatic
ô car ô wash.
In
ô
winter
, ô
it
ô
is
ô
advisable
ô
to
ô
waitô until
ô
the
ô
windscreen
ô
is
ô
completelyô clear
ô
of
ô
ice
ô
before
ô
activating
ô
theô automatic
ô rain ô sensitive ô wipers.
The
ô
automatic
ô
rain
ô
sensitive
ô
windscreen
ô
wipers
ô
must
ô
be
ô
re
-
activated ô if ô the ô ignition ô has ô been ô of
f ô for ô more ô than ô one ô minute.
Briefly
ô
push
ô
stalk
ô
A
ô
downwards
ô
again.
The
ô
instruction
ô
is
ô
confirmed
ô
by
ô
this
ô
warning
ô
lamp
ô
going
ô
of
f ô
in
ô
the
ô
instrument
ô
panel
ô
and/or
ô
the
ô
display
ô
of
ô a ô deactivation ô message.
Windscreen and headlamp
wash
Low screenwash / headlamp wash
fluid level
Onô
vehicle
ô
fitted
ô
with
ô
headlamp
ô
wash
-
ers,
ô
the
ô
low
ô
level
ô
of
ô
this
ô
fluid
ô
is
ô
indicat
-
ed
ô
by
ô
gauge
ô
in
ô
the
ô
reservoir
ô
filler
ô
neck
ô
under
ô the ô bonnet.
Checking
ô
and
ô
topping
ô
up
ô
this
ô
fluid
ô
can
ô
should
ô be ô done ô with ô the ô engine ô off.
The
ô
level
ô
of
ô
this
ô
fluid
ô
should
ô
be
ô
checked
ô
regularly
, ô particularly ô during ô winter.
Refer
ô
to
ô
"Checks
ô
-
ô
Screenwash
ô
/
ô
head
-
lamp
ô
wash
ô
level"
ô
section
ô
for
ô
the
ô
proce
-
dure
ô on ô checking ô the ô level.
F
ô
Pull
ô
the
ô
windscreen
ô
wiper
ô
stalk
ô
to
-
wards ô
you.
ô
The
ô
windscreen
ô
wash
ô
then
ô
the
ô
windscreen
ô
wipers
ô
operate
ô
for
ô a ô fixed ô period.
The ô
headlamp
ô
washers
ô
only
ô
operateô when
the dipped or main beam head
-
lamps are on, with the vehicle moving.
To ô
reduce
ô
the
ô
consumption
ô
of
ô
the
ô
fluid
ô
by
ô
the
ô
headlamp
ô
wash
-
ers, they operate only with every
seventh use of the screenwash
or ô
every
ô
25
ô
miles
ô
(40
ô
km)
ô
during
ô
a
ô given ô journey.
VISIBILITY
Page 103 of 340
101ô
C4-2_en_Chap06_amenagement_ed01-2014
230 V / 50 HZ POWER SOCKET
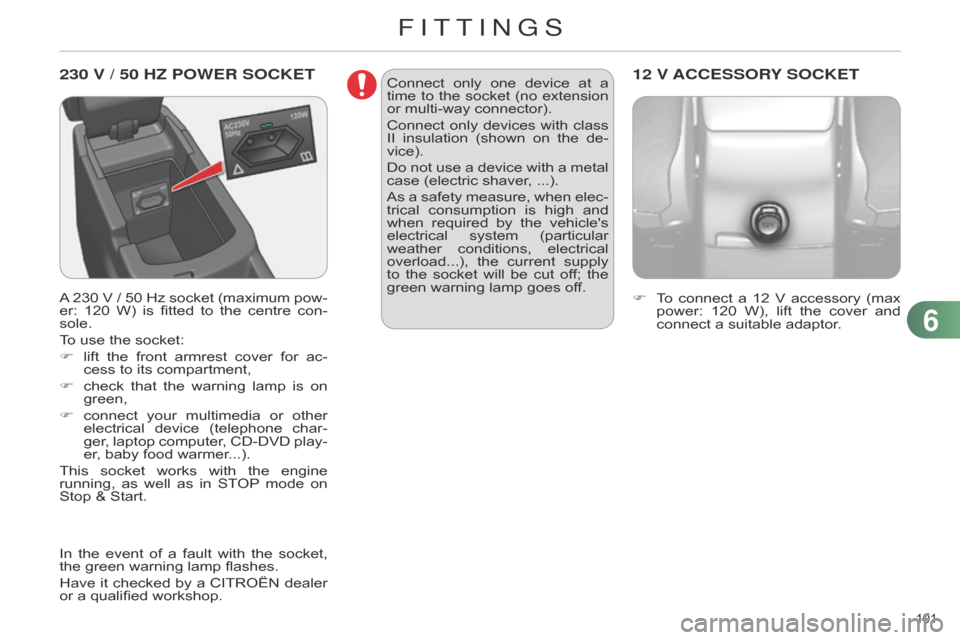
Aô 230ô V ô / ô 50 ô Hz ô socket ô (maximum ô pow -
er: ô 120 ô W) ô is ô fitted ô to ô the ô centre ô con -
sole.
To
ô use ô the ô socket:
F
ô
lift
ô
the
ô
front
ô
armrest
ô
cover
ô
for
ô
ac
-
cess
ô to ô its ô compartment,
F
ô
check
ô
that
ô
the
ô
warning
ô
lamp
ô
is
ô
on
ô
green,
F
ô
connect
ô
your
ô
multimedia
ô
or
ô
other
ô
electrical
ô
device
ô
(telephone
ô
char
-
ger,
ô
laptop
ô
computer
, ô
CD-DVD
ô
play
-
er,
ô baby ô food ô warmer...).
This
ô
socket
ô
works
ô
with
ô
the
ô
engine
ô
running,
ô
as
ô
well
ô
as
ô
in
ô
ST
OP
ô mode
ô
on
ô
Stopô &
ô Start. F
ô T o ô connect ô a ô 12 ô V ô accessory ô (max ô power:
ô 120 ô W), ô lift ô the ô cover ô and ô
connect
ô a ô suitable ô adaptor.
12 V ACCESSORY SOCKETConnectô onlyô one ô device ô at ô a ô time
ô to ô the ô socket ô (no ô extension ô
or
ô multi-way ô connector).
Connect
ô
only
ô
devices
ô
with
ô
class
ô
II
ô
insulation
ô
(shown
ô
on
ô
the
ô
de
-
vice).
Do
ô
not
ô
use
ô
a
ô
device
ô
with
ô
a
ô
metal
ô
case
ô (electric ô shaver, ô ...).
As
ô
a
ô
safety
ô
measure,
ô
when
ô
elec
-
trical
ô
consumption
ô
is
ô
high
ô
and
ô
when
ô
required
ô
by
ô
the
ô
vehicle's
ô
electrical
ô
system
ô
(particular
ô
weather
ô
conditions,
ô
electrical
ô
overload...),
ô
the
ô
current
ô
supply
ô
to
ô
the
ô
socket
ô
will
ô
be
ô
cut
ô
of
f; ô
the
ô
green
ô warning ô lamp ô goes ô off.
In
ô
the
ô
event
ô
of
ô
a
ô
fault
ô
with
ô
the
ô
socket,
ô
the
ô
green
ô
warning
ô
lamp
ô
flashes.
Have
ô
it
ô
checked
ô
by
ô
a
ô
CITROûN
ô
dealer
ô
or
ô
a
ô
qualified
ô
workshop.
6
FITTINGS
Page 112 of 340
77
110ô
C4-2_en_Chap07_securite-enfants_ed01-2014
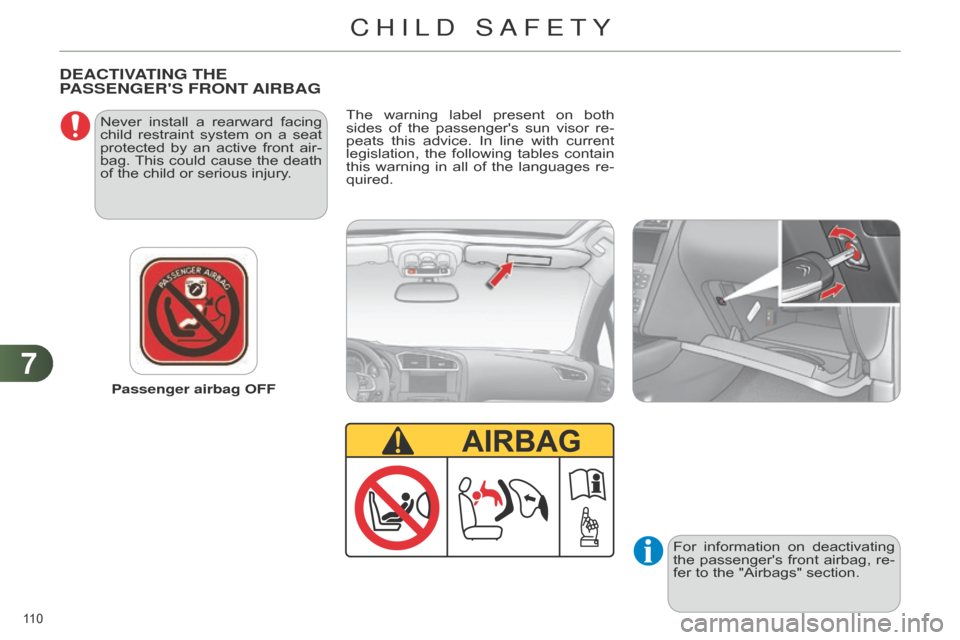
Passenger airbag OFF
Never ô
install
ô
a
ô
rearward
ô
facing
ô
child
ô
restraint
ô
system
ô
on
ô
a
ô
seat
ô
protected
ô
by
ô
an
ô
active
ô
front
ô
air
-
bag. ô
This
ô
could
ô
cause
ô
the
ô
death
ô
of
ô the ô child ô or ô serious ô injury.
DEACTIVATING THE P
ASSENGER ' S FRONT AIRBAG
Theô warningô label ô present ô on ô both ô sides
ô of ô the ô passenger's ô sun ô visor ô re -
peats
ô
this
ô
advice.
ô
In
ô
line
ô
with
ô
current
ô
legislation,
ô
the
ô
following
ô
tables
ô
contain
ô
this
ô
warning
ô
in
ô
all
ô
of
ô
the
ô
languages
ô
re
-
quired.
For
ô
information
ô
on
ô
deactivating
ô
the
ô
passenger's
ô
front
ô
airbag,
ô
re
-
fer
ô to ô the ô "Airbags" ô section.
CHILD SAFETY
Page 124 of 340
88
122ô
C4-2_en_Chap08_securite_ed01-2014
DIRECTION INDICATORS
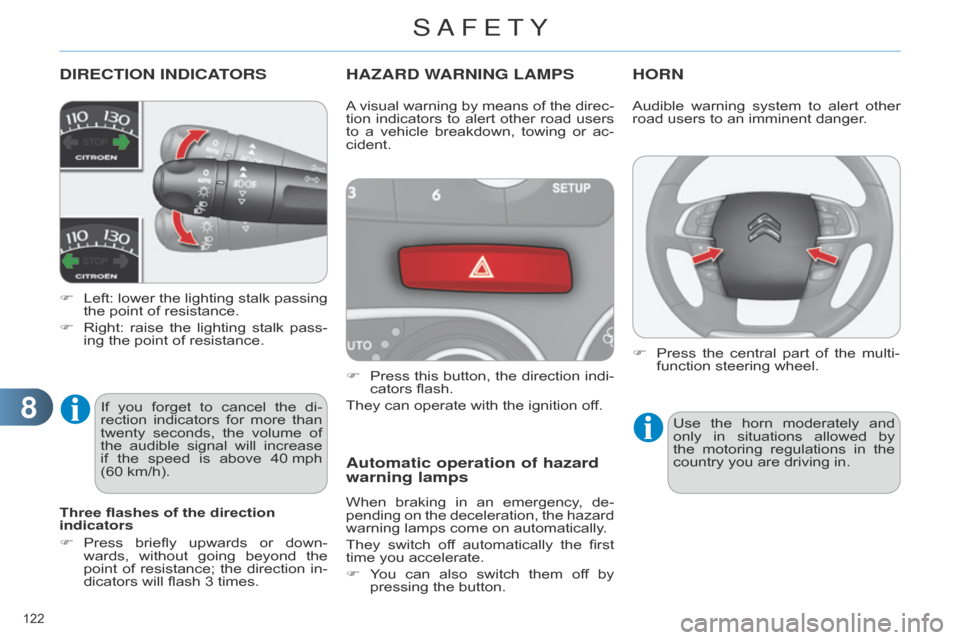
Fô Left:ô lower ô the ô lighting ô stalk ô passing ô the
ô point ô of ô resistance.
F
ô
Right:
ô
raise
ô
the
ô
lighting
ô
stalk
ô
pass
-
ing
ô the ô point ô of ô resistance.
HAZARD WARNING LAMPS
Fô Pressô this ô button, ô the ô direction ô indi -
cators ô flash.
They
ô can ô operate ô with ô the ô ignition ô off.
Automatic operation of hazard
warning lamps
Whenô brakingô in ô an ô emergency , ô de -
pending ô on ô the ô deceleration, ô the ô hazard ô
warning
ô lamps ô come ô on ô automatically.
They
ô
switch
ô
of
f ô
automatically
ô
the
ô
first
ô
time
ô you ô accelerate.
F
ô
Y
ou ô
can
ô
also
ô
switch
ô
them
ô
of
f ô
by
ô
pressing
ô the ô button.
HORN
Aô visualô warning ô by ô means ô of ô the ô direc -
tion ô indicators ô to ô alert ô other ô road ô users ô
to
ô
a
ô
vehicle
ô
breakdown,
ô
towing
ô
or
ô
ac
-
cident.
Three flashes of the direction
indicators
F
ô
Press
ô
briefly
ô
upwards
ô
or
ô
down
-
wards,
ô
without
ô
going
ô
beyond
ô
the
ô
point
ô
of
ô
resistance;
ô
the
ô
direction
ô
in
-
dicators
ô
will
ô
flash
ô
3
ô
times.
If
ô
you
ô
forget
ô
to
ô
cancel
ô
the
ô
di
-
rection
ô
indicators
ô
for
ô
more
ô
than
ô
twenty
ô
seconds,
ô
the
ô
volume
ô
of
ô
the
ô
audible
ô
signal
ô
will
ô
increase
ô
if
ô
the
ô
speed
ô
is
ô
above
ô
40
ô
mph
ô
(60
ô
km/h). Audible
ô warning ô system ô to ô alert ô other ô road
ô users ô to ô an ô imminent ô danger.
Use
ô
the
ô
horn
ô
moderately
ô
and
ô
only
ô
in
ô
situations
ô
allowed
ô
by
ô
the
ô
motoring
ô
regulations
ô
in
ô
the
ô
country
ô you ô are ô driving ô in.
F
ô
Press
ô
the
ô
central
ô
part
ô
of
ô
the
ô
multi
-
function
ô steering ô wheel.
SAFETY
Page 125 of 340
88
123ô
C4-2_en_Chap08_securite_ed01-2014
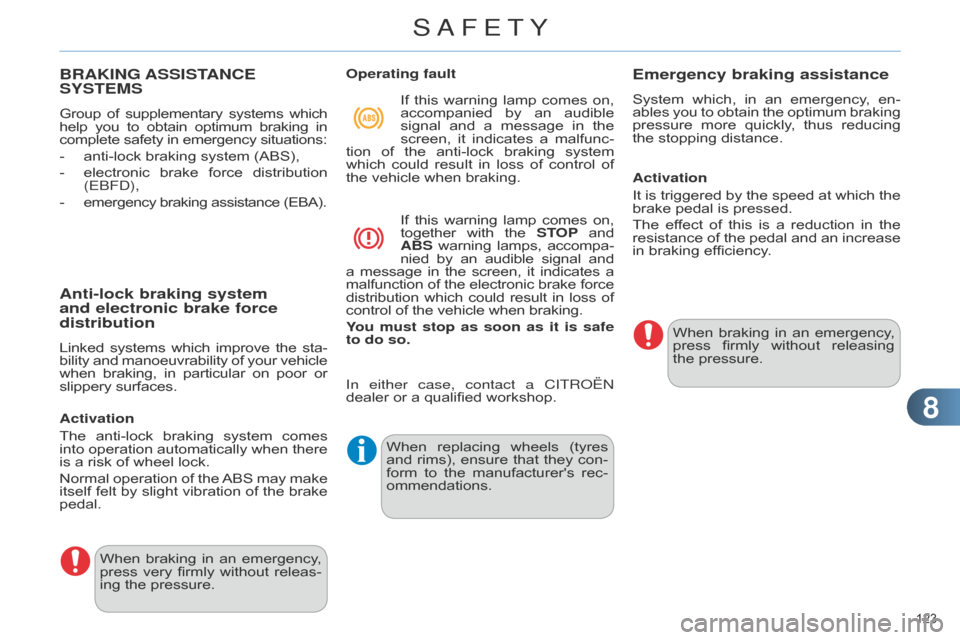
BRAKING ASSISTANCE SYSTEMS
Groupô ofô supplementary ô systems ô whichô help
ô you ô to ô obtain ô optimum ô braking ô inô complete
ô safety ô in ô emergency ô situations:
-
ô
anti-lock
ô braking ô system ô (ABS),
-
ô
electronic
ô
brake
ô
force
ô
distribution
ô
(E
b F d ),
-
ô emergency
ô braking ô assistance ô (EBA).
When
ô
braking
ô
in
ô
an
ô
emergency
, ô
press
ô
very
ô
firmly
ô
without
ô
releas
-
ing
ô the ô pressure. When
ô
replacing
ô
wheels
ô
(tyres
ô
and
ô
rims),
ô
ensure
ô
that
ô
they
ô
con
-
form
ô
to
ô
the
ô
manufacturer's
ô
rec
-
ommendations. When
ô
braking
ô
in
ô
an
ô
emergency
, ô
press
ô
firmly
ô
without
ô
releasing
ô
the
ô pressure.
Anti-lock braking system
and electronic brake force
distribution
Linkedô systemsô which ô improve ô the ô sta -
bility ô and ô manoeuvrability ô of ô your ô vehicleô when
ô
braking,
ô
in
ô
particular
ô
on
ô
poor
ô
orô slippery
ô surfaces.
Activation
The
ô
anti-lock
ô
braking
ô
system
ô
comes
ô
into
ô
operation
ô
automatically
ô
when
ô
there
ô
is
ô a ô risk ô of ô wheel ô lock.
Normal
ô
operation
ô
of
ô
the
ô
ABS
ô
may
ô
make
ô
itself
ô
felt
ô
by
ô
slight
ô
vibration
ô
of
ô
the
ô
brake
ô
pedal. Operating fault
If
ô
this
ô
warning
ô
lamp
ô
comes
ô
on,
ô
accompanied
ô
by
ô
an
ô
audible
ô
signal
ô
and
ô
a
ô
message
ô
in
ô
the
ô
screen,
ô
it
ô
indicates
ô
a
ô
malfunc
-
tion ô
of
ô
the
ô
anti-lock
ô
braking
ô
system
ô
which
ô
could
ô
result
ô
in
ô
loss
ô
of
ô
control
ô
of
ô
the
ô vehicle ô when ô braking.
If ô
this
ô
warning
ô
lamp
ô
comes
ô
on,ô together
ô
with
ô
the
ô
ST
OP ô
andô ABS
ô
warning
ô
lamps,
ô
accompa
-
nied ô
by
ô
an
ô
audible
ô
signal
ô
andô a
ô
message
ô
in
ô
the
ô
screen,
ô
it
ô
indicates
ô
aô malfunction
ô
of
ô
the
ô
electronic
ô
brake
ô
forceô distribution
ô
which
ô
could
ô
result
ô
in
ô
loss
ô
ofô control
ô of ô the ô vehicle ô when ô braking.
You must stop as soon as it is safe
to do so.
Emergency braking assistance
Systemô which, ô in ô an ô emergency , ô en -
ables ô you ô to ô obtain ô the ô optimum ô braking ô
pressure
ô
more
ô
quickly
, ô
thus
ô
reducing
ô
the
ô stopping ô distance.
Activation
It
ô
is
ô
triggered
ô
by
ô
the
ô
speed
ô
at
ô
which
ô
the
ô
brake
ô pedal ô is ô pressed.
The
ô
ef
fect ô
of
ô
this
ô
is
ô
a
ô
reduction
ô
in
ô
the
ô
resistance
ô
of
ô
the
ô
pedal
ô
and
ô
an
ô
increase
ô
in
ô braking ô efficiency.
In either case, contact a CITR
o
û
n
dealer
ô
or
ô
a
ô
qualified
ô
workshop.
SAFETY
Page 126 of 340
88
124ô
C4-2_en_Chap08_securite_ed01-2014
TRAjECTORY CONTROL SYSTEMS
Anti-slip regulation (ASR) and
dynamic stability control (DSC)
Theô anti-slipô regulation ô (also ô known ô as ô traction
ô control) ô optimises ô traction ô to ô
prevent
ô
skidding
ô
of
ô
the
ô
wheels,
ô
by
ô
act
-
ing
ô
on
ô
the
ô
brakes
ô
of
ô
the
ô
driving
ô
wheels
ô
and
ô on ô the ô engine.
The electronic stability control acts on
the
ô
brake
ô
of
ô
one
ô
or
ô
more
ô
wheels
ô
and
ô
on
ô
the
ô
engine
ô
to
ô
keep
ô
the
ô
vehicle
ô
on
ô
the
ô
trajectory
ô
required
ô
by
ô
the
ô
driver
, ô
within
ô
the
ô limits ô of ô the ô laws ô of ô physics.
Activation
These
ô
systems
ô
are
ô
activated
ô
automati
-
cally
ô each ô time ô the ô vehicle ô is ô started.
They
ô
come
ô
into
ô
operation
ô
in
ô
the
ô
event
ô
of
ô a ô grip ô or ô trajectory ô problem.
This
ô
is
ô
indicated
ô
by
ô
flashing
ô
of
ô
this
ô
warning
ô
lamp
ô
in
ô
the
ô
instru
-
ment
ô panel.
Intelligent traction control
system ("Snow motion")Deactivation
Inô
extremely
ô
severe
ô
conditions
ô
(deep
ô
snow
, ô
mud,
ô
...),
ô
if
ô
you
ô
are
ô
unable
ô
to
ô
move
ô
of
f, ô
it
ô
may
ô
be
ô
useful
ô
to
ô
temporar
-
ily
ô
deactivate
ô
these
ô
systems
ô
so
ô
that
ô
the
ô
wheels
ô
can
ô
spin
ô
freely
ô
and
ô
allow
ô
the
ô
vehicle
ô to ô move.
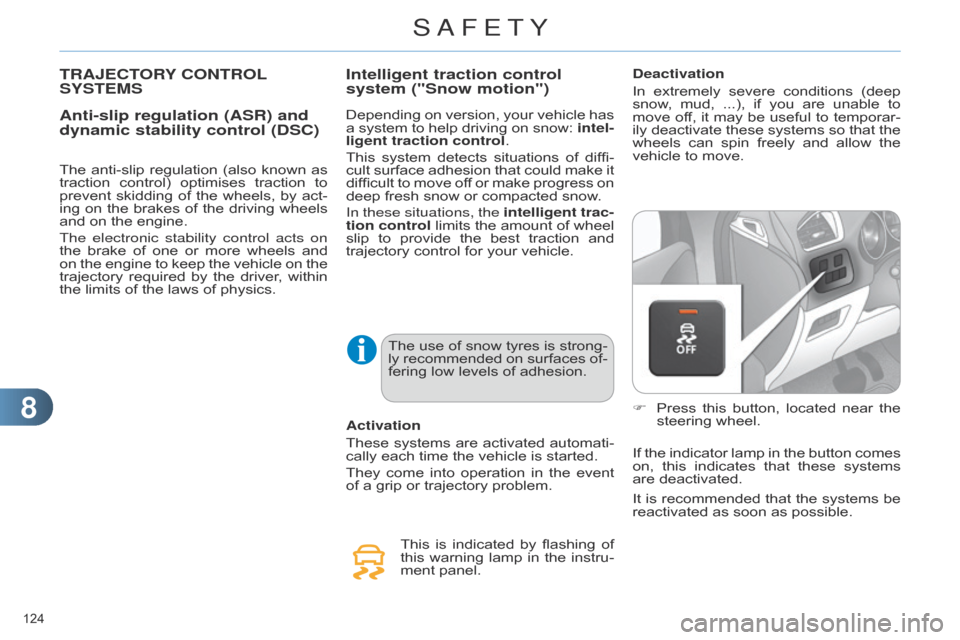
F
ô
Press
ô
this
ô
button,
ô
located
ô
near
ô
the
ô
steering
ô wheel.
If
ô
the
ô
indicator
ô
lamp
ô
in
ô
the
ô
button
ô
comes
ô
on,
ô
this
ô
indicates
ô
that
ô
these
ô
systems
ô
are
ô deactivated.
Depending
ô
on
ô
version,
ô
your
ô
vehicle
ô
has
ô
a
ô
system
ô
to
ô
help
ô
driving
ô
on
ô
snow:
ô
intel
-
ligent traction control.
This
ô
system
ô
detects
ô
situations
ô
of
ô
diffi
-
cult
ô
surface
ô
adhesion
ô
that
ô
could
ô
make
ô
it
ô
difficult
ô
to
ô
move
ô
of
f
ô
or
ô
make
ô
progress
ô
on
ô
deep
ô
fresh
ô
snow
ô
or
ô
compacted
ô
snow.
In these situations, the intelligent trac-
tion control
ô
limits
ô
the
ô
amount
ô
of
ô
wheel
ô
slip
ô
to
ô
provide
ô
the
ô
best
ô
traction
ô
and
ô
trajectory
ô
control
ô
for
ô
your
ô
vehicle.
The
ô
use
ô
of
ô
snow
ô
tyres
ô
is
ô
strong-
ly
ô
recommended
ô
on
ô
surfaces
ô
of
-
fering
ô
low
ô
levels
ô
of
ô
adhesion. It
ô
is
ô
recommended
ô
that
ô
the
ô
systems
ô
be
ô
reactivated
ô as ô soon ô as ô possible.
SAFETY
Page 128 of 340
88
126ô
C4-2_en_Chap08_securite_ed01-2014
Seat belt not fastened / unfastened
warning lamp in the instrument panelWhen
ô
the
ô
ignition
ô
is
ô
switched
ô
on,ô this
ô
warning
ô
lamp
ô
comes
ô
on
ô
inô the
ô
instrument
ô
panel
ô
if
ô
the
ô
driverô and/or
ô
the
ô
front
ô
passenger
ô
hasô not
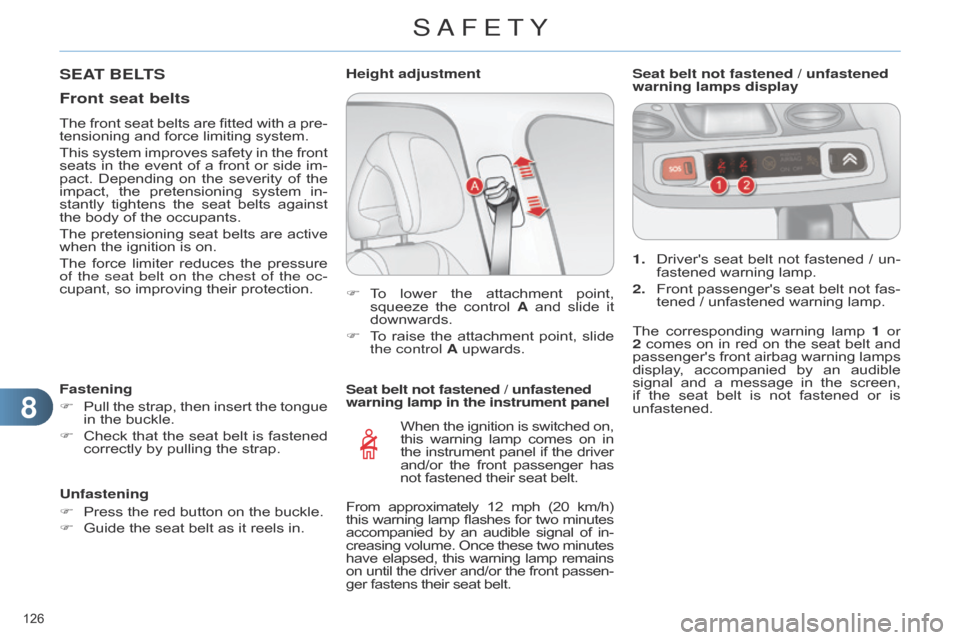
ô fastened ô their ô seat ô belt.1.
ô
Driver's
ô
seat
ô
belt
ô
not
ô
fastened
ô
/
ô
un
-
fastened ô warning ô lamp.
2. ô
Front
ô
passenger's
ô
seat
ô
belt
ô
not
ô
fas
-
tened ô / ô unfastened ô warning ô lamp.
Seat belt not fastened / unfastened
warning lamps display
F ô
T
o ô
lower
ô
the
ô
attachment
ô
point,
ô
squeeze
ô
the
ô
control
ô
A
ô
and
ô
slide
ô
it
ô
downwards.
F
ô
T
o ô
raise
ô
the
ô
attachment
ô
point,
ô
slide
ô
the control
A ô upwards.
Height adjustment
SEAT BELTS
Front seat belts
Theô front
ô seat ô belts ô are ô fitted ô with ô a ô pre -
tensioning ô and ô force ô limiting ô system.
This
ô
system
ô
improves
ô
safety
ô
in
ô
the
ô
front
ô
seats
ô
in
ô
the
ô
event
ô
of
ô
a
ô
front
ô
or
ô
side
ô
im
-
pact.
ô
Depending
ô
on
ô
the
ô
severity
ô
of
ô
the
ô
impact,
ô
the
ô
pretensioning
ô
system
ô
in
-
stantly
ô
tightens
ô
the
ô
seat
ô
belts
ô
against
ô
the
ô body ô of ô the ô occupants.
The
ô
pretensioning
ô
seat
ô
belts
ô
are
ô
active
ô
when
ô the ô ignition ô is ô on.
The
ô
force
ô
limiter
ô
reduces
ô
the
ô
pressure
ô
of
the seat belt on the chest of the oc-
cupant,
ô so ô improving ô their ô protection.
Fastening
F
ô
Pull
ô
the
ô
strap,
ô
then
ô
insert
ô
the
ô
tongue
ô
in
ô the ô buckle.
F
ô
Check
ô
that
ô
the
ô
seat
ô
belt
ô
is
ô
fastened
ô
correctly
ô by ô pulling ô the ô strap.
Unfastening
F
ô
Press
ô the ô red ô button ô on ô the ô buckle.
F
ô
Guide
ô the ô seat ô belt ô as ô it ô reels ô in. The
ô
corresponding
ô
warning
ô
lamp
ô
1
or
2
ô
comes
ô
on
ô
in
ô
red
ô
on
ô
the
ô
seat
ô
belt
ô
and
ô
passenger's
ô
front
ô
airbag
ô
warning
ô
lamps
ô
display
, ô
accompanied
ô
by
ô
an
ô
audible
ô
signal
ô
and
ô
a
ô
message
ô
in
ô
the
ô
screen,
ô
if
ô
the
ô
seat
ô
belt
ô
is
ô
not
ô
fastened
ô
or
ô
is
ô
unfastened.
From
ô
approximately
ô
12
ô
mph
ô
(20ô
km/h)
ô this
ô
warning
ô
lamp
ô
flashes
ô
for
ô
two
ô
minutesô accompanied
ô
by
ô
an
ô
audible
ô
signal
ô
of
ô
in
-
creasing
ô
volume.
ô
Once
ô
these
ô
two
ô
minutesô have
ô
elapsed,
ô
this
ô
warning
ô
lamp
ô
remainsô on
ô
until
ô
the
ô
driver
ô
and/or
ô
the
ô
front
ô
passen
-
ger
ô fastens ô their ô seat ô belt.
SAFETY
Page 129 of 340
88
127ô
C4-2_en_Chap08_securite_ed01-2014
Rear seat belts
Theô rearô seats ô are ô each ô fitted ô with ô a ô three-point
ô seat ô belt, ô with ô force ô limiter ô
and,
ô
for
ô
the
ô
outer
ô
seats,
ô
an
ô
ef
fort ô
limiter
.
Fastening
F
ô
Pull
ô
the
ô
strap,
ô
then
ô
insert
ô
the
ô
tongue
ô
in
ô the ô buckle.
F
ô
Check
ô
that
ô
the
ô
seat
ô
belt
ô
is
ô
fastened
ô
correctly
ô by ô pulling ô the ô strap.
Unfastening
F
ô
Press
ô the ô red ô button ô on ô the ô buckle.
F
ô
Guide
ô the ô seat ô belt ô as ô it ô reels ô in.
F
o n the outer seat belts, raise the
bar
ô
to
ô
the
ô
top
ô
of
ô
the
ô
backrest
ô
to
ô
prevent
ô
the
ô
tongue
ô
from
ô
knocking
ô
against
ô the ô side ô trim. This
ô warning ô lamp ô comes ô on ô in ô
the
ô
instrument
ô
panel
ô
when
ô
one
ô
or
ô
more
ô
rear
ô
passengers
ô
unfas
-
ten
ô their ô seat ô belt.
Seat belt unfastened warning lamp
in the instrument panel
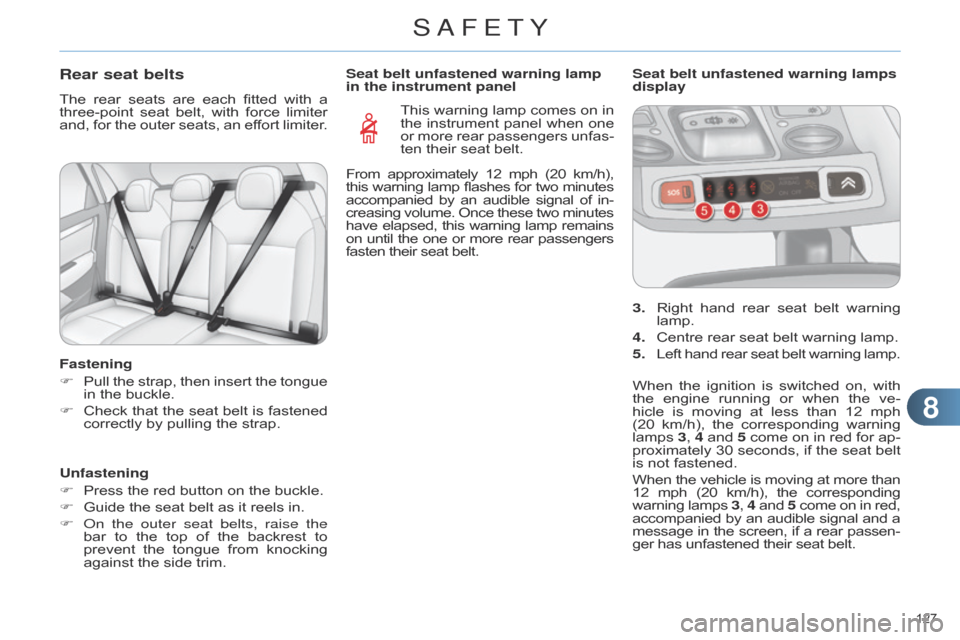
3. ô
Right
ô
hand
ô
rear
ô
seat
ô
belt
ô
warning
ô
lamp.
4.
ô
Centre
ô rear ô seat ô belt ô warning ô lamp.
5.
ô
Left
ô
hand
ô
rear
ô
seat
ô
belt
ô
warning
ô
lamp.
Seat belt unfastened warning lamps
display
When
ô
the
ô
ignition
ô
is
ô
switched
ô
on,
ô
with
ô
the
ô
engine
ô
running
ô
or
ô
when
ô
the
ô
ve
-
hicle
ô
is
ô
moving
ô
at
ô
less
ô
than
ô
12
ô
mph
ô
(20
ô
km/h),
ô
the
ô
corresponding
ô
warning
ô
lamps
ô
3
, 4
ô
and
ô
5
ô
come
ô
on
ô
in
ô
red
ô
for
ô
ap
-
proximately
ô
30
ô
seconds,
ô
if
ô
the
ô
seat
ô
belt
ô
is
ô not ô fastened.
When
ô
the
ô
vehicle
ô
is
ô
moving
ô
at
ô
more
ô
thanô 12
ô
mph
ô
(20
ô
km/h),
ô
the
ô
correspondingô warning
ô
lamps
ô
3, 4ô and
ô
5ô come
ô
on
ô
in
ô
red,ô accompanied
ô
by
ô
an
ô
audible
ô
signal
ô
and
ô
aô message
ô
in
ô
the
ô
screen,
ô
if
ô
a
ô
rear
ô
passen
-
ger
ô has ô unfastened ô their ô seat ô belt.
From
ô
approximately
ô
12ô
mph ô
(20ô
km/h),
ô this
ô
warning
ô
lamp
ô
flashes
ô
for
ô
two
ô
minutesô accompanied
ô
by
ô
an
ô
audible
ô
signal
ô
of
ô
in
-
creasing
ô
volume.
ô
Once
ô
these
ô
two
ô
minutesô have
ô
elapsed,
ô
this
ô
warning
ô
lamp
ô
remainsô on
ô
until
ô
the
ô
one
ô
or
ô
more
ô
rear
ô
passengersô fasten
ô their ô seat ô belt.
SAFETY