mirror Citroen C4 DAG 2014.5 2.G Owner's Manual
[x] Cancel search | Manufacturer: CITROEN, Model Year: 2014.5, Model line: C4 DAG, Model: Citroen C4 DAG 2014.5 2.GPages: 340, PDF Size: 12.89 MB
Page 4 of 340
2
C4-2_en_Chap00a_sommaire_ed01-2014
Monochrome screen A 35
Monochrome screen C 37
Colour
screen
41
T
rip computer
43
2 - 35 46
MULTIFUNCTION
SCREENS
Ventilation 47
Manual air conditioning 50
Dual-zone
digital
air
conditioning
52
Front
demist - defrost
56
Rear
screen demist -
defrost
56
Front
seats
57
Rear
seats
62
Mirrors
63
Steering
wheel adjustment
65
COMFORT
3 -
47 65
Remote control key 66
Alarm 74
Doors
76
Boot
77
Electric
windows
78
Panoramic
sunroof
80
ACCESS
4 -
66 80
Lighting controls 81Automatic illumination of headlamps 85
Welcome
lighting
86
Headlamp
adjustment
87
Directional
lighting
88
Wiper
controls
90
Automatic
rain
sensitive
wipers
91
Courtesy
lamps
93
Interior
mood
lighting
94
Boot
lamp
94
5 - 81 94
VISIBILITY
Interior fittings 95
Centre consoles 98
Front
armrest
99
Boot
fittings
104
Luggage
cover
(enterprise
version)
107
6 - 95 107
FITTINGS
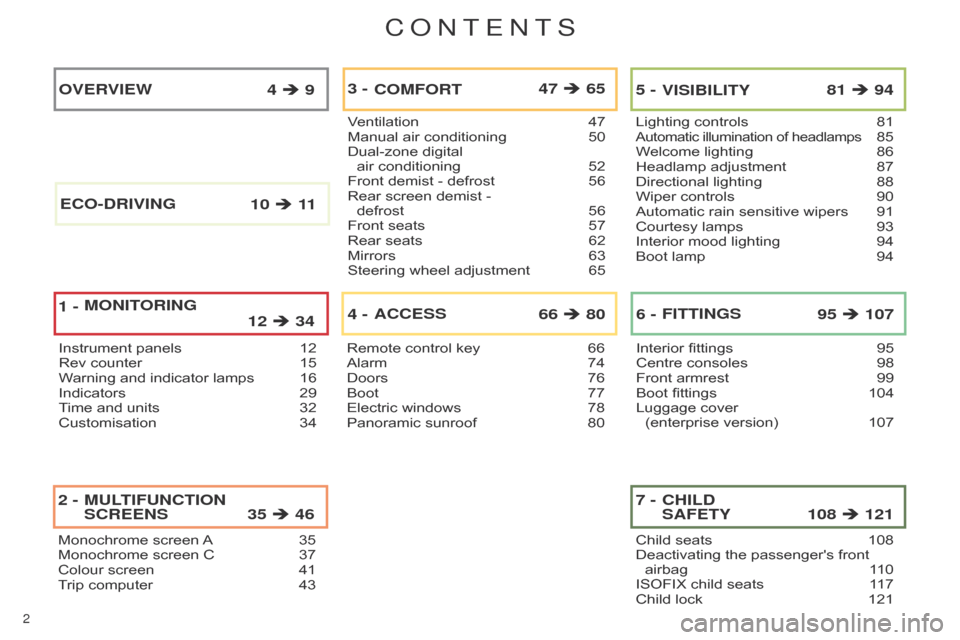
Instrument panels 12
Rev counter 15
W
arning and indicator lamps
16
Indicators
29
T
ime and units
32
Customisation
34
OVERVIEW 4 9
MONITORING
1 -
12 34
Child seats 108
Deactivating the passenger's front
airbag
1
10
ISOFIX
child seats
1
17
Child
lock
121
7 - 108 121
CHILD
SAFETY
E
CO
-
DRIVING
10
11
ConTEnTS
Page 6 of 340
4
C4-2_en_Chap00b_vue-ensemble_ed01-2014
4
C4-2_en_Chap00b_vue-ensemble_ed01-2014
ExTERIoR
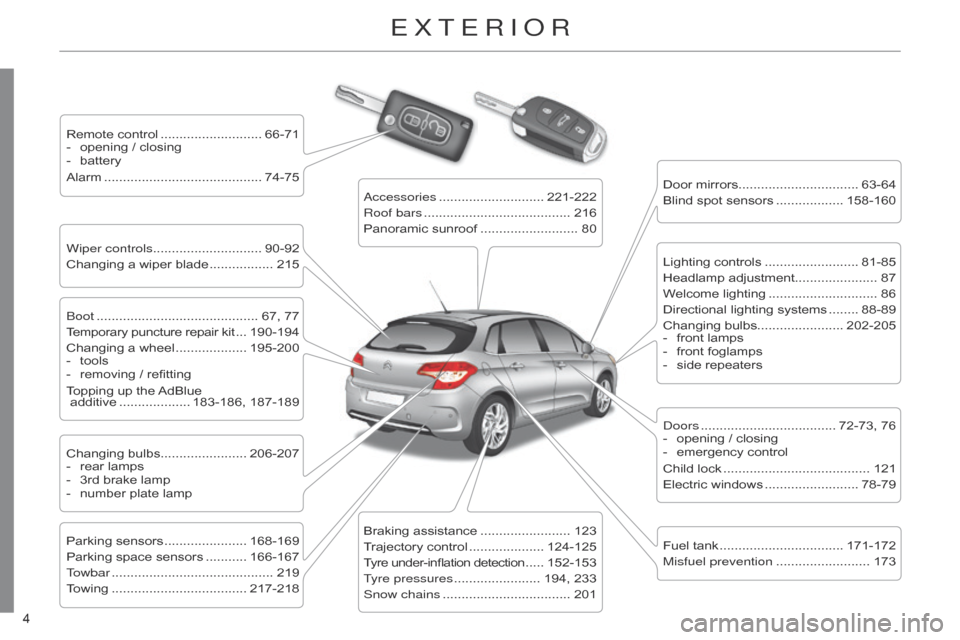
Remote control ........................... 66-71
- opening / closing
-
battery
Alarm
.......................................... 74-75
Wiper controls............................. 90-92
Changing
a wiper blade
................. 215 Door
mirrors
................................ 63-64
Blind
spot sensors
.................. 158-160
b
oot
........................................... 67,
77
Temporary
puncture repair kit
... 190-194
Changing
a wheel
................... 195-200
-
tools
-
removing
/ refitting
Topping
up the
AdBlue
additive
................... 183-186,
187-189
Changing
bulbs....................... 206-207
-
rear
lamps
-
3rd
brake lamp
-
number
plate lamp
Parking
sensors
...................... 168-169
Parking
space sensors
........... 166-167
T
owbar
........................................... 219
T
owing
.................................... 217-218
a
ccessories
............................ 221-222
Roof bars
....................................... 216
Panoramic
sunroof
.......................... 80
Braking
assistance
........................ 123
T
rajectory control
.................... 124-125
T
yre under-inflation detection
..... 152-153
T
yre pressures
....................... 194,
233
Snow chains
.................................. 201Lighting
controls
......................... 81-85
Headlamp
adjustment...................... 87
Welcome
lighting
............................. 86
Directional
lighting systems
........ 88-89
Changing
bulbs....................... 202-205
-
front
lamps
-
front
foglamps
-
side
repeaters
d
oors
.................................... 72-73,
76
-
opening
/ closing
-
emergency
control
Child
lock
....................................... 121
Electric
windows
......................... 78-79
Fuel
tank
................................. 171-172
Misfuel prevention
......................... 173
Page 8 of 340
6
C4-2_en_Chap00b_vue-ensemble_ed01-2014
6
C4-2_en_Chap00b_vue-ensemble_ed01-2014
INSTRUMENTS AND CONTROLS
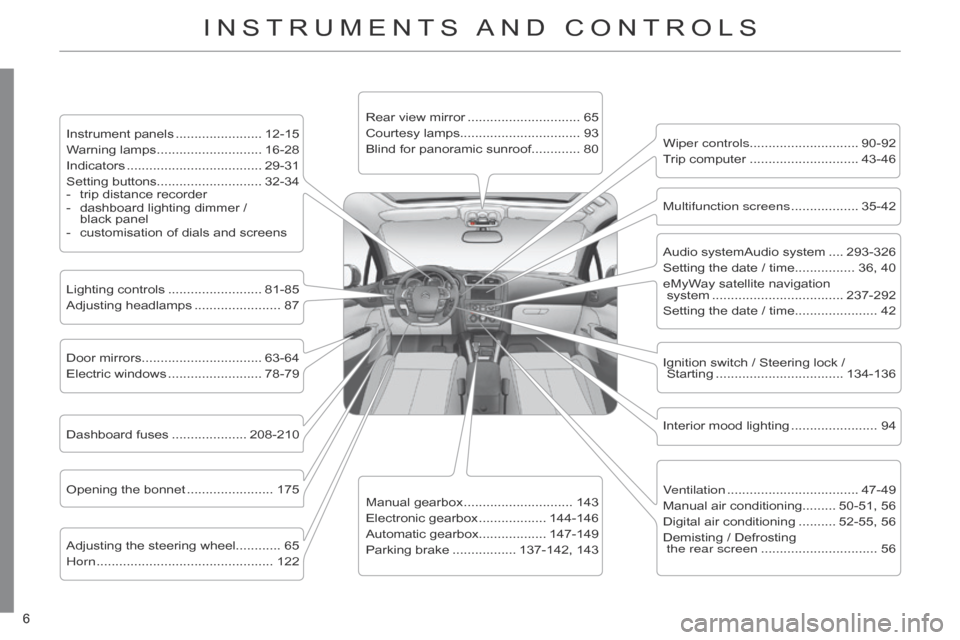
Instrument panels ....................... 12-15
W arning lamps ............................ 16-28
Indicators
.................................... 29-31
Setting
buttons............................ 32-34
-
trip
distance recorder
-
dashboard
lighting dimmer /
black
panel
-
customisation
of dials and screens
Lighting
controls
......................... 81-85
Adjusting
headlamps
....................... 87
Door
mirrors
................................ 63-64
Electric
windows
......................... 78-79
Dashboard
fuses
.................... 208-210
Opening
the bonnet
....................... 175
Adjusting
the steering wheel............ 65
Horn
............................................... 122 Audio
systemAudio system
.... 293-326
Setting
the date / time................ 36, 40
eMyWay
satellite navigation
system
................................... 237-292
Setting
the date / time...................... 42
Manual
gearbox
............................. 143
Electronic
gearbox
.................. 144-146
Automatic
gearbox.................. 147-149
Parking
brake
................. 137-142,
143Wiper controls............................. 90-92
Trip
computer
............................. 43-46
Rear
view mirror
.............................. 65
Courtesy
lamps................................ 93
Blind for panoramic sunroof............. 80
Interior
mood lighting
....................... 94
Ignition
switch / Steering lock /
Starting
.................................. 134-136
Multifunction screens
.................. 35-42
V
entilation
................................... 47-49
Manual
air conditioning......... 50-51, 56
Digital
air conditioning
.......... 52-55,
56
Demisting
/ Defrosting
the rear screen
............................... 56
Page 58 of 340
33
56
C4-2_en_Chap03_confort_ed01-2014
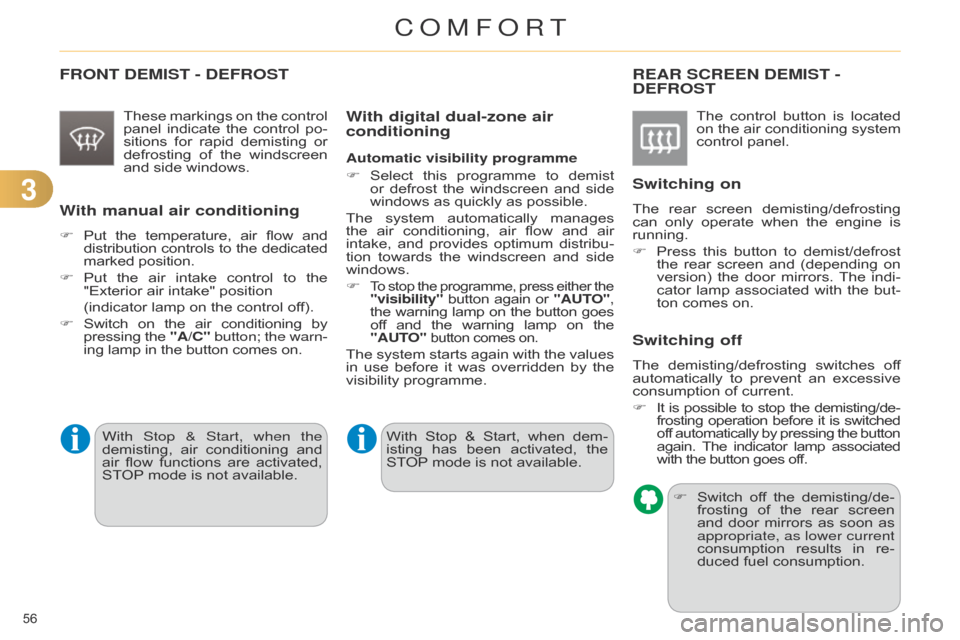
FRONT DEMIST - DEFROST
These markings on the control panel
indicate the control po -
sitions
for
rapid
demisting
or
defrosting
of
the
windscreen
and
side windows.
With manual air conditioning
F Put the temperature, air flow and distribution
controls to the dedicated marked
position.
F
Put
the
air
intake
control
to
the
"Exterior
air intake" position
(indicator
lamp on the control off).
F
Switch
on
the
air
conditioning
by pressing
the
"A/C"
button; the warn-
ing
lamp in the button comes on.
REAR SCREEN DEMIST - DEFROST
The control button is located on
the air conditioning system
control
panel.
Switching on
The rear screen demisting/defrosting can
only operate when the engine is
running.
F
Press
this
button
to
demist/defrost
the
rear
screen
and
(depending
on
version)
the
door
mirrors.
The
indi
-
cator
lamp
associated
with
the
but
-
ton
comes on.
Switching off
The demisting/defrosting switches of f automatically
to prevent an excessive
consumption
of current.
F
It
is
possible
to
stop
the
demisting/de
-
frosting
operation
before
it
is
switched of
f
automatically
by
pressing
the
button again.
The
indicator
lamp
associated with
the button goes off.
F
Switch
of
f
the
demisting/de
-
frosting
of
the
rear
screen
and
door
mirrors
as
soon
as
appropriate, as lower current
consumption
results
in
re
-
duced
fuel consumption.
With digital dual-zone air
conditioning
Automatic visibility programme
F
Select
this
programme
to
demist
or
defrost
the
windscreen
and
side
windows
as quickly as possible.
The
system
automatically
manages
the
air
conditioning,
air
flow
and
air
intake,
and
provides
optimum
distribu
-
tion
towards
the
windscreen
and
side
windows.
F
To stop the programme, press either the "visibility" button again or "AUT O",
the warning lamp on the button goes of
f
and
the
warning
lamp
on
the "AUT
O"
button comes on.
The system starts again with the values in
use before it was overridden by the
visibility
programme.
With
Stop
&
Start,
when
dem
-
isting
has
been
activated,
the
ST
OP
mode is not available.
With Stop & Start, when the
demisting,
air
conditioning
and
air
flow
functions
are
activated,
ST
OP
mode
is
not
available.
COMFORT
Page 63 of 340
33
61
C4-2_en_Chap03_confort_ed01-2014
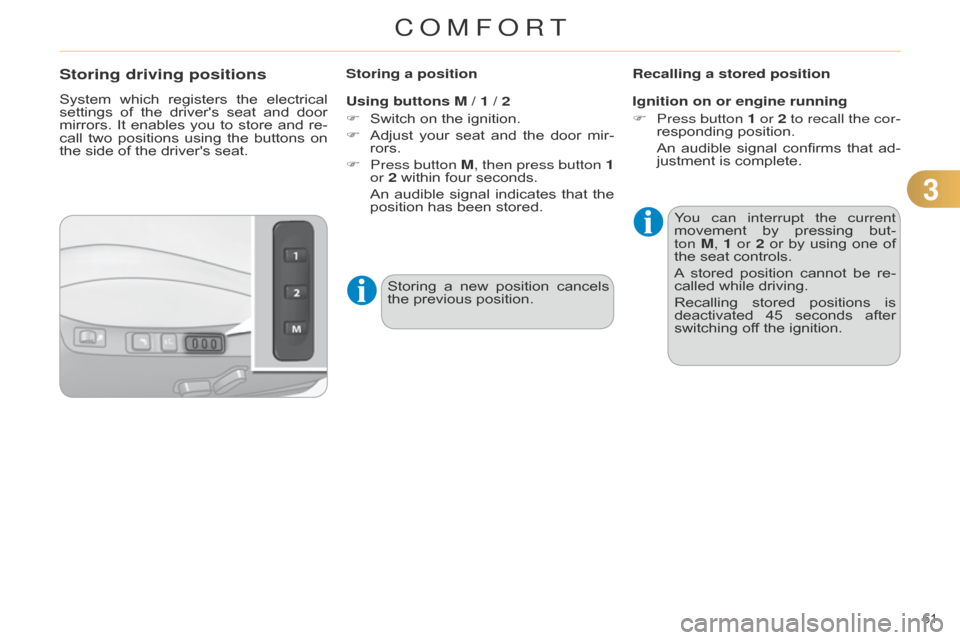
Storing driving positions
System which registers the electrical settings
of the driver's seat and door
mirrors.
It
enables
you
to
store
and
re
-
call
two
positions
using
the
buttons
on
the
side of the driver's seat.Storing a position
Using buttons M / 1 / 2
F
Switch
on the ignition.
F
Adjust
your
seat
and
the
door
mir
-
rors.
F
Press button
M, then press button 1
or 2
within four seconds.
An
audible
signal
indicates
that
the
position
has been stored.Recalling a stored position
Ignition on or engine running
F
Press button
1 or 2 to recall the cor-
responding
position.
An
audible
signal
confirms
that
ad
-
justment
is complete.
You can interrupt the current
movement
by
pressing
but
-
ton
M
, 1 or 2
or
by
using
one
of
the
seat controls.
A
stored
position
cannot
be
re
-
called
while driving.
Recalling
stored
positions
is
deactivated
45
seconds
after
switching
off the ignition.
Storing
a
new
position
cancels
the
previous position.
COMFORT
Page 65 of 340
33
63
C4-2_en_Chap03_confort_ed01-2014
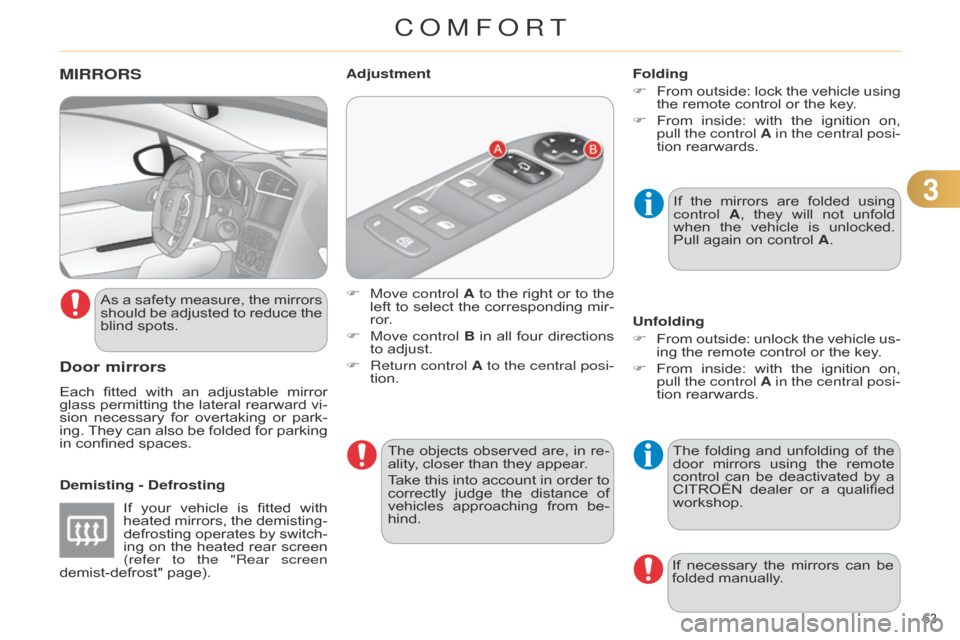
MIRRORS
Door mirrors
Each fitted with an adjustable mirror glass
permitting the lateral rearward vi -
sion
necessary
for
overtaking
or
park
-
ing.
They
can
also
be
folded
for
parking
in
confined spaces.
Demisting - Defrosting F
Move control
A
to
the
right
or
to
the
left
to
select
the
corresponding
mir
-
ror.
F
Move control
B
in
all
four
directions
to
adjust.
F
Return control
A to the central posi-
tion.
Adjustment
If
the
mirrors
are
folded
using
control
A
,
they
will
not
unfold
when
the
vehicle
is
unlocked.
Pull
again on control A.
Folding
F
From
outside:
lock
the
vehicle
using
the
remote control or the key.
F
From
inside:
with
the
ignition
on,
pull the
control A in the central posi-
tion rearwards.
The
folding
and
unfolding
of
the
door
mirrors
using
the
remote
control
can
be
deactivated
by
a
CITROËN
dealer
or
a
qualified
workshop.
Unfolding
F
From
outside:
unlock
the
vehicle
us
-
ing the remote control or the key.
F
From
inside:
with
the
ignition
on,
pull the
control A in the central posi-
tion rearwards.
If
necessary
the
mirrors
can
be
folded
manually.
If
your
vehicle
is
fitted
with
heated
mirrors,
the
demisting-
defrosting
operates
by
switch
-
ing
on
the
heated
rear
screen
(refer to the "Rear screen
demist-defrost"
page).
As
a
safety
measure,
the
mirrors
should
be
adjusted
to
reduce
the
blind
spots.
The
objects
observed
are,
in
re
-
ality,
closer than they appear.
Take
this
into
account
in
order
to
correctly
judge
the
distance
of
vehicles
approaching
from
be
-
hind.
COMFORT
Page 66 of 340
33
64
C4-2_en_Chap03_confort_ed01-2014
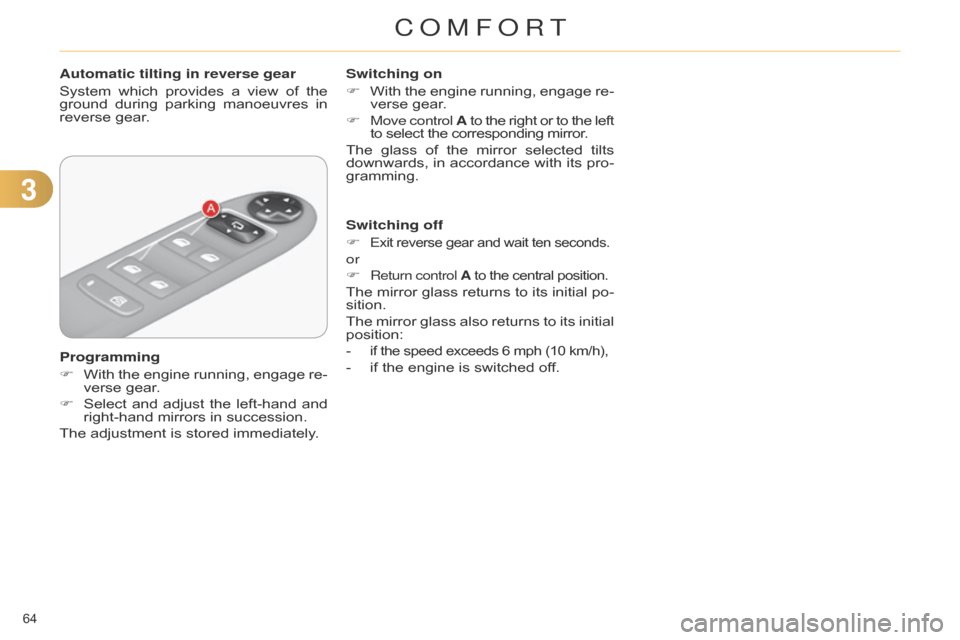
Automatic tilting in reverse gear
System
which
provides
a
view
of
the
ground
during
parking
manoeuvres
in
reverse
gear.
Programming
F
With
the
engine
running,
engage
re
-
verse
gear.
F
Select
and
adjust
the
left-hand
and
right-hand
mirrors in succession.
The
adjustment is stored immediately.Switching on
F
With
the
engine
running,
engage
re
-
verse
gear.
F
Move control
A
to
the
right
or
to
the
left to
select the corresponding mirror.
The
glass
of
the
mirror
selected
tilts
downwards,
in
accordance
with
its
pro
-
gramming.
Switching off
F
Exit reverse gear and wait ten seconds.
or
F
Return control A to the central position.
The mirror glass returns to its initial po -
sition.
The
mirror
glass
also
returns
to
its
initial
position:
-
if the speed exceeds 6 mph (10 km/h),
- if the engine is switched off.
COMFORT
Page 67 of 340

33
65
C4-2_en_Chap03_confort_ed01-2014
Automatic day/night model
By
means
of
a
sensor
,
which
measures
the
light
from
the
rear
of
the
vehicle,
this
system
automatically
and
progres
-
sively
changes
between
the
day
and
night
uses.In
order
to
ensure
optimum
vis
-
ibility
during
your
manoeuvres,
the
mirror
lightens
automatically
when
reverse gear is engaged.STEERING WHEEL AD j USTMENT
F When stationary, pull the control
lever to release the adjustment
mechanism.
F
Adjust
the
height
and
reach
to
suit
your
driving position.
F
Push
the
control
lever
to
lock
the
adjustment
mechanism.
a
s a safety precaution, these
operations
should
only
be
carried out
with the vehicle stationary.
Rear view mirror
Adjustable mirror providing a central rearward
view.
Equipped
with
an
anti-dazzle
system,
which
darkens
the
mirror
glass
and
re
-
duces
the
nuisance
to
the
driver
caused
by
the
sun,
headlamps
from
other
ve
-
hicles...
Manual day/night model
Adjustment
F
Adjust
the
mirror
so
that
the
glass
is
directed
correctly in the "day" position.
Day/night position
F
Pull
the
lever
to
change
to
the
"night"
anti-dazzle position.
F
Push
the
lever
to
change
to
the
normal
"day" position.
COMFORT
Page 68 of 340
66
C4-2_en_Chap04_ouvertures_ed01-2014
REMOTE CONTROL KEY
System which permits central unlocking or
locking of the vehicle using the door
lock
or
from
a
distance.
It
is
also
used
to
locate
and
start
the
vehicle,
as
well
as
providing protection against theft.
F
Press
the
open
padlock
once
to
unlock
the
driver's
door
only.
Selective unlocking using the
remote control
F
T
urn
the
key
towards
the
front
in
the
driver's
door
lock
to
unlock
the
vehicle
completely.
Complete unlocking using the
remote control
F Press the open padlock
to
unlock
the
vehicle
com
-
pletely.
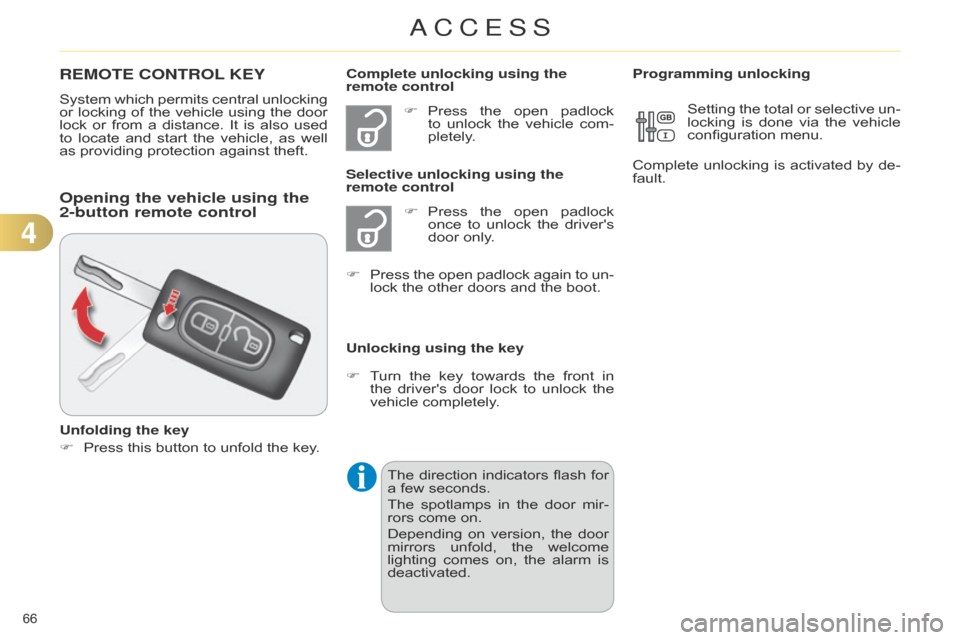
Opening the vehicle using the
2-button remote control
Unfolding the key
F
Press
this button to unfold the key.Unlocking using the key Programming unlocking
Setting
the
total
or
selective
un
-
locking
is
done
via
the
vehicle
configuration
menu.
Complete
unlocking
is
activated
by
de
-
fault.
F
Press
the
open
padlock
again
to
un
-
lock the other doors and the boot.
The
direction
indicators
flash
for
a
few seconds.
The
spotlamps
in
the
door
mir
-
rors
come on.
Depending
on
version,
the
door
mirrors
unfold,
the
welcome
lighting
comes
on,
the
alarm
is
deactivated.
4
ACCESS
Page 69 of 340
67
C4-2_en_Chap04_ouvertures_ed01-2014
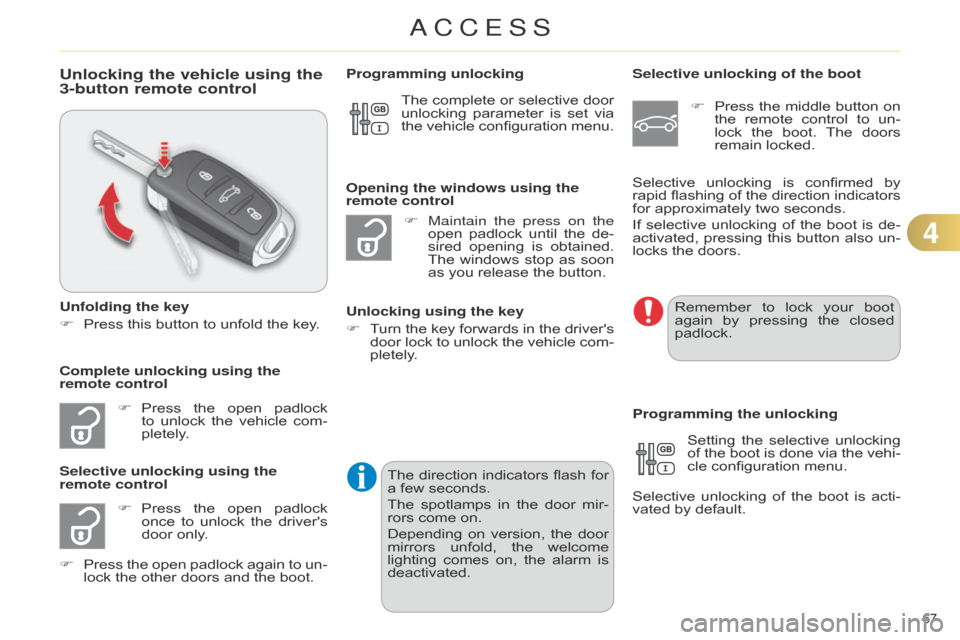
Unlocking the vehicle using the
3-button remote control
Unfolding the key
F
Press
this button to unfold the key.
F
Press
the
open
padlock
to
unlock
the
vehicle
com
-
pletely.
F
Press
the
open
padlock
once
to
unlock
the
driver's
door
only.
Selective unlocking using the
remote control F
Maintain the press on the
open
padlock
until
the
de
-
sired
opening
is
obtained.
The
windows
stop
as
soon
as
you release the button.
Opening the windows using the
remote control
Unlocking using the key
F
T
urn
the
key
forwards
in
the
driver's
door
lock
to
unlock
the
vehicle
com
-
pletely.
Programming unlocking
Selective unlocking of the boot
F
Press
the
middle
button
on
the
remote
control
to
un
-
lock
the
boot.
The
doors
remain
locked.
Setting
the
selective
unlocking
of
the
boot
is
done
via
the
vehi
-
cle
configuration menu.
Selective
unlocking
of
the
boot
is
acti
-
vated
by default.
Programming the unlocking
Complete unlocking using the
remote control Selective
unlocking
is
confirmed
by
rapid
flashing
of
the
direction
indicators
for
approximately two seconds.
If
selective
unlocking
of
the
boot
is
de
-
activated,
pressing
this
button
also
un
-
locks the doors.
The
complete
or
selective
door
unlocking
parameter
is
set
via
the
vehicle
configuration
menu.
Remember
to lock your boot again
by pressing the closed
padlock.
F
Press
the
open
padlock
again
to
un
-
lock
the other doors and the boot.The
direction
indicators
flash
for
a
few seconds.
The
spotlamps
in
the
door
mir
-
rors
come on.
Depending
on
version,
the
door
mirrors
unfold,
the
welcome
lighting
comes
on,
the
alarm
is
deactivated.
4
ACCESS