check engine Citroen C4 PICASSO 2016 2.G Owner's Guide
[x] Cancel search | Manufacturer: CITROEN, Model Year: 2016, Model line: C4 PICASSO, Model: Citroen C4 PICASSO 2016 2.GPages: 527, PDF Size: 13.72 MB
Page 260 of 527
258
C4-Picasso-II_en_Chap07_info-pratiques_ed01-2016
The petrol or Diesel engine of your vehicle is fitted with a catalytic converter, a device which
helps to reduce the level of harmful emissions
in
the exhaust gases.
For petrol engines, you must use unleaded
fuel.
The
filler neck is narrower, allowing only
u
nleaded petrol nozzles to be introduced.
If you have put in the wrong fuel
for your vehicle, you must have the
fuel tank drained and filled with
the correct fuel before star ting the
engine.
Fuel cut- of f
Your vehicle is equipped with a safety device
which cuts off the fuel supply in the event of a
collision.
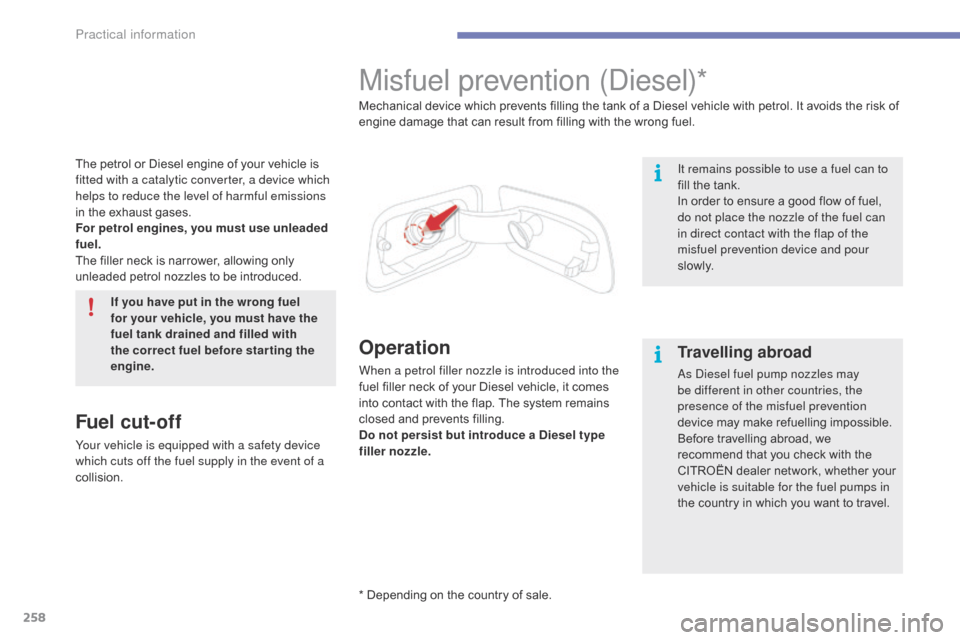
Misfuel prevention (Diesel)*
Operation
When a petrol filler nozzle is introduced into the
fuel filler neck of your Diesel vehicle, it comes
i
nto contact with the flap. The system remains
c
losed and prevents filling.
Do not persist but introduce a Diesel type
filler nozzle. Mechanical device which prevents filling the tank of a Diesel vehicle with petrol. It avoids the risk of
e
ngine damage that can result from filling with the wrong fuel.
It remains possible to use a fuel can to
fill the tank.
In order to ensure a good flow of fuel,
d
o not place the nozzle of the fuel can
in direct contact with the flap of the
misfuel prevention device and pour
s l ow l y.
Travelling abroad
As Diesel fuel pump nozzles may
be different in other countries, the
presence of the misfuel prevention
device
may make refuelling impossible.
Before
travelling abroad, we
r
ecommend that you check with the
C
ITROËN dealer network, whether your
v
ehicle is suitable for the fuel pumps in
the
country in which you want to travel.
* Depending
on
the
country
of
sale.
Practical information
Page 273 of 527
271
C4-Picasso-II_en_Chap07_info-pratiques_ed01-2016
Bonnet
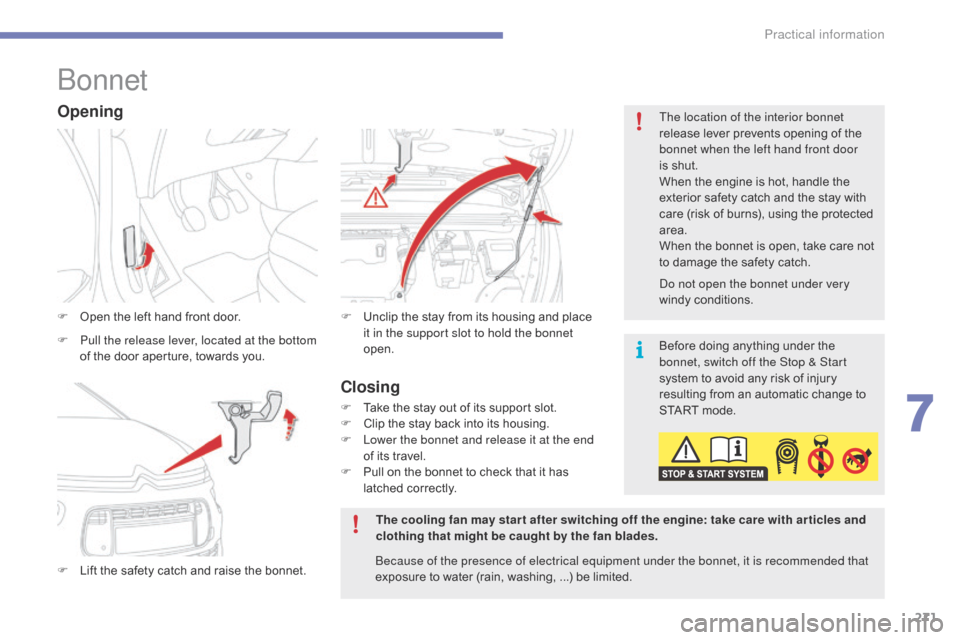
F Open the left hand front door.
F
L
ift the safety catch and raise the bonnet.F
U nclip the stay from its housing and place i
t in the support slot to hold the bonnet
open.
Opening
F Pull the release lever, located at the bottom of the door aperture, towards you. Before
doing anything under the
b
onnet, switch off the Stop & Start
system
to avoid any risk of injury
r
esulting from an automatic change to
S
TART mode.
The cooling fan may star t after switching off the engine: take care with ar ticles and
clothing that might be caught by the fan blades. Do not open the bonnet under very
windy
c
onditions.
The location of the interior bonnet
release lever prevents opening of the
b
onnet when the left hand front door
is shut.
When the engine is hot, handle the
e
xterior safety catch and the stay with
c
are (risk of burns), using the protected
a
rea.
When the bonnet is open, take care not
t
o damage the safety catch.
Because of the presence of electrical equipment under the bonnet, it is recommended that
exposure to water (rain, washing, ...) be limited.
Closing
F Take the stay out of its support slot.
F C lip the stay back into its housing.
F
L
ower the bonnet and release it at the end
of
its travel.
F
P
ull on the bonnet to check that it has
l
atched correctly.
7
Practical information
Page 276 of 527
274
C4-Picasso-II_en_Chap07_info-pratiques_ed01-2016
Checking levels
Take care when working under the bonnet, as certain areas of the engine may be extremely hot (risk of burns) and the cooling fan could start at any time (even with the ignition off).
Engine oil level
The check is carried out either when the ignition is switched on using the
o
il level indicator in the instrument
panel for vehicles so equipped, or
using
the dipstick.Checking using the dipstick
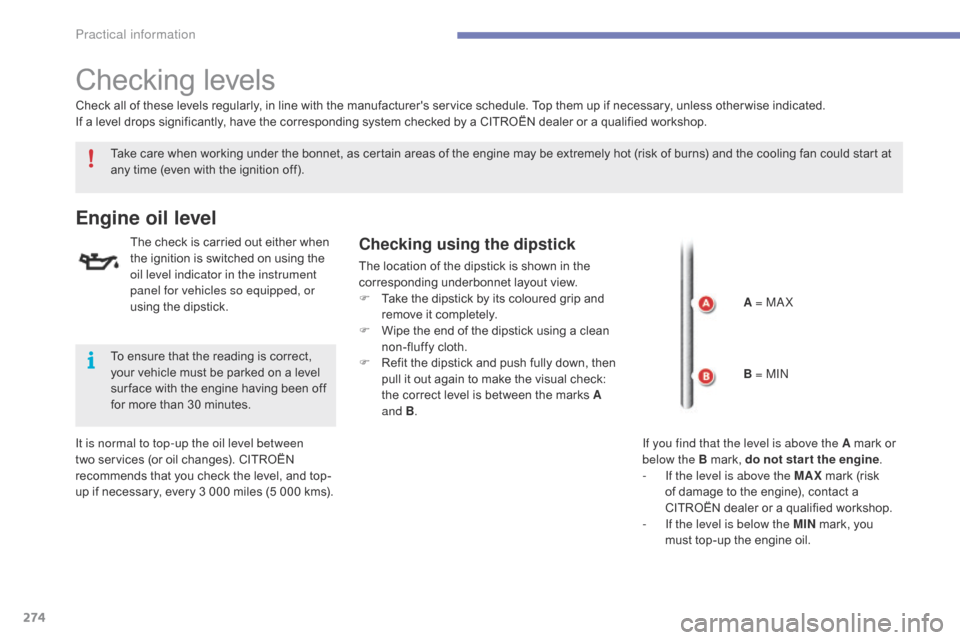
The location of the dipstick is shown in the corresponding underbonnet layout view.
F
T
ake the dipstick by its coloured grip and
r
emove it completely.
F
W
ipe the end of the dipstick using a clean
n
on-fluffy cloth.
F
R
efit the dipstick and push fully down, then
p
ull it out again to make the visual check:
t
he correct level is between the marks A
and B .
It is normal to top-up the oil level between
two
services
(or
oil
changes).
CITROËN
r
ecommends
that
you
check
the
level,
and
top-
up
if
necessary,
every
3
000
miles
(5
000
kms).
Check
all
of
these
levels
regularly,
in
line
with
the
manufacturer's service schedule. Top them up if necessary, unless other wise indicated.
If
a
level
drops
significantly,
have
the
corresponding system checked by a CITROËN dealer or a qualified workshop.
To
ensure
that
the
reading
is
correct,
y
our
vehicle
must
be
parked
on
a
level
s
ur face
with
the
engine
having
been
off
f
or
more
than
30
minutes. A = MA X
B = MIN
If you find that the level is above the A
mark or
belo
w the B mark, do not star t the engine.
-
I
f the level is above the MAX
mark (risk
o
f damage to the engine), contact a
C
ITROËN dealer or a qualified workshop.
-
I
f the level is below the MIN
mark, you
m
ust top-up the engine oil.
Practical information
Page 277 of 527
275
C4-Picasso-II_en_Chap07_info-pratiques_ed01-2016
The brake fluid level should be close to the "MA X" mark. If it is not, check
t
he brake pad wear.
Brake fluid level
Changing the fluid
Refer to the manufacturer's service schedule for details of the interval for this operation.
Fluid specification
The brake fluid must conform to the manufacturer's r ecommendations.
Topping-up the engine oil level
The location of the oil filler cap is shown in the
corresponding underbonnet layout view.
F
U
nscrew the oil filler cap to reveal the filler
aperture.
F
A
dd oil in small quantities, avoiding any
s
pills on engine components (risk of fire).
F
W
ait a few minutes before checking the
l
evel again using the dipstick.
F
A
dd more oil if necessary.
F
A
fter checking the level, carefully refit the
o
il filler cap and the dipstick in its tube.
Engine oil change
Refer to the manufacturer's service schedule for details of the interval for this operation.
In
order to maintain the reliability of the engine
a
nd emission control system, never use
additives
in the engine oil.
After
topping-up the oil, the check when
s
witching on the ignition with the oil
l
evel indicator in the instrument panel
is not valid during the 30 minutes after
t
opping up.
Oil grade
Before topping-up the oil or changing the oil, c
heck that the oil is the correct grade for your
e
ngine and conforms to the manufacturer's
r
ecommendations.
7
Practical information
Page 279 of 527
277
C4-Picasso-II_en_Chap07_info-pratiques_ed01-2016
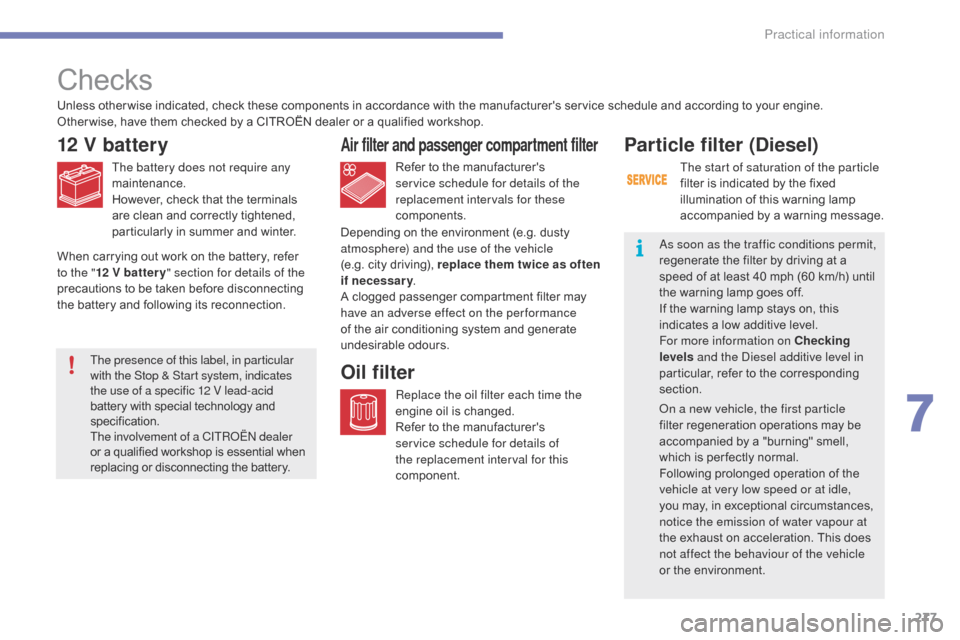
Checks
12 V battery
The battery does not require any
maintenance.
However, check that the terminals
a
re clean and correctly tightened,
p
articularly in summer and winter.Refer
to the manufacturer's s
ervice schedule for details of the
replacement intervals for these
components.
Air filter and passenger compartment filter
Replace the oil filter each time the
engine oil is changed.
Refer
to the manufacturer's
s
ervice schedule for details of
the replacement interval for this
component.
Oil filterThe presence of this label, in particular
with the Stop & Start system, indicates
the use of a specific 12 V lead-acid
battery
with special technology and
s
pecification.
T
he involvement of a CITROËN dealer
or
a qualified workshop is essential when
r
eplacing or disconnecting the battery.
Unless
other wise indicated, check these components in accordance with the manufacturer's service schedule and according to your engine.
Other wise, have them checked by a CITROËN dealer or a qualified workshop.
Depending on the environment (e.g. dusty
a
tmosphere) and the use of the vehicle
(e.g. city driving), replace them twice as often
if necessary .
A clogged passenger compartment filter may
h
ave an adverse effect on the per formance
of the air conditioning system and generate u
ndesirable o dours.
Particle filter (Diesel)
The start of saturation of the particle
filter
is indicated by the fixed
i
llumination of this warning lamp
a
ccompanied by a warning message.
As soon as the traffic conditions permit,
regenerate
the filter by driving at a
s
peed of at least 40 mph (60 km/h) until
t
he
warning lamp goes off.
If
the warning lamp stays on, this
i
ndicates a low additive level.
For more information on Checking
levels and the Diesel additive level in
particular,
refer to the corresponding
s
ection.
On a new vehicle, the first particle
filter
regeneration operations may be
a
ccompanied by a "burning" smell,
w
hich is per fectly normal.
Following
prolonged operation of the
v
ehicle at very low speed or at idle,
you
may, in exceptional circumstances,
n
otice the emission of water vapour at
the
exhaust on acceleration. This does
n
ot affect the behaviour of the vehicle
or
the environment.
When
carrying
out
work
on
the
battery,
refer
t
o the " 12 V batter y " section for details of the
precautions
to
be
taken
before
disconnecting
t
he
battery
and
following
its
reconnection.
7
Practical information
Page 280 of 527
278
C4-Picasso-II_en_Chap07_info-pratiques_ed01-2016
Brake wear depends on the style of driving, particularly in the case o
f vehicles used in town, over short
distances.
It may be necessary to have
t
he condition of the brakes checked,
e
ven between vehicle services.
Brake pads
For information on checking brake disc wear, contact a CITROËN dealer
or
a qualified workshop.
Brake disc wear
Only use products recommended by
CITROËN or products of equivalent
quality
an
d
sp
ecification.
In order to optimise the operation of
units as important as those in the
braking
system, CITROËN selects and
o
ffers very specific products.
After
washing the vehicle, dampness,
o
r in wintry conditions, ice can form
on
the brake discs and pads: braking
e
fficiency may be reduced. Make light
b
rake applications to dry and defrost
t
he brakes.
Electric parking brake
For more information, refer to the " Electric
parking brake - Operating faults "
section.
This system does not require any
routine
servicing. However, in the
e
vent of a problem, have the system
checked by a CITROËN dealer or a
q
ualified
w
orkshop.
Manual gearbox
The gearbox does not require any m
aintenance (no oil change).
Refer
to the manufacturer's service
s
chedule for the checking interval for
t
his
c
omponent.
Automatic gearbox
The gearbox does not require any maintenance (no oil change).
Refer
to the manufacturer's service
s
chedule for details of the level
checking
interval for this component.
To
avoid damaging the electrical units,
n
ever use a high pressure jet wash in
t
he engine compartment.
Unless
there is a leak in the circuit, a drop in
t
he brake fluid level indicates that the brake
p
ads are worn.
Practical information
Page 292 of 527
290
C4-Picasso-II_en_Chap08_en-cas-panne_ed01-2016
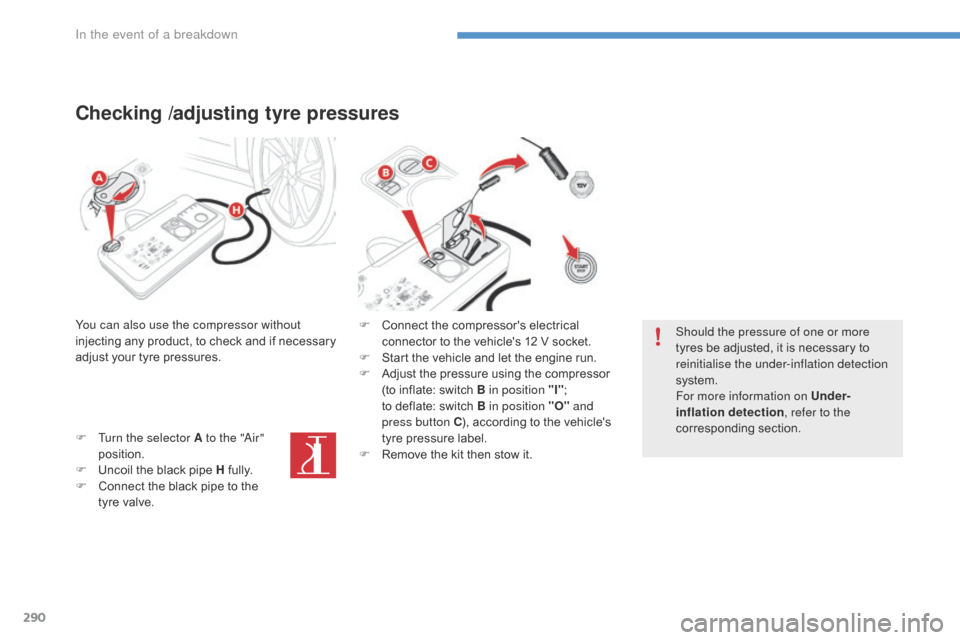
Checking /adjusting tyre pressures
You can also use the compressor without
injecting any product, to check and if necessary
a
djust your tyre pressures.
F
T
urn the selector A to the "Air"
position.
F
U
ncoil the black pipe H
f
ully.
F
C
onnect the black pipe to the
t
yre valve. F
C onnect the compressor's electrical
c
onnector to the vehicle's 12 V socket.
F
S
tart the vehicle and let the engine run.
F
A
djust the pressure using the compressor
(
to inflate: switch B in position "I";
t
o deflate: switch B in position "O" and
press button C ),
according to the vehicle's
t
yre pressure label.
F
R
emove the kit then stow it.Should the pressure of one or more
tyres
be adjusted, it is necessary to
r
einitialise the under-inflation detection
system.
For more information on Under-
inflation detection , refer to the
corresponding
s
ection.
In the event of a breakdown
Page 318 of 527
316
C4-Picasso-II_en_Chap08_en-cas-panne_ed01-2016
F Start the engine of the vehicle with the g
ood battery and leave it running for a few
m
inutes.
F
O
perate the starter on the broken down
v
ehicle and let the engine run.
I
f the engine does not start straight away,
s
witch off the ignition and wait a few
m
oments before trying again.
F
W
ait until the engine returns to idle then
d
isconnect the jump lead cables in the
r
everse
o
rder.
F
R
efit the plastic cover to the (+) terminal, if
your
vehicle has one.
F
A
llow the engine to run for at least
3
0 minutes, by driving or with the vehicle
s
tationary, so that the battery reaches an
adequate
state of charge.
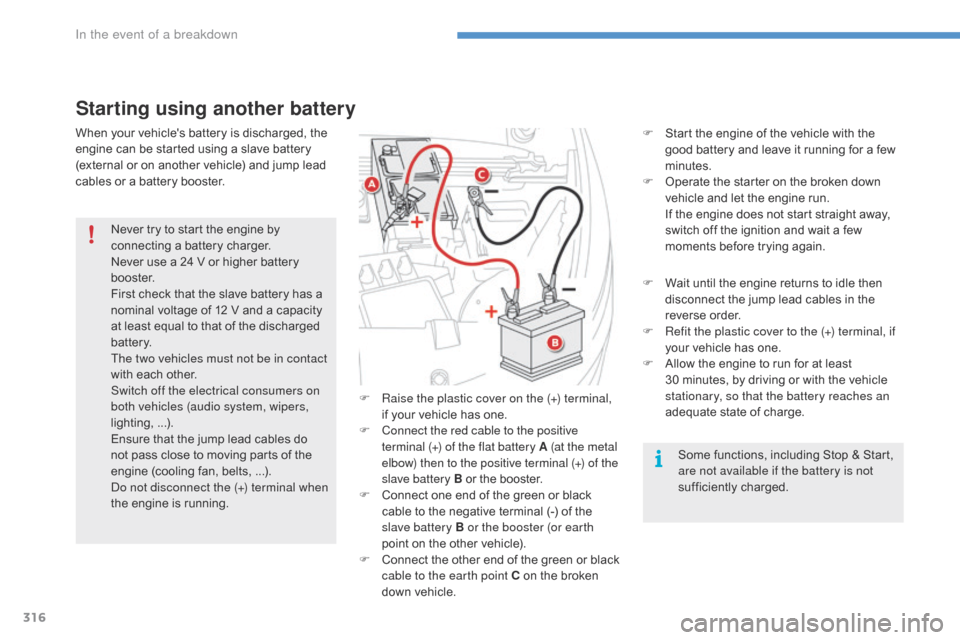
Starting using another battery
Some functions, including Stop & Start, are not available if the battery is not
sufficiently
c
harged.
F
R
aise the plastic cover on the (+) terminal,
if
your
vehicle
has
one.
F
C
onnect the red cable to the positive
terminal (+) of the flat battery A (at the metal
elbow) then to the positive terminal
(+) of the
slave battery B
or
the
booster.
F
C
onnect
one
end
of
the
green
or
black
c
able
to
the
negative
terminal
(-)
of
the
s
lave battery B or the booster (or earth
point
on
the
other
vehicle).
F
C
onnect
t
he
o
ther
e
nd
o
f
t
he
g
reen
o
r
b
lack
c
able to the earth point C
on
the
broken
d
own
vehicle.
Never
try
to
start
the
engine
by
c
onnecting
a
battery
charger.
Never
use
a
24
V
or
higher
battery
b
o o s t e r.
First
check
that
the
slave
battery
has
a
n
ominal
voltage
of
12
V
and
a
capacity
a
t
least
equal
to
that
of
the
discharged
b
attery.
The two vehicles must not be in contact
with
each
other.
Switch off the electrical consumers on
both vehicles (audio system, wipers,
lighting, ...).
Ensure
that
the
jump
lead
cables
do
n
ot
pass
close
to
moving
parts
of
the
e
ngine
(cooling
fan,
belts, ...).
Do not disconnect the (+) terminal when
the
engine
is
running.
When
your
vehicle's
battery
is
discharged,
the
e
ngine
can
be
started
using
a
slave
battery
(
external
or
on
another
vehicle)
and
jump
lead
c
ables
or
a
battery
booster.
In the event of a breakdown
Page 336 of 527
334
C4-Picasso-II_en_Chap11_index-alpha_ed01-2016
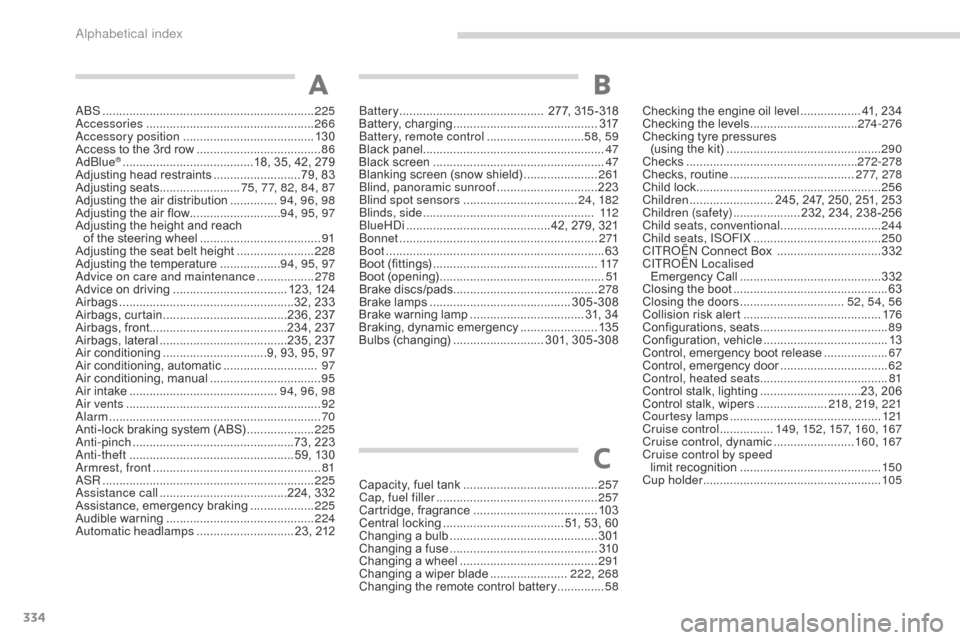
ABS ...............................................................225
Accessories .............................. ....................266
Accessory position
....................................... 13
0
Access
to the 3rd row
..................................... 86
Ad
Blue
® ............................... ........18, 35, 42, 279
Adjusting head restraints ..........................7 9, 83
Adjusting
s
eats
........................ 7
5, 77, 82, 84, 87
Adjusting
the air distribution
..............9
4, 96, 98
Adjusting
the air flow
........................... 9
4, 95, 97
Adjusting
the height and reach
of
the
steering wheel
.................................... 91
A
djusting the seat belt height
.......................2
28
Adjusting
the temperature
..................9
4, 95, 97
Advice on care and maintenance
................. 2
78
Advice
on driving
..............................
....123,
12
4
Airbags
...............
.....................................32, 233
Airbags,
c
urtain
.....................................2
36, 237
Airbags,
front.........................................234, 237
Airbags,
la
teral
......................................2
35, 237
Air
c
onditioning
...............................9
, 93, 95, 97
Air
conditioning, automatic
............................ 97
A
ir
c
onditioning,
m
anual
................................. 95
A
ir
intake
...............
............................. 94, 96, 98
Air vents
..............................
............................92
Alarm
............................................................... 70
A
nti-lock braking system (ABS)
....................2
25
Anti-pinch
................................................7
3, 223
Anti-theft
..............................
...................59, 130
Armrest, front
.................................................. 81
AS
R
............................................................... 2
25
Assistance call
...............................
.......224, 332
Assistance,
em
ergency
b
raking
...................2
25
Audible
w
arning
............................................ 2
24
Automatic headlamps
............................. 2
3, 212Battery
...............................
............
277, 315 -318
Battery,
c
harging
...............................
............
317
Battery, remote control
............................. 5
8, 59
Black pan el
...................................................... 47
Black screen .............................. .....................
47
Blanking screen (snow shield) ......................2
61
Blind, panoramic sunroof
.............................. 2
23
Blind spot sensors
.................................. 2
4, 182
Blinds, side
................................................... 11
2
BlueHDi
...............................
............42, 279, 321
Bonnet
...............
............................................271
Boot
........
.........................................................63
Boot
(fittings)
...............................
..................117
Boot
(opening)
...............................
..................51
Brake
d
iscs/pads........................................... 278
Brake
lamps
...............................
...........305-308
Brake
warning lamp
.................................. 3
1, 34
Braking,
d
ynamic
em
ergency
.......................13
5
Bulbs
(
changing)
...........................3
01,
3
05-308Checking
the engine oil level
.................. 4
1, 234
Checking the levels
................................
2
74-276
Checking tyre pressures
(using the kit) .............................. ................
290
Checks ............... ....................................
272-278
Checks, routine .....................................2
77, 278
Child
lock
...............................
........................256
Children
......................... 2
45, 247, 250, 251, 253
Children (safety)
.................... 2
32, 234, 238 -256
Child seats, conventional
.............................. 24
4
Child seats, ISOFIX
......................................25
0
C
ITROËN
Connect Box
...............................3
32
C
ITROËN
L
ocalised
Emergency
C
all
..........................................3
32
Closing
the boot
...............................
...............63
Closing
the doors
...............................5
2, 54, 56
Collision
risk alert
..............................
...........176
Configurations,
s
eats
......................................89
C
onfiguration,
v
ehicle
.....................................13
C
ontrol, emergency boot release
...................67
C
ontrol,
em
ergency
do
or
................................62
C
ontrol, heated seats
......................................81
C
ontrol stalk, lighting
..............................2
3, 206
Control
stalk, wipers
.....................21
8, 219, 221
Courtesy lamps
.............................................12
1
Cruise control
................ 1
49, 152, 157, 160, 167
Cruise control, dynamic
........................16
0, 167
Cruise control by speed limit
r
ecognition
..........................................15
0
Cup holder
...............................
......................105
A
Capacity, fuel tank .............................. ..........257
Cap, fuel filler ................................................ 2
57
Cartridge,
f
ragrance
..................................... 10
3
Central
locking
.................................... 5
1, 53, 60
Changing
a bu
lb
............................................ 3
01
Changing
a f
use
............................................ 31
0
Changing
a wheel
...............................
..........291
Changing
a wiper blade
.......................2
22, 268
Changing
the remote control battery
..............58
C
B
Alphabetical index
Page 338 of 527
336
C4-Picasso-II_en_Chap11_index-alpha_ed01-2016
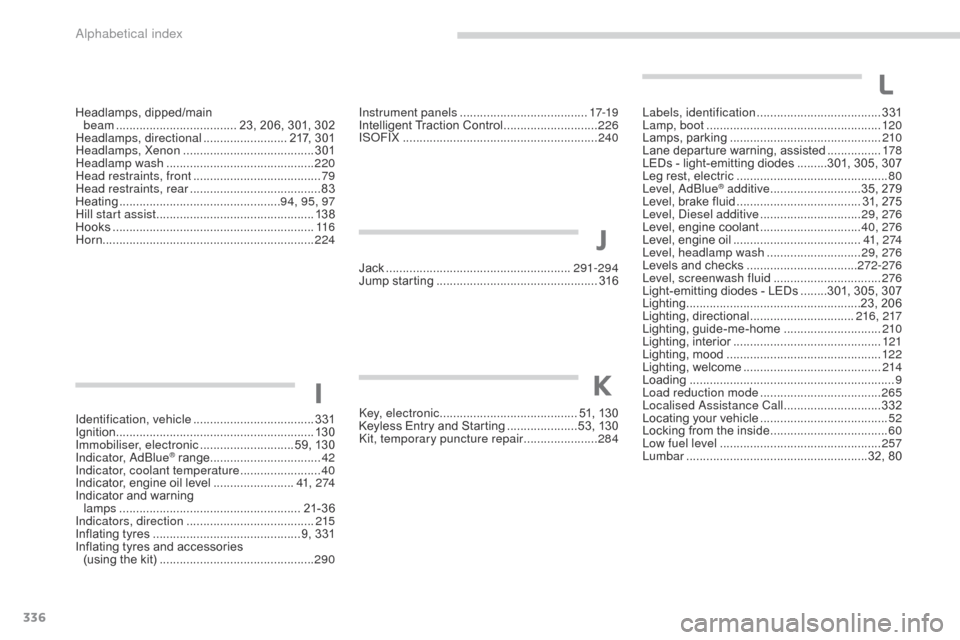
Identification, vehicle ....................................3 31
Ignition ................ ........................................... 13 0
Immobiliser, electronic
............................5
9, 130
Indicator, AdBlue
® range ................................. 42
In
dicator, coolant temperature ........................ 40
I
ndicator,
engine
oil level
........................ 4
1, 2 74
Indicator
and
warning
lamps
..............................
........................ 21-36
Indicators, direction
...................................... 2
15
Inflating
tyres
..............................
.............. 9, 331
Inflating
tyres
and
accessories
(using
the
kit)
..............................
................290Instrument panels
...............................
.......
17-19
Intelligent
T
raction
C
ontrol
............................
2
26
ISOFIX
...............
...........................................
240
Key, electronic
......................................... 5
1, 130
Keyless Entry and Starting
.....................5
3, 130
Kit, temporary puncture repair
...................... 28
4Labels, identification
.....................................
3
31
Lamp, boot
...............................
.....................
120
Lamps,
par
king
.............................................
2
10
Lane departure warning, assisted
................
17
8
LEDs - light-emitting diodes
.........3
01, 305, 307
Leg rest, electric
..............................
...............
80
Level, AdBlue
® additive ...........................3 5, 279
Level,
brake
fluid ..................................... 3 1, 275
Level, Diesel additive
.............................. 2
9, 276
Level,
engine
coolant
.............................. 4
0, 276
Level,
engine
oil
...............................
.......41, 2 74
Level, headlamp wash
............................ 2
9, 276
Levels
and
checks
..............................
...272-276
Level, screenwash fluid
................................ 2
76
Light-emitting
diodes - LEDs
........3
01, 305, 307
Lighting
................
....................................23, 206
Lighting,
d
irectional
............................... 21
6, 217
Lighting,
gu
ide-me-home
............................. 2
10
Lighting,
i
nterior
............................................ 12
1
Lighting,
m
ood
..............................
................12 2
Lighting,
welcome
......................................... 2
14
Loading
..............................
............................... 9
Load reduction mode
.................................... 26
5
Localised Assistance Call
............................. 3
32
Locating
your
vehicle
...................................... 52
L
ocking
from
the inside
................................... 60
L
ow fuel level
..............................
..................257
Lumbar
...............................
.......................32, 80
IK
L
Jack ....................................................... 291-294
Jump starting .............................. ..................316
J
Headlamps, d ipped/main b
eam ............... ..................... 23, 206, 301, 302
Headlamps, directional
......................... 2
17, 301
Headlamps, Xenon
....................................... 3
01
Headlamp wash
............................................ 2
20
Head restraints, front
...................................... 79
H
ead restraints, rear
....................................... 83
H
eating
................
................................ 94, 95, 97
Hill start assist
............................................... 13
8
Hooks
...............................
.............................11 6
Horn ............................................................... 224
Alphabetical index