instrument panel CITROEN C5 AIRCROSS 2020 Handbook (in English)
[x] Cancel search | Manufacturer: CITROEN, Model Year: 2020, Model line: C5 AIRCROSS, Model: CITROEN C5 AIRCROSS 2020Pages: 292, PDF Size: 8.59 MB
Page 31 of 292
29
Malfunction of the SCR
emissions control system
Malfunction detection
If a malfunction is detected,
t hese warning lamps come on,
accompanied by an audible signal
and the display of an "Emissions
fault" message.
The alert is triggered while driving as soon
as the fault is detected for the first time, then
when switching on the ignition for subsequent
journeys, while the fault persists. If it is a
temporary fault, the alert
disappears during the next journey,
after self-diagnostic checks of the SCR
emissions control system.
Malfunction confirmed during the
permitted driving phase (between
685
miles and 0 miles (1,100 km and 0 km))
If the warning lamp is still on after 31 miles
( 50 km) of driving, the fault in the SCR system
is confirmed. Have the system checked by a
CITROËN
dealer or a qualified workshop as soon as
possible.
Starting prevented
Every time the ignition is switched on, the
message "Emissions fault: Starting prevented"
is displayed.
To be able to restart the engine, call
on a
CITROËN dealer or a qualified
workshop.
The AdBlue warning lamp flashes,
accompanied by the display of a
message
("Emissions fault: Starting prevented in x
miles") indicating the remaining range in miles
or kilometres.
While driving, the message is displayed every
30
seconds. The alert is repeated when
switching on the ignition.
You can continue driving for up to 685 miles
(1,100 km) before the engine star ting
prevention system is triggered.
Manual test in the
instrument panel
This function allows you, at any time, to check
certain indicators and display the alerts log.
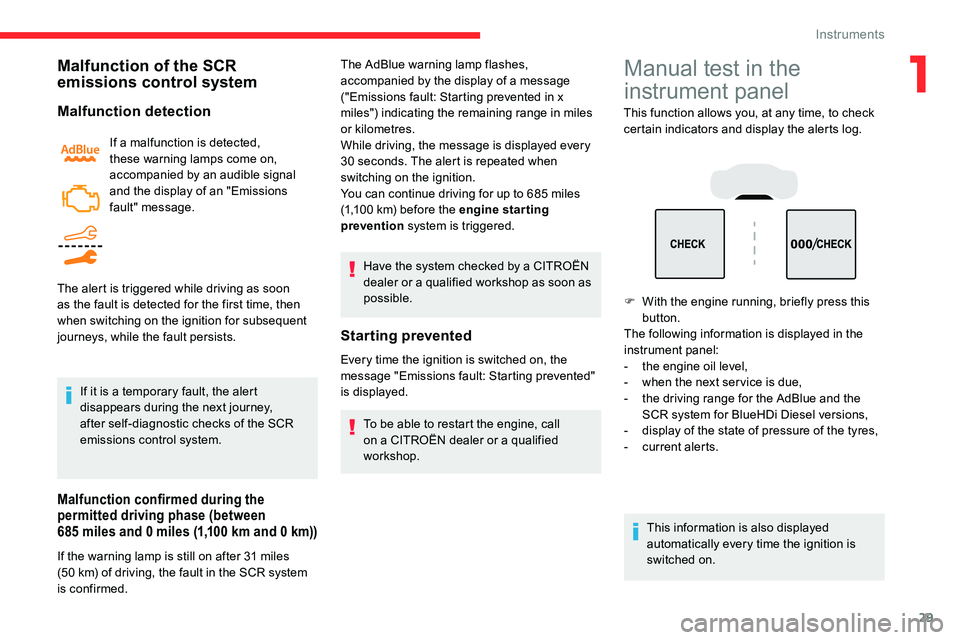
F
W
ith the engine running, briefly press this
button.
The following information is displayed in the
instrument panel:
-
t
he engine oil level,
-
w
hen the next ser vice is due,
-
t
he driving range for the AdBlue and the
SCR system for BlueHDi Diesel versions,
-
d
isplay of the state of pressure of the tyres,
-
c
urrent alerts.
This information is also displayed
automatically every time the ignition is
switched on.
1
Instruments
Page 33 of 292
31
Trip computer
Information displayed about the current journey
(range, fuel consumption, average speed, etc.).Display of the different trip computer tabs
With instrument panels with dials
The display of trip computer data is selected by
pressing on the end of the wiper control stalk or
by rotating the thumb wheel situated to the left
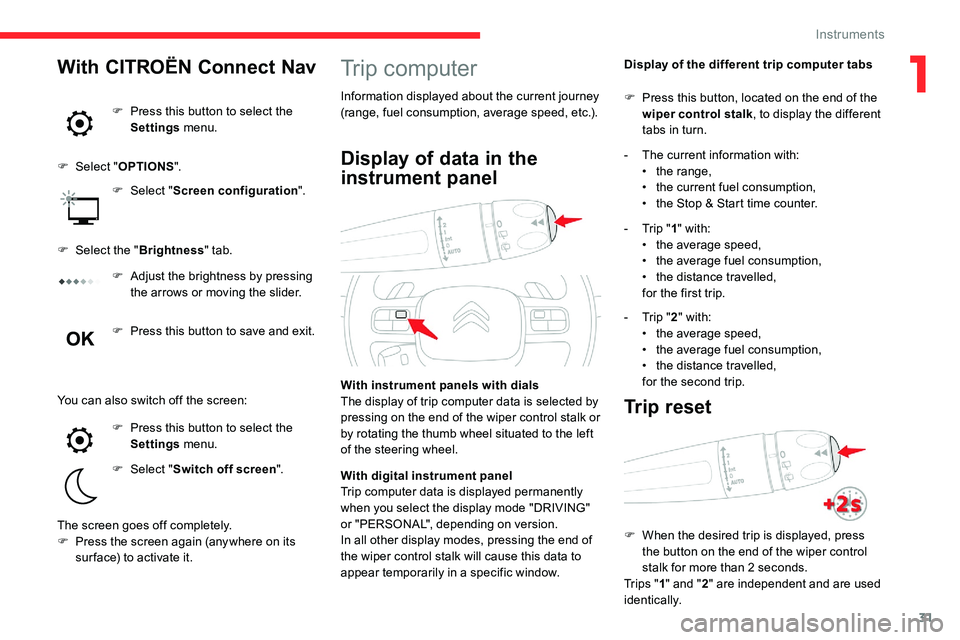
of the steering wheel. F
P ress this button, located on the end of the
wiper control stalk , to display the different
tabs in turn.
Display of data in the
instrument panel- The current information with: • t he range,
•
t
he current fuel consumption,
•
t
he Stop & Start time counter.
-
T
rip "1" with:
•
t
he average speed,
•
t
he average fuel consumption,
•
t
he distance travelled,
for the first trip.
-
T
rip "2" with:
•
t
he average speed,
•
t
he average fuel consumption,
•
t
he distance travelled,
for the second trip.
Trip reset
F When the desired trip is displayed, press the button on the end of the wiper control
stalk for more than 2
seconds.
Tr i p s " 1" and " 2" are independent and are used
identically.
With CITROËN Connect Nav
F Press this button to select the Settings menu.
F
Sel
ect " OPTIONS ".
F
Sel
ect "Screen configuration ".
F
Sel
ect the " Brightness " tab.
F
A
djust the brightness by pressing
the arrows or moving the slider.
F
P
ress this button to save and exit.
You can also switch off the screen: F
P
ress this button to select the
Settings menu.
F
Sel
ect "Switch off screen ".
The screen goes off completely.
F
P
ress the screen again (anywhere on its
sur face) to activate it. With digital instrument panel
Trip computer data is displayed permanently
when you select the display mode "DRIVING"
or "PERSONAL", depending on version.
In all other display modes, pressing the end of
the wiper control stalk will cause this data to
appear temporarily in a
specific window.
1
Instruments
Page 36 of 292
34
CITROËN Connect Nav side banners
Left-hand side
- E xterior temperature (a blue warning lamp
appears when there is a
risk of ice).
-
A
ccess to the Settings of the touch screen
and digital instrument panel (date/time,
languages, units, etc.).
-
R
eminder of the air conditioning information,
and direct access to the corresponding
menu.
Right-hand side
-
Time.
-
Notifications.
-
R
eminder of the air conditioning information,
and direct access to the corresponding
menu.
Date and time adjustment
With CITROËN Connect
Radio
F Select the Settings menu in
the upper banner of the touch
screen.
F
Sel
ect " Configuration ".
F
Sel
ect "Date and time ".
F
Sel
ect " Date " or "Time ".
F
C
hoose the display formats.
F
C
hange the date and/or time using the
numeric keypad.
F
C
onfirm with " OK".
With CITROËN Connect Nav
Setting of the time and date is only available if
synchronisation with the GPS is deactivated.
F
Sel
ect the Settings menu in the
touch screen banner.
F
P
ress the " OPTIONS " button to go to the
secondary page. F
Sel
ect "
Setting the time- date".
F
Sel
ect the "
Date" or "Time " tab.
F
S
et the date and/or time using the numeric
keypad.
F
C
onfirm with "
OK".
Additional settings
You can choose:
-
T he time zone.
-
T
he display format of the date and time
(12 h / 24 h).
-
T
he summer time management function
(+1
h o ur).
-
T
he synchronisation with GPS (UTC).
The system does not automatically
manage the change between winter and
summer time (depending on the country
of s a l e).
CITROËN Connect Radio upper
banner
- Time and exterior temperature (a blue warning lamp appears when there is a risk
of i c e).
-
R
eminder of the air conditioning information,
and direct access to the corresponding
menu.
-
R
eminder of the Radio Media and
Telephone menus information.
-
Notifications.
-
A
ccess to the Settings of the touch screen
and digital instrument panel (date/time,
languages, units, etc.).
Instruments
Page 44 of 292
42
If the vehicle is fitted with an alarm, this
function will not be activated when locking
with the key.
If the alarm is activated, the siren sounds
on opening the door; switch on the ignition
to stop it.
Central locking not
functioning
Use these procedures in the following cases:
- c entral locking fault,
-
b
attery disconnected or discharged. In the event of a
malfunction with the
central locking system, the battery must
be disconnected to lock the boot and thus
ensure that the vehicle is locked fully.
Driver's door
F Turn the key towards the rear of the vehicle to lock it, or towards the front to unlock it.
Passenger doors
Unlocking
F P ull the interior door opening handle.
Locking
F
O
pen the door.
F
F
or the rear doors, check that the child
lock is not on. Refer to the corresponding
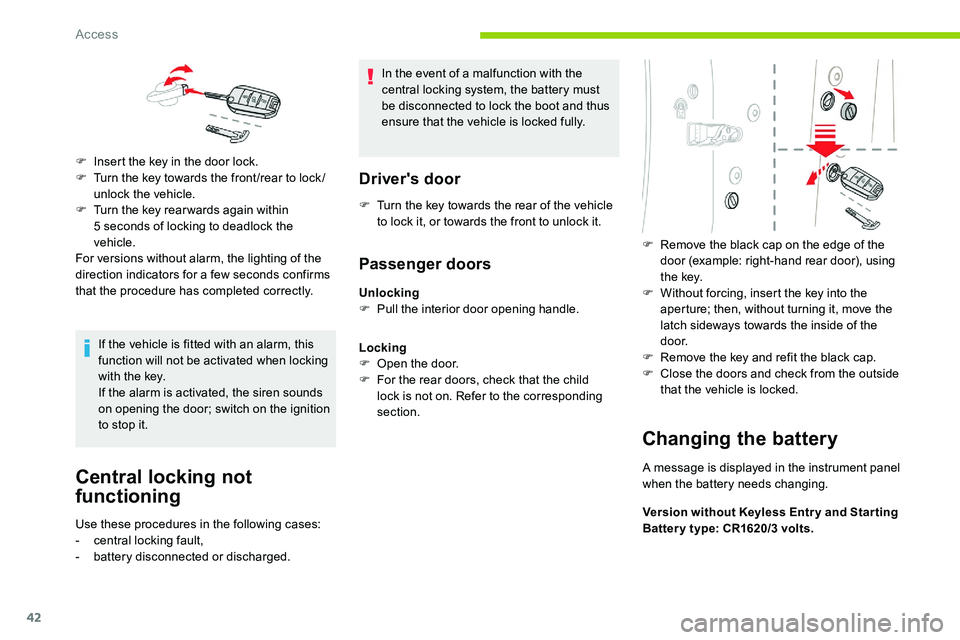
section. F
R
emove the black cap on the edge of the
door (example: right-hand rear door), using
t h e key.
F W ithout forcing, insert the key into the
aperture; then, without turning it, move the
latch sideways towards the inside of the
d o o r.
F
R
emove the key and refit the black cap.
F
C
lose the doors and check from the outside
that the vehicle is locked.
Changing the battery
A message is displayed in the instrument panel
when the battery needs changing.
Version without Keyless Entr y and Star ting
Batter y type: CR1620/3
volts.
F
I
nsert the key in the door lock.
F
T
urn the key towards the front /rear to lock /
unlock the vehicle.
F
T
urn the key rear wards again within
5
seconds of locking to deadlock the
vehicle.
For versions without alarm, the lighting of the
direction indicators for a
few seconds confirms
that the procedure has completed correctly.
Access
Page 56 of 292

54
Correct driving position
Before taking to the road and to make the most
of the ergonomic layout of the instruments and
controls, carry out these adjustments in the
following order:
-
t
he height of the head restraint,
-
t
he seat backrest angle,
-
t
he seat cushion height,
-
t
he longitudinal position of the seat,
-
t
he height and reach of the steering wheel,
-
t
he rear view mirror and door mirrors.
Once these adjustments have been made,
check the instrument panel can be viewed
correctly from your driving position.
Front seats
Caution when moving the
front seats
For safety reasons, only adjust seats
when the vehicle is stationary.
Before moving the seat backwards, ensure
that there is no person or object that might
prevent the full travel of the seat.
There is a risk of trapping or pinching
passengers if present in the rear seats or
of jamming the seat if large objects are
placed on the floor behind the seat.
Front head restraints
Adjusting the height
The adjustment is correct when the upper
edge of the head restraint is level with the
top of the head.
'Two-way' adjustment model
'Four-way' adjustment model
Upwards:
F p ull the head restraint up to the desired
position; the head restraint can be felt to
click into position.
Downwards:
F
p
ress lug A and push the head restraint
down to the desired position.
Upwards:
F
p
ull the head restraint up to the desired
position; the head restraint can be felt to
click into position.
Ease of use and comfort
Page 83 of 292
81
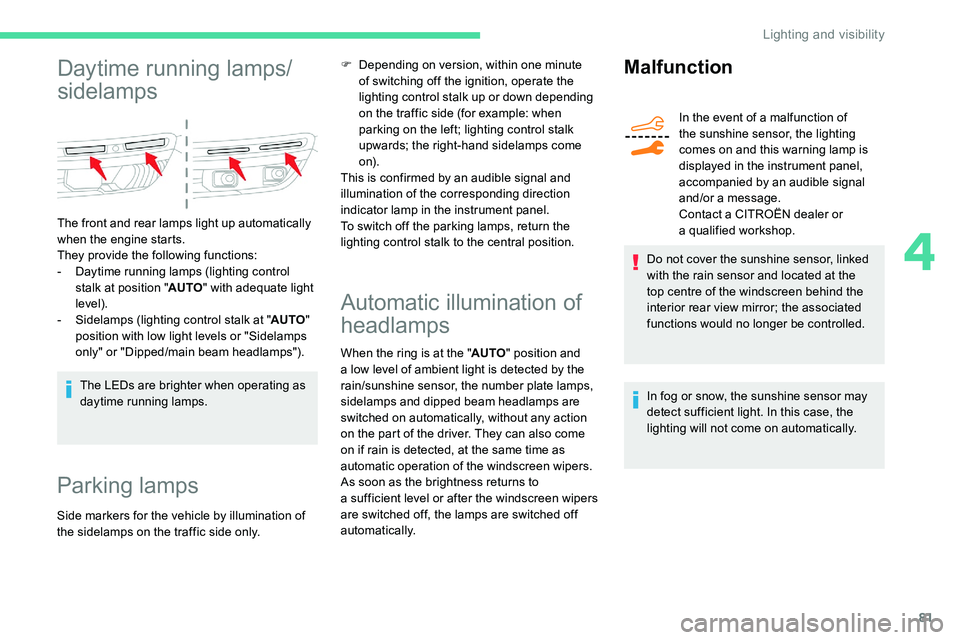
Daytime running lamps/
sidelamps
The front and rear lamps light up automatically
when the engine starts.
They provide the following functions:
-
D
aytime running lamps (lighting control
stalk at position " AUTO" with adequate light
level).
-
S
idelamps (lighting control stalk at " AUTO"
position with low light levels or "Sidelamps
only" or "Dipped/main beam headlamps").
The LEDs are brighter when operating as
daytime running lamps.
Parking lamps
Side markers for the vehicle by illumination of
the sidelamps on the traffic side only.
Automatic illumination of
headlamps
When the ring is at the " AUTO" position and
a low level of ambient light is detected by the
rain/sunshine sensor, the number plate lamps,
sidelamps and dipped beam headlamps are
switched on automatically, without any action
on the part of the driver. They can also come
on if rain is detected, at the same time as
automatic operation of the windscreen wipers.
As soon as the brightness returns to
a
sufficient level or after the windscreen wipers
are switched off, the lamps are switched off
automatically.
Malfunction
In the event of a malfunction of
t he sunshine sensor, the lighting
comes on and this warning lamp is
displayed in the instrument panel,
accompanied by an audible signal
and/or a
message.
Contact a
CITROËN dealer or
a
qualified workshop.
Do not cover the sunshine sensor, linked
with the rain sensor and located at the
top centre of the windscreen behind the
interior rear view mirror; the associated
functions would no longer be controlled.
In fog or snow, the sunshine sensor may
detect sufficient light. In this case, the
lighting will not come on automatically.
F
D
epending on version, within one minute
of switching off the ignition, operate the
lighting control stalk up or down depending
on the traffic side (for example: when
parking on the left; lighting control stalk
upwards; the right-hand sidelamps come
o n).
This is confirmed by an audible signal and
illumination of the corresponding direction
indicator lamp in the instrument panel.
To switch off the parking lamps, return the
lighting control stalk to the central position.
4
Lighting and visibility
Page 85 of 292

83
Whatever the position of the front courtesy
lamp switch, they also come on with the
exterior welcome lighting and the guide-me-
home lighting.
Automatic headlamp
dipping
This system automatically changes between
dipped and main beam headlamps according
to the brightness and driving conditions, using
a camera located at the top of the windscreen.
This system is a
driving aid.
The driver remains responsible for the
vehicle's lighting, its correct use for the
prevailing conditions of light, visibility and
traffic, and for obser vation of driving and
vehicle regulations.
The system will be operational as soon as
you exceed 16
mph (25 km/h).
If the speed drops below 9
mph (15 km/h),
the system no longer operates.Activation/Deactivation
F Turn the lighting control stalk ring to the "AUTO " position.
F
I
n the Vehicle/Driving menu,
select the " Driving functions "
tab, then " Automatic headlamp
dip ".
Until deactivated, the lighting system changes
to "automatic illumination of headlamps" mode.
The status of the system remains in memory
when the ignition is switched off.
Operation
If the ambient light level is sufficient and/or if
the traffic conditions do not allow illumination of
the main beam headlamps: -
d
ipped beam is kept on, these
indicator lamps come on in the
instrument panel.
If the ambient light level is very low and the
traffic conditions permit: -
m
ain beam comes on
automatically: these indicator
lamps come on in the instrument
panel.
When the system detects thick fog, it
temporarily deactivates the function.
As soon as the vehicle leaves the area of thick
fog, the function reactivates automatically. This indicator lamp goes off while
the function is deactivated.
Pause
If the situation requires a change of headlamp
b eam, the driver can take over at any time.
F
F
lashing the headlamps pauses the function
and the system changes to "automatic
illumination of headlamps" mode:
-
i
f the "AUTO" and "Dipped beam"
indicator lamps are on, the system
changes to main beam,
They go off automatically after 30
seconds.
4
Lighting and visibility
Page 86 of 292

84
Automatic adjustment
of "Full LED " technology
headlamps
If a fault occurs, this warning lamp
c omes on in the instrument panel,
accompanied by a
message and an
audible signal.
Do not touch the "Full LED" technology
headlamps – risk of electrocution!
This system automatically adjusts the height
of the beams from this type of headlamp,
according to the load in the vehicle, to avoid
causing a
nuisance to other road users.
The system then places the headlamp beams
in the lowest position.
Have the system checked by a
CITROËN
dealer or a
qualified workshop.
-
i
f the "AUTO" and "Main beam" indicator
lamps are on, the system changes to
dipped beam.
To reactivate the function, flash the headlamps
again.
The system may suffer inter ference or not
work correctly:
-
u
nder poor visibility conditions (snow,
heavy rain, etc.),
-
i
f the windscreen is dirty, misted or
obscured (by a
sticker, etc.) in front of
the camera,
-
i
f the vehicle is facing highly reflective
signs.
When the system detects thick fog, it
temporarily deactivates the function.
The system is not able to detect:
-
r
oad users that do not have their own
lighting, such as pedestrians,
-
v
ehicles whose lighting is obscured
(for example: vehicles running behind
a
safety barrier on a
motor way),
-
v
ehicles at the top or bottom of
a
steep slope, on winding roads, on
crossroads.
Headlamp adjustment
Manual adjustment of the
halogen headlamps
To avoid causing a nuisance to other road
u sers, the height of the halogen headlamps
should be adjusted according to the load in the
vehicle.
0 Driver only or driver + front passenger.
1 5
people.
4 5
people + loads in the boot.
5 Driver + loads in the boot.
The initial setting is position " 0".
Lighting and visibility
Page 90 of 292

88
Switching off
F Give the control stalk a further brief push
downwards or place the control stalk in
another position ( Int, 1
or 2). This indicator lamp goes off in the
instrument panel, accompanied by
a
message.
The automatic windscreen wipers must be
reactivated by pushing the control stalk
downwards, if the ignition has been off for
more than one minute.
Malfunction
If a fault occurs with automatic wiping, the
w ipers will operate in intermittent mode.
Have them checked by a
CITROËN dealer or
a
qualified workshop.
Do not cover the rain sensor linked to the
sunshine sensor and located at the top
centre of the windscreen.
Switch off the automatic wipers when using
an automatic car wash.
In winter, it is advisable to wait until the
windscreen is completely clear of ice before
activating the automatic windscreen wipers.
F Clean the windscreen using screenwash fluid.
Do not apply "Rain X" type water-repellent
products.
F
U
nclip the worn wiper blade closest to you
and remove it.
F
I
nstall the new wiper blade and clip it to the
arm.
F
R
epeat the procedure for the other wiper
blade.
F
S
tarting with the wiper blade closest to
you, once again hold each arm by the rigid
section, then fold it carefully, guiding it to
the windscreen.
Removing/refitting at the rear
F Hold the arm by the rigid section and raise it as far as possible.
F
C
lean the rear window using screenwash
fluid.
F
U
nclip the worn wiper blade and remove it.
F
I
nstall the new wiper blade and clip it to the
arm.
F
O
nce again hold the arm by the rigid section
then fold it carefully, guiding it to the rear
window.
Automatic windscreen
wipers
The windscreen wipers operate automatically,
adapting their speed to the intensity of the
rainfall without any action on the part of the
driver.
Detection of rainfall is by means of a
sensor at
the top centre of the windscreen, behind the
rear view mirror.
Switching on
F Give the control stalk a brief push
downwards.
A wiping cycle confirms that the instruction has
been accepted.
This indicator lamp comes on in the
instrument panel, accompanied by
the display of a
message.
Lighting and visibility
Page 95 of 292
93
The use of snow tyres is strongly
recommended on sur faces offering low
levels of grip.
Anti-slip regulation (ASR)/
Dynamic stability control
(DSC)
Operation
These systems are activated automatically
every time the vehicle is started.
They come into operation in the event of
a problem with grip or trajectory.
Deactivation
In exceptional conditions (starting a vehicle
w hich is bogged down, stuck in snow, on soft
ground, etc.), it may be advisable to deactivate
these systems, so that the wheels can turn
freely and regain grip.
Reactivate these systems as soon as the level
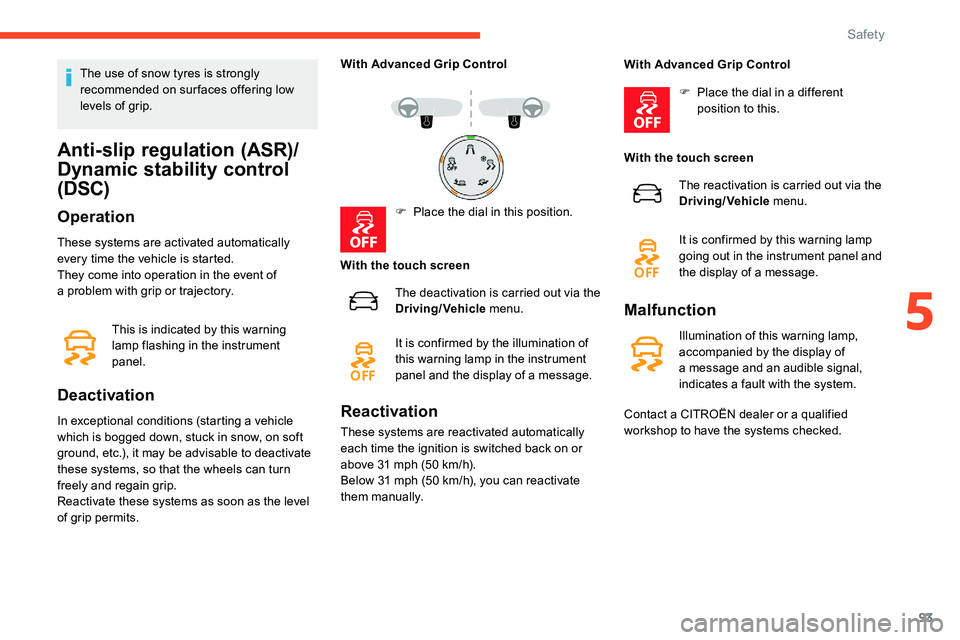
of grip permits. With Advanced Grip Control
F
P
lace the dial in this position.
With the touch screen The deactivation is carried out via the
Driving/Vehicle menu.
It is confirmed by the illumination of
this warning lamp in the instrument
panel and the display of a message.
This is indicated by this warning
lamp flashing in the instrument
panel.Reactivation
These systems are reactivated automatically
each time the ignition is switched back on or
above 31
mph (50 km/h).
Below 31
mph (50 km/h), you can reactivate
them manually. With Advanced Grip Control
F
P
lace the dial in a different
position to this.
With the touch screen The reactivation is carried out via the
Driving/Vehicle menu.
It is confirmed by this warning lamp
going out in the instrument panel and
the display of a message.
Malfunction
Illumination of this warning lamp,
accompanied by the display of
a
message and an audible signal,
indicates a
fault with the system.
Contact a
CITROËN dealer or a qualified
workshop to have the systems checked.
5
Safety