ESP CITROEN C5 AIRCROSS 2022 Handbook (in English)
[x] Cancel search | Manufacturer: CITROEN, Model Year: 2022, Model line: C5 AIRCROSS, Model: CITROEN C5 AIRCROSS 2022Pages: 276, PDF Size: 7.92 MB
Page 34 of 276
32
Access
Central locking not
functioning
Use these procedures in the following cases:
– Central locking malfunction.
– Battery disconnected or discharged.
In the event of a malfunction of the
central locking system, the battery must
be disconnected to ensure that the vehicle is
locked fully.
Front left-hand door
► Insert the key into the lock and turn it towards
the rear of the vehicle to lock the door, or
towards the front to unlock it.
Passenger doors
Unlocking
► Pull the interior door opening control.
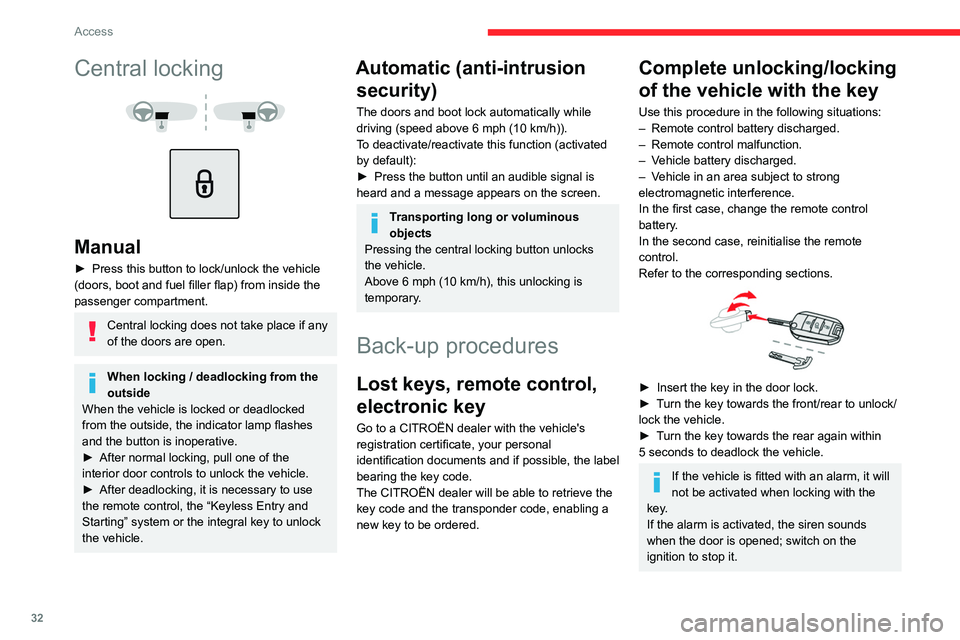
Central locking
Manual
► Press this button to lock/unlock the vehicle
(doors, boot and fuel filler flap) from inside the
passenger compartment.
Central locking does not take place if any
of the doors are open.
When locking / deadlocking from the
outside
When the vehicle is locked or deadlocked
from the outside, the indicator lamp flashes
and the button is inoperative.
►
After normal locking, pull one of the
interior door controls to unlock the vehicle.
►
After deadlocking, it is necessary to use
the remote control, the “Keyless Entry and
Starting” system or the integral key to unlock
the vehicle.
Automatic (anti-intrusion security)
The doors and boot lock automatically while
driving (speed above 6 mph (10
km/h)).
To deactivate/reactivate this function (activated
by default):
►
Press the button until an audible signal is
heard and a message appears on the screen.
Transporting long or voluminous
objects
Pressing the central locking button unlocks
the vehicle.
Above 6 mph (10 km/h), this unlocking is
temporary.
Back-up procedures
Lost keys, remote control,
electronic key
Go to a CITROËN dealer with the vehicle's
registration certificate, your personal
identification documents and if possible, the label
bearing the key code.
The CITROËN dealer will be able to retrieve the
key code and the transponder code, enabling a
new key to be ordered.
Complete unlocking/locking
of the vehicle with the key
Use this procedure in the following situations:
– Remote control battery discharged.
–
Remote control malfunction.
–
V
ehicle battery discharged.
–
V
ehicle in an area subject to strong
electromagnetic interference.
In the first case, change the remote control
battery.
In the second case, reinitialise
the remote
control.
Refer to the corresponding sections.
► Insert the key in the door lock.
► T urn the key towards the front/rear to unlock/
lock the vehicle.
►
T
urn the key towards the rear again within
5
seconds to deadlock the vehicle.
If the vehicle is fitted with an alarm, it will
not be activated when locking with the
key.
If the alarm is activated, the siren sounds
when the door is opened; switch on the
ignition to stop it.
Page 35 of 276

33
Access
2Central locking not
functioning
Use these procedures in the following cases:
– Central locking malfunction.
–
Battery disconnected or discharged.
In the event of a malfunction of the
central locking system, the battery must
be disconnected to ensure that the vehicle is
locked fully.
Front left-hand door
► Insert the key into the lock and turn it towards
the rear of the vehicle to lock the door , or
towards the front to unlock it.
Passenger doors
Unlocking
► Pull the interior door opening control.
Locking
► Open the doors.
► For the rear doors, check that the child lock
is not on.
Refer to the corresponding section.
►
Remove the black cap
, located on the edge
of the door, using the key.
►
Insert the key into the socket without forcing
it, then turn the latch towards the inside of the
door
.
►
Remove the key and refit the black cap.
►
Close the doors and check from the outside
that the vehicle is locked.
Changing the battery
A message is displayed on the instrument panel
when the battery needs changing.
Battery type: CR2032/3 volts.
Without
Keyless Entry and Starting
With Keyless Entry and Starting
► Unclip the cover by inserting a small
screwdriver in the slot and lift the cover .
►
Remove the flat battery from its housing.
►
Put the new battery in place, respecting the
polarity
. Start by inserting it into the contacts
Page 36 of 276
34
Access
system in the recognition zone, pull the door
handle.
When selective unlocking is activated,
the first press of the remote control
unlocking button permits unlocking of the
driver's door only.
From inside
► Pull the interior control lever of a front door;
this unlocks the vehicle completely.
When selective unlocking is activated:
– opening the driver's door unlocks
the driver's door only (if the vehicle has not
already been completely unlocked),
– opening one of the passenger doors
unlocks the rest of the vehicle.
The interior opening control on a rear door does not work if the child lock is on.
For more information on the Child Lock, refer
to the corresponding section.
Closing
When a door is not closed correctly:
located in the corner, then clip the cover onto
the unit.
►
Reinitialise the remote control.
For more information on Reinitialising the
remote control
, refer to the corresponding
section.
Do not throw remote control batteries
away, as they contain metals that are
harmful to the environment. Take them to an
approved disposal point.
Reinitialising the remote
control
Following replacement of the battery or in
the event of a remote control fault, it may be
necessary to reinitialise the remote control.
If the problem persists, contact a
CITROËN dealer or a qualified workshop
as soon as possible.
Without Keyless Entry and Starting
► Switch off the ignition.
► Return the key to position 2 (Ignition on).
►
Immediately press the closed padlock button
for a few seconds.
►
Switch off the ignition and remove the key
from the switch.
The remote control is now fully operational
again.
With Keyless Entry and Starting
► Insert the mechanical key (incorporated into
the remote control) into the lock to open the
vehicle.
►
Place the electronic key against the back-up
reader on the steering column and hold it there
until the ignition is switched on.
►
W
ith a manual gearbox, place the gear lever
in neutral then fully depress the clutch pedal.
►
W
ith an automatic gearbox, while in mode
P, depress the brake pedal.
►
Switch on the ignition by pressing the
"
START/STOP" button.
If the fault persists after reinitialisation, contact a
CITROËN dealer or a qualified workshop without
delay.
Doors
Opening
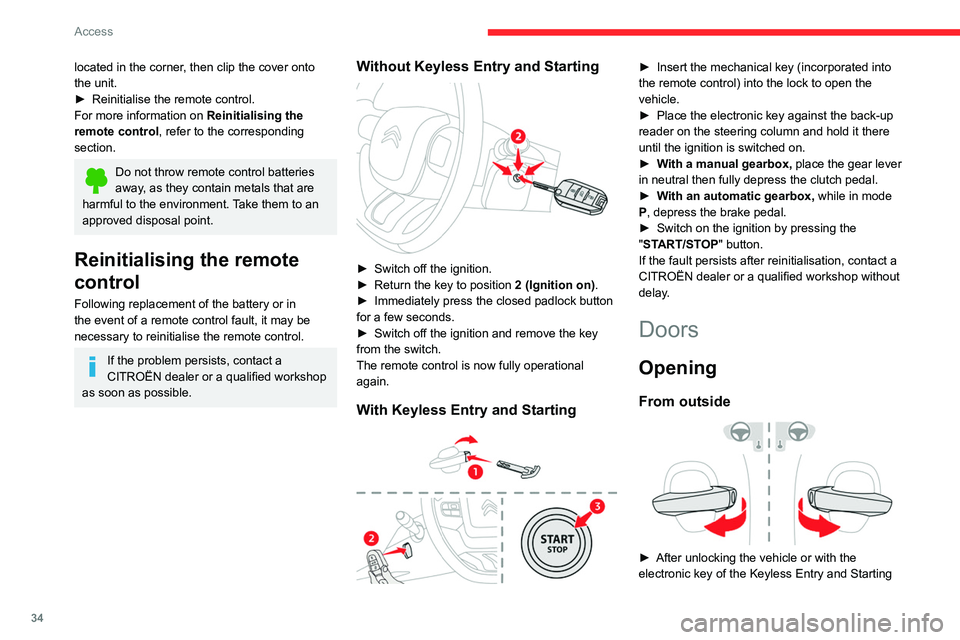
From outside
► After unlocking the vehicle or with the
electronic key of the Keyless Entry and Starting
Page 37 of 276
35
Access
2system in the recognition zone, pull the door
handle.
When selective unlocking is activated,
the first press of the remote control
unlocking button permits unlocking of the
driver's door only.
From inside
► Pull the interior control lever of a front door;
this unlocks the vehicle completely .
When selective unlocking is activated:
– opening the driver's door unlocks
the driver's door only (if the vehicle has not
already been completely unlocked),
–
opening one of the passenger doors
unlocks the rest of the vehicle.
The interior opening control on a rear door does not work if the child lock is on.
For more information on the Child Lock, refer
to the corresponding section.
Closing
When a door is not closed correctly:
– with the engine running or the vehicle
moving (speed below 6 mph (10 km/h)) , a
message appears in the screen.
–
with the vehicle moving (speed above 6
mph (10 km/h))
, a message appears in the
screen, accompanied by an audible signal.
Boot
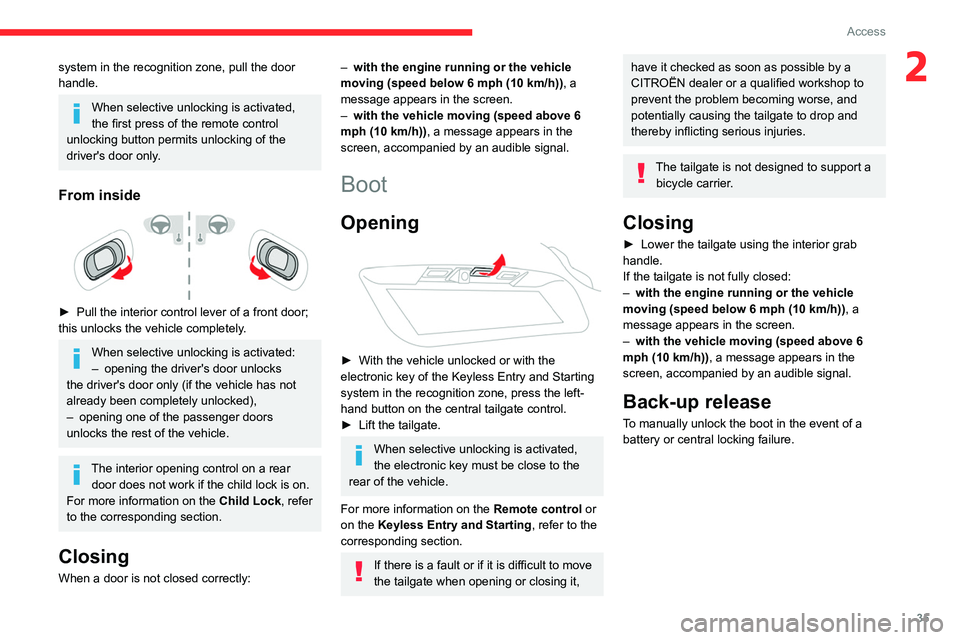
Opening
► With the vehicle unlocked or with the
electronic key of the Keyless Entry and Starting
system in the recognition zone, press the left-
hand button on the central tailgate control.
►
Lift the tailgate.
When selective unlocking is activated,
the electronic key must be close to the
rear of the vehicle.
For more information on the Remote control or
on the Keyless Entry and Starting, refer to the
corresponding section.
If there is a fault or if it is difficult to move
the tailgate when opening or closing it,
have it checked as soon as possible by a
CITROËN dealer or a qualified workshop to
prevent the problem becoming worse, and
potentially causing the tailgate to drop and
thereby inflicting serious injuries.
The tailgate is not designed to support a bicycle carrier.
Closing
► Lower the tailgate using the interior grab
handle.
If the tailgate is not fully closed:
–
with the engine running or the vehicle
moving (speed below 6 mph (10 km/h)) , a
message appears in the screen.
–
with the vehicle moving (speed above 6
mph (10 km/h))
, a message appears in the
screen, accompanied by an audible signal.
Back-up release
To manually unlock the boot in the event of a
battery or central locking failure.
Page 39 of 276
37
Access
2
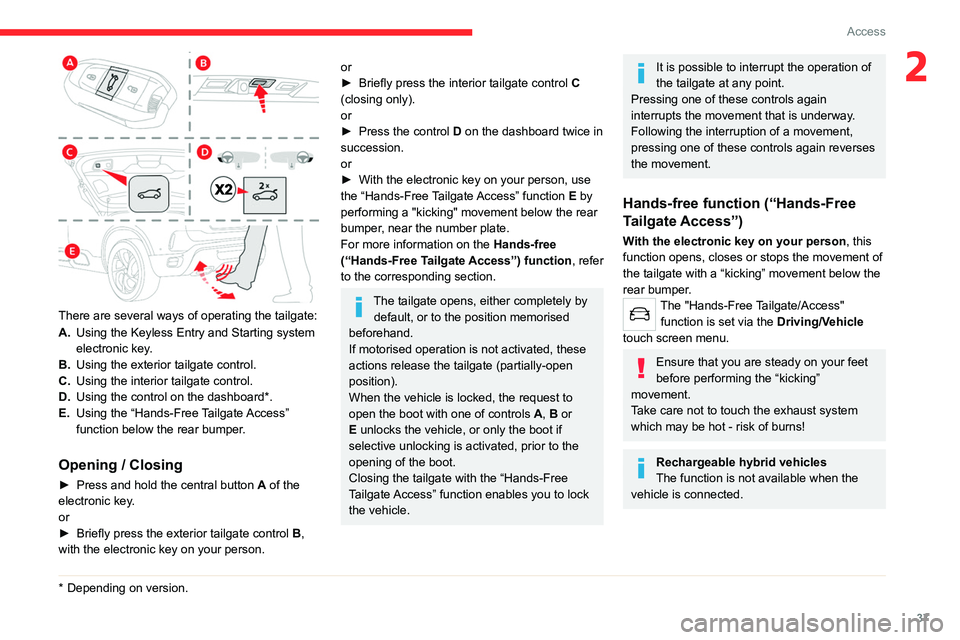
There are several ways of operating the tailgate:
A.Using the Keyless Entry and Starting system
electronic key.
B. Using the exterior tailgate control.
C. Using the interior tailgate control.
D. Using the control on the dashboard*.
E. Using the “Hands-Free Tailgate Access”
function below the rear bumper.
Opening / Closing
► Press and hold the central button A of the
electronic key.
or
►
Briefly press the exterior tailgate control B
,
with the electronic key on your person.
* Depending on version.
or
► Briefly press the interior tailgate control C
(closing only).
or
►
Press the control
D on the dashboard twice in
succession.
or
►
With the electronic key on your person, use
the “Hands-Free
Tailgate Access” function E by
performing a "kicking" movement below the rear
bumper, near the number plate.
For more information on the Hands-free
(“Hands-Free Tailgate Access”) function, refer
to the corresponding section.
The tailgate opens, either completely by default, or to the position memorised
beforehand.
If motorised operation is not activated, these
actions release the tailgate (partially-open
position).
When the vehicle is locked, the request to
open the boot with one of controls A, B or
E unlocks the vehicle, or only the boot if
selective unlocking is activated, prior to the
opening of the boot.
Closing the tailgate with the “Hands-Free
Tailgate Access” function enables you to lock
the vehicle.
It is possible to interrupt the operation of
the tailgate at any point.
Pressing one of these controls again
interrupts the movement that is underway.
Following the interruption of a movement,
pressing one of these controls again reverses
the movement.
Hands-free function (“Hands-Free
Tailgate Access”)
With the electronic key on your person , this
function opens, closes or stops the movement of
the tailgate with a “kicking” movement below the
rear bumper.
The "Hands-Free Tailgate/Access" function is set via the Driving/Vehicle
touch screen menu.
Ensure that you are steady on your feet
before performing the “kicking”
movement.
Take care not to touch the exhaust system
which may be hot - risk of burns!
Rechargeable hybrid vehicles
The function is not available when the
vehicle is connected.
Page 43 of 276

41
Access
2► Switch on the ignition; this stops the alarm.
The indicator lamp in the button goes off.
Locking the vehicle without
activating the alarm
► Lock or deadlock the vehicle using the key
(integral to the remote control) in the driver's
door lock.
Automatic activation
(Depending on version)
The system is activated automatically 2 minutes
after the last door or the boot is closed.
►
T
o avoid triggering the alarm on entering the
vehicle, first press the unlocking button on the
remote control or unlock the vehicle using the
“Keyless Entry and Starting” system.
Malfunction
When the ignition is switched on, fixed
illumination of the red indicator lamp in the
button indicates a malfunction of the system.
Have it checked by a CITROËN dealer or a
qualified workshop.
Electric windows
1. Left-hand front
2. Right-hand front
3. Right-hand rear
4. Left-hand rear
5. Deactivation of electric window controls
located by rear seats
Manual operation
► To open/close the window, press/pull the
switch without passing the point of resistance;
the window stops as soon as the switch is
released.
Automatic operation
► To open/close the window, press/pull the
switch past its resistance point: the window
opens/closes completely when the switch is
released.
Operating the switch again stops the movement
of the window.
Window controls remain operational for
approximately 45 seconds after switching
off the ignition or after locking the vehicle.
After that time, the controls are disabled.
To reactivate them, switch on the ignition or
unlock the vehicle.
Anti-pinch
If the window meets an obstacle while rising, it
stops and immediately partially lowers again.
Deactivating the rear
controls for the rear electric
windows
For your children's safety, press control 5
to deactivate the controls for the rear
electric windows, irrespective of their positions.
The red indicator lamp in the button comes
on and a confirmation message is displayed.
The lamp will remain lit until the controls are
reactivated.
The rear electric windows can still be controlled
using the driver's controls.
Reinitialising the electric
windows
After reconnecting the battery, or in the event
of abnormal window movement, the anti-pinch
function must be reinitialised.
The anti-pinch function is disabled during the
following sequence of operations.
Page 48 of 276

46
Ease of use and comfort
Electrically-adjustable seats
To avoid draining the battery, carry out these adjustments with the engine
running.
Longitudinal adjustment
► Push the control forwards or rearwards to
slide the seat.
Backrest angle
► Tilt the control forwards or rearwards.
Electric lumbar adjustment
The control allows independent adjustment of
the depth and vertical position of the lumbar
support.
► Press and hold the front or rear of the
control to increase or reduce the lumbar
support.
►
Press and hold the top or bottom of the
control to raise or lower the lumbar support area.
Seat cushion height and angle
► Tilt the rear of the control upwards or
downwards to obtain the required height.
►
T
ilt the front of the control upwards or
downwards to obtain the required angle.
Comfort functions
Memorising driving positions
Associated with the electrically-adjusted driver’s
seat, this function allows two driving positions
to be memorised, to make these adjustments
easier if there are frequent driver changes.
It records the electric adjustments made to the
seat and door mirrors.
Using buttons M/1/2
► Enter the vehicle and switch the ignition on.
►
Adjust your seat and the door mirrors.
►
Press button
M, then press button 1 or 2
within 4 seconds.
An audible signal confirms the memorisation.
Memorising a new position cancels the previous
position.
Recalling a stored position
While the seat is moving, take care that
no person or object hinders the
automatic movement of the seat.
With the ignition on or engine running
► Press button 1 or 2 to recall the
corresponding position.
An audible signal sounds when adjustment is
complete.
You can interrupt the current movement by
pressing button M, 1 or 2 or by using one of the
seat adjustment controls.
A stored position cannot be recalled while
driving.
The recalling of stored positions is deactivated
45 seconds after switching off the ignition.
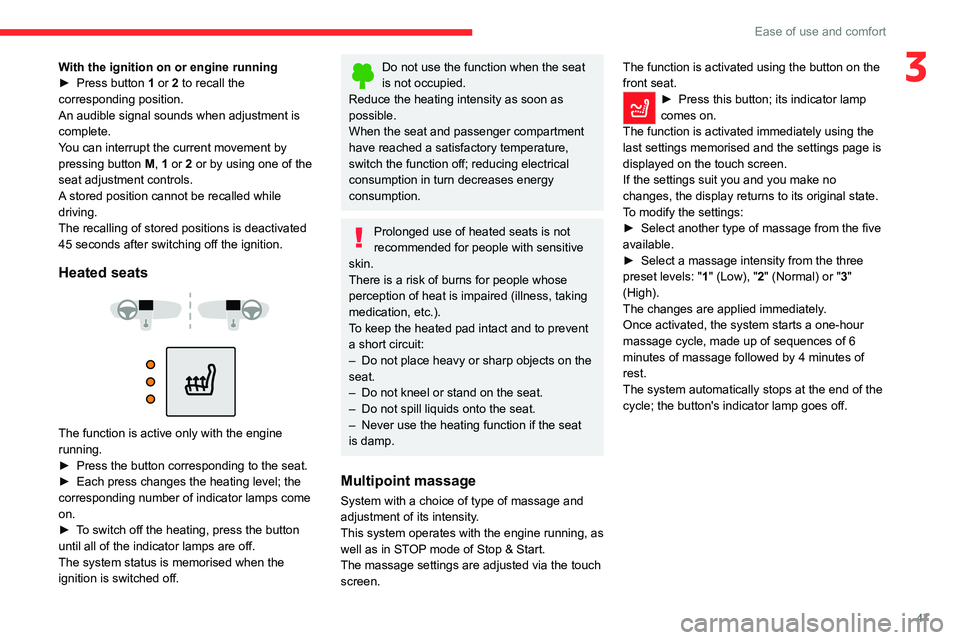
Heated seats
The function is active only with the engine
running.
► Press the button corresponding to the seat.
► Each press changes the heating level; the
corresponding number of indicator lamps come
on.
► To switch off the heating, press the button
until all of the indicator lamps are off.
The system status is memorised when the
ignition is switched off.
Page 49 of 276
47
Ease of use and comfort
3With the ignition on or engine running
► Press button 1 or 2 to recall the
corresponding position.
An audible signal sounds when adjustment is
complete.
You can interrupt the current movement by
pressing button M, 1 or 2 or by using one of the
seat adjustment controls.
A stored position cannot be recalled while
driving.
The recalling of stored positions is deactivated
45 seconds after switching off the ignition.
Heated seats
The function is active only with the engine
running.
►
Press the button corresponding to the seat.
►
Each press changes the heating level; the
corresponding number of indicator lamps come
on.
►
T
o switch off the heating, press the button
until all of the indicator lamps are off.
The system status is memorised when the
ignition is switched off.
Do not use the function when the seat
is not occupied.
Reduce the heating intensity as soon as
possible.
When the seat and passenger compartment
have reached a satisfactory temperature,
switch the function off; reducing electrical
consumption in turn decreases energy
consumption.
Prolonged use of heated seats is not
recommended for people with sensitive
skin.
There is a risk of burns for people whose
perception of heat is impaired (illness, taking
medication, etc.).
To keep the heated pad intact and to prevent
a short circuit:
–
Do not place heavy or sharp objects on the
seat.
–
Do not kneel or stand on the seat.
–
Do not spill liquids onto the seat.
–
Never use the heating function if the seat
is damp.
Multipoint massage
System with a choice of type of massage and
adjustment of its intensity.
This system operates with the engine running, as
well as in STOP mode of Stop & Start.
The massage settings are adjusted via the touch screen. The function is activated using the button on the
front seat.
► Press this button; its indicator lamp
comes on.
The function is activated immediately using the
last settings memorised and the settings page is
displayed on the touch screen.
If the settings suit you and you make no
changes, the display returns to its original state.
T
o modify the settings:
►
Select another type of massage from the five
available.
►
Select a massage intensity from the three
preset levels: "
1" (Low), "2" (Normal) or "3"
(High).
The changes are applied immediately.
Once activated, the system starts a one-hour
massage cycle, made up of sequences of 6
minutes of massage followed by 4 minutes of
rest.
The system automatically stops at the end of the
cycle; the button's indicator lamp goes off.
Page 50 of 276
48
Ease of use and comfort
With the engine running, on engaging reverse
gear, the mirror glasses tilt downwards.
They return to their initial position:
– A few seconds after coming out of reverse
gear.
– Once the vehicle speed exceeds 6 mph
(10 km/h).
– When the engine is switched off.
It is set via theDriving/Vehicle touch
screen menu.
Rear view mirror
Equipped with an anti-dazzle system, which
darkens the mirror glass and reduces the
nuisance to the driver caused by the sun,
headlamps of other vehicles, etc.
Manual model
Adjustment
► Adjust the mirror so that the glass is directed
correctly in the "day" position.
Day/night position
Steering wheel
adjustment
► When stationary , pull the control A to
release the steering wheel.
►
Adjust the height and reach to suit your
driving position.
►
Push the control
A to lock the steering wheel.
For safety reasons, these adjustments
must only be carried out with the vehicle
stationary.
Mirrors
Door mirrors
Demisting/Defrosting
If the vehicle is so equipped, demisting/
defrosting of the heated door mirrors is
performed when the heated rear screen is
switched on.
For more information on Rear screen
demisting/defrosting , refer to the
corresponding section.
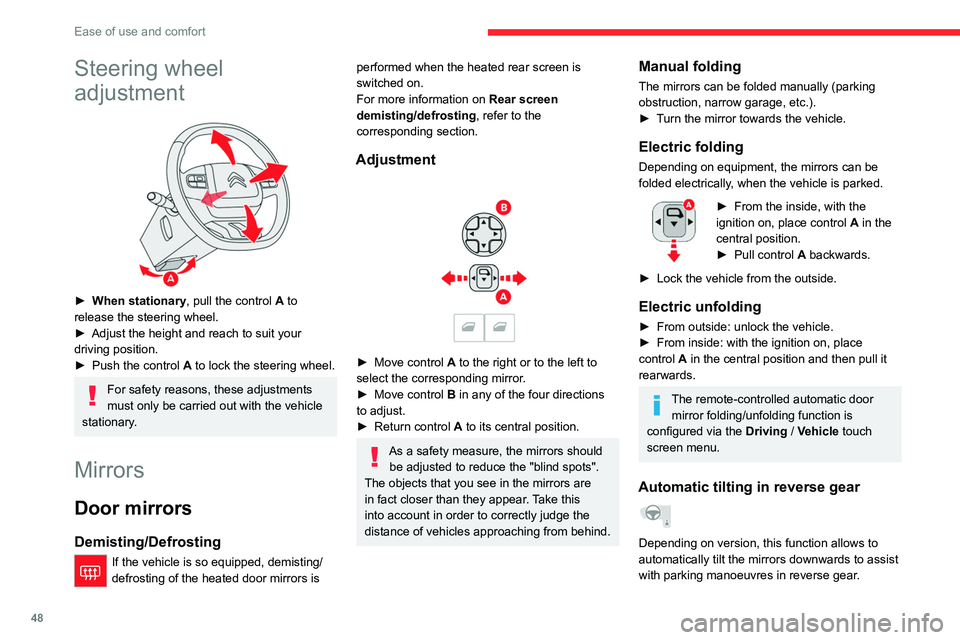
Adjustment
► Move control A to the right or to the left to
select the corresponding mirror.
►
Move control
B in any of the four directions
to adjust.
►
Return control A
to its central position.
As a safety measure, the mirrors should be adjusted to reduce the "blind spots".
The objects that you see in the mirrors are
in fact closer than they appear. Take this
into account in order to correctly judge the
distance of vehicles approaching from behind.
Manual folding
The mirrors can be folded manually (parking
obstruction, narrow garage, etc.).
►
T
urn the mirror towards the vehicle.
Electric folding
Depending on equipment, the mirrors can be
folded electrically, when the vehicle is parked.
► From the inside, with the
ignition on, place control A
in the
central position.
►
Pull control A
backwards.
►
Lock the vehicle from the outside.
Electric unfolding
► From outside: unlock the vehicle.
► From inside: with the ignition on, place
control
A in the central position and then pull it
rearwards.
The remote-controlled automatic door mirror folding/unfolding function is
configured via the Driving
/ Vehicle touch
screen menu.
Automatic tilting in reverse gear
Depending on version, this function allows to
automatically tilt the mirrors downwards to assist
with parking manoeuvres in reverse gear.
Page 52 of 276

50
Ease of use and comfort
retrieve the seat belt and hold it during the
operation.
► Put the backrest 2 in the upright position and
push firmly to latch it home.
► Check that the release strap 1 has correctly
returned to its position.
► Ensure that the outer seat belts are not
trapped during the operation.
Please note: an incorrectly latched
backrest compromises the safety of
passengers in the event of sudden braking or
an impact.
The contents of the boot may be thrown
forward - risk of serious injury!
Heating and Ventilation
Air intake
The air circulating in the passenger compartment
is filtered and originates either from the
exterior, via the grille located at the base of the
windscreen, or from the inside in air recirculation
mode.
Controls
The controls are accessible in the " Air
conditioning " touch screen menu and are also
grouped together in the control panel on the
centre console.
The rear head restraints can be removed.
To remove a head restraint:
►
pull the head restraint as far up as it will go,
►
press the lugs
A to release the head restraint
and remove it completely,
►
stow the head restraint.
T
o refit a head restraint:
►
insert the head restraint rods into the guides
in the corresponding seat backrest,
►
push the head restraint down as far as it will
go,
►
press the lugs
A to release the head restraint
and push it fully down.
Never drive with passengers seated at
the rear when the head restraints are
removed; they must be in place and in the
high position.
Longitudinal adjustment
Seat operations must only be done with
the vehicle stationary.
Each seat can be adjusted individually.
► Raise the control and slide the seat forwards
or backwards.
Once the backrest is folded, it is no
longer possible to slide the seat.
Backrest angle
Several adjustment positions are possible.
► Move the seat forward.
► Pull the strap forward, then tilt the backrest to
the desired position.
Folding the backrests
The backrests must only be operated with the vehicle stationary.
Preliminary operations:
►
lower the head restraints,
►
if necessary
, move the front seats forward,
►
check that no person or object could interfere
with the folding of the backrests (clothing,
luggage, etc.),
►
check that the outer seat belts are properly
tensioned along the pillars, that the central belt
is stowed and that the tongues of the three belts
are correctly in the storage position.
► Pull the strap 1 firmly to release the backrest.
► Guide the backrest 2 down to the horizontal
position.
Repositioning the backrests
Before raising the backrest of the outer
seats to the normal position, please