horn CITROEN C5 AIRCROSS 2022 Handbook (in English)
[x] Cancel search | Manufacturer: CITROEN, Model Year: 2022, Model line: C5 AIRCROSS, Model: CITROEN C5 AIRCROSS 2022Pages: 276, PDF Size: 7.92 MB
Page 4 of 276
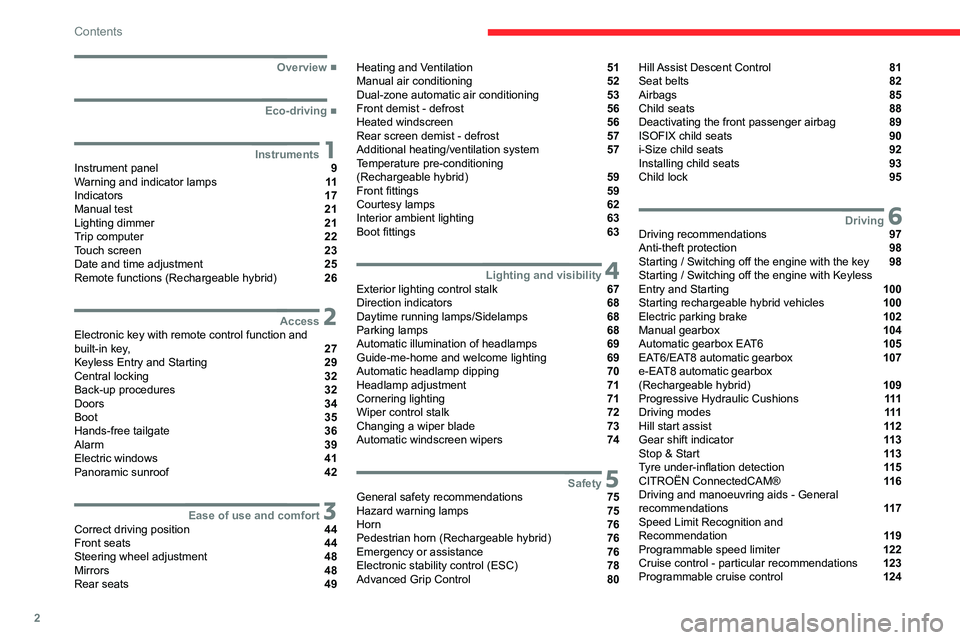
2
Contents
■
Overview
■
Eco-driving
1InstrumentsInstrument panel 9
Warning and indicator lamps 11
Indicators 17
Manual test 21
Lighting dimmer 21
Trip computer 22
Touch screen 23
Date and time adjustment 25
Remote functions (Rechargeable hybrid) 26
2AccessElectronic key with remote control function and
built-in key, 27
Keyless Entry and Starting 29
Central locking 32
Back-up procedures 32
Doors 34
Boot 35
Hands-free tailgate 36
Alarm 39
Electric windows 41
Panoramic sunroof 42
3Ease of use and comfortCorrect driving position 44
Front seats 44
Steering wheel adjustment 48
Mirrors 48
Rear seats 49
Heating and Ventilation 51
Manual air conditioning 52
Dual-zone automatic air conditioning 53
Front demist - defrost 56
Heated windscreen 56
Rear screen demist - defrost 57
Additional heating/ventilation system 57
Temperature pre-conditioning
(Rechargeable hybrid)
59
Front fittings 59
Courtesy lamps 62
Interior ambient lighting 63
Boot fittings 63
4Lighting and visibilityExterior lighting control stalk 67
Direction indicators 68
Daytime running lamps/Sidelamps 68
Parking lamps 68
Automatic illumination of headlamps 69
Guide-me-home and welcome lighting 69
Automatic headlamp dipping 70
Headlamp adjustment 71
Cornering lighting 71
Wiper control stalk 72
Changing a wiper blade 73
Automatic windscreen wipers 74
5SafetyGeneral safety recommendations 75
Hazard warning lamps 75
Horn 76
Pedestrian horn (Rechargeable hybrid) 76
Emergency or assistance 76
Electronic stability control (ESC) 78
Advanced Grip Control 80
Hill Assist Descent Control 81
Seat belts 82
Airbags 85
Child seats 88
Deactivating the front passenger airbag 89
ISOFIX child seats 90
i-Size child seats 92
Installing child seats 93
Child lock 95
6DrivingDriving recommendations 97
Anti-theft protection 98
Starting / Switching off the engine with the key 98
Starting / Switching off the engine with Keyless
Entry and Starting
100
Starting rechargeable hybrid vehicles 100
Electric parking brake 102
Manual gearbox 104
Automatic gearbox EAT6 105
EAT6/EAT8 automatic gearbox 107
e-EAT8 automatic gearbox
(Rechargeable hybrid)
109
Progressive Hydraulic Cushions 111
Driving modes 111
Hill start assist 11 2
Gear shift indicator 11 3
Stop & Start 11 3
Tyre under-inflation detection 11 5
CITROËN ConnectedCAM® 11 6
Driving and manoeuvring aids - General
recommendations
11 7
Speed Limit Recognition and
Recommendation
11 9
Programmable speed limiter 122
Cruise control - particular recommendations 123
Programmable cruise control 124
Page 6 of 276
4
Overview
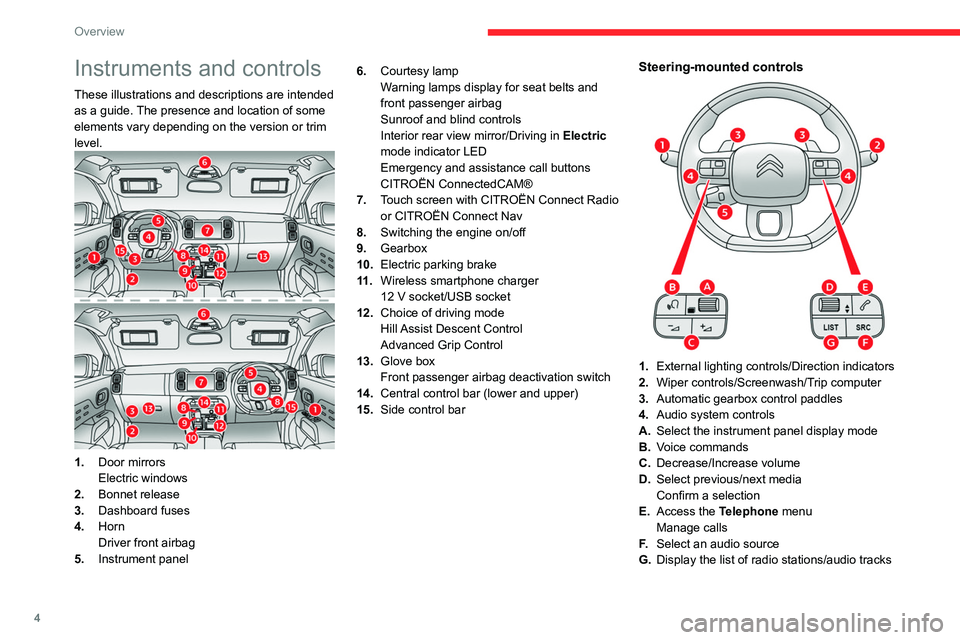
Instruments and controls
These illustrations and descriptions are intended
as a guide. The presence and location of some
elements vary depending on the version or trim
level.
1.Door mirrors
Electric windows
2. Bonnet release
3. Dashboard fuses
4. Horn
Driver front airbag
5. Instrument panel 6.
Courtesy lamp
Warning lamps display for seat belts and
front passenger airbag
Sunroof and blind controls
Interior rear view mirror/Driving in Electric
mode indicator LED
Emergency and assistance call buttons
CITROËN ConnectedCAM®
7. Touch screen with CITROËN Connect Radio
or CITROËN Connect Nav
8. Switching the engine on/off
9. Gearbox
10. Electric parking brake
11 . Wireless smartphone charger
12 V socket/USB socket
12. Choice of driving mode
Hill Assist Descent Control
Advanced Grip Control
13. Glove box
Front passenger airbag deactivation switch
14. Central control bar (lower and upper)
15. Side control bar
Steering-mounted controls
1.External lighting controls/Direction indicators
2. Wiper controls/Screenwash/Trip computer
3. Automatic gearbox control paddles
4. Audio system controls
A. Select the instrument panel display mode
B. Voice commands
C. Decrease/Increase volume
D. Select previous/next media
Confirm a selection
E. Access the Telephone menu
Manage calls
F. Select an audio source
G. Display the list of radio stations/audio tracks
Page 17 of 276
15
Instruments
1If the engine does not start, switch the ignition off
and then on, wait until the indicator lamp goes off
again, then start the engine.
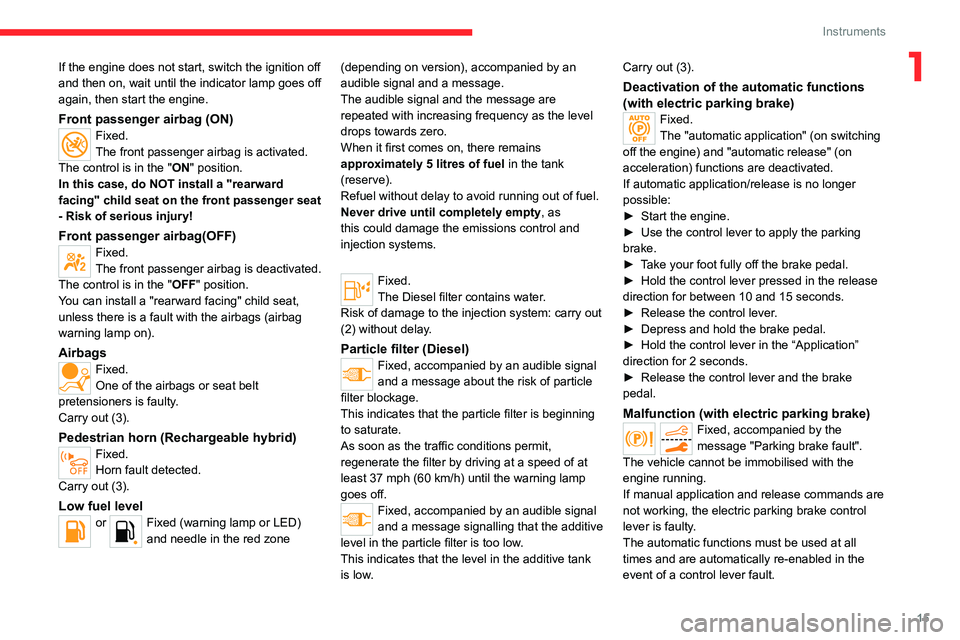
Front passenger airbag (ON)Fixed.
The front passenger airbag is activated.
The control is in the "ON" position.
In this case, do NOT install a "rearward
facing" child seat on the front passenger seat
- Risk of serious injury!
Front passenger airbag(OFF)Fixed.
The front passenger airbag is deactivated.
The control is in the "OFF" position.
You can install a "rearward facing" child seat,
unless there is a fault with the airbags (airbag
warning lamp on).
AirbagsFixed.
One of the airbags or seat belt
pretensioners is faulty.
Carry out (3).
Pedestrian horn (Rechargeable hybrid)Fixed.
Horn fault detected.
Carry out (3).
Low fuel levelor Fixed (warning lamp or LED)
and needle in the red zone (depending on version), accompanied by an
audible signal and a message.
The audible signal and the message are
repeated with increasing frequency as the level
drops towards zero.
When it first comes on, there remains
approximately 5 litres of fuel in the tank
(reserve).
Refuel without delay to avoid running out of fuel.
Never drive until completely empty, as
this could damage the emissions control and
injection systems.
Fixed.
The Diesel filter contains water.
Risk of damage to the injection system: carry out
(2) without delay.
Particle filter (Diesel)Fixed, accompanied by an audible signal
and a message about the risk of particle
filter blockage.
This indicates that the particle filter is beginning
to saturate.
As soon as the traffic conditions permit,
regenerate the filter by driving at a speed of at
least 37 mph (60 km/h) until the warning lamp
goes off.
Fixed, accompanied by an audible signal
and a message signalling that the additive
level in the particle filter is too low.
This indicates that the level in the additive tank
is low. Carry out (3).
Deactivation of the automatic functions
(with electric parking brake)
Fixed.
The "automatic application" (on switching
off the engine) and "automatic release" (on
acceleration) functions are deactivated.
If automatic application/release is no longer
possible:
►
Start the engine.
►
Use the control lever to apply the parking
brake.
►
T
ake your foot fully off the brake pedal.
►
Hold the control lever pressed in the release
direction for between 10 and 15 seconds.
►
Release the control lever
.
►
Depress and hold the brake pedal.
►
Hold the control lever in the “Application”
direction for 2
seconds.
►
Release the control lever and the brake
pedal.
Malfunction (with electric parking brake)
Fixed, accompanied by the
message "Parking brake fault".
The vehicle cannot be immobilised with the
engine running.
If manual application and release commands are
not working, the electric parking brake control
lever is faulty.
The automatic functions must be used at all
times and are automatically re-enabled in the
event of a control lever fault.
Page 30 of 276
28
Access
illumination of the direction indicators for a
few seconds.
With the remote control
► Within 5 seconds of locking the
vehicle, press the button again to
deadlock it.
With the key
► Within 5 seconds of locking the vehicle, turn
the key to the rear again to deadlock it.
Locating your vehicle
This function allows you to identify your vehicle
from a distance, particularly in poor light. Your
vehicle must be locked.
► Press this button. The courtesy lamps
will come on and the direction indicators
will flash for a few seconds.
Remote lighting of the
lamps
Availability of this function depends on version.► Press this button. The sidelamps,
dipped beam headlamps, number plate
lamps and door mirror spotlamps come on for 30
seconds.
Pressing again before the end of the timed
period switches off the lamps immediately.
Complete or selective unlocking, and alarm
deactivation (depending on version), is confirmed
by the flashing of the direction indicators.
Depending on version, the door mirrors unfold.
Opening the windows
Depending on version, holding the
unlocking button pressed for more than 3
seconds opens the windows.
The windows stop when the button is released.
With the key
► Turn the key in the front left-hand door lock
towards the front of the vehicle to unlock it.
Selective unlocking and opening of
the tailgate
The settings for the selective tailgate unlocking
and motorised operation are made in the vehicle
configuration menu.
By default, selective tailgate unlocking is
activated and and motorised operation is
deactivated.
► Make a long press on the button to
unlock the boot and trigger the motorised
opening of the tailgate.
The doors and fuel filler flap remain locked.
If selective unlocking of the tailgate is
deactivated, pressing the button unlocks
the whole vehicle.
If motorised operation of the tailgate is
deactivated, pressing the button releases
the tailgate.
To lock the vehicle, it is necessary to close
the tailgate again.
Locking the vehicle
With the remote control
► Press this button to lock the vehicle.
Locking is confirmed by fixed illumination of
the direction indicators for approximately two
seconds. Depending on version, the door mirrors
fold.
If one of the doors or the boot is still open, the
central locking does not work; the vehicle locks,
then immediately unlocks, identifiable by the
locks making a rebound sound.
When the vehicle is locked, if it is
unlocked without the opening of a door
or the boot, it will automatically lock itself
again after thirty seconds.
The automatic folding and unfolding of the door mirrors can be deactivated via
the vehicle's configuration menu.
With the key
► Turn the key in the front left-hand door lock
towards the rear of the vehicle to unlock it.
Check that the doors and boot are fully
closed.
Closing the windows and sunroof
Maintaining pressure on the locking button
allows the windows and, depending on version,
the sunroof to be closed to the desired position.
This operation also closes the sunroof blind.
Ensure that no person or object could
prevent the correct closing of the
windows and sunroof.
If, on versions with alarm, you want to leave
the windows and/or sunroof partly open, you
must first deactivate the volumetric alarm
protection.
For more information on the Alarm, refer to
the corresponding section.
Deadlocking
Deadlocking deactivates the exterior and
interior door controls, as well as the
central locking button on the dashboard.
The horn remains operational.
You must therefore never leave anyone inside
the vehicle when it is deadlocked.
If your vehicle is fitted with an alarm,
activation is confirmed by fixed
Page 33 of 276
31
Access
2Closing the windows and the sunroof
Maintaining pressure on the door handle or
the tailgate control allows the windows and,
depending on version, the sunroof to be closed
to the desired position.
This operation also closes the sunroof blind.
Make sure that no item or person could
prevent the correct closing of the
windows and sunroof.
Be particularly aware of children when
operating the windows.
Illumination of the direction indicators for a few
seconds signals:
–
the locking of the vehicle for versions without
alarm,
–
the activation of the alarm for other versions.
Depending on version, the door mirrors fold.
For safety and theft protection reasons,
never leave the electronic key in the
vehicle, even when you are close to it.
Accumulations (water, dust, grime, salt etc.) on the inner surface of the door
handle may affect detection.
If cleaning the inner surface of the door
handle using a cloth does not restore
detection, contact a CITROËN dealer or a
qualified workshop.
A sudden splash of water (stream of water,
high pressure jet washer, etc.) may be
identified by the system as the desire to open
the vehicle.
Deadlocking
Deadlocking deactivates the exterior and
interior door controls, as well as the
central locking button on the dashboard.
The horn remains operational.
You must therefore never leave anyone inside
the vehicle when it is deadlocked.
►
With the electronic key in recognition zone A
,
press once with your finger or thumb on the door
handle of one of the front doors (at the markings)
or on the locking control located on the tailgate
(at the right of the control) to lock the vehicle.
►
Within 5 seconds, press the door handle
again to deadlock the vehicle.
Advice
Remote control
The remote control is a sensitive, high-
frequency device; avoid handling it in your
pocket, due to the risk of unintentionally
unlocking the vehicle.
Avoid pressing the remote control buttons
while out of range of the vehicle, due to
the risk of rendering the remote control
inoperative. It would then be necessary to
reset it.
The remote control does not work
when the
key is in the ignition switch, even when the
ignition is switched off.
Anti-theft protection
Do not modify the electronic vehicle
immobiliser, as this might result in
malfunctions.
For vehicles with a key ignition switch,
remember to remove the key and turn the
steering wheel to engage the steering lock.
Locking the vehicle
Driving with the doors locked could make
it more difficult for the emergency services
to enter the passenger compartment in an
emergency.
As a safety precaution, remove the key from
the ignition or take the electronic key with you
when leaving the vehicle, even for a short
time.
Purchasing a second-hand vehicle
Have the key codes memorised by a
CITROËN dealer, to ensure that the keys in
your possession are the only ones able to
start the vehicle.
Page 78 of 276

76
Safety
Horn
► Press the central part of the multifunction
steering wheel.
Pedestrian horn
(Rechargeable hybrid)
This system alerts pedestrians that the vehicle is approaching, when driving in ELECTRIC mode
(100% electric driving).
The pedestrian horn operates once the vehicle
is moving and at speeds of up to 19 mph
(30
km/h), in forward or reverse gear.
Malfunction
In the event of a malfunction, this warning
lamp comes on on the instrument panel.
Contact a CITROËN dealer or a qualified
workshop to have the system checked.
* In accordance with the general conditions of use of the service, available from dealers an\
d subject to technological and technical limitations.
** In areas covered by ‘Localised Emergency Call’ and ‘Localised Assistance Call’.
The list of countries covered and telematic services provided is availab\
le from dealers or on the website for your country.
Emergency or assistance
call
Localised Emergency Call
(PE112)
► In an emergency , press button 1 for more
than 2 seconds.
The lighting of the indicator lamp and a voice
message confirm that the call has been made to
the emergency services*.
‘Localised Emergency Call’ immediately locates
your vehicle and puts you in contact with the
appropriate emergency services**.
►
Pressing again immediately cancels the
request.
The indicator lamp flashes when the vehicle
data is sent, and then remains lit when
communication is established.
If an impact is detected by the airbag
control unit, an emergency call is made
automatically, independently of the
deployment of any airbags.
‘Localised Emergency Call’ is a service
that can be accessed free of charge.
System operation
– Upon switching on the ignition, if the indicator
lamp lights up red, then green, and then goes
out: the system is operating correctly
.
–
If the indicator lamp is fixed red: system
malfunction
–
If the indicator lamp flashes red: replace the
emergency battery
.
In the latter two cases, emergency and
assistance call services may not work.
Contact a dealer or a qualified repairer as soon
as possible.
The system fault does not prevent the vehicle from being driven.
Data processing
All processing of personal information
by the "Localised Emergency Call" system
(PE112) complies with the framework for
Page 102 of 276

100
Driving
When the vehicle starts in electric mode,
it makes no noise.
Pay particular attention to pedestrians and
cyclists who may not hear the vehicle coming
despite the pedestrian horn.
Switching off
► Immobilise the vehicle.
► With a manual gearbox, ideally put the gear
lever into neutral.
► With an automatic gearbox, ideally select
mode P or N.
► Press the "START/STOP" button..
► For rechargeable hybrid vehicles, before
leaving the vehicle, check that the READY
indicator lamp is switched off.
In some circumstances, it is necessary to turn
the steering wheel to lock the steering column.
On certain versions with an automatic gearbox
(EAT6/EAT8), the steering column does not lock,
but the gearbox locks in mode P.
If the vehicle is not immobilised, the
engine will not switch off.
With the engine off, the braking and
steering assistance systems are also cut
off - risk of loss of control of the vehicle!
Never leave your vehicle with the
electronic key still inside.
will be switched off automatically after one
hour.
To switch the ignition back on, turn the key
to position 1 (Stop), then back to position 2
(Ignition on) .
Starting / Switching off the
engine with Keyless Entry
and Starting
The electronic key must be present in the
passenger compartment.
If it is not detected, a message is displayed.
Move the electronic key so that the engine
can be started or switched off.
If there is still a problem, refer to the "Key
not detected - Back-up starting or Back-up
switch-off" section.
Starting the engine
► With a manual gearbox, place the gear lever
in neutral and depress the clutch pedal fully.
or
►
With an
automatic gearbox, select mode P
or N and press the brake pedal.
►
Press the "
START/STOP" button while
maintaining pressure on the pedal until the
engine starts.
For Diesel engines, when the temperature is
below zero and/or the engine is cold, starting
will only occur once the preheater warning lamp
is off.
If this warning lamp comes on after
pressing the " START/STOP" button:
►
Y
ou should keep the pedal fully depressed
and not press the "START/STOP" button again
until the engine is running.
If one of the starting conditions is not met, a
message is displayed.
In some circumstances, you are alerted by a
message that it is necessary to turn the steering
wheel while pressing the " START/STOP" button,
to help unlock the steering column.
With petrol engines , after a cold start,
preheating the catalytic converter can
cause noticeable engine vibrations for
anything up to 2 minutes while stationary with
the engine running (accelerated idle speed).
Starting rechargeable hybrid
vehicles
► Fully depress the brake pedal and press
the START/STOP button for approximately 2
seconds.
► Keep your foot on the pedal until this
indicator lamp comes on, indicating the
activation of the rechargeable hybrid system
(confirmed by an audible signal).
To exit Park mode, wait for the READY indicator lamp to come on.
By default, the system starts in Electric mode.
Depending on certain parameters (battery
charge level or outside temperature), the system
determines whether it is necessary to start the
petrol engine.
It is possible to change the driving mode at any
time using the mode selector.
Page 103 of 276
101
Driving
6When the vehicle starts in electric mode,
it makes no noise.
Pay particular attention to pedestrians and
cyclists who may not hear the vehicle coming
despite the pedestrian horn.
Switching off
► Immobilise the vehicle.
► With a manual gearbox, ideally put the gear
lever into neutral.
►
With an
automatic gearbox, ideally select
mode
P or N.
►
Press the "
START/STOP" button..
►
For rechargeable hybrid vehicles, before
leaving the vehicle, check that the READY
indicator lamp is switched off.
In some circumstances, it is necessary to turn
the steering wheel to lock the steering column.
On certain versions with an automatic gearbox
(EAT6/EAT8), the steering column does not lock,
but the gearbox locks in mode P.
If the vehicle is not immobilised, the
engine will not switch off.
With the engine off, the braking and
steering assistance systems are also cut
off - risk of loss of control of the vehicle!
Never leave your vehicle with the
electronic key still inside.
Switching on the ignition
without starting the engine
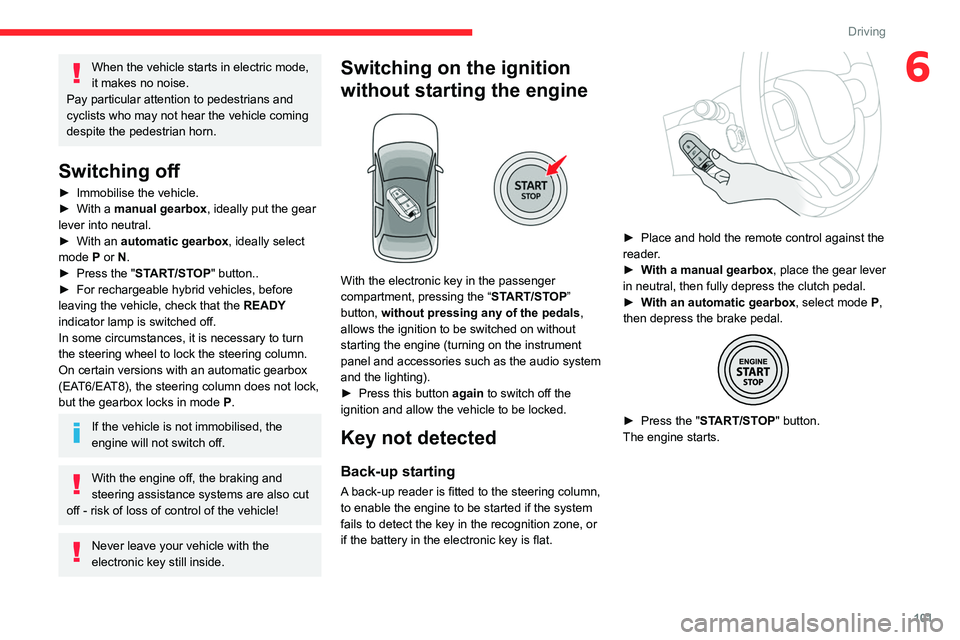
With the electronic key in the passenger
compartment, pressing the “ START/STOP”
button, without pressing any of the pedals ,
allows the ignition to be switched on without
starting the engine (turning on the instrument
panel and accessories such as the audio system
and the lighting).
►
Press this button
again to switch off the
ignition and allow the vehicle to be locked.
Key not detected
Back-up starting
A back-up reader is fitted to the steering column,
to enable the engine to be started if the system
fails to detect the key in the recognition zone, or
if the battery in the electronic key is flat.
► Place and hold the remote control against the
reader .
►
W
ith a manual gearbox, place the gear lever
in neutral, then fully depress the clutch pedal.
►
W
ith an automatic gearbox, select mode P,
then depress the brake pedal.
► Press the " START/STOP" button.
The engine starts.
Page 192 of 276
190
In the event of a breakdown
► Stop all power consumption.
► Immobilise the vehicle and switch the ignition
off.
►
Identify the defective fuse using the current
allocation tables and diagrams.
T
o replace a fuse, it is essential to:
►
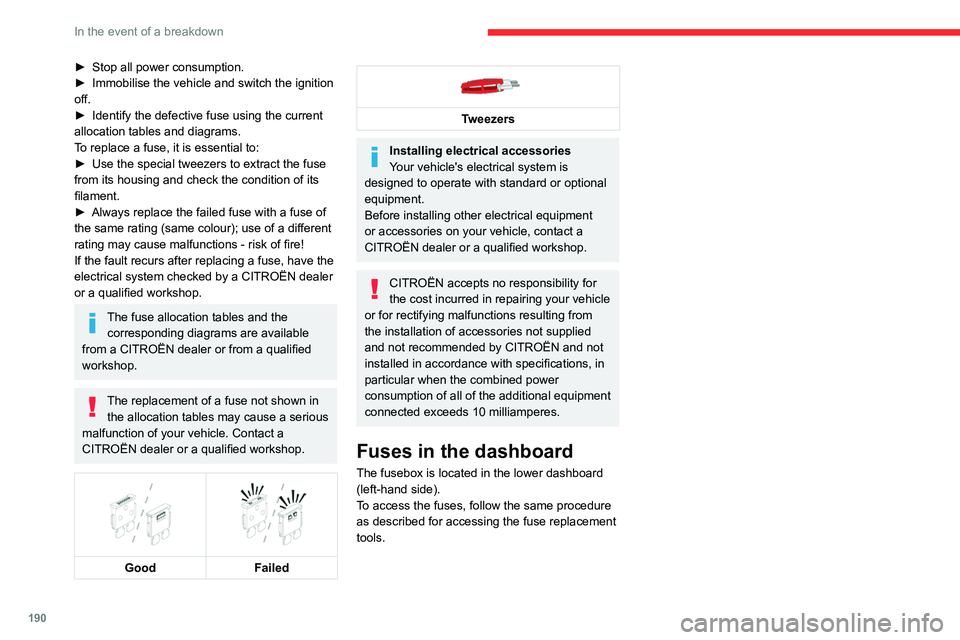
Use the special tweezers to extract the fuse
from its housing and check the condition of its
filament.
►
Always replace the failed fuse with a fuse of
the same rating (same colour); use of a different
rating may cause malfunctions - risk of fire!
If the fault recurs after replacing a fuse, have the
electrical system checked by a CITROËN dealer
or a qualified workshop.
The fuse allocation tables and the corresponding diagrams are available
from a CITROËN dealer or from a qualified
workshop.
The replacement of a fuse not shown in the allocation tables may cause a serious
malfunction of your vehicle. Contact a
CITROËN dealer or a qualified workshop.
Good
Failed
Tweezers
Installing electrical accessories
Your vehicle's electrical system is
designed to operate with standard or optional
equipment.
Before installing other electrical equipment
or accessories on your vehicle, contact a
CITROËN dealer or a qualified workshop.
CITROËN accepts no responsibility for
the cost incurred in repairing your vehicle
or for rectifying malfunctions resulting from
the installation of accessories not supplied
and not recommended by CITROËN and not
installed in accordance with specifications, in
particular when the combined power
consumption of all of the additional equipment
connected exceeds 10 milliamperes.
Fuses in the dashboard
The fusebox is located in the lower dashboard
(left-hand side).
To access the fuses, follow the same procedure
as described for accessing the fuse replacement
tools.
Lower fusebox
Fuse No. Rating
(Amps) Functions
F4 15Horn.
F6 20Front and rear screenwash pump.
F7 10Rear 12 V USB socket.
F8 20Rear wiper.
F10 30Locking/unlocking of the doors and fuel filler flap.
F14 5Alarm (unit).
F18 5Trailer power supply.
F28 5Alarm (siren), additional heating/ventilation remote control receiver.
F29 20Touch screen (CITROËN Connect Radio or CITROËN Connect Nav).
Page 193 of 276
191
In the event of a breakdown
8Lower fusebox
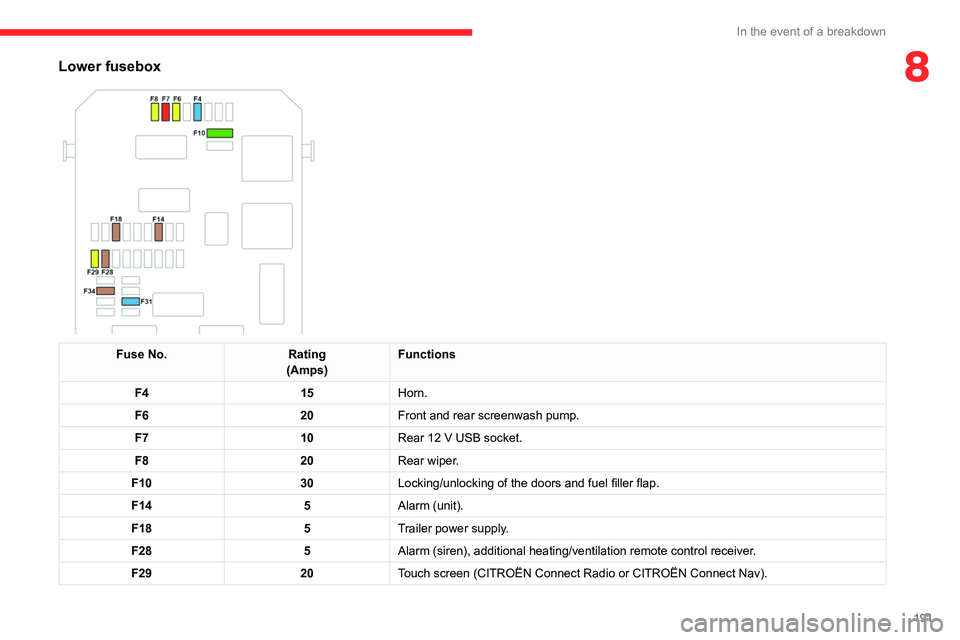
Fuse No.Rating
(Amps) Functions
F4 15Horn.
F6 20Front and rear screenwash pump.
F7 10Rear 12
V USB socket.
F8 20Rear wiper.
F10 30Locking/unlocking of the doors and fuel filler flap.
F14 5Alarm (unit).
F18 5Trailer power supply.
F28 5Alarm (siren), additional heating/ventilation remote control receiver.
F29 20Touch screen (CITROËN Connect Radio or CITROËN Connect Nav).