45 mph CITROEN C5 AIRCROSS 2022 Handbook (in English)
[x] Cancel search | Manufacturer: CITROEN, Model Year: 2022, Model line: C5 AIRCROSS, Model: CITROEN C5 AIRCROSS 2022Pages: 276, PDF Size: 7.92 MB
Page 9 of 276
7
Eco-driving
Eco-driving
Eco-driving refers to a range of everyday
practices that allow the motorist to optimise
the vehicle's energy consumption (fuel and/or
electricity) and CO
2 emissions.
Optimise your use of the gearbox
With a manual gearbox, move off gently and
change up promptly. While accelerating, change
up early.
With an automatic gearbox, favour automatic
mode. Do not depress the accelerator pedal
heavily or suddenly.
The gear shift indicator prompts you to engage
the most suitable gear. Whenever this indication
is displayed on the instrument panel, follow it
straight away.
With an automatic gearbox, this indicator
appears only in manual mode.
Drive smoothly
Maintain a safe distance between vehicles, use
engine braking rather than the brake pedal and
press the accelerator gradually. These practices
help to save on energy consumption, reduce
CO
2 emissions and decrease general traffic
noise.
Favour the use of “Eco” driving mode.
With an EAT8 gearbox, with the gear selector
in mode
D, and except in Sport mode, favour
"free-wheeling" by fully lifting your foot from the
accelerator pedal in order to save fuel. When the traffic is flowing smoothly, select the
cruise control.
Control the use of electrical equipment
Before moving off, if the passenger compartment
is too warm, ventilate it by opening the windows
and air vents before using the air conditioning.
At speeds above 31
mph (50 km/h), close the
windows and leave the air vents open.
Consider using equipment that can help keep
the temperature in the passenger compartment
down (e.g.
sunroof blind, window blinds).
Unless automatically regulated, switch off the air
conditioning as soon as the desired temperature
has been reached.
Switch off the demisting and defrosting functions,
if they are not managed automatically.
Switch off the heated seat as soon as possible.
Adapt the use of headlamps and/or foglamps
depending on visibility conditions.
Avoid running the engine before moving off,
particularly in winter (other than in severe wintry
conditions: temperature below -23°C). The
vehicle will warm up much faster while driving.
As a passenger, avoid connecting your
multimedia devices (e.g.
film, music, video
game) to help reduce the consumption of energy.
Disconnect all portable devices before leaving
the vehicle.
Limit the causes of excess consumption
Spread loads throughout the vehicle. Place the
heaviest items in the boot as close as possible to
the rear seats. Limit the loads carried in the vehicle and
minimise wind resistance (e.g.
roof bars, roof
rack, bicycle carrier, trailer). Preferably, use a
roof box.
Remove roof bars and roof racks after use.
At the end of winter, remove snow tyres and refit
summer tyres.
Avoid using Sport mode for too long, in order to
limit your energy consumption.
Comply with the servicing instructions
Check tyre pressures regularly, with the tyres
cold, referring to the label in the door aperture on
the driver's side.
Carry out this check in particular:
–
before a long journey
.
–
at each change of season.
–
after a long period out of use.
Do not forget the spare wheel and, where
applicable, the tyres on your trailer or caravan.
Have your vehicle serviced regularly (e.g.
engine
oil, oil filter, air filter, passenger compartment
filter, etc.). Observe the schedule of operations in
the manufacturer's service schedule.
With a BlueHDi Diesel engine, if the SCR system
is faulty, your vehicle will emit pollution. Visit
a CITROËN dealer or a qualified workshop
as soon as possible to restore your vehicle's
nitrogen oxide emissions to legal levels.
When filling the fuel tank, do not continue after
the third cut-out of the nozzle, to avoid overflow.
Page 11 of 276
9
Instruments
1Instrument panel with
dials
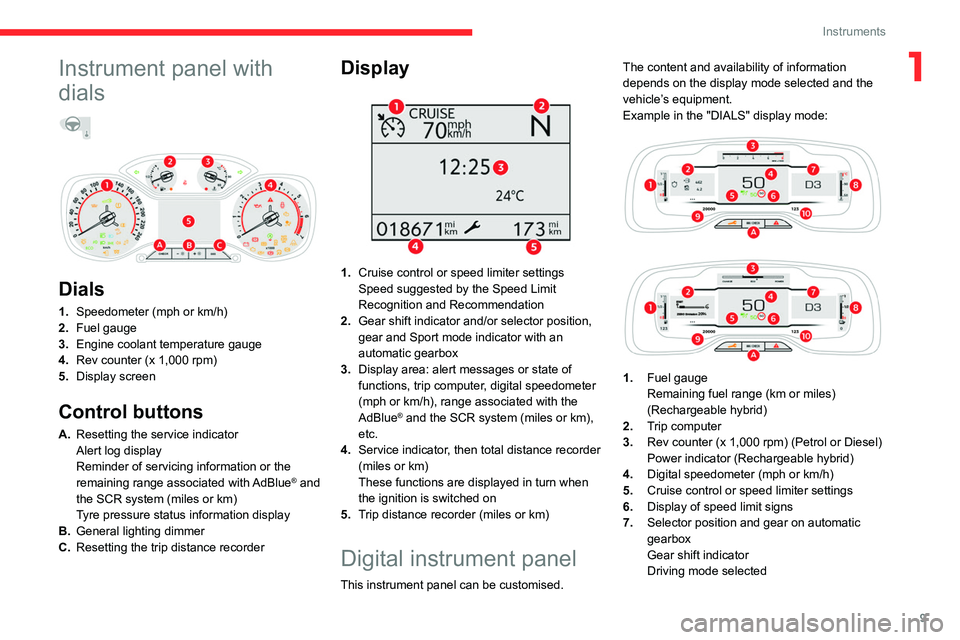
Dials
1. Speedometer (mph or km/h)
2. Fuel gauge
3. Engine coolant temperature gauge
4. Rev counter (x 1,000 rpm)
5. Display screen
Control buttons
A.Resetting the service indicator
Alert log display
Reminder of servicing information or the
remaining range associated with AdBlue
® and
the SCR system (miles or km)
Tyre pressure status information display
B. General lighting dimmer
C. Resetting the trip distance recorder
Display
1.Cruise control or speed limiter settings
Speed suggested by the Speed Limit
Recognition and Recommendation
2. Gear shift indicator and/or selector position,
gear and Sport mode indicator with an
automatic gearbox
3. Display area: alert messages or state of
functions, trip computer, digital speedometer
(mph or km/h), range associated with the
AdBlue
® and the SCR system (miles or km),
etc.
4. Service indicator, then total distance recorder
(miles or km)
These functions are displayed in turn when
the ignition is switched on
5. Trip distance recorder (miles or km)
Digital instrument panel
This instrument panel can be customised. The content and availability of information
depends on the display mode selected and the
vehicle’s equipment.
Example in the "DIALS" display mode:
1. Fuel gauge
Remaining fuel range (km or miles)
(Rechargeable hybrid)
2. Trip computer
3. Rev counter (x 1,000 rpm) (Petrol or Diesel)
Power indicator (Rechargeable hybrid)
4. Digital speedometer (mph or km/h)
5. Cruise control or speed limiter settings
6. Display of speed limit signs
7. Selector position and gear on automatic
gearbox
Gear shift indicator
Driving mode selected
Page 12 of 276
10
Instruments
8.Coolant temperature indicator (°C) (Petrol
or Diesel)
Battery charge level and remaining range
(miles or km) (Rechargeable hybrid)
9. Total distance recorder (miles or km)
10. Trip distance recorder (miles or km)
Control button
A.Short press: display the alerts log, reminder
of servicing information or the remaining
range associated with the AdBlue
® and the
SCR system (miles or km) and tyre pressure
status information display.
Long press: reset the service indicator or trip
distance recorder (depending on the context).
Displays
Some lamps have a fixed location, others can
change location.
For certain functions that have indicator lamps
for both operation and deactivation, there is only
one dedicated location.
Permanent information
In the standard display, the instrument panel
shows:
–
in fixed locations:
•
Rev counter (Petrol or Diesel).
•
Fuel level indicator
.
•
Coolant temperature indicator
.
•
Charge level and range indicator
(Rechargeable hybrid).
• Power indicator (Rechargeable hybrid).
• Distance recorders.
–
in variable locations:
•
Information related to the gearbox and gear
shift indicator
.
•
Digital speedometer
.
•
Status or alert messages displayed
temporarily
.
Optional information
Depending on the selected display mode and
active features, additional information may be
displayed:
–
Rev counter (Petrol or Diesel).
–
T
rip computer.
–
Driving aid functions.
–
Speed limiter or cruise control.
–
Media currently playing.
–
Navigation instructions.
–
Analogue speedometer
.
–
Engine oil level and temperature.
Customising the instrument
panel
You can modify the appearance of the instrument
panel by choosing:
–
a display colour
.
–
a display mode.
Display language and units
These depend on the touch screen
settings.
When travelling abroad, the speed must be
shown in the official units of the country you
are driving in (mph, miles or km/h, km).
As a safety measure, these adjustments must be carried out with the vehicle
stationary.
Choosing the display colour
► Press " Settings" in the upper banner
of the touch screen.
►
Select "
Color schemes".
►
Select a display colour
.
Choosing the display mode
In each mode, specific types of information are
displayed on the instrument panel.
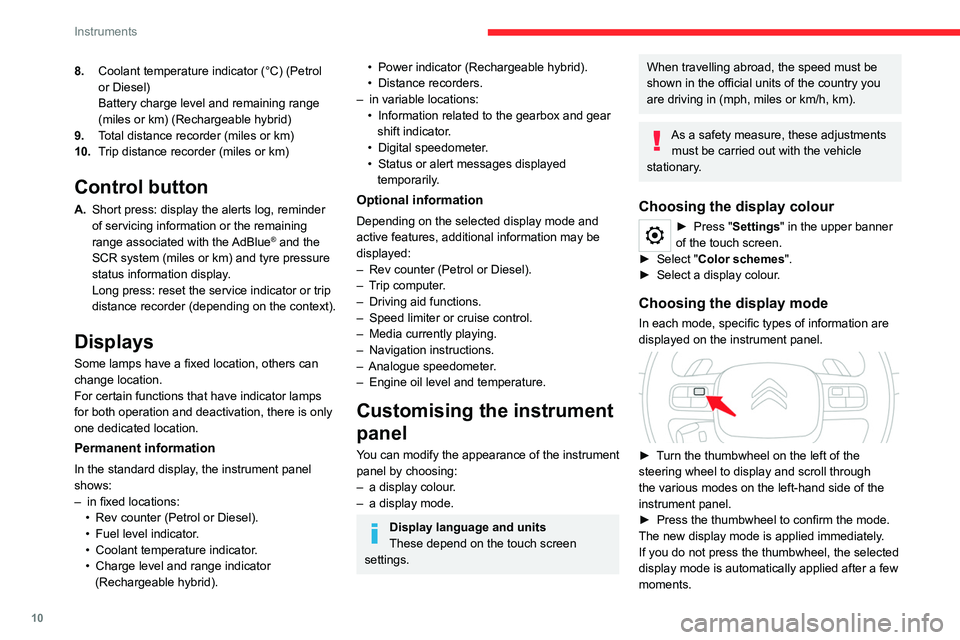
► Turn the thumbwheel on the left of the
steering wheel to display and scroll through
the various modes on the left-hand side of the
instrument panel.
►
Press the thumbwheel to confirm the mode.
The new display mode is applied immediately
.
If you do not press the thumbwheel, the selected
display mode is automatically applied after a few
moments.
Page 14 of 276
12
Instruments
(2): Contact a CITROËN dealer or a qualified
workshop.
(3): Go to a CITROËN dealer or a qualified
workshop.
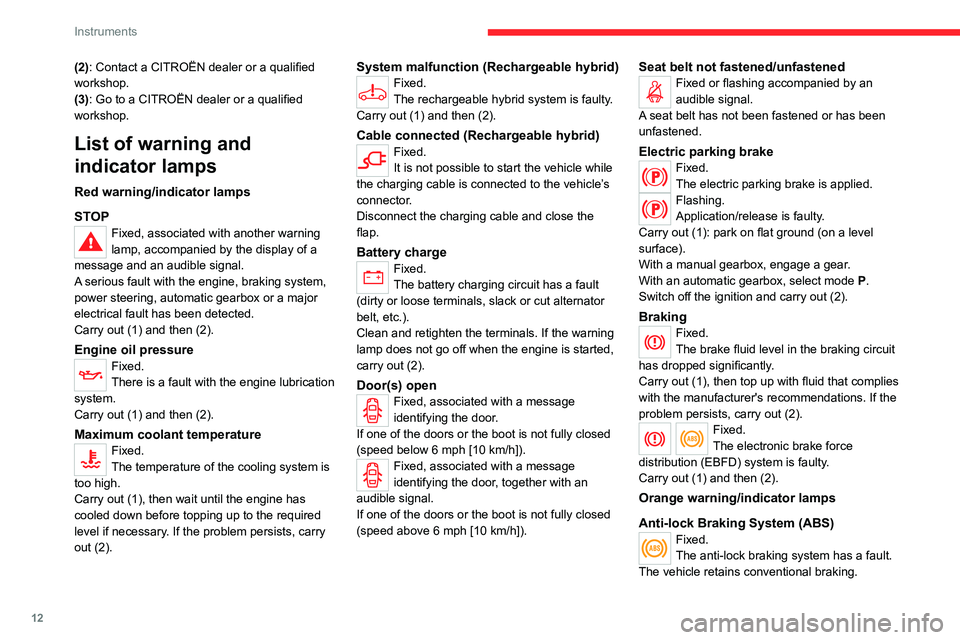
List of warning and
indicator lamps
Red warning/indicator lamps
STOP
Fixed, associated with another warning
lamp, accompanied by the display of a
message and an audible signal.
A serious fault with the engine, braking system,
power steering, automatic gearbox or a major
electrical fault has been detected.
Carry out (1) and then (2).
Engine oil pressureFixed.
There is a fault with the engine lubrication
system.
Carry out (1) and then (2).
Maximum coolant temperatureFixed.
The temperature of the cooling system is
too high.
Carry out (1), then wait until the engine has
cooled down before topping up to the required
level if necessary. If the problem persists, carry
out (2).
System malfunction (Rechargeable hybrid)Fixed.
The rechargeable hybrid system is faulty.
Carry out (1) and then (2).
Cable connected (Rechargeable hybrid)Fixed.
It is not possible to start the vehicle while
the charging cable is connected to the vehicle’s
connector.
Disconnect the charging cable and close the
flap.
Battery chargeFixed.
The battery charging circuit has a fault
(dirty or loose terminals, slack or cut alternator
belt, etc.).
Clean and retighten the terminals. If the warning
lamp does not go off when the engine is started,
carry out (2).
Door(s) openFixed, associated with a message
identifying the door.
If one of the doors or the boot is not fully closed
(speed below 6 mph [10 km/h]).
Fixed, associated with a message
identifying the door, together with an
audible signal.
If one of the doors or the boot is not fully closed
(speed above 6 mph [10 km/h]).
Seat belt not fastened/unfastenedFixed or flashing accompanied by an
audible signal.
A seat belt has not been fastened or has been
unfastened.
Electric parking brakeFixed.
The electric parking brake is applied.
Flashing.
Application/release is faulty.
Carry out (1): park on flat ground (on a level
surface).
With a manual gearbox, engage a gear.
With an automatic gearbox, select mode
P
.
Switch off the ignition and carry out (2).
BrakingFixed.
The brake fluid level in the braking circuit
has dropped significantly.
Carry out (1), then top up with fluid that complies
with the manufacturer's recommendations. If the
problem persists, carry out (2).
Fixed.
The electronic brake force
distribution
(EBFD) system is faulty.
Carry out (1) and then (2).
Orange warning/indicator lamps
Anti-lock Braking System (ABS)
Fixed.
The anti-lock braking system has a fault.
The vehicle retains conventional braking.
Page 16 of 276
14
Instruments
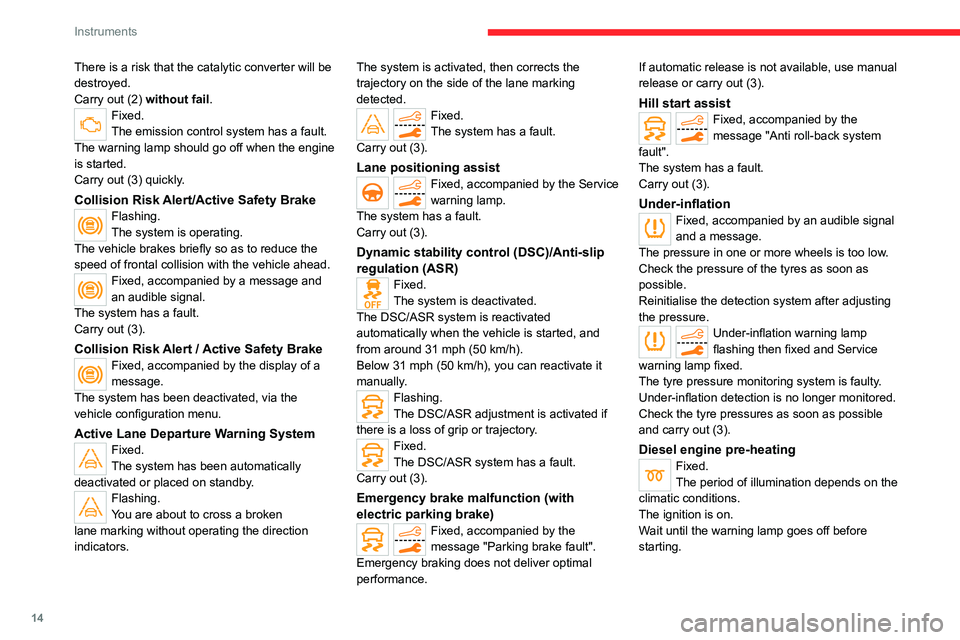
There is a risk that the catalytic converter will be
destroyed.
Carry out (2) without fail.
Fixed.
The emission control system has a fault.
The warning lamp should go off when the engine
is started.
Carry out (3) quickly.
Collision Risk Alert/Active Safety BrakeFlashing.
The system is operating.
The vehicle brakes briefly so as to reduce the
speed of frontal collision with the vehicle ahead.
Fixed, accompanied by a message and
an audible signal.
The system has a fault.
Carry out (3).
Collision Risk Alert / Active Safety BrakeFixed, accompanied by the display of a
message.
The system has been deactivated, via the
vehicle configuration menu.
Active Lane Departure Warning SystemFixed.
The system has been automatically
deactivated or placed on standby.
Flashing.
You are about to cross a broken
lane marking without operating the direction
indicators. The system is activated, then corrects the
trajectory on the side of the lane marking
detected.
Fixed.
The system has a fault.
Carry out (3).
Lane positioning assistFixed, accompanied by the Service
warning lamp.
The system has a fault.
Carry out (3).
Dynamic stability control (DSC)/Anti-slip
regulation (ASR)
Fixed.
The system is deactivated.
The DSC/ASR system is reactivated
automatically when the vehicle is started, and
from around 31 mph (50
km/h).
Below 31 mph (50
km/h), you can reactivate it
manually.
Flashing.
The DSC/ASR adjustment is activated if
there is a loss of grip or trajectory.
Fixed.
The DSC/ASR system has a fault.
Carry out (3).
Emergency brake malfunction (with
electric parking brake)
Fixed, accompanied by the
message "Parking brake fault".
Emergency braking does not deliver optimal
performance. If automatic release is not available, use manual
release or carry out (3).
Hill start assistFixed, accompanied by the
message "Anti roll-back system
fault".
The system has a fault.
Carry out (3).
Under-inflationFixed, accompanied by an audible signal
and a message.
The pressure in one or more wheels is too low.
Check the pressure of the tyres as soon as
possible.
Reinitialise the detection system after adjusting
the pressure.
Under-inflation warning lamp
flashing then fixed and Service
warning lamp fixed.
The tyre pressure monitoring system is faulty.
Under-inflation detection is no longer monitored.
Check the tyre pressures as soon as possible
and carry out (3).
Diesel engine pre-heatingFixed.
The period of illumination depends on the
climatic conditions.
The ignition is on.
Wait until the warning lamp goes off before
starting.
Page 17 of 276
15
Instruments
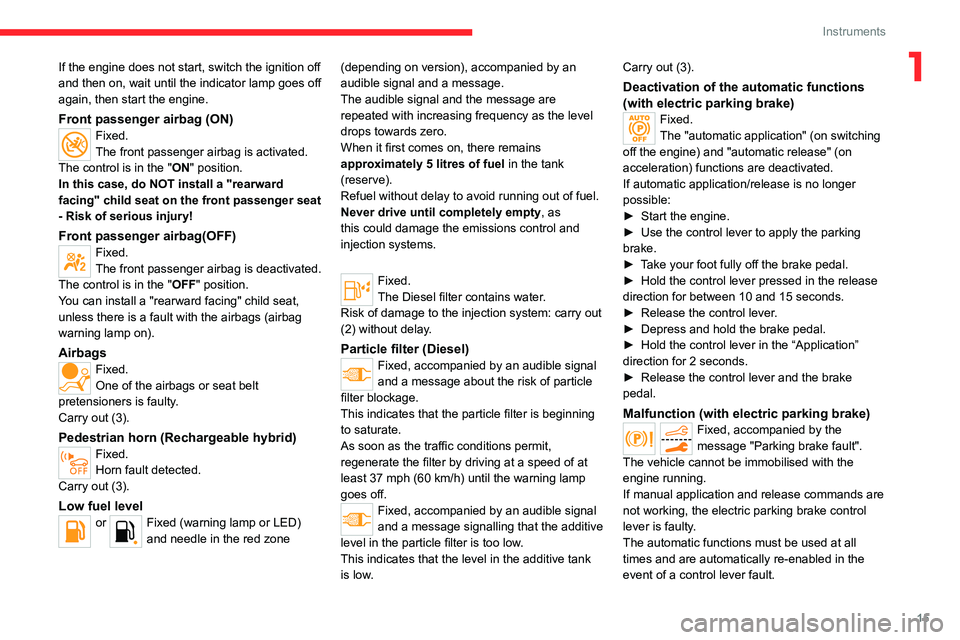
1If the engine does not start, switch the ignition off
and then on, wait until the indicator lamp goes off
again, then start the engine.
Front passenger airbag (ON)Fixed.
The front passenger airbag is activated.
The control is in the "ON" position.
In this case, do NOT install a "rearward
facing" child seat on the front passenger seat
- Risk of serious injury!
Front passenger airbag(OFF)Fixed.
The front passenger airbag is deactivated.
The control is in the "OFF" position.
You can install a "rearward facing" child seat,
unless there is a fault with the airbags (airbag
warning lamp on).
AirbagsFixed.
One of the airbags or seat belt
pretensioners is faulty.
Carry out (3).
Pedestrian horn (Rechargeable hybrid)Fixed.
Horn fault detected.
Carry out (3).
Low fuel levelor Fixed (warning lamp or LED)
and needle in the red zone (depending on version), accompanied by an
audible signal and a message.
The audible signal and the message are
repeated with increasing frequency as the level
drops towards zero.
When it first comes on, there remains
approximately 5 litres of fuel in the tank
(reserve).
Refuel without delay to avoid running out of fuel.
Never drive until completely empty, as
this could damage the emissions control and
injection systems.
Fixed.
The Diesel filter contains water.
Risk of damage to the injection system: carry out
(2) without delay.
Particle filter (Diesel)Fixed, accompanied by an audible signal
and a message about the risk of particle
filter blockage.
This indicates that the particle filter is beginning
to saturate.
As soon as the traffic conditions permit,
regenerate the filter by driving at a speed of at
least 37 mph (60 km/h) until the warning lamp
goes off.
Fixed, accompanied by an audible signal
and a message signalling that the additive
level in the particle filter is too low.
This indicates that the level in the additive tank
is low. Carry out (3).
Deactivation of the automatic functions
(with electric parking brake)
Fixed.
The "automatic application" (on switching
off the engine) and "automatic release" (on
acceleration) functions are deactivated.
If automatic application/release is no longer
possible:
►
Start the engine.
►
Use the control lever to apply the parking
brake.
►
T
ake your foot fully off the brake pedal.
►
Hold the control lever pressed in the release
direction for between 10 and 15 seconds.
►
Release the control lever
.
►
Depress and hold the brake pedal.
►
Hold the control lever in the “Application”
direction for 2
seconds.
►
Release the control lever and the brake
pedal.
Malfunction (with electric parking brake)
Fixed, accompanied by the
message "Parking brake fault".
The vehicle cannot be immobilised with the
engine running.
If manual application and release commands are
not working, the electric parking brake control
lever is faulty.
The automatic functions must be used at all
times and are automatically re-enabled in the
event of a control lever fault.
Page 18 of 276
16
Instruments
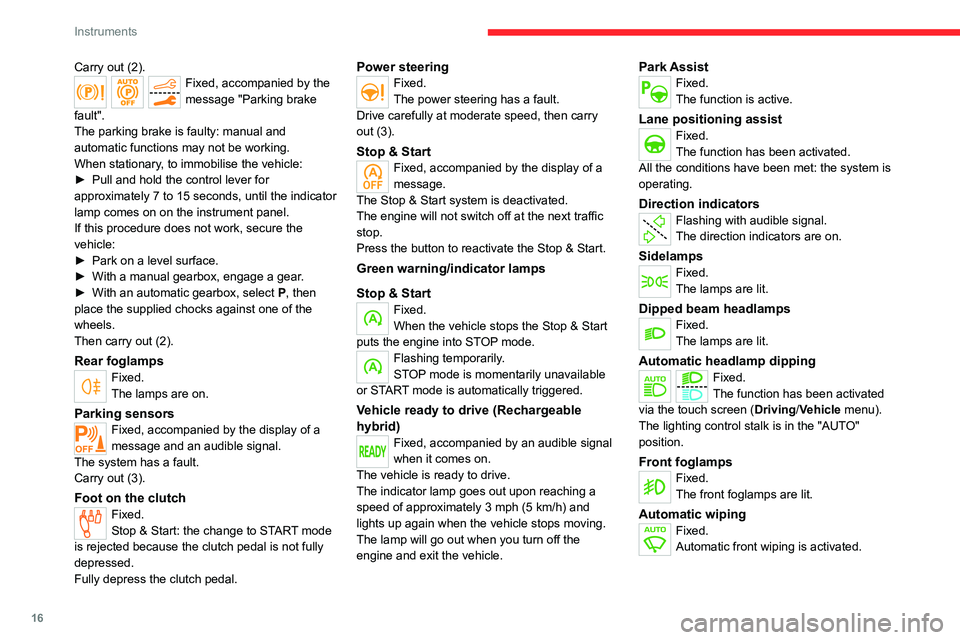
Carry out (2).Fixed, accompanied by the
message "Parking brake
fault".
The parking brake is faulty: manual and
automatic functions may not be working.
When stationary, to immobilise the vehicle:
►
Pull and hold the control lever for
approximately 7 to 15 seconds, until the indicator
lamp comes on on the instrument panel.
If this procedure does not work, secure the
vehicle:
►
Park on a level surface.
►
With a manual gearbox, engage a gear
.
►
With an automatic gearbox, select
P
, then
place the supplied chocks against one of the
wheels.
Then carry out (2).
Rear foglampsFixed.
The lamps are on.
Parking sensors
Fixed, accompanied by the display of a
message and an audible signal.
The system has a fault.
Carry out (3).
Foot on the clutchFixed.
Stop & Start: the change to START mode
is rejected because the clutch pedal is not fully
depressed.
Fully depress the clutch pedal.
Power steeringFixed.
The power steering has a fault.
Drive carefully at moderate speed, then carry
out (3).
Stop & StartFixed, accompanied by the display of a
message.
The Stop & Start system is deactivated.
The engine will not switch off at the next traffic
stop.
Press the button to reactivate the Stop & Start.
Green warning/indicator lamps
Stop & Start
Fixed.
When the vehicle stops the Stop & Start
puts the engine into STOP mode.
Flashing temporarily.
STOP mode is momentarily unavailable
or START mode is automatically triggered.
Vehicle ready to drive (Rechargeable
hybrid)
Fixed, accompanied by an audible signal
when it comes on.
The vehicle is ready to drive.
The indicator lamp goes out upon reaching a
speed of approximately 3 mph (5
km/h) and
lights up again when the vehicle stops moving.
The lamp will go out when you turn off the
engine and exit the vehicle.
Park AssistFixed.
The function is active.
Lane positioning assistFixed.
The function has been activated.
All the conditions have been met: the system is
operating.
Direction indicatorsFlashing with audible signal.
The direction indicators are on.
SidelampsFixed.
The lamps are lit.
Dipped beam headlampsFixed.
The lamps are lit.
Automatic headlamp dippingFixed.
The function has been activated
via the touch screen (Driving/Vehicle menu).
The lighting control stalk is in the "AUTO"
position.
Front foglampsFixed.
The front foglamps are lit.
Automatic wipingFixed.
Automatic front wiping is activated.
Page 19 of 276
17
Instruments
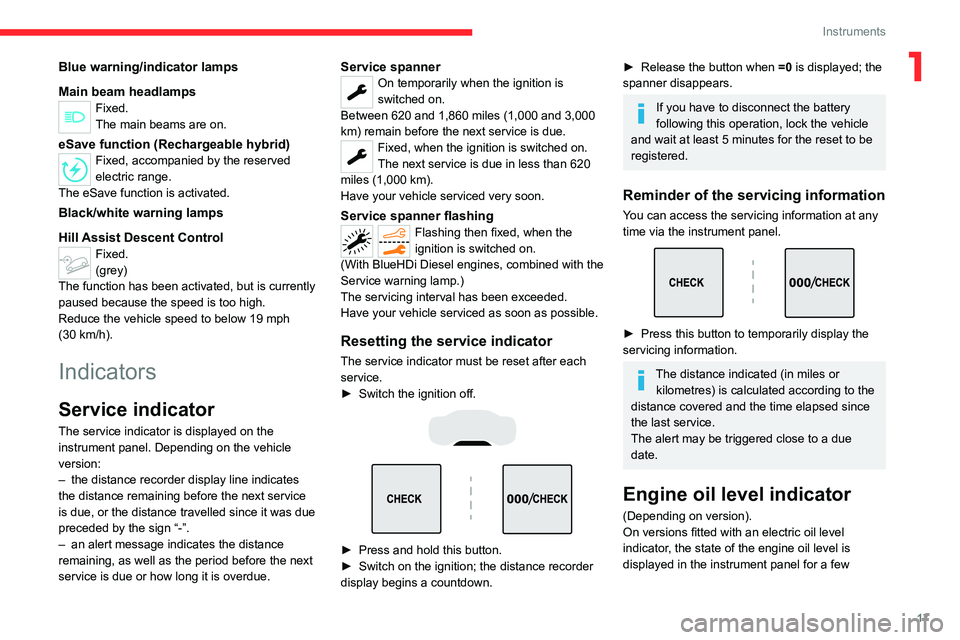
1Blue warning/indicator lamps
Main beam headlamps
Fixed.
The main beams are on.
eSave function (Rechargeable hybrid)Fixed, accompanied by the reserved
electric range.
The
eSave function is activated.
Black/white warning lamps
Hill Assist Descent Control
Fixed.
(grey)
The function has been activated, but is currently
paused because the speed is too high.
Reduce the vehicle speed to below 19 mph
(30
km/h).
Indicators
Service indicator
The service indicator is displayed on the
instrument panel. Depending on the vehicle
version:
–
the distance recorder display line indicates
the distance remaining before the next service
is due, or the distance travelled since it was due
preceded by the sign “-”.
–
an alert message indicates the distance
remaining, as well as the period before the next
service is due or how long it is overdue.
Service spannerOn temporarily when the ignition is
switched on.
Between 620 and 1,860 miles (1,000 and 3,000
km) remain before the next service is due.
Fixed, when the ignition is switched on.
The next service is due in less than 620
miles (1,000 km).
Have your vehicle serviced very soon.
Service spanner flashingFlashing then fixed, when the
ignition is switched on.
(With BlueHDi Diesel engines, combined with the
Service warning lamp.)
The servicing interval has been exceeded.
Have your vehicle serviced as soon as possible.
Resetting the service indicator
The service indicator must be reset after each
service.
►
Switch the ignition off.
► Press and hold this button.
► Switch on the ignition; the distance recorder
display begins a countdown.
► Release the button when =0 is displayed; the
spanner disappears.
If you have to disconnect the battery
following this operation, lock the vehicle
and wait at least 5 minutes for the reset to be
registered.
Reminder of the servicing information
You can access the servicing information at any
time via the instrument panel.
► Press this button to temporarily display the
servicing information.
The distance indicated (in miles or kilometres) is calculated according to the
distance covered and the time elapsed since
the last service.
The alert may be triggered close to a due
date.
Engine oil level indicator
(Depending on version).
On versions fitted with an electric oil level
indicator, the state of the engine oil level is
displayed in the instrument panel for a few
Page 25 of 276
23
Instruments
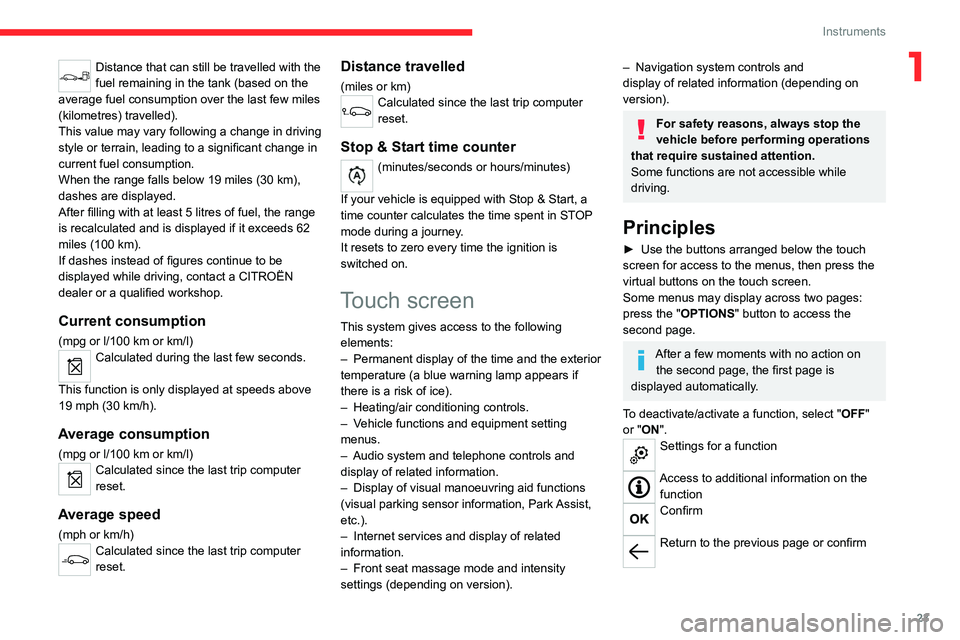
1Distance that can still be travelled with the
fuel remaining in the tank (based on the
average fuel consumption over the last few miles
(kilometres) travelled).
This value may vary following a change in driving
style or terrain, leading to a significant change in
current fuel consumption.
When the range falls below 19 miles (30
km),
dashes are displayed.
After filling with at least 5 litres of fuel, the range
is recalculated and is displayed if it exceeds 62
miles (100
km).
If dashes instead of figures continue to be
displayed while driving, contact a CITROËN
dealer or a qualified workshop.
Current consumption
(mpg or l/100 km or km/l)Calculated during the last few seconds.
This function is only displayed at speeds above
19 mph (30
km/h).
Average consumption
(mpg or l/100 km or km/l)Calculated since the last trip computer
reset.
Average speed
(mph or km/h)Calculated since the last trip computer
reset.
Distance travelled
(miles or km)Calculated since the last trip computer
reset.
Stop & Start time counter
(minutes/seconds or hours/minutes)
If your vehicle is equipped with Stop & Start, a
time counter calculates the time spent in STOP
mode during a journey.
It resets to zero every time the ignition is
switched on.
Touch screen
This system gives access to the following elements:
–
Permanent display of the time and the exterior
temperature (a blue warning lamp appears if
there is a risk of ice).
–
Heating/air conditioning controls.
–
V
ehicle functions and equipment setting
menus.
–
Audio system and telephone controls and
display of related information.
–
Display of visual manoeuvring aid functions
(visual parking sensor information, Park
Assist,
etc.).
–
Internet services and display of
related
information.
–
Front seat massage mode and intensity
settings (depending on version).
– Navigation system controls and
display of related information (depending on
version).
For safety reasons, always stop the
vehicle before performing operations
that require sustained attention.
Some functions are not accessible while
driving.
Principles
► Use the buttons arranged below the touch
screen for access to the menus, then press the
virtual buttons on the touch screen.
Some menus may display across two pages:
press the "OPTIONS" button to access the
second page.
After a few moments with no action on the second page, the first page is
displayed automatically.
To deactivate/activate a function, select " OFF"
or "ON".
Settings for a function
Access to additional information on the function
Confirm
Return to the previous page or confirm
Page 34 of 276
32
Access
Central locking not
functioning
Use these procedures in the following cases:
– Central locking malfunction.
– Battery disconnected or discharged.
In the event of a malfunction of the
central locking system, the battery must
be disconnected to ensure that the vehicle is
locked fully.
Front left-hand door
► Insert the key into the lock and turn it towards
the rear of the vehicle to lock the door, or
towards the front to unlock it.
Passenger doors
Unlocking
► Pull the interior door opening control.
Central locking
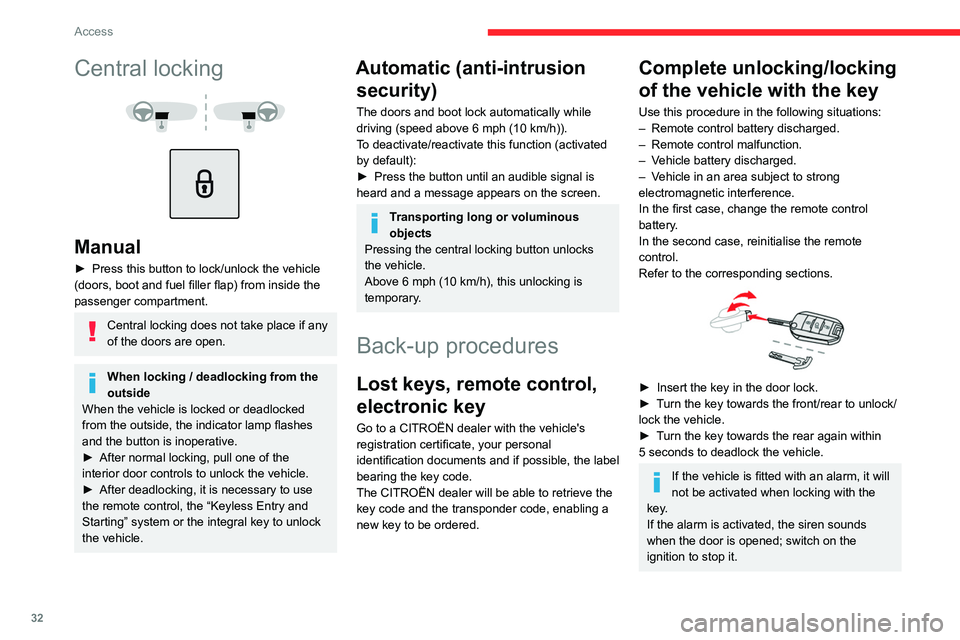
Manual
► Press this button to lock/unlock the vehicle
(doors, boot and fuel filler flap) from inside the
passenger compartment.
Central locking does not take place if any
of the doors are open.
When locking / deadlocking from the
outside
When the vehicle is locked or deadlocked
from the outside, the indicator lamp flashes
and the button is inoperative.
►
After normal locking, pull one of the
interior door controls to unlock the vehicle.
►
After deadlocking, it is necessary to use
the remote control, the “Keyless Entry and
Starting” system or the integral key to unlock
the vehicle.
Automatic (anti-intrusion security)
The doors and boot lock automatically while
driving (speed above 6 mph (10
km/h)).
To deactivate/reactivate this function (activated
by default):
►
Press the button until an audible signal is
heard and a message appears on the screen.
Transporting long or voluminous
objects
Pressing the central locking button unlocks
the vehicle.
Above 6 mph (10 km/h), this unlocking is
temporary.
Back-up procedures
Lost keys, remote control,
electronic key
Go to a CITROËN dealer with the vehicle's
registration certificate, your personal
identification documents and if possible, the label
bearing the key code.
The CITROËN dealer will be able to retrieve the
key code and the transponder code, enabling a
new key to be ordered.
Complete unlocking/locking
of the vehicle with the key
Use this procedure in the following situations:
– Remote control battery discharged.
–
Remote control malfunction.
–
V
ehicle battery discharged.
–
V
ehicle in an area subject to strong
electromagnetic interference.
In the first case, change the remote control
battery.
In the second case, reinitialise
the remote
control.
Refer to the corresponding sections.
► Insert the key in the door lock.
► T urn the key towards the front/rear to unlock/
lock the vehicle.
►
T
urn the key towards the rear again within
5
seconds to deadlock the vehicle.
If the vehicle is fitted with an alarm, it will
not be activated when locking with the
key.
If the alarm is activated, the siren sounds
when the door is opened; switch on the
ignition to stop it.