light Citroen C5 RHD 2016 (RD/TD) / 2.G Owner's Guide
[x] Cancel search | Manufacturer: CITROEN, Model Year: 2016, Model line: C5 RHD, Model: Citroen C5 RHD 2016 (RD/TD) / 2.GPages: 362, PDF Size: 32.49 MB
Page 85 of 362

83
Map reading lamps
F With the ignition on, press the
corresponding switch.
Panoramic sunroof rear
reading lamps (Tourer)
With the key in position or with the ignition on:
F Press the corresponding switch 1 .
The reading lamp concerned comes on for
ten minutes.
The rear reading lamps come on:
- when the key is removed from the ignition,
- when the vehicle is unlocked.
They switch off gradually:
- when the vehicle is locked,
- when the ignition is switched on.
Courtesy lamps
1. Front courtesy lamp
2. Map reading lamp s
Front courtesy lamp
Rear courtesy lamp
1. Rear courtesy lamp
2. Map reading lamps In this position, the courtesy lamp
comes on gradually:
Lighting off.
Lighting on.
-
when the vehicle is unlocked,
- when a door is opened,
- when the key is removed from the ignition,
- when the remote control locking button is
activated, in order to locate your vehicle.
It switches off gradually:
- when the vehicle is locked,
- when the ignition is switched on,
- 30 seconds after the last door is closed.
In lighting on mode, different lighting
times are available:
- with the ignition off, approximately
ten minutes,
- in energy economy mode,
approximately thirty seconds,
- with the engine running, unlimited.
3
Ease of use and comfort
Page 86 of 362

84
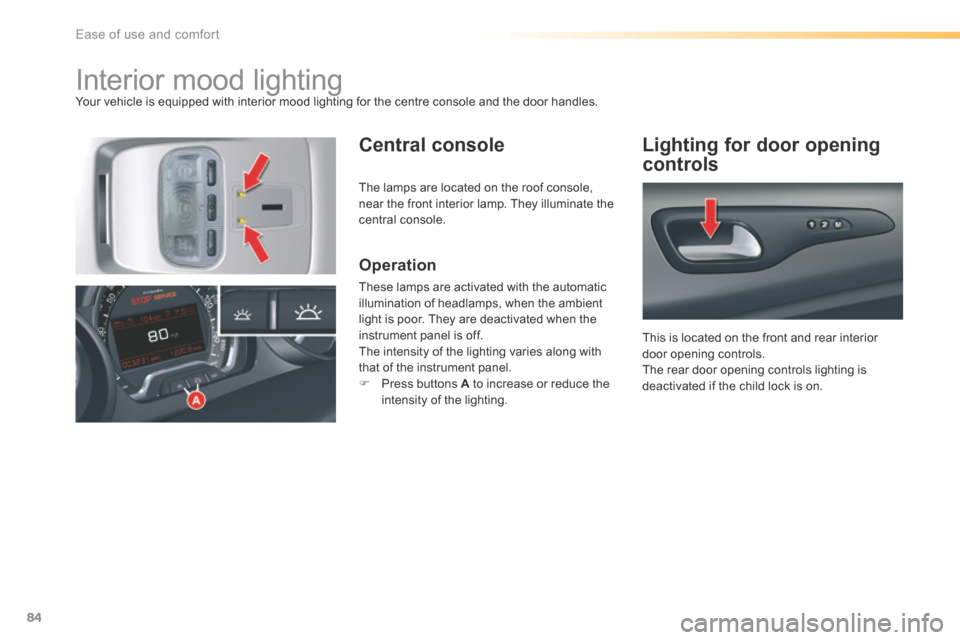
Interior mood lightingYour vehicle is equipped with interior mood lighting for the centre console and the door handles.
Central consoleLighting for door opening
controls
Operation
These lamps are activated with the automatic
illumination of headlamps, when the ambient
light is poor. They are deactivated when the
instrument panel is off.
The intensity of the lighting varies along with
that of the instrument panel.
F Press buttons A to increase or reduce the
intensity of the lighting. This is located on the front and rear interior
door opening controls.
The rear door opening controls lighting is
deactivated if the child lock is on.
The lamps are located on the roof console,
near the front interior lamp. They illuminate the
central console.
Ease of use and comfort
Page 87 of 362

85
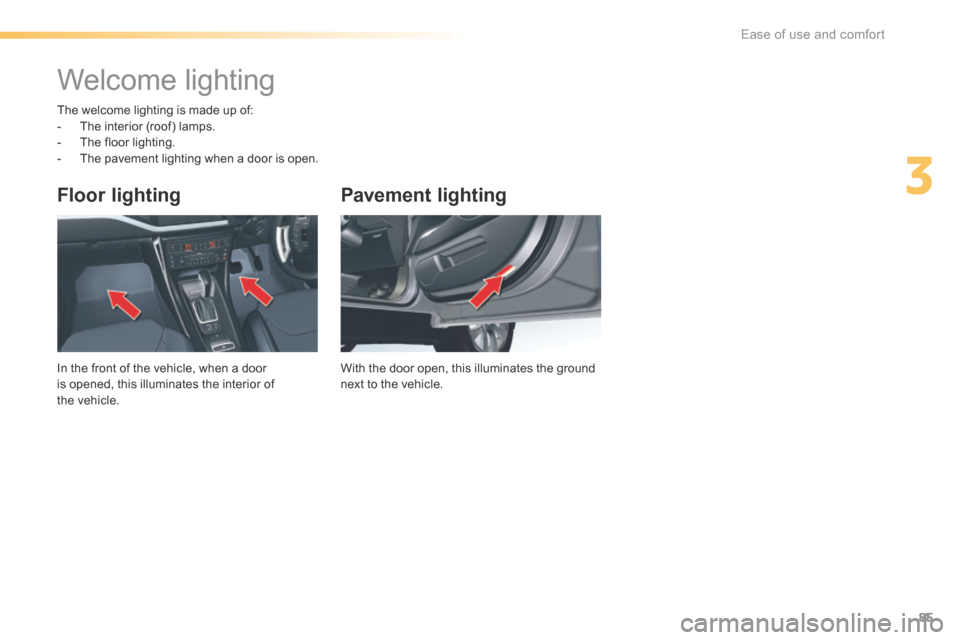
Pavement lighting
With the door open, this illuminates the ground
next to the vehicle.
Floor lighting
In the front of the vehicle, when a door
is opened, this illuminates the interior of
the vehicle.
The welcome lighting is made up of:
-
The interior (roof) lamps.
- The floor lighting.
- The pavement lighting when a door is open.
Welcome lighting
3
Ease of use and comfort
Page 94 of 362

92
Boot fittings (Tourer)
1. Hook
For shopping bags.
2. To r c h
To recharge, return it to its housing.
3. Storage net 1.
Luggage-cover blind
(see details on following page)
2. Luggage stowing rings
Use the 4 stowing rings provided on the
boot floor to secure your loads. 1.
Boot lamp
2. 12 V accessor y socket (100 W maximum)
Cigarette lighter type 12 volt socket. It is
located on the rear right-hand trim.
3. Loading height control
You can change the height of the vehicle to
make loading or unloading the boot easier.
4. Hook
For shopping bags.
5. Storage net or Closed storage well
For vehicles so equipped, this is the
location for the Hi-Fi amplifier.
As a safety measure in the event of
sharp braking, you are advised to
place heavy objects as far for wards as
possible.
3. Hooks
These allow a high load net to be fitted
(see details on following page).
Ease of use and comfort
Page 98 of 362

96
Observe the driving regulations and remain
vigilant whatever the traffic conditions.
Pay close attention to the traffic and keep your
hands on the wheel so that you are ready to
react at any time to any eventuality.
On a long journey, a break every two hours is
strongly recommended.
In difficult weather, drive smoothly, anticipate
the need to brake and increase the distance
from other vehicles.
Driving on flooded
roads
We strongly advise against driving on flooded
roads, as this could cause serious damage
to the engine or gearbox, as well as to the
electrical systems of your vehicle.
Driving recommendations
Important!
Never drive with the parking brake
applied - Risk of overheating and
damage to the braking system!
Do not park or run the engine when
stationary in areas where inflammable
substances and materials (dry grass,
dead leaves...) might come into contact
with the hot exhaust system - Risk
of fire!
Never leave a vehicle unsupervised
with the engine running. If you have
to leave your vehicle with the engine
running, apply the parking brake
and put the gearbox into neutral or
position N or P, depending on the type
of gearbox.
If you are obliged to drive through water:
-
check that the depth of water does not
exceed 15 cm, taking account of waves
that might be generated by other users,
- deactivate the Stop & Start system,
- drive as slowly as possible without
stalling. In all cases, do not exceed 6 mph
(10 km/h),
- do not stop and do not switch off the
engine.
On leaving the flooded road, as soon as
circumstances allow, make several light brake
applications to dry the brake discs and pads.
If in doubt on the state of your vehicle, contact
a CITROËN dealer or a qualified workshop.
Driving
Page 117 of 362

115
Stop & Start
Operation
- with a manual gearbox, at speeds below
12 mph (20 km/h) with BlueHDi Diesel
versions, when you put the gear lever into
neutral and release the clutch pedal,
- with an automatic gearbox, vehicle
stationary, when you press the brake pedal
or place the gear lever in position N .
Going into engine STOP
mode
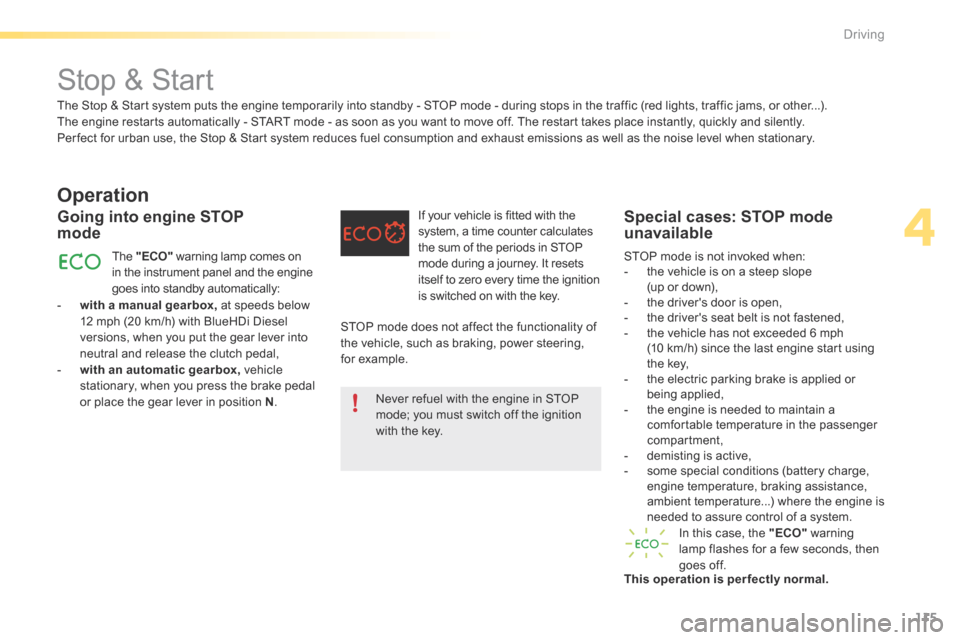
The "ECO" warning lamp comes on
in the instrument panel and the engine
goes into standby automatically: If your vehicle is fitted with the
system, a time counter calculates
the sum of the periods in STOP
mode during a journey. It resets
itself to zero every time the ignition
is switched on with the key.
Special cases: STOP mode
unavailable
In this case, the "ECO"
warning
lamp flashes for a few seconds, then
goes off.
This operation is perfectly normal. STOP mode is not invoked when:
- the vehicle is on a steep slope
(up or down),
- the driver's door is open,
- the driver's seat belt is not fastened,
- the vehicle has not exceeded 6 mph
(10 km/h) since the last engine start using
the key,
- the electric parking brake is applied or
being applied,
- the engine is needed to maintain a
comfortable temperature in the passenger
compartment,
- demisting is active,
- some special conditions (battery charge,
engine temperature, braking assistance,
ambient temperature...) where the engine is
needed to assure control of a system.
The Stop & Start system puts the engine temporarily into standby - STOP mode - during stops in the traffic (red lights, traffic jams, or other...).
The engine restarts automatically - START mode - as soon as you want to move off. The restart takes place instantly, quickly and silently.
Per fect for urban use, the Stop & Start system reduces fuel consumption and exhaust emissions as well as the noise level when stationary.
STOP mode does not affect the functionality of
the vehicle, such as braking, power steering,
for example.Never refuel with the engine in STOP
mode; you must switch off the ignition
with the key.
4
driving
Page 128 of 362

126
Exceeding the programmed
speed
While cruise control is in operation, it is always
possible to go above the programmed speed
simply by pressing the accelerator pedal (for
example to overtake another vehicle).
The speed displayed in zone A flashes.
You only have to release the accelerator pedal
to return to the programmed speed.
Programming
The selection is confirmed by the display of the
"CRUISE " function in zone A of the instrument
panel.
When the function is selected, no cruising
speed has yet been memorised .
Once the desired speed has been reached
using the accelerator, press button 1 or 2 . The
cruising speed is then memorised and cruise
control is activated. The cruising speed is
displayed in zone A of the instrument panel,
and "ON" is displayed.
Adjusting the memorised
speed while the cruise
control is in operation
You can adjust the memorised speed,
displayed in zone A , by pressing:
- Button 1 to increase the speed.
- Button 2 to reduce the speed.
Successive presses will modify the cruise
speed in steps of 1 mph (km/h) and a
continuous press in steps of 5 mph (km/h).
You can then release the accelerator pedal.
The vehicle will automatically keep to the speed
chosen.
The vehicle speed may vary slightly from that
memorised.
If during cruise control the system cannot keep
to the cruise speed (e.g. on a steep descent),
then the speed flashes. If necessary, brake to
curb your speed.
F
Press button 4 to select " CRUISE" cruise
control mode.
Driving
Page 138 of 362

136
Exterior lighting controls
Main lighting
The various front and rear lamps of the
vehicle are designed to adapt the driver's
visibility progressively in relation to the climatic
conditions:
- sidelamps, to be seen,
- dipped beam headlamps to see without
dazzling other drivers,
- main beam headlamps to see clearly when
the road is clear.
Additional lighting
Other lamps are fitted to fulfil the requirements
of particular driving conditions:
- a rear foglamp to be seen from a distance,
- front foglamps for even better for ward
vision,
- directional headlamps for improved
visibility when cornering,
- daytime running lamps to be seen during
the day.
Settings
Various automatic lighting control modes are
also available depending on options:
- daytime running lamps,
- automatic illumination of headlamps,
- directional lighting,
- guide-me-home lighting.
In some weather conditions (e.g. low
temperature or humidity), the presence
of misting on the internal sur face of the
glass of the headlamps and rear lamps
is normal; it disappears after the lamps
have been on for a few minutes.
Control stalk for the selection and control of the various front and rear lamps providing the vehicle's lighting.
Visibility
Page 139 of 362

137
Manual controls
Lighting off (ignition off)
Daytime running lamps (engine running).
Automatic illumination of headlamps.
Sidelamps.Dipped headlamps or main
beam headlamps.
B. Stalk for switching headlamps: pull
the stalk towards you to switch the
lighting between dipped and main beam
headlamps.
In the lamps off and sidelamps modes, the
driver can switch on the main beam headlamps
temporarily ("headlamp flash") by maintaining a
pull on the stalk.
Displays
The lighting is controlled directly by the driver
by means of the ring A and the stalk B .A.
Main lighting mode selection ring: turn it
to position the symbol required facing the
mark.
C. Foglamps selection ring.
The foglamps operate with the sidelamps and
the dipped and main beam headlamps.
Illumination of the corresponding indicator
lamp in the instrument panel confirms that the
lighting selected is on.
5
Visibility
Page 140 of 362

138
- 1st turn for wards: rear foglamps on.
- 1st turn rear wards: rear foglamps off. -
1
st turn for wards: front foglamps on.
- 2nd turn for wards: rear foglamps on.
- 1st turn rear wards: rear foglamps off.
- 2nd turn rear wards: front foglamps off.
Model with rear foglamps
only Model with front
and rear foglamps
In good or rainy weather, both day and
night, use of the front foglamps and the
rear foglamps is prohibited. In these
situations, the power of their beams
may dazzle other drivers. They should
only be used in fog or falling snow.
In these weather conditions, it is your
responsibility to switch on the foglamps
and dipped headlamps manually as the
sunshine sensor may detect sufficient
light.
Do not forget to switch off the front and
rear foglamps when they are no longer
needed.
Visibility