lock CITROEN C6 2012 Handbook (in English)
[x] Cancel search | Manufacturer: CITROEN, Model Year: 2012, Model line: C6, Model: CITROEN C6 2012Pages: 216, PDF Size: 10.23 MB
Page 28 of 216
26
II
A
ANTI-INTRUSION ALARM
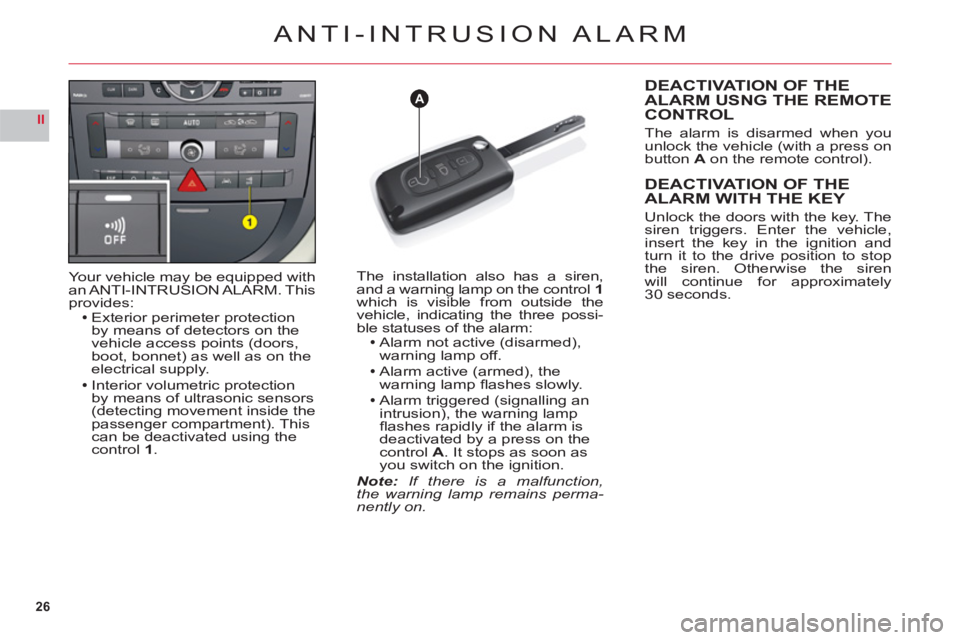
Your vehicle may be equipped with
an ANTI-INTRUSION ALARM. Thisprovides:Exterior perimeter protection
by means of detectors on the
vehicle access points (doors,
boot, bonnet) as well as on the electrical supply.
Interior volumetric protection
by means of ultrasonic sensors (detecting movement inside thepassenger compartment). This can be deactivated using thecontrol1.
The installation also has a siren,
and a warning lamp on the control1which is visible from outside the
vehicle, indicating the three possi-ble statuses of the alarm:Alarm not active (disarmed),
warning lamp off.
Alarm active
(armed), the
warning lamp fl ashes slowly.
Alarm tri
ggered (signalling an
intrusion), the warning lamp
fl ashes rapidly if the alarm is deactivated by a press on thecontrol A. It stops as soon as you switch on the ignition.Note: If there is a malfunction,
the warning lamp remains perma-nently on.
DEACTIVATION OF THE
ALARM USNG THE REMOTE
CONTROL
The alarm is disarmed when youunlock the vehicle (with a press onbutton Aon the remote control).
DEACTIVATION OF THEALARM WITH THE KEY
Unlock the doors with the key. Thesiren triggers. Enter the vehicle,
insert the key in the ignition and
turn it to the drive position to stopthe siren. Otherwise the siren
will continue for approximately30 seconds.
Page 29 of 216
27
II
AB
ANTI-INTRUSION ALARM
OPERATING THE ALARM
First make sure all the doors are closed.
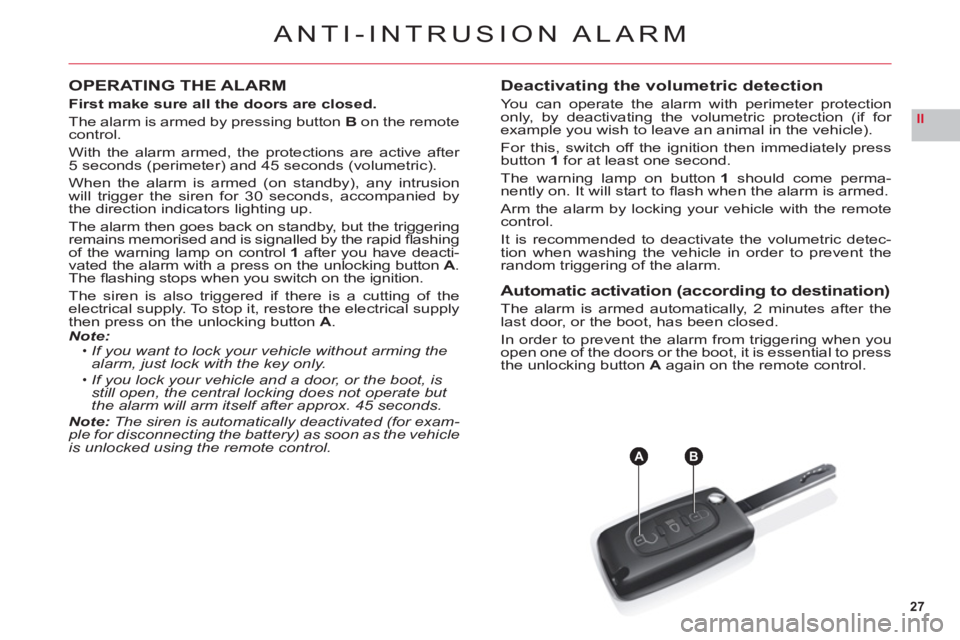
The alarm is armed by pressing button Bon the remote control.
With the alarm armed, the protections are active after 5 seconds (perimeter) and 45 seconds (volumetric).
When the alarm is armed (on standby), any intrusion
will trigger the siren for 30 seconds, accompanied by
the direction indicators lighting up.
The alarm then
goes back on standby, but the triggering remains memorised and is signalled by the rapid fl ashing
of the warning lamp on control1 after you have deacti-
vated the alarm with a press on the unlocking button A.The fl ashing stops when you switch on the ignition.
The siren is also triggered if there is a cutting of the electrical supply. To stop it, restore the electrical supply
then press on the unlocking button A.Note:If you want to lock your vehicle without arming the
alarm, just lock with the key only.
If you lock your vehicle and a door, or the boot, is still open, the central locking does not operate but the alarm will arm itself after approx. 45 seconds.Note:The siren is automatically deactivated (for exam-ple for disconnecting the battery) as soon as the vehicle is unlocked using the remote control.
•
•
Deactivating the volumetric detection
You can operate the alarm with perimeter protection
only, by deactivating the volumetric protection (if for example you wish to leave an animal in the vehicle).
For this, switch o
ff the ignition then immediately pressbutton1 for at least one second.
The warning lamp on button1should come perma-nently on. It will start to fl ash when the alarm is armed.
Arm the alarm b
y locking your vehicle with the remotecontrol.
It is recommended to deactivate the volumetric detec-
tion when washing the vehicle in order to prevent the
random triggering of the alarm.
Automatic activation (according to destination)
The alarm is armed automatically, 2 minutes after the
last door, or the boot, has been closed.
In order to prevent the alarm from triggering when you
open one of the doors or the boot, it is essential to press
the unlocking button A again on the remote control.
Page 30 of 216
28
II
STEERING LOCK – IGNITION – STA R T ER
NEVER REMOVE THE IGNITION KEY BEFORE THE ENGINE HAS COME TO A COMPLETE STOP.
IT IS ESSENTIAL ALWAYS TO DRIVE WITH THE ENGINE RUNNING, SO AS TO RETAIN STEERING AND BRAKING ASSISTANCE (risk of the steering lock engaging and loss of safety features).
Do not hang a heavy object on the key; it could pull the key out of alignment in the switch and could cause a malfunction.
When stationary, having removed the key, carefully turn the steering wheel if you wish to lock the steering.
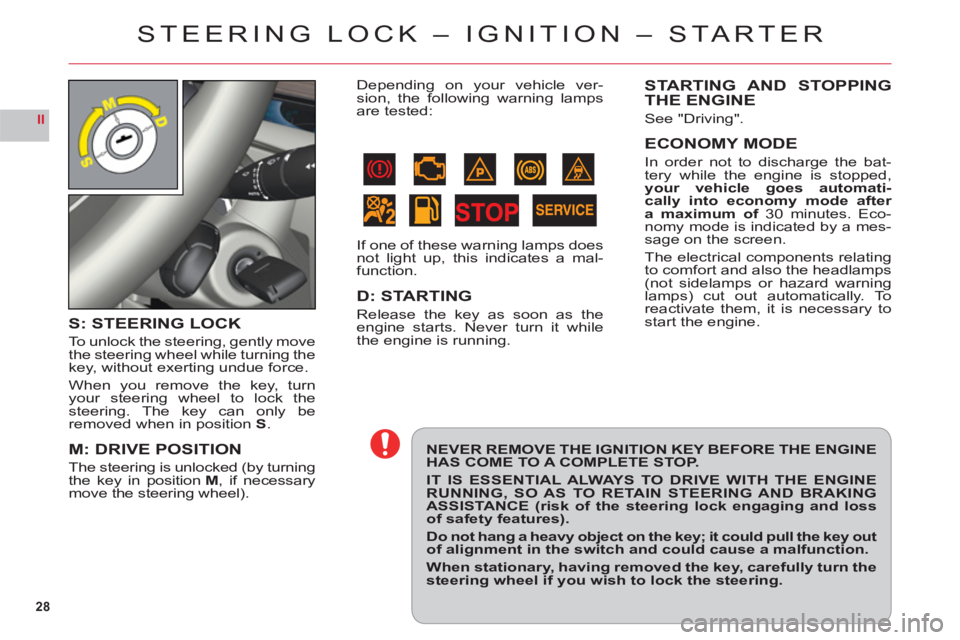
S: STEERING LOCK
To unlock the steering, gently move
the steering wheel while turning the
ke
y, without exerting undue force.
When you remove the key, turn
your steering wheel to lock the
steering. The key can only beremoved when in positionS.
M: DRIVE POSITION
The steering is unlocked (by turningthe key in positionM, if necessarymove the steering wheel).
STARTING AND STOPPINGTHE ENGINE
See "Driving".
ECONOMY MODE
In order not to discharge the bat-
tery while the engine is stopped,your vehicle goes automati-cally into economy mode after
a maximum of 30 minutes. Eco-nomy mode is indicated by a mes-sage on the screen.
The electrical components relatin
gto comfort and also the headlamps(not sidelamps or hazard warninglamps) cut out automatically. Toreactivate them, it is necessary tostart the engine.
Depending on your vehicle ver-
sion, the following warning lamps are tested:
If one of these warning lamps does
not light up, this indicates a mal-
function.
D: STARTING
Release the key as soon as the engine starts. Never turn it while
the engine is running.
Page 37 of 216
35
II
00
00A
A
INSTRUMENT PANEL
Maintenance intervals
If you use your vehicle in particu-larly diffi cult conditions, it is essen-
tialto use the service schedule for "severe conditions" comprisingshorter intervals between services.See "Maintenance and WarrantyGuide".
Reset to zero
It is reset by your CITROËN dealer
or a qualifi ed workshop after eachservice. However, if you do your
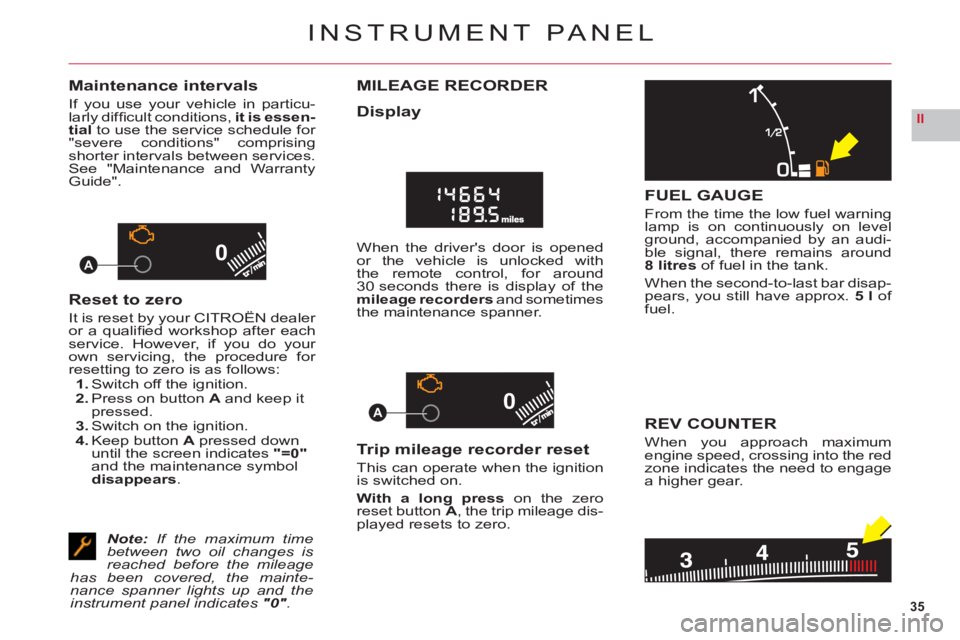
own servicing, the procedure for resetting to zero is as follows:1. Switch off the ignition.2. Press on button A and keep it pressed.3. Switch on the ignition.4. Keep buttonA pressed down until the screen indicates"=0"
and the maintenance symboldisappears.
Note:If the maximum time between two oil changes is reached before the mileage has been covered, the mainte-nance spanner lights up and the instrument panel indicates "0".
MILEAGE RECORDER
Display
When the driver's door is opened or the vehicle is unlocked with
the remote control, for around
30 seconds there is display of the mileage recorders and sometimes
the maintenance spanner.
Trip mileage recorder reset
This can operate when the ignition is switched on.
With a long press on the zero
reset buttonA, the trip mileage dis-
played resets to zero.
FUEL GAUGE
From the time the low fuel warninglamp is on continuously on levelground, accompanied by an audi-
ble signal, there remains around8 litresof fuel in the tank.
When the second-to-last bar disap-pears, you still have approx. 5 l of
fuel.
REV COUNTER
When you approach maximumengine speed, crossing into the redzone indicates the need to engage
a higher gear.
Page 59 of 216
57
II
STEERING COLUMN ADJUSTMENT –
SEAT BELT HEIGHT ADJUSTMENT
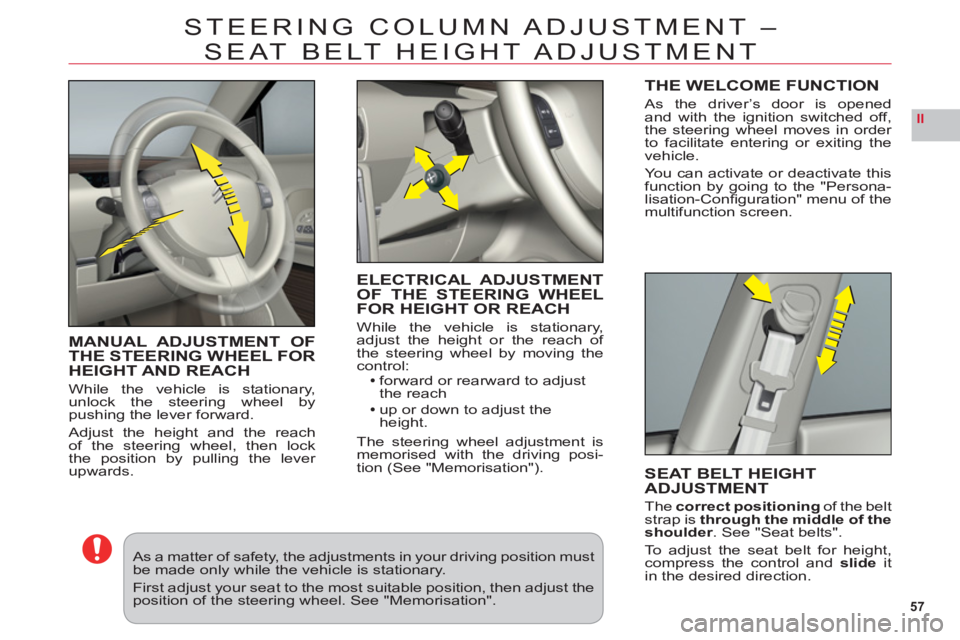
MANUAL ADJUSTMENT OFTHE STEERING WHEEL FORHEIGHT AND REACH
While the vehicle is stationary,unlock the steering wheel bypushing the lever forward.
Adjust the height and the reach
of the steering wheel, then lock
the position by pulling the lever upwards.
ELECTRICAL ADJUSTMENT
OF THE STEERING WHEEL
FOR HEIGHT OR REAC
H
While the vehicle is stationary,
adjust the height or the reach of
the steering wheel by moving the control:forward or rearward to adjust
the reach
up or down to adjust the
height.
The steering wheel adjustment is
memorised with the driving posi-
tion (See "Memorisation").
SEAT BELT HEIGHT
ADJUSTMENT
Thecorrect positioningof the beltstrap is through the middle of the
shoulder. See "Seat belts".
To a d
just the seat belt for height,compress the control andslideitin the desired direction.
As a matter of safety, the adjustments in your driving position must be made only while the vehicle is stationary.
First adjust your seat to the most suitable position, then adjust the position of the steering wheel. See "Memorisation".
THE WELCOME FUNCTION
As the driver’s door is opened
and with the ignition switched off,
the steering wheel moves in order
to
facilitate entering or exiting the
vehicle.
Yo u can activate or deactivate thisfunction by going to the "Persona-lisation-Confi guration" menu of themultifunction screen.
Page 60 of 216
58
II
1
3
2
FRONT SEATS
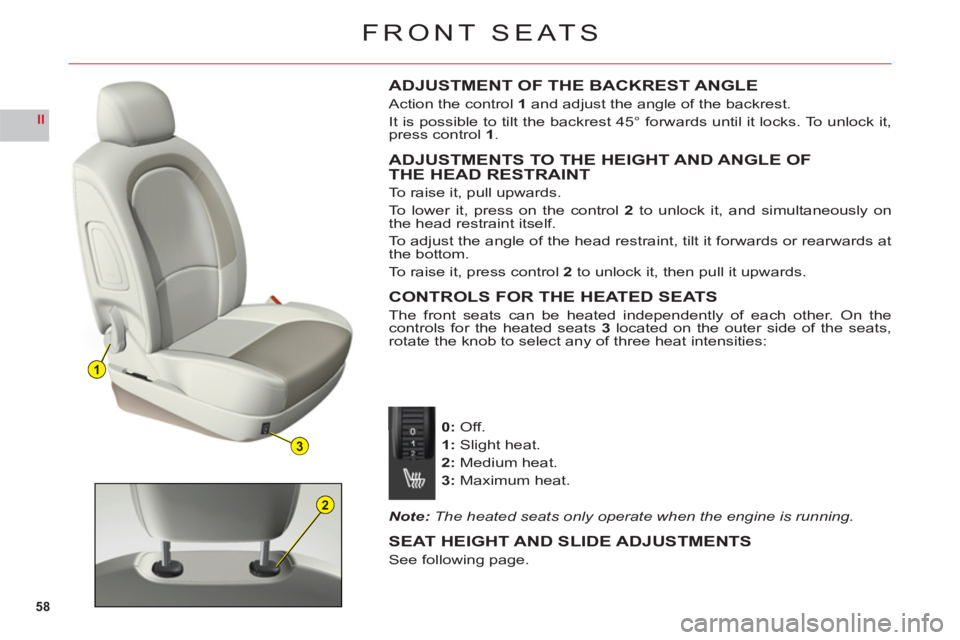
ADJUSTMENT OF THE BACKREST ANGLE
Action the control 1 and adjust the angle of the backrest.
It is possible to tilt the backrest 45° forwards until it locks. To unlock it,
press control1.
ADJUSTMENTS TO THE HEIGHT AND ANGLE OF THE HEAD RESTRAINT
To raise it, pull upwards.
To lower it, press on the control 2 to unlock it, and simultaneously on
the head restraint itself.
To a d
just the angle of the head restraint, tilt it forwards or rearwards at
the bottom.
To raise it,
press control 2 to unlock it, then pull it upwards.
CONTROLS FOR THE HEATED SEATS
The front seats can be heated independently of each other. On thecontrols for the heated seats 3 located on the outer side of the seats,rotate the knob to select any of three heat intensities:
0:Off.
1:Slight heat.
2:Medium heat.
3:Maximum heat.
Note: The heated seats only operate when the engine is running.
SEAT HEIGHT AND SLIDE ADJUSTMENTS
See following page.
Page 65 of 216

63
II
21
REAR VIEW MIRRORS
ELECTRIC EXTERIOR REAR VIEW MIRRORS
Features
The end of the glass in the exte-rior rear view mirrors is aspherical,so as to enlarge the lateral fi eld of
vision.
Objects observed in the aspheri-cal part of the rear view mirrors
are in reality closer than theyappear.
Yo u must take this into account in
order to be properly aware of thedistances involved.
Adjustment of the rear view mirrors
This can operate when the ignition is switched on.
The driver selects the rear view mirror by moving control 1, to the left or to the
right, then adjusts the mirror in the four directions by moving control 2.
Demisting-deicing of the rear view mirrors is linked with that for the rear screen.
The ad
justments you have made to the rear view mirrors are included in the
memorisation of driving positions. See "Memorisation".
Fold-back of door mirrors
When the vehicle is parked, the door mirrors can be folded back either manuallyor electrically.
Electric fold-back
From the central position, one press towards the rear on control1folds therear view mirrors back.
To return them to the initial position, press again on control 1 towards therear.
Automatic fold-back
Automatic fold-back operates when you lock the doors.
Page 68 of 216

66
II
AUTOMATIC GEARBOX
The engine can only be started when the lever is at position P or N.
A safety device ensures that starting is impossible in the other positions.
After starting the engine, with selector on P, depress the brake pedal then shift the selector toD, R or M:Dfor automatic mode.
Rfor reverse gear.
Mto change to manual mode.
The chan
ge from positionD (driving in automatic mode) to position M(driving
in sequential mode) or vice versa can be made at any time.
USING THE AUTOMATIC GEARBOX
Do not select position N if the vehicle is moving (except in absolute necessity).Never select positions P or R if the vehicle is notcompletely stationary.
If while the vehicle is moving you inadvertently select position N,leave the engine to idle before engaging position D or M.
Parking
To avoid any movement of the vehicle when parked, select position P. Only engage it when the vehicle iscompletely stationary. In this position the driving wheels are locked. Check that the selector is in the correctposition. Apply the electric parking brake fi rmly.
Reverse gear
Do not engage until the vehicle is stationary, foot on brake. To avoid gearbox snatching, do not accelerate
immediately after the selection.
Neutral
Do not select positionNif the
vehicle is moving (except in
absolute necessity).
Page 76 of 216
74
II
BRAKES
ABS system
The ABS system enhances your safety by preventing the wheels from locking in the event of sudden brakingor in conditions of poor road adherence. It enables you to retain control of the steering.
The
functioning capability of all the electrical components essential to the ABS is monitored electronically before and
during your journey. The ABS warning lamp lights up when you switch on the ignition: it should go out after a fewseconds.
If the monitoring warning lamp does not go out, that means that the ABS has disconnected because there is a fault.Also, the fact that the monitoring warning lamp comes on during the journey shows that the ABS system is inactive.
In both cases, the normal braking system remains effi cient, exactly as on a vehicle without ABS. However, to restorethe level of safety provided by correct operation of the ABS, the vehicle should be inspected as soon as possible bya CITROÀN dealer or a qualifi ed workshop.yp y p
On roads with poor adherence (chippings, snow, ice etc.), it is always imperative to drive with prudence.
SYSTEM OF EMERGENCY BRAKING ASSISTANCE
The emergency braking assistance system helps you to attain the required braking pressure more rapidly, thus
to reduce the stopping distance. It operates depending on the speed of action on the brake pedal, decreasing theresistance to this action. To prolong this action of the emergency braking assistance system, simply keep your foot
on the brake pedal.
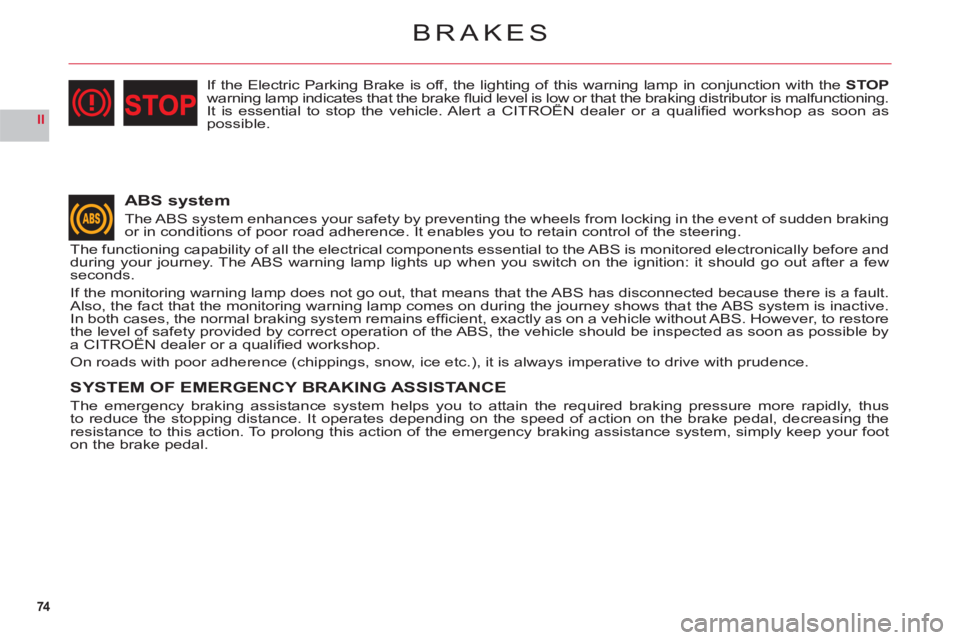
If the Electric Parking Brake is off, the lighting of this warning lamp in conjunction with the STOPwarning lamp indicates that the brake fl uid level is low or that the braking distributor is malfunctioning.It is essential to stop the vehicle. Alert a CITROËN dealer or a qualifi ed workshop as soon asgpgg
possible.
Page 78 of 216
76
II
B
D
E
C
A
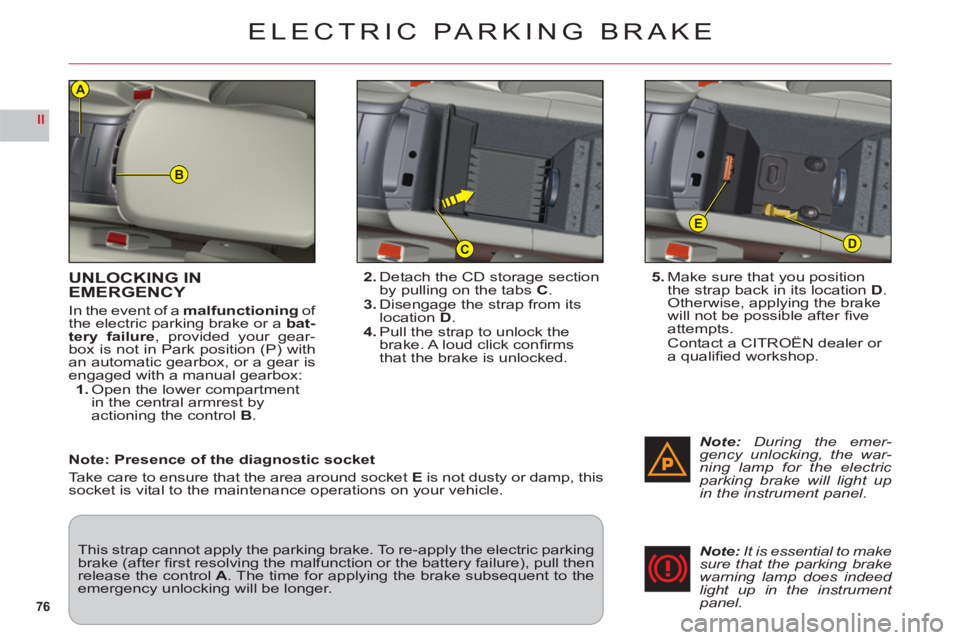
UNLOCKING INEMERGENCY
In the event of a malfunctioningof
the electric parking brake or a bat-
tery failure, provided your gear-
box is not in Park position (P) with
an automatic gearbox, or a gear isengaged with a manual gearbox:1.Open the lower compartmentin the central armrest by
actioning the control B.
ELECTRIC PARKING BRAKE
5. Make sure that you position
the strap back in its locationD.Otherwise, applying the brake
will not be possible after fi ve
attempts.Contact a CITROÀN dealer or
a qualifi ed workshop.
This strap cannot apply the parking brake. To re-apply the electric parking brake (after fi rst resolving the malfunction or the battery failure), pull then release the control A. The time for applying the brake subsequent to the emergency unlocking will be longer.
Note:During the emer-gency unlocking, the war-ning lamp for the electric parking brake will light upin the instrument panel.
2.Detach the CD storage sectionby pulling on the tabsC.3. Disengage the strap from itslocationD.4.Pull the strap to unlock the brake. A loud click confi rmsthat the brake is unlocked.
Note: It is essential to makesure that the parking brakewarning lamp does indeed light up in the instrument panel. Note: Presence of the dia
gnostic socket
Take care to ensure that the area around socket Eis not dusty or damp, this socket is vital to the maintenance operations on your vehicle.