engine CITROEN C6 2012 Handbook (in English)
[x] Cancel search | Manufacturer: CITROEN, Model Year: 2012, Model line: C6, Model: CITROEN C6 2012Pages: 216, PDF Size: 10.23 MB
Page 56 of 216

54
II
WIPERS
CONTROL POSITIONS2: Rapid wipe.
1: Normal wipe.I: Intermittent wipe.
0: Off.
One press downwards:AUTO:Automatic wipe activated.
Single wipe.
Position I: The wipe speed adjusts automatically to the speed of the vehicle.
Positions 1 and 2: When the vehicle is stationary, the speed of the wipers
will reduce automatically.
For safet
y, the wiper system is deactivated when the ignition is swit-ched off.
When you switch the ignition on again, to reactivate the function:
Return to position 0, then go to the desiredposition.
Activation of the function is confi rmed by one sweep of the wipers.
Automatic wipe: To activate automatic wipe, place the control stalk on
position 0, then press it downwards. The wipe speed will adjust according to
the intensity of the rain.Note: One press downwards produces a single wipe, without deactivating automatic wipe.
Deactivation of automatic wipe:Go to position I, then return to position0.
Or stop the engine.
WARNING
Do not cover the rain detectorwhich is located behind the interior rear rview mirror and visible from outside the windscreen.
If washing the vehicle, with ignition on for example in an automatic car
wash, deactivate the wiper system.
For safety, the wiper systemis deactivated when the igni-tion is switched off.
Page 60 of 216
58
II
1
3
2
FRONT SEATS
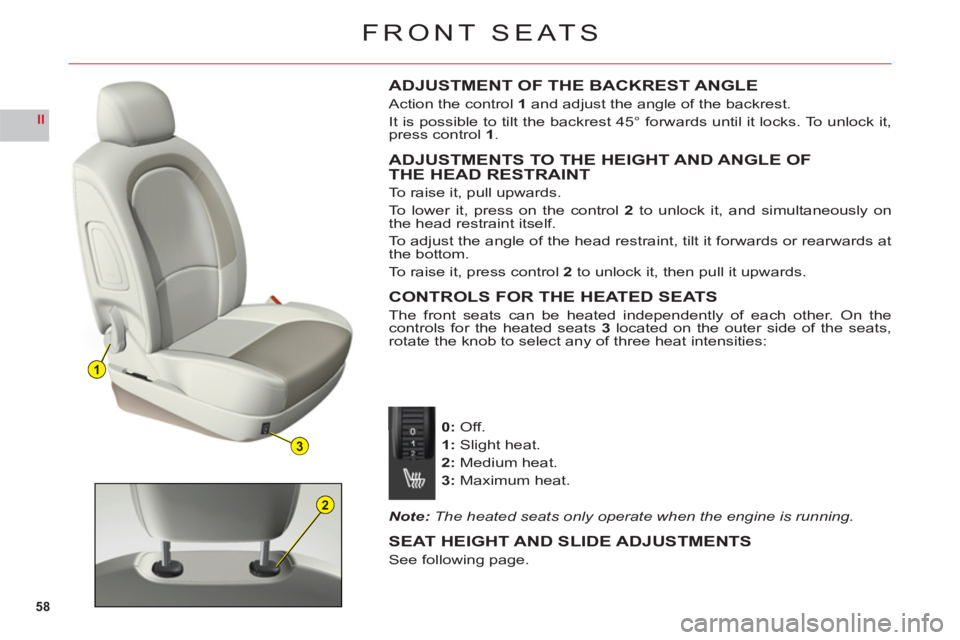
ADJUSTMENT OF THE BACKREST ANGLE
Action the control 1 and adjust the angle of the backrest.
It is possible to tilt the backrest 45° forwards until it locks. To unlock it,
press control1.
ADJUSTMENTS TO THE HEIGHT AND ANGLE OF THE HEAD RESTRAINT
To raise it, pull upwards.
To lower it, press on the control 2 to unlock it, and simultaneously on
the head restraint itself.
To a d
just the angle of the head restraint, tilt it forwards or rearwards at
the bottom.
To raise it,
press control 2 to unlock it, then pull it upwards.
CONTROLS FOR THE HEATED SEATS
The front seats can be heated independently of each other. On thecontrols for the heated seats 3 located on the outer side of the seats,rotate the knob to select any of three heat intensities:
0:Off.
1:Slight heat.
2:Medium heat.
3:Maximum heat.
Note: The heated seats only operate when the engine is running.
SEAT HEIGHT AND SLIDE ADJUSTMENTS
See following page.
Page 62 of 216
60
II
21
M
MEMORISAT ION
DRIVING POSITIONS MEMORISED VIA
BUTTONS 1 AND 2
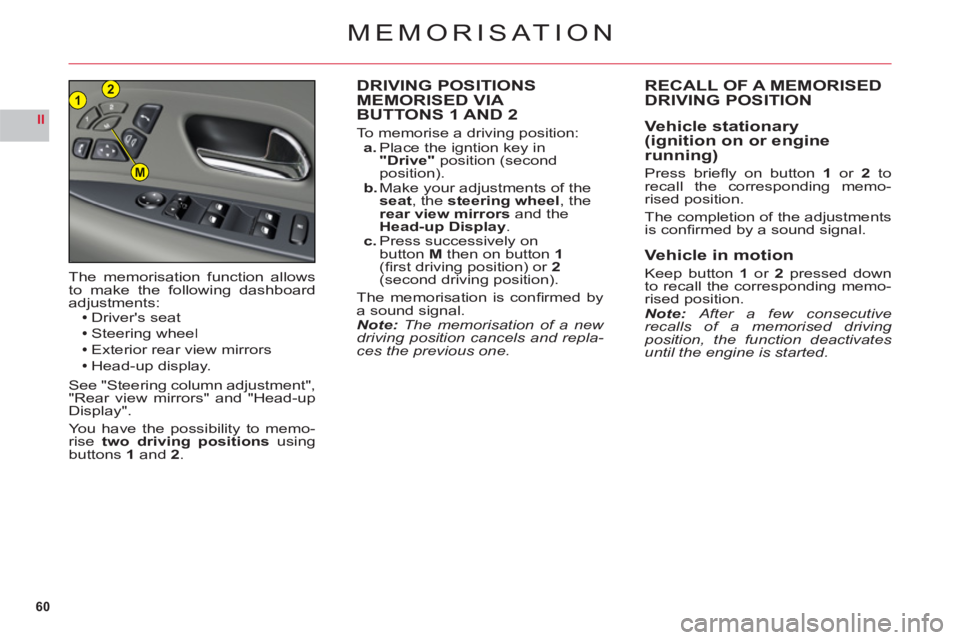
To memorise a driving position:a. Place the igntion key in "Drive"position (second
position).b. Make your adjustments of the
seat, the steering wheel, the
rear view mirrors and theHead-up Display.c. Press successively on button M then on button 1(fi rst driving position) or 2(second driving position).
The memorisation is confi rmed by
a sound signal.Note: The memorisation of a new driving position cancels and repla-ces the previous one. Th
e memorisation function allowsto make the following dashboard
adjustments:Driver's seat
Steering wheelExterior rear view mirrors
Head-up display.
See "Steering column adjustment","Rear view mirrors" and "Head-up
Display".
You have the possibility to memo-rise two driving positions usingbuttons1and2.
RECALL OF A MEMORISEDDRIVING POSITION
Vehicle stationary(ignition on or enginerunning)
Press briefl y on button1 or 2 torecall the corresponding memo-rised position.
The completion of the adjustments
is confi rmed by a sound signal.
Vehicle in motion
Keep button 1or 2pressed down
to recall the corresponding memo-rised position.Note: After a few consecutiverecalls of a memorised driving position, the function deactivates until the engine is started.
Page 63 of 216
61
II
23
1
SEAT BELTS NOT FASTENED/
UNFASTENED WARNING LAMPS
OPERATION
The driver's and the front and rear passengers' seats have sensors
that detect non-fastening/unfaste-ning of the seat belts.
The fastened
/non-fastened status
of the seat belts for each type of seat is indicated by the illumination
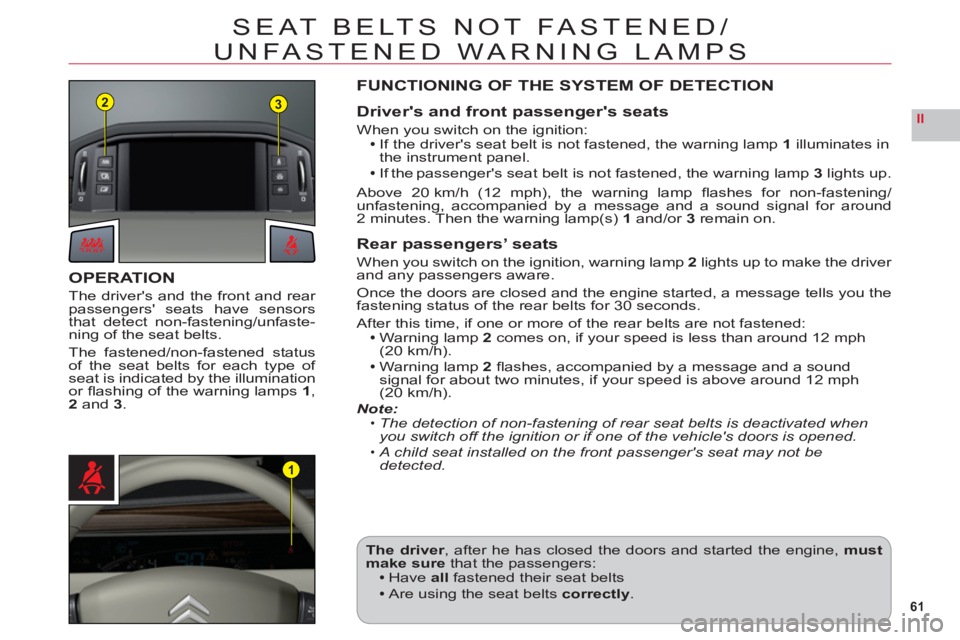
or fl ashing of the warning lamps 1,2 and 3.
FUNCTIONING OF THE SYSTEM OF DETECTION
Driver's and front passenger's seats
When you switch on the ignition:If the driver's seat belt is not fastened, the warning lamp 1 illuminates in
the instrument panel.
If the passenger's seat belt is not fastened, the warning lamp 3 lights up.
Above 20 km
/h (12 mph), the warning lamp fl ashes for non-fastening/ unfastening, accompanied by a message and a sound signal for around
2 minutes. Then the warning lamp(s) 1 and/or 3 remain on.
Rear passengers’ seats
When you switch on the ignition, warning lamp2lights up to make the driver
and any passengers aware.
Once the doors are closed and the engine started, a message tells you thefastening status of the rear belts for 30 seconds.
A
fter this time, if one or more of the rear belts are not fastened:Warning lamp 2comes on, if your speed is less than around 12 mph (20 km/h).Warning lamp 2fl ashes, accompanied by a message and a sound signal for about two minutes, if your speed is above around 12 mph (20 km/h).Note:The detection of non-fastening of rear seat belts is deactivated whenyou switch off the ignition or if one of the vehicle's doors is opened.
A child seat installed on the front passenger's seat may not bedetected.
•
•
The driver, after he has closed the doors and started the engine,mustmake sure that the passengers:Have allfastened their seat belts
Are using the seat belts correctly.
Page 66 of 216

64
II
1
REAR VIEW MIRRORS
ELECTRIC EXTERIOR REAR VIEW MIRRORS (CONTINUED)
In reverse gear: adjustment of the indexed positions for thepassenger’s and driver’s rear view mirrors
With the engine running:1. Select the (driver's or passenger's) rear view mirror using control 1.2. Engage reverse gear, the mirror glass automatically positions itself to
improve your vision of the pavement.3. If necessary, adjust the mirror to your preference using the electriccontrol.
Deactivation of the rear view mirror indexing function
To deactivate the function, move control 1to the central position.
Page 68 of 216

66
II
AUTOMATIC GEARBOX
The engine can only be started when the lever is at position P or N.
A safety device ensures that starting is impossible in the other positions.
After starting the engine, with selector on P, depress the brake pedal then shift the selector toD, R or M:Dfor automatic mode.
Rfor reverse gear.
Mto change to manual mode.
The chan
ge from positionD (driving in automatic mode) to position M(driving
in sequential mode) or vice versa can be made at any time.
USING THE AUTOMATIC GEARBOX
Do not select position N if the vehicle is moving (except in absolute necessity).Never select positions P or R if the vehicle is notcompletely stationary.
If while the vehicle is moving you inadvertently select position N,leave the engine to idle before engaging position D or M.
Parking
To avoid any movement of the vehicle when parked, select position P. Only engage it when the vehicle iscompletely stationary. In this position the driving wheels are locked. Check that the selector is in the correctposition. Apply the electric parking brake fi rmly.
Reverse gear
Do not engage until the vehicle is stationary, foot on brake. To avoid gearbox snatching, do not accelerate
immediately after the selection.
Neutral
Do not select positionNif the
vehicle is moving (except in
absolute necessity).
Page 69 of 216

67
II
AUTOMATIC GEARBOX
AUTOMATIC FORWARD DRIVE
The gearbox always selects the gear best adapted to the following parameters:Style of driving.
Road profi le.
Vehicle load.
In this way the gearbox operates without the need for your intervention.
For certain manoeuvres
(for example overtaking), it is possible to obtain
maximum acceleration by pressing hard down on the accelerator pedal,
which may trigger automatic changedown to a lower gear.
Notes:During braking, the gearbox may kick down automatically in order to
offer an effective engine brake.
If you suddenly lift your foot off the accelerator, the gearbox will guard your safety by not changing up again.
SEQUENTIAL FORWARD DRIVE
Selector position for manual
gear changingSelector onM.
Push the selector towards"+" to change up a gear.Pull the selector towards"-"to change down a gear.
Note:Passage from one gear to another is only possible when vehicle speed and engine speed permit.
The "SPORT" and "SNOW" modes are not available in sequential
operation.
If the engine speed is too high, the gearbox automatically selects ahigher gear.
If the engine speed is too low, the gearbox automatically selects a lower gear.
The chan
ge from position D(driving in automatic mode) to positionM (drivingin sequential mode) or vice versa can be made at any time.
•
•
•
•
Page 70 of 216
68
II
A
AUTOMATIC GEARBOX
OPERATION IN SPORT OR SNOW AUTOMATIC MODE
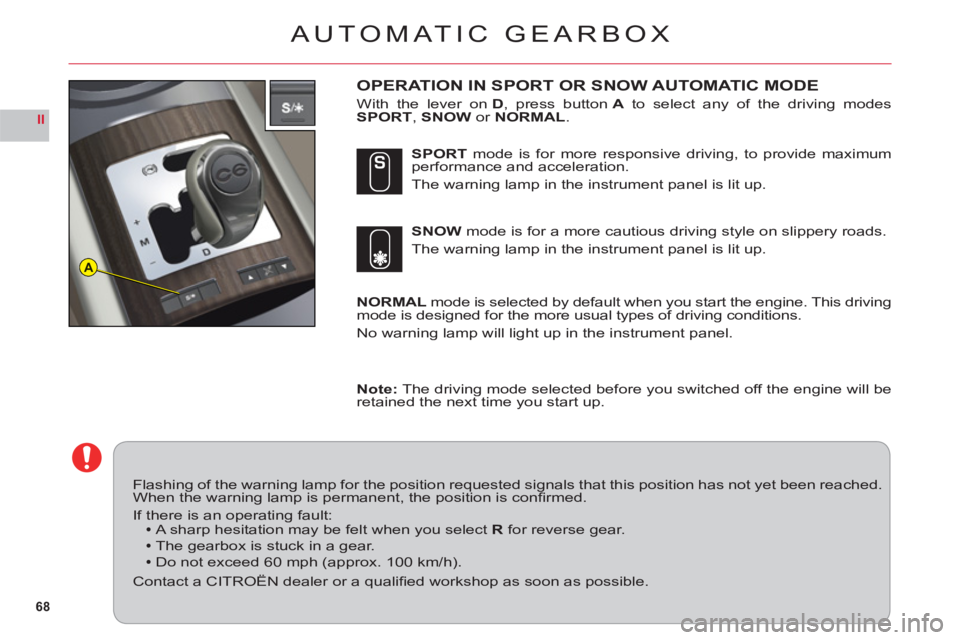
With the lever on D, press button Ato select any of the driving modesSPORT,SNOW or NORMAL.
NORMAL mode is selected by default when you start the engine. This drivingmode is designed for the more usual types of driving conditions.
No warnin
g lamp will light up in the instrument panel. SNO
W mode is for a more cautious driving style on slippery roads.
The warning lamp in the instrument panel is lit up. SPOR
T mode is for more responsive driving, to provide maximumperformance and acceleration.
The warnin
g lamp in the instrument panel is lit up.
Note
: The driving mode selected before you switched off the engine will be
retained the next time you start up.
Flashing of the warning lamp for the position requested signals that this position has not yet been reached.When the warning lamp is permanent, the position is confi rmed.
If there is an operating fault:A sharp hesitation may be felt when you selectR for reverse gear.The gearbox is stuck in a gear.
Do not exceed 60 mph (approx. 100 km/h).
Contact a CITROËN dealer or a qualifi ed workshop as soon as possible.
Page 72 of 216
70
II
CRUISE CONTROL
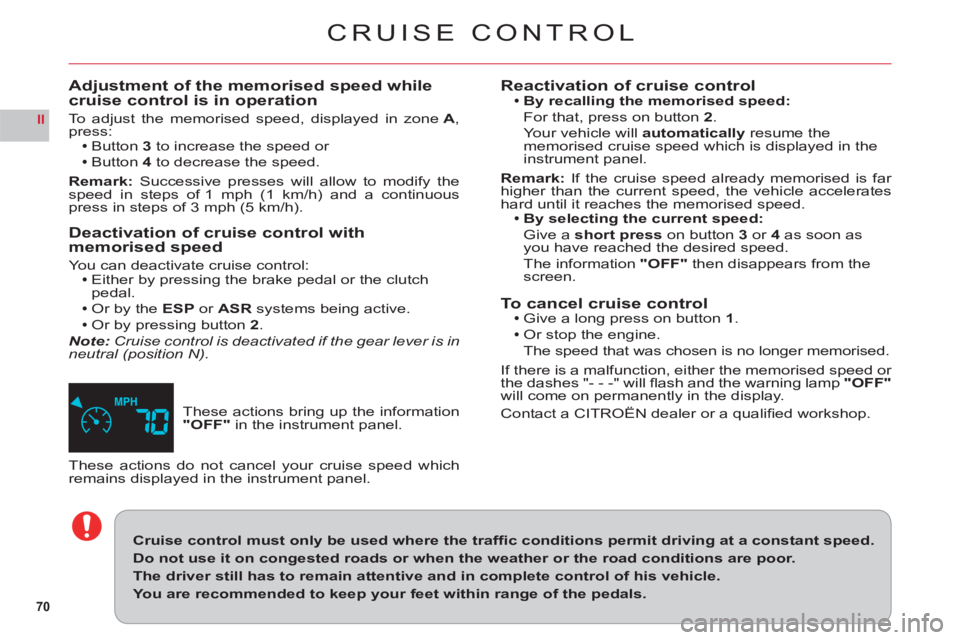
These actions bring up the information "OFF"in the instrument panel.
Adjustment of the memorised speed whilecruise control is in operation
To adjust the memorised speed, displayed in zone A, press:Button 3 to increase the speed or
Button 4 to decrease the speed.
Remark: Successive presses will allow to modify the speed in steps of 1 mph (1 km/h) and a continuous press in steps of 3 mph (5 km/h).
Deactivation of cruise control withmemorised speed
Yo u can deactivate cruise control:Either by pressing the brake pedal or the clutchpedal.Or by the ESP or ASR systems being active.
Or by pressing button2.Note:Cruise control is deactivated if the gear lever is in
neutral (position N).
These actions do not cancel your cruise speed which remains displayed in the instrument panel.
Cruise control must only be used where the traffi c conditions permit driving at a constant speed.
Do not use it on congested roads or when the weather or the road conditions are poor.
The driver still has to remain attentive and in complete control of his vehicle.
You are recommended to keep your feet within range of the pedals.
Reactivation of cruise controlBy recalling the memorised speed:
For that, press on button 2.
Yo ur vehicle willautomatically resume the
memorised cruise speed which is displayed in the instrument panel.
Remark
:If the cruise speed already memorised is far higher than the current speed, the vehicle accelerateshard until it reaches the memorised speed.By selecting the current speed:
Give ashort press on button 3or 4as soon asyou have reached the desired speed.
Th
e information "OFF"then disappears from the screen.
To cancel cruise controlGive a long press on button 1.
Or stop the engine.
The speed that was chosen is no lon
ger memorised.
If there is a malfunction, either the memorised speed or
the dashes "- - -" will fl ash and the warning lamp "OFF"
will come on permanently in the display.
Contact a CITROËN dealer or a qualifi ed workshop.
Page 73 of 216

71
II
13
24
A
B
SPEED LIMITER
SELECTION OF THE SPEED LIMITER
To select the speed limiter, press on button 1 to display inzoneA of your instrument panel the symbol Bfor the speed
limiter.
The last speed memorised is also displayed.
TO ADJUST THE MAXIMUM SPEED
Provided the engine is running, you can select your maximum speed, with
short or long presses on:Button3to increase the speed orButton4to decrease the speed.
Remark:
Successive presses will allow to modify the speed in steps of 1 mph (1 km/h)and a continuous press in steps of 3 mph (5 km/h).
ACTIVATION OF THE MAXIMUM SPEED
When the desired maximum speed is displayed, press button2 to activatethe speed limiter.
The information "OFF" then disappears from the screen.
As long as the function is active, action on the accelerator pedal will not per-
mit the programmed speed to be exceeded, unless you press the pedal hard
down to activate the switch at the end of its travel. See "Temporary overrideof the maximum speed".Note: The vehicle speed may slightly exceed the memorised maximumspeed. This drivin
g assistance functionenables you to select a maximumspeed that you wish not to exceed.This must be greater than 18 mph(30 km/h).Note:The information relating tothe limiter is displayed in zone Aof the instrument panel.