ignition CITROEN C6 2012 Handbook (in English)
[x] Cancel search | Manufacturer: CITROEN, Model Year: 2012, Model line: C6, Model: CITROEN C6 2012Pages: 216, PDF Size: 10.23 MB
Page 76 of 216
74
II
BRAKES
ABS system
The ABS system enhances your safety by preventing the wheels from locking in the event of sudden brakingor in conditions of poor road adherence. It enables you to retain control of the steering.
The
functioning capability of all the electrical components essential to the ABS is monitored electronically before and
during your journey. The ABS warning lamp lights up when you switch on the ignition: it should go out after a fewseconds.
If the monitoring warning lamp does not go out, that means that the ABS has disconnected because there is a fault.Also, the fact that the monitoring warning lamp comes on during the journey shows that the ABS system is inactive.
In both cases, the normal braking system remains effi cient, exactly as on a vehicle without ABS. However, to restorethe level of safety provided by correct operation of the ABS, the vehicle should be inspected as soon as possible bya CITROÀN dealer or a qualifi ed workshop.yp y p
On roads with poor adherence (chippings, snow, ice etc.), it is always imperative to drive with prudence.
SYSTEM OF EMERGENCY BRAKING ASSISTANCE
The emergency braking assistance system helps you to attain the required braking pressure more rapidly, thus
to reduce the stopping distance. It operates depending on the speed of action on the brake pedal, decreasing theresistance to this action. To prolong this action of the emergency braking assistance system, simply keep your foot
on the brake pedal.
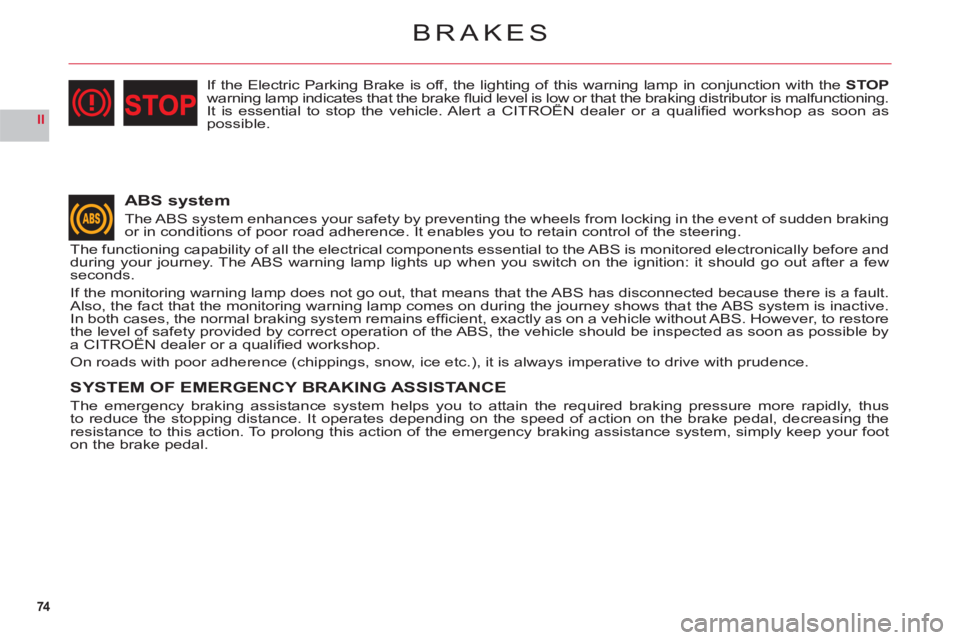
If the Electric Parking Brake is off, the lighting of this warning lamp in conjunction with the STOPwarning lamp indicates that the brake fl uid level is low or that the braking distributor is malfunctioning.It is essential to stop the vehicle. Alert a CITROËN dealer or a qualifi ed workshop as soon asgpgg
possible.
Page 79 of 216
77
II
SPEED-SENSITIVE REAR SPOILER (DEFLECTOR)
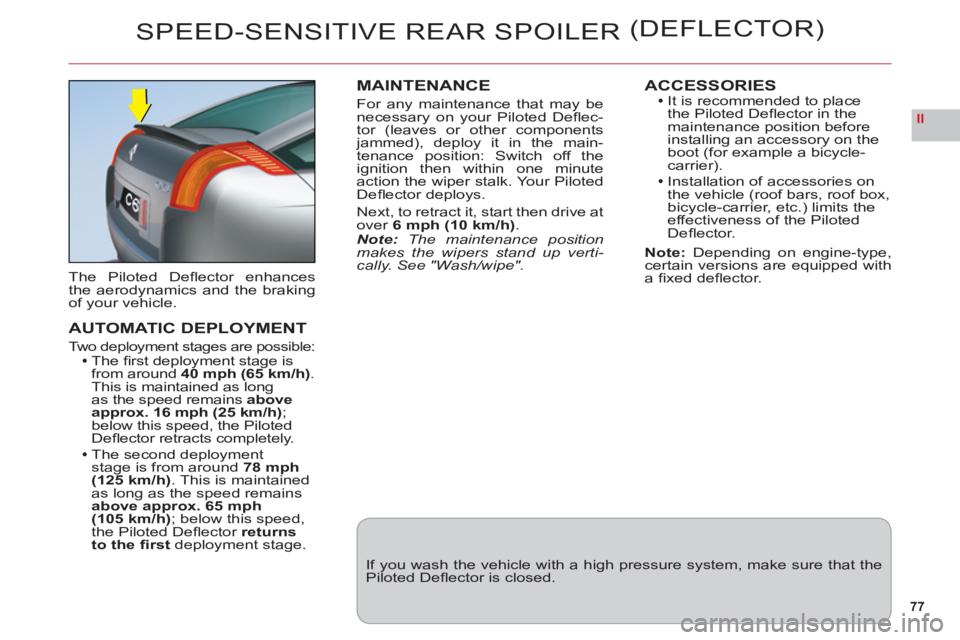
The Piloted Defl ector enhancesthe aerodynamics and the brakingof your vehicle.
AUTOMATIC DEPLOYMENT
Two deployment stages are possible:The fi rst deployment stage isfrom around 40 mph (65 km/h).This is maintained as long
as the speed remainsabove approx.16 mph (25 km/h);
below this speed, the Piloted
Defl ector retracts completely.
The second deploymentstage is from around 78 mph(125 km/h). This is maintained
as long as the speed remainsabove approx.65 mph (105 km/h); below this speed,
the Piloted Defl ector returns
to the fi rstdeployment stage.
MAINTENANCE
For any maintenance that may be
necessary on your Piloted Defl ec-
tor (leaves or other components jammed), deploy it in the main-
tenance position: Switch off the
ignition then within one minute
action the wiper stalk. Your Piloted
Defl ector deploys.
Next, to retract it, start then drive at
over 6 mph (10 km/h).Note: The maintenance position makes the wipers stand up verti-cally. See "Wash/wipe".
ACCESSORIESIt is recommended to place
the Piloted Defl ector in themaintenance position before
installing an accessory on the
boot (for example a bicycle-carrier).Installation of accessories on
the vehicle (roof bars, roof box,
bicycle-carrier, etc.) limits theeffectiveness of the Piloted Defl ector.
Note:Depending on engine-type,certain versions are equipped witha fi xed defl ector.
If you wash the vehicle with a high pressure system, make sure that thePiloted Defl ector is closed.
Page 84 of 216
82
III
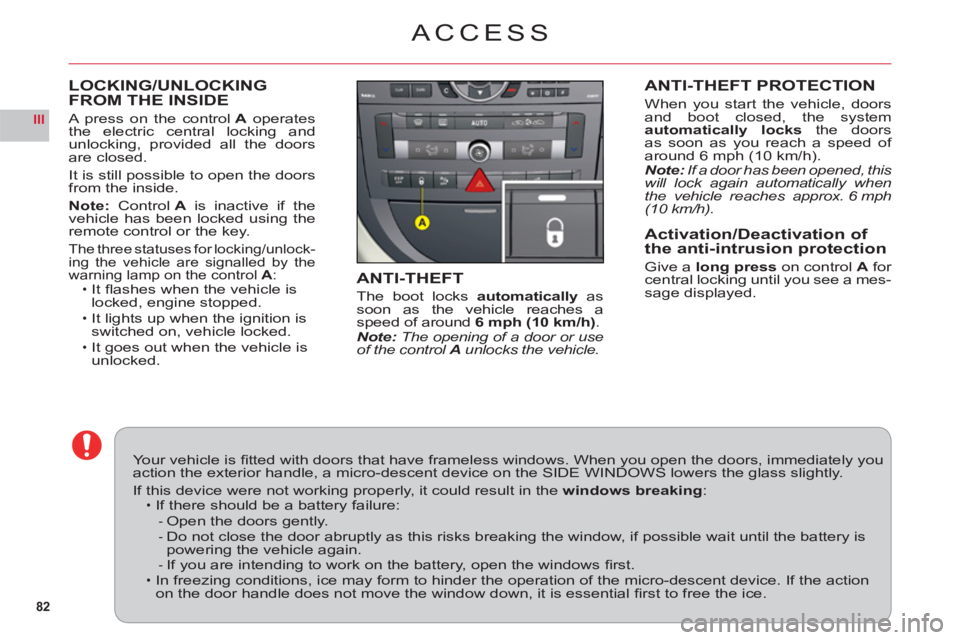
LOCKING/UNLOCKING
FROM THE INSIDE
A press on the controlA operates
the electric central locking andunlocking, provided all the doorsare closed.
It is still possible to open the doorsfrom the inside.
Note: ControlAis inactive if thevehicle has been locked using theremote control or the key.
The three statuses for locking/unlock-ing the vehicle are signalled by the
warning lamp on the control A:It fl ashes when the vehicle is
locked, engine stopped.
It lights up when the ignition is switched on, vehicle locked.It goes out when the vehicle is unlocked.
ï
ï
ï
ACCESS
ANTI-THEFT PROTECTION
When you start the vehicle, doors
and boot closed, the system
automatically locksthe doorsas soon as you reach a speed of
around 6 mph (10 km/h).Note: If a door has been opened, this will lock again automatically whenthe vehicle reaches approx. 6 mph(10 km/h).
Activation/Deactivation of
the anti-intrusion protection
Give a long press on control Afor central locking until you see a mes-sage displayed.ANTI-THEFT
The boot locks automatically as soon as the vehicle reaches a
speed of around6 mph (10 km/h).Note: The opening of a door or use of the control A unlocks the vehicle.
Your vehicle is fi tted with doors that have frameless windows. When you open the doors, immediately youaction the exterior handle, a micro-descent device on the SIDE WINDOWS lowers the glass slightly.
If this device were not working properly, it could result in thewindows breaking:If there should be a battery failure:
Open the doors gently.Do not close the door abruptly as this risks breaking the window, if possible wait until the battery ispowering the vehicle again.If you are intending to work on the battery, open the windows fi rst.In freezing conditions, ice may form to hinder the operation of the micro-descent device. If the actionon the door handle does not move the window down, it is essential fi rst to free the ice.
ï
--
-ï
Page 101 of 216

99
III
A
BC
D
REAR SEATS
Seat cushion folded.
Stow the head restraints.
Pr
ess the controlA located at theend of the backrest and fully tilt for-
wards.
The benchseat backrest can befolded in two sections. When youreposition the backrest, make sure
that it locks in place.Your vehicle's boot can be kept
isolated from the passen
ger com-
partment.
T
o lock the access to the boot:1.Place the benchseat in its correct position.The red warning lamp oncontrol Ashould no longer be
visible.
2.Insert the ignition key in thelock.3. Lock it.
Before moving the seats
So as to avoid damaging the seat belts by jamming them, takecare to keep them to the sides of the backrest.
LOCKING/UNLOCKING OF THE ACCESS INTO THE BOOT VIA THE REAR BENCHSEATREAR CENTRAL SEAT BELT
For easier opening of the seat beltcover D, you should fi rst raise thecentral head restraint.
Insert the fi rst fasteningC into thefront left hand (black) buckle, then
insert the second fastening B intothe front right hand buckle.
Page 103 of 216
101
IIIA
AIRBAGS
AIRBAG EQUIPMENT
Yo ur vehicle has:A driver's front airbag.
A driver's knees airbag.
A front passenger's airbag
which can be deactivated.
Front lateral airba
gs.
Front and rear curtain airbags.
Rear lateral airbags.
Deplo
yment of your airbags is
dependent on the degree of vio-lence of the collision.
•
•
•
••
•
REACTIVATING THE FRONTPASSENGER'S AIRBAG
Do not forget to reactivate the func-
tion.
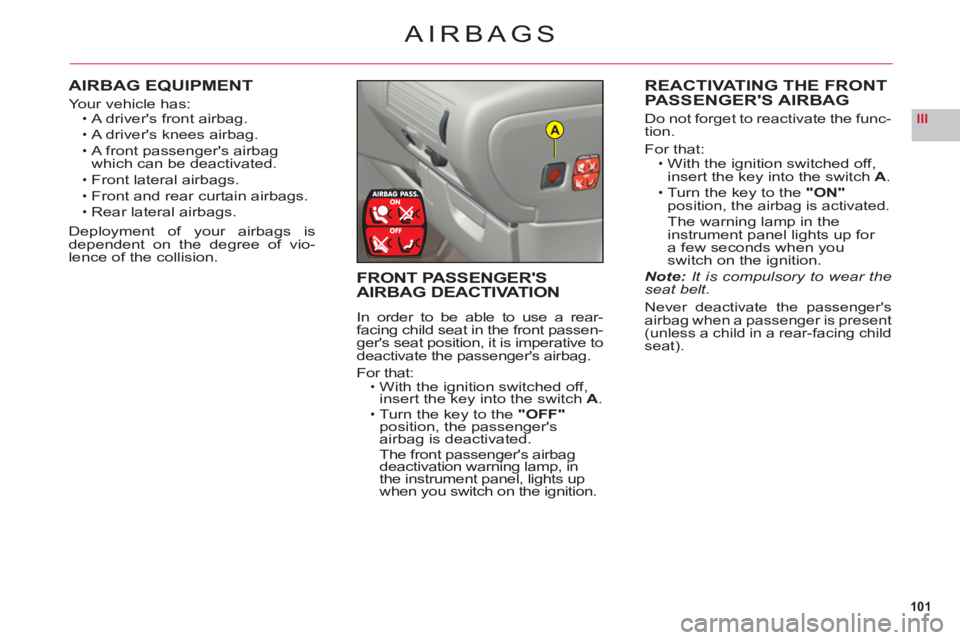
For that:With the ignition switched off, insert the key into the switch A.Turn the key to the"ON"position, the airbag is activated.
The warning lamp in the
instrument panel lights up for
a few seconds when youswitch on the ignition.Note: It is compulsory to wear theseat belt.
Never deactivate the passenger'sairbag when a passenger is present(unless a child in a rear-facing child
seat).
•
•
FRONT PASSENGER'SAIRBAG DEACTIVATION
In order to be able to use a rear-facing child seat in the front passen-ger's seat position, it is imperative to
deactivate the passenger's airbag.
For that:With the ignition switched off,
insert the key into the switchA.Turn the key to the "OFF"
position, the passenger's airbag is deactivated.The front passenger's airbag deactivation warning lamp, in
the instrument panel, lights up
when you switch on the ignition.
•
•
Page 108 of 216
106
III
A
SUSPENSION WITH ELECTRONICALLY
CONTROLLED SPRINGING AND DAMPING
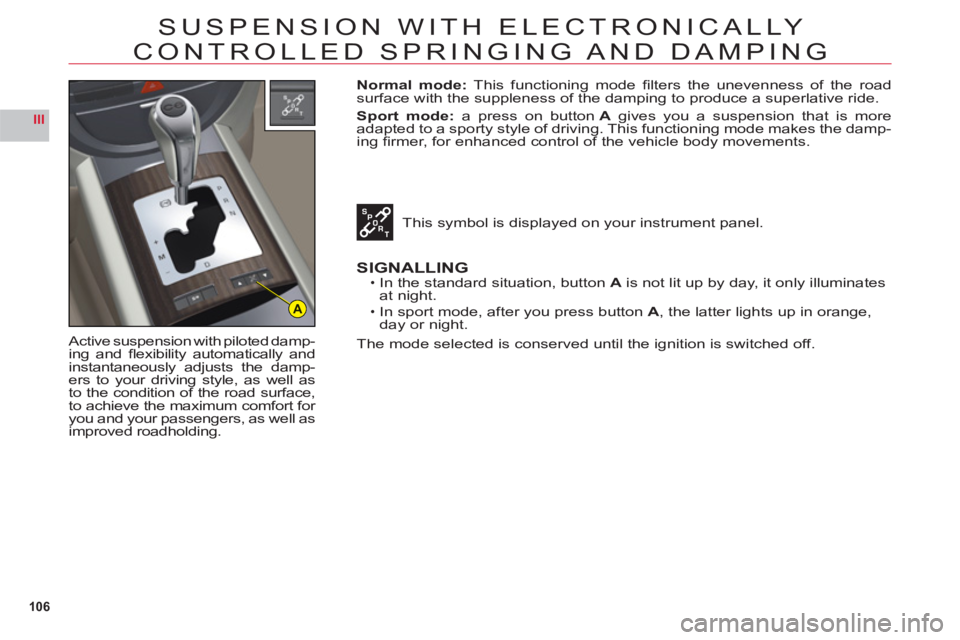
Active suspension with piloted damp-
ing and fl exibility automatically and
instantaneously adjusts the damp-ers to your driving style, as well as
to the condition of the road surface,
t
o achieve the maximum comfort for you and your passengers, as well asimproved roadholding.
Normal mode: This functioning mode fi lters the unevenness of the road
surface with the suppleness of the damping to produce a superlative ride.
S
port mode: a press on buttonA gives you a suspension that is more
adapted to a sporty style of driving. This functioning mode makes the damp-
ing fi rmer, for enhanced control of the vehicle body movements.
This s
ymbol is displayed on your instrument panel.
SIGNALLINGIn the standard situation, buttonA is not lit up by day, it only illuminates at night.
In sport mode, after
you press button A, the latter lights up in orange,
day or night.
The mode selected is conserved until the ignition is switched off.
•
•
Page 111 of 216
109
III221
2
2
INTERIOR LIGHTING
Front
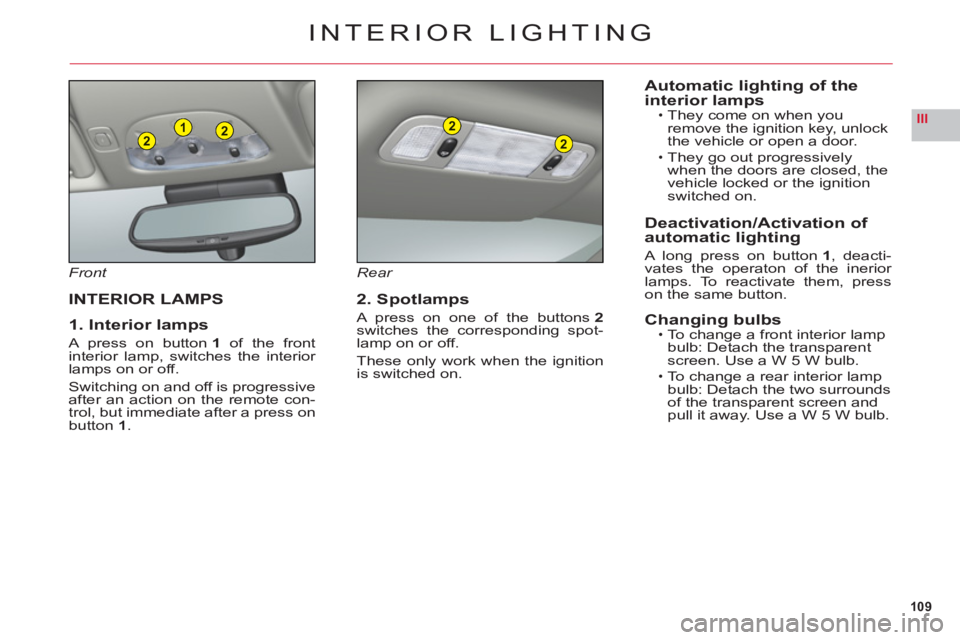
INTERIOR LAMPS
1. Interior lamps
A press on button 1 of the front
interior lamp, switches the interior lamps on or off.
Switching on and off is progressiveafter an action on the remote con-
trol, but immediate after a press on
button 1.
Rear
2. Spotlamps
A press on one of the buttons2switches the corresponding spot-lamp on or off.
These only work when the ignition
is switched on.
Automatic lighting of the
interior lampsThey come on when you
remove the ignition key, unlock
the vehicle or open a door.
They go out progressively
when the doors are closed, the
vehicle locked or the i
gnitionswitched on.
Deactivation/Activation of
automatic lighting
A long press on button1, deacti-
vates the operaton of the inerior lamps. To reactivate them, presson the same button.
Changing bulbsTo change a front interior lamp
bulb: Detach the transparent
screen. Use a W 5 W bulb.
To change a rear interior lamp bulb: Detach the two surroundsof the transparent screen and pull it away. Use a W 5 W bulb.
•
•
•
•
Page 115 of 216
113
III
INTERIOR COMFORT
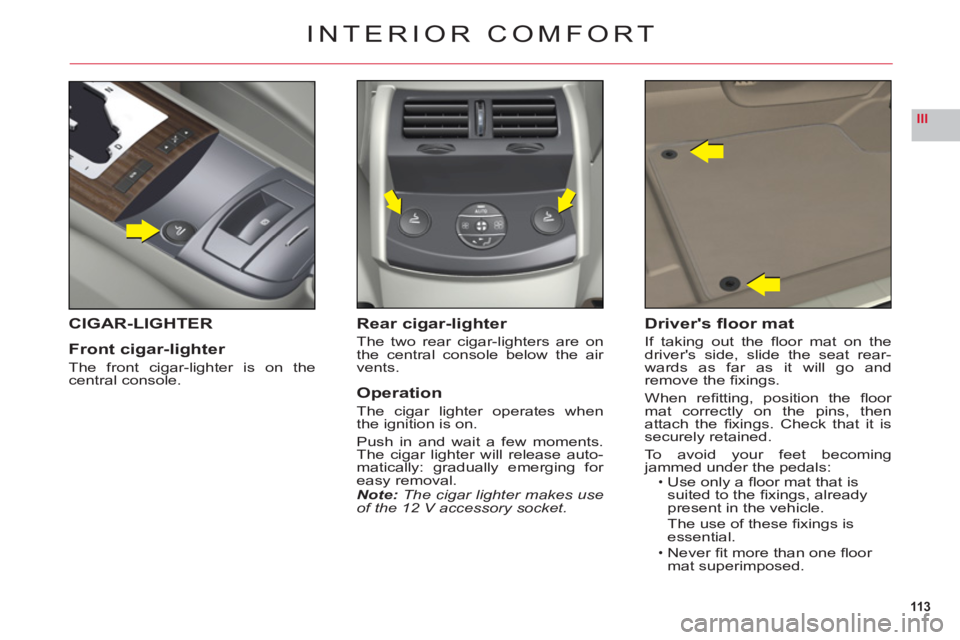
CIGAR-LIGHTER
Front ci
gar-lighter
The front cigar-lighter is on thecentral console.
Rear cigar-lighter
The two rear cigar-lighters are on
the central console below the air
vents.
Operation
The cigar lighter operates when
the ignition is on.
Push in and wait a few moments.
The cigar lighter will release auto-
matically: gradually emerging for easy removal.Note: The cigar lighter makes use
of the 12 V accessory socket.
Driver's fl oor mat
If taking out the fl oor mat on the
driver's side, slide the seat rear-
wards as
far as it will go andremove the fi xings.
When re
fi tting, position the fl oor mat correctly on the pins, then
attach the fi xings. Check that it issecurely retained.
To avoid
your feet becomingjammed under the pedals:Use only a fl oor mat that issuited to the fi xings, already present in the vehicle.
The use o
f these fi xings isessential.
Never fi t more than one fl oor
mat superimposed.
ï
ï
Page 118 of 216

116
III
To prevent dazzle from ahead, fold
the visor downwards.
The
y can be disengaged from their central fi xing and pivoted over to
the side windows if required.
SUN VISOR WITH
ILLUMINATED MIRROR
Illuminates automatically on openingthe mirror cover fl ap (ignition on).
CARD-HOLDER
This is situated above the sun visor.
REAR BLIND
Take the blind by its grip and unroll it.
Engage the blind on the fi xings on each side of the third stoplamp.
BADGE READER
The athermic windscreen has adarkened area above the level of
the interior rear view mirror, to per-mit the optical registering of accesspermits (e.g. motorway toll cards).
GRAB HANDLES - COAT HOOKS
INTERIOR COMFORT
Page 119 of 216
117
III
5
4
4
1
3
2
6
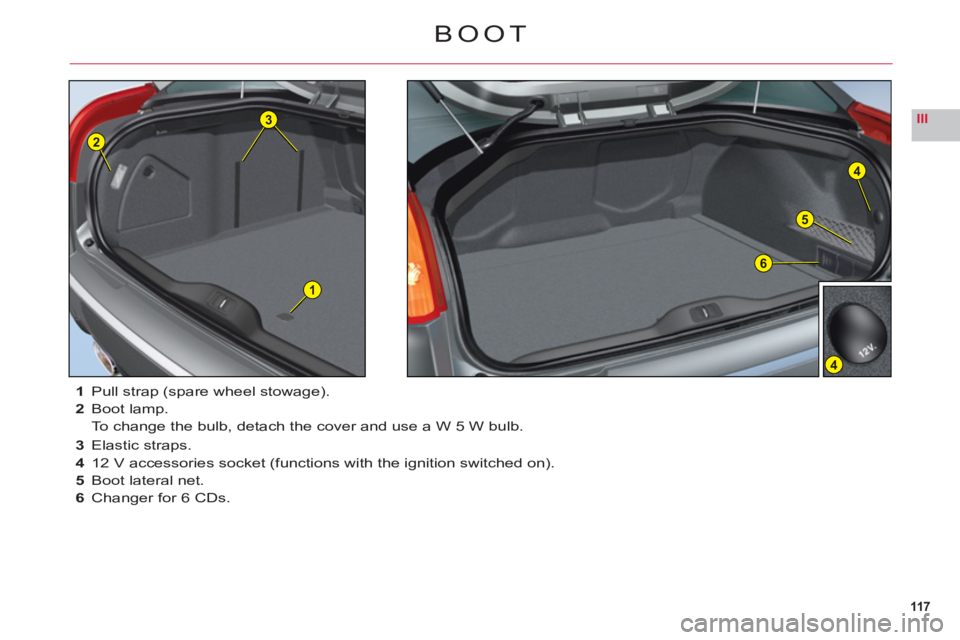
1Pull strap (spare wheel stowage).
2Boot lamp.
To change the bulb, detach the cover and use a W 5 W bulb.
3 Elastic straps.
4 12 V accessories socket (functions with the ignition switched on).
5 B
oot lateral net.
6 Changer for 6 CDs.
BOOT