instrument CITROEN DISPATCH SPACETOURER DAG 2020 Handbook (in English)
[x] Cancel search | Manufacturer: CITROEN, Model Year: 2020, Model line: DISPATCH SPACETOURER DAG, Model: CITROEN DISPATCH SPACETOURER DAG 2020Pages: 324, PDF Size: 10.89 MB
Page 27 of 324
25
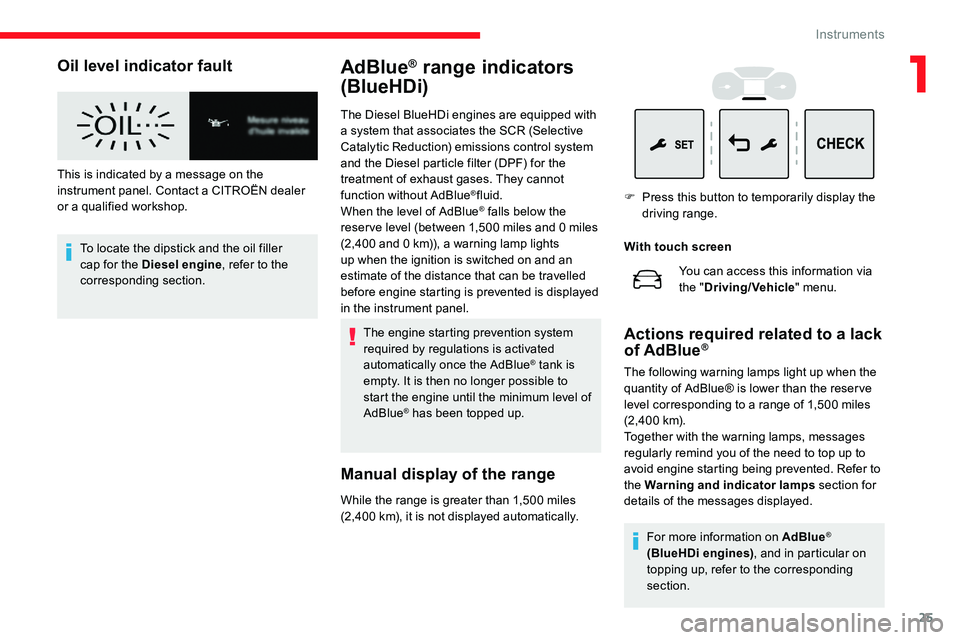
Oil level indicator fault
This is indicated by a message on the
instrument panel. Contact a CITROËN dealer
or a qualified workshop.To locate the dipstick and the oil filler
cap for the Diesel engine , refer to the
corresponding section.
AdBlue® range indicators
(BlueHDi)
The Diesel BlueHDi engines are equipped with
a system that associates the SCR (Selective
Catalytic Reduction) emissions control system
and the Diesel particle filter (DPF) for the
treatment of exhaust gases. They cannot
function without AdBlue
®fluid.
When the level of AdBlue® falls below the
reser ve level (between 1,500 miles and 0 miles
(2,400 and 0
km)), a warning lamp lights
up when the ignition is switched on and an
estimate of the distance that can be travelled
before engine starting is prevented is displayed
in the instrument panel.
The engine starting prevention system
required by regulations is activated
automatically once the AdBlue
® tank is
empty. It is then no longer possible to
start the engine until the minimum level of
AdBlue
® has been topped up.
Manual display of the range
While the range is greater than 1,500 miles
( 2,400 km), it is not displayed automatically. With touch screen
Actions required related to a lack
of AdBlue®
The following warning lamps light up when the
quantity of AdBlue® is lower than the reser ve
level corresponding to a range of 1,500
miles
(2, 4 0 0
k m).
Together with the warning lamps, messages
regularly remind you of the need to top up to
avoid engine starting being prevented. Refer to
the Warning and indicator lamps section for
details of the messages displayed. You can access this information via
the "
Driving/Vehicle " menu.
F
P
ress this button to temporarily display the
driving range.
For more information on AdBlue
®
(BlueHDi engines) , and in particular on
topping up, refer to the corresponding
section.
1
Instruments
Page 28 of 324
26
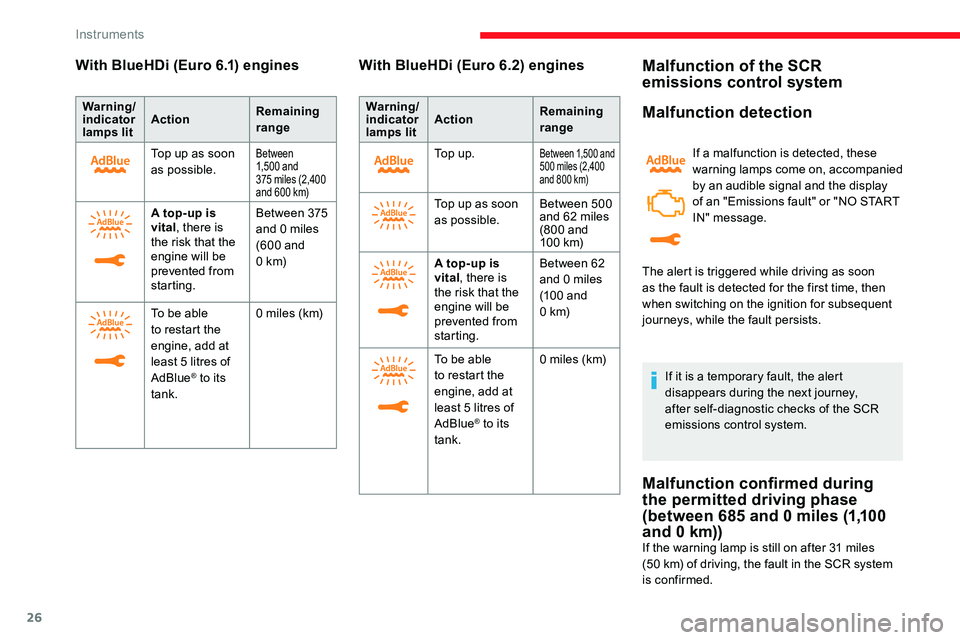
With BlueHDi (Euro 6.1) engines
Warning/
indicator
lamps litAction
Remaining
range
Top up as soon
as possible.
Between
1,5 0 0 and
375
miles (2,400
and 600
km)
A top-up is
vital, there is
the risk that the
engine will be
prevented from
starting. Between 375
and 0
miles
(600 and
0
k m)
To be able
to restart the
engine, add at
least 5
litres of
AdBlue
® to its
tank. 0
miles (km)
With BlueHDi (Euro 6.2) engines
Warning/
indicator
lamps lit
Action
Remaining
range
To p u p .
Between 1,500 and
500 miles (2,400
and 800
km)
Top up as soon
as possible. Between 500
and 62
miles
(800 and
10 0
k m)
A top-up is
vital , there is
the risk that the
engine will be
prevented from
starting. Between 62
and 0
miles
(100 and
0
k m)
To be able
to restart the
engine, add at
least 5
litres of
AdBlue
® to its
tank. 0
miles (km)
Malfunction of the SCR
emissions control system
Malfunction detection
If a malfunction is detected, these
warning lamps come on, accompanied
by an audible signal and the display
of an "Emissions fault" or "NO START
IN" message.
If it is a temporary fault, the alert
disappears during the next journey,
after self-diagnostic checks of the SCR
emissions control system.
Malfunction confirmed during
the permitted driving phase
(between 685 and 0 miles (1,100
and 0
km))
If the warning lamp is still on after 31 miles
( 50 km) of driving, the fault in the SCR system
is confirmed. The alert is triggered while driving as soon
as the fault is detected for the first time, then
when switching on the ignition for subsequent
journeys, while the fault persists.
Instruments
Page 29 of 324
27
Have the system checked by a CITROËN
dealer or a qualified workshop as soon as
possible.
Starting prevented
Every time the ignition is switched on, the
message "Emissions fault: Starting prevented"
or "NO START IN" is displayed.To be able to restart the engine, call on a
CITROËN dealer or a qualified workshop.
Distance recorders
The total and trip distances are displayed for
thirty seconds when the ignition is switched off,
when the driver's door is opened and when the
vehicle is locked or unlocked.
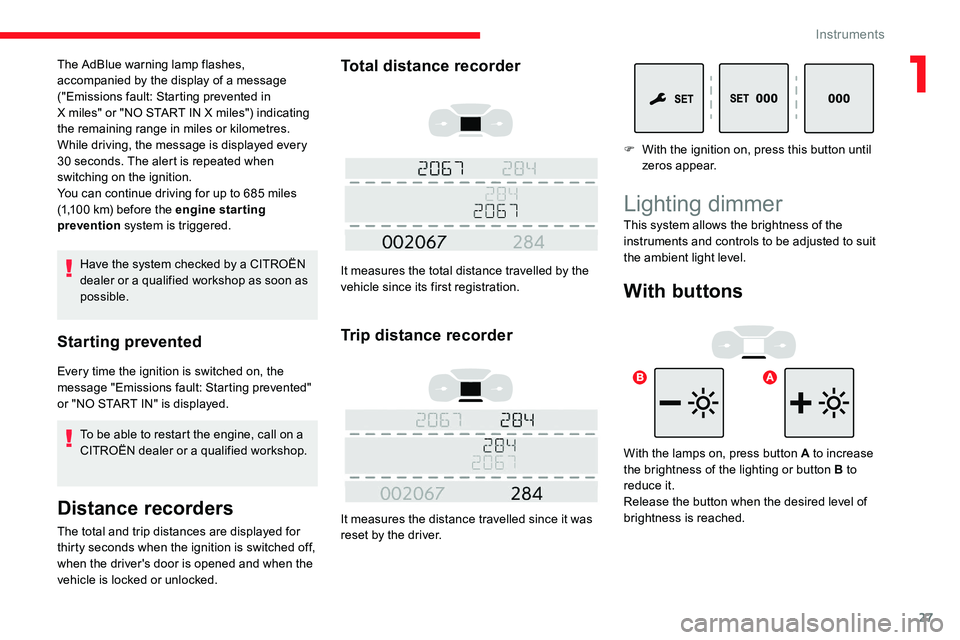
Total distance recorder
It measures the total distance travelled by the
vehicle since its first registration.
Trip distance recorder
It measures the distance travelled since it was
reset by the driver.
The AdBlue warning lamp flashes,
accompanied by the display of a message
("Emissions fault: Starting prevented in
X
miles" or "NO START IN X
miles") indicating
the remaining range in
miles or kilometres.
While driving, the message is displayed every
30 seconds. The alert is repeated when
switching on the ignition.
You can continue driving for up to 685
miles
(1,100
km) before the engine star ting
prevention system is triggered. F
W
ith the ignition on, press this button until
zeros appear.
Lighting dimmer
With buttons
With the lamps on, press button A to increase
the brightness of the lighting or button B to
reduce it.
Release the button when the desired level of
brightness is reached. This system allows the brightness of the
instruments and controls to be adjusted to suit
the ambient light level.
1
Instruments
Page 30 of 324
28
With touch screen
The brightness can be adjusted differently
for day mode and night mode.
F
I
n the Settings
menu, select " Brightness".
Or select " OPTIONS", "Screen
configuration " then "Brightness ".
F
A
djust the brightness by pressing the
arrows or moving the slider.
Trip computer
Information displayed about the current journey
(range, fuel consumption, average speed, etc.).
Display of information
To display the various trip computer tabs in
succession:
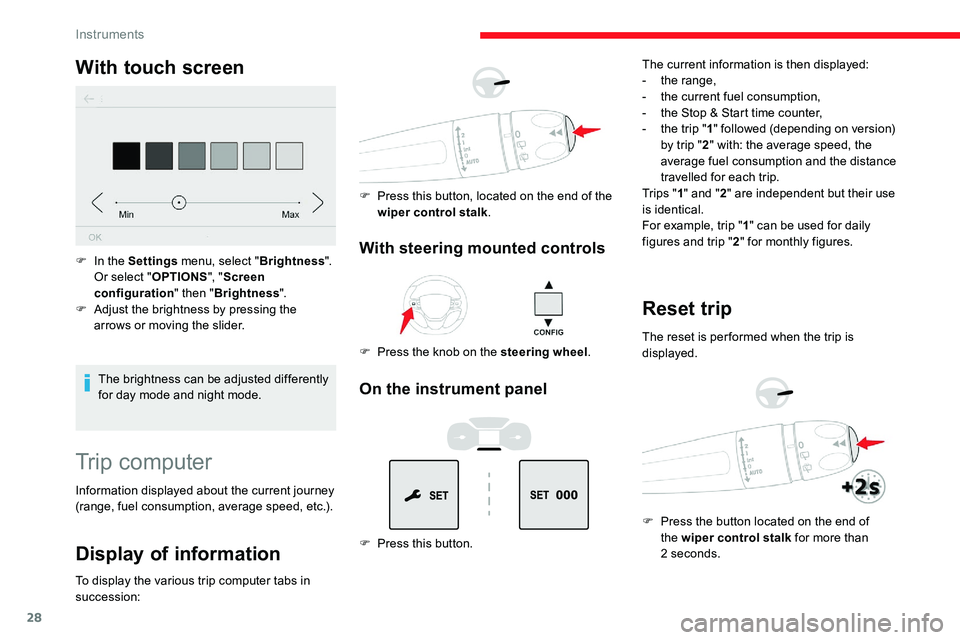
With steering mounted controls
F Press the knob on the steering wheel .
F
P
ress this button, located on the end of the
wiper control stalk .
On the instrument panel
F Press this button. The current information is then displayed:
-
t
he range,
-
t
he current fuel consumption,
-
t
he Stop & Start time counter,
-
t
he trip "
1" followed (depending on version)
by trip " 2" with: the average speed, the
average fuel consumption and the distance
travelled for each trip.
Tr i p s " 1" and " 2" are independent but their use
is identical.
For example, trip " 1" can be used for daily
figures and trip " 2" for monthly figures.
Reset trip
The reset is per formed when the trip is
displayed.
F
P
ress the button located on the end of
the wiper control stalk for more than
2
seconds.
Instruments
Page 31 of 324
29
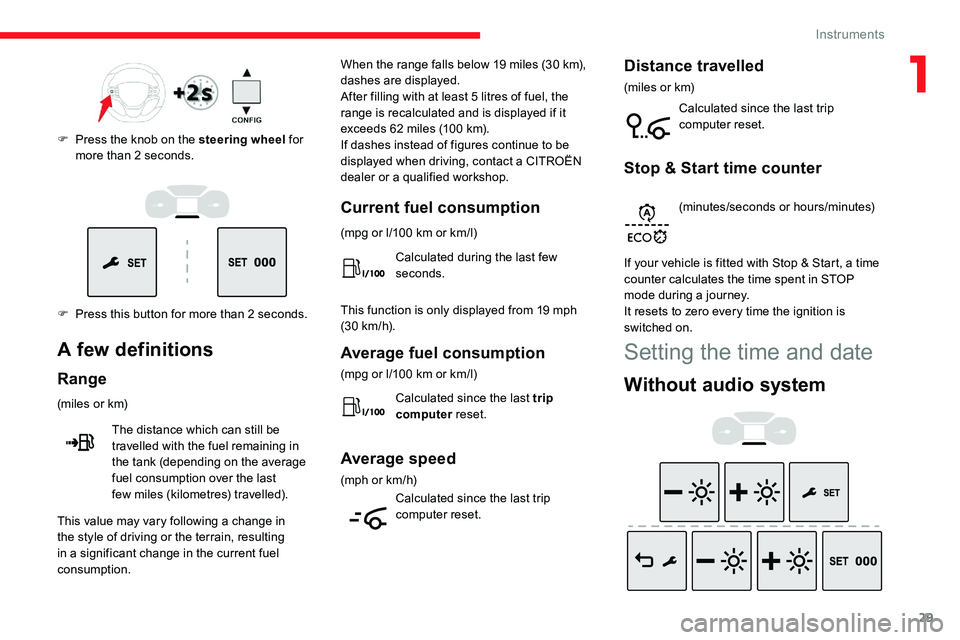
F Press this button for more than 2 seconds. F
P
ress the knob on the steering wheel
for
more than 2 seconds.
A few definitions
Range
(miles or km)
T he distance which can still be
travelled with the fuel remaining in
the tank (depending on the average
fuel consumption over the last
few
miles (kilometres) travelled). When the range falls below 19
miles (30 km),
dashes are displayed.
After filling with at least 5 litres of fuel, the
range is recalculated and is displayed if it
exceeds 62 miles (100 km).
If dashes instead of figures continue to be
displayed when driving, contact a CITROËN
dealer or a qualified workshop.
This value may vary following a change in
the style of driving or the terrain, resulting
in a significant change in the current fuel
consumption.
Current fuel consumption
(mpg or l/100 km or km/l)
C alculated during the last few
seconds.
This function is only displayed from 19 mph
(30
km/h).
Average fuel consumption
(mpg or l/100 km or km/l)
C alculated since the last trip
computer reset.
Average speed
(mph or km/h)
C alculated since the last trip
computer reset.
Distance travelled
(miles or km)
C alculated since the last trip
computer reset.
Stop & Start time counter
(minutes/seconds or hours/minutes)
If your vehicle is fitted with Stop & Start, a time
counter calculates the time spent in STOP
mode during a journey.
It resets to zero every time the ignition is
switched on.
Setting the time and date
Without audio system
1
Instruments
Page 32 of 324
30
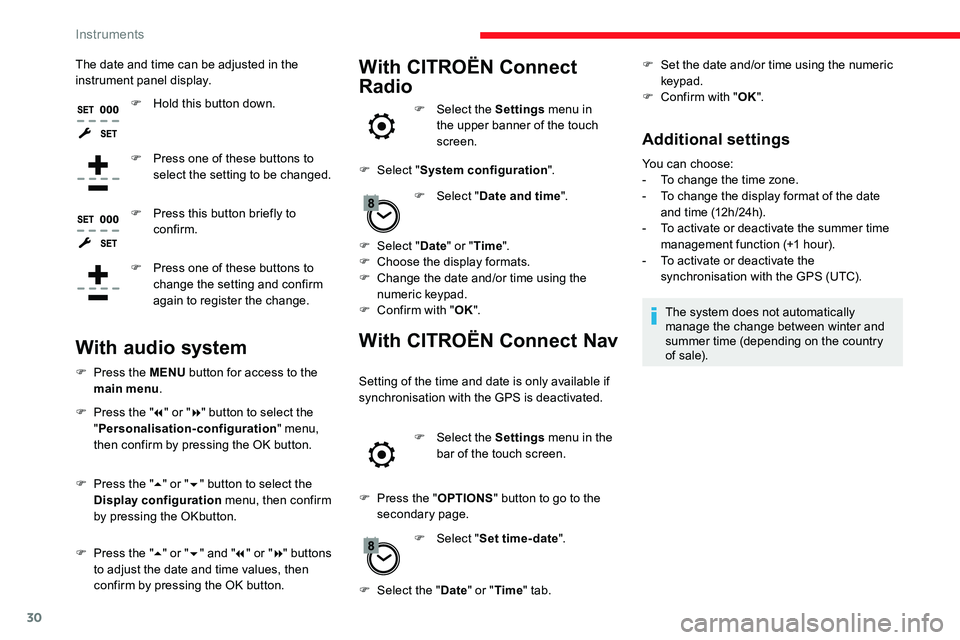
The date and time can be adjusted in the
instrument panel display.F
H
old this button down.
F
P
ress one of these buttons to
select the setting to be changed.
F
P
ress this button briefly to
confirm.
F
P
ress one of these buttons to
change the setting and confirm
again to register the change.With CITROËN Connect
Radio
F Select the Settings menu in
the upper banner of the touch
screen.
F
Sel
ect " System configuration ".
F
Sel
ect "Date and time ".
F
Sel
ect " Date " or "Time ".
F
C
hoose the display formats.
F
C
hange the date and/or time using the
numeric keypad.
F
C
onfirm with " OK".
With CITROËN Connect Nav
Setting of the time and date is only available if
synchronisation with the GPS is deactivated.
F
Sel
ect the Settings menu in the
bar of the touch screen.
F
P
ress the " OPTIONS " button to go to the
secondary page.
F
Sel
ect "Set time-date ".
With audio system
F Press the MENU button for access to the
main menu .
F
P
ress the " 7" or " 8" button to select the
" Personalisation-configuration " menu,
then confirm by pressing the OK button.
F
P
ress the " 5" or " 6" button to select the
Display configuration menu, then confirm
by pressing the OKbutton.
F
P
ress the " 5" or " 6" and " 7" or " 8" buttons
to adjust the date and time values, then
confirm by pressing the OK button. F
Sel
ect the "Date" or "Time " tab. F
S
et the date and/or time using the numeric
keypad.
F
C
onfirm with "
OK".
Additional settings
You can choose:
-
T o change the time zone.
-
T
o change the display format of the date
and time (12h/24h).
-
T
o activate or deactivate the summer time
management function (+1 hour).
-
T
o activate or deactivate the
synchronisation with the GPS (UTC).
The system does not automatically
manage the change between winter and
summer time (depending on the country
of s a l e).
Instruments
Page 56 of 324
54
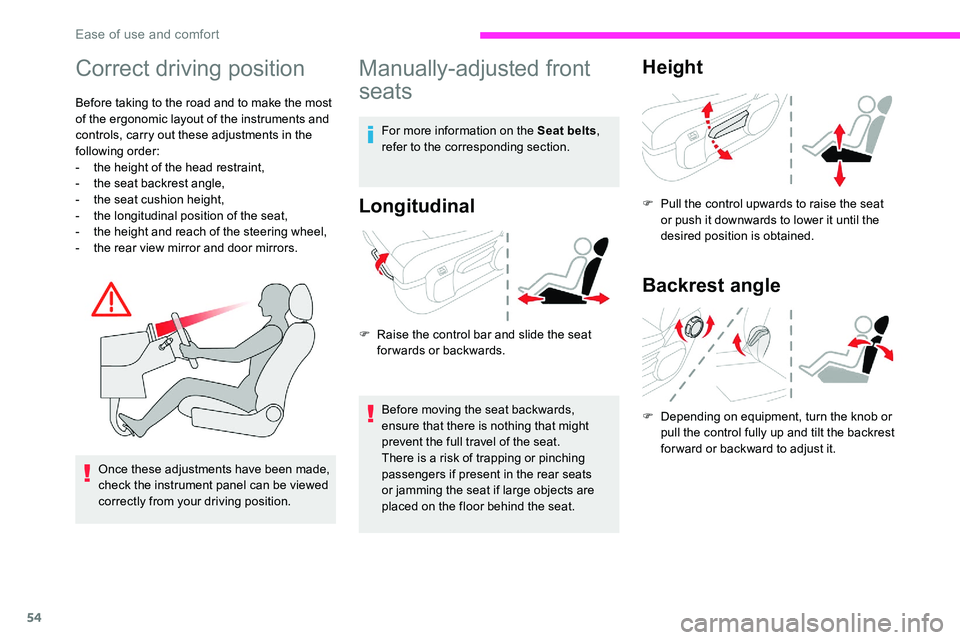
Correct driving position
Before taking to the road and to make the most
of the ergonomic layout of the instruments and
controls, carry out these adjustments in the
following order:
-
t
he height of the head restraint,
-
t
he seat backrest angle,
-
t
he seat cushion height,
-
t
he longitudinal position of the seat,
-
t
he height and reach of the steering wheel,
-
t
he rear view mirror and door mirrors.
Once these adjustments have been made,
check the instrument panel can be viewed
correctly from your driving position.
Manually-adjusted front
seats
For more information on the Seat belts ,
refer to the corresponding section.
Longitudinal
F Raise the control bar and slide the seat forwards or backwards.
Before moving the seat backwards,
ensure that there is nothing that might
prevent the full travel of the seat.
There is a risk of trapping or pinching
passengers if present in the rear seats
or jamming the seat if large objects are
placed on the floor behind the seat.
Height
F Pull the control upwards to raise the seat or push it downwards to lower it until the
desired position is obtained.
Backrest angle
F Depending on equipment, turn the knob or pull the control fully up and tilt the backrest
forward or backward to adjust it.
Ease of use and comfort
Page 101 of 324

99
Daytime running lamps/
Sidelamps
If the vehicle is so equipped, they come on
automatically when the engine is started, when
the lighting control stalk is in position "0" or
" AUTO ".
Automatic headlamp
illumination
When a low level of ambient light is detected
by a sunshine sensor, the number plate
lamps,
sidelamps and dipped beam headlamps
are switched on automatically, without any F
T
urn the ring to the "AUTO"
position. When
the function is activated, a message is
displayed.
F
T
urn the ring to another position
.
Deactivation of the function is accompanied
by the display of a message.
Malfunction
In the event of a malfunction of
the sunshine sensor, the lighting
comes on and this warning lamp is
displayed in the instrument panel,
accompanied by an audible signal
and/or a message.
Contact a CITROËN dealer or a qualified
workshop.
In fog or snow, the sunshine sensor may
detect sufficient light. In this case, the
lighting will not come on automatically.
Do not cover the sunshine sensor,
integrated with the rain sensor and located
at the top of the windscreen behind the
rear view mirror
; the associated functions
would no longer be controlled.
Guide-me-home and
welcome lightingaction on the part of the driver. They can also
come on if rain is detected, at the same time as
the automatic rain sensitive wipers.
As soon as the brightness returns to a
sufficient level or after the windscreen wipers
are switched off, the lamps are switched off
automatically.
Guide-me-home lighting
Manual
Switching on/off
F W ith the ignition off, "flash" the headlamps
using the lighting control stalk to switch the
function on/off.
Manual guide-me-home lighting goes off
automatically at the end of a given period of
time.
Automatic
With the "Automatic headlamp illumination"
function activated (lighting control stalk
in the " AUTO" position), when the light is
poor, the dipped beam headlamps come on
automatically when the ignition is switched off.
With the ring in the " AUTO" position, when the
light is poor, the dipped beam headlamps come
on automatically when the ignition is switched
of f.
4
Lighting and visibility
Page 106 of 324

104
Windscreen and headlamp
wash
Switching on
Give a short downwards push to the
control stalk.
A wiping cycle confirms that the
instruction has been accepted.
This indicator lamp comes on in the
instrument panel and a message is
displayed.
Switching off
Give the control stalk a brief push
downwards or shift the control stalk
to a different position (Int, 1 or 2).
This indicator lamp goes off in the
instrument panel and a message is
displayed.
The automatic rain sensitive windscreen
wipers must be reactivated by pushing the
control stalk downwards, if the ignition has
been off for more than one
minute.
Operating fault
If a fault occurs with the automatic windscreen
wipers, the wipers will operate in intermittent
mode.
Have it checked by a CITROËN dealer or a
qualified workshop. Do not cover the rain sensor, linked with
the sunshine sensor and located in the
top of the windscreen behind the rear view
m i r r o r.
Switch off the automatic windscreen
wipers when using an automatic car wash.
In winter, it is advisable to wait until
the windscreen is completely clear of
ice before activating the automatic rain
sensitive wipers.
Rear wiper
Of f.
Intermittent wipe.
Wash-wipe (set duration).
Reverse gear
When reverse gear is engaged, the rear wiper
will come into operation automatically if the
windscreen wipers are operating.
Activation/Deactivation
With audio system or touch screen
The system is activated or
deactivated via the vehicle
configuration menu.
This system is activated by default.
If a significant accumulation of snow or ice
is present, or when using a bicycle carrier
on the tailgate, deactivate the automatic
rear wiper.
F
P
ull the wiper control stalk towards you.
Lighting and visibility
Page 107 of 324
105
The screenwash then the windscreen wipers
operate for a pre-determined time.
The headlamp washers only operate when
the dipped beam headlamps are on and the
vehicle is moving.
With daytime running lamps on, to activate the
headlamp wash, position the lighting control
stalk in the dipped beam headlamps position.
On vehicles fitted with automatic air
conditioning, any action on the windscreen
wash control results in temporary closing
of the air intake to avoid odours inside the
passenger compartment.
Screenwash/headlamp wash
level low
For vehicles fitted with headlamp
washers, when the fluid reservoir
low level is reached, this warning
lamp comes on in the instrument
panel, accompanied by an audible
signal and a message.
It comes on when the ignition is switched on,
or every time the stalk is operated, until the
reservoir is refilled.
Next time you stop, refill the screenwash/
headlamp wash reservoir.
Special position of the
windscreen wipers
This maintenance position is used for cleaning
or replacement of the wiper blades. It can also
be useful, in winter (ice, snow), to release the
wiper blades from the windscreen.
To maintain the effectiveness of the flat
wiper blades, it is advisable to:
-
h
andle them with care,
-
c
lean them regularly using soapy
water,
-
a
void using them to retain cardboard
on the windscreen,
-
r
eplace them at the first signs of wear.
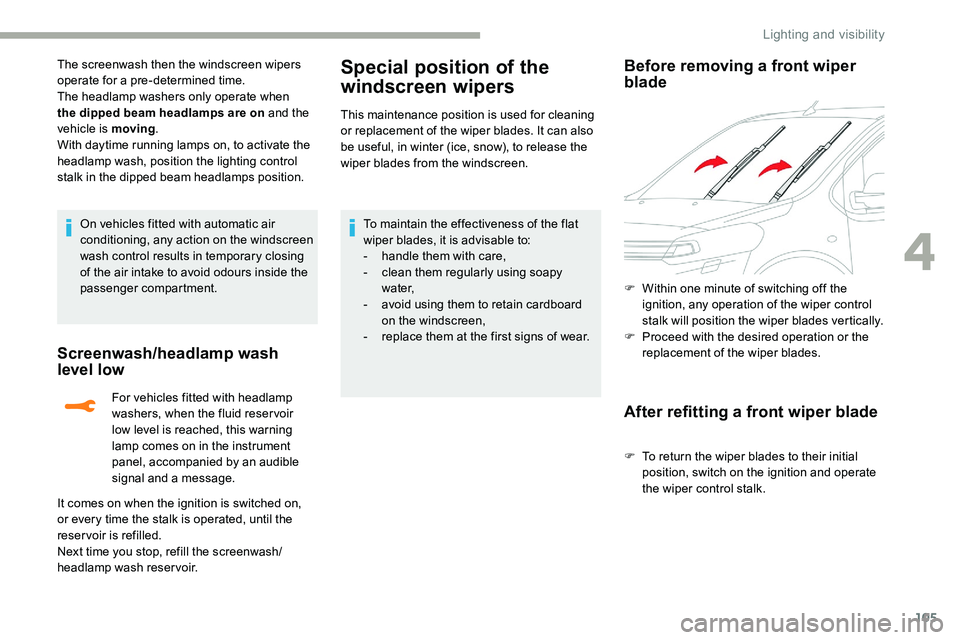
Before removing a front wiper
blade
F Within one minute of switching off the
ignition, any operation of the wiper control
stalk will position the wiper blades vertically.
F
P
roceed with the desired operation or the
replacement of the wiper blades.
After refitting a front wiper blade
F To return the wiper blades to their initial position, switch on the ignition and operate
the wiper control stalk.
4
Lighting and visibility