tow CITROEN DS3 2018 Handbook (in English)
[x] Cancel search | Manufacturer: CITROEN, Model Year: 2018, Model line: DS3, Model: CITROEN DS3 2018Pages: 248, PDF Size: 8.79 MB
Page 87 of 248
85
Selection of main lighting
mode
Turn the ring to align the desired symbol with
the marking.
Lighting off (ignition off) /
Daytime running lamps (engine running).
Automatic illumination of headlamps.
Sidelamps only.
Dipped or main beam headlamps.
Headlamp dipping
Pull the stalk towards you to switch between
dipped and main beam headlamps.
When the lighting is off or only the sidelamps
are on, the driver can directly switch on the
main beam headlamps (headlamp flash) for as
long as the lever is kept pulled.
Displays
Illumination of the corresponding indicator
lamp in the instrument panel confirms that the
lighting selected is on.
Foglamps
The instrument panel is permanently back-lit.
The instrument panel lighting therefore has no
relationship to the vehicle lamps.
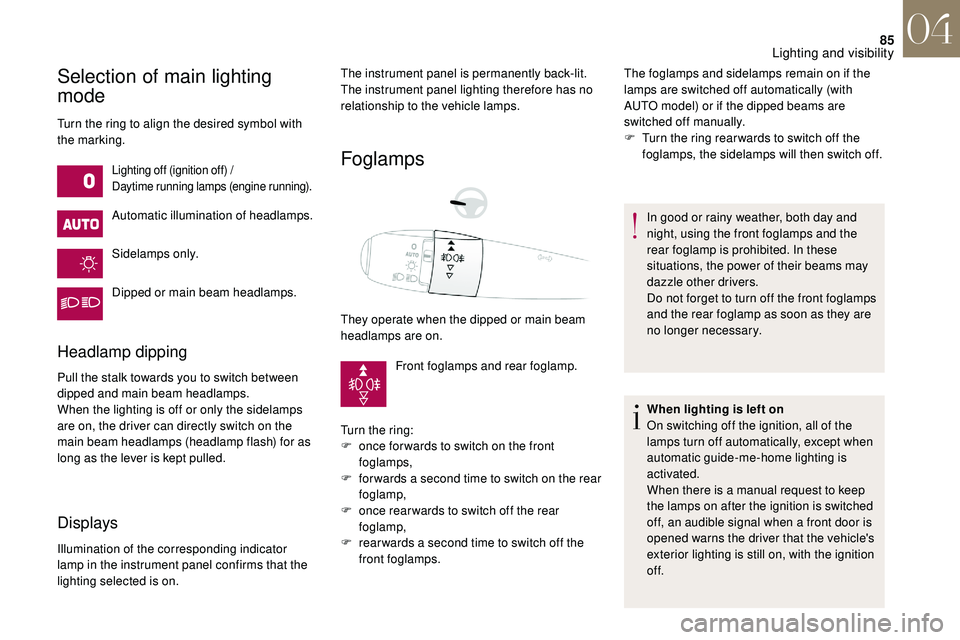
They operate when the dipped or main beam
headlamps are on.Front foglamps and rear foglamp.
Turn the ring:
F
o
nce for wards to switch on the front
foglamps,
F
f
or wards a second time to switch on the rear
foglamp,
F
o
nce rear wards to switch off the rear
foglamp,
F
r
ear wards a second time to switch off the
front foglamps. The foglamps and sidelamps remain on if the
lamps are switched off automatically (with
AUTO model) or if the dipped beams are
switched off manually.
F
T
urn the ring rear wards to switch off the
foglamps, the sidelamps will then switch off.
In good or rainy weather, both day and
night, using the front foglamps and the
rear foglamp is prohibited. In these
situations, the power of their beams may
dazzle other drivers.
Do not forget to turn off the front foglamps
and the rear foglamp as soon as they are
no longer necessary.
When lighting is left on
On switching off the ignition, all of the
lamps turn off automatically, except when
automatic guide-me-home lighting is
activated.
When there is a
manual request to keep
the lamps on after the ignition is switched
off, an audible signal when a
front door is
opened warns the driver that the vehicle's
exterior lighting is still on, with the ignition
of f.
04
Lighting and visibility
Page 91 of 248
89
Reverse gear
When reverse gear is engaged, the rear wiper
will come into operation if the windscreen
wipers are operating.
Programming
The function is activated or deactivated via the
vehicle configuration or settings menu.
This function is activated by default.
Windscreen wash
Pull the wiper stalk towards you. The
windscreen wash, then the windscreen wipers
operate for a pre-determined time.
Automatic windscreen wipers
The windscreen wipers operate automatically
once rainfall is detected (sensor behind the
rear view mirror), adapting their speed to the
intensity of the rainfall without any action on the
part of the driver.
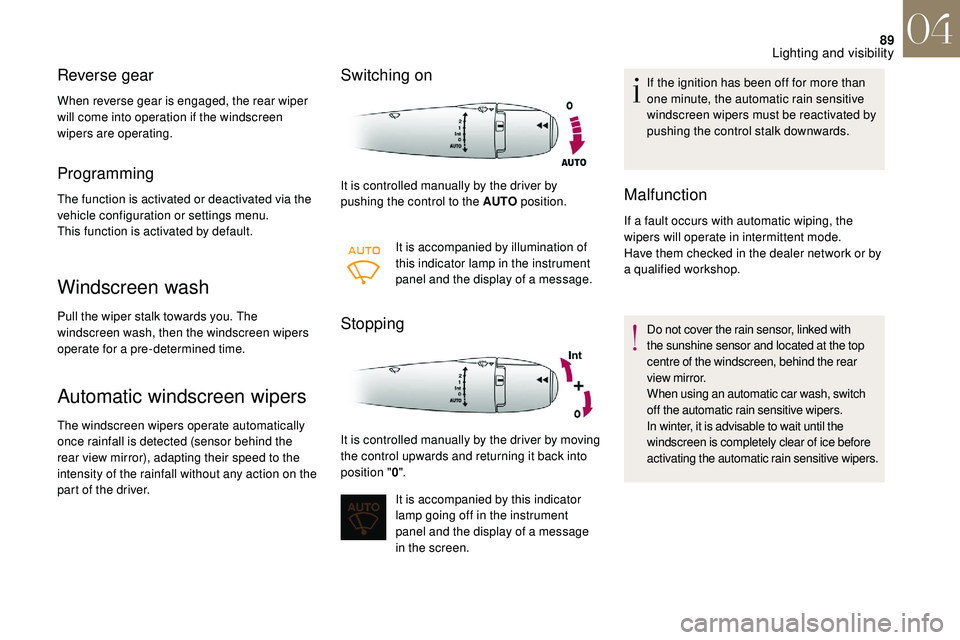
Switching on
It is controlled manually by the driver by
pushing the control to the AUTO position.
It is accompanied by illumination of
this indicator lamp in the instrument
panel and the display of a
message.
Stopping
It is controlled manually by the driver by moving
the control upwards and returning it back into
position "0".
It is accompanied by this indicator
lamp going off in the instrument
panel and the display of a
message
in the screen. If the ignition has been off for more than
one minute, the automatic rain sensitive
windscreen wipers must be reactivated by
pushing the control stalk downwards.
Malfunction
If a fault occurs with automatic wiping, the
w ipers will operate in intermittent mode.
Have them checked in the dealer network or by
a
qualified workshop.
Do not cover the rain sensor, linked with
the sunshine sensor and located at the top
centre of the windscreen, behind the rear
view mirror.
When using an automatic car wash, switch
off the automatic rain sensitive wipers.
In winter, it is advisable to wait until the
windscreen is completely clear of ice before
activating the automatic rain sensitive wipers.
04
Lighting and visibility
Page 98 of 248
96
The fault with the system does not prevent
the vehicle being driven.
Localised Assistance Call
** According to the geographic coverage of "Localised Emergency Call", "Localised
Assistance Call" and the official national
language chosen by the owner of the
vehicle.
T
he list of countries covered and of
telematic services is available from dealers
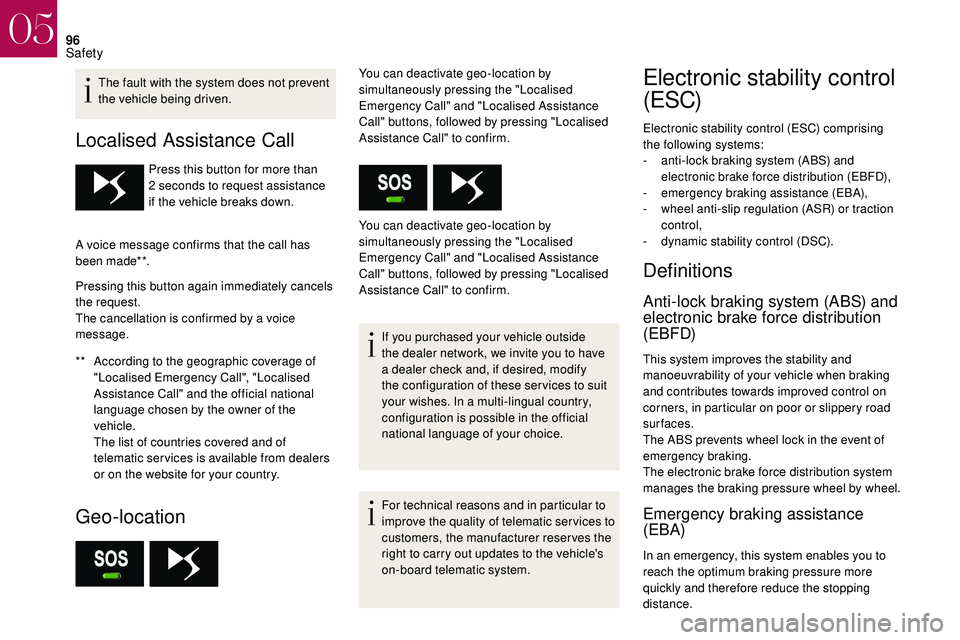
or on the website for your country. Press this button for more than
2
seconds to request assistance
if the vehicle breaks down.
A voice message confirms that the call has
been made**.
Pressing this button again immediately cancels
the request.
The cancellation is confirmed by a voice
message.
Geo-location
You can deactivate geo-location by
simultaneously pressing the "Localised
Emergency Call" and "Localised Assistance
Call" buttons, followed by pressing "Localised
Assistance Call" to confirm.
You can deactivate geo-location by
simultaneously pressing the "Localised
Emergency Call" and "Localised Assistance
Call" buttons, followed by pressing "Localised
Assistance Call" to confirm.
If you purchased your vehicle outside
the dealer network, we invite you to have
a
dealer check and, if desired, modify
the configuration of these ser vices to suit
your wishes. In a
multi-lingual country,
configuration is possible in the official
national language of your choice.
For technical reasons and in particular to
improve the quality of telematic ser vices to
customers, the manufacturer reserves the
right to carry out updates to the vehicle's
on-board telematic system.Electronic stability control
(ESC)
Electronic stability control (ESC) comprising
the following systems:
-
a
nti-lock braking system (ABS) and
electronic brake force distribution (EBFD),
-
em
ergency braking assistance (EBA),
-
w
heel anti-slip regulation (ASR) or traction
control,
-
d
ynamic stability control (DSC).
Definitions
Anti-lock braking system (ABS) and
electronic brake force distribution
(EBFD)
This system improves the stability and
manoeuvrability of your vehicle when braking
and contributes towards improved control on
corners, in particular on poor or slippery road
surfaces.
The ABS prevents wheel lock in the event of
emergency braking.
The electronic brake force distribution system
manages the braking pressure wheel by wheel.
Emergency braking assistance
(EBA)
In an emergency, this system enables you to
reach the optimum braking pressure more
quickly and therefore reduce the stopping
distance.
05
Safety
Page 102 of 248
100
Advice
The driver must ensure that the passengers
use the seat belts correctly and that they are
all fastened before driving.
Wherever you are seated in the vehicle,
always fasten your seat belt, even for short
journeys.
Do not interchange the seat belt buckles as
they will not completely fulfil their role.
The seat belts are equipped with an inertia
reel which allows the strap length to adjust
automatically to your shape. The seat belt is
stowed automatically when not in use.
Before and after use, ensure that the seat belt
is reeled in correctly.
The lower part of the strap must be positioned
as low as possible on the pelvis.
The upper part must be positioned in the
hollow of the shoulder.
The inertia reels have an automatic blocking
device at the time of a collision, during
sudden braking or if the vehicle turns over.
You can release the device by pulling the
strap firmly and then releasing it so that it
reels in slightly. In order to be effective, a seat belt must:
-
b e tightened as close to the body as
possible,
-
b
e pulled in front of you with a smooth
movement, checking that it does not twist,
-
b
e used to restrain only one person,
-
n
ot show any signs of cuts or fraying,
-
n
ot be converted or modified to avoid
affecting its performance. Recommendations for children
Use a
suitable child seat if the passenger is
less than 12
years old or shorter than one and
a
half metres.
Never use the same seat belt to secure more
than one person.
Never allow a
child to travel on your lap.
For more information on Child seats , refer to
the corresponding section.
In accordance with current safety regulations,
for all repairs on your vehicle's seat belts, go
to a
qualified workshop with the skills and
equipment needed, which the dealer network
is able to provide.
Have your seat belts checked regularly in
the dealer network or a
qualified workshop,
particularly if the straps show signs of
damage.
Clean the seat belt straps with soapy water or
a
textile cleaning product, sold in the dealer
network.
After folding or moving a
seat or a rear bench
seat, ensure that the seat belt is positioned
and reeled in correctly. In the event of an impact
Depending on the nature and seriousness
of the impact
, the pyrotechnic device may
be deployed before and independent of the
airbags. Deployment of the pre-tensioners
is accompanied by a
slight discharge of
harmless smoke and a
noise, due to the
activation of the pyrotechnic cartridge
incorporated in the system.
In all cases, the airbag warning lamp comes
on.
Following an impact, have the seat belt
system checked, and if necessary replaced,
in the dealer network or by a
qualified
workshop.
05
Safety
Page 103 of 248
101
Airbags
General information
This system contributes towards improving the
safety of passengers (with the exception of the
rear centre passenger) in the event of violent
collisions. The airbags supplement the action
of the seat belts fitted with force limiters (all
except the centre rear passenger belt).
If a collision occurs, the electronic detectors
record and analyse the front and side impacts
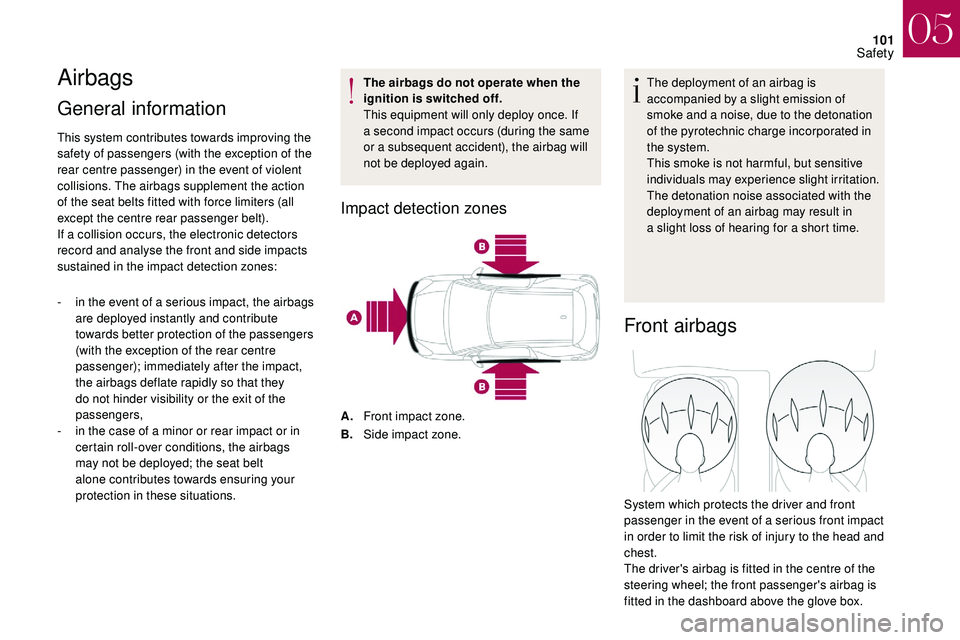
sustained in the impact detection zones:
-
i
n the event of a serious impact, the airbags
are deployed instantly and contribute
towards better protection of the passengers
(with the exception of the rear centre
passenger); immediately after the impact,
the airbags deflate rapidly so that they
do not hinder visibility or the exit of the
passengers,
-
i
n the case of a minor or rear impact or in
certain roll-over conditions, the airbags
may not be deployed; the seat belt
alone contributes towards ensuring your
protection in these situations. The airbags do not operate when the
ignition is switched off.
This equipment will only deploy once. If
a
second impact occurs (during the same
or a subsequent accident), the airbag will
not be deployed again.
Impact detection zones
A. Front impact zone.
B. Side impact zone. The deployment of an airbag is
accompanied by a
slight emission of
smoke and a noise, due to the detonation
of the pyrotechnic charge incorporated in
the system.
This smoke is not harmful, but sensitive
individuals may experience slight irritation.
The detonation noise associated with the
deployment of an airbag may result in
a slight loss of hearing for a short time.
Front airbags
System which protects the driver and front
passenger in the event of a
serious front impact
in order to limit the risk of injury to the head and
chest.
The driver's airbag is fitted in the centre of the
steering wheel; the front passenger's airbag is
fitted in the dashboard above the glove box.
05
Safety
Page 104 of 248
102
Deployment
The airbags are deployed, except the
passenger's front airbag if it has been
deactivated, in the event of a serious front
impact to all or part of the front impact zone A ,
in the longitudinal centreline of the vehicle on
a
horizontal plane and directed from the front to
the rear of the vehicle.
The front airbag inflates between the thorax and
head of the front occupant of the vehicle and the
dashboard, to cushion their forward movement.
Malfunction
If this warning lamp comes on in the
instrument panel, you must contact
the dealer network or a
qualified
workshop to have the system
checked. The airbags may no longer
be deployed in the event of a
serious
impact.
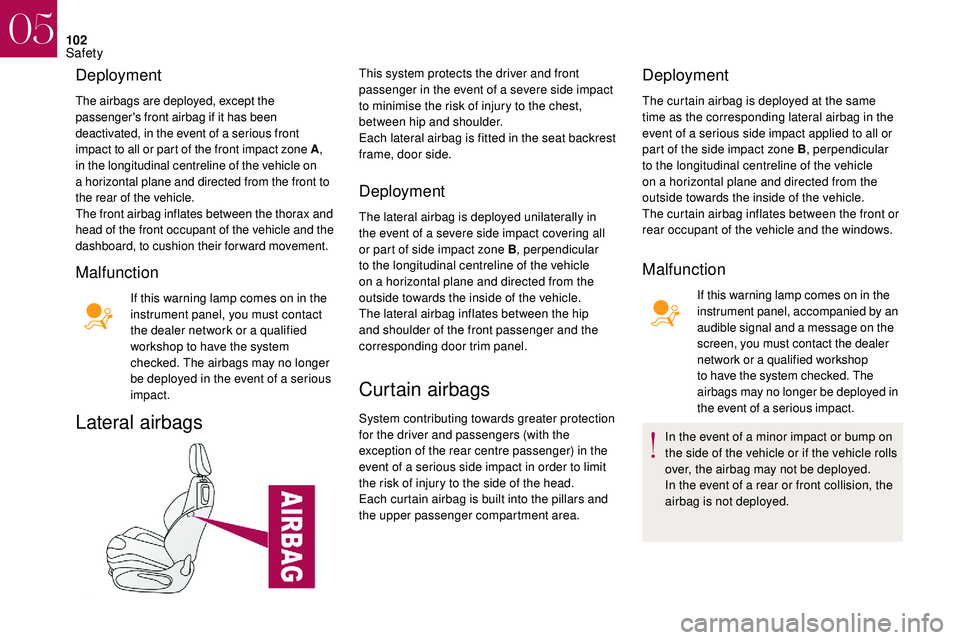
Lateral airbags
This system protects the driver and front
passenger in the event of a severe side impact
to minimise the risk of injury to the chest,
between hip and shoulder.
Each lateral airbag is fitted in the seat backrest
frame, door side.
Deployment
The lateral airbag is deployed unilaterally in
the event of a severe side impact covering all
or part of side impact zone B , perpendicular
to the longitudinal centreline of the vehicle
on a
horizontal plane and directed from the
outside towards the inside of the vehicle.
The lateral airbag inflates between the hip
and shoulder of the front passenger and the
corresponding door trim panel.
Curtain airbags
System contributing towards greater protection
for the driver and passengers (with the
exception of the rear centre passenger) in the
event of a
serious side impact in order to limit
the risk of injury to the side of the head.
Each curtain airbag is built into the pillars and
the upper passenger compartment area.
Deployment
The curtain airbag is deployed at the same
time as the corresponding lateral airbag in the
event of a
serious side impact applied to all or
part of the side impact zone B , perpendicular
to the longitudinal centreline of the vehicle
on a
horizontal plane and directed from the
outside towards the inside of the vehicle.
The curtain airbag inflates between the front or
rear occupant of the vehicle and the windows.
Malfunction
If this warning lamp comes on in the
instrument panel, accompanied by an
audible signal and a
message on the
screen, you must contact the dealer
network or a
qualified workshop
to have the system checked. The
airbags may no longer be deployed in
the event of a
serious impact.
In the event of a
minor impact or bump on
the side of the vehicle or if the vehicle rolls
over, the airbag may not be deployed.
In the event of a
rear or front collision, the
airbag is not deployed.
05
Safety
Page 113 of 248
111
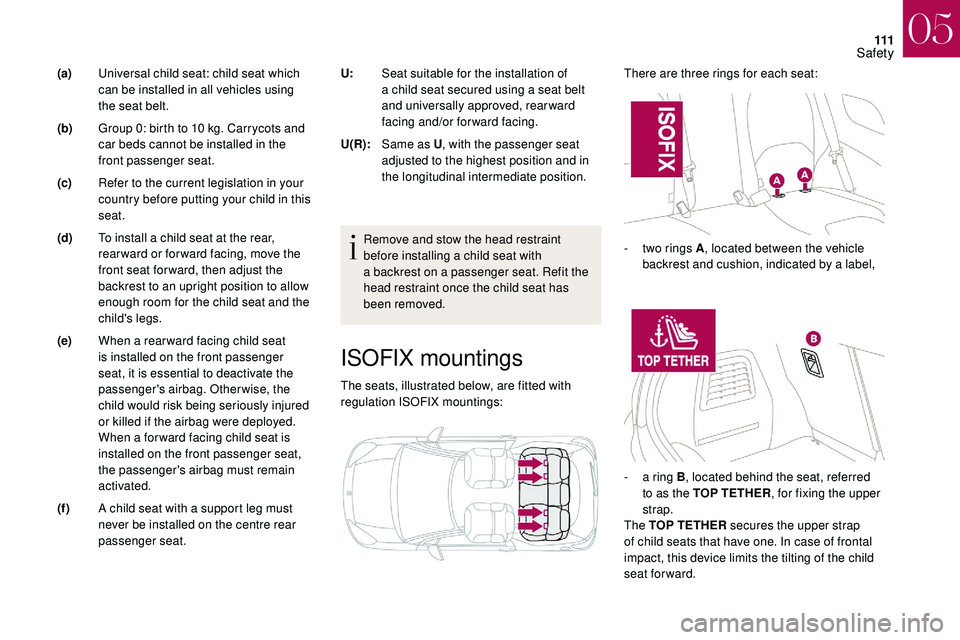
ISOFIX mountings
The seats, illustrated below, are fitted with
regulation ISOFIX mountings:There are three rings for each seat:
Remove and stow the head restraint
before installing a child seat with
a backrest on a passenger seat. Refit the
head restraint once the child seat has
been removed.
(a)
Universal child seat: child seat which
can be installed in all vehicles using
the seat belt.
(b) Group 0: birth to 10
kg. Carrycots and
car beds cannot be installed in the
front passenger seat.
(c) Refer to the current legislation in your
country before putting your child in this
seat.
(d) To install a
child seat at the rear,
rear ward or for ward facing, move the
front seat for ward, then adjust the
backrest to an upright position to allow
enough room for the child seat and the
child's legs.
(e) When a
rear ward facing child seat
is installed on the front passenger
seat, it is essential to deactivate the
passenger's airbag. Otherwise, the
child would risk being seriously injured
or killed if the airbag were deployed.
When a
for ward facing child seat is
installed on the front passenger seat,
the passenger's airbag must remain
activated.
(f ) A child seat with a
support leg must
never be installed on the centre rear
passenger seat. U:
Seat suitable for the installation of
a child seat secured using a seat belt
and universally approved, rearward
facing and/or forward facing.
U(R): Same as U , with the passenger seat
adjusted to the highest position and in
the longitudinal intermediate position.
-
t
wo rings A
, located between the vehicle
backrest and cushion, indicated by a label,
-
a r
ing B, located behind the seat, referred
to as the TOP TETHER , for fixing the upper
strap.
The TOP TETHER secures the upper strap
of child seats that have one. In case of frontal
impact, this device limits the tilting of the child
seat forward.
05
Safety
Page 114 of 248
11 2
This ISOFIX mounting system provides fast,
reliable and safe fitting of the child seat in your
vehicle.
The ISOFIX child seats are fitted with two
latches which are secured on the two rings A.
Some seats also have an upper strap , which is
attached to ring B .
To secure the child seat to the Top Tether:
-
r
emove and stow the head restraint before
installing the child seat on the seat (refit it
once the child seat has been removed),
-
p
ass the strap of the child seat behind
the top of the backrest, centring the holes
between the head restraint rods,
-
f
ix the hook of the upper strap to ring B ,
-
t
ighten the upper strap.
When installing an ISOFIX child seat on the
right-hand rear seat, before securing the seat,
first move the centre rear seat belt towards the
middle of the vehicle, so as to not inter fere with
the operation of the seat belt.
For information on installing ISOFIX child seats
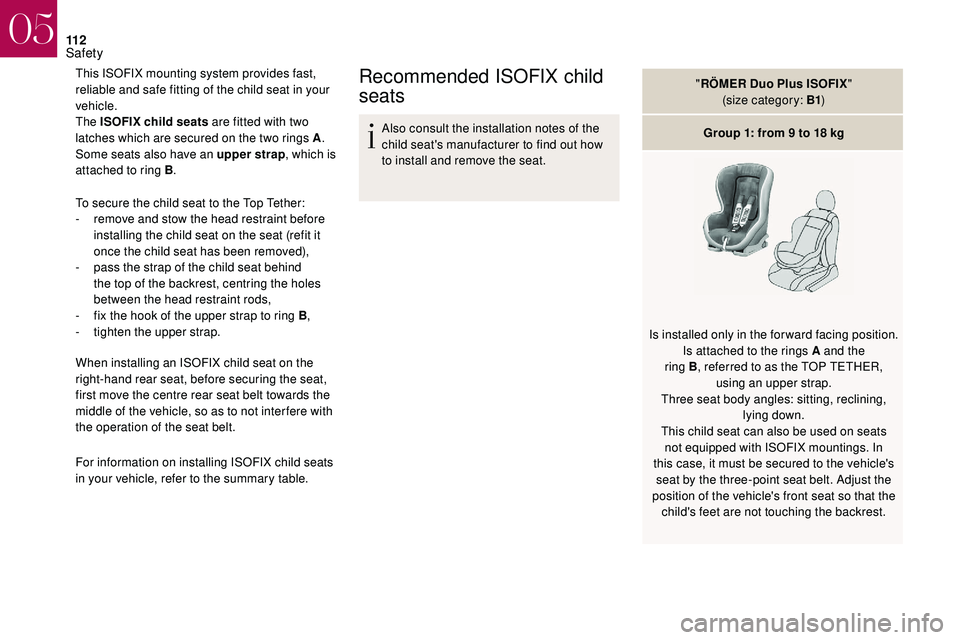
in your vehicle, refer to the summary table.Recommended ISOFIX child
seats
Also consult the installation notes of the
child seat's manufacturer to find out how
to install and remove the seat. "
RÖMER Duo Plus ISOFIX "
(size category: B1 )
Group 1: from 9 to 18 kg
Is installed only in the forward facing position. Is attached to the rings A and the
ring B , referred to as the TOP TETHER,
using an upper strap.
Three seat body angles: sitting, reclining, lying down.
This child seat can also be used on seats not equipped with ISOFIX mountings. In
this case, it must be secured to the vehicle's seat by the three-point seat belt. Adjust the
position of the vehicle's front seat so that the child's feet are not touching the backrest.
05
Safety
Page 115 of 248
11 3
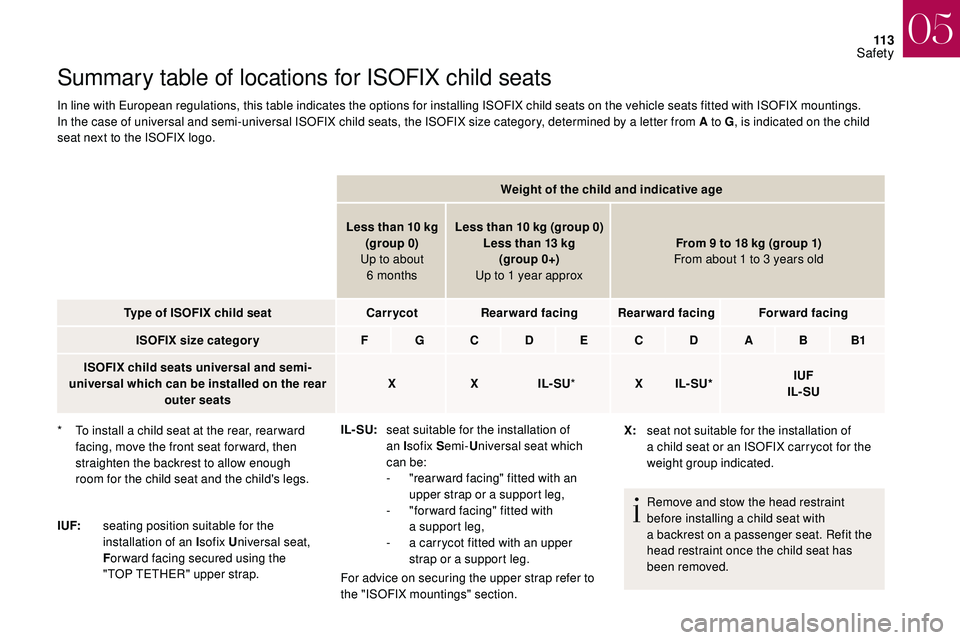
Summary table of locations for ISOFIX child seats
In line with European regulations, this table indicates the options for installing ISOFIX child seats on the vehicle seats fitted with ISOFIX mountings.
In the case of universal and semi-universal ISOFIX child seats, the ISOFIX size category, determined by a letter from A to G, is indicated on the child
seat next to the ISOFIX logo.
Weight of the child and indicative age
Less than 10
kg
(group 0)
Up to about 6
monthsLess than 10
kg (group 0)
Less than 13
kg
(group 0+)
Up to 1
year approxFrom 9
to 18 kg (group 1)
From about 1
to 3 years old
Type of ISOFIX child seat Carr ycotRearward facing Rearward facing Forward facing
ISOFIX size categor y F G C D E C D A B B1
ISOFIX child seats universal and semi-
universal which can be installed on the rear outer seats X
XIL- SU* XIL- SU* IUF
IL- SU
IL- SU: seat suitable for the installation of
an Isofix S emi-Universal seat which
can be:
-
"
rear ward facing" fitted with an
upper strap or a
support leg,
-
"
for ward facing" fitted with
a
support leg,
-
a c
arrycot fitted with an upper
strap or a
support leg.
For advice on securing the upper strap refer to
the "ISOFIX mountings" section. X:
seat not suitable for the installation of
a
child seat or an ISOFIX carrycot for the
weight group indicated.
Remove and stow the head restraint
before installing a
child seat with
a
backrest on a passenger seat. Refit the
head restraint once the child seat has
been removed.
*
T
o install a child seat at the rear, rear ward
facing, move the front seat for ward, then
straighten the backrest to allow enough
room for the child seat and the child's legs.
I UF: seating position suitable for the
installation of an I sofix Universal seat,
F or ward facing secured using the
"TOP TETHER" upper strap.
05
Safety
Page 119 of 248
11 7
In case of towing
Driving with a trailer places greater
d emands on the towing vehicle and
requires extra care from the driver.
Distribution of loads
F Distribute the load in the trailer so that the heaviest items are as close as possible to
the axle and the nose weight approaches
the maximum permitted without exceeding
it.
Air density decreases with altitude, thus
reducing engine performance. The maximum
towed load must be reduced by 10% for every
1,000
metres of altitude.
Please respect the maximum towable
weights.
Side wind
F Take into account the increased sensitivity to wind.
Cooling
Towing a trailer on a slope increases the
t emperature of the coolant.
As the fan is electrically controlled, its cooling
capacity is not dependent on the engine speed.
F
T
o lower the engine speed, reduce your
speed.
The maximum towable load on an incline
depends on the gradient and the exterior
temperature.
In all cases, keep a
check on the coolant
temperature.
F
I
f this warning lamp and the
STOP warning lamp come on,
stop the vehicle and switch off
the engine as soon as possible.
New vehicle
Do not pull a trailer before having driven at least
approximately 600
miles (1,000
kilometres).
Braking
Towing a trailer increases the braking distance.
T o avoid overheating of the brakes, the use of
engine braking is recommended.
Ty r e s
F Check the tyre pressures of the towing vehicle and of the trailer, observing the
recommended pressures.
Lighting
F Check the electrical lighting and signalling on the trailer and the headlamp beam height
of your vehicle.
For more information on Headlamp
beam height adjustment , refer to the
corresponding section.
The rear parking sensors will be
deactivated automatically to avoid
the audible signal if a
genuine
DS
AUTOMOBILES towbar is used.
If the exterior temperature is high, it is
recommended that the engine be allowed
to idle for 1
to 2 minutes after the vehicle
comes to a
stop, to facilitate its cooling.
06
Driving