ECO mode CITROEN DS3 2018 Handbook (in English)
[x] Cancel search | Manufacturer: CITROEN, Model Year: 2018, Model line: DS3, Model: CITROEN DS3 2018Pages: 248, PDF Size: 8.79 MB
Page 5 of 248
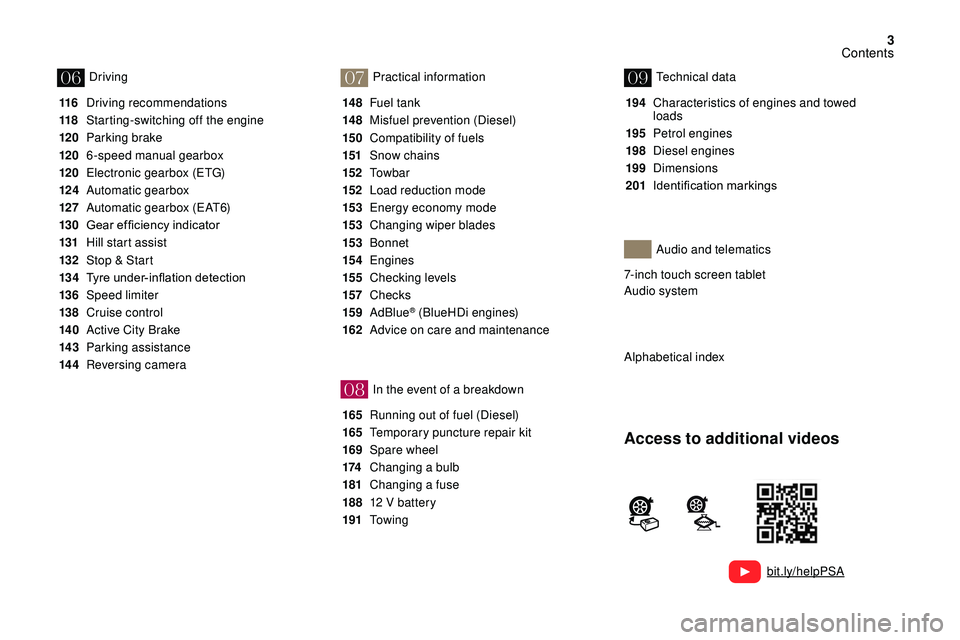
3
07
08
0609
bit.ly/helpPSA
116 Driving recommendations
118
S
tarting-switching off the engine
120
P
arking brake
120
6
-speed manual gearbox
120
E
lectronic gearbox (ETG)
124
Aut
omatic gearbox
127
A
utomatic gearbox (EAT6)
130 Gear
ef ficiency indicator
131
H
ill start assist
132
St
op & Start
13 4 Tyre
under-inflation detection
136
Spe
ed limiter
138
C
ruise control
14 0
A
ctive City Brake
14 3
P
arking assistance
14 4
R
eversing camera 14 8 Fu
el tank
14 8
M
isfuel prevention (Diesel)
15 0
C
ompatibility of fuels
151
S
now chains
152
To w b a r
152
L
oad reduction mode
15 3
E
nergy economy mode
15 3
C
hanging wiper blades
15 3
Bonnet
15 4
Engines
155
Ch
ecking levels
157
C
hecks
15 9
Ad
Blue
® (BlueHDi engines)
162
A
dvice on care and maintenance
165
R
unning out of fuel (Diesel)
165
T
emporary puncture repair kit
169
S
pare wheel
174
C
hanging a
bulb
181
C
hanging a
fuse
188
1
2
V battery
191
To w i n g 194
C
haracteristics of engines and towed
loads
195
Pe
trol engines
198
D
iesel engines
199
Dimensions
201 Identification
ma
rkings
Driving
Practical information
In the event of a
breakdown Technical data
Alphabetical index Audio and telematics
Access to additional videos
7-inch touch screen tablet
Audio system
Contents
Page 8 of 248

6
Eco-driving
Eco-driving is a range of everyday practices
t hat allow the motorist to optimise their fuel
consumption and CO
2 emissions.
Optimise the use of your gearbox
With a manual gearbox, move off gently
an d change up without waiting. During
acceleration, change up early.
With an automatic gearbox, give preference
to automatic mode and avoid pressing the
accelerator pedal heavily or suddenly.
The gear efficiency indicator invites you to
engage the most suitable gear: as soon as the
indication is displayed in the instrument panel,
follow it straight away.
For vehicles fitted with an automatic gearbox,
this indicator appears only in manual mode.
Drive smoothly
Maintain a safe distance between vehicles,
u se engine braking rather than the
brake pedal, and press the accelerator
progressively. These practices contribute
towards a
reduction in fuel consumption and
CO
2 emissions and also help reduce the
b
ackground traffic noise.
If your vehicle has cruise control, make use of
the system at speeds above 25
mph (40 km/h)
when the traffic is flowing well.
Control the use of your electrical
equipment
Switch off the demisting and defrosting
controls, if these are not automatically
managed.
Switch off the heated seat as soon as
possible.
Switch off the headlamps and front foglamps
when the ambient light level does not require
their use.
Avoid running the engine before moving off,
particularly in winter; your vehicle will warm up
much faster while driving.
Before moving off, if the passenger
compartment is too warm, ventilate it by
opening the windows and air vents before
using the air conditioning.
Above 30
mph (50
km/h), close the windows
and leave the air vents open.
Consider using equipment that can help
keep the temperature in the passenger
compartment down (sunroof blind and window
blinds, etc.).
Unless it has automatic regulation, switch off
the air conditioning as soon as the desired
temperature has been reached. As a
passenger, if you avoid connecting your
multimedia devices (film, music, video game,
etc.), you will contribute towards limiting the
consumption of electrical energy, and so of
fuel.
Disconnect your portable devices before
leaving the vehicle.
Eco-driving
Page 24 of 248
22
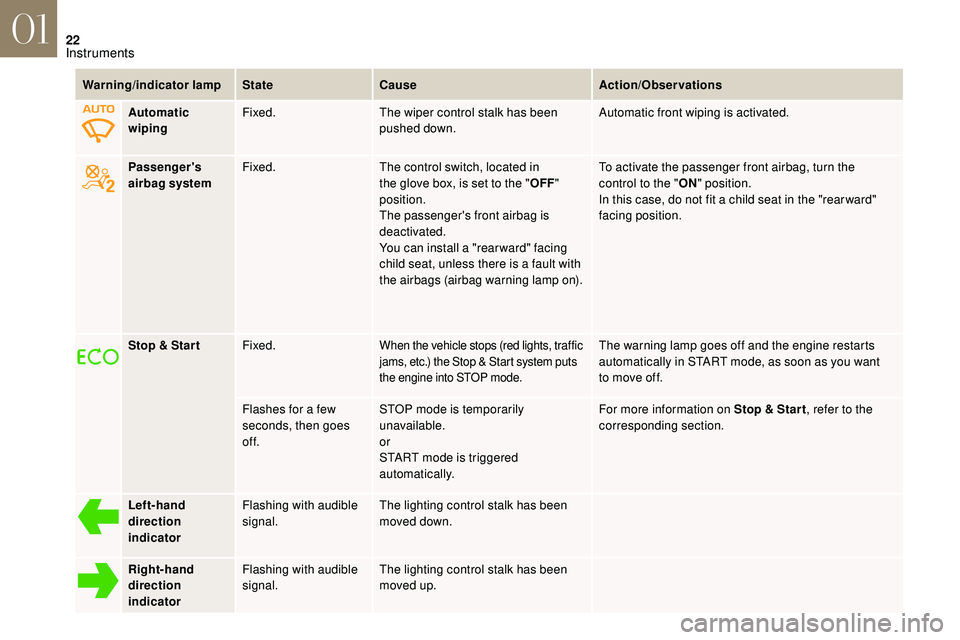
Warning/indicator lampStateCause Action/Observations
Passenger's
airbag system Fixed.
The control switch, located in
the glove box, is set to the " OFF"
position.
The passenger's front airbag is
deactivated.
You can install a "rearward" facing
child seat, unless there is a
fault with
the airbags (airbag warning lamp on). To activate the passenger front airbag, turn the
control to the "
ON" position.
In this case, do not fit a
child seat in the "rear ward"
facing position.
Stop & Star t Fixed.
When the vehicle stops (red lights, traffic
jams, etc.) the Stop & Start system puts
the engine into STOP mode.The warning lamp goes off and the engine restarts
automatically in START mode, as soon as you want
to move off.
Flashes for a
few
seconds, then goes
of f. STOP mode is temporarily
unavailable.
or
START mode is triggered
automatically. For more information on Stop & Star t
, refer to the
corresponding section.
Left-hand
direction
indicator Flashing with audible
signal.
The lighting control stalk has been
moved down.
Right-hand
direction
indicator Flashing with audible
signal.
The lighting control stalk has been
moved up.
Automatic
wiping
Fixed.
The wiper control stalk has been
pushed down. Automatic front wiping is activated.
01
Instruments
Page 42 of 248
40
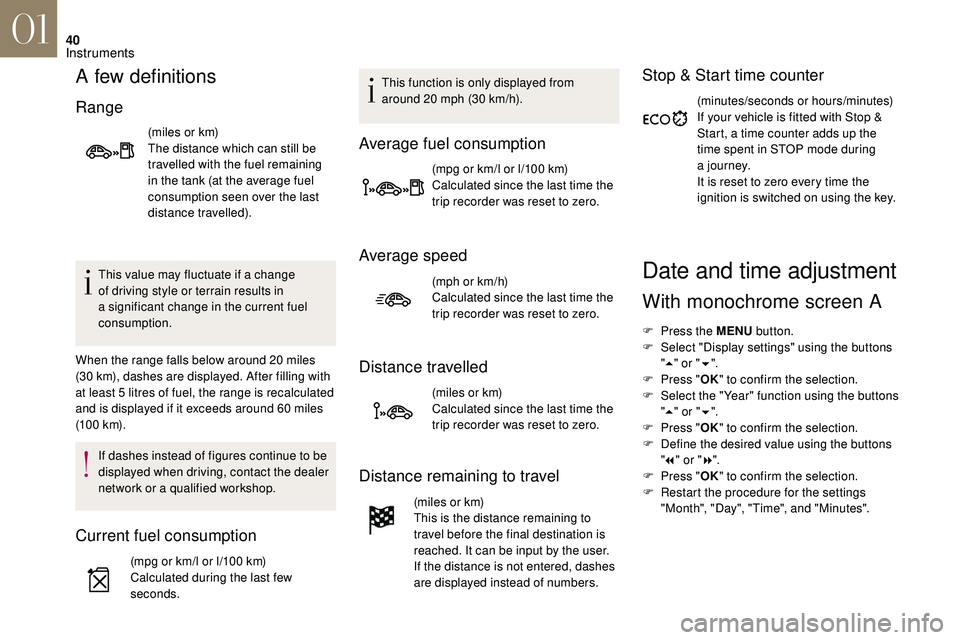
A few definitions
Range
(miles or km)
The distance which can still be
travelled with the fuel remaining
in the tank (at the average fuel
consumption seen over the last
distance travelled).
This value may fluctuate if a
change
of driving style or terrain results in
a
significant change in the current fuel
consumption.
When the range falls below around 20
miles
(30
km), dashes are displayed. After filling with
at least 5
litres of fuel, the range is recalculated
and is displayed if it exceeds around 60
miles
(10 0
k m).
If dashes instead of figures continue to be
displayed when driving, contact the dealer
network or a
qualified workshop.
Current fuel consumption
(mpg or km/l or l/100 km)
C alculated during the last few
seconds. This function is only displayed from
around 20 mph (30 km/h).
Average fuel consumption
(mpg or km/l or l/100 km)
C alculated since the last time the
trip recorder was reset to zero.
Average speed
(mph or km/h)
Calculated since the last time the
trip recorder was reset to zero.
Distance travelled
(miles or km)
Calculated since the last time the
trip recorder was reset to zero.
Distance remaining to travel
(miles or km)
This is the distance remaining to
travel before the final destination is
reached. It can be input by the user.
If the distance is not entered, dashes
are displayed instead of numbers.
Stop & Start time counter
(minutes/seconds or hours/minutes)
If your vehicle is fitted with Stop &
Start, a time counter adds up the
time spent in STOP mode during
a
j o u r n ey.
It is reset to zero every time the
ignition is switched on using the key.
Date and time adjustment
With monochrome screen A
F Press the MENU button.
F S elect "Display settings" using the buttons
" 5 " or " 6".
F
P
ress " OK" to confirm the selection.
F
S
elect the "Year" function using the buttons
" 5 " or " 6".
F
P
ress " OK" to confirm the selection.
F
D
efine the desired value using the buttons
" 7 " or " 8".
F
P
ress " OK" to confirm the selection.
F
R
estart the procedure for the settings
"Month", "Day", "Time", and "Minutes".
01
Instruments
Page 50 of 248
48
The electric window controls remain
active for approximately 45 seconds after
the ignition is turned off, or until a
door is
opened. During this period of 45
seconds,
if you open a
door while operating
a
window, the window stops. Any new
electric window command will be ignored
until the ignition is switched back on.
Electric passenger window
F Press or pull the control. The window stops as soon as the
switch is released.
Sequential electric driver
window
There are two options:
-
man
ual mode
F
P
ress or pull the control gently, without
exceeding the point of resistance. The
window stops as soon as the control is
released.
Safety anti-pinch
The sequential electrical window on the driver
side has an anti-pinch function.
When the window rises and meets an obstacle,
it stops and partially lowers again.
In the event of unwanted opening of the
window on closing (for example, when
f re ezing):
F
p
ress the control beyond the point of
resistance and release it; the window
opens fully,
F
t
hen immediately pull the control
without passing the point of resistance
until the window is fully closed,
F
c
ontinue to hold the control for
approximately one second after the
window has closed.
The safety anti-pinch function is not
operational during these operations.
Reinitialisation
If a fault occurs, you must reinitialise the
el ectric window operation:
F
r
elease the control and pull it again until the
window closes fully,
F
c
ontinue to hold the switch for
approximately one second after the window
has closed,
F
p
ress the control to lower the window
automatically to the low position.
The safety anti-pinch function is not
operational during these operations.
-
a
utomatic mode
F
P
ress or pull the switch fully, beyond the
point of resistance. The window opens
or closes completely when the switch is
released.
F
P
ressing the switch again stops the
movement of the window.
Always remove the key from the ignition
when leaving the vehicle, even for a
short
time.
In the event of contact during operation
of the windows, you must reverse the
movement of the window. To do this, press
the switch concerned.
When the driver operates the passenger
electric window switch, they should ensure
that no-one is preventing correct closing
of the window.
Be particularly aware of children when
operating the windows.
02
Access
Page 58 of 248
56
General operation
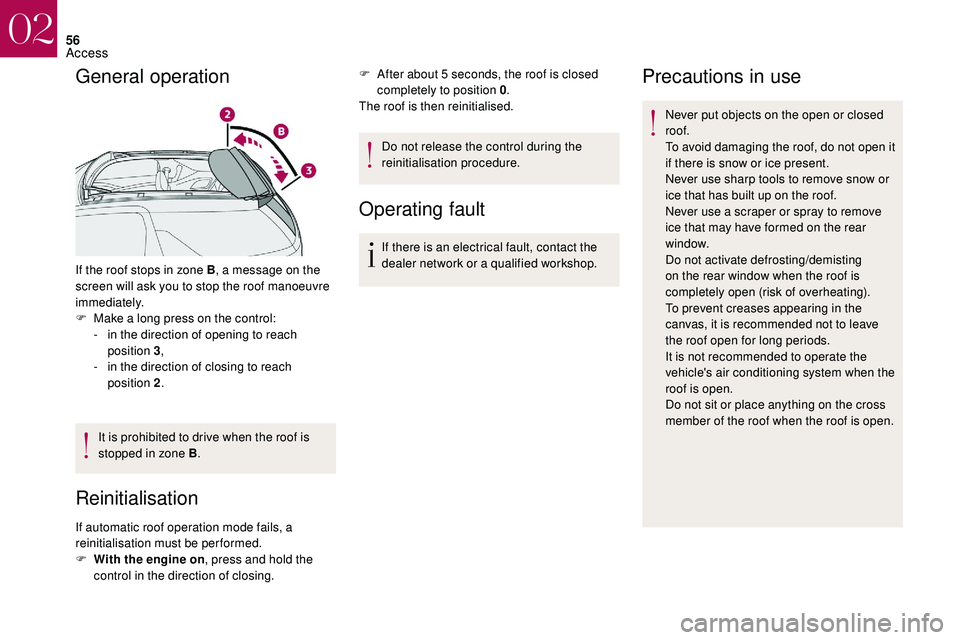
If the roof stops in zone B, a message on the
screen will ask you to stop the roof manoeuvre
immediately.
F
M
ake a long press on the control:
-
i
n the direction of opening to reach
position 3 ,
-
i
n the direction of closing to reach
position 2 .
It is prohibited to drive when the roof is
stopped in zone B .
Reinitialisation
If automatic roof operation mode fails, a
reinitialisation must be performed.
F
W
ith the engine on, press and hold the
control in the direction of closing. F
A
fter about 5 seconds, the roof is closed
completely to position 0 .
The roof is then reinitialised.
Do not release the control during the
reinitialisation procedure.
Operating fault
If there is an electrical fault, contact the
dealer network or a qualified workshop.
Precautions in use
Never put objects on the open or closed
roof.
To avoid damaging the roof, do not open it
if there is snow or ice present.
Never use sharp tools to remove snow or
ice that has built up on the roof.
Never use a
scraper or spray to remove
ice that may have formed on the rear
window.
Do not activate defrosting/demisting
on the rear window when the roof is
completely open (risk of overheating).
To prevent creases appearing in the
canvas, it is recommended not to leave
the roof open for long periods.
It is not recommended to operate the
vehicle's air conditioning system when the
roof is open.
Do not sit or place anything on the cross
member of the roof when the roof is open.
02
Access
Page 74 of 248
72
Footwells.
Central and side air vents.The air distribution can be
modulated by placing the
knob at an intermediate
position.
Air intake/Air recirculation
For more information on Recirculation of
interior air , refer to the corresponding section.
Automatic air conditioning
The air conditioning system operates with the
engine running, as well as in STOP mode of
Stop & Start.
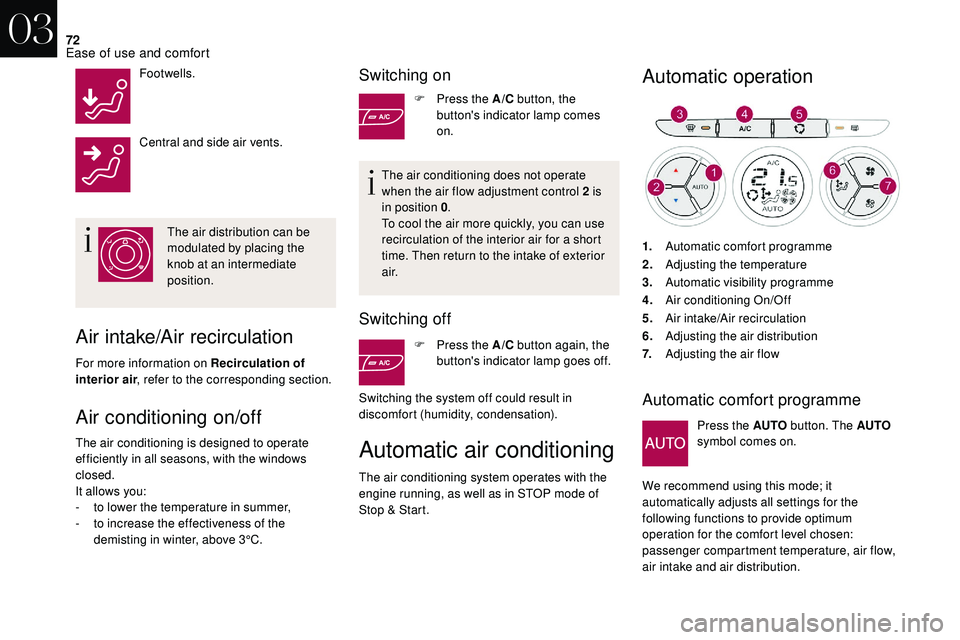
Automatic operation
1.Automatic comfort programme
2. Adjusting the temperature
3. Automatic visibility programme
4. Air conditioning On/Off
5. Air intake/Air recirculation
6. Adjusting the air distribution
7. Adjusting the air flow
Automatic comfort programme
Press the AUTO button. The AUTO
symbol comes on.
We recommend using this mode; it
automatically adjusts all settings for the
following functions to provide optimum
operation for the comfort level chosen:
passenger compartment temperature, air flow,
air intake and air distribution.Air conditioning on/off
The air conditioning is designed to operate
efficiently in all seasons, with the windows
closed.
It allows you:
-
t
o lower the temperature in summer,
-
t
o increase the effectiveness of the
demisting in winter, above 3°C.
Switching on
F Press the A/C button, the
button's indicator lamp comes
on.
The air conditioning does not operate
when the air flow adjustment control 2
is
in position 0 .
To cool the air more quickly, you can use
recirculation of the interior air for a
short
time. Then return to the intake of exterior
a i r.
Switching off
F Press the A/C button again, the
button's indicator lamp goes off.
Switching the system off could result in
discomfort (humidity, condensation).
03
Ease of use and comfort
Page 79 of 248
77
Courtesy lamp
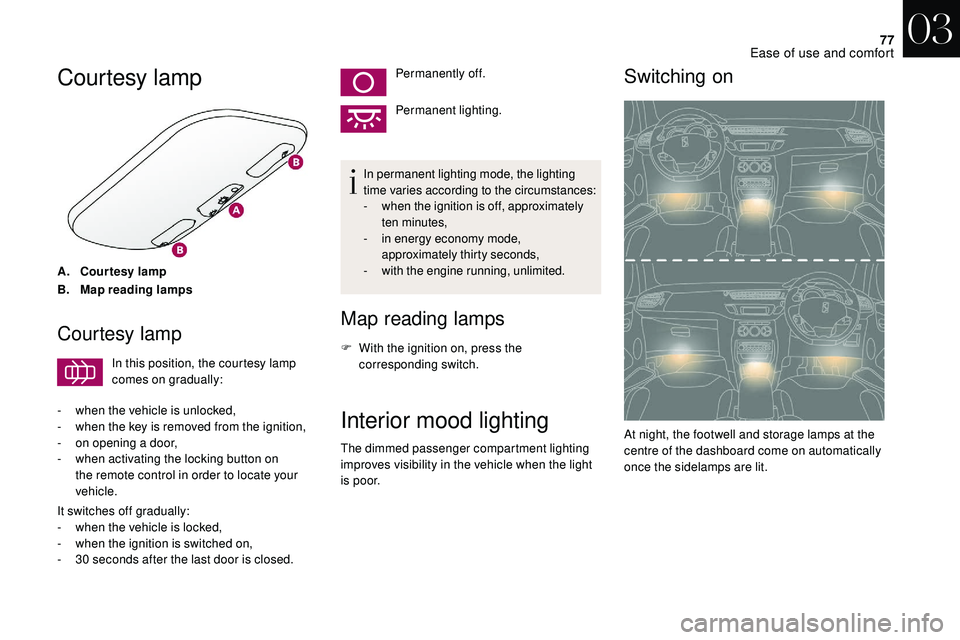
A.Courtesy lamp
B. Map reading lamps
Courtesy lamp
In this position, the courtesy lamp
comes on gradually:
-
w
hen the vehicle is unlocked,
-
w
hen the key is removed from the ignition,
-
o
n opening a door,
-
w
hen activating the locking button on
the remote control in order to locate your
vehicle.
It switches off gradually:
-
w
hen the vehicle is locked,
-
w
hen the ignition is switched on,
-
3
0
seconds after the last door is closed. Permanently off.
Permanent lighting.
In permanent lighting mode, the lighting
time varies according to the circumstances:
-
w
hen the ignition is off, approximately
ten minutes,
-
i
n energy economy mode,
approximately thirty seconds,
-
w
ith the engine running, unlimited.
Map reading lamps
F With the ignition on, press the
corresponding switch.
Interior mood lighting
The dimmed passenger compartment lighting
improves visibility in the vehicle when the light
i s p o o r.
Switching on
At night, the footwell and storage lamps at the
centre of the dashboard come on automatically
once the sidelamps are lit.
03
Ease of use and comfort
Page 84 of 248
82
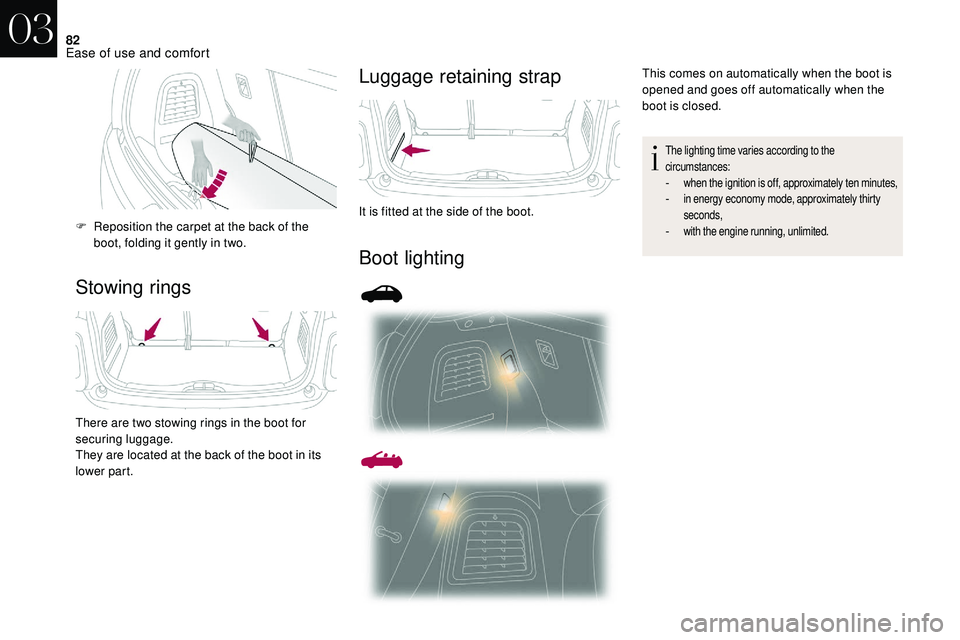
Stowing ringsLuggage retaining strap
Boot lighting
F Reposition the carpet at the back of the
boot, folding it gently in two.
There are two stowing rings in the boot for
securing luggage.
They are located at the back of the boot in its
lower part. It is fitted at the side of the boot.
This comes on automatically when the boot is
opened and goes off automatically when the
boot is closed.
The lighting time varies according to the
circumstances:
- when the ignition is off, approximately ten minutes,- in energy economy mode, approximately thirty
seconds,
- with the engine running, unlimited.
03
Ease of use and comfort
Page 87 of 248
85
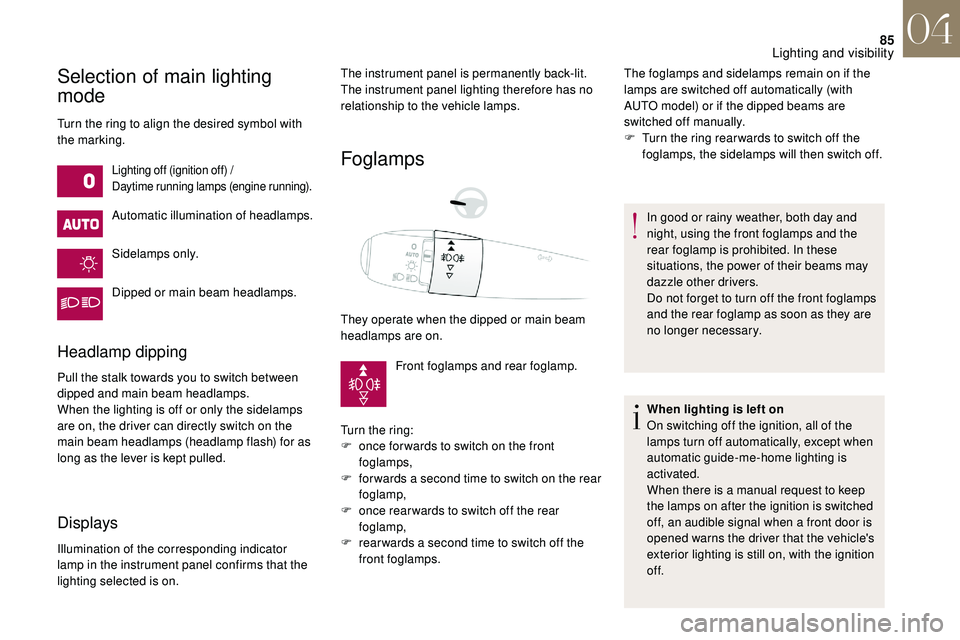
Selection of main lighting
mode
Turn the ring to align the desired symbol with
the marking.
Lighting off (ignition off) /
Daytime running lamps (engine running).
Automatic illumination of headlamps.
Sidelamps only.
Dipped or main beam headlamps.
Headlamp dipping
Pull the stalk towards you to switch between
dipped and main beam headlamps.
When the lighting is off or only the sidelamps
are on, the driver can directly switch on the
main beam headlamps (headlamp flash) for as
long as the lever is kept pulled.
Displays
Illumination of the corresponding indicator
lamp in the instrument panel confirms that the
lighting selected is on.
Foglamps
The instrument panel is permanently back-lit.
The instrument panel lighting therefore has no
relationship to the vehicle lamps.
They operate when the dipped or main beam
headlamps are on.Front foglamps and rear foglamp.
Turn the ring:
F
o
nce for wards to switch on the front
foglamps,
F
f
or wards a second time to switch on the rear
foglamp,
F
o
nce rear wards to switch off the rear
foglamp,
F
r
ear wards a second time to switch off the
front foglamps. The foglamps and sidelamps remain on if the
lamps are switched off automatically (with
AUTO model) or if the dipped beams are
switched off manually.
F
T
urn the ring rear wards to switch off the
foglamps, the sidelamps will then switch off.
In good or rainy weather, both day and
night, using the front foglamps and the
rear foglamp is prohibited. In these
situations, the power of their beams may
dazzle other drivers.
Do not forget to turn off the front foglamps
and the rear foglamp as soon as they are
no longer necessary.
When lighting is left on
On switching off the ignition, all of the
lamps turn off automatically, except when
automatic guide-me-home lighting is
activated.
When there is a
manual request to keep
the lamps on after the ignition is switched
off, an audible signal when a
front door is
opened warns the driver that the vehicle's
exterior lighting is still on, with the ignition
of f.
04
Lighting and visibility