ECO mode CITROEN DS3 CROSSBACK 2020 User Guide
[x] Cancel search | Manufacturer: CITROEN, Model Year: 2020, Model line: DS3 CROSSBACK, Model: CITROEN DS3 CROSSBACK 2020Pages: 244, PDF Size: 7.7 MB
Page 22 of 244
20
Instruments01
With the ignition off, opening the driver's
door activates the indicator, which moves
to the "neutral" position.
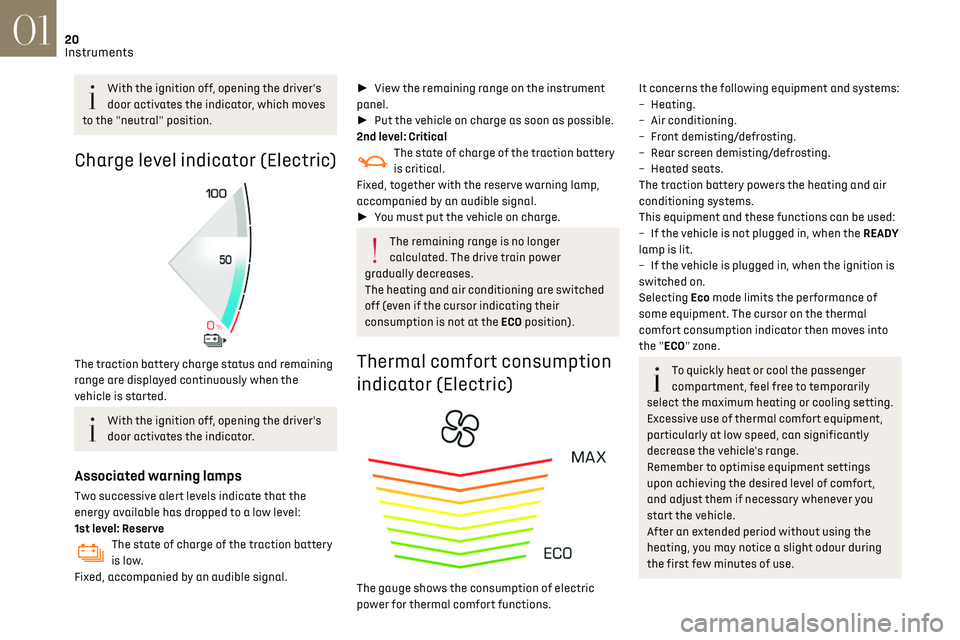
Charge level indicator (Electric)
The traction battery charge status and remaining
range are displayed continuously when the
vehicle is started.
With the ignition off, opening the driver's
door activates the indicator.
Associated warning lamps
Two successive alert levels indicate that the
energy available has dropped to a low level:
1st level: Reserve
The state of charge of the traction battery
is low.
Fixed, accompanied by an audible signal.
► View the remaining range on the instrument
panel.
► Put the vehicle on charge as soon as possible.
2nd level: Critical
The state of charge of the traction battery
is critical.
Fixed, together with the reserve warning lamp,
accompanied by an audible signal.
► You must put the vehicle on charge.
The remaining range is no longer
calculated. The drive train power
gradually decreases.
The heating and air conditioning are switched
off (even if the cursor indicating their
consumption is not at the ECO position).
Thermal comfort consumption
indicator (Electric)
The gauge shows the consumption of electric
power for thermal comfort functions.
It concerns the following equipment and systems:
– Heating.
–
Air c
onditioning.
–
F
ront demisting/defrosting.
–
R
ear screen demisting/defrosting.
–
Hea
ted seats.
The traction battery powers the heating and air
conditioning systems.
This equipment and these functions can be used:
–
If the v
ehicle is not plugged in, when the READY
lamp is lit.
–
If the v
ehicle is plugged in, when the ignition is
switched on.
Selecting Eco mode limits the performance of
some equipment. The cursor on the thermal
comfort consumption indicator then moves into
the "ECO" zone.
To quickly heat or cool the passenger
compartment, feel free to temporarily
select the maximum heating or cooling setting.
Excessive use of thermal comfort equipment,
particularly at low speed, can significantly
decrease the vehicle's range.
Remember to optimise equipment settings
upon achieving the desired level of comfort,
and adjust them if necessary whenever you
start the vehicle.
After an extended period without using the
heating, you may notice a slight odour during
the first few minutes of use.
Page 24 of 244
22
Instruments01
Trip computer
Information displayed about the current journey
(range, fuel consumption, average speed, etc.).
Data displayed on the
instrument panel
Display of the various tabs
► Pressing the button located on the end of the
wiper control stalk displays the following tabs in
turn:
–
Curren
t information:
•
D
riving range (Petrol or Diesel).
•
Curren
t fuel consumption.
•
St
op & Start time counter (Petrol or Diesel).
•
T
otal mileage (Electric).
–
Trip
s "1" then "2":
•
A
verage speed.
•
A
verage fuel consumption.
•
Dist
ance travelled.
Trip reset
► When the desired trip is displayed,
press the button on the end of the wiper
control stalk for more than 2 seconds.
Trips "1" and "2" are independent and are used
identically.
Definitions
Range
(miles or km)Distance that can still be travelled with the
fuel remaining in the tank (based on the
average fuel consumption over the last few miles
(kilometres) travelled).
This value may vary following a change in driving
style or relief, resulting in a significant change in
the current fuel consumption.
When the range falls below 19 miles (30 km),
dashes are displayed.
After filling with at least 5 litres of fuel, the range
is recalculated and is displayed if it exceeds 62
miles (100 km).
If dashes instead of figures continue to be
displayed while driving, contact a dealer or a
qualified workshop.
Current fuel consumption
(mpg or l/100 km or km/l)
(miles/kWh or kWh/100 km or km/kWh)
Calculated based on the past few
seconds. This function is only displayed at speeds above 19
mph (30 km/h).
Average fuel consumption
(mpg or l/100 km or km/l)
(miles/kWh or kWh/100 km or km/kWh)
Calculated since the last trip
computer reset.
Average speed
(mph or km/h)Calculated since the last trip computer
reset.
Distance travelled
(miles or km)Calculated since the last trip computer
reset.
Stop & Start time counter
(minutes/seconds or hours/minutes)
If your vehicle is equipped with Stop & Start, a
time counter calculates the time spent in STOP
mode during a journey.
It resets to zero every time the ignition is
switched on.
5-inch touch screen
This system gives access to the following
elements:
Page 27 of 244
25
Instruments01
– Access to the Settings of the touch screen and
digital instrument panel (date/time, languages,
units, etc.).
Side banners of the DS CONNECT NAV
– Exterior temperature (a blue warning lamp
appears when there is a risk of ice).
–
Ac
cess to the Settings of the touch screen and
digital instrument panel (date/time, languages,
units, etc.).
–
Notifications.
–
R
eminder of the air conditioning information,
and direct access to the corresponding menu.
–
Ac
cess to the heated seat settings.
–
Time.
Electric / Energy menu
Depending on version, this is accessible either:– directly, by pressing the button near the
touch screen.
– via the Applications menu.
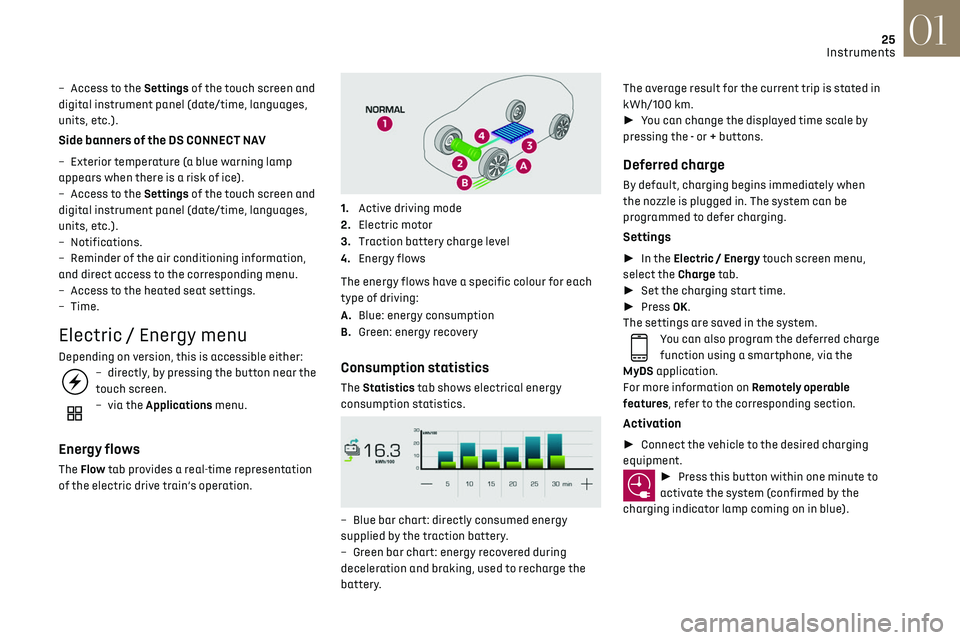
Energy flows
The Flow tab provides a real-time representation
of the electric drive train’s operation.
1.Active driving mode
2. Electric motor
3. Traction battery charge level
4. Energy flows
The energy flows have a specific colour for each
type of driving:
A. Blue: energy consumption
B. Green: energy recovery
Consumption statistics
The Statistics tab shows electrical energy
consumption statistics.
– Blue bar chart: directly c onsumed energy
supplied by the traction battery.
–
G
reen bar chart: energy recovered during
deceleration and braking, used to recharge the
battery. The average result for the current trip is stated in
kWh/100 km.
►
You can change the displayed time scale by
pressing the - or + buttons.
Deferred charge
By default, charging begins immediately when
the nozzle is plugged in. The system can be
programmed to defer charging.
Settings
► In the Electric / Energy touch screen menu,
select the Charge tab.
► Set the charging start time.
► Press OK.
The settings are saved in the system.
You can also program the deferred charge
function using a smartphone, via the
MyDS application.
For more information on Remotely operable
features, refer to the corresponding section.
Activation
► Connect the vehicle to the desired charging
equipment.
► Press this button within one minute to
activate the system (confirmed by the
charging indicator lamp coming on in blue).
Page 52 of 244
50Ease of use and comfort03
The connection of an unapproved
electrical device, such as a USB charger,
may adversely affect the operation of vehicle
electrical systems, causing faults such as poor
radio reception or interference with displays in
the screens.
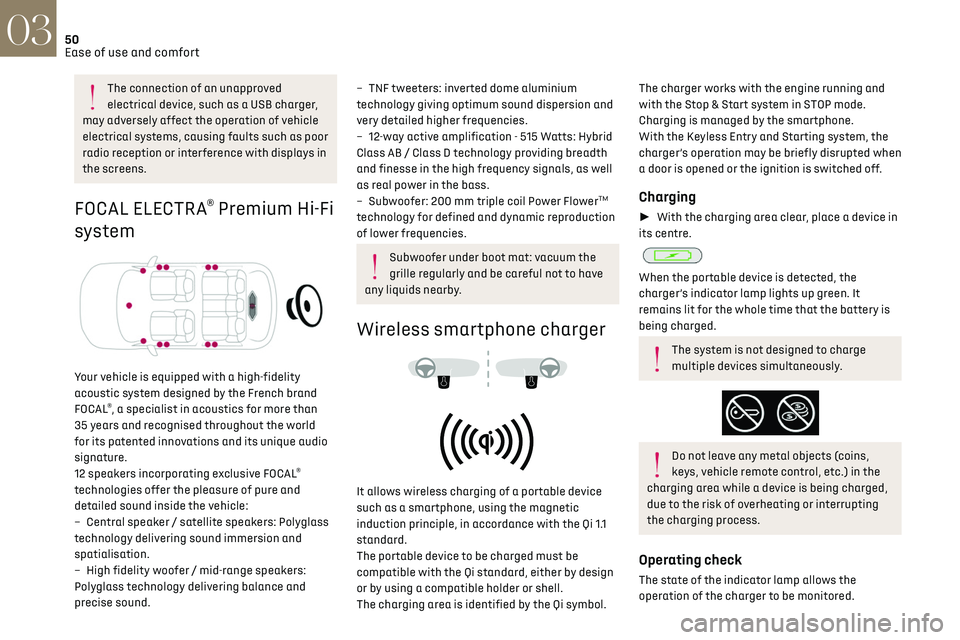
FOCAL ELECTRA® Premium Hi-Fi
system
Your vehicle is equipped with a high-fidelity
acoustic system designed by the French brand
FOCAL
®, a specialist in acoustics for more than
35 years and recognised throughout the world
for its patented innovations and its unique audio
signature.
12 speakers incorporating exclusive FOCAL
®
technologies offer the pleasure of pure and
detailed sound inside the vehicle:
–
Cen
tral speaker / satellite speakers: Polyglass
technology delivering sound immersion and
spatialisation.
–
High fidelity w
oofer / mid-range speakers:
Polyglass technology delivering balance and
precise sound.
– TNF tweeters: inverted dome aluminium
technology giving optimum sound dispersion and
very detailed higher frequencies.
–
12-w
ay active amplification - 515 Watts: Hybrid
Class AB / Class D technology providing breadth
and finesse in the high frequency signals, as well
as real power in the bass.
–
Sub
woofer: 200 mm triple coil Power Flower
TM
technology for defined and dynamic reproduction
of lower frequencies.
Subwoofer under boot mat: vacuum the
grille regularly and be careful not to have
any liquids nearby.
Wireless smartphone charger
It allows wireless charging of a portable device
such as a smartphone, using the magnetic
induction principle, in accordance with the Qi 1.1
standard.
The portable device to be charged must be
compatible with the Qi standard, either by design
or by using a compatible holder or shell.
The charging area is identified by the Qi symbol.
The charger works with the engine running and
with the Stop & Start system in STOP mode.
Charging is managed by the smartphone.
With the Keyless Entry and Starting system, the
charger’s operation may be briefly disrupted when
a door is opened or the ignition is switched off.
Charging
► With the charging area clear, place a device in
its centre.
When the portable device is detected, the
charger’s indicator lamp lights up green. It
remains lit for the whole time that the battery is
being charged.
The system is not designed to charge
multiple devices simultaneously.
Do not leave any metal objects (coins,
keys, vehicle remote control, etc.) in the
charging area while a device is being charged,
due to the risk of overheating or interrupting
the charging process.
Operating check
The state of the indicator lamp allows the
operation of the charger to be monitored.
Page 54 of 244

52Ease of use and comfort03
Permanent lighting.
In "permanent lighting" mode, the lighting time
varies according to the circumstances:
–
when the ignition is o
ff, approximately ten
minutes,
–
in energy ec
onomy mode, approximately thirty
seconds,
–
with the engine running, unlimit
ed.
Map reading lamps
► With the ignition on, operate the
corresponding switch.
Take care not to place anything in contact
with the courtesy lamps.
Touch-sensitive courtesy
lamps
1. Front touch-sensitive courtesy lamp
2. Front touch-sensitive reading lamps
3.Rear touch-sensitive reading lamps
Front touch-sensitive courtesy
lamp
It comes on gradually:
–
when the v ehicle is unlocked.
–
when the ignition is s
witched off.
–
when a door is opened.
–
when the remo
te control locking button is
activated, in order to locate the vehicle.
It switches off:
–
when the v
ehicle is locked.
–
when the ignition is s
witched on.
–
30 sec
onds after the last door is closed.
The front and rear touch-sensitive reading lamps
come on and go off at the same time as the
courtesy lamp.
A long press on the courtesy lamp completely
deactivates it from coming on (confirmed by the
"OFF" symbol).
Touch-sensitive reading lamps
► With the ignition on, press the corresponding
reading lamp.
Boot fittings
1. Load space cover
2. Boot lamp
3. Stowing rings
4. Boot mat
5. Tool kit (depending on equipment)
6. Storage well
The stowing rings are designed to secure
luggage using different types of retaining
nets. They are used with the ISOFIX mounting
rings located behind the rear seats.
The retaining nets are available as an option or
as an accessory.
For more information, contact a dealer.
Load space cover
To remove the load space cover:
► unhook the two cords,
► gently lift the shelf, then remove it.
When sharp deceleration occurs, objects
placed on the load space cover can turn
into projectiles.
Storage well
► Fully raise the boot carpet to access the
storage well.
Page 55 of 244
53Ease of use and comfort03
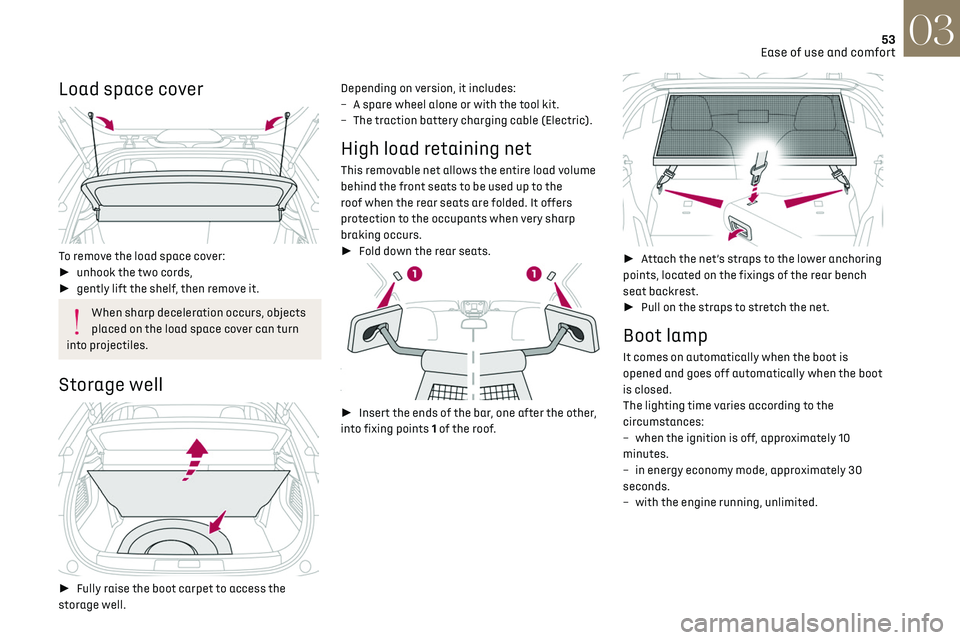
Load space cover
To remove the load space cover:
► unhook the two cords,
► gently lift the shelf, then remove it.
When sharp deceleration occurs, objects
placed on the load space cover can turn
into projectiles.
Storage well
► Fully raise the boot carpet to access the
storage well. Depending on version, it includes:
–
A spare wheel alone or with the t
ool kit.
–
The traction ba
ttery charging cable (Electric).
High load retaining net
This removable net allows the entire load volume
behind the front seats to be used up to the
roof when the rear seats are folded. It offers
protection to the occupants when very sharp
braking occurs.
►
Fold down the rear seats.
► Insert the ends of the bar, one after the other,
into fixing points 1 of the roof.
► Attach the net’s straps to the lower anchoring
points, located on the fixings of the rear bench
seat backrest.
► Pull on the straps to stretch the net.
Boot lamp
It comes on automatically when the boot is
opened and goes off automatically when the boot
is closed.
The lighting time varies according to the
circumstances:
–
when the ignition is o
ff, approximately 10
minutes.
–
in energy ec
onomy mode, approximately 30
seconds.
–
with the engine running, unlimit
ed.
Page 56 of 244

54Lighting and visibility04
Exterior lighting control
stalk
Main lighting
Automatic illumination of headlamps/
daytime running lamps.
Sidelamps only.
Dipped or main beam headlamps.
"Highway function"
On versions fitted with "Full LED"
technology headlamps, the range of the dipped
beam headlamps is automatically increased
once the speed of the vehicle is above 68 mph
(110 km/h).
Headlamp dipping
► Pull the stalk to switch between dipped and
main beam headlamps.
In “AUTO” and sidelamps modes, the driver can
switch on the main beam headlamps temporarily
(“headlamp flash”) by pulling the stalk.
Displays
Illumination of the corresponding indicator lamp
in the instrument panel confirms that the lighting
selected is on.
A fault with a lamp is signalled by the
permanent illumination of this warning
lamp, accompanied by the display of a message
and an audible signal.
Rear foglamp
It only works if the dipped or main beam
headlamps are on.
► Rotate the ring forwards to switch it on and
backwards to switch it off.
When the lamps are switched off automatically
("AUTO" position), the foglamp and the dipped
beam headlamps will remain on.
Switching on the foglamps is prohibited in
clear weather or in rain, both day and
night. In these situations, the power of their
beams may dazzle other drivers. They must
only be used in fog or falling snow (rules may
vary depending on country).
Do not forget to switch off the foglamps when
they are no longer necessary.
Switching off of the lamps when the
ignition is switched off
When the ignition is switched off, all of the
lamps turn off immediately, except for dipped
beam headlamps if automatic guide-me-home
lighting is activated.
Switching on the lamps after switching
off the ignition
To reactivate the lighting control, rotate the
ring to the "AUTO" position, then to the desired
position.
If the driver's door is opened, a temporary
audible signal warns the driver that the lamps
are on.
They will go off automatically after a period
of time that depends on the state of charge of
the battery (entering energy economy mode).
In some weather conditions (e.g. low
temperature or humidity), the presence of
misting on the internal surface of the glass of
the headlamps and rear lamps is normal; it
disappears after the lamps have been on for a
few minutes.
Never look too closely at the luminous
beam of “Full LED” headlamps: risk of
serious eye injury.
Travelling abroad
Vehicles equipped with halogen
headlamps:
If planning to use your vehicle in a country
that drives on the other side of the road, the
headlamp dipped beams must be adjusted to
avoid dazzling oncoming drivers. Contact a
dealer or a qualified workshop.
Daytime running lamps/
sidelamps
The front and rear lamps light up automatically
when the engine starts.
Page 57 of 244

55Lighting and visibility04
If the driver's door is opened, a temporary
audible signal warns the driver that the lamps
are on.
They will go off automatically after a period
of time that depends on the state of charge of
the battery (entering energy economy mode).
In some weather conditions (e.g. low
temperature or humidity), the presence of
misting on the internal surface of the glass of
the headlamps and rear lamps is normal; it
disappears after the lamps have been on for a
few minutes.
Never look too closely at the luminous
beam of “Full LED” headlamps: risk of
serious eye injury.
Travelling abroad
Vehicles equipped with halogen
headlamps:
If planning to use your vehicle in a country
that drives on the other side of the road, the
headlamp dipped beams must be adjusted to
avoid dazzling oncoming drivers. Contact a
dealer or a qualified workshop.
Daytime running lamps/
sidelamps
The front and rear lamps light up automatically
when the engine starts.
They provide the following functions:
– Da ytime running lamps (lighting control stalk at
position "AUTO" with adequate light level).
–
Sidelamp
s (lighting control stalk "AUTO"
position with low light levels or "Sidelamps only”
or "Dipped/main beam headlamps").
The LEDs are brighter when operating as
daytime running lamps.
Direction indicators
► Left or right: lower or raise the lighting control
stalk, beyond the point of resistance.
If you forget to cancel the direction
indicators for more than 20 seconds, the
volume of the audible signal will increase if the
speed is above 50 mph (80 km/h).
Three flashes
► Press briefly upwards or downwards, without
going beyond the point of resistance; the direction
indicators will flash 3 times.
Parking lamps
Vehicle side marking by lighting the sidelamps on
the traffic side only.
► Depending on version, within one minute
of switching off the ignition, move the lighting
control stalk up or down, depending which side
the traffic is on (for example, when parking on the
left, moving the lighting control stalk upwards
turns on the right-hand sidelamps).
This is confirmed by an audible signal and the
lighting of the corresponding direction indicator
lamp on the instrument panel.
► To switch off the parking lamps, return the
lighting control stalk to the central position.
Automatic illumination of
headlamps
When the ring is at the “AUTO" position and
a low level of ambient light is detected by the
rain/sunshine sensor, the number plate lamps,
sidelamps and dipped beam headlamps are
switched on automatically, without any action on
the part of the driver. They may also come on if
rain is detected, at the same time as automatic
operation of the windscreen wipers.
Page 60 of 244
58Lighting and visibility04
Pause
If the situation requires a change of headlamp
beam, the driver can take over at any time.
► A "headlamp flash" pauses the function:
•
If the "
AUTO" and "Dipped beam" indicator
lamps were on, the system changes to main
beam.
•
If the "
AUTO" and "Main beam"
indicator lamps were on, the system changes
to dipped beam.
To reactivate the system, flash the headlamps
again.
The system may be disrupted or not work
correctly:
–
When visibility c
onditions are poor
(snowfall, heavy rain, etc.).
–
If the windscreen in fron
t of the camera is
dirty, misted or obscured (for example, by a
sticker).
–
If the v
ehicle is facing highly reflective
signs.
When the system detects thick fog, it
temporarily deactivates the function.
The system is not able to detect:
–
R
oad users that do not have their own
lighting, such as pedestrians.
–
V
ehicles whose lighting is obscured (for
example, vehicles driving behind a safety
barrier on a motorway).
–
V
ehicles at the top or bottom of a steep
slope, on winding roads, on crossroads.
Clean the windscreen regularly,
particularly the area in front of the
camera.
The internal surface of the windscreen can
also become misted around the camera.
In humid and cold weather, demist the
windscreen regularly.
Do not allow snow to accumulate on the
bonnet or roof of the vehicle as this could
obstruct the detection camera.
DS MATRIX LED VISION
Available only on versions equipped with Full LED
headlamps with the Matrix Beam function.
This system automatically adapts the main
beam according to the driving conditions, so that
optimum illumination is maintained for the driver,
without causing a nuisance to other road users.
The driver remains responsible for the
vehicle's lighting, its correct use for the
prevailing conditions of light, visibility and
traffic, and for observation of driving and
vehicle regulations.
The system is active from 25 mph
(40 km/h) and deactivates below 12 mph
(20 km/h).
Operation
Using a camera, the system detects the driving
conditions (brightess, lights from oncoming or
followed vehicles, road turns) and adapts the
beams of the main headlamps accordingly.
The modules that make up the main beams
switch on and off gradually, segment by segment,
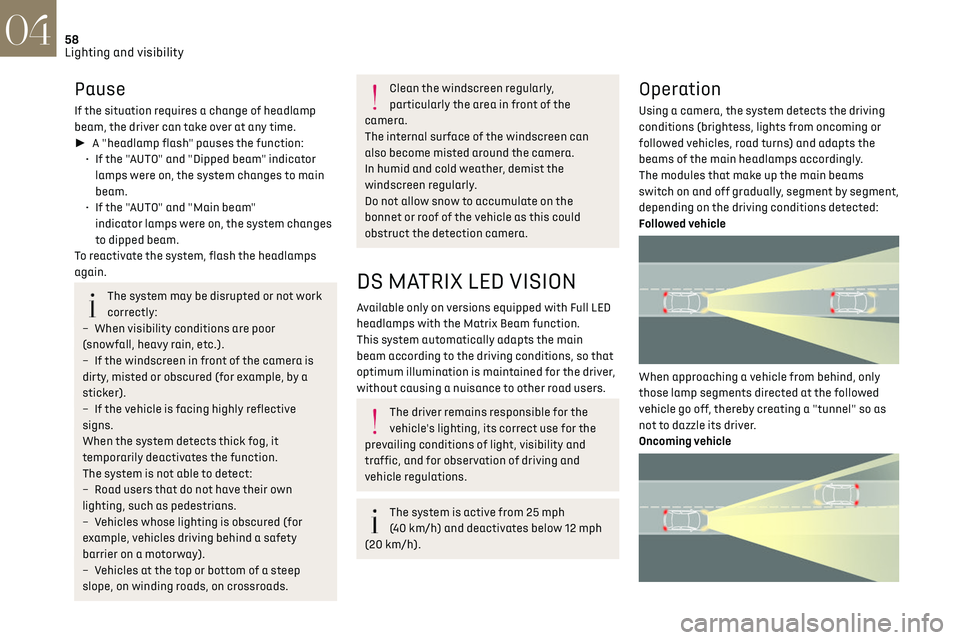
depending on the driving conditions detected:
Followed vehicle
When approaching a vehicle from behind, only
those lamp segments directed at the followed
vehicle go off, thereby creating a "tunnel" so as
not to dazzle its driver.
Oncoming vehicle
When an oncoming vehicle approaches, only
those lamp segments directed at this vehicle
go off, thereby creating a "tunnel" during the
duration of the approach.
Nominal main beam lighting is restored as soon
as the vehicle is no longer detected by the system.
Entering an illuminated area
At the entrance to an illuminated area (for
example, a town), the lamp segments are
gradually switched off from the outside to the
inside of the vehicle to switch to the dipped
beams.
Exiting an illuminated area
The lamp segments gradually light up from the
inside to the outside of the vehicle to restore the
main beams.
Activation/Deactivation
► Turn the lighting control stalk ring to the
"AUTO" position.
This indicator lamp comes on in the
instrument panel.
The function can be activated and
deactivated in the Driving / Vehicle touch
screen menu.
When deactivated, the lighting system changes to
"automatic illumination of lamps" mode.
The status of the system remains in the memory
when the ignition is switched off.
Pause
If the situation requires a change of headlamp
beam, the driver can take over at any time.
Page 61 of 244
59
Lighting and visibility04
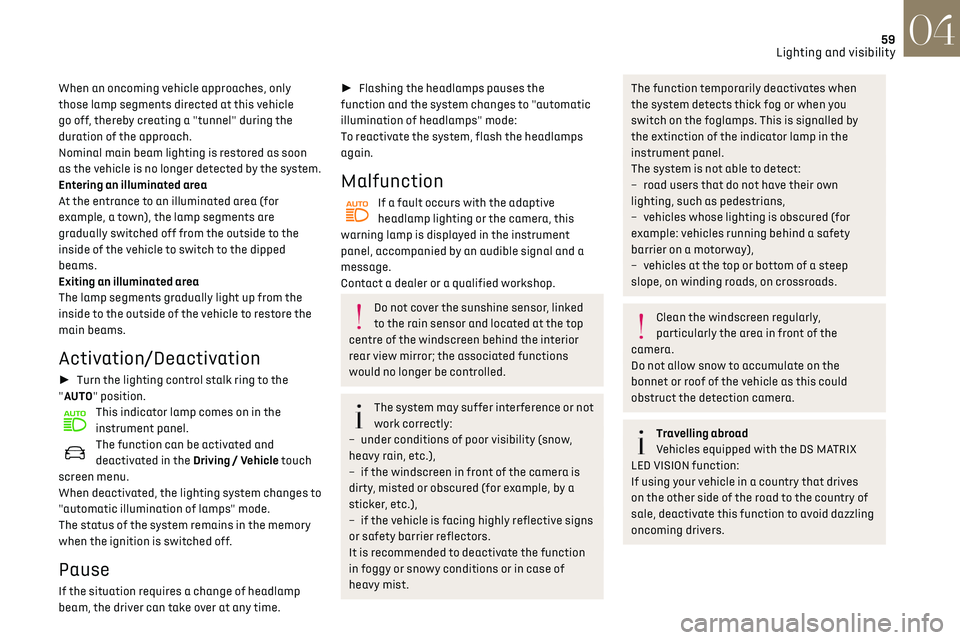
When an oncoming vehicle approaches, only
those lamp segments directed at this vehicle
go off, thereby creating a "tunnel" during the
duration of the approach.
Nominal main beam lighting is restored as soon
as the vehicle is no longer detected by the system.
Entering an illuminated area
At the entrance to an illuminated area (for
example, a town), the lamp segments are
gradually switched off from the outside to the
inside of the vehicle to switch to the dipped
beams.
Exiting an illuminated area
The lamp segments gradually light up from the
inside to the outside of the vehicle to restore the
main beams.
Activation/Deactivation
► Turn the lighting control stalk ring to the
"AUTO" position.
This indicator lamp comes on in the
instrument panel.
The function can be activated and
deactivated in the Driving / Vehicle touch
screen menu.
When deactivated, the lighting system changes to
"automatic illumination of lamps" mode.
The status of the system remains in the memory
when the ignition is switched off.
Pause
If the situation requires a change of headlamp
beam, the driver can take over at any time.
► Flashing the headlamps pauses the
function and the system changes to "automatic
illumination of headlamps" mode:
To reactivate the system, flash the headlamps
again.
Malfunction
If a fault occurs with the adaptive
headlamp lighting or the camera, this
warning lamp is displayed in the instrument
panel, accompanied by an audible signal and a
message.
Contact a dealer or a qualified workshop.
Do not cover the sunshine sensor, linked
to the rain sensor and located at the top
centre of the windscreen behind the interior
rear view mirror; the associated functions
would no longer be controlled.
The system may suffer interference or not
work correctly:
–
under c
onditions of poor visibility (snow,
heavy rain, etc.),
–
if the windscreen in fron
t of the camera is
dirty, misted or obscured (for example, by a
sticker, etc.),
–
if the v
ehicle is facing highly reflective signs
or safety barrier reflectors.
It is recommended to deactivate the function
in foggy or snowy conditions or in case of
heavy mist.
The function temporarily deactivates when
the system detects thick fog or when you
switch on the foglamps. This is signalled by
the extinction of the indicator lamp in the
instrument panel.
The system is not able to detect:
–
road users tha
t do not have their own
lighting, such as pedestrians,
–
v
ehicles whose lighting is obscured (for
example: vehicles running behind a safety
barrier on a motorway),
–
v
ehicles at the top or bottom of a steep
slope, on winding roads, on crossroads.
Clean the windscreen regularly,
particularly the area in front of the
camera.
Do not allow snow to accumulate on the
bonnet or roof of the vehicle as this could
obstruct the detection camera.
Travelling abroad
Vehicles equipped with the DS MATRIX
LED VISION function:
If using your vehicle in a country that drives
on the other side of the road to the country of
sale, deactivate this function to avoid dazzling
oncoming drivers.