battery CITROEN DS4 2018 Owner's Manual
[x] Cancel search | Manufacturer: CITROEN, Model Year: 2018, Model line: DS4, Model: CITROEN DS4 2018Pages: 296, PDF Size: 9.91 MB
Page 149 of 296
147
Stop & Start
The Stop & Start system puts the engine
t emporarily into standby – STOP mode – during
stops in the traffic (red lights, traffic jams,...).
The engine restarts automatically – START
mode – as soon as you want to move off.
The restart takes place instantly, quickly and
silently.
Per fect for urban use, the Stop & Start system
reduces fuel consumption and exhaust
emissions as well as the noise level when
stationary.
Operation
Going into engine STOP mode
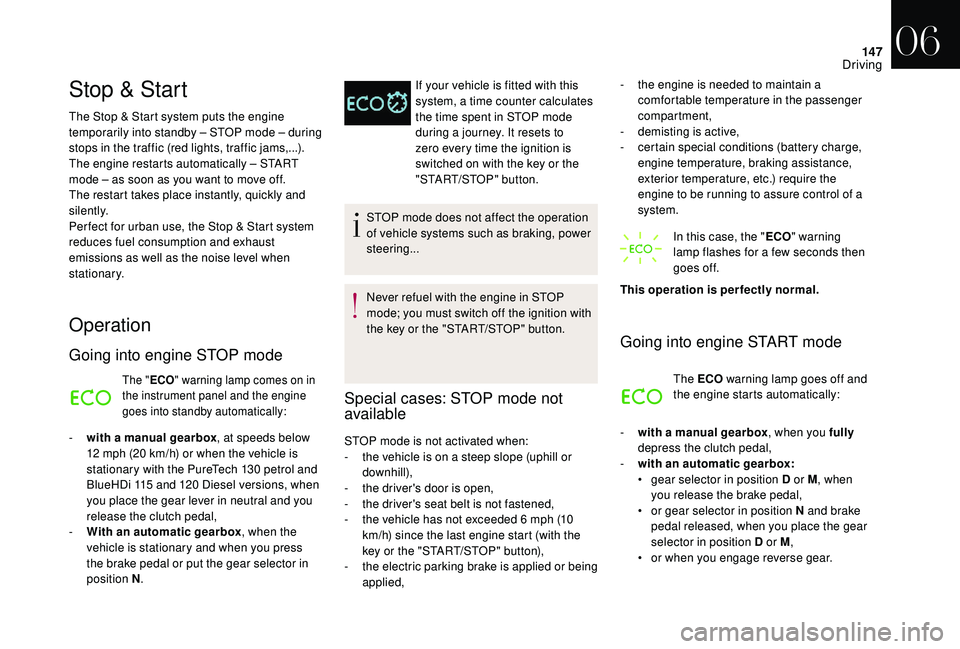
The " ECO" warning lamp comes on in
the instrument panel and the engine
goes into standby automatically:
- with a manual gearbox , at speeds below
12 mph (20 km/h) or when the vehicle is
stationary with the PureTech 130 petrol and
BlueHDi 115 and 120 Diesel versions, when
you place the gear lever in neutral and you
release the clutch pedal,
-
W
ith an automatic gearbox , when the
vehicle is stationary and when you press
the brake pedal or put the gear selector in
position N . If your vehicle is fitted with this
system, a time counter calculates
the time spent in STOP mode
during a journey. It resets to
zero every time the ignition is
switched on with the key or the
"START/STOP" button.
STOP mode does not affect the operation
of vehicle systems such as braking, power
steering...
Never refuel with the engine in STOP
mode; you must switch off the ignition with
the key or the "START/STOP" button.
Special cases: STOP mode not
available
STOP mode is not activated when:
- t he vehicle is on a steep slope (uphill or
downhill),
-
t
he driver's door is open,
-
t
he driver's seat belt is not fastened,
-
t
he vehicle has not exceeded 6 mph (10
km/h) since the last engine start (with the
key or the "START/STOP" button),
-
t
he electric parking brake is applied or being
applied, -
t
he engine is needed to maintain a
comfortable temperature in the passenger
compartment,
-
d
emisting is active,
-
c
ertain special conditions (battery charge,
engine temperature, braking assistance,
exterior temperature, etc.) require the
engine to be running to assure control of a
system.
In this case, the " ECO" warning
lamp flashes for a few seconds then
goes off.
This operation is perfectly normal.
Going into engine START mode
The ECO warning lamp goes off and
the engine starts automatically:
-
w
ith a manual gearbox , when you fully
depress the clutch pedal,
-
w
ith an automatic gearbox:
•
g
ear selector in position D or M , when
you release the brake pedal,
•
o
r gear selector in position N and brake
pedal released, when you place the gear
selector in position D or M ,
•
o
r when you engage reverse gear.
06
Driving
Page 150 of 296
148
With a manual gearbox in STOP mode, if
a gear is engaged without fully depressing
the clutch pedal, a warning lamp comes
on or an alert message is displayed asking
you to depress the clutch pedal to restart
the engine.
Special cases: START mode
activated automatically
As a safety measure or to maintain comfort
levels in the vehicle, START mode is activated
automatically when:
-
y
ou open the driver's door,
-
y
ou unfasten the driver's seat belt,
-
t
he speed of the vehicle exceeds 16 mph
(25 km/h) with a manual gearbox (2 mph
(3
km/h) with PureTech 130 petrol and
BlueHDi 115 and 120 Diesel versions), or
2
mph (3 km/h) with an automatic gearbox.
-
t
he electric parking brake is being applied,
-
s
ome special conditions (battery charge,
engine temperature, braking assistance,
exterior temperature...) require the engine to
be running to assure control of a system. In this case, the "
ECO" warning
lamp flashes for a few seconds then
goes off.
This operation is perfectly normal.
Deactivation
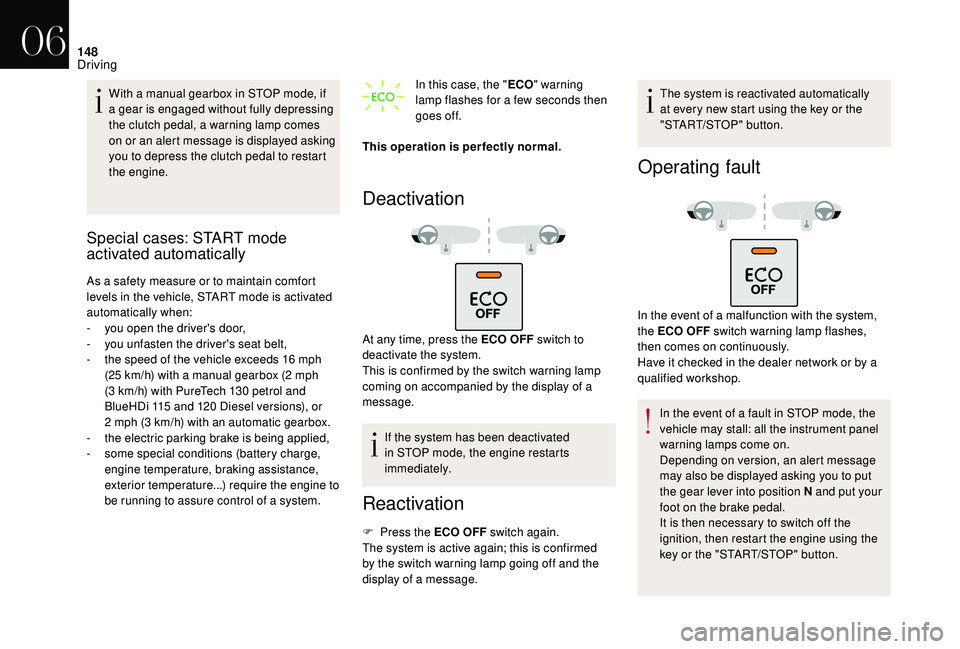
At any time, press the ECO OFF switch to
d eactivate the system.
This is confirmed by the switch warning lamp
coming on accompanied by the display of a
message.
If the system has been deactivated
in STOP mode, the engine restarts
immediately.
Reactivation
F Press the ECO OFF switch again.
The system is active again; this is confirmed
by the switch warning lamp going off and the
display of a message. The system is reactivated automatically
at every new start using the key or the
"START/STOP" button.
Operating fault
In the event of a malfunction with the system,
the ECO OFF switch warning lamp flashes,
then comes on continuously.
Have it checked in the dealer network or by a
qualified workshop.
In the event of a fault in STOP mode, the
vehicle may stall: all the instrument panel
warning lamps come on.
Depending on version, an alert message
may also be displayed asking you to put
the gear lever into position N and put your
foot on the brake pedal.
It is then necessary to switch off the
ignition, then restart the engine using the
key or the "START/STOP" button.
06
Driving
Page 151 of 296
149
The Stop & Start system requires a
12 V battery of specific technology and
specification.
All work on this type of battery must only
be carried out in the dealer network or by
a qualified workshop.
For more information on the 12 V batter y ,
refer to the corresponding section.
Opening the bonnet
Driving on flooded roads
Before driving in a flooded area, it is
strongly recommended that you deactivate
the Stop & Start system.
For more information on Driving advice ,
particularly on flooded roads, refer to the
corresponding section. Before doing anything under the bonnet,
deactivate the Stop & Start system to
avoid any risk of injury resulting from an
automatic change to START mode.Hill start assist
System which keeps your vehicle immobilised
temporarily (approximately 2 seconds) when
starting on a gradient, the time it takes to
move your foot from the brake pedal to the
accelerator pedal.
This system only operates when:
-
t
he vehicle is completely stationary, with
your foot on the brake pedal,
-
c
ertain slope conditions are met,
-
w
ith the driver’s door closed.
The hill start assist function cannot be
deactivated.
Operation
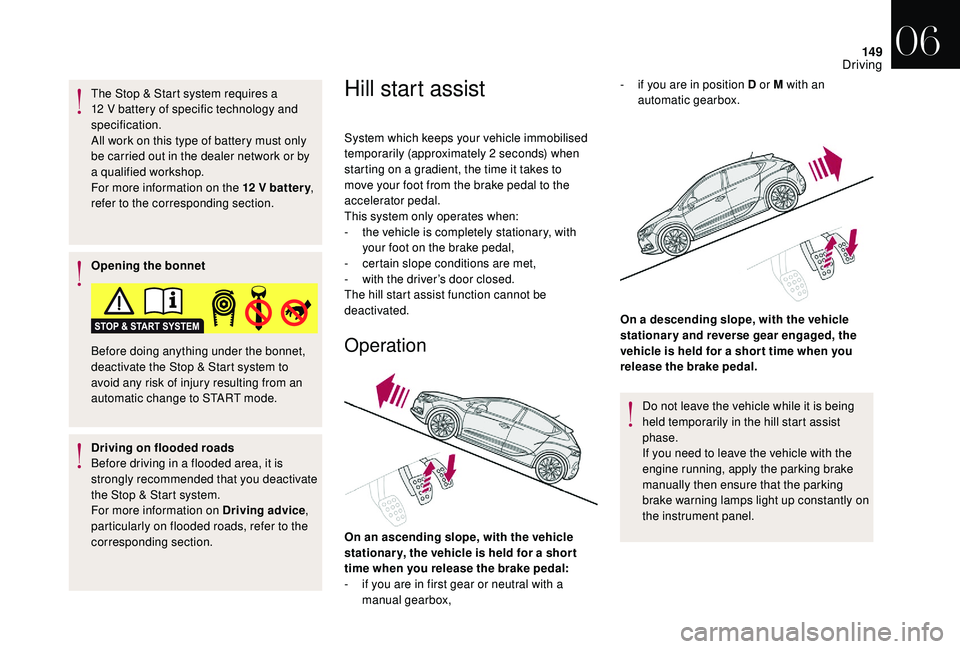
On an ascending slope, with the vehicle
stationar y, the vehicle is held for a shor t
time when you release the brake pedal:
-
i
f you are in first gear or neutral with a
manual gearbox, On a descending slope, with the vehicle
stationary and reverse gear engaged, the
vehicle is held for a shor t time when you
release the brake pedal.
Do not leave the vehicle while it is being
held temporarily in the hill start assist
phase.
If you need to leave the vehicle with the
engine running, apply the parking brake
manually then ensure that the parking
brake warning lamps light up constantly on
the instrument panel.
-
i
f you are in position D or M with an
automatic gearbox.
06
Driving
Page 177 of 296
175
Load reduction mode
System which manages the use of certain
functions according to the level of charge
remaining in the battery.
When the vehicle is being driven, the load
reduction function temporarily deactivates
certain functions, such as air conditioning,
heated rear screen...
The deactivated functions are reactivated
automatically as soon as conditions permit.
Energy saving mode
System that manages the duration of use of
certain functions to conser ve a sufficient level
of charge in the battery.
After the engine has stopped, you can
still use functions such as the audio
equipment, windscreen wipers, dipped
beam headlamps,
courtesy lamps, etc. for a
maximum combined period of thirty minutes.
This period may be greatly reduced if the
battery is not fully charged.
Switching to this mode
Once this period has elapsed, a message
appears in the screen indicating that the
vehicle has switched to the energy saving
mode and the active functions are put on
st a n d by.If the telephone was operated via
the touch screen at that moment, the
connection would be interrupted after
10
minutes.
Exiting the mode
These functions will be automatically restored
the next time the vehicle is used.
F
I
n order to restore the use of these functions
immediately, start the engine and let it run
for a few minutes.
The time available to you will then be double
the period for which the engine is left running.
However, this period will always be between
five and thirty minutes.
The engine will not start if the battery is
discharged.
For more information on the 12 V batter y ,
refer to the corresponding section.
07
Practical information
Page 180 of 296

178
The location of the interior bonnet release
lever prevents opening of the bonnet when
the left-hand front door is shut.
Do not open the bonnet when there is a
very strong wind.
When the engine is hot, handle the
exterior safety catch and the stay with
care (risk of burns).
Closing
F Take the stay out of the support slot.
F C lip the stay in its housing on the back of
the bonnet.
F
L
ower the bonnet and release it near the
end of its travel.
F
P
ull on the bonnet to check that it is fully
latched.
Because of the presence of electrical
equipment under the bonnet, it is
recommended that exposure to water
(rain, washing, etc.) be limited.
Engines
Petrol
Diesel
These engines are examples provided as a
guide.
The locations of the following elements may
vary:
-
A
ir filter.
-
E
ngine oil dipstick.
-
E
ngine oil filler cap.
-
P
riming pump. 1.
Power steering fluid reservoir.
2. Screenwash and headlamp wash
reservoir.
3. Engine coolant reservoir.
4. Brake fluid tank.
5. Battery/Fuses.
6. Fusebox.
7. Remote earth point.
8. A i r f i l t e r.
9. Engine oil dipstick.
10. Engine oil filler cap.
11. Priming pump*
The Diesel circuit is under very high
pressure.
All work on this circuit must be carried out
only in the dealer network or a qualified
workshop.
*
D
epending on engine.
07
Practical information
Page 183 of 296
181
Screenwash/headlamp wash
level
To check the level or top up the fluid
on vehicles fitted with headlamp
washers, immobilise the vehicle and
switch off the engine.
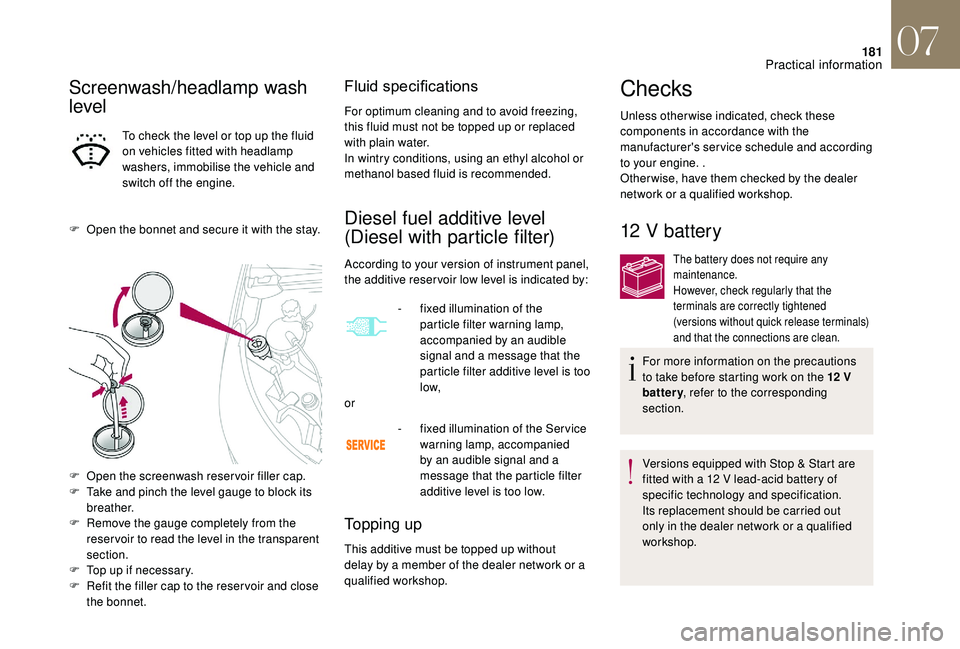
F
O
pen the bonnet and secure it with the stay.
F
O
pen the screenwash reservoir filler cap.
F
T
ake and pinch the level gauge to block its
breather.
F
R
emove the gauge completely from the
reser voir to read the level in the transparent
section.
F
T
op up if necessary.
F
R
efit the filler cap to the reser voir and close
the bonnet.
Fluid specifications
For optimum cleaning and to avoid freezing,
this fluid must not be topped up or replaced
with plain water.
In wintry conditions, using an ethyl alcohol or
methanol based fluid is recommended.
Diesel fuel additive level
(Diesel with particle filter)
According to your version of instrument panel,
the additive reser voir low level is indicated by:
Topping up
This additive must be topped up without
delay by a member of the dealer network or a
qualified workshop. -
f
ixed illumination of the
particle filter warning lamp,
accompanied by an audible
signal and a message that the
particle filter additive level is too
low,
or
-
f
ixed illumination of the Ser vice
warning lamp, accompanied
by an audible signal and a
message that the particle filter
additive level is too low.
Checks
Unless otherwise indicated, check these
components in accordance with the
manufacturer's service schedule and according
to your engine. .
Otherwise, have them checked by the dealer
network or a qualified workshop.
12 V battery
The battery does not require any
maintenance.
However, check regularly that the
terminals are correctly tightened
(versions without quick release terminals)
and that the connections are clean.
For more information on the precautions
to take before starting work on the 12 V
battery , refer to the corresponding
section.
Versions equipped with Stop & Start are
fitted with a 12 V lead-acid battery of
specific technology and specification.
Its replacement should be carried out
only in the dealer network or a qualified
workshop.
07
Practical information
Page 210 of 296

208
Engine compartment fuses
The fusebox is located in the engine
compartment near the battery (left-hand side).
Access to the fuses
F Unclip the cover.
F C hange the fuse.
For information on the special requirements
and precautions to take before changing a fuse,
refer to the start of this section.
F
W
hen you have finished, close the cover
very carefully to ensure correct sealing of
the fusebox. Fuse No.
Rating Functions
F19 30 A
Windscreen wipers slow/fast speed.
F20 15 A
Front and rear screenwash pump.
F21 20 A
Headlamp wash pump.
F22 15 A
Horn.
F23 15 A
Right-hand main beam headlamp.
F24 15 A
Left-hand main beam headlamp.
F27 5 A
Left-hand dipped headlamp.
F28 5 A
Right-hand dipped headlamp.
08
In the event of a breakdown
Page 211 of 296

209
12 V battery
Procedure for starting the engine using another
battery or charging a discharged battery.
General points
Lead-acid starter batteries
Batteries contain harmful substances
such as sulphuric acid and lead.
They must be disposed of in accordance
with regulations and must not, in any
circumstances, be discarded with
household waste.
Take used remote control batteries and
vehicle batteries to a special collection
point.
Protect your eyes and face before
handling the battery.
All operations on the battery must be
carried out in a well ventilated area and
away from naked flames and sources of
sparks, so as to avoid the risk of explosion
or fire.
Wash your hands afterwards. If your vehicle has an automatic gearbox,
do not try to start the engine by pushing
the vehicle.
Access to the battery
The battery is located under the bonnet.
For access to the (+) terminal:
F
r
elease the bonnet using the interior lever,
then the exterior lever,
F
r
aise the bonnet and secure it with its stay,
F
l
ift the plastic cover for access to the (+)
terminal.
Starting using another battery
When your vehicle's battery is discharged, the
engine can be started using a slave battery
(external or on another vehicle) and jump leads
or a battery booster.
Never try to start the engine by connecting
a battery charger.
Never use a 24 V or higher battery
b o o s t e r.
First check that the slave battery has a
nominal voltage of 12 V and a capacity
at least equal to that of the discharged
battery.
The two vehicles must not be in contact
with each other.
Switch off all the electrical consumers
on both vehicles (audio system, wipers,
lighting, etc.).
Make sure that the jump leads are not
close to moving parts of the engine (fan,
belts, etc.).
Do not disconnect the (+) terminal while
the engine is running.
08
In the event of a breakdown
Page 212 of 296
210
F Lift the plastic cover on the (+) terminal, if your vehicle has one.
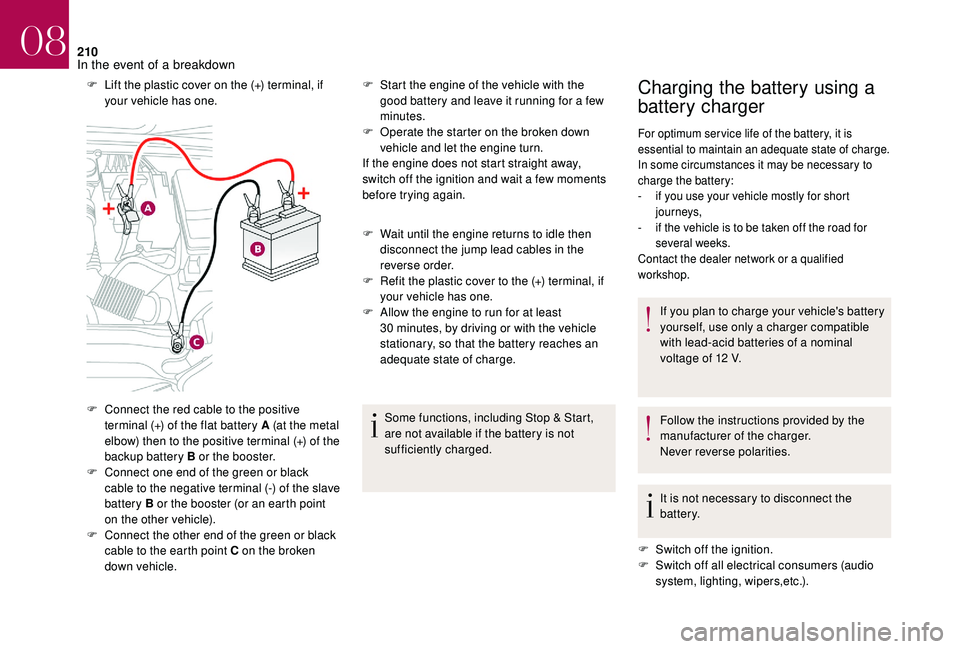
F
C
onnect the red cable to the positive
terminal (+) of the flat battery A (at the metal
elbow) then to the positive terminal (+) of the
backup battery B or the booster.
F
C
onnect one end of the green or black
cable to the negative terminal (-) of the slave
battery B or the booster (or an earth point
on the other vehicle).
F
C
onnect the other end of the green or black
cable to the earth point C on the broken
down vehicle. F
S tart the engine of the vehicle with the
good battery and leave it running for a few
minutes.
F
O
perate the starter on the broken down
vehicle and let the engine turn.
If the engine does not start straight away,
switch off the ignition and wait a few moments
before trying again.
F
W
ait until the engine returns to idle then
disconnect the jump lead cables in the
reverse order.
F
R
efit the plastic cover to the (+) terminal, if
your vehicle has one.
F
A
llow the engine to run for at least
30
minutes, by driving or with the vehicle
stationary, so that the battery reaches an
adequate state of charge.
Some functions, including Stop & Start,
are not available if the battery is not
sufficiently charged.Charging the battery using a
battery charger
For optimum ser vice life of the battery, it is
essential to maintain an adequate state of charge.
In some circumstances it may be necessary to
charge the battery:
-
i
f you use your vehicle mostly for short
journeys,
-
i
f the vehicle is to be taken off the road for
several weeks.
Contact the dealer network or a qualified
workshop.
If you plan to charge your vehicle's battery
yourself, use only a charger compatible
with lead-acid batteries of a nominal
voltage of 12 V.
Follow the instructions provided by the
manufacturer of the charger.
Never reverse polarities.
It is not necessary to disconnect the
battery.
F
S
witch off the ignition.
F
S
witch off all electrical consumers (audio
system, lighting, wipers,etc.).
08
In the event of a breakdown
Page 213 of 296
2 11
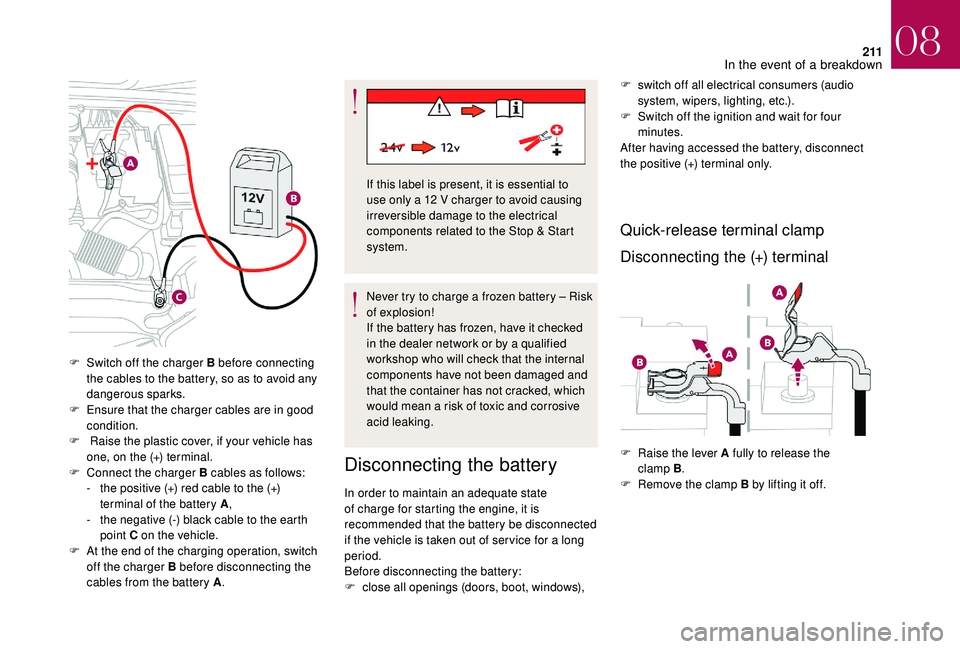
F Switch off the charger B before connecting the cables to the battery, so as to avoid any
dangerous sparks.
F
E
nsure that the charger cables are in good
condition.
F
R
aise the plastic cover, if your vehicle has
one, on the (+) terminal.
F
C
onnect the charger B cables as follows:
-
t
he positive (+) red cable to the (+)
terminal of the battery A ,
-
t
he negative (-) black cable to the earth
point C on the vehicle.
F
A
t the end of the charging operation, switch
off the charger B before disconnecting the
cables from the battery A . Never try to charge a frozen battery – Risk
of explosion!
If the battery has frozen, have it checked
in the dealer network or by a qualified
workshop who will check that the internal
components have not been damaged and
that the container has not cracked, which
would mean a risk of toxic and corrosive
acid leaking.
Disconnecting the battery
F switch off all electrical consumers (audio
system, wipers, lighting, etc.).
F
S
witch off the ignition and wait for four
minutes.
After having accessed the battery, disconnect
the positive (+) terminal only.
Quick-release terminal clamp
Disconnecting the (+) terminal
If this label is present, it is essential to
use only a 12 V charger to avoid causing
irreversible damage to the electrical
components related to the Stop & Start
system.
In order to maintain an adequate state
of charge for starting the engine, it is
recommended that the battery be disconnected
if the vehicle is taken out of ser vice for a long
period.
Before disconnecting the battery:
F
c
lose all openings (doors, boot, windows), F
Ra
ise the lever A fully to release the
clamp B .
F
R
emove the clamp B by lifting it off.
08
In the event of a breakdown