display Citroen DS5 RHD 2014 1.G User Guide
[x] Cancel search | Manufacturer: CITROEN, Model Year: 2014, Model line: DS5 RHD, Model: Citroen DS5 RHD 2014 1.GPages: 400, PDF Size: 37.32 MB
Page 47 of 400
45Monitoring
Engine oil level indicator *
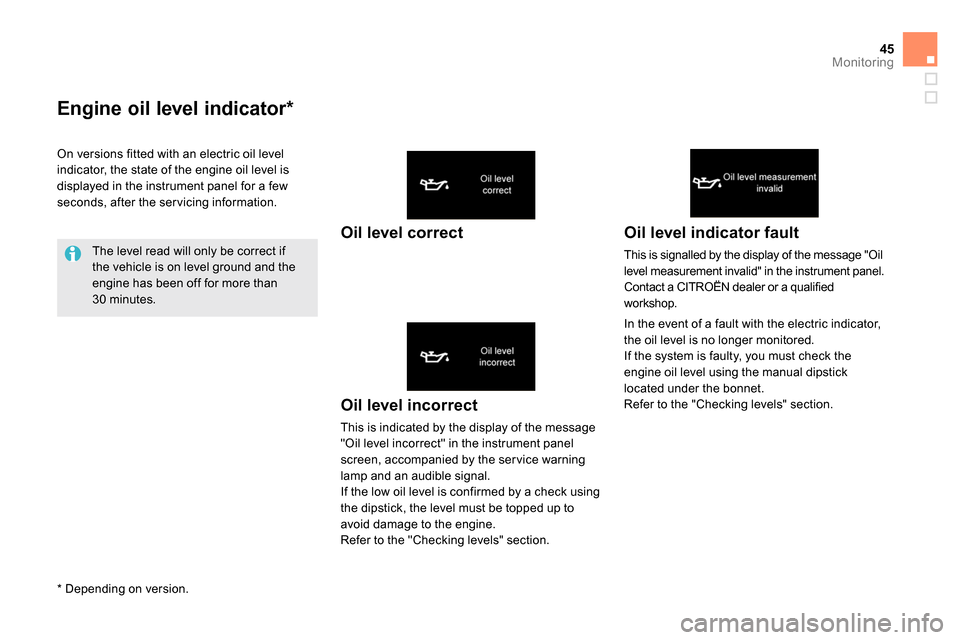
Oil level incorrect
This is indicated by the display of the message
"Oil level incorrect" in the instrument panel
screen, accompanied by the ser vice warning
lamp and an audible signal.
If the low oil level is confirmed by a check using
the dipstick, the level must be topped up to
avoid damage to the engine.
Refer to the "Checking levels" section.
Oil level indicator fault
This is signalled by the display of the message "Oil
level measurement invalid" in the instrument panel.
Contact a CITROËN dealer or a qualified
workshop.
In the event of a fault with the electric indicator,
the oil level is no longer monitored.
If the system is faulty, you must check the
engine oil level using the manual dipstick
located under the bonnet.
Refer to the "Checking levels" section.
On versions fitted with an electric oil level
indicator, the state of the engine oil level is
displayed in the instrument panel for a few
seconds, after the ser vicing information.
The level read will only be correct if
the vehicle is on level ground and the
engine has been off for more than
30 minutes.
Oil level correct
*
Depending on version.
Page 48 of 400
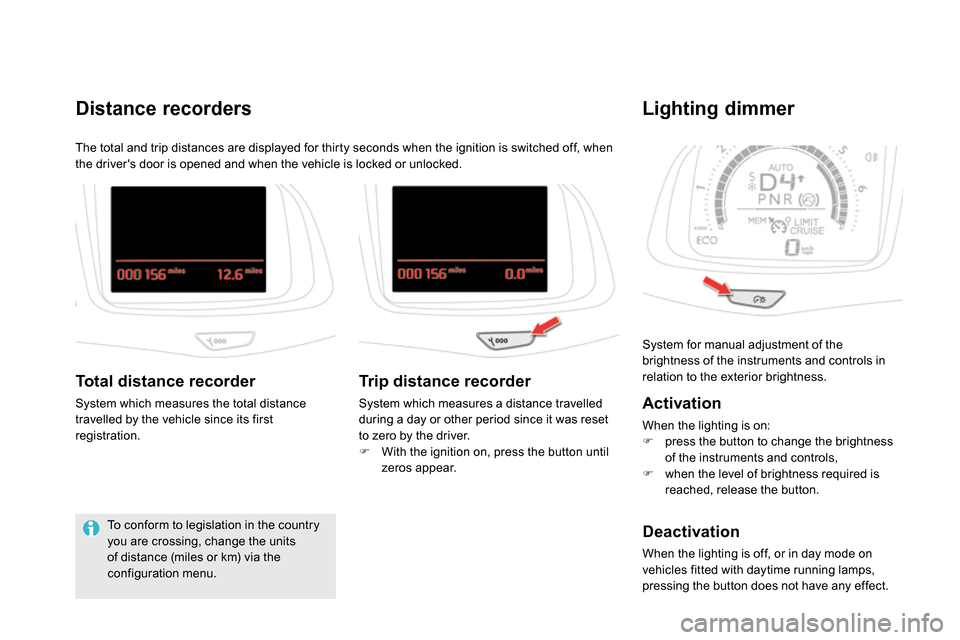
System for manual adjustment of the
brightness of the instruments and controls in
relation to the exterior brightness.
Lighting dimmer
Activation
When the lighting is on:
press the button to change the brightness
of the instruments and controls,
when the level of brightness required is
reached, release the button.
Deactivation
When the lighting is off, or in day mode on
vehicles fitted with daytime running lamps,
pressing the button does not have any effect.
The total and trip distances are displayed for thirty seconds when the ignition is switched off, when
the driver's door is opened and when the vehicle is locked or unlocked.
Distance recorders
Total distance recorder
System which measures the total distance
travelled by the vehicle since its first
registration.
To conform to legislation in the country
you are crossing, change the units
of distance (miles or km) via the
configuration menu.
Trip distance recorder
System which measures a distance travelled
during a day or other period since it was reset
to zero by the driver.
With the ignition on, press the button until
zeros appear.
Page 50 of 400
Clock
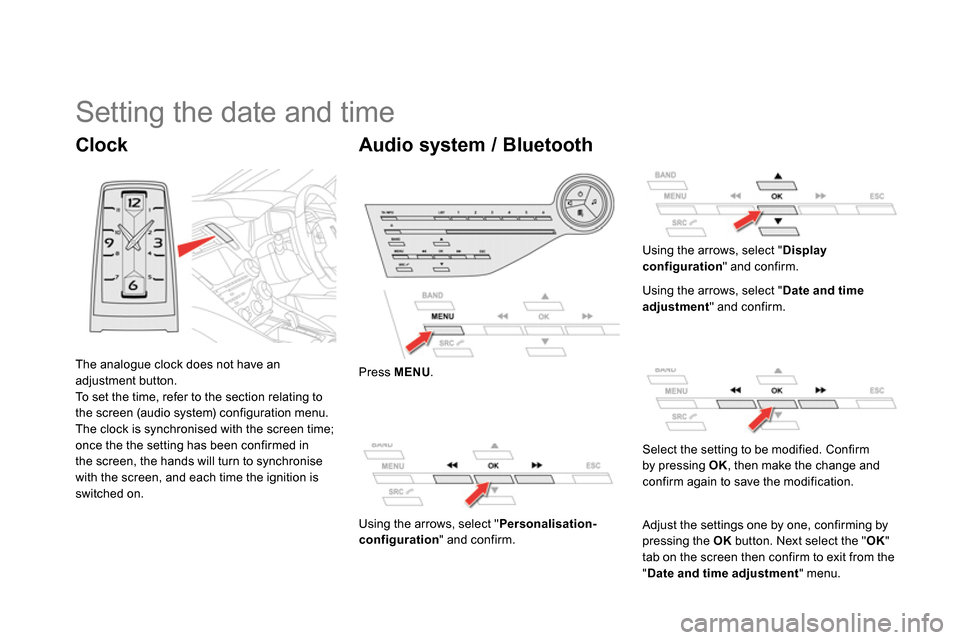
The analogue clock does not have an
adjustment button.
To set the time, refer to the section relating to
the screen (audio system) configuration menu.
The clock is synchronised with the screen time;
once the the setting has been confirmed in
the screen, the hands will turn to synchronise
with the screen, and each time the ignition is
switched on.
Setting the date and time
Audio system / Bluetooth
Press MENU
.
Using the arrows, select " Personalisation-
configuration
" and confirm.
Using the arrows, select " Display
configuration
" and confirm.
Using the arrows, select " Date and time
adjustment
" and confirm.
Select the setting to be modified. Confirm
by pressing OK
, then make the change and
confirm again to save the modification.
Adjust the settings one by one, confirming by
pressing the OK
button. Next select the " OK
"
tab on the screen then confirm to exit from the
" Date and time adjustment
" menu.
Page 51 of 400
49Monitoring
eMyWay
Select " Synchronize the minutes
with GPS
" so that setting the minutes
is done automatically by satellite
reception.
The clock, located in the dashboard,
is synchronised with the time in the
screen. It is set once the time is
adjusted using the " SETUP
" menu and
every time the ignition is switched on.
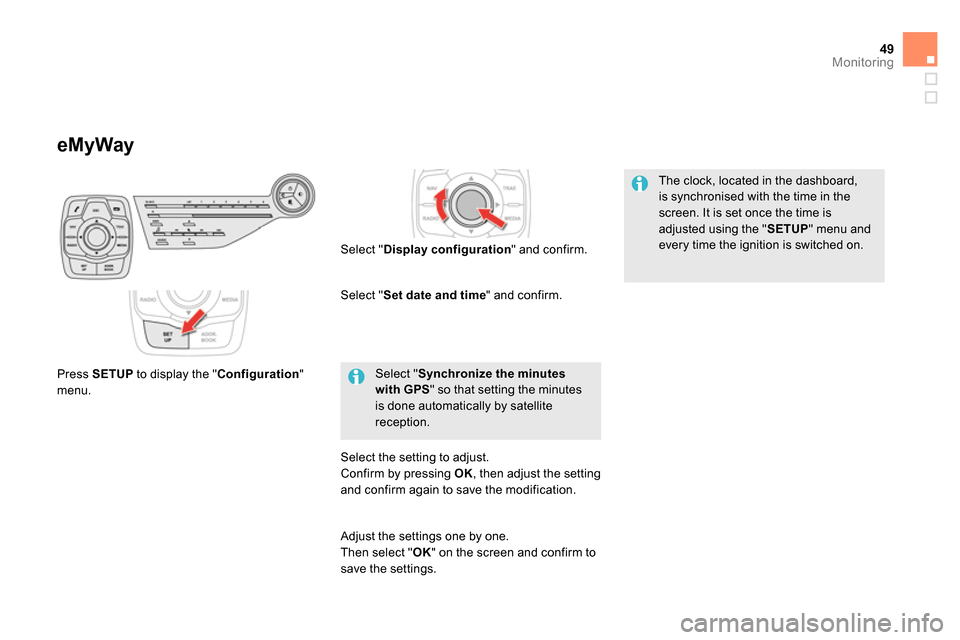
Press SETUP
to display the " Configuration
"
menu.
Select " Display configuration
" and confirm.
Select " Set date and time
" and confirm.
Select the setting to adjust.
Confirm by pressing OK
, then adjust the setting
and confirm again to save the modification.
Adjust the settings one by one.
Then select " OK
" on the screen and confirm to
save the settings.
Page 52 of 400
Tr i p c o m p u t e r
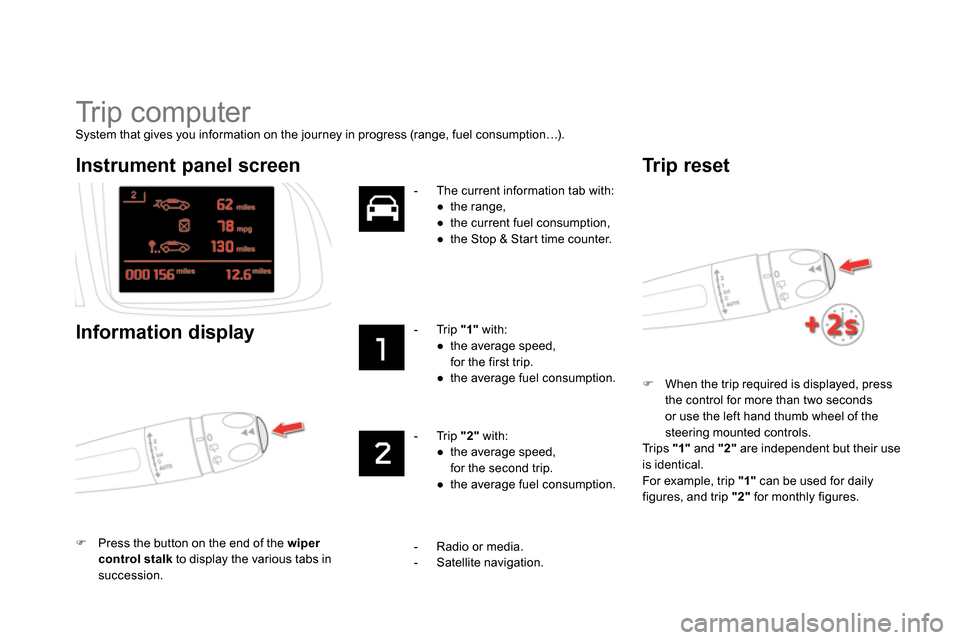
System that gives you information on the journey in progress (range, fuel consumption…).
When the trip required is displayed, press
the control for more than two seconds
or use the left hand thumb wheel of the
steering mounted controls.
Trips "1"
and "2"
are independent but their use
is identical.
For example, trip "1"
can be used for daily
figures, and trip "2"
for monthly figures.
Instrument panel screen
Information display
Press the button on the end of the wiper
control stalk
to display the various tabs in
succession.
- The current information tab with:
●
the range,
●
the current fuel consumption,
●
the Stop & Start time counter.
- Tr i p "1"
with:
●
the average speed,
for the first trip.
●
the average fuel consumption.
- Tr i p "2"
with:
●
the average speed,
for the second trip.
●
the average fuel consumption.
Tr i p r e s e t
- Radio or media.
- Satellite navigation.
Page 53 of 400
51Monitoring
If dashes are displayed continuously
while driving in place of the digits,
contact a CITROËN dealer or a
qualified workshop. This value may vary following a change
in the style of driving or the relief,
resulting in a significant change in the
current fuel consumption.
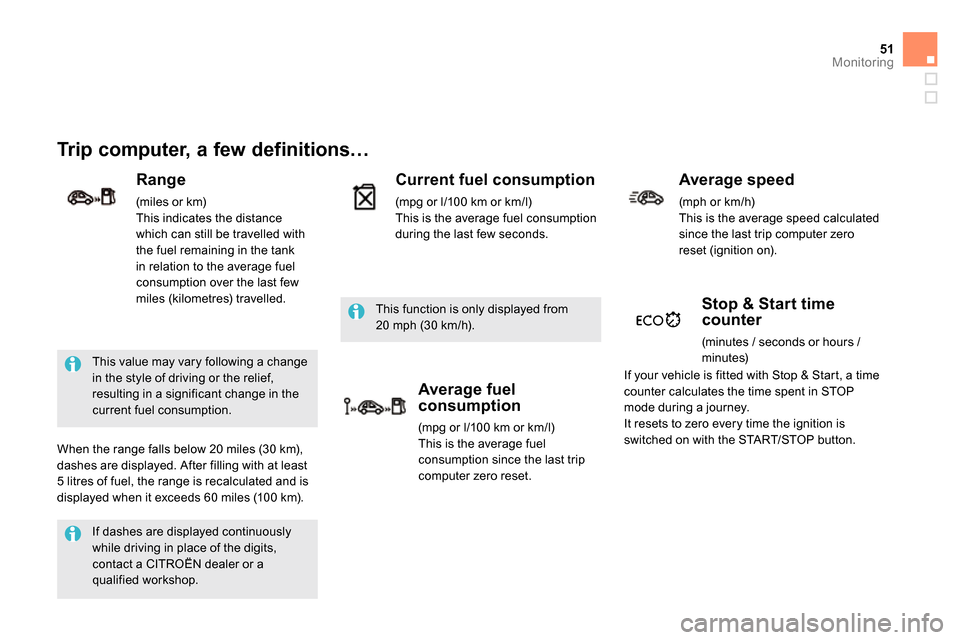
Trip computer, a few definitions…
Range
(miles or km)
This indicates the distance
which can still be travelled with
the fuel remaining in the tank
in relation to the average fuel
consumption over the last few
miles (kilometres) travelled.
When the range falls below 20 miles (30 km),
dashes are displayed. After filling with at least
5 litres of fuel, the range is recalculated and is
displayed when it exceeds 60 miles (100 km). This function is only displayed from
20 mph (30 km/h).
Current fuel consumption
(mpg or l/100 km or km/l)
This is the average fuel consumption
during the last few seconds.
Average fuel
consumption
(mpg or l/100 km or km/l)
This is the average fuel
consumption since the last trip
computer zero reset.
Average speed
(mph or km/h)
This is the average speed calculated
since the last trip computer zero
reset (ignition on).
Stop & Start time
counter
(minutes / seconds or hours /
minutes)
If your vehicle is fitted with Stop & Start, a time
counter calculates the time spent in STOP
mode during a journey.
It resets to zero every time the ignition is
switched on with the START/STOP button.
Page 82 of 400
Storing driving positions
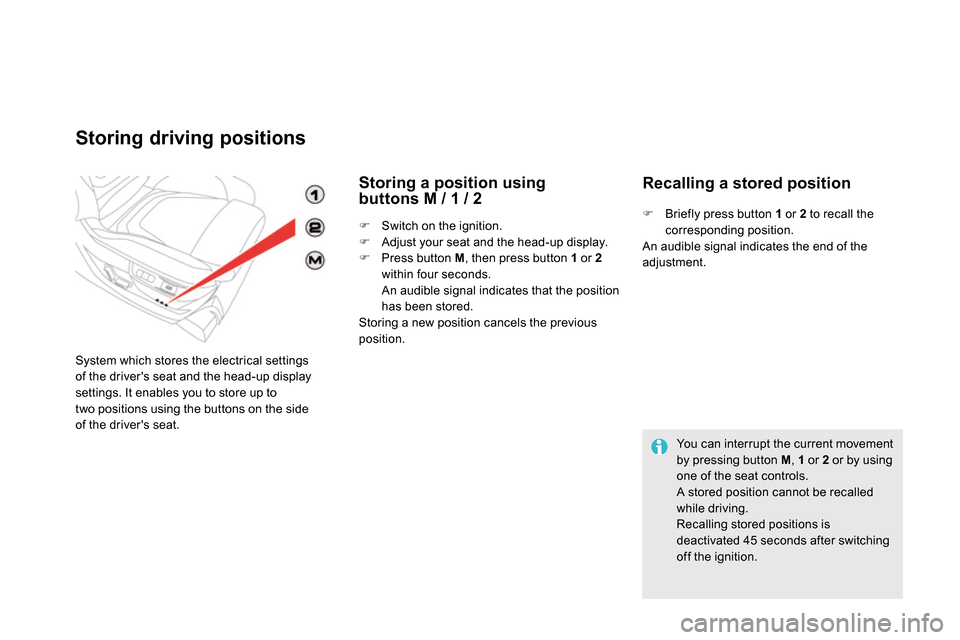
System which stores the electrical settings
of the driver's seat and the head-up display
settings. It enables you to store up to
two positions using the buttons on the side
of the driver's seat.
Storing a position using
buttons M / 1 / 2
Switch on the ignition.
Adjust your seat and the head-up display.
Press button M
, then press button 1
or 2
within four seconds.
An audible signal indicates that the position
has been stored.
Storing a new position cancels the previous
position.
Recalling a stored position
Briefly press button 1
or 2
to recall the
corresponding position.
An audible signal indicates the end of the
adjustment.
You can interrupt the current movement
by pressing button M
, 1
or 2
or by using
one of the seat controls.
A stored position cannot be recalled
while driving.
Recalling stored positions is
deactivated 45 seconds after switching
off the ignition.
Page 92 of 400
USB Player
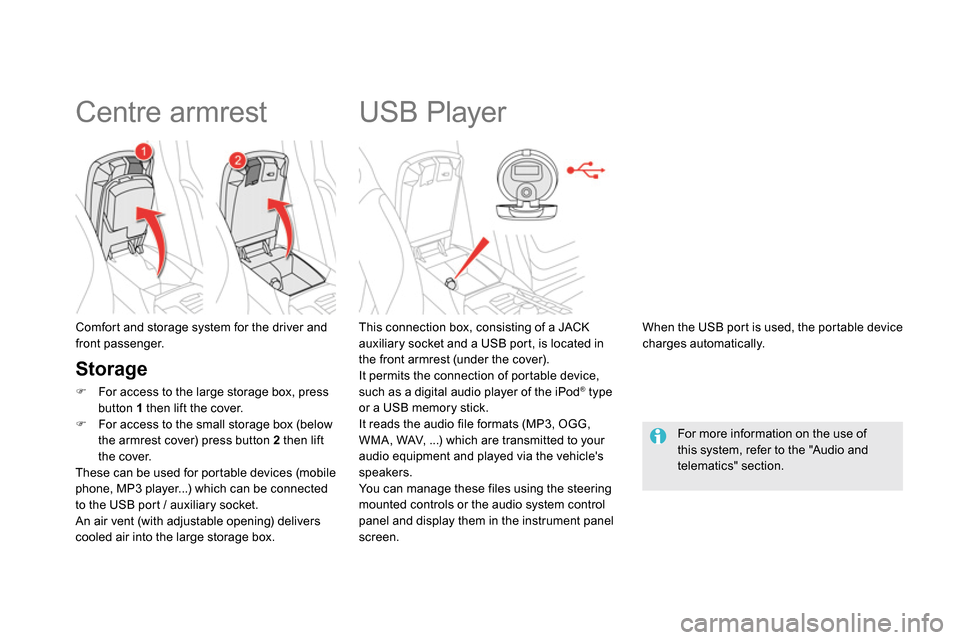
This connection box, consisting of a JACK
auxiliary socket and a USB port, is located in
the front armrest (under the cover).
It permits the connection of portable device,
such as a digital audio player of the iPod
® type
or a USB memory stick.
It reads the audio file formats (MP3, OGG,
WMA, WAV, ...) which are transmitted to your
audio equipment and played via the vehicle's
speakers.
You can manage these files using the steering
mounted controls or the audio system control
panel and display them in the instrument panel
screen.
When the USB por t is used, the por table device
charges automatically.
For more information on the use of
this system, refer to the "Audio and
telematics" section. Comfort and storage system for the driver and
front passenger.
Centre armrest
Storage
For access to the large storage box, press
button 1
then lift the cover.
For access to the small storage box (below
the armrest cover) press button 2
then lift
the cover.
These can be used for portable devices (mobile
phone, MP3 player...) which can be connected
to the USB port / auxiliary socket.
An air vent (with adjustable opening) delivers
cooled air into the large storage box.
Page 98 of 400
Dual-zone digital air conditioning
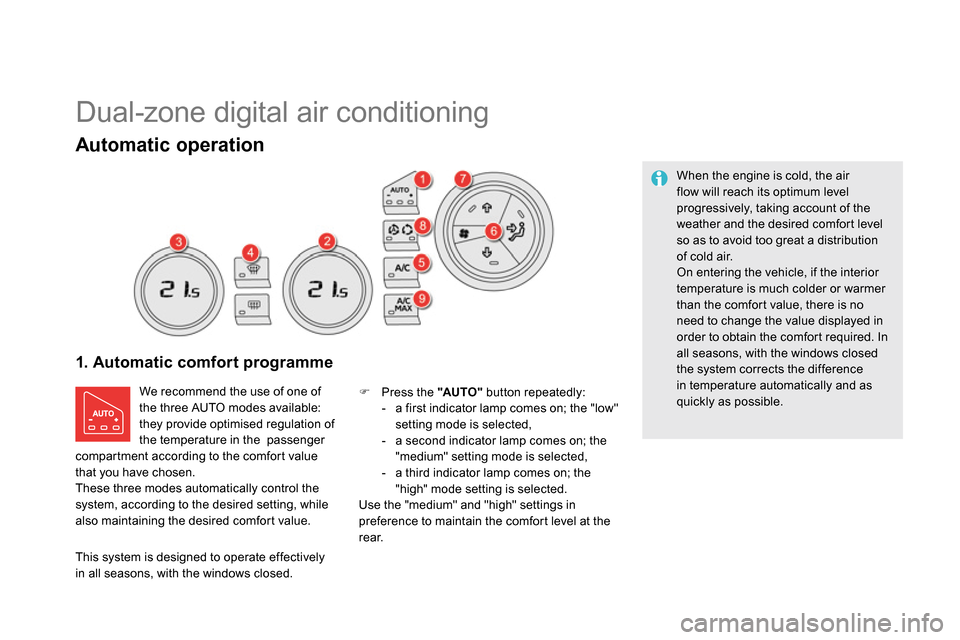
1. Automatic comfort programme
We recommend the use of one of
the three AUTO modes available:
they provide optimised regulation of
the temperature in the passenger
compartment according to the comfort value
that you have chosen.
These three modes automatically control the
system, according to the desired setting, while
also maintaining the desired comfort value.
Press the "AUTO "
button repeatedly:
- a first indicator lamp comes on; the "low"
setting mode is selected,
- a second indicator lamp comes on; the
"medium" setting mode is selected,
- a third indicator lamp comes on; the
"high" mode setting is selected.
Use the "medium" and "high" settings in
preference to maintain the comfort level at the
rear.
When the engine is cold, the air
flow will reach its optimum level
progressively, taking account of the
weather and the desired comfort level
so as to avoid too great a distribution
of cold air.
On entering the vehicle, if the interior
temperature is much colder or warmer
than the comfort value, there is no
need to change the value displayed in
order to obtain the comfort required. In
all seasons, with the windows closed
the system corrects the difference
in temperature automatically and as
quickly as possible.
This system is designed to operate effectively
in all seasons, with the windows closed.
Automatic operation
Page 99 of 400
97Comfort
4. Automatic visibility
programme
For maximum cooling or heating of the
passenger compartment, it is possible
to exceed the minimum value 14 or the
maximum value 28.
Turn control 2
or 3
to the left
until "LO"
is displayed or to the
right until "HI"
is displayed.
See "Front demisting - defrosting".
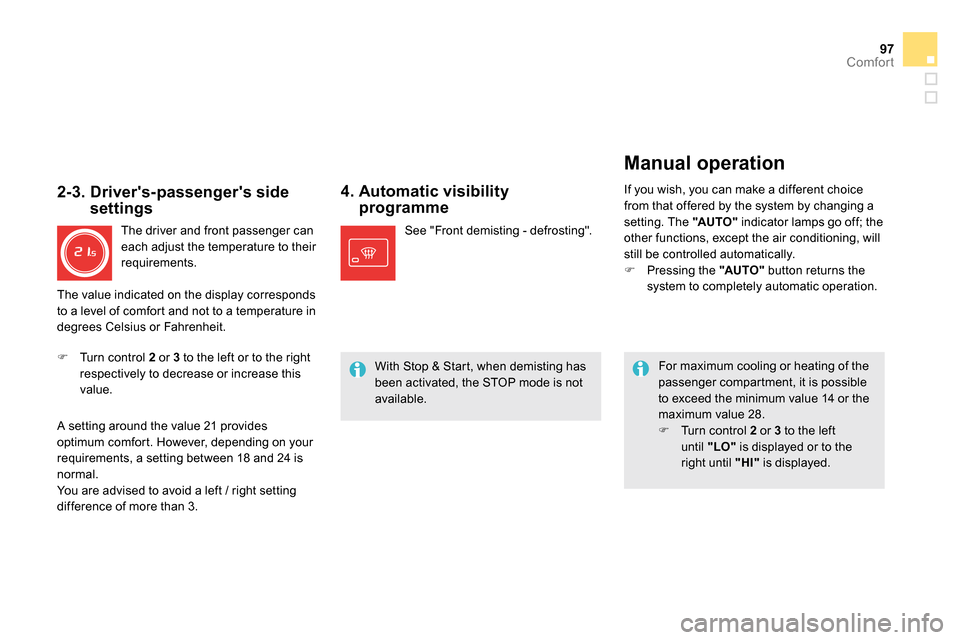
2-3. Driver's-passenger's side
settings
The driver and front passenger can
each adjust the temperature to their
requirements.
Turn control 2
or 3
to the left or to the right
respectively to decrease or increase this
value.
A setting around the value 21 provides
optimum comfort. However, depending on your
requirements, a setting between 18 and 24 is
normal.
You are advised to avoid a left / right setting
difference of more than 3.
Manual operation
If you wish, you can make a different choice
from that offered by the system by changing a
setting. The "AUTO "
indicator lamps go off; the
other functions, except the air conditioning, will
still be controlled automatically.
Pressing the "AUTO "
button returns the
system to completely automatic operation.
With Stop & Start, when demisting has
been activated, the STOP mode is not
available. The value indicated on the display corresponds
to a level of comfort and not to a temperature in
degrees Celsius or Fahrenheit.