tow Citroen JUMPER RHD 2011.5 2.G Owner's Manual
[x] Cancel search | Manufacturer: CITROEN, Model Year: 2011.5, Model line: JUMPER RHD, Model: Citroen JUMPER RHD 2011.5 2.GPages: 184, PDF Size: 4.98 MB
Page 5 of 184
3
CONTENT
S
Contents
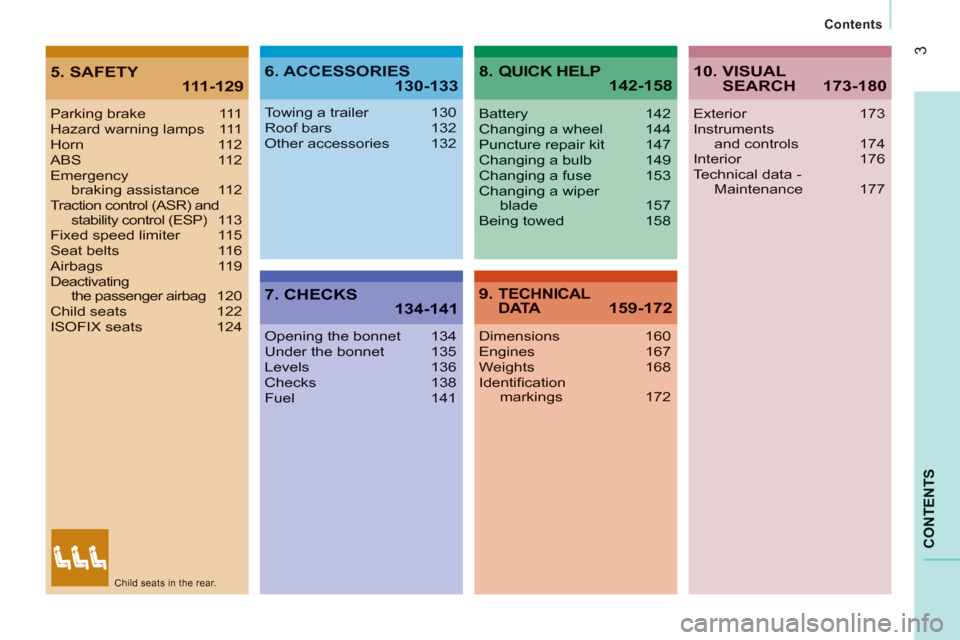
5. SAFETY111-1296. ACCESSORIES130-133
7. CHECKS 134-141
8. QUICK HELP 142-158
9. TECHNICALD ATA159-172A
Parking brake 111Hazard warning lamps 111Horn 112ABS 112Emergencybraking assistance 112Traction control (ASR) and stability control (ESP)113Fixed speed limiter 115Seat belts 116Airbags 119Deactivating the passenger airbag120Child seats 122ISOFIX seats 124
Towing a trailer 130Roof bars 132Other accessories 132
Opening the bonnet134Under the bonnet 135Levels 136Checks 138Fuel 141
Battery 142Changing a wheel 144Puncture repair kit 147Changing a bulb 149Changing a fuse 153Changing a wiper blade 157Being towed 158
Dimensions 160Engines 167Weights 168Identifi cationmarkings 172
10. VISUALSEARCH 173-180
Exterior 173Instrumentsand controls 174Interior 176Technical data - Maintenance 177
Child seats in the rear.
Page 8 of 184
222
6
Familiarisation
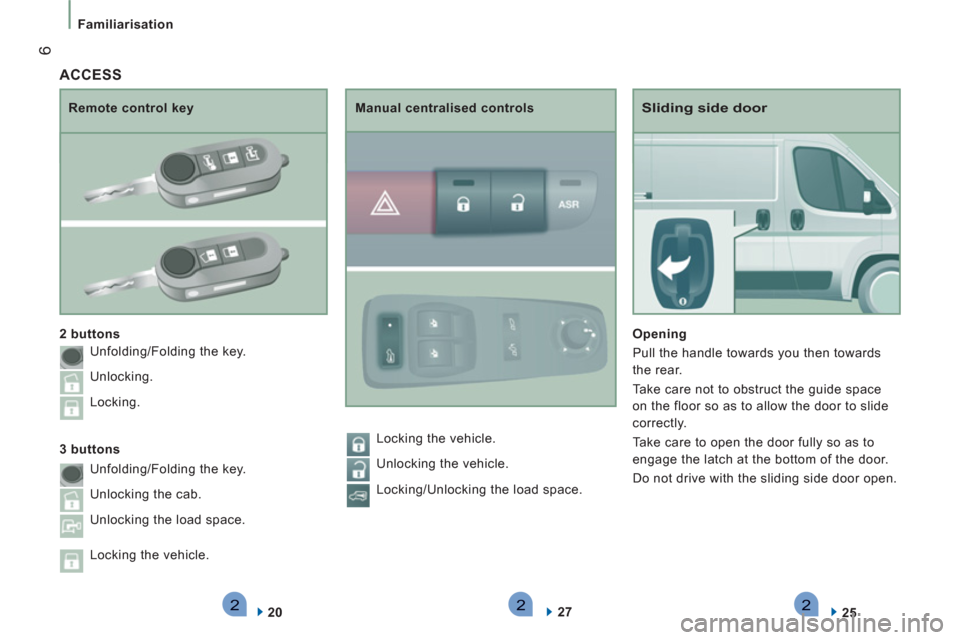
Sliding side door
Opening
Pull the handle towards you then towards
the rear.
Take care not to obstruct the guide space
on the floor so as to allow the door to slide
correctly.
Take care to open the door fully so as to
engage the latch at the bottom of the door.
Do not drive with the sliding side door open.
25
Remote control key
2 buttons
20
Manual centralised controls
27
ACCESS
3 buttons Unfolding/Folding the key.
Unlocking.
Locking.
Unfolding/Folding the key.
Unlocking the cab.
Unlocking the load space.
Locking the vehicle.
Locking the vehicle.
Unlocking the vehicle.
Locking/Unlocking the load space.
Page 9 of 184
2271
FAMILIARISATION
7
Familiarisation
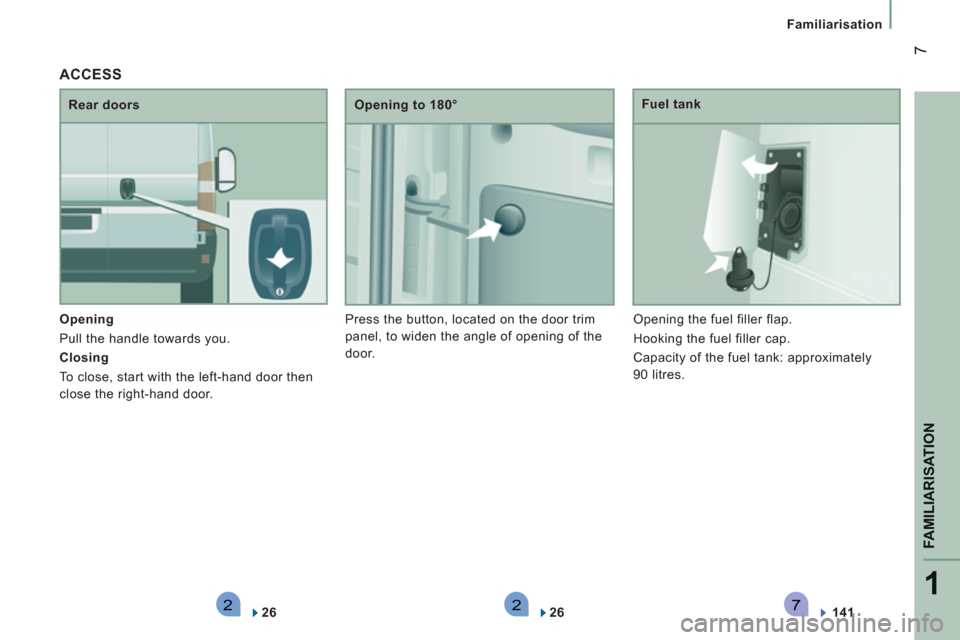
Opening
Pull the handle towards you.
Closing
To close, start with the left-hand door then
close the right-hand door.
Rear doors
Opening to 180°
Press the button, located on the door trim
panel, to widen the angle of opening of the
door.
Fuel tank
Opening the fuel filler flap.
Hooking the fuel filler cap.
Capacity of the fuel tank: approximately
90 litres.
26
ACCESS
26
141
Page 15 of 184

3331
FAMILIARISATION
13
Familiarisation
45
Windscreen wash
Pull the control stalk towards you, the
windscreen wash is accompanied by a timed
operation of the wipers.
SEEING CLEARLY
73
Electric window controls
A.
Driver’s electric window control.
B.
Passenger’s electric window control.
The electric window functions are
deactivated one minute after the ignition is
switched off.
45
Windscreen wipers
A.
Park.
B.
Intermittent (4 speeds).
C.
Slow continuous.
D.
Fast continuous.
E.
Single wipe.
Page 20 of 184
18
ECO-DRIVING
Eco-driving is a range of everyday practices that allow the motorist to optimise their fuel consumption and CO2 emissions.
Optimise the use of your gearbox
With a manual gearbox, move off gently,
change up without waiting and drive by
changing up quite soon. If your vehicle
has the system, the gear efficiency
indicator invites you to change up; it is
displayed in the instrument panel, follow
its instructions.
With an automatic or electronic gearbox,
stay in Drive "D"
or Auto "A"
, according to
the type of gearbox, without pressing the
accelerator pedal heavily or suddenly.
Drive smoothly
Maintain a safe distance between vehicles,
use engine braking rather than the
brake pedal, and press the accelerator
progressively. These practices contribute
towards a reduction in fuel consumption
and CO
2 emissions and also helps reduce
the background traffic noise.
If your vehicle has cruise control, make
use of the system at speeds above 25 mph
(40 km/h) when the traffic is flowing well.
Control the use of your electricalequipment
Before moving off, if the passenger
compartment is too warm, ventilate it by
opening the windows and air vents before
using the air conditioning.
Above 30 mph (50 km/h), close the windows
and leave the air vents open.
Remember to make use of equipment
that can help keep the temperature in the
passenger compartment down (sun roof and
window blinds...).
Switch off the air conditioning, unless it has
automatic digital regulation, as soon as the
desired temperature is attained.
Switch off the demisting and defrosting
controls, if not automatic.
Switch off the heated seat as soon as
possible.
Switch off the headlamps and front foglamps
when the level of light does not require their
use.
Avoid running the engine before moving
off, particularly in winter; your vehicle will
warm up much faster while driving.
As a passenger, if you avoid connecting
your multimedia devices (film, music,
video game...), you will contribute towards
limiting the consumption of electrical
energy, and so of fuel.
Disconnect your portable devices before
leaving the vehicle.
Page 27 of 184

25
2
Access
READY TO G
O
FRONT DOORS
Child lock
This prevents opening of the sliding side
door from the inside.
Press the control located on the edge of the
side door. Driver’s door
Use the remote control to unlock/lock.
SLIDING SIDE DOOR
Take care not to obstruct the guide space
on the floor in order for the door to slide
correctly.
From outside
Pull the handle towards you then towards
the rear.
From inside
To unlock and open, push the handle
towards the rear.
Ensure that the door opens fully in order for
the latch at the bottom of the door to engage.
To release and close, pull the handle while
sliding the door.
Do not drive with the sliding side door
open.
Page 28 of 184

26
Access
REAR DOORS
From outside
Pull the handle towards you. The two hinged
doors open to 96°.
Opening/Closing the doors
To open, pull the handle towards you then
pull the lever to open the left-hand door.
To close, start with the left-hand door then
close the right-hand door.
Opening to 180°
If your vehicle is fitted with this equipment,
a retractable check strap system permits
extending of the opening from 96° to 180°.
Press the button, located on the door trim
pad, to widen the angle of the door.
The check strap will take up its normal
position again automatically on closing.
Page 35 of 184

Instruments and controls
33
2
READY TO G
O
Warning lamp
is
indicates
Solution - action
Water in Diesel
filter on, accompanied
by a message on
the screen. that there is water in the Diesel
fuel filter. Have the filter bled by a CITROËN dealer. Refer to the
"Checks" section of chapter 7.
Low fuel level on with the
gauge needle in
zone E. that the fuel reserved is being
used. Fill up with fuel without delay. The calculation of the
remaining fuel depends on the style of driving, the profile
of the road, the time elapsed and the distance travelled
since the warning lamp first came on.
flashing. a malfunction. Consult a CITROËN dealer.
Diesel
pre-heating on. that the weather conditions
impose pre-heating. Wait for the warning lamp to switch off before operating
the starter.
Sidelamps on, accompanied
by a message on
the screen. manual selection. Turn the ring on the lighting stalk to the first position.
automatic illumination of
headlamps, ring in position A. Adjust the sensitivity of the sunshine sensor via the
MODE menu. Refer to the "Mode" section of chapter 4.
Dipped beam
headlamps
on. manual selection. Turn the ring on the lighting stalk to the second position.
Main beam
headlamps pulling of the stalk towards you. Pull the stalk to return to dipped beam headlamps.
Page 40 of 184
38
Gearbox and steering wheel
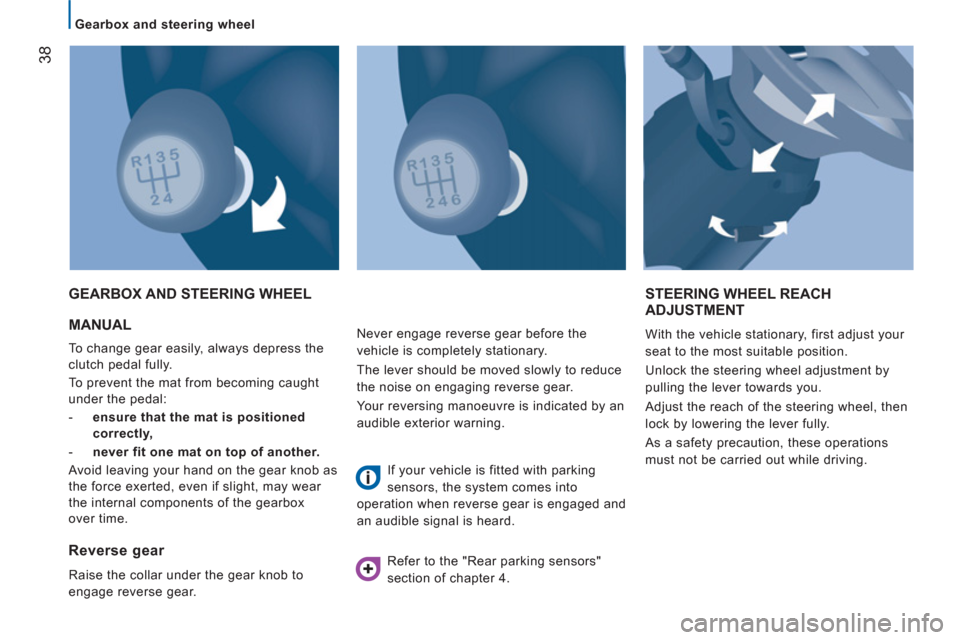
MANUAL
To change gear easily, always depress the
clutch pedal fully.
To prevent the mat from becoming caught
under the pedal:
- ensure that the mat is positioned
correctly,
- never fit one mat on top of another.
Avoid leaving your hand on the gear knob as
the force exerted, even if slight, may wear
the internal components of the gearbox
over time.
GEARBOX AND STEERING WHEELSTEERING WHEEL REACH ADJUSTMENT
With the vehicle stationary, first adjust your
seat to the most suitable position.
Unlock the steering wheel adjustment by
pulling the lever towards you.
Adjust the reach of the steering wheel, then
lock by lowering the lever fully.
As a safety precaution, these operations
must not be carried out while driving.
Reverse gear
Raise the collar under the gear knob to
engage reverse gear. Never engage reverse gear before the
vehicle is completely stationary.
The lever should be moved slowly to reduce
the noise on engaging reverse gear.
Your reversing manoeuvre is indicated by an
audible exterior warning.
If your vehicle is fitted with parking
sensors, the system comes into
operation when reverse gear is engaged and
an audible signal is heard.
Refer to the "Rear parking sensors"
section of chapter 4.
Page 44 of 184
42
Steering mounted controls
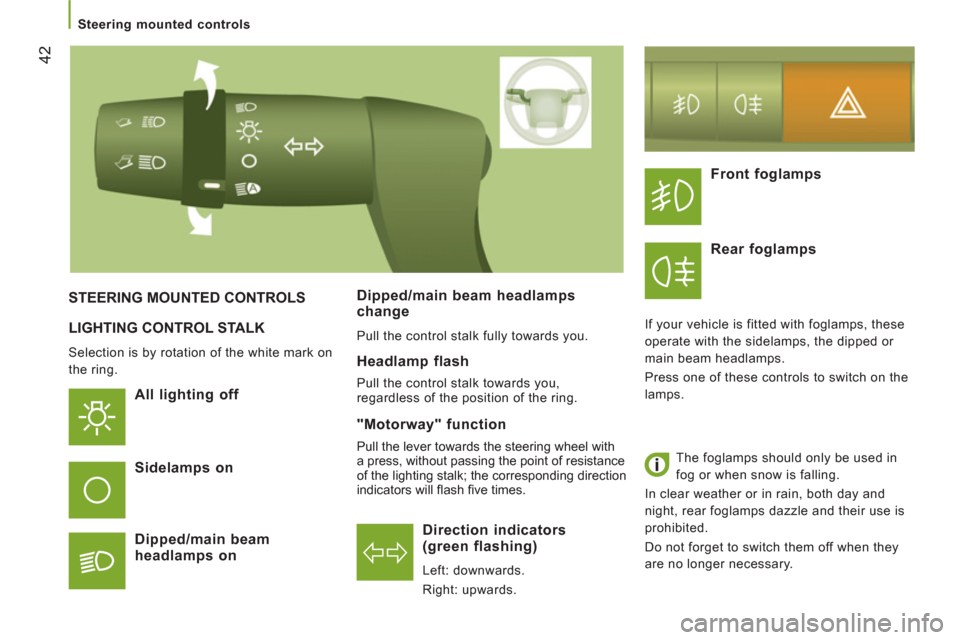
LIGHTING CONTROL STALK
Selection is by rotation of the white mark on
the ring.
All lighting off
Direction indicators
(green flashing)
Left: downwards.
Right: upwards.
STEERING MOUNTED CONTROLS
Sidelam
ps on
Di
pped/main beam
headlamps on Dipped
/main beam headlampschange
Pull the control stalk fully towards you.
Headlamp flash
Pull the control stalk towards you,
regardless of the position of the ring.
Front foglamps
Rear fo
glamps
If your vehicle is fitted with foglamps, these
operate with the sidelamps, the dipped or
main beam headlamps.
Press one of these controls to switch on the
lamps.
The foglamps should only be used in
fog or when snow is falling.
In clear weather or in rain, both day and
night, rear foglamps dazzle and their use is
prohibited.
Do not forget to switch them off when they
are no longer necessary.
"Motorway" function
Pull the lever towards the steering wheel with
a press, without passing the point of resistance
of the lighting stalk; the corresponding direction
indicators will fl ash fi ve times.