headlamp Citroen JUMPY 2008.5 2.G Owner's Manual
[x] Cancel search | Manufacturer: CITROEN, Model Year: 2008.5, Model line: JUMPY, Model: Citroen JUMPY 2008.5 2.GPages: 185, PDF Size: 6.66 MB
Page 5 of 185
Interior
8
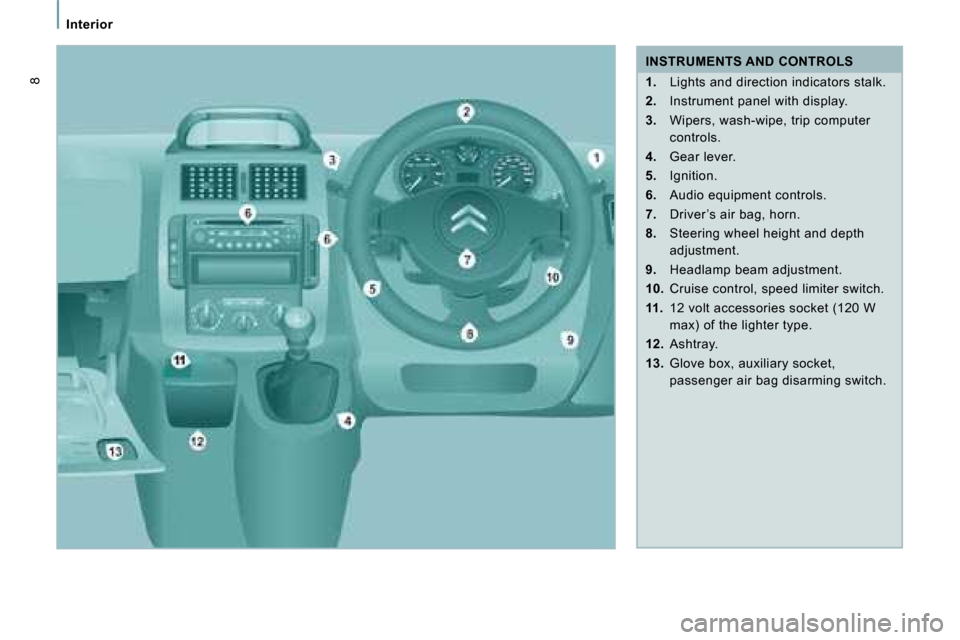
INSTRUMENTS AND CONTROLS
1. Lights and direction indicators stalk.
2. Instrument panel with display.
3. Wipers, wash-wipe, trip computer
controls.
4. Gear lever.
5. Ignition.
6. Audio equipment controls.
7. Driver ’s air bag, horn.
8. Steering wheel height and depth
adjustment.
9. Headlamp beam adjustment.
10. Cruise control, speed limiter switch.
11. 12 volt accessories socket (120 W
max) of the lighter type.
12. Ashtray.
13. Glove box, auxiliary socket,
passenger air bag disarming switch.
Page 9 of 185
3
3
8
Interior
12
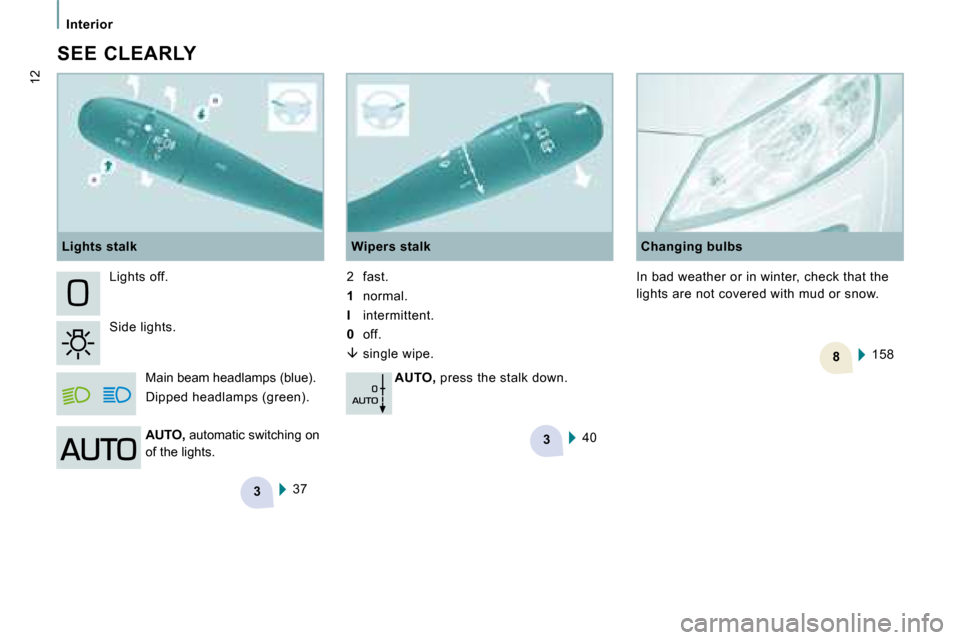
SEE CLEARLY 37
Lights off.
Side lights.
Main beam headlamps (blue).
Dipped headlamps (green). Wipers stalk
2 fast.
1 normal.
I intermittent.
0 off.
� single wipe.
AUTO, press the stalk down.
AUTO, automatic switching on
of the lights.
Lights stalk
40 Changing bulbs
158
In bad weather or in winter, check that the
lights are not covered with mud or snow.
Page 30 of 185
30
Instruments and controls
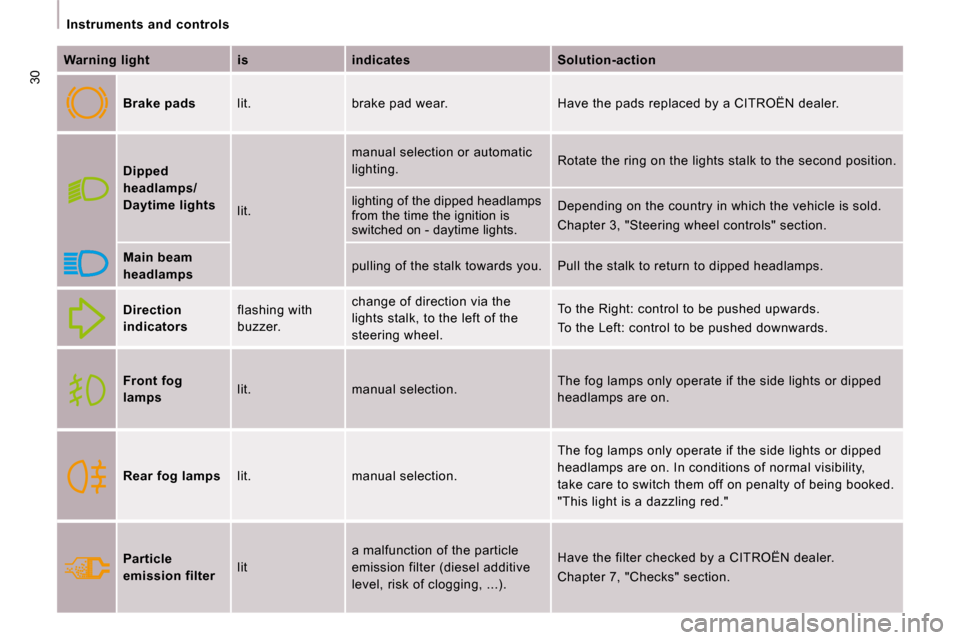
Warning light is indicates Solution-action
Brake pads lit. brake pad wear. Have the pads replaced by a CITROËN dealer.
Dipped
headlamps/
Daytime lights
lit. manual selection or automatic
lighting.
Rotate the ring on the lights stalk to the second
position.
lighting of the dipped headlamps
from the time the ignition is
switched on - daytime lights. Depending on the country in which the vehicle is s
old.
Chapter 3, "Steering wheel controls" section.
Main beam
headlamps pulling of the stalk towards you. Pull the stalk
to return to dipped headlamps.
Direction
indicators flashing with
buzzer. change of direction via the
lights stalk, to the left of the
steering wheel. To the Right: control to be pushed upwards.
To the Left: control to be pushed downwards.
Front fog
lamps lit. manual selection. The fog lamps only operate if the side lights or d
ipped
headlamps are on.
Rear fog lamps lit. manual selection. The fog lamps only operate if the side lights or d
ipped
headlamps are on. In conditions of normal visibilit y,
take care to switch them off on penalty of being bo oked.
"This light is a dazzling red."
Particle
emission filter lit a malfunction of the particle
emission filter (diesel additive
level, risk of clogging, ...). Have the filter checked by a CITROËN dealer.
Chapter 7, "Checks" section.
Page 40 of 185
38
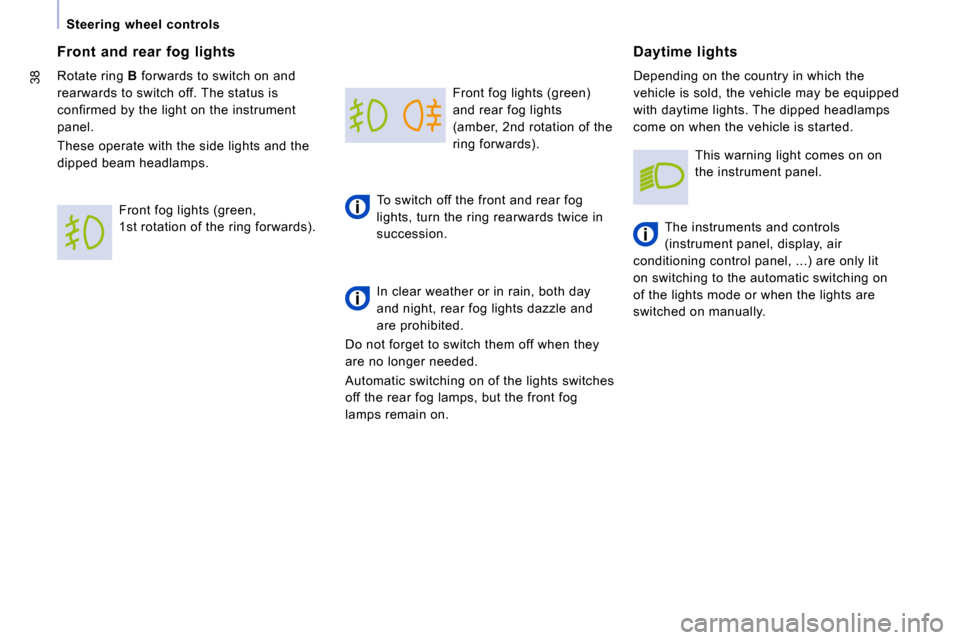
Steering wheel controls Front fog lights (green)
and rear fog lights
(amber, 2nd rotation of the
ring forwards).
To switch off the front and rear fog
lights, turn the ring rearwards twice in
succession.
In clear weather or in rain, both day
and night, rear fog lights dazzle and
are prohibited.
Do not forget to switch them off when they
are no longer needed.
Automatic switching on of the lights switches
off the rear fog lamps, but the front fog
lamps remain on. Daytime lights
Depending on the country in which the
vehicle is sold, the vehicle may be equipped
with daytime lights. The dipped headlamps
come on when the vehicle is started.
The instruments and controls
(instrument panel, display, air
conditioning control panel, ...) are only lit
on switching to the automatic switching on
of the lights mode or when the lights are
switched on manually.
Front and rear fog lights
Rotate ring
B forwards to switch on and
rearwards to switch off. The status is
confirmed by the light on the instrument
panel.
These operate with the side lights and the
dipped beam headlamps.
Front fog lights (green,
1st rotation of the ring forwards). This warning light comes on on
the instrument panel.
Page 41 of 185
39
Steering wheel controls
ERGONOMICS and COMFORT
3
Automatic switching on of the lights Activation
Turn the ring to the AUTO position. The
activation of this function is accompanied by
a message on the display.
If the brightness sensor does not
function correctly, the lights come on
accompanied by the service warning light,
an audible signal and a message on the
display.
Consult a CITROËN dealer.
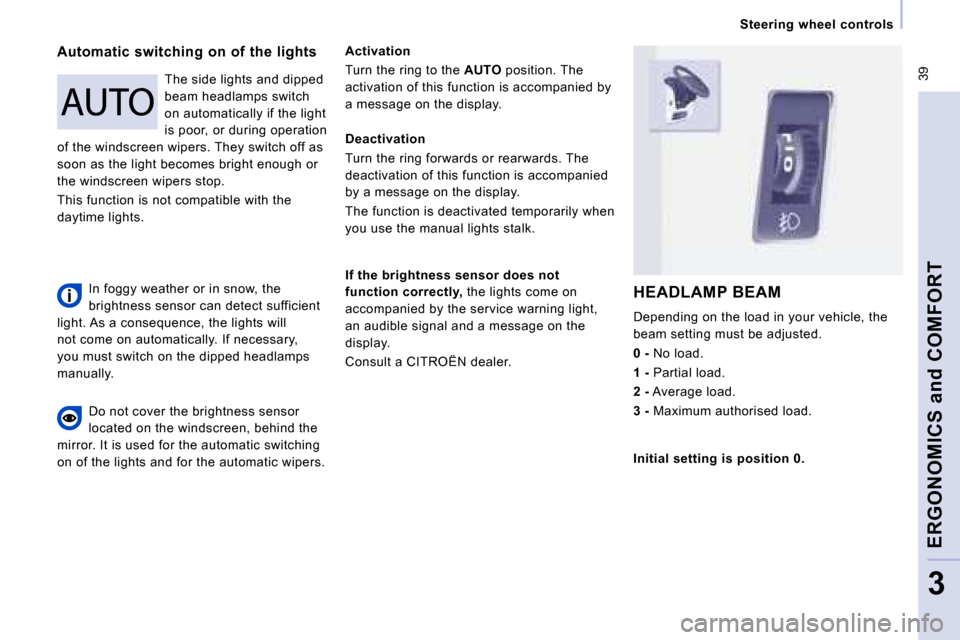
HEADLAMP BEAM
Depending on the load in your vehicle, the
beam setting must be adjusted.
0 - No load.
1 - Partial load.
2 - Average load.
3 - Maximum authorised load.
Do not cover the brightness sensor
located on the windscreen, behind the
mirror. It is used for the automatic switching
on of the lights and for the automatic wipers. The side lights and dipped
beam headlamps switch
on automatically if the light
is poor, or during operation
of the windscreen wipers. They switch off as
soon as the light becomes bright enough or
the windscreen wipers stop.
This function is not compatible with the
daytime lights. Deactivation
Turn the ring forwards or rearwards. The
deactivation of this function is accompanied
by a message on the display.
The function is deactivated temporarily when
you use the manual lights stalk.
Initial setting is position 0.
In foggy weather or in snow, the
brightness sensor can detect sufficient
light. As a consequence, the lights will
not come on automatically. If necessary,
you must switch on the dipped headlamps
manually.
Page 42 of 185
40
Steering wheel controls
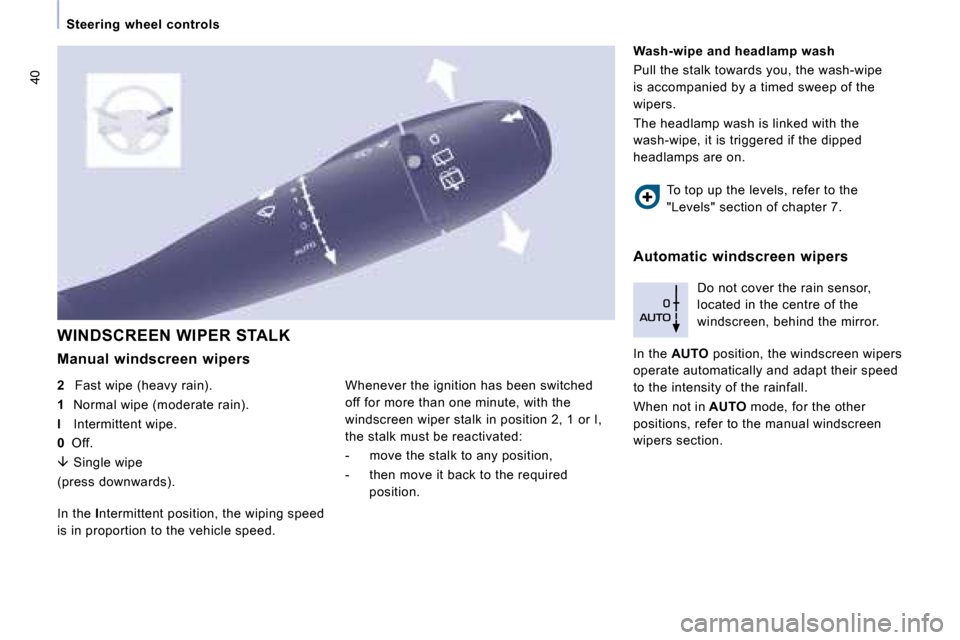
WINDSCREEN WIPER STALK
Manual windscreen wipers
2 Fast wipe (heavy rain).
1 Normal wipe (moderate rain).
l Intermittent wipe.
0 Off.
� Single wipe
(press downwards). Do not cover the rain sensor,
located in the centre of the
windscreen, behind the mirror.
Wash-wipe and headlamp wash
Pull the stalk towards you, the wash-wipe
is accompanied by a timed sweep of the
wipers.
The headlamp wash is linked with the
wash-wipe, it is triggered if the dipped
headlamps are on.
In the I ntermittent position, the wiping speed
is in proportion to the vehicle speed. To top up the levels, refer to the
"Levels" section of chapter 7.
In the AUTO position, the windscreen wipers
operate automatically and adapt their speed
to the intensity of the rainfall.
When not in AUTO mode, for the other
positions, refer to the manual windscreen
wipers section.
Whenever the ignition has been switched
off for more than one minute, with the
windscreen wiper stalk in position 2 , 1 or I
,
the stalk must be reactivated:
- move the stalk to any position,
- then move it back to the required position. Automatic windscreen wipers
Page 147 of 185
144
Under the bonnet
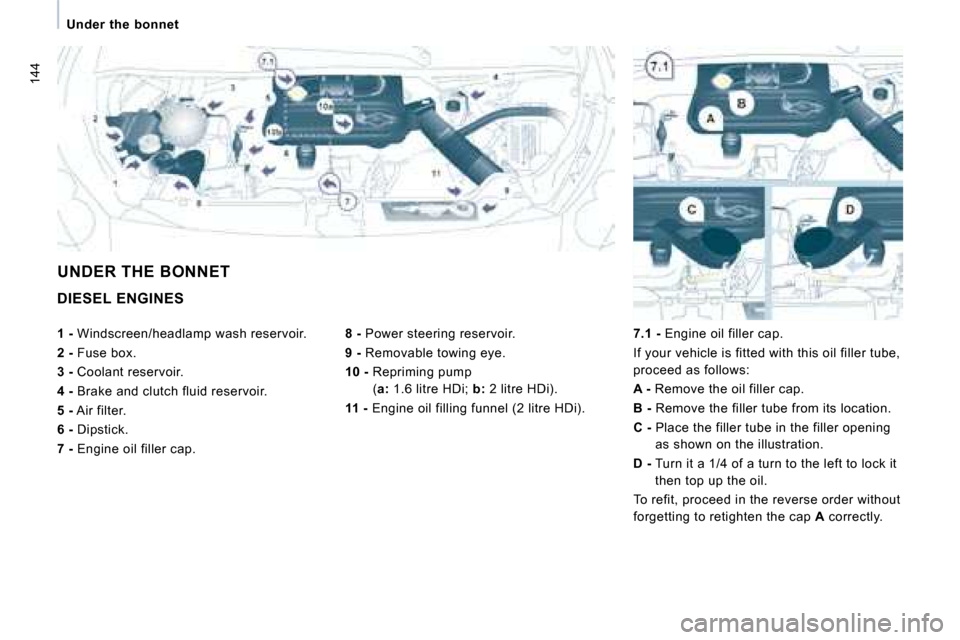
DIESEL ENGINES
8 - Power steering reservoir.
9 - Removable towing eye.
10 - Repriming pump
( a
: 1.6 litre HDi; b : 2 litre HDi).
11 - Engine oil filling funnel (2 litre HDi).
7.1 - Engine oil filler cap.
If your vehicle is fitted with this oil filler tub e,
proceed as follows:
A - Remove the oil filler cap.
B - Remove the filler tube from its location.
C - Place the filler tube in the filler opening
as shown on the illustration.
D - Turn it a 1/4 of a turn to the left to lock it
then top up the oil.
To refit, proceed in the reverse order without
forgetting to retighten the cap A correctly.
UNDER THE BONNET
1 - Windscreen/headlamp wash reservoir.
2 - Fuse box.
3 - Coolant reservoir.
4 - Brake and clutch fluid reservoir.
5 - Air filter.
6 - Dipstick.
7 - Engine oil filler cap.
Page 148 of 185
145
Under the bonnet
CHECKS
7
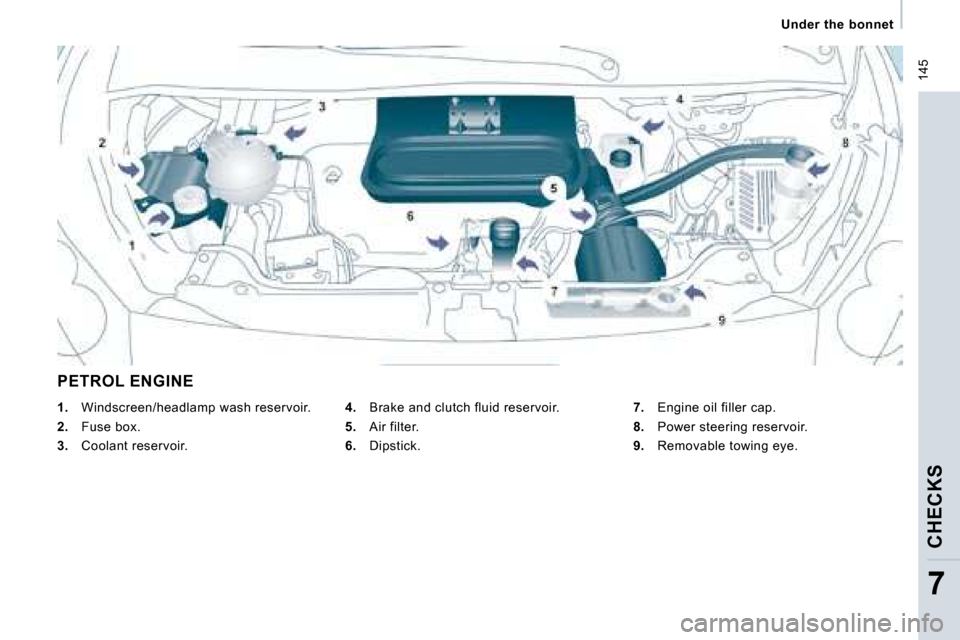
PETROL ENGINE
4. Brake and clutch fluid reservoir.
5. Air filter.
6. Dipstick.
7. Engine oil filler cap.
8. Power steering reservoir.
9. Removable towing eye.
1. Windscreen/headlamp wash reservoir.
2. Fuse box.
3. Coolant reservoir.
Page 150 of 185
147
Levels
CHECKS
7
Cooling system
Only use the fluid recommended by the
manufacturer.
Otherwise, you risk seriously damaging your
engine.
When the engine is warm, the temperature
of the coolant is controlled by the engine
fan. As this fan can operate with the ignition
key removed and because the cooling
system is pressurised, wait for at least one
hour after the engine has stopped before
carrying out any work.
Slacken the cap by 1/4 of a turn to release
the pressure to prevent any risk of scalding.
When the pressure has dropped, remove the
cap and top up the level with coolant.
If fluid has to be added frequently, this
indicates a failure which must be checked by
a CITROËN dealer as soon as possible. Power steering fluid level
The vehicle must be parked on level ground
with the engine cold. Unscrew the cap
integrated with the gauge and check the
level which must be between the MIN and
MAX marks.
When this occurs with the engine running it
is due to the start of saturation of the particle
emission filter (exceptionally prolonged
urban type driving conditions: low speed,
long traffic jams, ...).
In order to regenerate the filter, you are
advised to drive at a speed higher than
40 mph (60 km/h) for at least five minutes
as soon as possible, when traffic conditions
permit (until the message disappears and
the service warning light is switched off).
During regeneration of the particle emission
filter, relay noise may be heard under the
fascia.
If the message is still displayed and if the
service warning light remains on, contact a
CITROËN dealer.
Topping up
The level must be between the MIN and
MAX marks on the expansion bottle. If
more than 1 litre of fluid is required to top
up the level, have the system checked by a
CITROËN dealer. Windscreen wash and headlamp
wash level
For best quality cleaning and for your safety,
we would advise that you use products of
the CITROËN Universal range.
Capacity of the screenwash reservoir:
approximately 4.5 litres.
If your vehicle is fitted with headlamp
washers, the capacity of the reservoir is
7.5 litres.
To guarantee optimum cleaning and prevent
freezing, this fluid must not be topped up or
replaced with water.
Diesel additive level (Diesel
with particle emission filter)
The minimum level of this additive
is indicated by lighting of the
service warning light, accompanied by
an audible signal and a message on the
display. Topping up
It is imperative that this additive is topped up
by a CITROËN dealer without delay.
Page 161 of 185
Changing a bulb
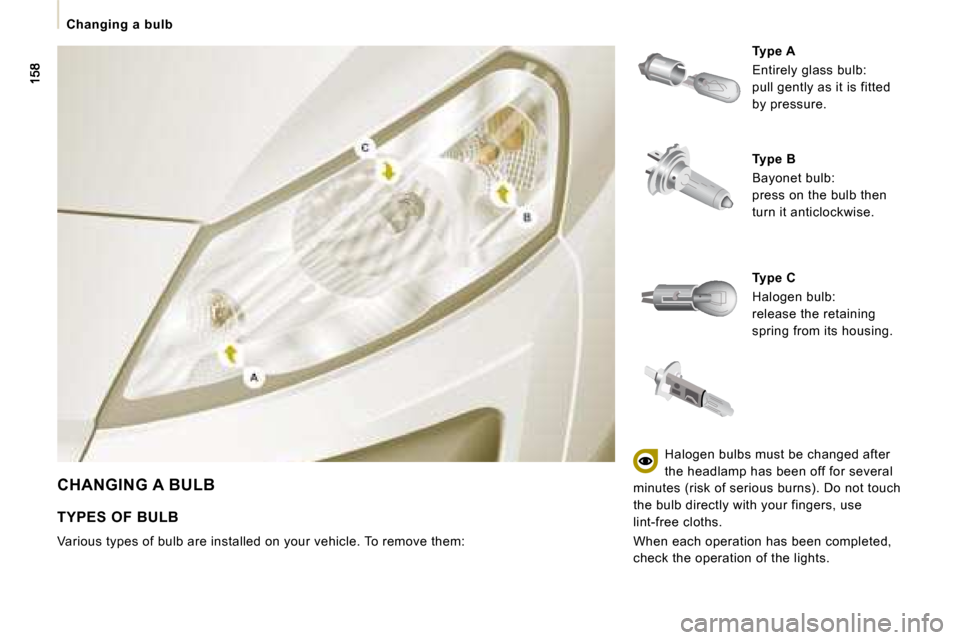
CHANGING A BULB
Type A
Entirely glass bulb:
pull gently as it is fitted
by pressure.
Type B
Bayonet bulb:
press on the bulb then
turn it anticlockwise.
Type C
Halogen bulb:
release the retaining
spring from its housing.
TYPES OF BULB
Various types of bulb are installed on your vehicl e. To remove them: Halogen bulbs must be changed after
the headlamp has been off for several
minutes (risk of serious burns). Do not touch
the bulb directly with your fingers, use
lint-free cloths.
When each operation has been completed,
check the operation of the lights.