central CITROEN JUMPY 2021 Owners Manual
[x] Cancel search | Manufacturer: CITROEN, Model Year: 2021, Model line: JUMPY, Model: CITROEN JUMPY 2021Pages: 324, PDF Size: 10.05 MB
Page 4 of 324
2
Contents
■
OverviewOverview 4
Labels 5
■
Eco-driving
1Dashboard instrumentsInstrument Panel 9
Warning and indicator lamps 11
Indicators 16
Distance recorders 21
Lighting dimmer 22
Trip computer 22
Touch screen 24
Additional remotely operable functions (Electric) 26
Setting the date and time 26
2AccessElectronic key with remote control function and
built-in key 28
Unlocking/Complete or selective unlocking 30
Back-up procedures 34
Central locking 37
Electric sliding side door(s) 38
General recommendations for the sliding
side doors
39
Hands-free sliding side door(s) 42
Side-hinged rear doors 43
Tailgate 44
Tailgate rear screen 44
Alarm 45
Electric windows 47
3Ease of use and comfortCorrect driving position 48
Front seats 48
2-seat front bench seat 50
Steering wheel adjustment 52
Mirrors 52
Moduwork 53
Precautions for the seats and bench seats 57
Fixed one-piece bench seat 57
Fixed rear seat and bench seat 59
Rear seat and bench seat on rails 61
Individual rear seat(s) on rails 63
Crew cab, fixed 65
Crew cab, folding 67
Interior fittings 68
Loading area fittings 71
Seating area fittings 72
Panoramic sunroof 74
Retractable sliding table 74
Heating and Ventilation 77
Heating 78
Manual air conditioning 78
Dual-zone automatic air conditioning 79
Front demisting - defrosting 81
Demisting/de-icing the rear screen and/or
the door mirrors
82
Rear heating - air conditioning 82
Additional heating/ventilation system 83
Temperature pre-conditioning (Electric) 85
Courtesy lamp(s) 86
4Lighting and visibilityLighting control stalk 88
Direction indicators 89
Daytime running lamps/Sidelamps 89
Automatic illumination of headlamps 89
Guide-me-home and welcome lighting 90
Automatic headlamp dipping 90
Headlamp beam height adjustment 92
Interior ambient lighting 92
Wiper control stalk 92
Automatic wipers 93
Changing a wiper blade 95
5SafetyGeneral safety recommendations 96
Hazard warning lamps 96
Emergency or assistance 97
Horn 99
Pedestrian horn (Electric) 99
Electronic stability control (ESC) 99
Advanced Grip Control 101
Seat belts 102
Airbags 106
Child seats 108
Deactivating the front passenger airbag 11 0
ISOFIX and i-Size child seats 11 8
i-Size child seats 130
Manual child lock 132
Electric child lock 133
Child lock on rear windows 133
6DrivingDriving recommendations 134
Starting/switching off the engine 136
Manual parking brake 140
Electric parking brake 140
Hill start assist 142
6-speed manual gearbox 143
Page 6 of 324
4
Overview
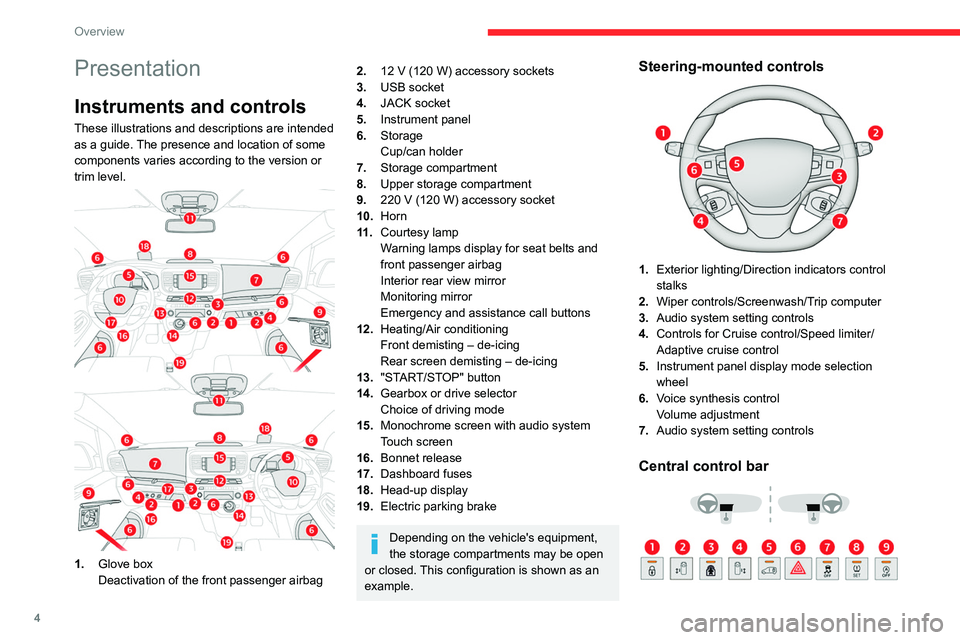
Presentation
Instruments and controls
These illustrations and descriptions are intended
as a guide. The presence and location of some
components varies according to the version or
trim level.
1.Glove box
Deactivation of the front passenger airbag
2.12 V (120 W) accessory sockets
3. USB socket
4. JACK socket
5. Instrument panel
6. Storage
Cup/can holder
7. Storage compartment
8. Upper storage compartment
9. 220
V (120 W) accessory socket
10.Horn
11
.Courtesy lamp
Warning lamps display for seat belts and
front passenger airbag
Interior rear view mirror
Monitoring mirror
Emergency and assistance call buttons
12. Heating/Air conditioning
Front demisting – de-icing
Rear screen demisting – de-icing
13. "START/STOP" button
14. Gearbox or drive selector
Choice of driving mode
15. Monochrome screen with audio system
Touch screen
16. Bonnet release
17. Dashboard fuses
18. Head-up display
19. Electric parking brake
Depending on the vehicle's equipment,
the storage compartments may be open
or closed. This configuration is shown as an
example.
Steering-mounted controls
1. Exterior lighting/Direction indicators control
stalks
2. Wiper controls/Screenwash/Trip computer
3. Audio system setting controls
4. Controls for Cruise control/Speed limiter/
Adaptive cruise control
5. Instrument panel display mode selection
wheel
6. Voice synthesis control
Volume adjustment
7. Audio system setting controls
Central control bar
Page 30 of 324
28
Access
Electronic key with
remote control function
and built-in key
Advice
If one of the doors or the boot is still open
or if the electronic key for the Keyless
Entry and Start
system has been left inside
the vehicle, central locking will not take place.
However
, if the vehicle is fitted with an alarm,
it will be activated after 45
seconds.
If the vehicle is unlocked but the doors or
boot are not subsequently opened, the
vehicle will automatically lock itself again after
about 30
seconds. If the vehicle is fitted with
an alarm, it will be reactivated automatically.
Automatic door mirror folding and unfolding can be deactivated by a
CITROËN dealer or a qualified workshop.
As a safety measure, never leave the vehicle, even for a short time, without
taking the Keyless Entry and Start system’s
electronic key with you.
Be aware of the risk of theft of the vehicle if
the key is present in one of the defined areas
while the vehicle is unlocked.
If a door is not properly closed (except the
right-hand door with side-hinged rear
doors):
–
when the vehicle is stationary and engine
running, this warning lamp comes on,
accompanied by a warning message for a few
seconds,
–
when the vehicle is moving (at speeds above
6 mph (10 km/h)), this warning lamp comes on,
accompanied by an audible signal and a warning
message for a few seconds.
Remote control key
This allows the central locking or unlocking of the
vehicle using the door lock or from a distance.
It also allows the vehicle to be located, the fuel
filler cap and charging flap to be opened and
closed and the engine to be started or switched
off, as well as providing protection against theft.
The remote control buttons are not active with the ignition switched on.
Unfolding / Folding the key
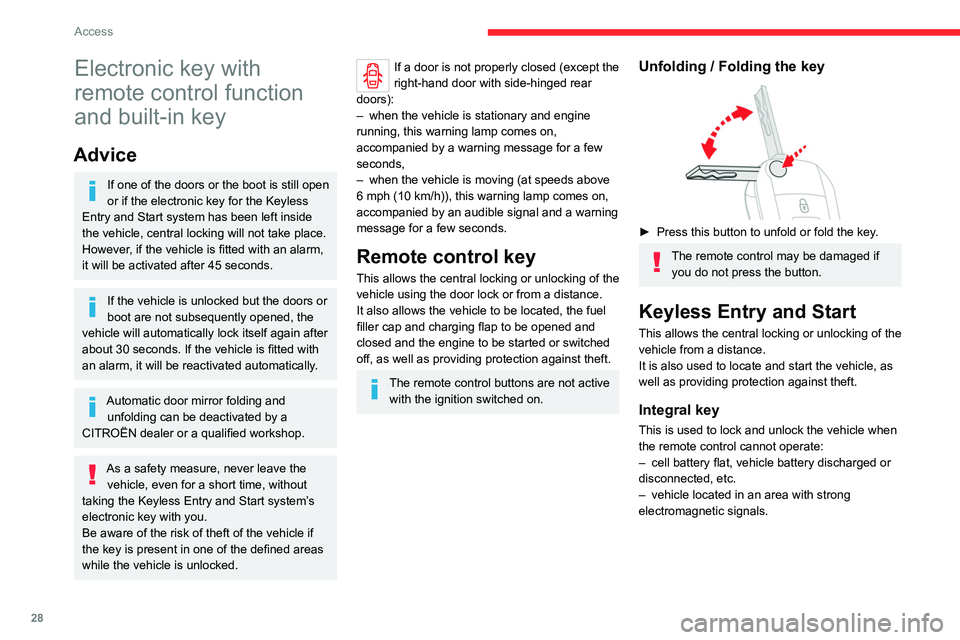
► Press this button to unfold or fold the key .
The remote control may be damaged if
you do not press the button.
Keyless Entry and Start
This allows the central locking or unlocking of the
vehicle from a distance.
It is also used to locate and start the vehicle, as
well as providing protection against theft.
Integral key
This is used to lock and unlock the vehicle when
the remote control cannot operate:
–
cell battery flat, vehicle battery discharged or
disconnected, etc.
–
vehicle located in an area with strong
electromagnetic signals.
Page 35 of 324
33
Access
2Locking
With the key
► To lock the vehicle fully, turn the key in the
front left-hand door lock towards the rear of the
vehicle.
If your vehicle has an alarm, it will not be
activated.
With the remote control
► To lock the vehicle completely, press
this button.
With Keyless Entry and
Start on your person
To lock the vehicle, the remote control must be in
recognition zone A.
► To lock the vehicle, press the markings on
one of the door handles (front door(s), manual
sliding side door(s) or left-hand side-hinged
door).
With electric sliding side door(s)
► With the Keyless Entry and Start on your
person, to lock the vehicle fully , press the
markings on one of the front
door handles.
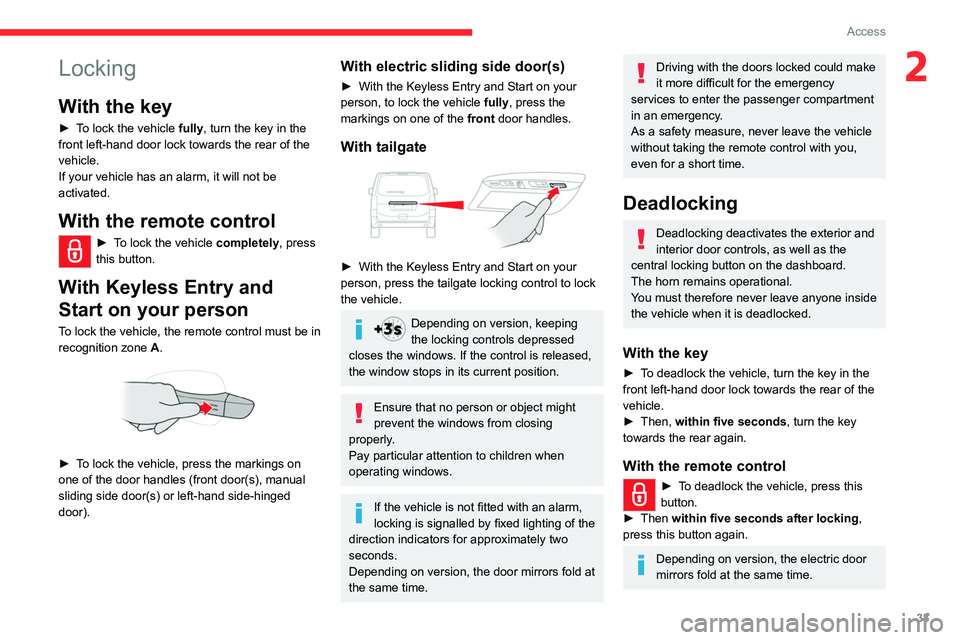
With tailgate
► With the Keyless Entry and Start on your
person, press the tailgate locking control to lock
the vehicle.
Depending on version, keeping
the locking controls depressed
closes the windows. If the control is released,
the window stops in its current position.
Ensure that no person or object might
prevent the windows from closing
properly.
Pay particular attention to children when
operating windows.
If the vehicle is not fitted with an alarm,
locking is signalled by fixed lighting of the
direction indicators for approximately two
seconds.
Depending on version, the door mirrors fold at
the same time.
Driving with the doors locked could make
it more difficult for the emergency
services to enter the passenger compartment
in an emergency.
As a safety measure, never leave the vehicle
without taking the remote control with you,
even for a short time.
Deadlocking
Deadlocking deactivates the exterior and
interior door controls, as well as the
central locking button on the dashboard.
The horn remains operational.
You must therefore never leave anyone inside
the vehicle when it is deadlocked.
With the key
► To deadlock the vehicle, turn the key in the
front left-hand door lock towards the rear of the
vehicle.
►
Then,
within five seconds , turn the key
towards the rear again.
With the remote control
► To deadlock the vehicle, press this
button.
►
Then
within five seconds after locking ,
press this button again.
Depending on version, the electric door
mirrors fold at the same time.
Page 37 of 324
35
Access
2system, all doors and the boot are
unlocked.
If the vehicle is unlocked with the key in the
lock after locking it with the key , only the
doors (front door and sliding side door(s)) are
unlocked. The side-hinged doors and tailgate
are not unlocked. Switching on the ignition
unlocks them.
Central locking not
functioning
Use these procedures in the following cases:
– Central locking malfunction.
–
Battery disconnected or discharged.
In the event of a malfunction of the
central locking system, the battery must
be disconnected to ensure that the vehicle is
locked fully.
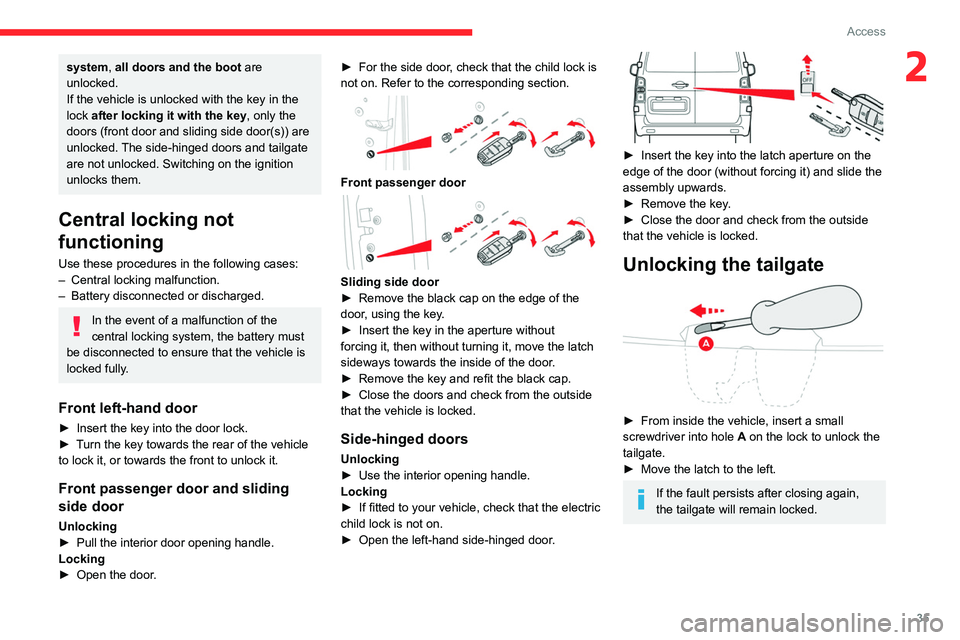
Front left-hand door
► Insert the key into the door lock.
► T urn the key towards the rear of the vehicle
to lock it, or towards the front to unlock it.
Front passenger door and sliding
side door
Unlocking
► Pull the interior door opening handle.
Locking
►
Open the door
. ►
For the side door
, check that the child lock is
not on. Refer to the corresponding section.
Front passenger door
Sliding side door
► Remove the black cap on the edge of the
door
, using the key.
►
Insert the key in the aperture without
forcing it, then without turning it, move the latch
sideways towards the inside of the door
.
►
Remove the key and refit the black cap.
►
Close the doors and check from the outside
that the vehicle is locked.
Side-hinged doors
Unlocking
► Use the interior opening handle.
Locking
►
If fitted to your vehicle, check that the electric
child lock is not on.
►
Open the left-hand side-hinged door
.
► Insert the key into the latch aperture on the
edge of the door (without forcing it) and slide the
assembly upwards.
►
Remove the key
.
►
Close the door and check from the outside
that the vehicle is locked.
Unlocking the tailgate
► From inside the vehicle, insert a small
screwdriver into hole A
on the lock to unlock the
tailgate.
►
Move the latch to the left.
If the fault persists after closing again,
the tailgate will remain locked.
Page 39 of 324
37
Access
2Central locking
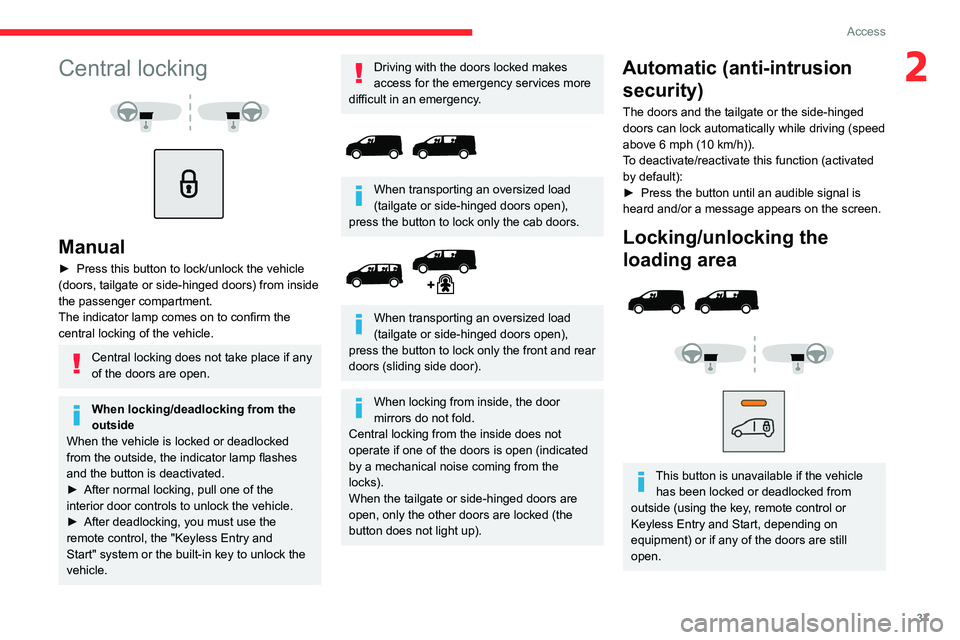
Manual
► Press this button to lock/unlock the vehicle
(doors, tailgate or side-hinged doors) from inside
the passenger compartment.
The indicator lamp comes on to confirm the
central locking of the vehicle.
Central locking does not take place if any
of the doors are open.
When locking/deadlocking from the
outside
When the vehicle is locked or deadlocked
from the outside, the indicator lamp flashes
and the button is deactivated.
►
After normal locking, pull one of the
interior door controls to unlock the vehicle.
►
After deadlocking, you must use the
remote control, the "Keyless Entry and
Start" system or the built-in key to unlock the
vehicle.
Driving with the doors locked makes
access for the emergency services more
difficult
in an emergency.
When transporting an oversized load
(tailgate or side-hinged doors open),
press the button to lock only the cab doors.
When transporting an oversized load
(tailgate or side-hinged doors open),
press the button to lock only the front and rear
doors (sliding side door).
When locking from inside, the door
mirrors do not fold.
Central locking from the inside does not
operate if one of the doors is open (indicated
by a mechanical noise coming from the
locks).
When the tailgate or side-hinged doors are
open, only the other doors are locked (the
button does not light up).
Automatic (anti-intrusion security)
The doors and the tailgate or the side-hinged
doors can lock automatically while driving (speed
above 6 mph (10
km/h)).
To deactivate/reactivate this function (activated
by default):
►
Press the button until an audible signal is
heard and/or a message appears on the screen.
Locking/unlocking the
loading area
This button is unavailable if the vehicle has been locked or deadlocked from
outside (using the key, remote control or
Keyless Entry and Start, depending on
equipment) or if any of the doors are still
open.
Page 47 of 324
45
Access
2indicator lamps and in particular the door open
warning, refer to the corresponding section.
The tailgate and rear screen cannot both be open at the same time, to avoid
damaging them.
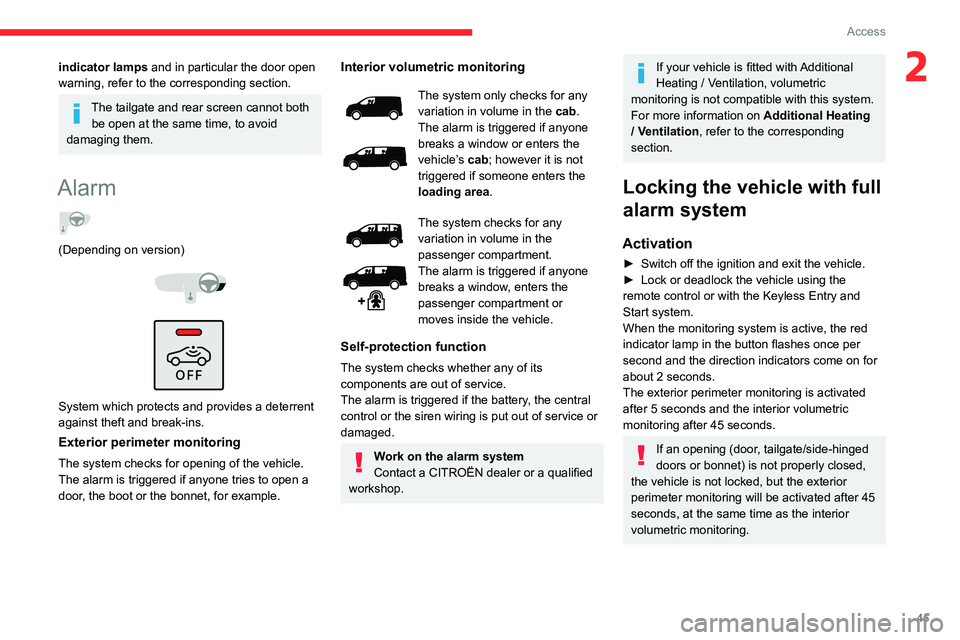
Alarm
(Depending on version)
System which protects and provides a deterrent
against theft and break-ins.
Exterior perimeter monitoring
The system checks for opening of the vehicle.
The alarm is triggered if anyone tries to open a
door, the boot or the bonnet, for example.
Interior volumetric monitoring
The system only checks for any
variation in volume in the cab.
The alarm is triggered if anyone
breaks a window or enters the
vehicle’s cab; however it is not
triggered if someone enters the
loading area.
The system checks for any
variation in volume in the
passenger compartment.
The alarm is triggered if anyone
breaks a window, enters the
passenger compartment or
moves inside the vehicle.
Self-protection function
The system checks whether any of its
components are out of service.
The alarm is triggered if the battery, the central
control or the siren wiring is put out of service or
damaged.
Work on the alarm system
Contact a CITROËN dealer or a qualified
workshop.
If your vehicle is fitted with Additional
Heating / Ventilation, volumetric
monitoring is not compatible with this system.
For more information on Additional Heating
/ Ventilation , refer to the corresponding
section.
Locking the vehicle with full
alarm system
Activation
► Switch off the ignition and exit the vehicle.
► Lock or deadlock the vehicle using the
remote control or with the Keyless Entry and
Start system.
When the monitoring system is active, the red
indicator lamp in the button flashes once per
second and the direction indicators come on for
about 2 seconds.
The exterior perimeter monitoring is activated
after 5 seconds and the interior volumetric
monitoring after 45 seconds.
If an opening (door, tailgate/side-hinged
doors or bonnet) is not properly closed,
the vehicle is not locked, but the exterior
perimeter monitoring will be activated after 45
seconds, at the same time as the interior
volumetric monitoring.
Page 54 of 324
52
Ease of use and comfort
This function provides lumbar massage; it only
operates when the engine is running as well as
in STOP mode of the Stop & Start system.
Activation/Deactivation
► Press this button to activate/deactivate
the function.
Upon activation, the indicator lamp comes on.
The massage function is activated for a period
of one hour
.
During this time, massage is performed in
6
cycles of 10 minutes (6 minutes of massage
followed by a 4-minute break).
After one hour, the function is deactivated; the
indicator lamp goes off.
Adjustment of intensity
Press this button to adjust the intensity of
the massage.
Two levels of massage are available.
Steering wheel
adjustment
► When stationary , lower the control lever to
release the steering wheel.
►
Adjust the height and reach.
►
Pull the control lever to lock the steering
wheel.
As a safety precaution, these operations must only be carried out while the vehicle
is stationary.
Mirrors
Door mirrors
As a safety measure, the mirrors should be adjusted to reduce the "blind spots".
The objects that you see in the mirrors are
in fact closer than they appear. Take this
into account in order to correctly judge the
distance of vehicles approaching from behind.
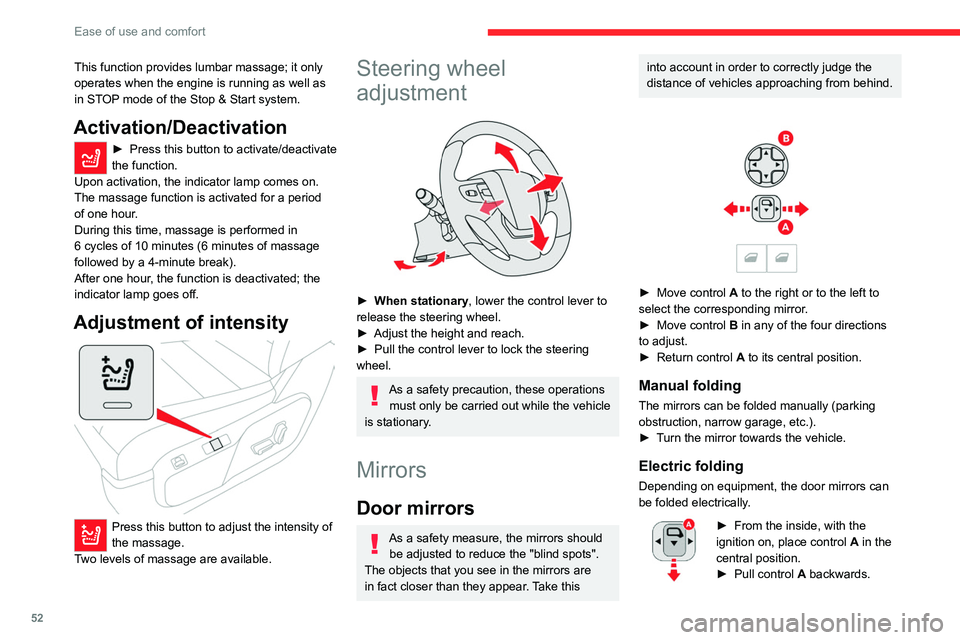
► Move control A to the right or to the left to
select the corresponding mirror.
►
Move control
B in any of the four directions
to adjust.
►
Return control A
to its central position.
Manual folding
The mirrors can be folded manually (parking
obstruction, narrow garage, etc.).
►
T
urn the mirror towards the vehicle.
Electric folding
Depending on equipment, the door mirrors can
be folded electrically.
► From the inside, with the
ignition on, place control A
in the
central position.
►
Pull control A
backwards.
Page 55 of 324
53
Ease of use and comfort
3► Lock the vehicle from the outside.
If the mirrors are folded using control A,
they will not unfold when the vehicle is
unlocked.
Electric unfolding
The door mirrors are unfolded electrically when
the vehicle is unlocked using the remote control
or key. Unless folding was selected with control
A, pull the control in the central position towards
the rear again.
Folding/unfolding when locking/unlocking
the vehicle can be deactivated. Contact a
CITROËN dealer or a qualified workshop.
If necessary, the mirrors can be folded
manually.
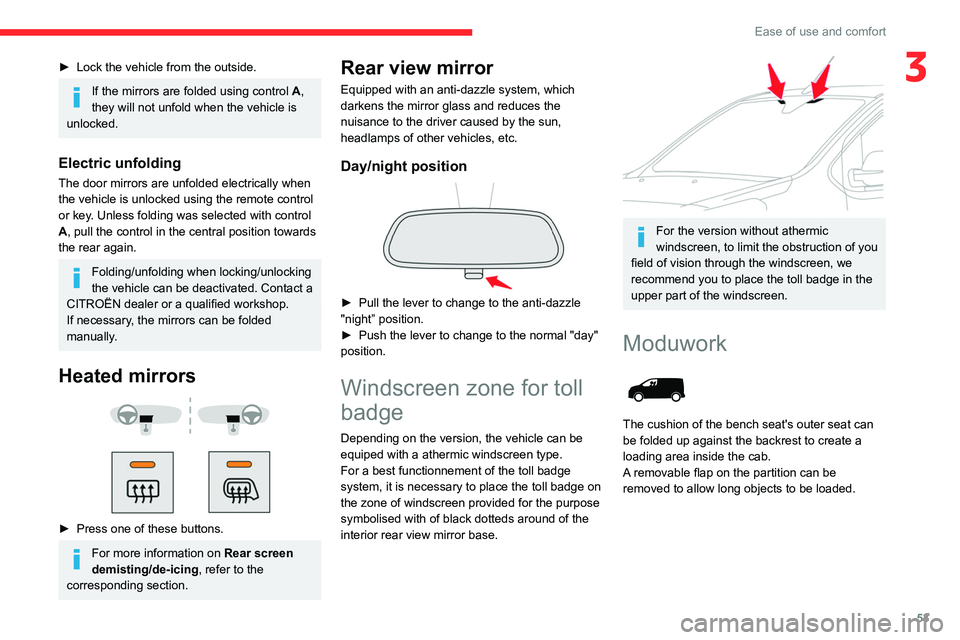
Heated mirrors
► Press one of these buttons.
For more information on Rear screen
demisting/de-icing , refer to the
corresponding section.
Rear view mirror
Equipped with an anti-dazzle system, which
darkens the mirror glass and reduces the
nuisance to the driver caused by the sun,
headlamps of other vehicles, etc.
Day/night position
► Pull the lever to change to the anti-dazzle
"night” position.
►
Push the lever to change to the normal "day"
position.
Windscreen zone for toll
badge
Depending on the version, the vehicle can be
equiped with a athermic windscreen type.
For a best functionnement of the toll badge
system, it is necessary to place the toll badge on
the zone of windscreen provided for the purpose
symbolised with of black dotteds around of the
interior rear view mirror base.
For the version without athermic
windscreen, to limit the obstruction of you
field of vision through the windscreen, we
recommend you to place the toll badge in the
upper part of the windscreen.
Moduwork
The cushion of the bench seat's outer seat can
be folded up against the backrest to create a
loading area inside the cab.
A removable flap on the partition can be
removed to allow long objects to be loaded.
Page 58 of 324
56
Ease of use and comfort
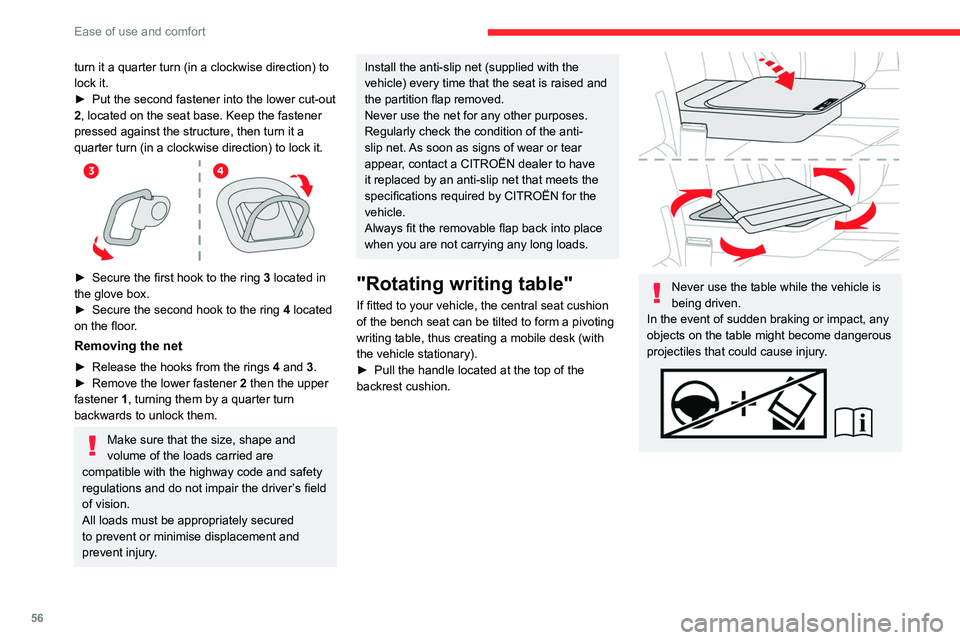
turn it a quarter turn (in a clockwise direction) to
lock it.
►
Put the second fastener into the lower cut-out
2
, located on the seat base. Keep the fastener
pressed against the structure, then turn it a
quarter turn (in a clockwise direction) to lock it.
► Secure the first hook to the ring 3 located in
the glove box.
►
Secure the second hook to the ring 4
located
on the floor.
Removing the net
► Release the hooks from the rings 4 and 3.
► Remove the lower fastener 2
then the upper
fastener 1, turning them by a quarter turn
backwards to unlock them.
Make sure that the size, shape and
volume of the loads carried are
compatible with the highway code and safety
regulations and do not impair the driver’s field
of vision.
All loads must be appropriately secured
to prevent or minimise displacement and
prevent injury.
Install the anti-slip net (supplied with the
vehicle) every time that the seat is raised and
the partition flap removed.
Never use the net for any other purposes.
Regularly check the condition of the anti-
slip net. As soon as signs of wear or tear
appear, contact a CITROËN dealer to have
it replaced by an anti-slip net that meets the
specifications required by CITROËN for the
vehicle.
Always fit the removable flap back into place
when you are not carrying any long loads.
"Rotating writing table"
If fitted to your vehicle, the central seat cushion
of the bench seat can be tilted to form a pivoting
writing table, thus creating a mobile desk (with
the vehicle stationary).
►
Pull the handle located at the top of the
backrest cushion.
Never use the table while the vehicle is
being driven.
In the event of sudden braking or impact, any
objects on the table might become dangerous
projectiles that could cause injury.