Citroen JUMPY DAG 2010 2.G Repair Manual
Manufacturer: CITROEN, Model Year: 2010, Model line: JUMPY DAG, Model: Citroen JUMPY DAG 2010 2.GPages: 225, PDF Size: 10.81 MB
Page 61 of 225
59
Seats
EASE OF USE
and
COMFORT
3
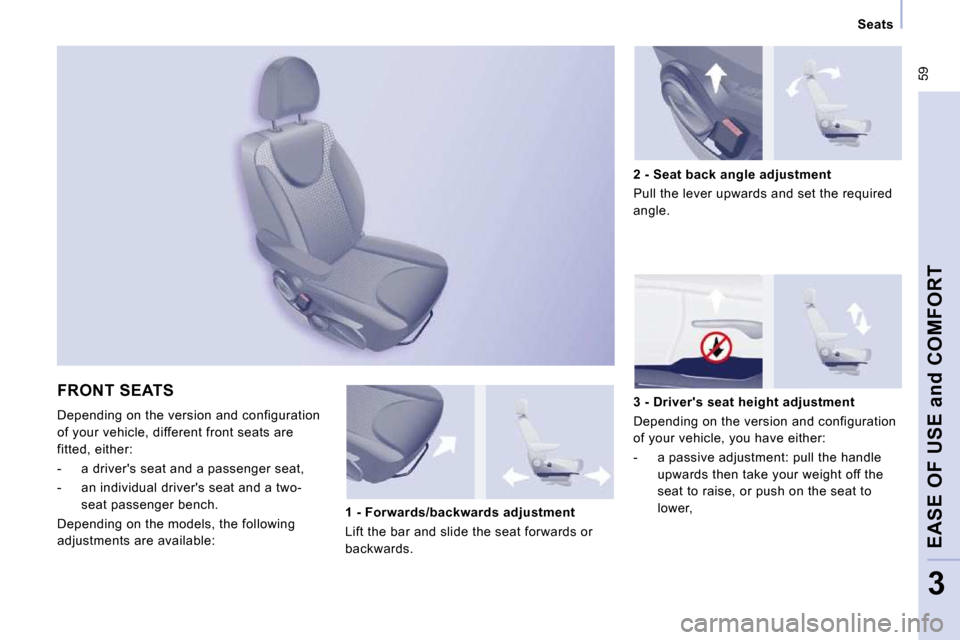
FRONT SEATS
Depending on the version and configuration
of your vehicle, different front seats are
fitted, either:
- a driver's seat and a passenger seat,
- an individual driver's seat and a two-seat passenger bench.
Depending on the models, the following
adjustments are available: 3 - Driver's seat height adjustment
Depending on the version and configuration
of your vehicle, you have either:
- a passive adjustment: pull the handle
upwards then take your weight off the
seat to raise, or push on the seat to
lower,
2 - Seat back angle adjustment
Pull the lever upwards and set the required
angle.
1 - Forwards/backwards adjustment
Lift the bar and slide the seat forwards or
backwards.
Page 62 of 225
60
Seats
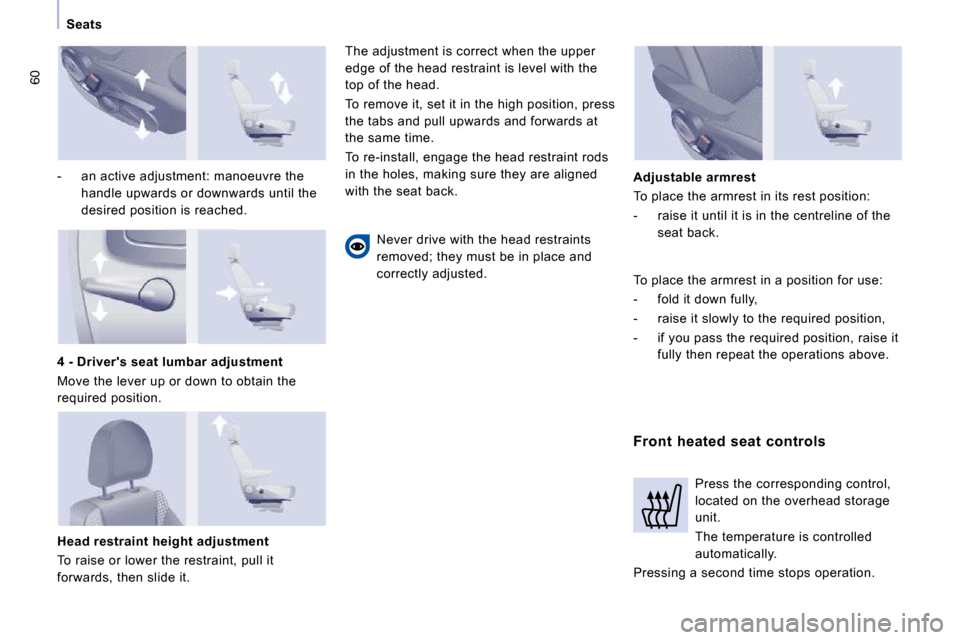
- an active adjustment: manoeuvre the handle upwards or downwards until the
desired position is reached.
Head restraint height adjustment
To raise or lower the restraint, pull it
forwards, then slide it. The adjustment is correct when the upper
edge of the head restraint is level with the
top of the head.
To remove it, set it in the high position, press
the tabs and pull upwards and forwards at
the same time.
To re-install, engage the head restraint rods
in the holes, making sure they are aligned
with the seat back.
Never drive with the head restraints
removed; they must be in place and
correctly adjusted.
Front heated seat controls
Adjustable armrest
To place the armrest in its rest position:
- raise it until it is in the centreline of the
seat back.
4 - Driver's seat lumbar adjustment
Move the lever up or down to obtain the
required position. Press the corresponding control,
located on the overhead storage
unit.
The temperature is controlled
automatically.
Pressing a second time stops operation.
To place the armrest in a position for use:
- fold it down fully,
- raise it slowly to the required position,
- if you pass the required position, raise it
fully then repeat the operations above.
Page 63 of 225
61
Seats
EASE OF USE
and
COMFORT
3
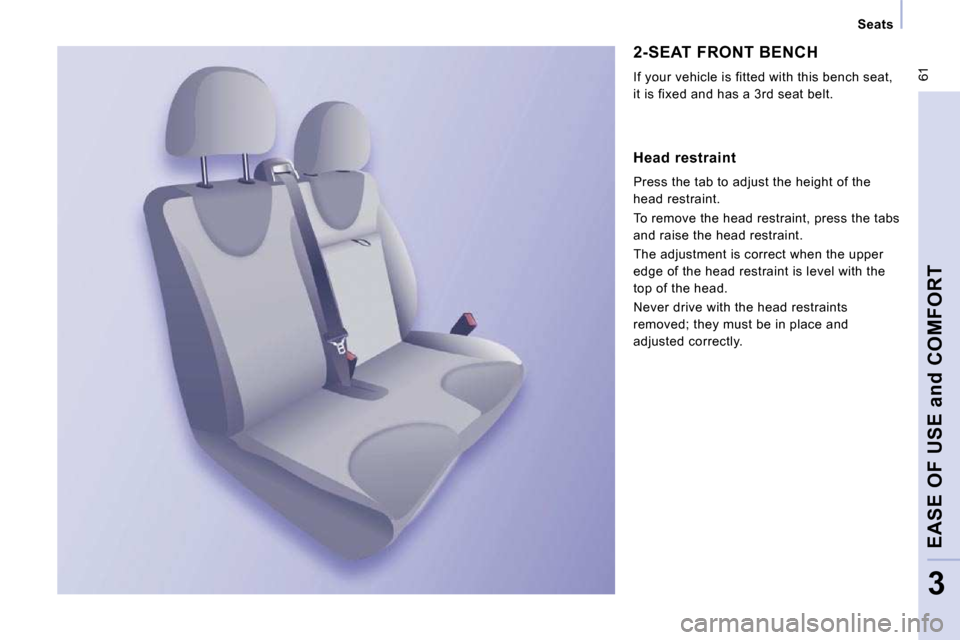
2-SEAT FRONT BENCH
If your vehicle is fitted with this bench seat,
it is fixed and has a 3rd seat belt.
Head restraint
Press the tab to adjust the height of the
head restraint.
To remove the head restraint, press the tabs
and raise the head restraint.
The adjustment is correct when the upper
edge of the head restraint is level with the
top of the head.
Never drive with the head restraints
removed; they must be in place and
adjusted correctly.
Page 64 of 225
62
Seats
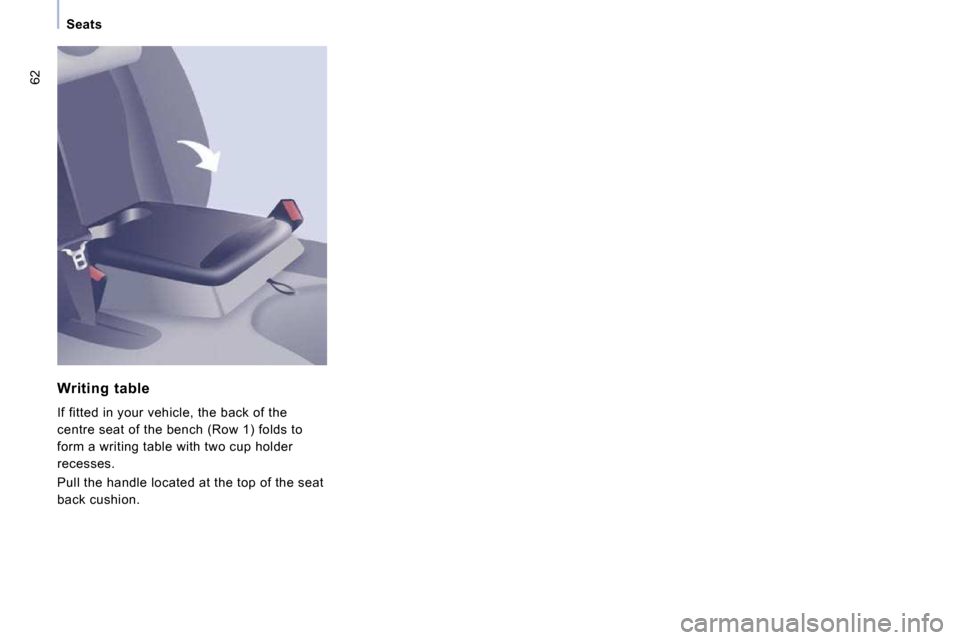
Writing table
If fitted in your vehicle, the back of the
centre seat of the bench (Row 1) folds to
form a writing table with two cup holder
recesses.
Pull the handle located at the top of the seat
back cushion.
Page 65 of 225
63
Practical information
EASE OF USE
and
COMFORT
3
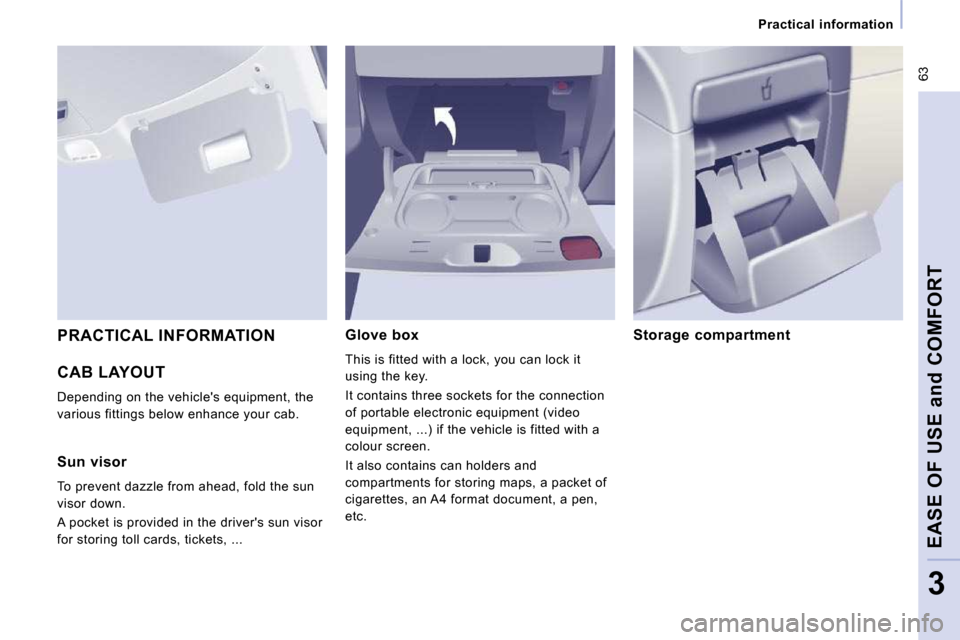
CAB LAYOUT
Depending on the vehicle's equipment, the
various fittings below enhance your cab. Glove box
This is fitted with a lock, you can lock it
using the key.
It contains three sockets for the connection
of portable electronic equipment (video
equipment, ...) if the vehicle is fitted with a
colour screen.
It also contains can holders and
compartments for storing maps, a packet of
cigarettes, an A4 format document, a pen,
etc. Storage compartment
PRACTICAL INFORMATION
Sun visor
To prevent dazzle from ahead, fold the sun
visor down.
A pocket is provided in the driver's sun visor
for storing toll cards, tickets, ...
Page 66 of 225
64
Practical information
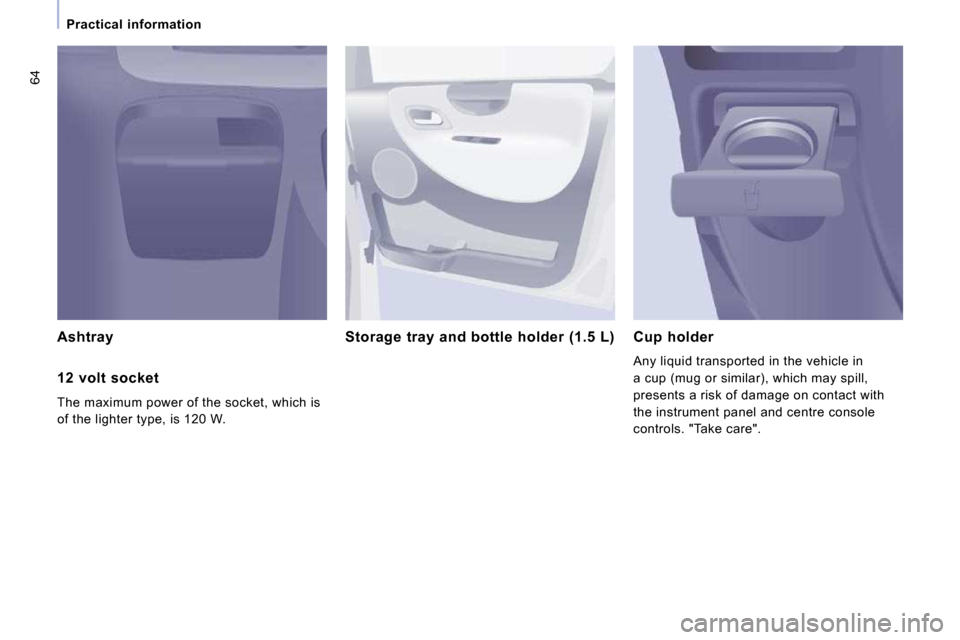
Ashtray Storage tray and bottle holder (1.5 L) Cup holder
Any liquid transported in the vehicle in
a cup (mug or similar), which may spill,
presents a risk of damage on contact with
the instrument panel and centre console
controls. "Take care".
12 volt socket
The maximum power of the socket, which is
of the lighter type, is 120 W.
Page 67 of 225
65
Practical information
EASE OF USE
and
COMFORT
3
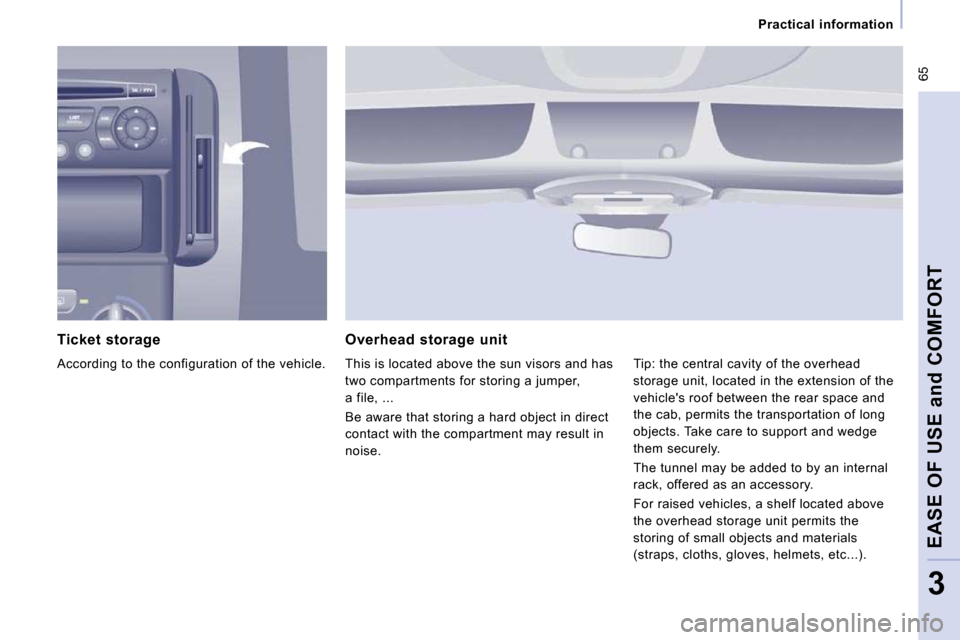
Ticket storage
According to the configuration of the vehicle. Overhead storage unit
This is located above the sun visors and has
two compartments for storing a jumper,
a file, ...
Be aware that storing a hard object in direct
contact with the compartment may result in
noise. Tip: the central cavity of the overhead
storage unit, located in the extension of the
vehicle's roof between the rear space and
the cab, permits the transportation of long
objects. Take care to support and wedge
them securely.
The tunnel may be added to by an internal
rack, offered as an accessory.
For raised vehicles, a shelf located above
the overhead storage unit permits the
storing of small objects and materials
(straps, cloths, gloves, helmets, etc...).
Page 68 of 225
66
Practical information
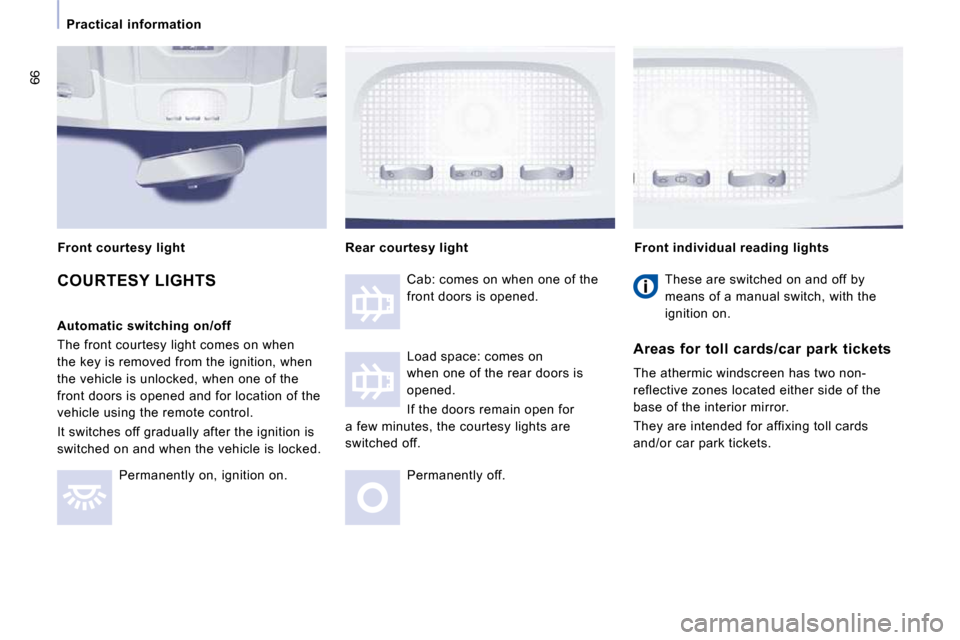
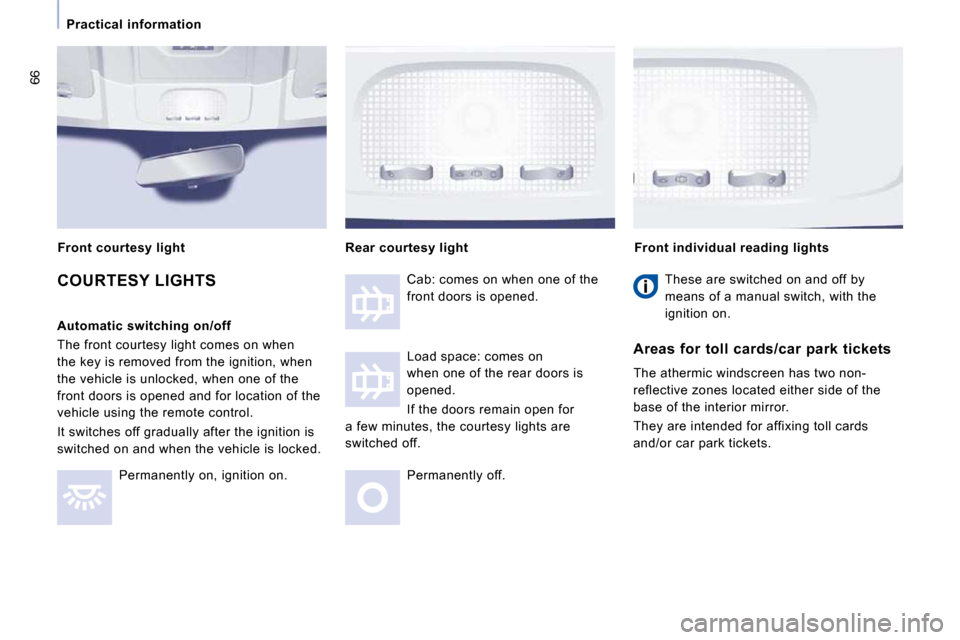
COURTESY LIGHTS
Automatic switching on/off
The front courtesy light comes on when
the key is removed from the ignition, when
the vehicle is unlocked, when one of the
front doors is opened and for location of the
vehicle using the remote control.
It switches off gradually after the ignition is
switched on and when the vehicle is locked. Permanently on, ignition on. Cab: comes on when one of the
front doors is opened.
Load space: comes on
when one of the rear doors is
opened.
If the doors remain open for
a few minutes, the courtesy lights are
switched off.
Permanently off. Front individual reading lights
Rear courtesy light
These are switched on and off by
means of a manual switch, with the
ignition on.
Areas for toll cards/car park tickets
The athermic windscreen has two non-
reflective zones located either side of the
base of the interior mirror.
They are intended for affixing toll cards
and/or car park tickets.
Front courtesy light
Page 69 of 225
66
Practical information
COURTESY LIGHTS
Automatic switching on/off
The front courtesy light comes on when
the key is removed from the ignition, when
the vehicle is unlocked, when one of the
front doors is opened and for location of the
vehicle using the remote control.
It switches off gradually after the ignition is
switched on and when the vehicle is locked. Permanently on, ignition on. Cab: comes on when one of the
front doors is opened.
Load space: comes on
when one of the rear doors is
opened.
If the doors remain open for
a few minutes, the courtesy lights are
switched off.
Permanently off. Front individual reading lights
Rear courtesy light
These are switched on and off by
means of a manual switch, with the
ignition on.
Areas for toll cards/car park tickets
The athermic windscreen has two non-
reflective zones located either side of the
base of the interior mirror.
They are intended for affixing toll cards
and/or car park tickets.
Front courtesy light
Page 70 of 225
67
Practical information
EASE OF USE
and
COMFORT
3
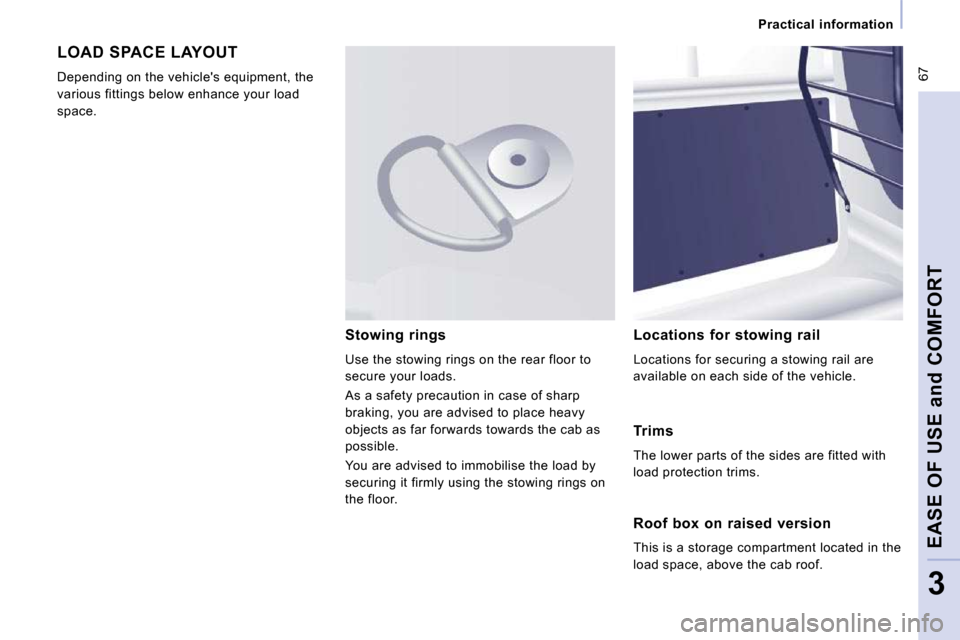
LOAD SPACE LAYOUT
Depending on the vehicle's equipment, the
various fittings below enhance your load
space. Locations for stowing rail
Locations for securing a stowing rail are
available on each side of the vehicle.
Stowing rings
Use the stowing rings on the rear floor to
secure your loads.
As a safety precaution in case of sharp
braking, you are advised to place heavy
objects as far forwards towards the cab as
possible.
You are advised to immobilise the load by
securing it firmly using the stowing rings on
the floor. Trims
The lower parts of the sides are fitted with
load protection trims.
Roof box on raised version
This is a storage compartment located in the
load space, above the cab roof.