Citroen JUMPY DAG 2010 2.G Manual PDF
Manufacturer: CITROEN, Model Year: 2010, Model line: JUMPY DAG, Model: Citroen JUMPY DAG 2010 2.GPages: 225, PDF Size: 10.81 MB
Page 71 of 225
68
Practical information
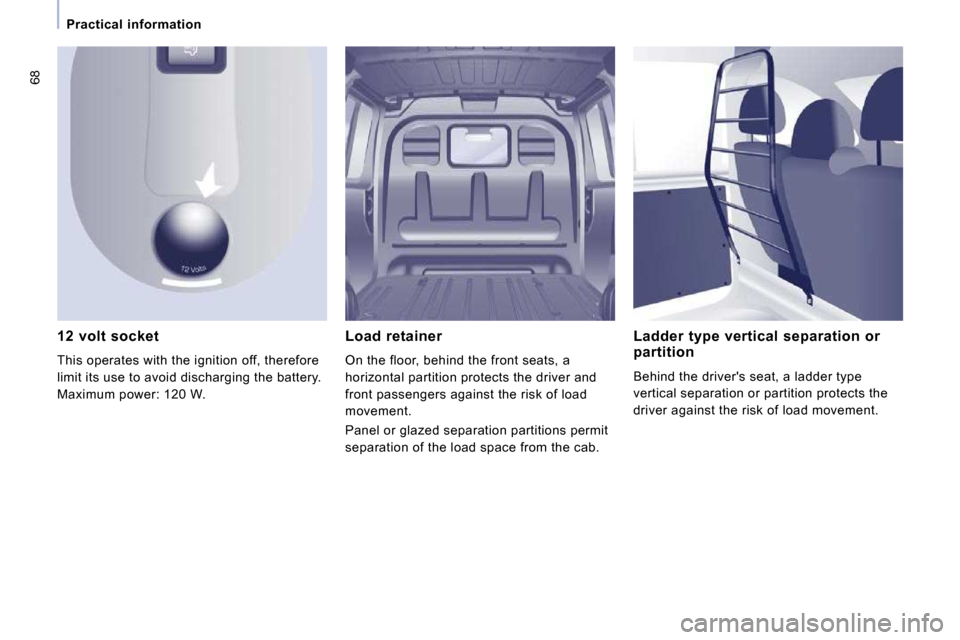
12 volt socket
This operates with the ignition off, therefore
limit its use to avoid discharging the battery.
Maximum power: 120 W. Ladder type vertical separation or
partition
Behind the driver's seat, a ladder type
vertical separation or partition protects the
driver against the risk of load movement.
Load retainer
On the floor, behind the front seats, a
horizontal partition protects the driver and
front passengers against the risk of load
movement.
Panel or glazed separation partitions permit
separation of the load space from the cab.
Page 72 of 225
69
Practical information
EASE OF USE
and
COMFORT
3
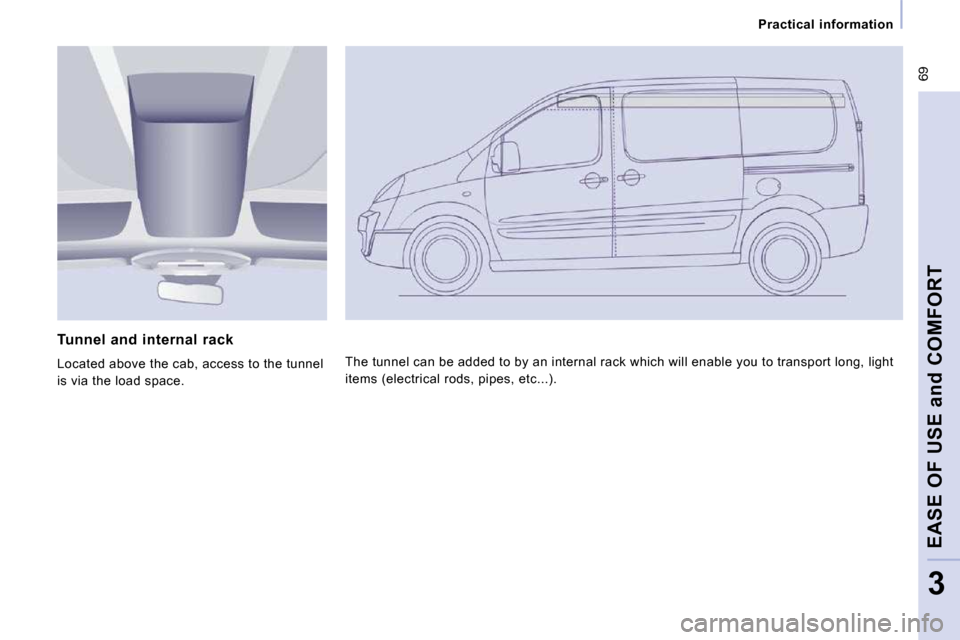
Tunnel and internal rack
Located above the cab, access to the tunnel
is via the load space. The tunnel can be added to by an internal rack whi
ch will enable you to transport long, light
items (electrical rods, pipes, etc...).
Page 73 of 225
70
Rear suspension
Metal suspension
This equipment adopts long movement
limiters which make it possible to guarantee
stable behaviour both when loaded and
when empty. No action on your part is
required except to ensure that maintenance
is carried out and that the authorised loads
are complied with. irrespective of the weight of the load, within
the limit of the authorised values. On board,
the increasing or lightening of the load on the
vehicle's platform is detected by two height
sensors. When all of the doors are closed, the
sensors trigger the automatic compensation
and determine the optimum height of the sill
for the vehicle's driving conditions.
Deactivation of the automatic correction
The control which permits deactivation of the
automatic control is located on the right-
hand side, at the rear of the vehicle.
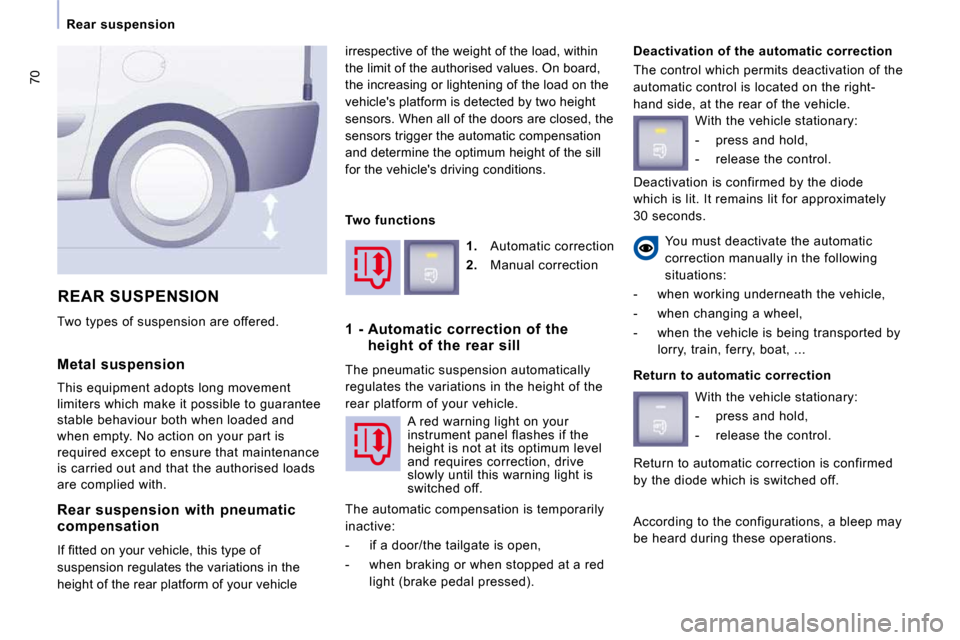
REAR SUSPENSION
You must deactivate the automatic
correction manually in the following
situations:
- when working underneath the vehicle,
- when changing a wheel,
- when the vehicle is being transported by lorry, train, ferry, boat, ...
Two types of suspension are offered.
Rear suspension with pneumatic
compensation
� �I�f� �fi� �t�t�e�d� �o�n� �y�o�u�r� �v�e�h�i�c�l�e�,� �t�h�i�s� �t�y�p�e� �o�f�
suspension regulates the variations in the
height of the rear platform of your vehicle
1. Automatic correction
2. Manual correction
1 - Automatic correction of the height of the rear sill
The pneumatic suspension automatically
regulates the variations in the height of the
rear platform of your vehicle. A red warning light on your
instrument panel flashes if the
height is not at its optimum level
and requires correction, drive
slowly until this warning light is
switched off.
The automatic compensation is temporarily
inactive:
- if a door/the tailgate is open,
- when braking or when stopped at a red light (brake pedal pressed). With the vehicle stationary:
- press and hold,
- release the control.
Return to automatic correction With the vehicle stationary:
- press and hold,
- release the control.
According to the configurations, a bleep may
be heard during these operations.
Two functions
Return to automatic correction is confirmed
by the diode which is switched off.
Deactivation is confirmed by the diode
which is lit. It remains lit for approximately
30 seconds.
Page 74 of 225
71
Rear suspension
EASE OF USE
and
COMFORT
3
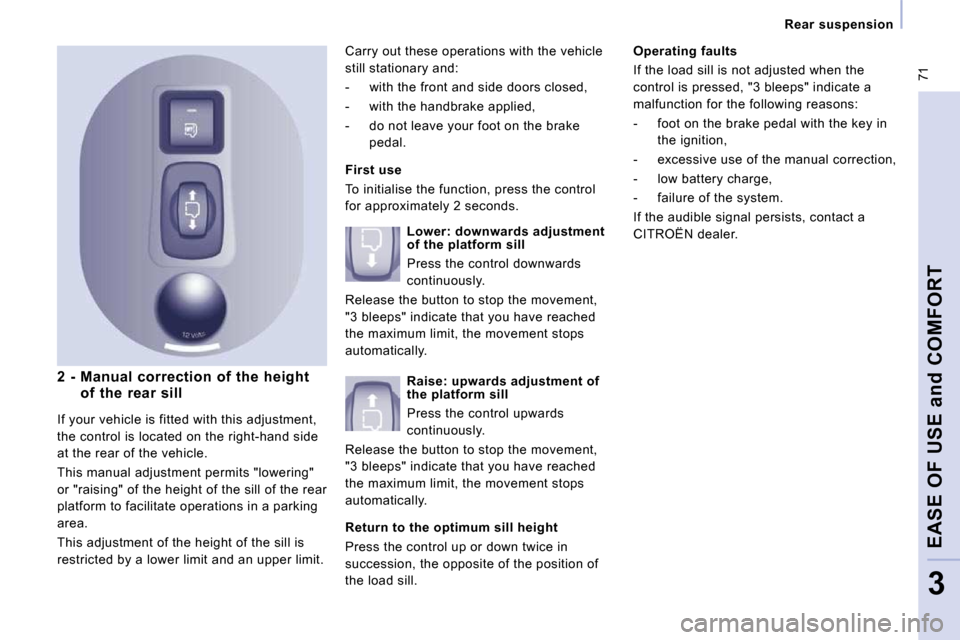
2 - Manual correction of the height of the rear sill First use
To initialise the function, press the control
for approximately 2 seconds.
Return to the optimum sill height
Press the control up or down twice in
succession, the opposite of the position of
the load sill.
Carry out these operations with the vehicle
still stationary and:
- with the front and side doors closed,
- with the handbrake applied,
- do not leave your foot on the brake
pedal.
If your vehicle is fitted with this adjustment,
the control is located on the right-hand side
at the rear of the vehicle.
This manual adjustment permits "lowering"
or "raising" of the height of the sill of the rear
platform to facilitate operations in a parking
area.
This adjustment of the height of the sill is
restricted by a lower limit and an upper limit. Lower: downwards adjustment
of the platform sill
Press the control downwards
continuously.
Release the button to stop the movement,
"3 bleeps" indicate that you have reached
the maximum limit, the movement stops
automatically.
Raise: upwards adjustment of
the platform sill
Press the control upwards
continuously.
Release the button to stop the movement,
"3 bleeps" indicate that you have reached
the maximum limit, the movement stops
automatically. Operating faults
If the load sill is not adjusted when the
control is pressed, "3 bleeps" indicate a
malfunction for the following reasons:
- foot on the brake pedal with the key in
the ignition,
- excessive use of the manual correction,
- low battery charge,
- failure of the system.
If the audible signal persists, contact a
CITROËN dealer.
Page 75 of 225

72
Rear suspension
Deactivation of the manual correction Good practice
When stationary and with the ignition key
removed, excessive use of the system
consumes battery charge. Parking for a long duration
Avoid parking for a long duration on ground
which could present a potential obstacle as
your vehicle could lower.
Following a long period out of use, the
height of the platform may change due to the
automatic compensation on unlocking or on
opening one of your vehicle's doors.
With the vehicle stationary:
- press and hold,
- release the control.
Return to manual correction
According to the configurations, a bleep may
be heard during these operations. You must deactivate the manual
correction in the following situations:
- when working underneath the vehicle,
- when changing a wheel,
- when the vehicle is being transported by lorry, train, ferry, boat, ... Warning light
Driving with the height of the rear platform:
- too low, risks damaging the technical
components underneath the vehicle,
- too high, risks unstable driving.
With the vehicle stationary:
- press and hold,
- release the control. Refer to the "Instruments and controls"
section of chapter 2.
If you start and the warning light flashes, to
switch it off:
- correct the position of the manual
control which is still at the lower or
upper limit,
- or drive slowly at above 6 mph (10 km/h), until the compensation
returns to automatic mode.
Return to manual correction is confirmed by
the diode which is switched off.
Deactivation is confirmed by the diode
which is lit. It remains lit for approximately
30 seconds.
Page 76 of 225
73
Mirrors and windows
EASE OF USE
and
COMFORT
3
MIRRORS
MIRRORS AND WINDOWS Electric folding/unfolding
If your vehicle is fitted with this function, the
mirrors can be folded or unfolded electrically
from the inside, with the vehicle parked and
the ignition on:
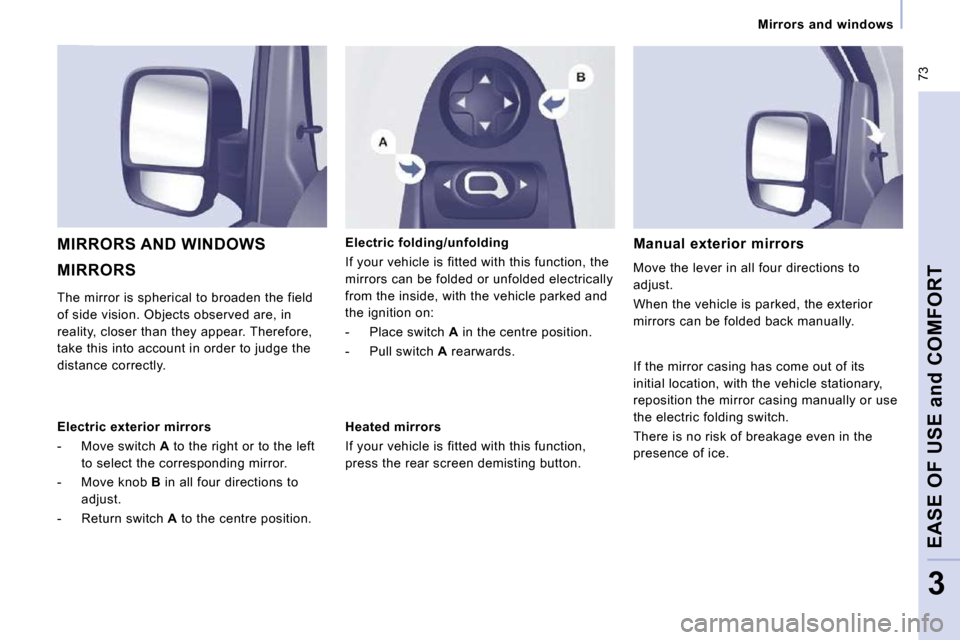
- Place switch A in the centre position.
- Pull switch A rearwards. Manual exterior mirrors
Move the lever in all four directions to
adjust.
When the vehicle is parked, the exterior
mirrors can be folded back manually.
The mirror is spherical to broaden the field
of side vision. Objects observed are, in
reality, closer than they appear. Therefore,
take this into account in order to judge the
distance correctly.
Heated mirrors
If your vehicle is fitted with this function,
press the rear screen demisting button. If the mirror casing has come out of its
initial location, with the vehicle stationary,
reposition the mirror casing manually or use
the electric folding switch.
There is no risk of breakage even in the
presence of ice.
Electric exterior mirrors
- Move switch
A to the right or to the left
to select the corresponding mirror.
- Move knob B in all four directions to
adjust.
- Return switch A to the centre position.
Page 77 of 225
74
Mirrors and windows
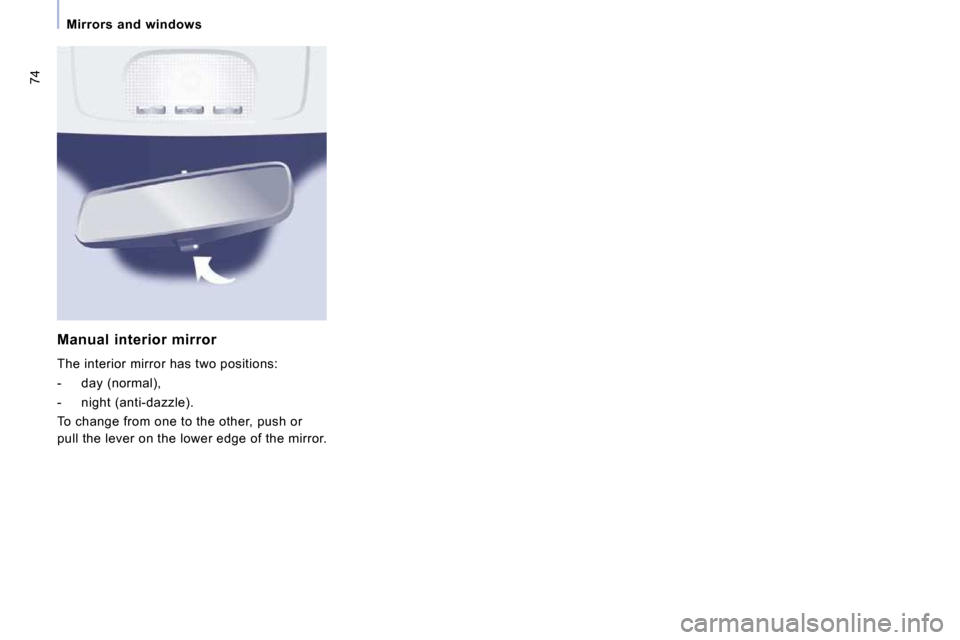
Manual interior mirror
The interior mirror has two positions:
- day (normal),
- night (anti-dazzle).
To change from one to the other, push or
pull the lever on the lower edge of the mirror.
Page 78 of 225
75
Mirrors and windows
EASE OF USE
and
COMFORT
3
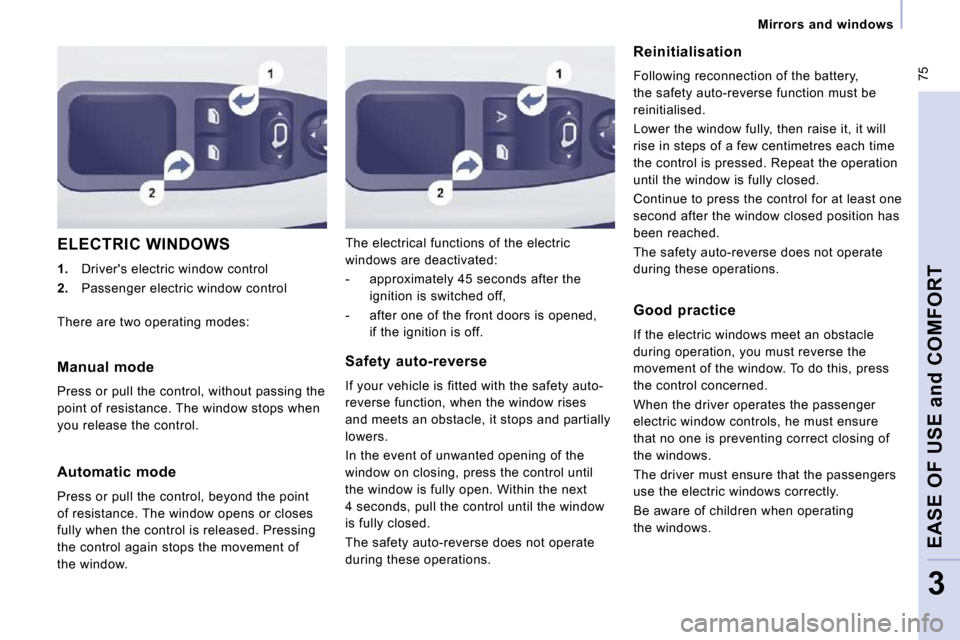
ELECTRIC WINDOWS
1. Driver's electric window control
2. Passenger electric window control The electrical functions of the electric
windows are deactivated:
- approximately 45 seconds after the
ignition is switched off,
- after one of the front doors is opened, if the ignition is off. Reinitialisation
Following reconnection of the battery,
the safety auto-reverse function must be
reinitialised.
Lower the window fully, then raise it, it will
rise in steps of a few centimetres each time
the control is pressed. Repeat the operation
until the window is fully closed.
Continue to press the control for at least one
second after the window closed position has
been reached.
The safety auto-reverse does not operate
during these operations.
Manual mode
Press or pull the control, without passing the
point of resistance. The window stops when
you release the control.
Automatic mode
Press or pull the control, beyond the point
of resistance. The window opens or closes
fully when the control is released. Pressing
the control again stops the movement of
the window. Safety auto-reverse
If your vehicle is fitted with the safety auto-
reverse function, when the window rises
and meets an obstacle, it stops and partially
lowers.
In the event of unwanted opening of the
window on closing, press the control until
the window is fully open. Within the next
4 seconds, pull the control until the window
is fully closed.
The safety auto-reverse does not operate
during these operations. Good practice
If the electric windows meet an obstacle
during operation, you must reverse the
movement of the window. To do this, press
the control concerned.
When the driver operates the passenger
electric window controls, he must ensure
that no one is preventing correct closing of
the windows.
The driver must ensure that the passengers
use the electric windows correctly.
Be aware of children when operating
the windows.
There are two operating modes:
Page 79 of 225
76
Driving safely
PARKING BRAKE When parking on a slope, direct your wheels
towards the pavement and pull the parking
brake lever up.
There is no advantage in engaging a gear
after parking the vehicle, particularly if the
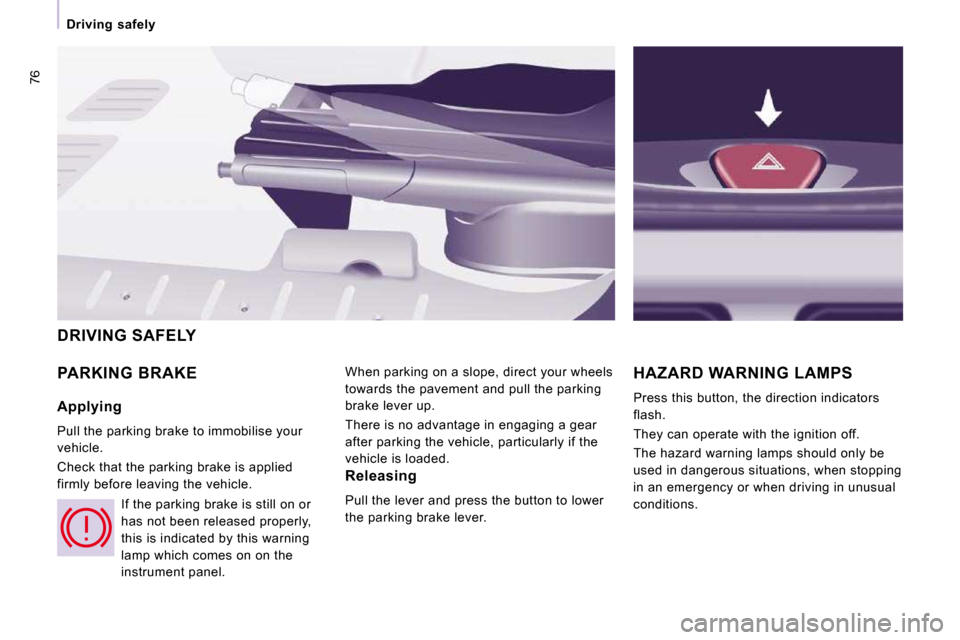
vehicle is loaded. HAZARD WARNING LAMPS
Press this button, the direction indicators
flash.
They can operate with the ignition off.
The hazard warning lamps should only be
used in dangerous situations, when stopping
in an emergency or when driving in unusual
conditions.
DRIVING SAFELY
Applying
Pull the parking brake to immobilise your
vehicle.
Check that the parking brake is applied
firmly before leaving the vehicle. If the parking brake is still on or
has not been released properly,
this is indicated by this warning
lamp which comes on on the
instrument panel. Releasing
Pull the lever and press the button to lower
the parking brake lever.
Page 80 of 225
77
Parking assistance
SAFETY
4
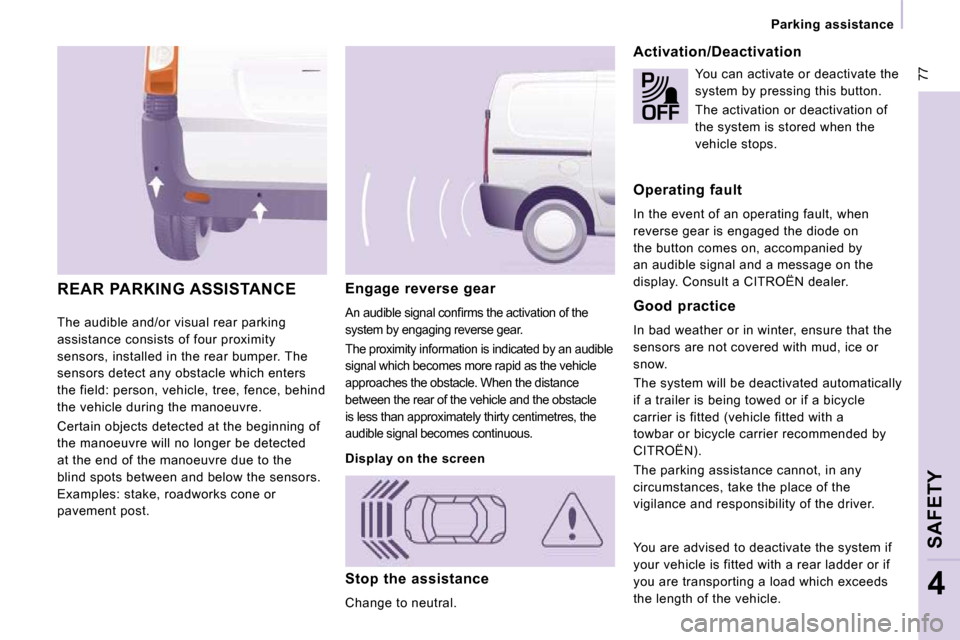
The audible and/or visual rear parking
assistance consists of four proximity
sensors, installed in the rear bumper. The
sensors detect any obstacle which enters
the field: person, vehicle, tree, fence, behind
the vehicle during the manoeuvre.
Certain objects detected at the beginning of
the manoeuvre will no longer be detected
at the end of the manoeuvre due to the
blind spots between and below the sensors.
Examples: stake, roadworks cone or
pavement post. Engage reverse gear
�A�n� �a�u�d�i�b�l�e� �s�i�g�n�a�l� �c�o�n�fi� �r�m�s� �t�h�e� �a�c�t�i�v�a�t�i�o�n� �o�f� �t�h�e�
system by engaging reverse gear.
The proximity information is indicated by an audibl
e
signal which becomes more rapid as the vehicle
approaches the obstacle. When the distance
between the rear of the vehicle and the obstacle
is less than approximately thirty centimetres, the
audible signal becomes continuous.
Stop the assistance
Change to neutral.
REAR PARKING ASSISTANCE
Activation/Deactivation
You can activate or deactivate the
system by pressing this button.
The activation or deactivation of
the system is stored when the
vehicle stops.
Operating fault
In the event of an operating fault, when
reverse gear is engaged the diode on
the button comes on, accompanied by
an audible signal and a message on the
display. Consult a CITROËN dealer.
Good practice
In bad weather or in winter, ensure that the
sensors are not covered with mud, ice or
snow.
The system will be deactivated automatically
if a trailer is being towed or if a bicycle
carrier is fitted (vehicle fitted with a
towbar or bicycle carrier recommended by
CITROËN).
The parking assistance cannot, in any
circumstances, take the place of the
vigilance and responsibility of the driver.
Display on the screen
You are advised to deactivate the system if
your vehicle is fitted with a rear ladder or if
you are transporting a load which exceeds
the length of the vehicle.