ignition Citroen NEMO 2008.5 1.G Owner's Guide
[x] Cancel search | Manufacturer: CITROEN, Model Year: 2008.5, Model line: NEMO, Model: Citroen NEMO 2008.5 1.GPages: 140, PDF Size: 2.21 MB
Page 44 of 140
38
Steering wheel controls
Headlamp beam
You are advised to adjust the height of the
headlamp beams in accordance with the
load in your vehicle.
This function can only be accessed in
the main beam headlamps and dipped
headlamps position.
Press these controls, located
on the fascia panel, several
times in succession to adjust the
headlamps.
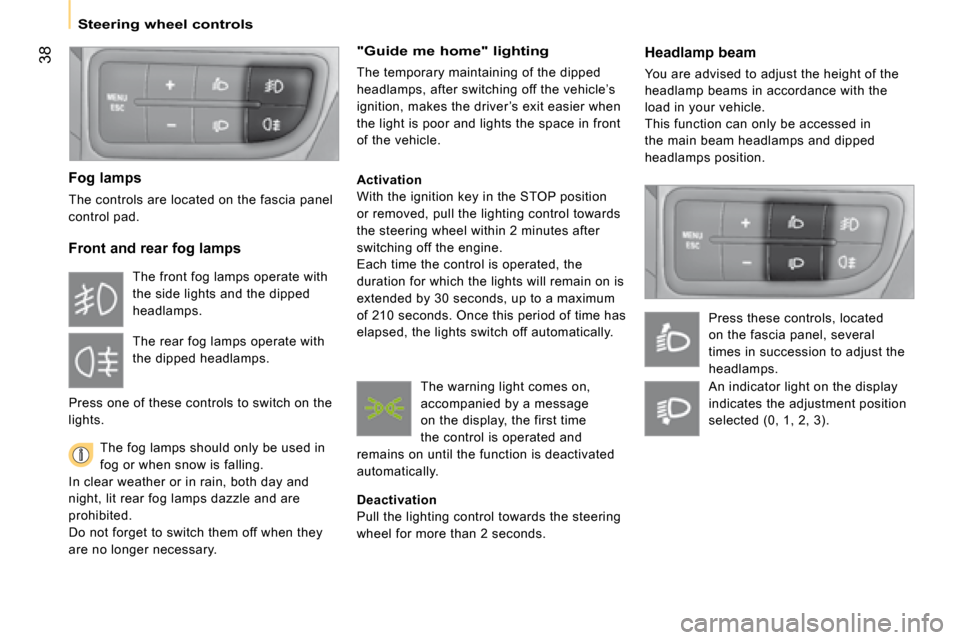
Fog lamps
The controls are located on the fascia panel
control pad.
Front and rear fog lamps
The fog lamps should only be used in
fog or when snow is falling.
In clear weather or in rain, both day and
night, lit rear fog lamps dazzle and are
prohibited.
Do not forget to switch them off when they
are no longer necessary.
"Guide me home" lighting
The temporary maintaining of the dipped
headlamps, after switching off the vehicle’s
ignition, makes the driver ’s exit easier when
the light is poor and lights the space in front
of the vehicle.
Activation
With the ignition key in the STOP position
or removed, pull the lighting control towards
the steering wheel within 2 minutes after
switching off the engine.
Each time the control is operated, the
duration for which the lights will remain on is
extended by 30 seconds, up to a maximum
of 210 seconds. Once this period of time has
elapsed, the lights switch off automatically.
Deactivation
Pull the lighting control towards the steering
wheel for more than 2 seconds.
The front fog lamps operate with
the side lights and the dipped
headlamps.
The rear fog lamps operate with
the dipped headlamps.
Press one of these controls to switch on the
lights.
The warning light comes on,
accompanied by a message
on the display, the first time
the control is operated and
remains on until the function is deactivated
automatically.
An indicator light on the display
indicates the adjustment position
selected (0, 1, 2, 3).
Page 45 of 140
38
Steering wheel controls
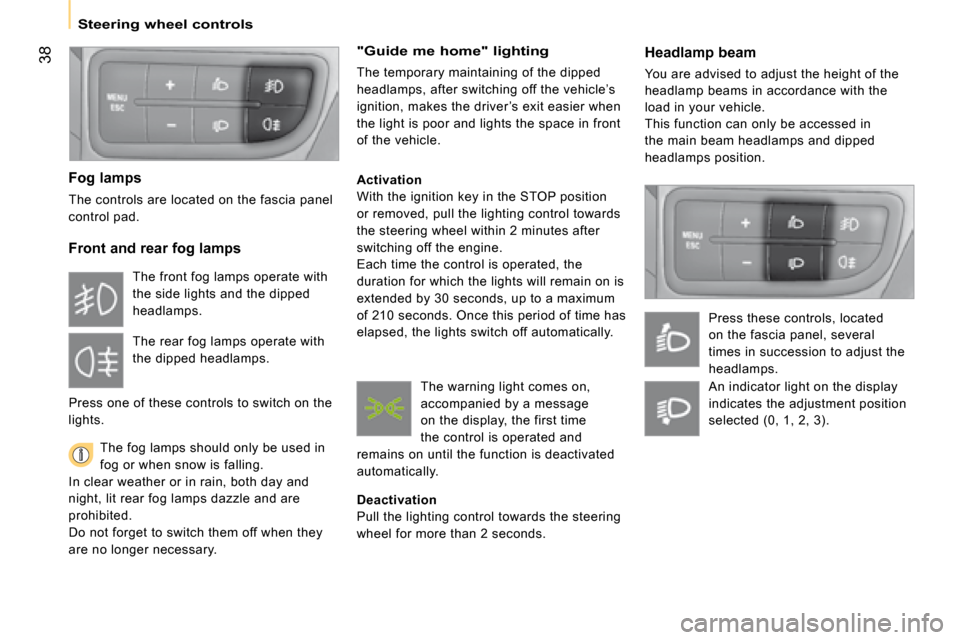
Headlamp beam
You are advised to adjust the height of the
headlamp beams in accordance with the
load in your vehicle.
This function can only be accessed in
the main beam headlamps and dipped
headlamps position.
Press these controls, located
on the fascia panel, several
times in succession to adjust the
headlamps.
Fog lamps
The controls are located on the fascia panel
control pad.
Front and rear fog lamps
The fog lamps should only be used in
fog or when snow is falling.
In clear weather or in rain, both day and
night, lit rear fog lamps dazzle and are
prohibited.
Do not forget to switch them off when they
are no longer necessary.
"Guide me home" lighting
The temporary maintaining of the dipped
headlamps, after switching off the vehicle’s
ignition, makes the driver ’s exit easier when
the light is poor and lights the space in front
of the vehicle.
Activation
With the ignition key in the STOP position
or removed, pull the lighting control towards
the steering wheel within 2 minutes after
switching off the engine.
Each time the control is operated, the
duration for which the lights will remain on is
extended by 30 seconds, up to a maximum
of 210 seconds. Once this period of time has
elapsed, the lights switch off automatically.
Deactivation
Pull the lighting control towards the steering
wheel for more than 2 seconds.
The front fog lamps operate with
the side lights and the dipped
headlamps.
The rear fog lamps operate with
the dipped headlamps.
Press one of these controls to switch on the
lights.
The warning light comes on,
accompanied by a message
on the display, the first time
the control is operated and
remains on until the function is deactivated
automatically.
An indicator light on the display
indicates the adjustment position
selected (0, 1, 2, 3).
Page 46 of 140
39
1
READY TO SET OFF
Steering wheel controls
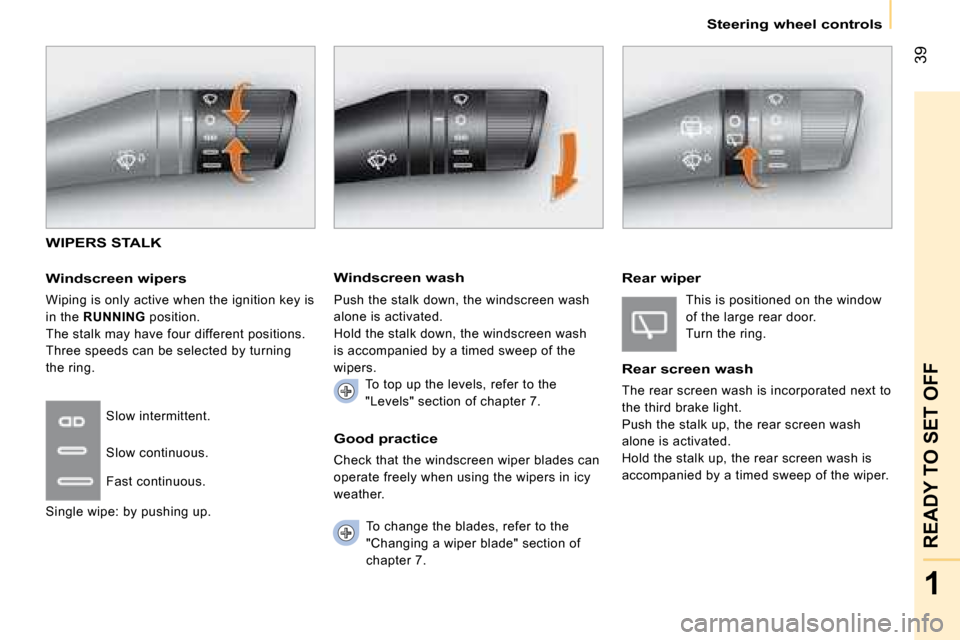
WIPERS STALK
Windscreen wipers
Wiping is only active when the ignition key is
in the RUNNING position.
The stalk may have four different positions.
Three speeds can be selected by turning
the ring.
To change the blades, refer to the
"Changing a wiper blade" section of
chapter 7.
Good practice
Check that the windscreen wiper blades can
operate freely when using the wipers in icy
weather.
Slow intermittent.
Slow continuous.
Fast continuous.
Single wipe: by pushing up.
Windscreen wash
Push the stalk down, the windscreen wash
alone is activated.
Hold the stalk down, the windscreen wash
is accompanied by a timed sweep of the
wipers.
To top up the levels, refer to the
"Levels" section of chapter 7.
Rear wiper
This is positioned on the window
of the large rear door.
Turn the ring.
Rear screen wash
The rear screen wash is incorporated next to
the third brake light.
Push the stalk up, the rear screen wash
alone is activated.
Hold the stalk up, the rear screen wash is
accompanied by a timed sweep of the wiper.
Page 48 of 140
41
1
READY TO SET OFF
Mirrors and windows
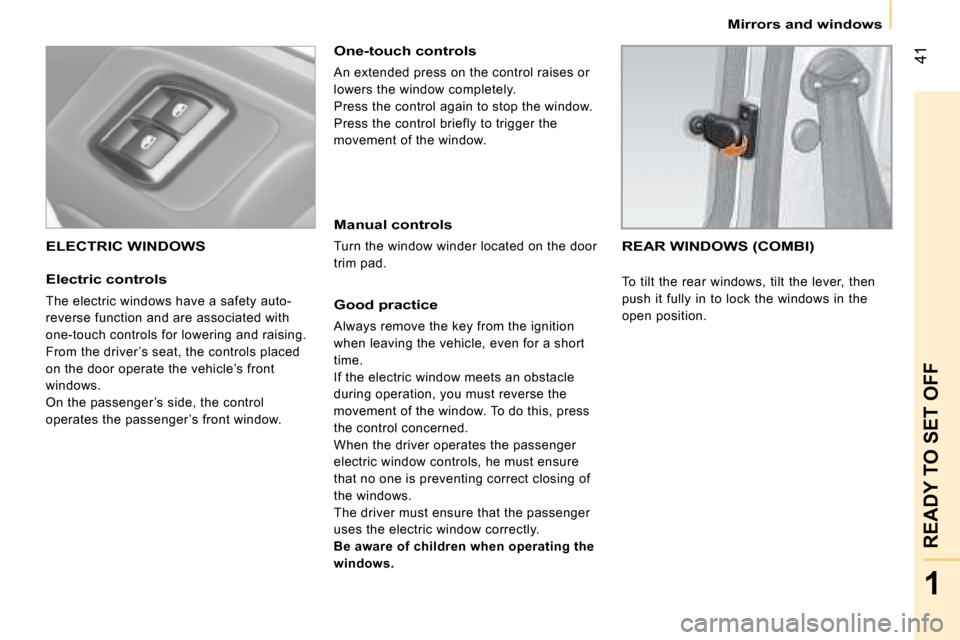
ELECTRIC WINDOWS
Electric controls
The electric windows have a safety auto-
reverse function and are associated with
one-touch controls for lowering and raising.
From the driver ’s seat, the controls placed
on the door operate the vehicle’s front
windows.
On the passenger ’s side, the control
operates the passenger ’s front window.
One-touch controls
An extended press on the control raises or
lowers the window completely.
Press the control again to stop the window.
Press the control briefly to trigger the
movement of the window.
Manual controls
Turn the window winder located on the door
trim pad.
Good practice
Always remove the key from the ignition
when leaving the vehicle, even for a short
time.
If the electric window meets an obstacle
during operation, you must reverse the
movement of the window. To do this, press
the control concerned.
When the driver operates the passenger
electric window controls, he must ensure
that no one is preventing correct closing of
the windows.
The driver must ensure that the passenger
uses the electric window correctly.
Be aware of children when operating the
windows.
REAR WINDOWS (COMBI)
To tilt the rear windows, tilt the lever, then
push it fully in to lock the windows in the
open position.
Page 51 of 140
44
Gearbox and steering wheel
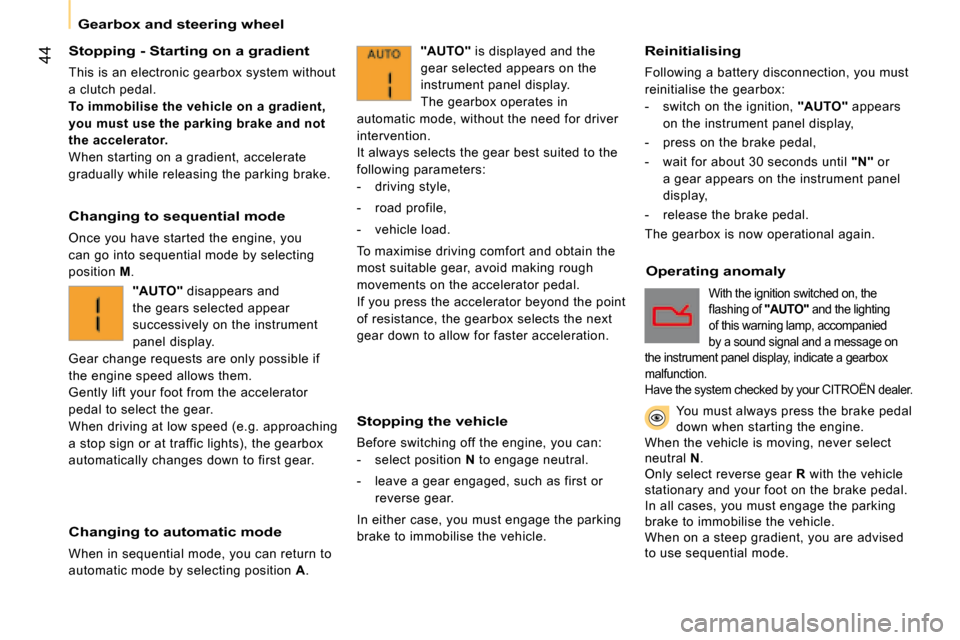
Stopping - Starting on a gradient
This is an electronic gearbox system without
a clutch pedal.
To immobilise the vehicle on a gradient,
you must use the parking brake and not
the accelerator.
When starting on a gradient, accelerate
gradually while releasing the parking brake.
Changing to sequential mode
Once you have started the engine, you
can go into sequential mode by selecting
position M.
Changing to automatic mode
When in sequential mode, you can return to
automatic mode by selecting position A.
Stopping the vehicle
Before switching off the engine, you can:
- select position N to engage neutral.
- leave a gear engaged, such as first or
reverse gear.
In either case, you must engage the parking
brake to immobilise the vehicle.
Reinitialising
Following a battery disconnection, you must
reinitialise the gearbox:
- switch on the ignition, "AUTO" appears
on the instrument panel display,
- press on the brake pedal,
- wait for about 30 seconds until "N" or
a gear appears on the instrument panel
display,
- release the brake pedal.
The gearbox is now operational again.
Operating anomaly
"AUTO" is displayed and the
gear selected appears on the
instrument panel display.
The gearbox operates in
automatic mode, without the need for driver
intervention.
It always selects the gear best suited to the
following parameters:
- driving style,
- road profile,
- vehicle load.
To maximise driving comfort and obtain the
most suitable gear, avoid making rough
movements on the accelerator pedal.
If you press the accelerator beyond the point
of resistance, the gearbox selects the next
gear down to allow for faster acceleration.
"AUTO" disappears and
the gears selected appear
successively on the instrument
panel display.
Gear change requests are only possible if
the engine speed allows them.
Gently lift your foot from the accelerator
pedal to select the gear.
When driving at low speed (e.g. approaching
a stop sign or at traffic lights), the gearbox
automatically changes down to first gear.
With the ignition switched on, the
�fl� �a�s�h�i�n�g� �o�f� "AUTO" and the lighting
of this warning lamp, accompanied
by a sound signal and a message on
the instrument panel display, indicate a gearbox
malfunction.
Have the system checked by your CITROËN dealer.
You must always press the brake pedal down when starting the engine. When the vehicle is moving, never select neutral N.Only select reverse gear R with the vehicle stationary and your foot on the brake pedal.In all cases, you must engage the parking brake to immobilise the vehicle.When on a steep gradient, you are advised to use sequential mode.
Page 54 of 140
1
READY TO SET OFF
Gearbox and steering wheel
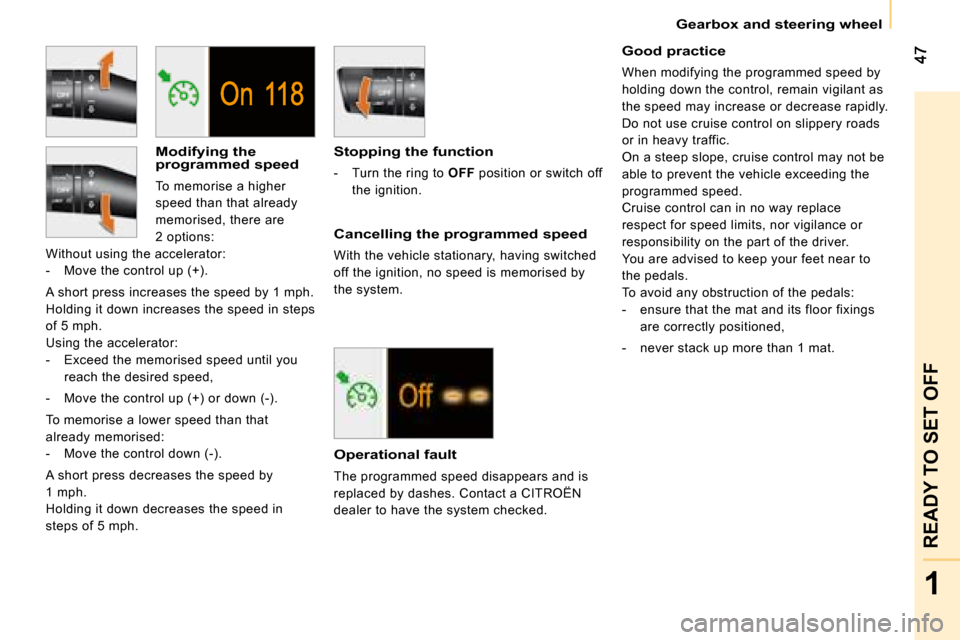
Modifying the programmed speed
To memorise a higher
speed than that already
memorised, there are
2 options:
Without using the accelerator:
- Move the control up (+).
A short press increases the speed by 1 mph.
Holding it down increases the speed in steps
of 5 mph.
Using the accelerator:
- Exceed the memorised speed until you reach the desired speed,
- Move the control up (+) or down (-).
To memorise a lower speed than that
already memorised:
- Move the control down (-).
A short press decreases the speed by
1 mph.
Holding it down decreases the speed in
steps of 5 mph.
Stopping the function
- Turn the ring to OFF position or switch off
the ignition.
Cancelling the programmed speed
With the vehicle stationary, having switched
off the ignition, no speed is memorised by
the system.
Operational fault
The programmed speed disappears and is
replaced by dashes. Contact a CITROËN
dealer to have the system checked.
Good practice
When modifying the programmed speed by
holding down the control, remain vigilant as
the speed may increase or decrease rapidly.
Do not use cruise control on slippery roads
or in heavy traffic.
On a steep slope, cruise control may not be
able to prevent the vehicle exceeding the
programmed speed.
Cruise control can in no way replace
respect for speed limits, nor vigilance or
responsibility on the part of the driver.
You are advised to keep your feet near to
the pedals.
To avoid any obstruction of the pedals:
- ensure that the mat and its floor fixings are correctly positioned,
- never stack up more than 1 mat.
Page 57 of 140
50
Gearbox and steering wheel
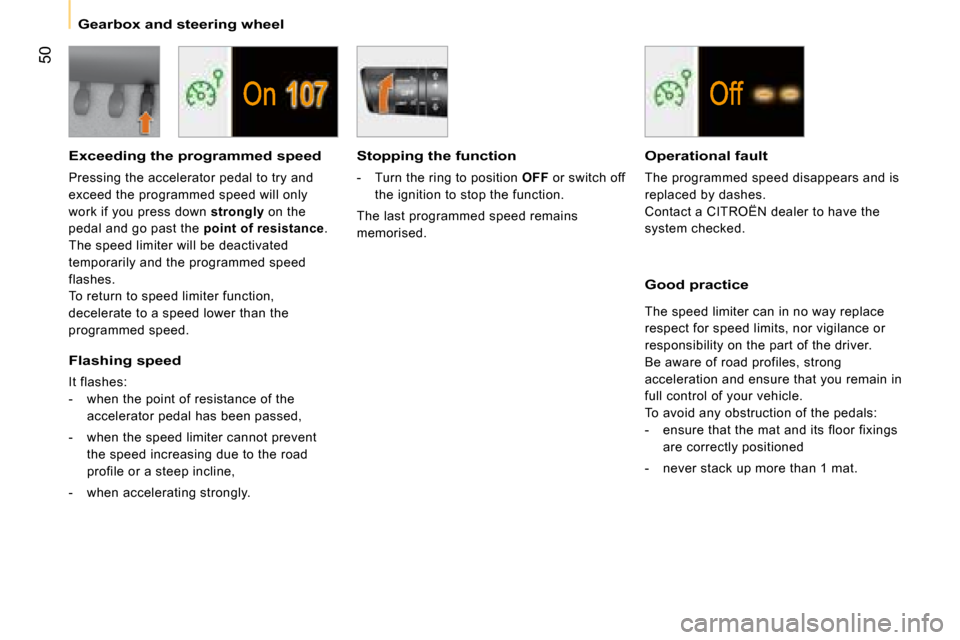
Exceeding the programmed speed
Pressing the accelerator pedal to try and
exceed the programmed speed will only
work if you press down strongly on the
pedal and go past the point of resistance.
The speed limiter will be deactivated
temporarily and the programmed speed
flashes.
To return to speed limiter function,
decelerate to a speed lower than the
programmed speed.
Flashing speed
It flashes:
- when the point of resistance of the accelerator pedal has been passed,
- when the speed limiter cannot prevent the speed increasing due to the road
profile or a steep incline,
- when accelerating strongly.
Stopping the function
- Turn the ring to position OFF or switch off
the ignition to stop the function.
The last programmed speed remains
memorised.
Operational fault
The programmed speed disappears and is
replaced by dashes.
Contact a CITROËN dealer to have the
system checked.
Good practice
The speed limiter can in no way replace
respect for speed limits, nor vigilance or
responsibility on the part of the driver.
Be aware of road profiles, strong
acceleration and ensure that you remain in
full control of your vehicle.
To avoid any obstruction of the pedals:
- ensure that the mat and its floor fixings are correctly positioned
- never stack up more than 1 mat.
Page 68 of 140
62
Menu
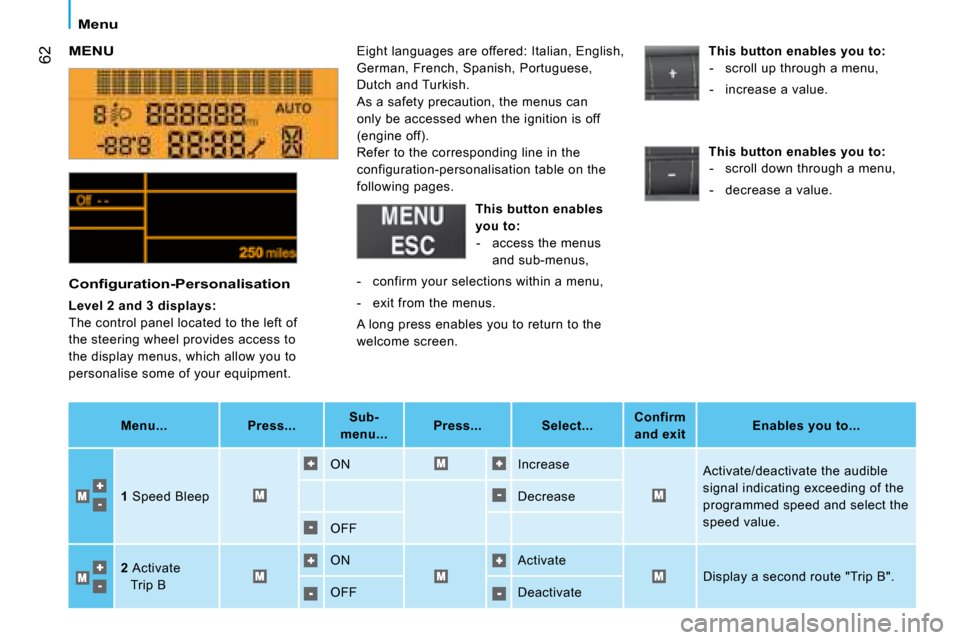
MENU Eight languages are offered: Italian, English,
German, French, Spanish, Portuguese,
Dutch and Turkish.
As a safety precaution, the menus can
only be accessed when the ignition is off
(engine off).
Refer to the corresponding line in the
configuration-personalisation table on the
following pages.
This button enables you to:
- scroll up through a menu,
- increase a value.
This button enables you to:
- scroll down through a menu,
- decrease a value.
Menu... Press...
Sub-
menu...
Press... Select...
Confirm
and exit
Enables you to...
1 Speed Bleep ON Increase
Activate/deactivate the audible
signal indicating exceeding of the
programmed speed and select the
speed value.
Decrease
OFF
2 Activate
Trip B ON Activate
Display a second route "Trip B".
OFF
Deactivate
� � �C�o�n�fi� �g�u�r�a�t�i�o�n�-�P�e�r�s�o�n�a�l�i�s�a�t�i�o�n�
Level 2 and 3 displays:
The control panel located to the left of
the steering wheel provides access to
the display menus, which allow you to
personalise some of your equipment.
This button enables
you to:
- access the menus and sub-menus,
- confirm your selections within a menu,
- exit from the menus.
A long press enables you to return to the
welcome screen.
Page 75 of 140
69
3
IN-CAR TECHNOLOGY
Mobile telephone with hands-free function
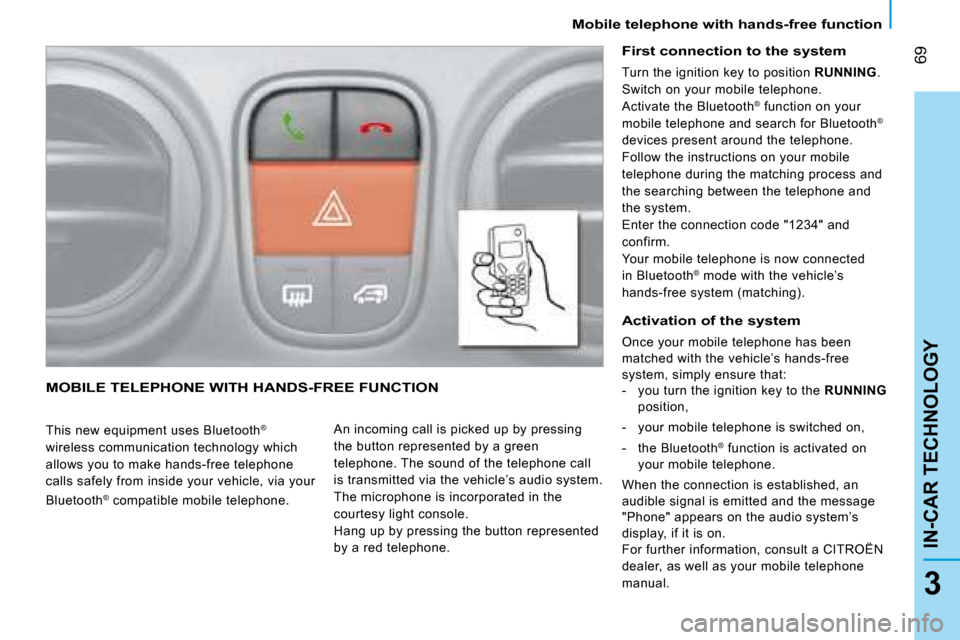
MOBILE TELEPHONE WITH HANDS-FREE FUNCTION
This new equipment uses Bluetooth®
wireless communication technology which
allows you to make hands-free telephone
calls safely from inside your vehicle, via your
Bluetooth ®
compatible mobile telephone. An incoming call is picked up by pressing
the button represented by a green
telephone. The sound of the telephone call
is transmitted via the vehicle’s audio system.
The microphone is incorporated in the
courtesy light console.
Hang up by pressing the button represented
by a red telephone.
First connection to the system
Turn the ignition key to positionRUNNING.
Switch on your mobile telephone.
Activate the Bluetooth® function on your
mobile telephone and search for Bluetooth®
devices present around the telephone.
Follow the instructions on your mobile
telephone during the matching process and
the searching between the telephone and
the system.
Enter the connection code "1234" and
confirm.
Your mobile telephone is now connected
in Bluetooth® mode with the vehicle’s
hands-free system (matching).
Activation of the system
Once your mobile telephone has been matched with the vehicle’s hands-free system, simply ensure that:
- you turn the ignition key to the RUNNING
position,
- your mobile telephone is switched on,
- the Bluetooth® function is activated on your mobile telephone.
When the connection is established, an audible signal is emitted and the message "Phone" appears on the audio system’s
display, if it is on. For further information, consult a CITROËN
dealer, as well as your mobile telephone
manual.
Page 76 of 140

70
Mobile telephone with hands-free function
� � �M�a�n�a�g�i�n�g� �i�n�c�o�m�i�n�g� �c�a�l�l�s�
When an incoming call arrives, the message
"Phone" appears on the audio display, if the
radio is on.
Simple call
To accept a call, press the green
button.
Dual call
To accept a second call while already on the
phone, press the green button once.
To switch back to the first call, press the
green button again.
To refuse the second call while already on
the phone, press the red button.
To end the call, press the red button again.
To refuse or finish a call, press
the red button.
To switch communication between the
system and the mobile telephone (private
mode) and vice-versa, press the green
button .
� � �M�a�n�a�g�i�n�g� �o�u�t�g�o�i�n�g� �c�a�l�l�s�
With the keypad
Enter the number of the person you are
calling on the mobile telephone keypad.
Press the "Call" button of the mobile
telephone.
Depending on the mobile telephone model,
the call will be automatically transferred to
hands-free mode, otherwise press the green
button.
To redial the last number dialled, hold
down the green button until the number is
redialled.
With voice commands
Press the green button.
Wait for the sound signal and/or the display
of the message "Phone" on the audio
display.
Say the voice identity of the person to call.
The system repeats the voice identity for
confirmation and automatically makes the
call.
If the voice identity repeated by the system
is not correct, press the red button to cancel
and restart the procedure.
� � �D�e�l�e�t�i�n�g� �t�h�e� �s�y�s�t�e�m� �
To delete the contents of the system’s
memory, press the green and red buttons at
the same time for over two seconds.
This operation deletes all of the matched
mobile telephones, as well as all of the
telephone numbers recorded in the memory.
For the next hands-free communication,
you must restart the procedure for the first
connection to the system (matching).
Good practice
You can match up to three mobile
telephones in the system.
For safety reasons and because
matching operations require prolonged
attention on the part of the driver, matching
operations between the mobile telephone
and the Bluetooth® hands-free kit must be
carried out with the vehicle stationary, and
the ignition switched on.
To use voice commands, you must
have already recorded and linked a
voice identity to the telephone number to
be called; refer to your mobile telephone
handbook.
The management of the second call
by the system is only possible if the
function is activated on the mobile
telephone.