open bonnet CITROEN RELAY 2017 Handbook (in English)
[x] Cancel search | Manufacturer: CITROEN, Model Year: 2017, Model line: RELAY, Model: CITROEN RELAY 2017Pages: 292, PDF Size: 9.04 MB
Page 5 of 292
3
cOnt
Ent
S
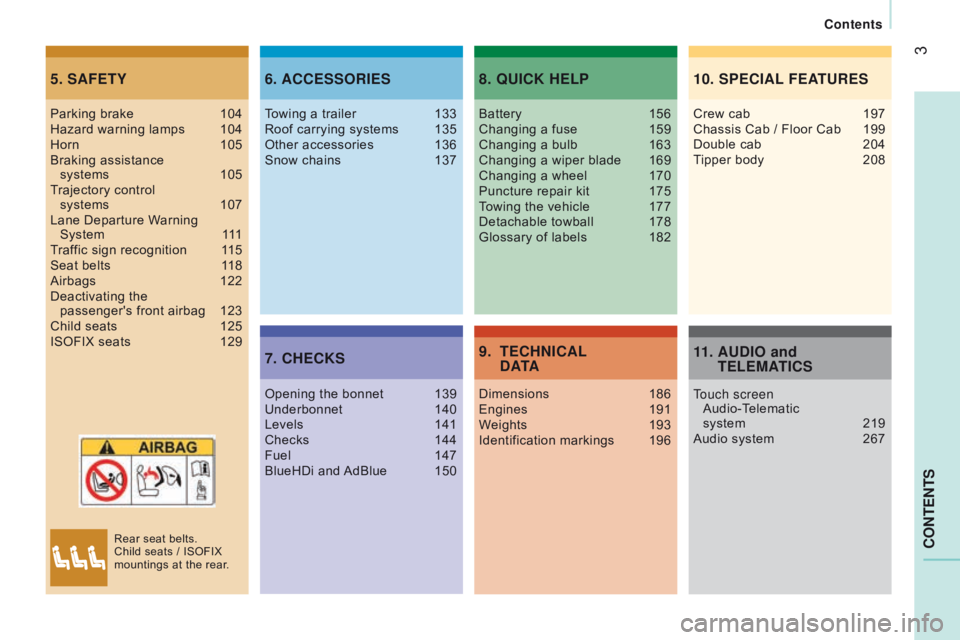
5. SAFEtY6. A cc ESSO r IES
7. c HE c KS8. Q
u I c K HELP
9. t E c H n I c AL
dA
t A
Parking brake 104
Hazard warning lamps 104
Horn
105
Braking assistance
systems
105
T
rajectory control
systems
107
Lane Departure W
arning
System
1
11
Traffic sign recognition
1
15
Seat belts
1
18
Airbags
122
Deactivating the
passenger's
front airbag
123
Child seats
125
ISOFIX seats
129T
owing a trailer 133
Roof carrying systems
135
Other accessories
136
Snow chains
137
Opening the bonnet
139
Underbonnet
140
Levels
141
Checks
144
Fuel
147
BlueHDi and
AdBlue
150Battery
156
Changing a fuse
159
Changing a bulb
163
Changing a wiper blade
169
Changing a wheel
170
Puncture repair kit
175
T
owing the vehicle
177
Detachable towball
178
Glossary of labels
182
Dimensions
186
Engines
191
W
eights
193
Identification markings
196
11. A ud IO and t
ELEMAt I c S
10. SPE
c IAL FEA
tur
ES
Crew cab 197
Chassis Cab / Floor Cab 199
Double cab
204
T
ipper body
208
T
ouch screen
Audio-Telematic
system
219
Audio system
267
Rear seat belts.
Child seats / ISOFIX
mountings at the rear.
contents
Page 10 of 292
8
Lane departure warning
system 1 11-114
Hill descent control
1
10
Intelligent Traction Control
109
ASR, DSC
107-108
V
ehicle configuration
96-97
Setting the time
97
Reversing camera
101
T
ouch screen audio
system
219-266
Audio system
267-283
T
achograph
99
Cab fittings
81-85
●
cigarette lighter
,
●
glove box - cooled,
●
overhead storage,
●
portable ashtray
,
●
courtesy lamps,
●
12 volt socket / USB port,
●
writing table / multifunction
support,
●
storage compartments.
Demisting-defrosting
64
Central locking
22
Locking indicator lamp
22
Hazard warning lamps
104 V
entilation, heating,
A/C
65-67, 68-69
●
manual air conditioning,
●
mono-zone digital air
conditioning,
●
air recirculation.
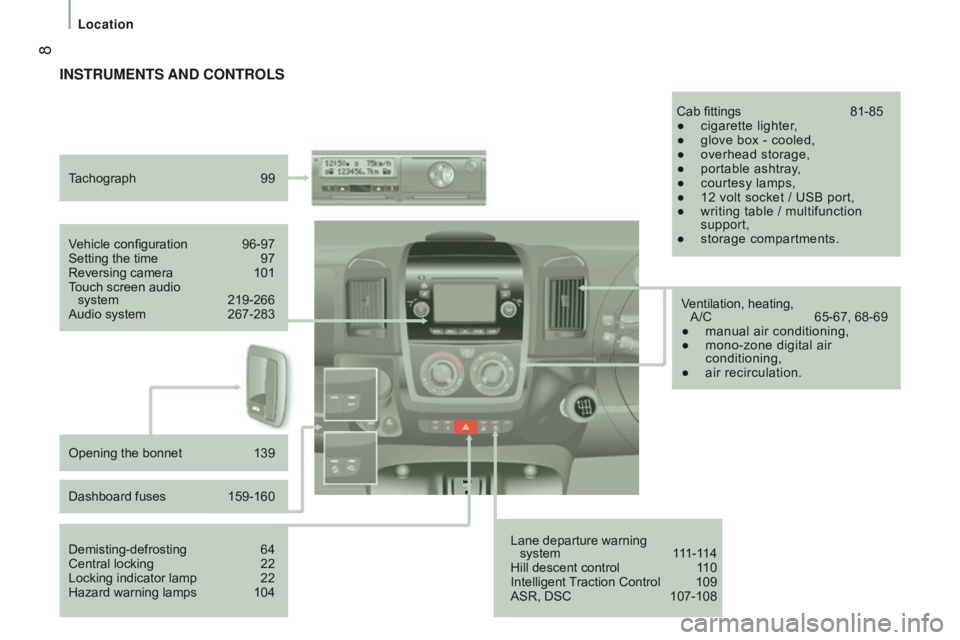
Opening the bonnet
139
Dashboard fuses
159-160
InStruMEntS And cOntrOLS
Location
Page 12 of 292
10
Changing a wiper
blade 169
Bulbs, lighting, changing
bulbs
163-168
V
ery cold conditions protectors
89
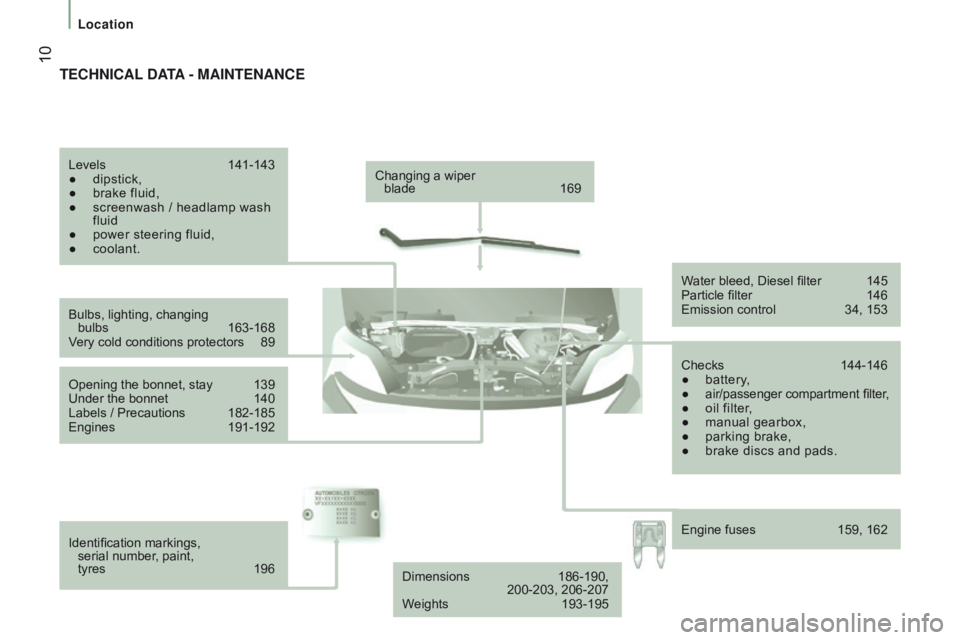
Opening the bonnet, stay
139
Under the bonnet
140
Labels / Precautions
182-185
Engines
191-192
Identification markings,
serial number
, paint,
tyres
196
Levels
141-143
●
dipstick,
●
brake fluid,
●
screenwash / headlamp wash
fluid
●
power steering fluid,
●
coolant. W
ater bleed, Diesel filter
145
Particle filter
146
Emission control
34, 153
Checks
144-146
●
battery
,
●
air/passenger compartment filter
,
●
oil filter
,
●
manual gearbox,
●
parking brake,
●
brake discs and pads.
tEcHnIcAL dAtA - M AI nt E n A nc E
Dimensions 186-190, 200-203, 206-207
W
eights
193-195 Engine fuses
159, 162
Location
Page 21 of 292

19remote control fault
Unlock the doors by using the key in the
door lock; the alarm is triggered.
Switch on the ignition, recognition of the
key's code turns off the alarm.Locking the doors by using the key in
the door lock does not set the alarm.
deactivation using the remote control
When this button is pressed, the
alarm is deactivated when the
vehicle is unlocked.
deactivation of the anti-tilt
protection*
Press this control to deactivate
the protection (when towing the
vehicle with the alarm on, for
example).
The protection remains active until the doors
are unlocked with the central locking.
ALArM
If your vehicle is fitted with an anti-theft
alarm.
This provides:
-
exterior perimeter protection by
detectors on the openings (doors,
bonnet) and on the electrical power
supply,
-
anti-tilt protection*.
Activation of the alarm
First ensure that all of the doors and bonnet
are closed correctly.
*
Depending on engine.
Good practice
to deactivate the siren quickly following
a false alarm:
-
switch on the ignition, recognition of the
key's code will switch off the alarm,
-
press the unlocking button (cab and key)
on the remote control.
To avoid setting the alarm, when washing
the vehicle for example, lock the vehicle
using the key.
Unlocking the vehicle using the remote
control deactivates the siren automatically.
The alarm is set by pressing this
padlock, the protection is active
after a few seconds.
While the alarm is monitoring,
any intrusion triggers the siren for
approximately 30 seconds, accompanied by
illumination of the direction indicators.
The alarm then returns to
monitoring mode but the
triggering event is stored and is
indicated by illumination of the
electronic immobiliser warning lamp for about
10
seconds when the ignition is switched on.
The alarm is also triggered following an
electrical supply cut-off, when the supply is
restored.
2
Access
rEAdY tO GO
Page 24 of 292

22
LOcKInG / unLOcKInG FrOM InSIdEd oor open warning lamp
If this warning lamp comes on,
check that all of the doors and
the bonnet are closed correctly.
reversing camera
With the vehicle stationary, opening the rear
doors activates the camera and sends the
image to the screen fitted in the cab.
cab and load space
Pressing permits electric central
locking and unlocking, when the
doors are closed.
The doors can still be opened from the
inside. If one of the doors is open or is not
closed correctly, the central locking
does not work. The indicator lamp in the control:
Load space
Press to lock or unlock the side
door and rear doors from the cab.
The indicator lamp remains on
when locked
Anti-intrusion security
When the vehicle is started, the
system locks the cab and load space
doors automatically when you reach
approximately
12 mph (20 km/h).
If none of the doors is opened during the
journey, the locking remains active.
Activation/deactivation of the system
The system setting is made with the MO
d E
button: in the "Autoclose" menu, select "ON"
or "OFF".
-
comes on when the doors
are locked and the ignition is
switched on,
-
then flashes when the doors
are locked when stationary
with the engine off.
The control is not active when the vehicle
has been locked using the remote control or
the key from the outside.
Good practice
If you decide to drive with the doors locked,
be aware that this could make access to the
vehicle by the emergency services more
difficult in an emergency. Refer to the "Technology on board -
Vehicle configuration" section.
Access
Page 28 of 292
26
Warning/indicator lampisindicates Solution - action
Coolant
temperature on H in the red
zone.
the coolant temperature is too
high.
and/or
an abnormal increase. Park and switch off the ignition.
Allow the system to cool sufficiently.
Check the level visually.
"Checks - Levels and checks" section.
If the level is low, top-up the coolant.
If the level is correct, contact a CITROËN dealer or a
qualified workshop.
on with the
needle in the red
zone.
Engine oil
pressure flashing, for a
few seconds,
with a message
in the screen.
a high level of deterioration of
the engine oil.
Have the engine oil changed as soon as possible.
After the second level of alert, engine performance will
be limited.
on temporarily
or remains on
continuously,
with the engine
running. low oil level
or
a major fault. Park and switch off the ignition.
Check the level with the dipstick.
"Checks - Levels and checks" section.
If the level is low, top-up the oil.
If the level is correct, contact a CITROËN dealer or a
qualified workshop.
Battery charge on.
a fault with the charging system
or the battery. Check the battery terminals…
"Quick help - Flat battery" section.
continuously on,
fixed or flashing
in spite of the
checks. an ignition or injection fault.
Have it checked by a CITROËN dealer or a qualified
workshop.
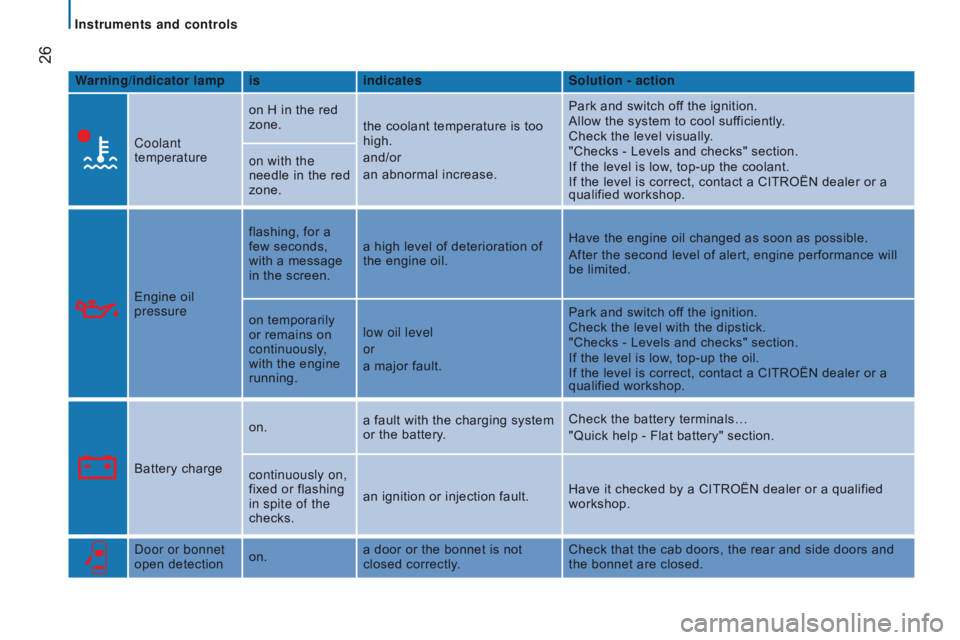
Door or bonnet
open detection on.a door or the bonnet is not
closed correctly. Check that the cab doors, the rear and side doors and
the bonnet are closed.
Instruments and controls
Page 42 of 292
40
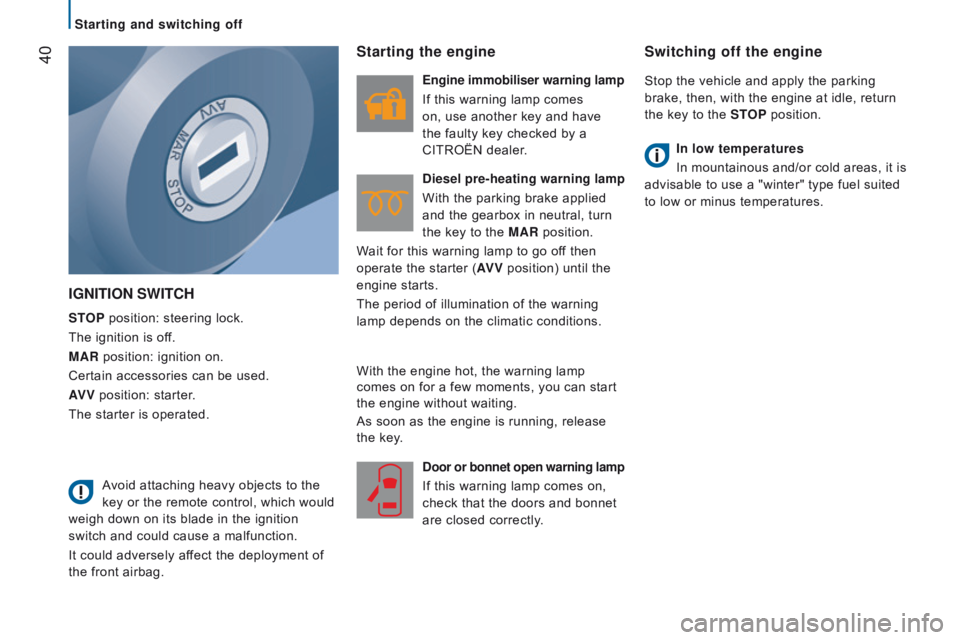
IGnItIOn SWItcH
StOP position: steering lock.
The ignition is off.
MA
r position: ignition on.
Certain accessories can be used.
AV V position: starter.
The starter is operated.
Starting the engine
Engine immobiliser warning lamp
If this warning lamp comes
on, use another key and have
the faulty key checked by a
CITROËN dealer.
d
iesel pre-heating warning lamp
With the parking brake applied
and the gearbox in neutral, turn
the key to the MA
r position.
Wait for this warning lamp to go off then
operate the starter (AV V position) until the
engine starts.
The period of illumination of the warning
lamp depends on the climatic conditions.
d
oor or bonnet open warning lamp
If this warning lamp comes on,
check that the doors and bonnet
are closed correctly.
Switching off the engine
Stop the vehicle and apply the parking
brake, then, with the engine at idle, return
the key to the S
t
OP
position.
In low temperatures
In mountainous and/or cold areas, it is
advisable to use a "winter" type fuel suited
to low or minus temperatures.
Avoid attaching heavy objects to the
key or the remote control, which would
weigh down on its blade in the ignition
switch and could cause a malfunction.
It could adversely affect the deployment of
the front airbag. With the engine hot, the warning lamp
comes on for a few moments, you can start
the engine without waiting.
As soon as the engine is running, release
the key.
Starting and switching off
Page 91 of 292

89
ExtErIOr FIttInGS
Protective grille
Depending on the country of sale, a
protective grille fitted to the inside of
the front bumper provides protection for
underbonnet components against flying
stones...
Very cold conditions protectors
Depending on the country of sale, protective
foam pads are present to avoid the ingress
of cold or snow to the upper part of the
underbonnet.
Located at the edge of each headlamp,
they are fitted to the front panel above the
radiator.
Slide them towards the outisde of the
vehicle to remove them.
Folding foot board
To faciltate the entry and exit of rear
passengers, your vehicle may be fitted with
a foot board, which is deployed on opening
the sliding side door.
3
EASE OF uSE and cOMFOrt
Life on board
Page 141 of 292

139
On the inside
This operation must only be carried out with the
vehicle stationary and the driver's door open.
Pull the release lever on the side of the
dashboard towards you.
On the outside
Raise the safety catch lever located above
the grille to the right and raise the bonnet.Before closing the bonnet, put the stay back
in its housing.
Lower the bonnet and release it at the end
of its travel. Check that the bonnet has
latched.
OPEnInG tHE BOnnEt
Do not open the bonnet in strong
winds.
When the engine is hot, handle the safety
catch and stay with care (risk of burns).
Before doing anything under the
bonnet, switch off the ignition with the
key to avoid any risk of injury resulting from
an automatic change to START mode of the
Stop & Start system.
cLOSInG tHE BOnnEt
Bonnet stay
Unclip the stay and tilt it to insert it in the
first notch, then the second.
Because of the presence of electrical
equipment under the bonnet, it is
recommended that exposure to water (rain,
washing, ...) be limited.
7
under the bonnet
cHEcKS
Page 166 of 292

164
1 - Main beam headlamps
type
d , H7 - 55 W
-
Remove the cover by pulling on the
rubber tongue.
-
Disconnect the electrical connector
.
-
Release the retaining spring by pressing
on the central clip.
-
Change the bulb taking care to align the
metal part with the groove on the lamp. 2 -
d ipped beam headlamps
type
d , H7 - 55 W
-
Remove the cover by pulling on the
rubber tongue.
- Disconnect the electrical connector .
- Release the retaining spring by pressing
on the central clip.
-
Change the bulb taking care to align the
metal part with the grooves on the lamp.
Front lamps
3 - direction indicators
type A
, WY 21 W - 21 W
-
Remove the cover by pulling on the
rubber tongue.
-
T
urn the bulb holder a quarter turn
anticlockwise.
-
Change the bulb.
Open and secure the bonnet with the stay
.
To access the bulbs, reach behind the
headlamp unit.
If necessary you can remove the headlamp:
-
Depending on the country of sale,
remove the very low temperature
protection padding by sliding it towards
the outside of the vehicle.
-
Disconnect the electrical connector by
removing its locking ring.
-
Remove the two headlamp fixing
screws.
-
Move the headlamp towards the centre
of the vehicle to extract it from its
sliders. On the left hand side, take care not to
dislodge the bonnet stay.
Failed bulb or lamp