ignition CITROEN RELAY 2020 Handbook (in English)
[x] Cancel search | Manufacturer: CITROEN, Model Year: 2020, Model line: RELAY, Model: CITROEN RELAY 2020Pages: 196, PDF Size: 34.07 MB
Page 24 of 196
22
Access
Type of keyUnlocking the cabLocking the doorsUnlocking the rear doors
Direction indicators 2 flashes.1 flash.2 flashes.
Central locking control indicator
lamp on the dashboard Off.
Fixed for approximately 3
seconds, then flashing. Flashing.
Using the key in the driver's door lock does not activate/deactivate the alarm.
Locking/Unlocking from
inside
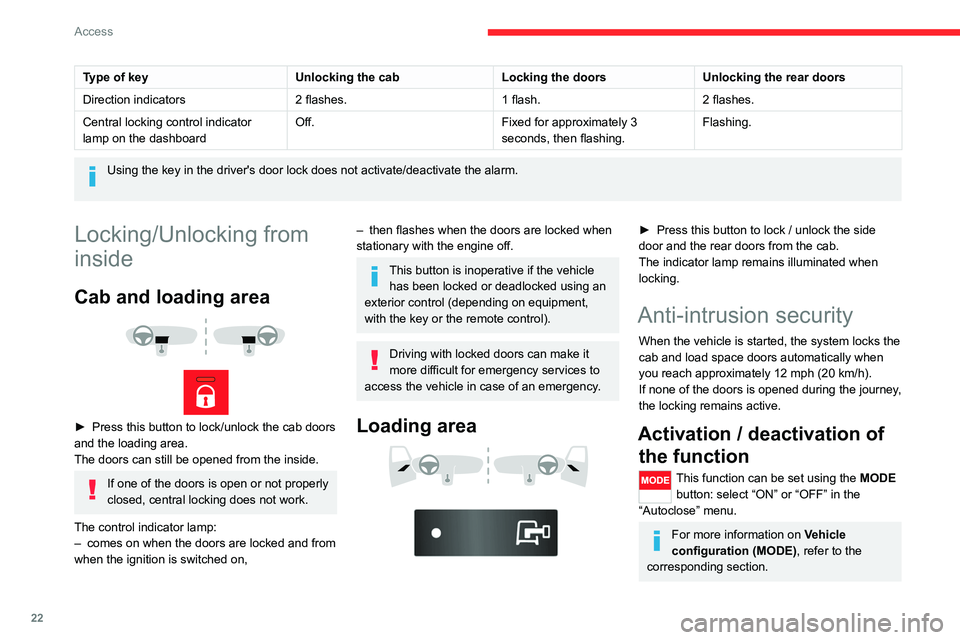
Cab and loading area
► Press this button to lock/unlock the cab doors
and the loading area.
The doors can still be opened from the inside.
If one of the doors is open or not properly
closed, central locking does not work.
The control indicator lamp:
– comes on when the doors are locked and from
when the ignition is switched on,
– then flashes when the doors are locked when
stationary with the engine off.
This button is inoperative if the vehicle has been locked or deadlocked using an
exterior control (depending on equipment,
with the key or the remote control).
Driving with locked doors can make it
more difficult for emergency services to
access the vehicle in case of an emergency.
Loading area
► Press this button to lock / unlock the side
door and the rear doors from the cab.
The indicator lamp remains illuminated when
locking.
Anti-intrusion security
When the vehicle is started, the system locks the
cab and load space doors automatically when
you reach approximately 12 mph (20 km/h).
If none of the doors is opened during the journey,
the locking remains active.
Activation / deactivation of the function
This function can be set using the MODE
button: select “ON” or “OFF” in the
“Autoclose” menu.
For more information on Vehicle
configuration (MODE) , refer to the
corresponding section.
Front doors
► Use the corresponding button on the remote
control or use the key in the driver's door lock to
unlock.
► Pull the handle towards you.
Sliding side door
Take care not to block the guide space
on the floor to allow the door to slide
correctly.
Opening
From outside
► Pull the handle towards you and then towards
the rear.
Page 26 of 196
24
Access
Opening
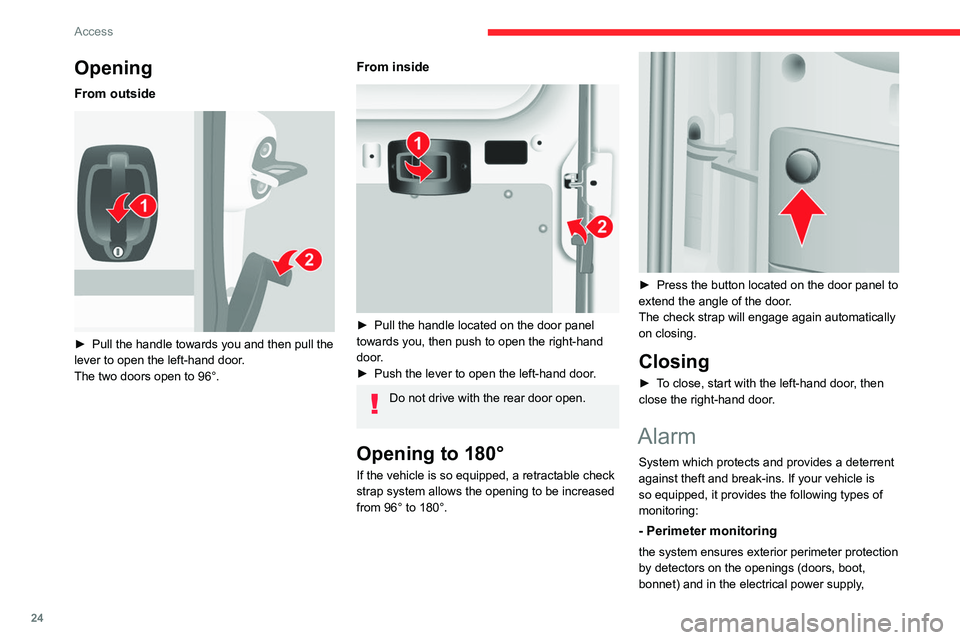
From outside
► Pull the handle towards you and then pull the
lever to open the left-hand door.
The two doors open to 96°.
From inside
► Pull the handle located on the door panel
towards you, then push to open the right-hand
door.
► Push the lever to open the left-hand door.
Do not drive with the rear door open.
Opening to 180°
If the vehicle is so equipped, a retractable check
strap system allows the opening to be increased
from 96° to 180°.
► Press the button located on the door panel to
extend the angle of the door.
The check strap will engage again automatically
on closing.
Closing
► To close, start with the left-hand door, then
close the right-hand door.
Alarm
System which protects and provides a deterrent
against theft and break-ins. If your vehicle is
so equipped, it provides the following types of
monitoring:
- Perimeter monitoring
the system ensures exterior perimeter protection
by detectors on the openings (doors, boot,
bonnet) and in the electrical power supply,
- Anti-tilt monitoring
The system checks for any change in the attitude
of the vehicle.
Activation
► Switch off the ignition and exit the vehicle.► Press this button of the remote
control.
The protections are active after a few seconds.
Triggering of the alarm
This is signalled by the siren sounding and
flashing of the direction indicators for thirty
seconds.
The alarm then returns to monitoring mode but the triggering event is stored
and is indicated by illumination of the electronic
immobiliser warning lamp for about 10 seconds
when the ignition is switched on.
The alarm is also triggered after interruption of
the electrical supply and when it is reconnected.
Deactivation using the
remote control
► Press this button.
The standby mode is deactivated when the
vehicle is unlocked.
Page 27 of 196

25
Access
2- Anti-tilt monitoring
The system checks for any change in the attitude
of the vehicle.
Activation
► Switch off the ignition and exit the vehicle.► Press this button of the remote
control.
The protections are active after a few seconds.
Triggering of the alarm
This is signalled by the siren sounding and
flashing of the direction indicators for thirty
seconds.
The alarm then returns to monitoring mode but the triggering event is stored
and is indicated by illumination of the electronic
immobiliser warning lamp for about 10 seconds
when the ignition is switched on.
The alarm is also triggered after interruption of
the electrical supply and when it is reconnected.
Deactivation using the
remote control
► Press this button.
The standby mode is deactivated when the
vehicle is unlocked.
Deactivating the anti-tilt
monitoring
(Depending on engine)► Press this button to deactivate the
protection (e.g. when towing the vehicle
with the alarm on).
The protection remains active until the central
opening of the doors.
Failure of the remote control
► Unlock the doors using the key in the lock;
the alarm goes off.
► Turn the ignition on; the identification of the
key code will turn off the alarm.
Locking the doors using the key in the
lock does not activate the alarm.
To deactivate the siren quickly
following a false alarm:
► switch on the ignition, recognition of the
key code stops the alarm,
► press the unlocking button (cab and key)
on the remote control.
To avoid setting the alarm, when washing the
vehicle for example, lock the vehicle using
the key.
Unlocking the vehicle using the remote
control deactivates the siren automatically.
Electric windows
A. Driver electric window
B. Passenger electric window
Manual operation
► To open or close the window, press or
pull switch A/B without passing its point of
resistance. The window stops when the switch
is released.
Automatic operation
► To open or close the window, press or pull
switch A past its point of resistance: the window
opens or closes completely when the switch is
released. Operating the switch again stops the
movement of the window.
Page 28 of 196

26
Access
Always remove the key from the ignition when leaving the vehicle, even for a
short time.
If an obstacle is encountered during operation
of the electric windows, you must reverse the
movement of the window. To do this, press
the window control concerned.
When the driver operates the passenger
electric windows, they must ensure that
no one is preventing correct closing of the
windows.
The driver must ensure that all passengers
make correct use of electric windows.
Be particularly aware of children when
operating the windows.
Page 33 of 196

31
Ease of use and comfort
3As a safety precaution, these operations should only be carried out while the
vehicle is stationary.
Mirrors
Door mirrors
They are divided into two zones:
A - Upper mirror
B - Lower mirror
The mirrors are spherical in shape to widen the
lateral field of vision. The objects that you see in
the mirrors are in fact closer than they appear.
This must be taken into account to correctly
assess the distance.
The shell integrates the direction indicator
side repeater and the aerials, according to the
equipment available on board (GPS, GSM,
Radio, etc.).
Electric adjustments
The ignition key must be in MAR position.
► Turn the control to select the mirror zone.
Left-hand door mirror:
A1 - Upper mirror
B1 - Lower mirror
Right-hand door mirror:
A2 - Upper mirror
B2 - Lower mirror
► Then move the control in the direction of the
desired adjustment.
Electric folding
► Press this control.
De-icing the mirrors
► Press the heated rear screen button.
Interior rear view mirror
The lever on the lower edge allows the mirror to
be placed in two positions.
Day position, the lever is pushed.
Night position for anti-glare, pull the lever
towards you.
Heating and Ventilation
Advice
Using the ventilation and air
conditioning system
► To ensure that air is distributed evenly,
keep the external air intake grilles at the base
of the windscreen, the nozzles, the vents, the
air outlets and the air extractor in the boot
free from obstructions.
► Do not cover the sunshine sensor located
on the dashboard; this sensor is used to
regulate the automatic air conditioning
system.
Page 36 of 196

34
Ease of use and comfort
Additional pre-heater or programmable additional
heating
This is an additional, programmable and
independent system that heats the hot water
loop of the Diesel engine to facilitate starting.
It improves the performance of the defrosting
and demisting and, if fitted to the vehicle, that of
the heated seats.
The passenger compartment’s temperature rises
more quickly.
This system must be programmed to be started
before entering the vehicle.
Automatic additional heating
This is an additional system that starts
automatically when the ignition is switched on. Its
activation depends on the outside temperature
and the temperature inside the vehicle.
It switches off automatically as soon as the
heating is manually switched on.
Supplementary heating
On 2-3 seat versions, it is located under the
driver's seat with air diffusion directed towards
the front.
Complete switch-off
► Press button 3 to switch off the system. The
LED and the display go out.
Temperature
The scale is between:
– a rise in interior air temperature HI (High),
which heats up to a maximum graduation of 32,
– a cooling of interior air temperature LO (Low),
which decreases to a graduation of 16.
Air distribution
► Press one of the buttons 4 to direct the air
flow towards:
the windscreen and front side window
vents (demisting - defrosting windows),
the central and side vents (chest and
face),
the diffusers of the front and rear zones
(footwells).
Combining buttons makes it possible to refine
the air distribution.
Air flow
► Press one of the buttons 5 to increase or
decrease the air flow.
Air intake/Air recirculation
The intake of exterior air prevents the formation
of mist on the windscreen and side windows.
Recirculating the interior air isolates the
passenger compartment from exterior odours
and fumes.
This function allows hot or cold air to be delivered selectively and more quickly.
Return to exterior air intake as soon as possible
to avoid deterioration of the air quality and the
formation of mist.
► Press button 6 to activate interior air
recirculation. The indicator lamp comes on.
Pressing this button again restores exterior air
intake. The indicator lamp goes off.
Pressing button 1 also restores exterior
air intake. Returning to this position
allows the air in the passenger compartment
to be renewed and demisting. Pressing button
1 again restores the FULL AUTO function.
Additional rear ventilation
This system is complementary
to the standard passenger
compartment ventilation
equipment.
Air output
► Press control 1 to activate/deactivate the
release of air to the exterior (confirmed by the
LED coming on/going out).
Air intake
► Press control 2 to activate/deactivate
the exterior air intake into the passenger
compartment (confirmed by the LED coming on/
going out).
Additional heating systems
Additional heating
This is heating for the passenger compartment
which is additional to the standard equipment.
Its operation may be independent of the engine.
Page 37 of 196
35
Ease of use and comfort
3Additional pre-heater or programmable additional
heating
This is an additional, programmable and
independent system that heats the hot water
loop of the Diesel engine to facilitate starting.
It improves the performance of the defrosting
and demisting and, if fitted to the vehicle, that of
the heated seats.
The passenger compartment’s temperature rises
more quickly.
This system must be programmed to be started
before entering the vehicle.
Automatic additional heating
This is an additional system that starts
automatically when the ignition is switched on. Its
activation depends on the outside temperature
and the temperature inside the vehicle.
It switches off automatically as soon as the
heating is manually switched on.
Supplementary heating
On 2-3 seat versions, it is located under the
driver's seat with air diffusion directed towards
the front.
On 5-9 seat versions, it is
located at the rear. Depending
on the version of the model, the
air diffusion is either direct from
the rear, or comes from the rail
located under each of the two
rows of seats.
► Press this control to activate/
deactivate the heating. The LED lights up
if heating is activated.
When quickly defrosting and demisting, turn off
the control.
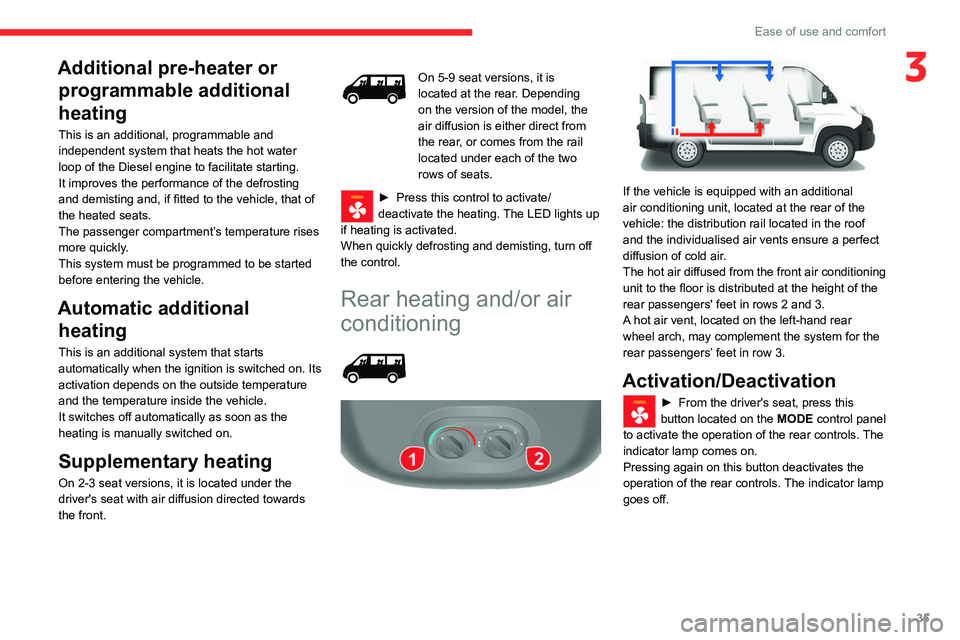
Rear heating and/or air
conditioning
If the vehicle is equipped with an additional
air conditioning unit, located at the rear of the
vehicle: the distribution rail located in the roof
and the individualised air vents ensure a perfect
diffusion of cold air.
The hot air diffused from the front air conditioning
unit to the floor is distributed at the height of the
rear passengers' feet in rows 2 and 3.
A hot air vent, located on the left-hand rear
wheel arch, may complement the system for the
rear passengers’ feet in row 3.
Activation/Deactivation
► From the driver's seat, press this
button located on the MODE control panel
to activate the operation of the rear controls. The
indicator lamp comes on.
Pressing again on this button deactivates the
operation of the rear controls. The indicator lamp
goes off.
Page 44 of 196
42
Ease of use and comfort
Support for stowing rail
Supports for securing a stowing rail are available
above the trims, on each side of the vehicle.
Maximum load: 200 kg.
Side trim
The interior sections of the side walls are fitted
with loading protection trims.
12 volt socket
Maximum power: 180 W.
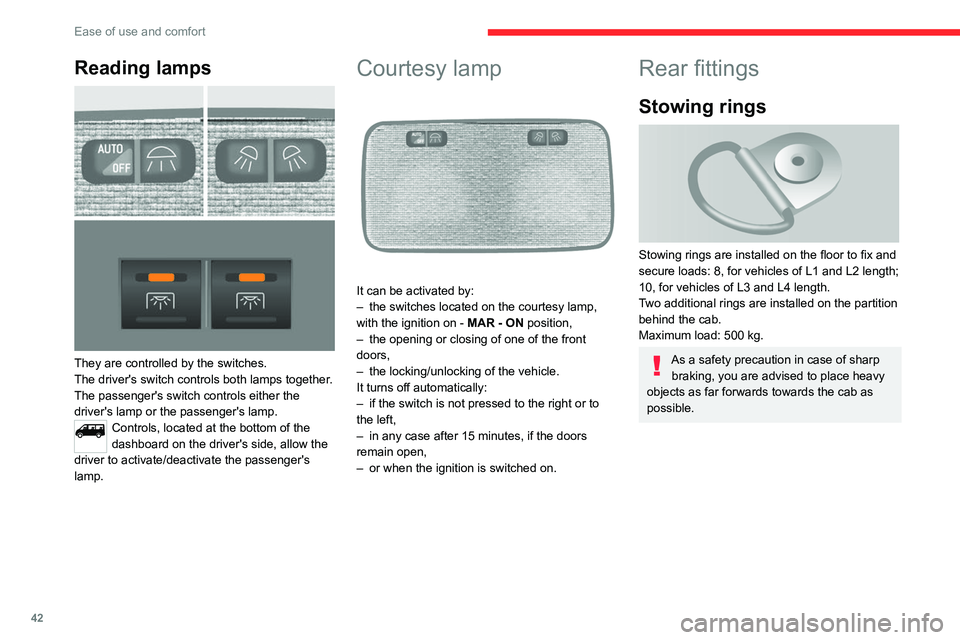
Reading lamps
They are controlled by the switches.
The driver's switch controls both lamps together.
The passenger's switch controls either the
driver's lamp or the passenger's lamp.
Controls, located at the bottom of the
dashboard on the driver's side, allow the
driver to activate/deactivate the passenger's
lamp.
Courtesy lamp
It can be activated by:
– the switches located on the courtesy lamp,
with the ignition on - MAR - ON position,
– the opening or closing of one of the front
doors,
– the locking/unlocking of the vehicle.
It turns off automatically:
– if the switch is not pressed to the right or to
the left,
– in any case after 15 minutes, if the doors
remain open,
– or when the ignition is switched on.
Rear fittings
Stowing rings
Stowing rings are installed on the floor to fix and
secure loads: 8, for vehicles of L1 and L2 length;
10, for vehicles of L3 and L4 length.
Two additional rings are installed on the partition
behind the cab.
Maximum load: 500 kg.
As a safety precaution in case of sharp braking, you are advised to place heavy
objects as far forwards towards the cab as
possible.
Page 46 of 196
44
Ease of use and comfort
Exterior fittings
Protective grille
Depending on the country of sale, a protective
grille, fixed inside the front bumper, protects the
engine parts against loose chippings, etc.
Very cold climate protectors
Depending on the country of sale, protective
foam is present to prevent the penetration of
cold or snow in the upper part of the engine
compartment.
Load stop
On the floor, behind the front seats, a horizontal
partition protects the driver and front passengers
against the risk of load movement.
Ladder-type vertical
partition
Depending on the country of sale, behind the
driver’s seat, a ladder-type vertical partition
protects the driver against the risk of load
movement.
Glass partition
Depending on the country of sale, a glass
partition isolates the cab from the loading area.
You can nevertheless use the control to open/
close its sliding glass.
Torch
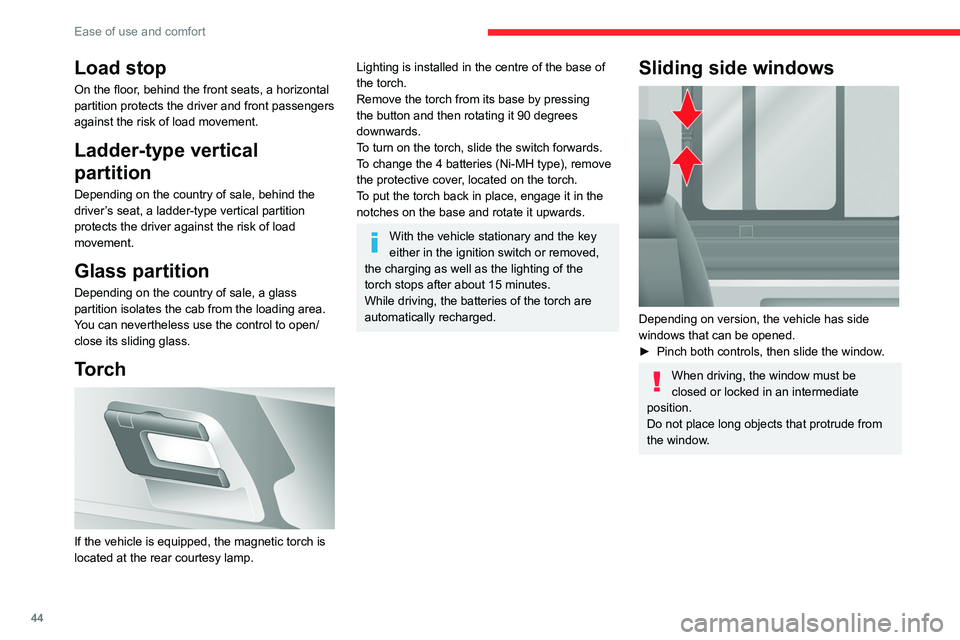
If the vehicle is equipped, the magnetic torch is
located at the rear courtesy lamp.
Lighting is installed in the centre of the base of
the torch.
Remove the torch from its base by pressing
the button and then rotating it 90 degrees
downwards.
To turn on the torch, slide the switch forwards.
To change the 4 batteries (Ni-MH type), remove
the protective cover, located on the torch.
To put the torch back in place, engage it in the
notches on the base and rotate it upwards.
With the vehicle stationary and the key
either in the ignition switch or removed,
the charging as well as the lighting of the
torch stops after about 15 minutes.
While driving, the batteries of the torch are
automatically recharged.
Sliding side windows
Depending on version, the vehicle has side
windows that can be opened.
► Pinch both controls, then slide the window.
When driving, the window must be
closed or locked in an intermediate
position.
Do not place long objects that protrude from
the window.
Page 48 of 196
46
Lighting and visibility
Lighting control stalk
In some weather conditions (e.g. low
temperature or humidity), the presence
of misting on the internal surface of the glass
of the headlamps and rear lamps is normal; it
disappears after the lamps have been on for a
few minutes.
Travelling abroad
If using your vehicle in a country that
drives on the other side of the road, the
headlamps must be adjusted to avoid
dazzling on-coming drivers.
Contact a CITROËN dealer or a qualified
workshop.
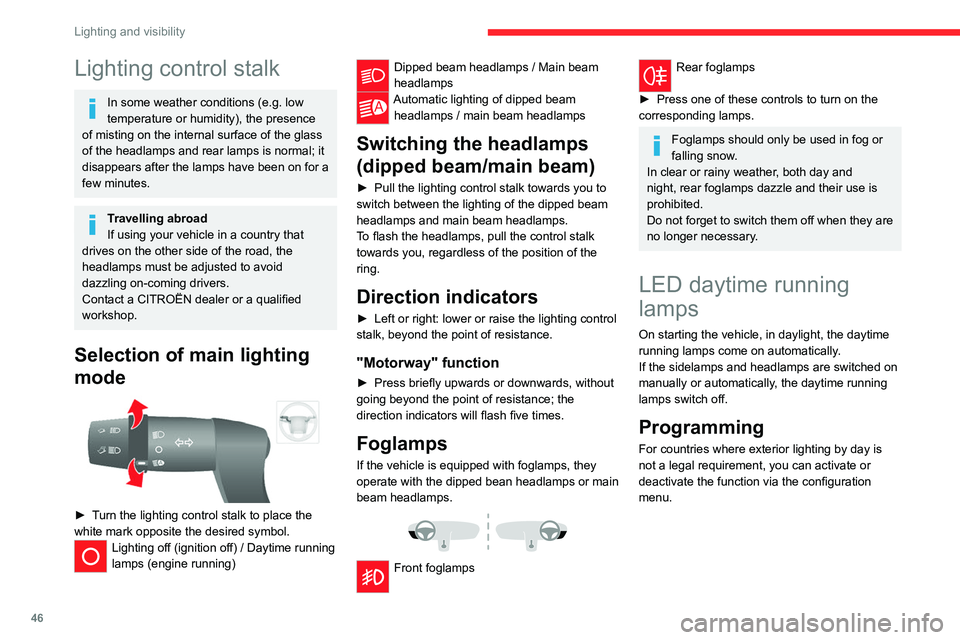
Selection of main lighting
mode
► Turn the lighting control stalk to place the
white mark opposite the desired symbol.
Lighting off (ignition off) / Daytime running
lamps (engine running)
Dipped beam headlamps / Main beam
headlamps
Automatic lighting of dipped beam headlamps / main beam headlamps
Switching the headlamps
(dipped beam/main beam)
► Pull the lighting control stalk towards you to
switch between the lighting of the dipped beam
headlamps and main beam headlamps.
To flash the headlamps, pull the control stalk
towards you, regardless of the position of the
ring.
Direction indicators
► Left or right: lower or raise the lighting control
stalk, beyond the point of resistance.
"Motorway" function
► Press briefly upwards or downwards, without
going beyond the point of resistance; the
direction indicators will flash five times.
Foglamps
If the vehicle is equipped with foglamps, they
operate with the dipped bean headlamps or main
beam headlamps.
Front foglamps
Rear foglamps
► Press one of these controls to turn on the
corresponding lamps.
Foglamps should only be used in fog or
falling snow.
In clear or rainy weather, both day and
night, rear foglamps dazzle and their use is
prohibited.
Do not forget to switch them off when they are
no longer necessary.
LED daytime running
lamps
On starting the vehicle, in daylight, the daytime
running lamps come on automatically.
If the sidelamps and headlamps are switched on
manually or automatically, the daytime running
lamps switch off.
Programming
For countries where exterior lighting by day is
not a legal requirement, you can activate or
deactivate the function via the configuration
menu.
Automatic illumination of headlamps
If your vehicle is fitted with this function, the
dipped beam headlamps are switched on
automatically if the light is poor.
In fog or snow, the sunshine sensor may
detect sufficient light. In this case, the
lighting will not come on automatically. If
necessary, you must switch on the dipped
beam headlamps manually.
They are switched off when the light returns
to a sufficient level.
Do not cover the sunshine sensor at the top
centre of the windscreen.
You can adjust the sensitivity of the sunshine sensor.
For more information on Vehicle
configuration , refer to the corresponding
section.
Activation
► Turn the ring to this position.
The lamps go out automatically when the ignition
is switched off.