DAEWOO LACETTI 2004 Service Repair Manual
LACETTI 2004
DAEWOO
DAEWOO
https://www.carmanualsonline.info/img/54/56877/w960_56877-0.png
DAEWOO LACETTI 2004 Service Repair Manual
Trending: four wheel drive, fuel consumption, air filter, lacett 2004, Panel cluster light symbol, Pressure valve, Panel cluster symbol
Page 1871 of 2643
FIVE–SPEED MANUAL TRANSAXLE 5B – 47
DAEWOO V–121 BL4
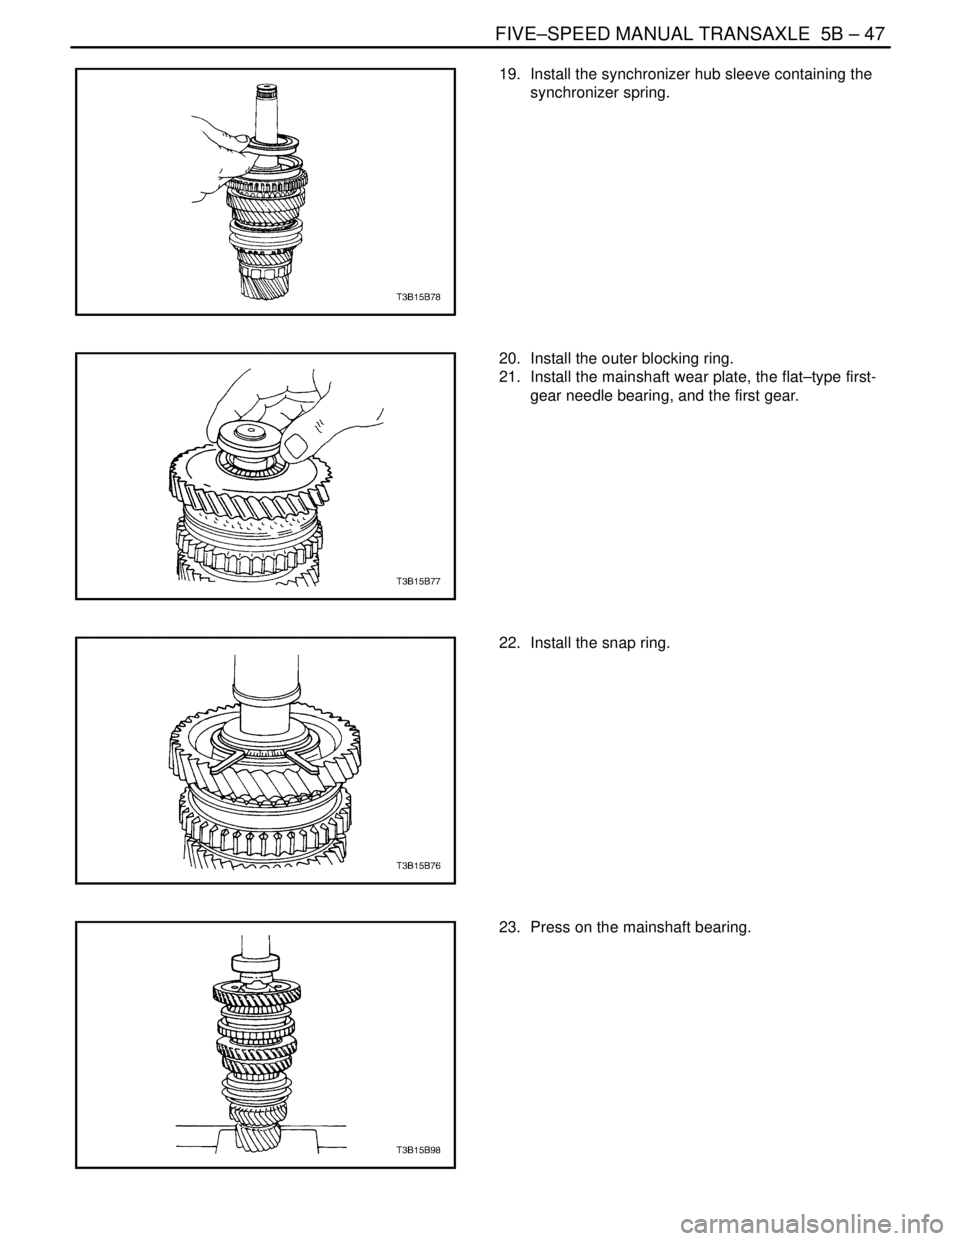
19. Install the synchronizer hub sleeve containing the
synchronizer spring.
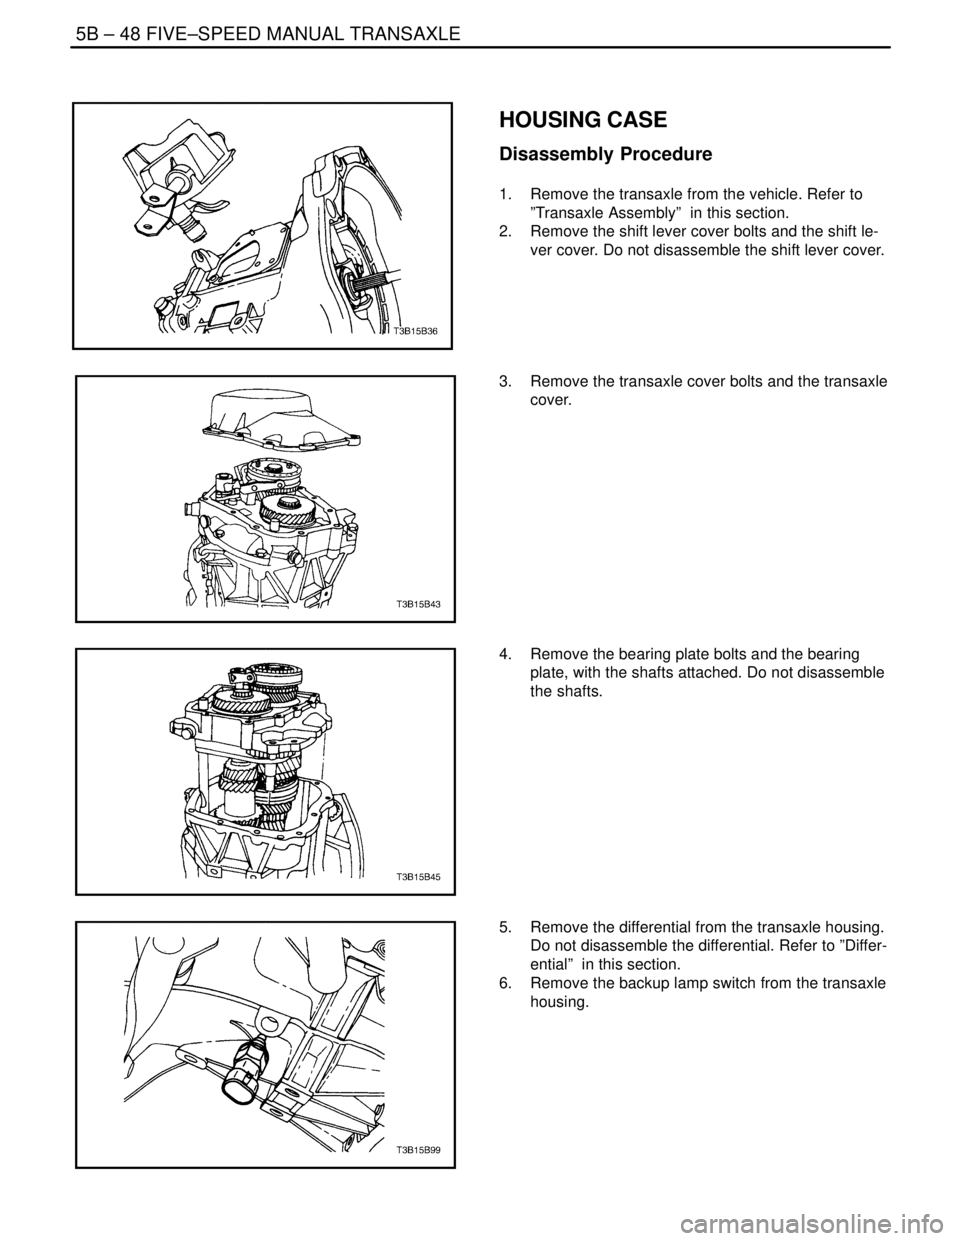
20. Install the outer blocking ring.
21. Install the mainshaft wear plate, the flat–type first-
gear needle bearing, and the first gear.
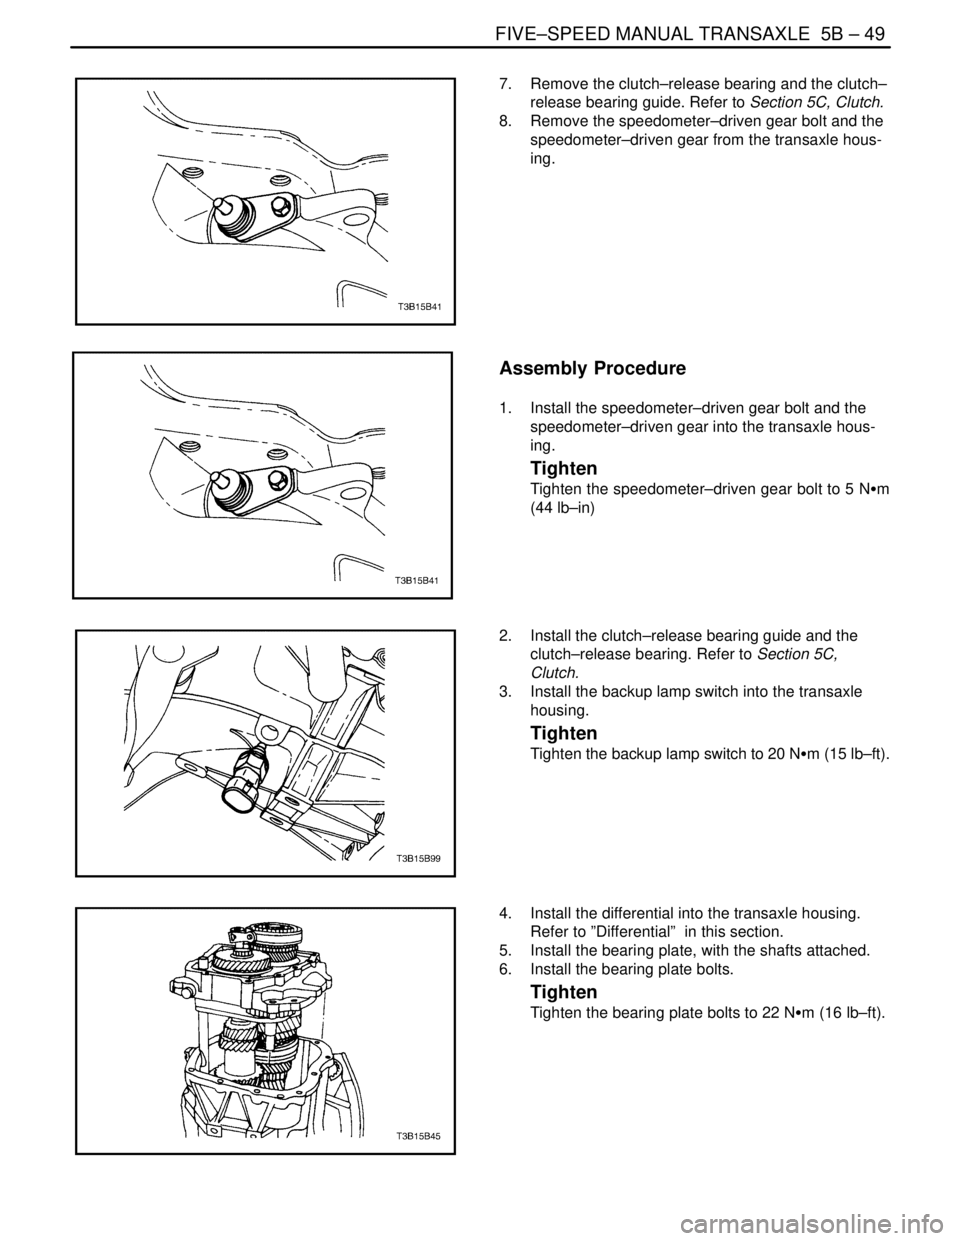
22. Install the snap ring.
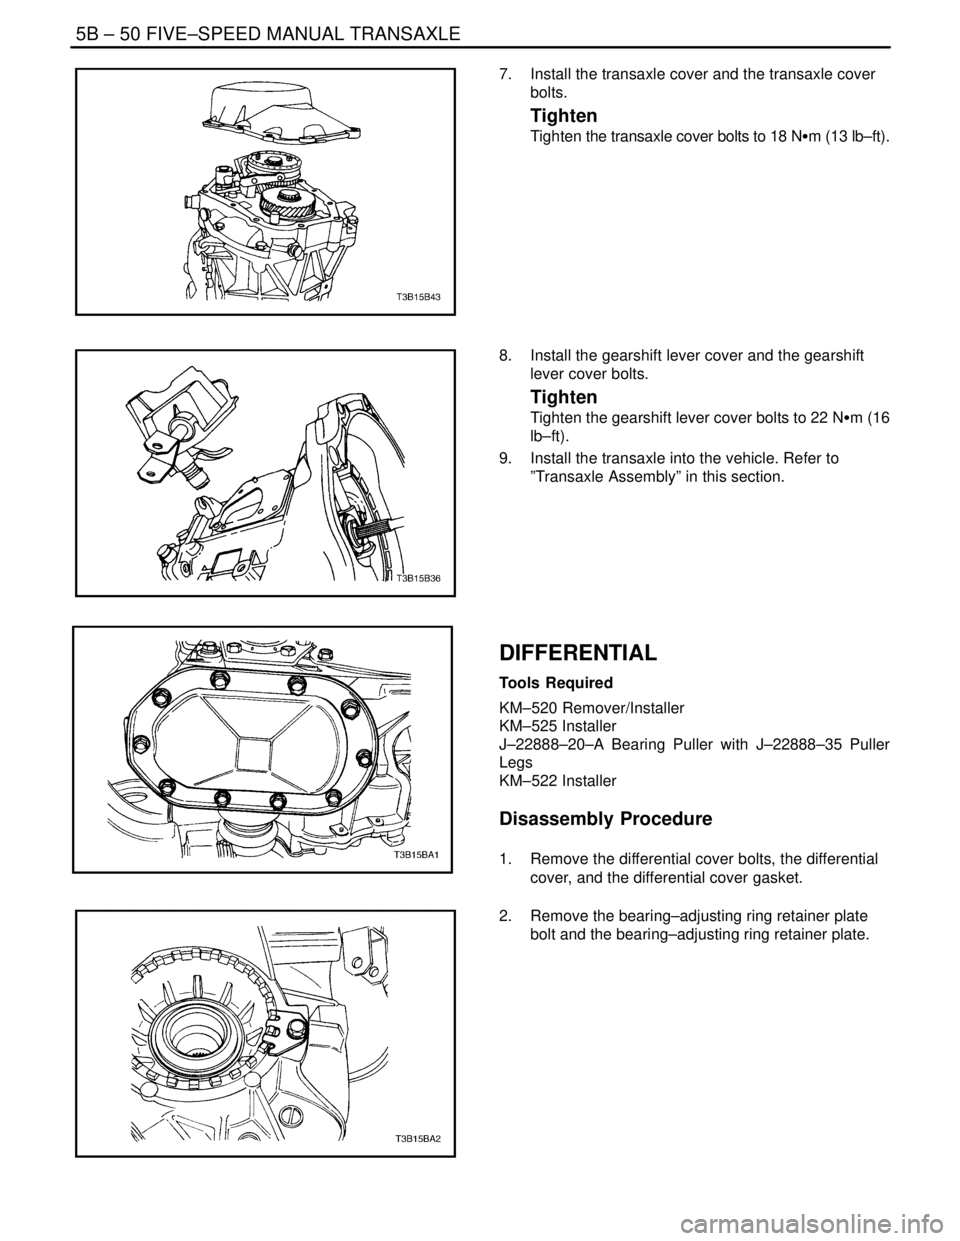
23. Press on the mainshaft bearing.
Page 1872 of 2643
5B – 48IFIVE–SPEED MANUAL TRANSAXLE
DAEWOO V–121 BL4
HOUSING CASE
Disassembly Procedure
1. Remove the transaxle from the vehicle. Refer to
”Transaxle Assembly” in this section.
2. Remove the shift lever cover bolts and the shift le-
ver cover. Do not disassemble the shift lever cover.
3. Remove the transaxle cover bolts and the transaxle
cover.
4. Remove the bearing plate bolts and the bearing
plate, with the shafts attached. Do not disassemble
the shafts.
5. Remove the differential from the transaxle housing.
Do not disassemble the differential. Refer to ”Differ-
ential” in this section.
6. Remove the backup lamp switch from the transaxle
housing.
Page 1873 of 2643
FIVE–SPEED MANUAL TRANSAXLE 5B – 49
DAEWOO V–121 BL4
7. Remove the clutch–release bearing and the clutch–
release bearing guide. Refer to Section 5C, Clutch.
8. Remove the speedometer–driven gear bolt and the
speedometer–driven gear from the transaxle hous-
ing.
Assembly Procedure
1. Install the speedometer–driven gear bolt and the
speedometer–driven gear into the transaxle hous-
ing.
Tighten
Tighten the speedometer–driven gear bolt to 5 NSm
(44 lb–in)
2. Install the clutch–release bearing guide and the
clutch–release bearing. Refer to Section 5C,
Clutch.
3. Install the backup lamp switch into the transaxle
housing.
Tighten
Tighten the backup lamp switch to 20 NSm (15 lb–ft).
4. Install the differential into the transaxle housing.
Refer to ”Differential” in this section.
5. Install the bearing plate, with the shafts attached.
6. Install the bearing plate bolts.
Tighten
Tighten the bearing plate bolts to 22 NSm (16 lb–ft).
Page 1874 of 2643
5B – 50IFIVE–SPEED MANUAL TRANSAXLE
DAEWOO V–121 BL4
7. Install the transaxle cover and the transaxle cover
bolts.
Tighten
Tighten the transaxle cover bolts to 18 NSm (13 lb–ft).
8. Install the gearshift lever cover and the gearshift
lever cover bolts.
Tighten
Tighten the gearshift lever cover bolts to 22 NSm (16
lb–ft).
9. Install the transaxle into the vehicle. Refer to
”Transaxle Assembly” in this section.
DIFFERENTIAL
Tools Required
KM–520 Remover/Installer
KM–525 Installer
J–22888–20–A Bearing Puller with J–22888–35 Puller
Legs
KM–522 Installer
Disassembly Procedure
1. Remove the differential cover bolts, the differential
cover, and the differential cover gasket.
2. Remove the bearing–adjusting ring retainer plate
bolt and the bearing–adjusting ring retainer plate.
Page 1875 of 2643
FIVE–SPEED MANUAL TRANSAXLE 5B – 51
DAEWOO V–121 BL4
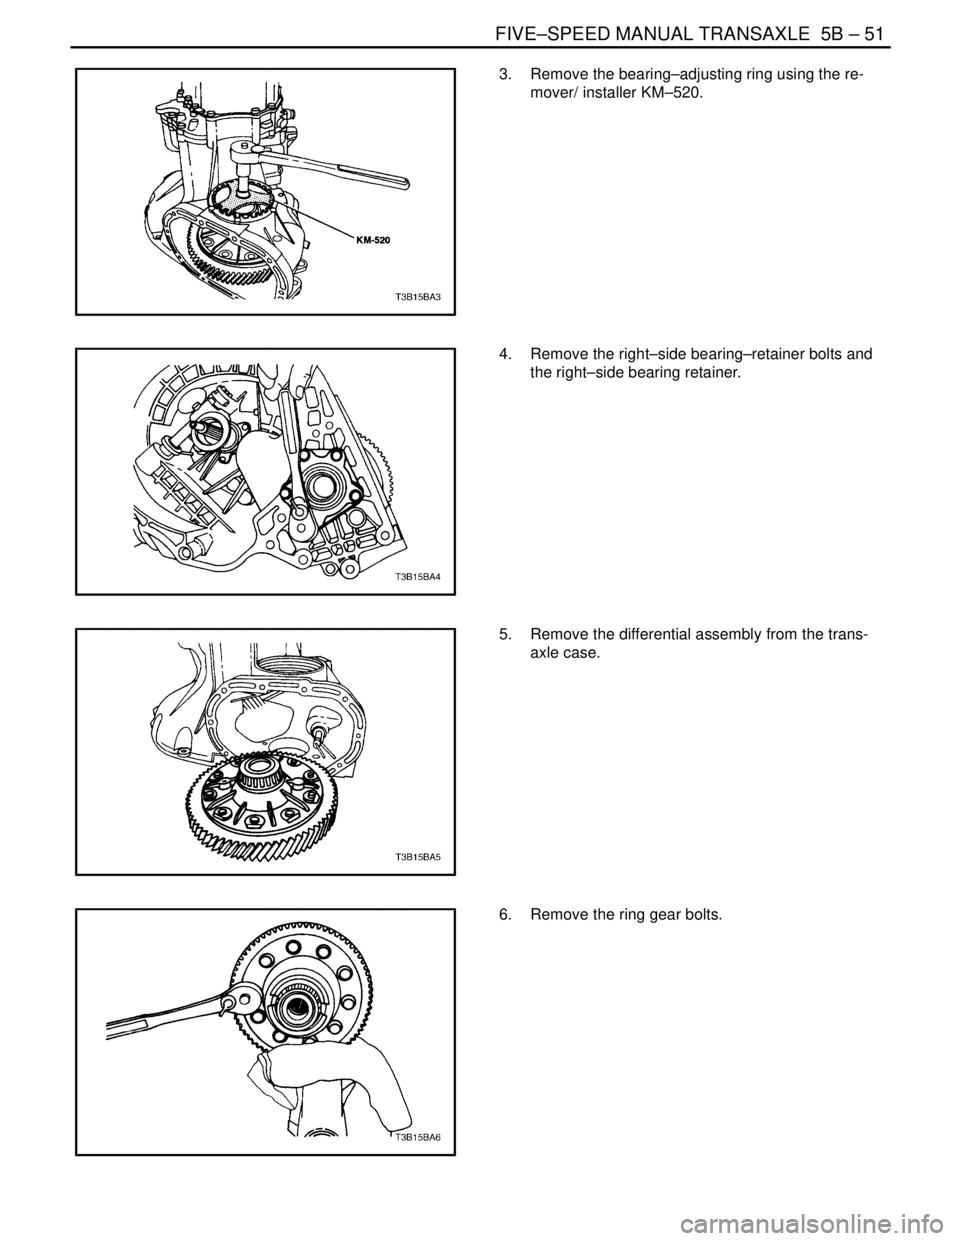
3. Remove the bearing–adjusting ring using the re-
mover/ installer KM–520.
4. Remove the right–side bearing–retainer bolts and
the right–side bearing retainer.
5. Remove the differential assembly from the trans-
axle case.
6. Remove the ring gear bolts.
Page 1876 of 2643
5B – 52IFIVE–SPEED MANUAL TRANSAXLE
DAEWOO V–121 BL4
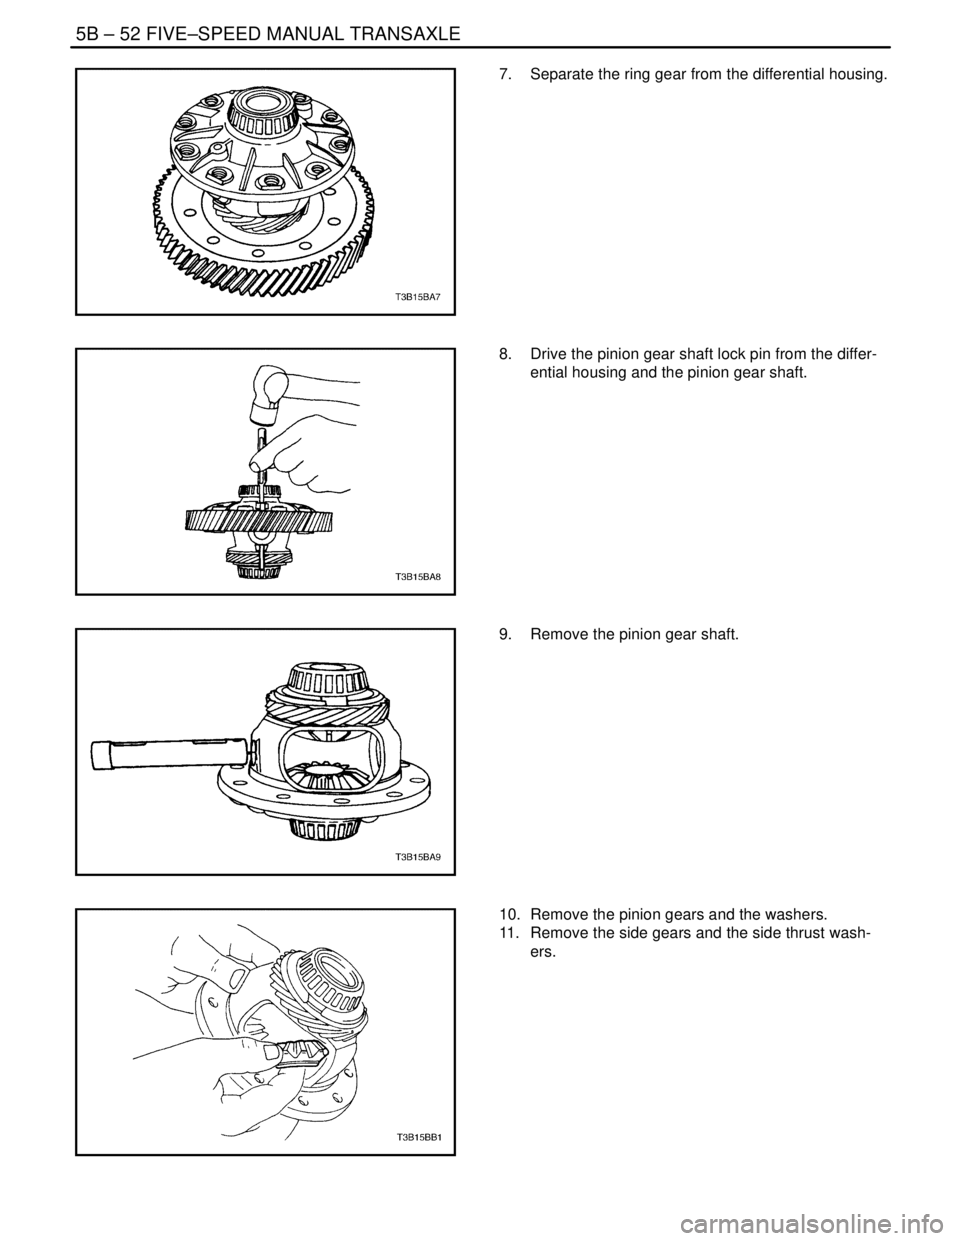
7. Separate the ring gear from the differential housing.
8. Drive the pinion gear shaft lock pin from the differ-
ential housing and the pinion gear shaft.
9. Remove the pinion gear shaft.
10. Remove the pinion gears and the washers.
11. Remove the side gears and the side thrust wash-
ers.
Page 1877 of 2643
FIVE–SPEED MANUAL TRANSAXLE 5B – 53
DAEWOO V–121 BL4
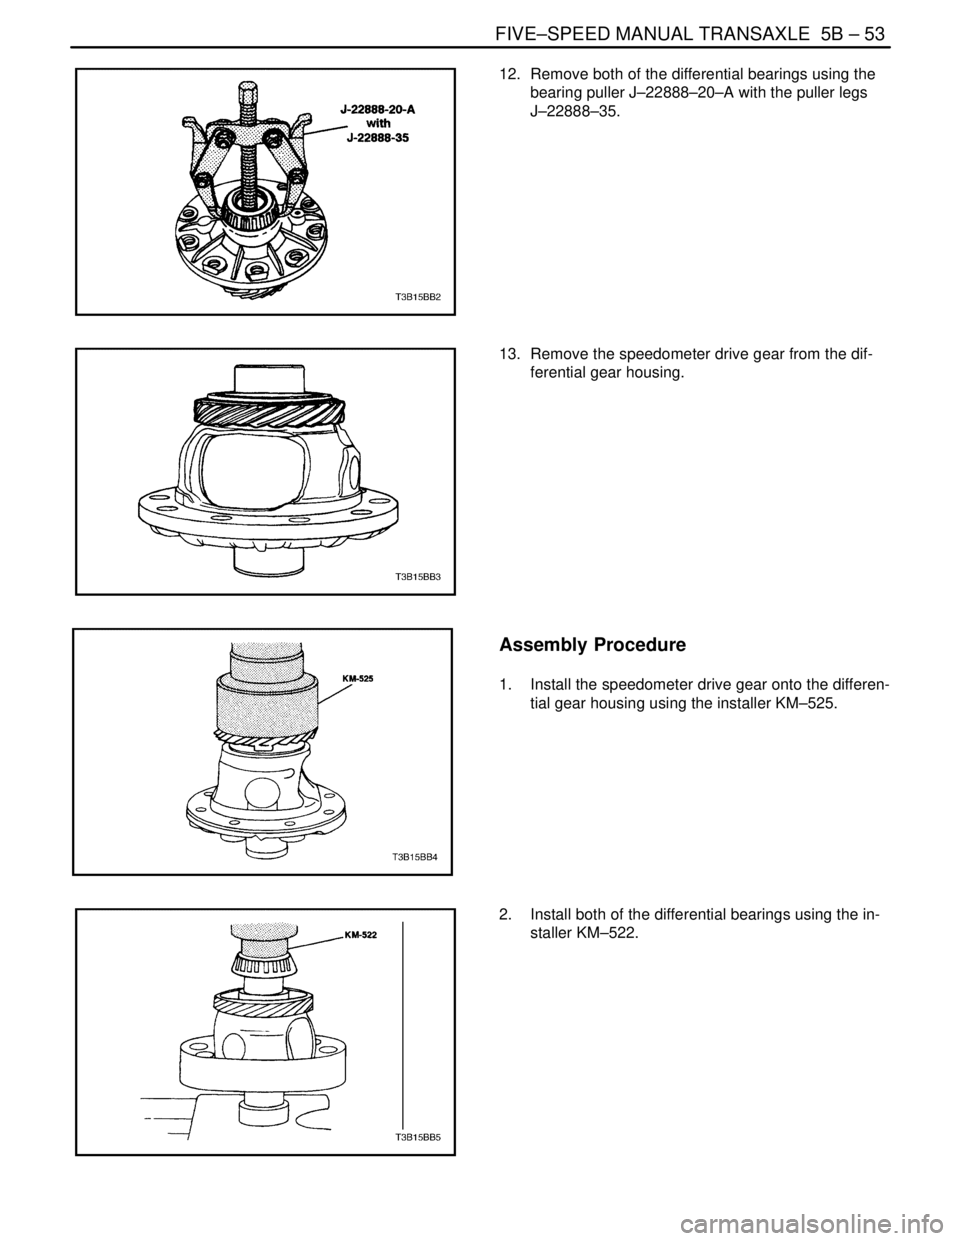
12. Remove both of the differential bearings using the
bearing puller J–22888–20–A with the puller legs
J–22888–35.
13. Remove the speedometer drive gear from the dif-
ferential gear housing.
Assembly Procedure
1. Install the speedometer drive gear onto the differen-
tial gear housing using the installer KM–525.
2. Install both of the differential bearings using the in-
staller KM–522.
Page 1878 of 2643
5B – 54IFIVE–SPEED MANUAL TRANSAXLE
DAEWOO V–121 BL4
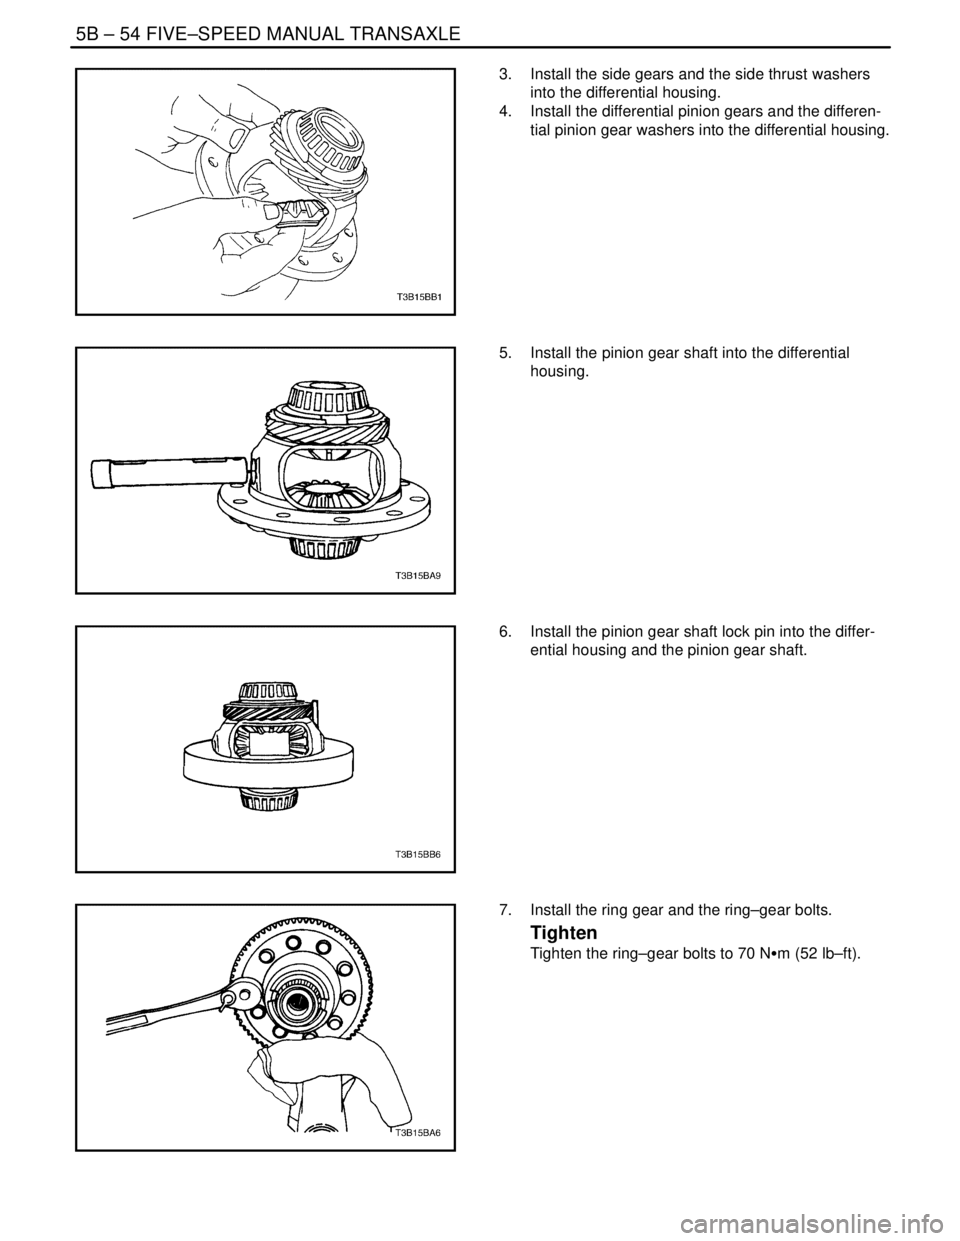
3. Install the side gears and the side thrust washers
into the differential housing.
4. Install the differential pinion gears and the differen-
tial pinion gear washers into the differential housing.
5. Install the pinion gear shaft into the differential
housing.
6. Install the pinion gear shaft lock pin into the differ-
ential housing and the pinion gear shaft.
7. Install the ring gear and the ring–gear bolts.
Tighten
Tighten the ring–gear bolts to 70 NSm (52 lb–ft).
Page 1879 of 2643
FIVE–SPEED MANUAL TRANSAXLE 5B – 55
DAEWOO V–121 BL4
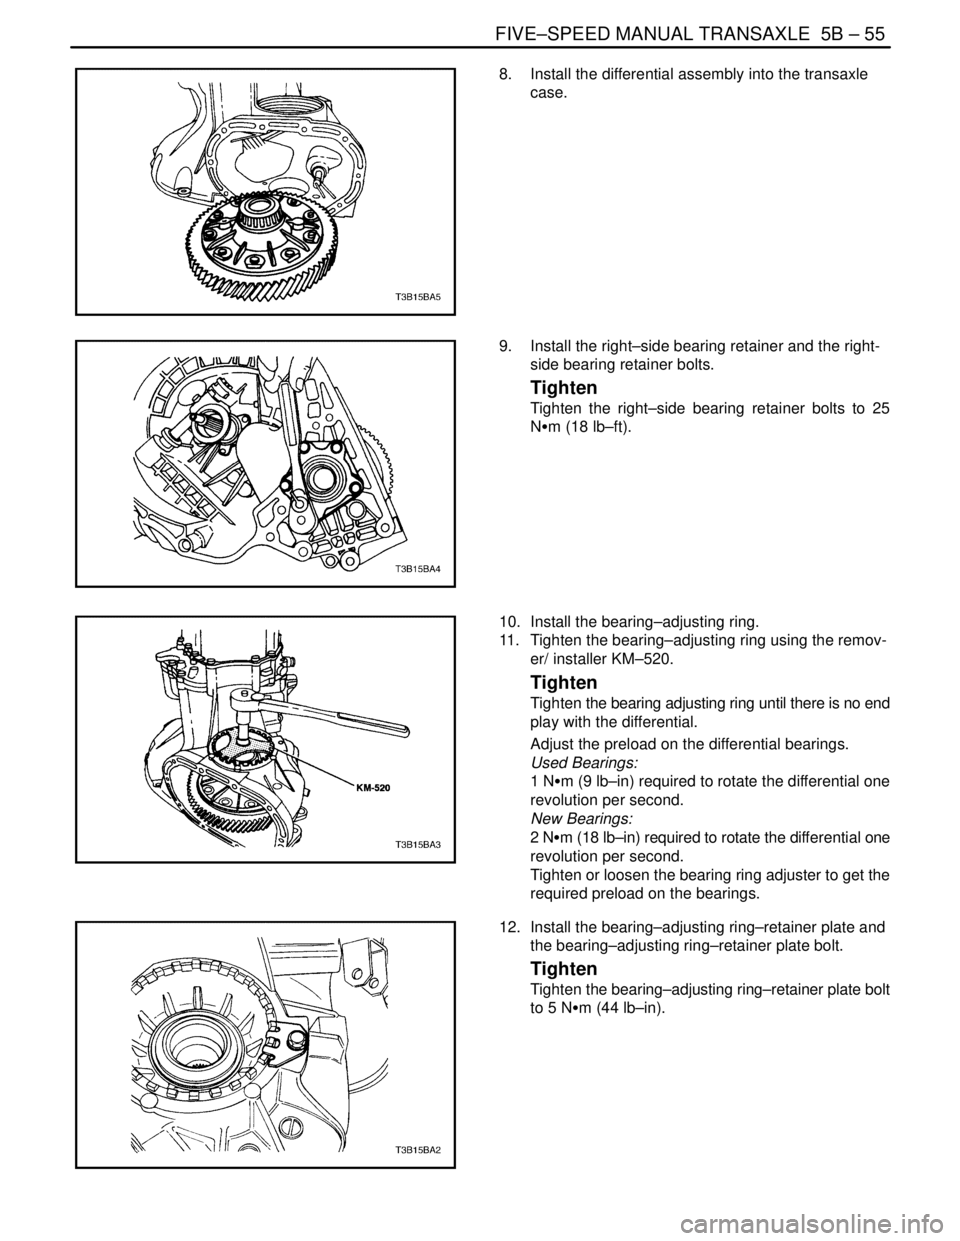
8. Install the differential assembly into the transaxle
case.
9. Install the right–side bearing retainer and the right-
side bearing retainer bolts.
Tighten
Tighten the right–side bearing retainer bolts to 25
NSm (18 lb–ft).
10. Install the bearing–adjusting ring.
11. Tighten the bearing–adjusting ring using the remov-
er/ installer KM–520.
Tighten
Tighten the bearing adjusting ring until there is no end
play with the differential.
Adjust the preload on the differential bearings.
Used Bearings:
1 NSm (9 lb–in) required to rotate the differential one
revolution per second.
New Bearings:
2 NSm (18 lb–in) required to rotate the differential one
revolution per second.
Tighten or loosen the bearing ring adjuster to get the
required preload on the bearings.
12. Install the bearing–adjusting ring–retainer plate and
the bearing–adjusting ring–retainer plate bolt.
Tighten
Tighten the bearing–adjusting ring–retainer plate bolt
to 5 NSm (44 lb–in).
Page 1880 of 2643
5B – 56IFIVE–SPEED MANUAL TRANSAXLE
DAEWOO V–121 BL4
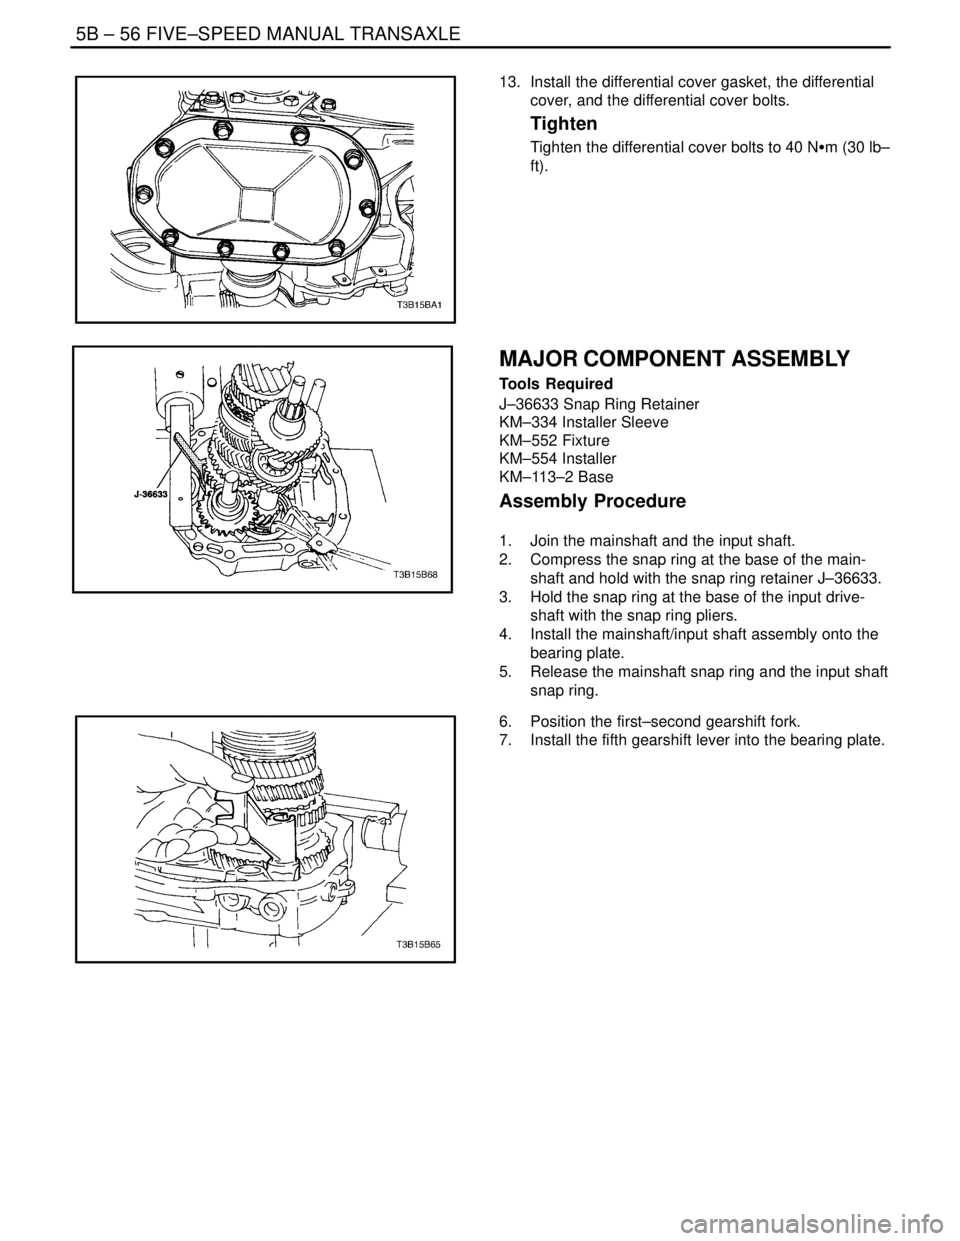
13. Install the differential cover gasket, the differential
cover, and the differential cover bolts.
Tighten
Tighten the differential cover bolts to 40 NSm (30 lb–
ft).
MAJOR COMPONENT ASSEMBLY
Tools Required
J–36633 Snap Ring Retainer
KM–334 Installer Sleeve
KM–552 Fixture
KM–554 Installer
KM–113–2 Base
Assembly Procedure
1. Join the mainshaft and the input shaft.
2. Compress the snap ring at the base of the main-
shaft and hold with the snap ring retainer J–36633.
3. Hold the snap ring at the base of the input drive-
shaft with the snap ring pliers.
4. Install the mainshaft/input shaft assembly onto the
bearing plate.
5. Release the mainshaft snap ring and the input shaft
snap ring.
6. Position the first–second gearshift fork.
7. Install the fifth gearshift lever into the bearing plate.
Trending: hood, oil temperature, Gear, fuel consumption, P1661, child lock, Pressure valve
