9–14 SEALING, CAULKING AND DEADNER NUBIRA/LACETTI
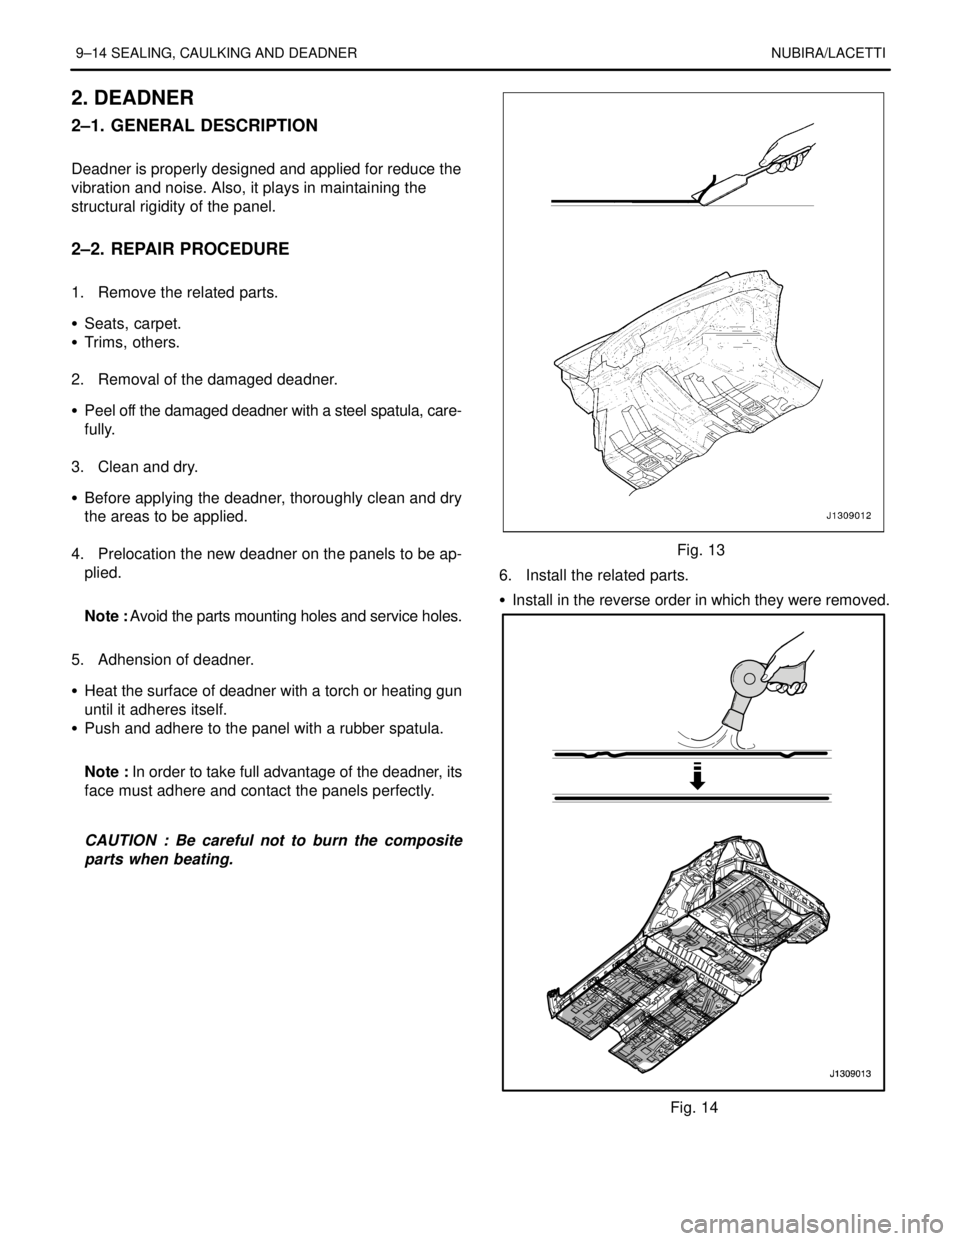
2. DEADNER
2–1. GENERAL DESCRIPTION
.
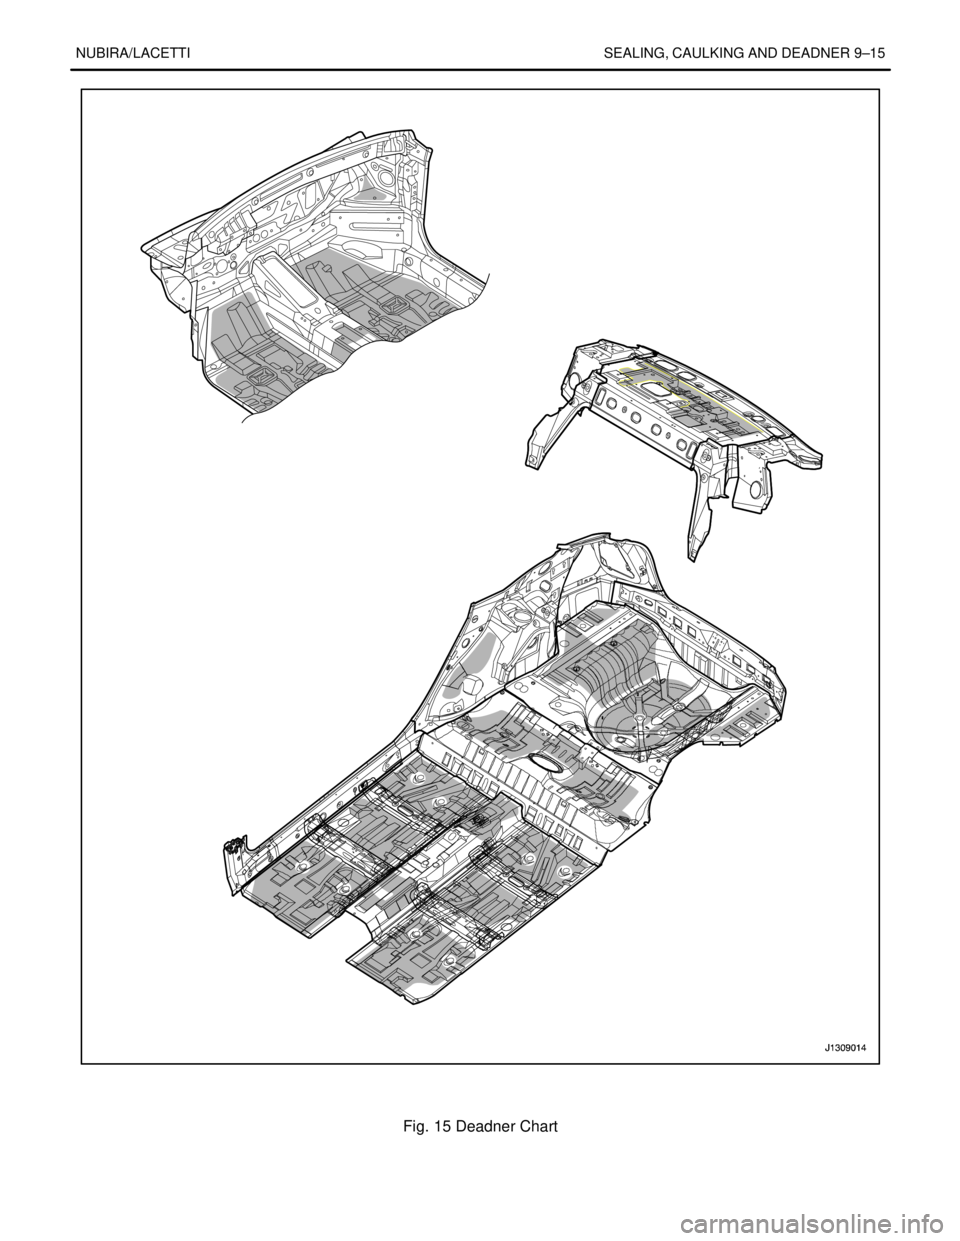
Deadner is properly designed and applied for reduce the
vibration and noise. Also, it plays in maintaining the
structural rigidity of the panel.
.
2–2. REPAIR PROCEDURE
.
1. Remove the related parts.
S Seats, carpet.
S Trims, others.
.
2. Removal of the damaged deadner.
S Peel off the damaged deadner with a steel spatula, care-
fully.
.
3. Clean and dry.
S Before applying the deadner, thoroughly clean and dry
the areas to be applied.
.
4. Prelocation the new deadner on the panels to be ap-
plied.
.
Note : Avoid the parts mounting holes and service holes.
.
5. Adhension of deadner.
S Heat the surface of deadner with a torch or heating gun
until it adheres itself.
S Push and adhere to the panel with a rubber spatula.
.
Note : In order to take full advantage of the deadner, its
face must adhere and contact the panels perfectly.
.
CAUTION : Be careful not to burn the composite
parts when beating.
Fig. 13
6. Install the related parts.
S Install in the reverse order in which they were removed.
Fig. 14
NUBIRA/LACETTIRUST PREVENTION 10–1
SECTION 10
RUST PREVENTION
CONTENTS
1. ZINC TREATED STEEL PLATE REPAIR 10 – 2. . . . . . . . . . . . . . . . . . . . . . . . . . . . .
2. RUST PREVENTIVE PROCEDURE 10 – 3. . . . . . . . . . . . . . . . . . . . . . . . . . . . . . . . . .
2.1.GENERAL INFORMATION10–3 . . . . . . . . . . . . . . . . . . . . . . . . . . . . . . . . . . . . . . . . . . . . . . . . . . . . . . . . . . . . . . . . . . . . .
2.2.AREA COVERED BY ANTI–RUST AGENTS 10–5. . . . . . . . . . . . . . . . . . . . . . . . . . . . . . . . . . . . . . . . . . . . . . . . . . . . .
2.3.UNDERCOATING DIAGRAM10–6 . . . . . . . . . . . . . . . . . . . . . . . . . . . . . . . . . . . . . . . . . . . . . . . . . . . . . . . . . . . . . . . . . . .
10–2 RUST PREVENTIONNUBIRA/LACETTI
1. ZINC TREATED STEEL PLATE
REPAIR
Avoid puttying as much as possible when repairing a
new car. Use alternative methods as much as possible.
.
CAUTION
S Most paints contain substances that are harmful if in-
haled or swallowed. Read the paint label before openingthe container. Spray paint only in a well ventilated area.
S Cover spilled paint with sand, or wipe it up at once.
S Wear an approved respirator, gloves, eye protection and
appropriate clothing when painting. Avoid contact with
skin.
S If paint gets in your mouth or on your skin, rinse or wash
thoroughly with water. If paint gets in your eyes, flush
with water and get prompt medical attention.
S Paint is flammable. Store it in a safe place, and keep it
away from sparks, flames or cigarettes.
Operation
Tools/MaterialsProcedureRemarks
1. Prep the repair
area.Double–action sander, #80 sand-
paper.Sand the area with a double–action sander
and #80 sandpaper. Clean with wax and
grease remover..
2. Apply putty
Note : Putty can be
applied after priming
as described in step 4.
Epoxy–based putty.
S Mix the putty and hardener ac-
cording to the manufacturer’s di-
recctions.
S Polyester resin putty. Body filler.Apply in several thin coats if necessary. Try
to avoid leaving pinholes in the putty.
S Follow the manufacturer’s recommenda-
tions for preparaton.
.
3. Sand and clean
the puttied area.Double–action sander, orbital
sander, hand sanding file, #80,
#120, #240 sandpaper, wax and
grease remover, shop towels.Rough–sand the area with a double– action
sander and #80 sandpaper, then sand with
#120 sandpaper. Featheredge with #240
sandpaper. Clean with wax and grease re-
mover..
4. Coat with primer.
Note : Apply to bare
sheet metal and put-
tied area.
Epoxy–based primer and harden-
er, epoxy thinner.
S Mix and thin the primer accord-
ing to the manufacturer’s direc-
tions.
Apply 2–4 coats, allowing sufficient flash time
between coats.
Force dry at 60–70�C(140–158�F) for at
least 30 minutes.Spray to
a thick-
ness of
30–35
microns.
5. Sand and clean
the whole area.Double–action sander, #400
sandpaper, wax and greases re-
mover, shop towels.Sand the whole area to be repainted with a
double–action sander and #400 sandpaper.
Blow off with compressed air. Clean with wax
and grease remover..
6. Coat the whole
area to be repainted
with primer/ surfacer.
Polyester/urethane resin primer/
surfacer.
S Mix and thin the primer accord-
ing to the manufacturer’s direc-
tions.
Apply 2–4 coats, allowing sufficient flash time
between coats.
Force dry at 60–70�C(140–158�F) for at
least 30 minutes.Spray to
a thick-
ness of
30–35
microns.
7. Sand and clean
the whole area to be
repainted.Hand sanding file, double–action
sander, #240, #320, #400, #600
sandpaper, wax grease and re-
mover, shop towels.Sand the repair area by hand with #240
sandpaper until it’s level. Sand the whole
area to repainted with #320– 600 sandpaper.
Clean with wax and grease remover..
8. Top–coat the
whole area to re-
painted.
Acrylic urethane resin top coat
paint, hardener, and thinner.
S Mix and thin the paint according
to the manufacturer’s directions.
Apply 2–4 coats, allowing sufficient flash time
between coats.
Force dry at 60–70�C(140–158�F) for at
least 30 minutes.Spray to
a thick-
ness of
40–50
microns.
