tow DATSUN 210 1979 Owner's Manual
[x] Cancel search | Manufacturer: DATSUN, Model Year: 1979, Model line: 210, Model: DATSUN 210 1979Pages: 548, PDF Size: 28.66 MB
Page 292 of 548
Place
the
vehicle
in
a
pit
and
by
sampling
the
lealeed
oil
deiermine
if
it
is
the
torque
converter
oil
The
torque
converter
oil
has
a
color
like
red
wine
so
it
is
easily
distinguished
from
engine
oil
or
gear
oil
Wipe
off
the
lealeing
oil
and
dust
and
detect
the
spot
of
ill
lell8e
nonflammable
organic
solvent
such
as
carbon
tetrachloride
for
wiping
Raise
the
oil
tcmperature
by
op
erating
the
engine
and
shift
the
lever
to
D
to
increase
the
oil
pressure
The
sp
Q
of
o
1
1I8
u
J1en
be
found
more
easily
Note
As
oil
leakage
from
the
breath
er
does
not
talee
place
except
when
running
at
high
peed
it
iSimpos
sible
to
ate
this
lealcage
with
vehicle
stationary
CHECKING
ENGINE
IDLING
REVOLunON
The
engine
idling
revolution
should
be
properly
adjusted
If
the
engine
revolution
is
too
low
the
e
gine
does
not
operate
smoothly
and
if
too
high
a
strong
shocle
or
creep
develops
when
changing
over
from
ON
to
Dn
or
R
CHECKING
AND
ADJUSTING
KICK
WN
SWITCH
AND
DOWNSH
FT
SOLENOID
When
the
Ieickdown
operation
is
not
made
properly
or
the
speed
chang
ingpoint
is
too
high
check
the
kick
down
switch
downshift
solenoid
and
wiring
between
them
When
the
igni
tion
Ieey
is
po
iti
ned
at
the
1st
stage
and
the
accelerator
pedal
is
depressed
deeply
the
switch
contact
hould
be
closed
and
the
solenoid
should
clicle
If
it
does
not
click
it
indicates
a
defect
Then
check
each
part
with
the
testing
inatrumen15
Auto
lT1atic
Transmissiqn
Fi
J
A
T
84
Down
ltift
Sole
id
Note
Watch
for
oil
leekage
from
tnnsmission
case
INSPECTION
AND
ADJUSTMENT
OF
MANUAL
LINKAGE
The
adjustmcnt
of
manual
linkage
i
equany
important
as
Inspection
of
Oil
Level
for
the
automatic
transmis
sion
Therefore
great
care
should
be
cxercised
oecause
incorrect
adjustment
will
result
in
the
breakdown
of
the
transmission
Inspection
pun
the
selector
lever
toward
you
and
turn
it
as
far
as
p
to
range
where
clicks
will
be
ell
by
the
hand
This
is
the
detent
of
manual
valve
in
the
valve
body
and
indicates
the
corrett
position
of
the
lever
Inspect
whether
the
pointer
of
selector
dial
corresponds
to
this
point
and
also
whether
the
lever
comes
in
alignment
with
the
stepping
of
posi
iion
plate
when
itis
released
CHECKING
AND
ADJUSTING
INHIBITOR
SWITCH
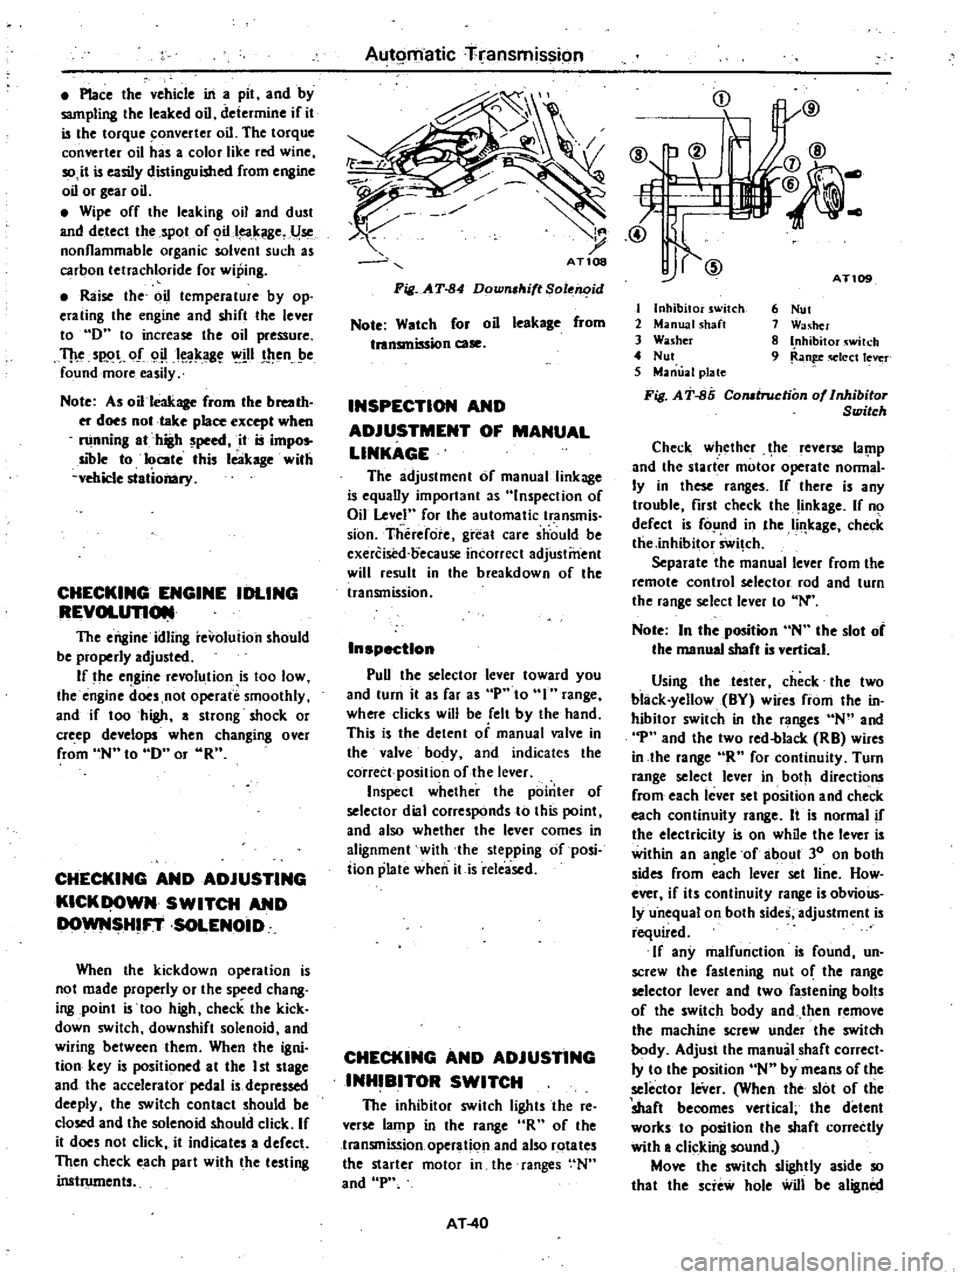
The
inhibitor
switch
lights
the
re
verse
lamp
in
the
range
R
of
the
transmission
operation
and
also
rotates
the
starter
motor
in
the
ranges
N
and
P
AT
40
i
j
tI
IlV
@
@
AT
I
Inhibitor
switch
2
Manual
shaft
3
Washer
4
Nut
5
Manual
plate
Fi
J
AT
85
Comtruction
of
Inhibitor
Switch
6
Nut
1
Washer
8
Inhibitor
wilch
9
Ran
q
Iect
lever
Check
w
ethcr
he
leverse
lal
1p
and
the
starter
motor
operate
nonnal
Iy
in
these
ranges
If
there
is
any
trouble
first
check
the
inkage
If
no
defect
is
fo
nd
in
the
Ii
leage
check
tlie
inhibitor
Swi
ch
Separate
the
manual
lever
from
the
remote
control
selector
rod
and
turn
the
range
select
lever
to
N
Note
In
the
position
N
the
slot
of
the
manual
shaft
is
vertical
Using
the
tester
check
the
two
black
yellow
BY
wire
from
the
in
hibitor
switch
in
the
ranges
N
and
p
and
the
two
red
blacle
RB
wires
in
the
lange
R
for
continuity
Turn
range
select
lever
in
both
directions
from
each
lever
set
position
and
check
each
continuity
range
It
is
normal
if
the
electricity
is
on
while
the
lever
is
within
an
angle
of
about
30
on
both
sides
from
each
lever
set
line
How
ever
if
its
continuity
range
is
obvioUs
ly
u
nequal
on
both
sides
adjustment
is
required
If
any
malfunction
is
found
un
screw
the
fastening
nut
o
the
range
selector
lever
and
two
fastening
bolts
of
the
switch
body
and
then
remove
the
machine
screw
under
the
switch
body
Adjust
the
manual
shaft
correct
Iy
to
the
position
N
by
means
of
the
selector
leVer
When
the
slot
of
the
shaft
becomes
vertical
the
detent
worles
to
position
the
shaft
correctly
with
a
clicking
sound
Move
the
switch
slightly
aside
so
that
the
scie
hole
will
be
aligned
Page 324 of 548
Front
Axle
Front
Suspension
INSPECTION
AND
ADJUSTIVIENT
INSPECTION
Inspect
in
accordance
with
periodic
maintenance
schedule
Block
rear
wheels
with
chocks
2
Jack
up
the
front
of
car
and
support
it
with
safety
stands
Refer
to
Section
GI
for
lifting
points
and
towing
3
Shaking
each
fiont
wheel
by
grasping
the
upper
and
lower
surfaces
of
the
tires
check
suspension
parts
for
looseness
wear
or
damage
Tighten
aU
loose
bolts
and
nuts
to
the
specified
torque
Replace
all
worn
parts
as
described
under
Front
Suspension
4
Check
wheel
bearings
If
there
is
any
axial
end
play
adjust
bearings
to
specifications
Replace
worn
or
damaged
bearings
as
described
under
Front
Axle
S
Check
strut
for
oil
leakage
or
damage
ADJUSTMENT
WHEEL
BEARING
Block
rear
wheels
with
chocks
2
Jack
up
the
front
of
car
and
support
it
with
safety
stands
3
Remove
brake
pads
Refer
to
Section
BR
for
pad
replacement
4
Remove
hub
cap
cotter
pin
ad
justing
cap
and
wheel
bearing
nut
S
Sparingly
apply
recommended
multi
purpose
grease
to
threaded
por
tion
of
spindle
and
contact
surface
between
wheel
bearing
washer
and
outer
wheel
bearing
6
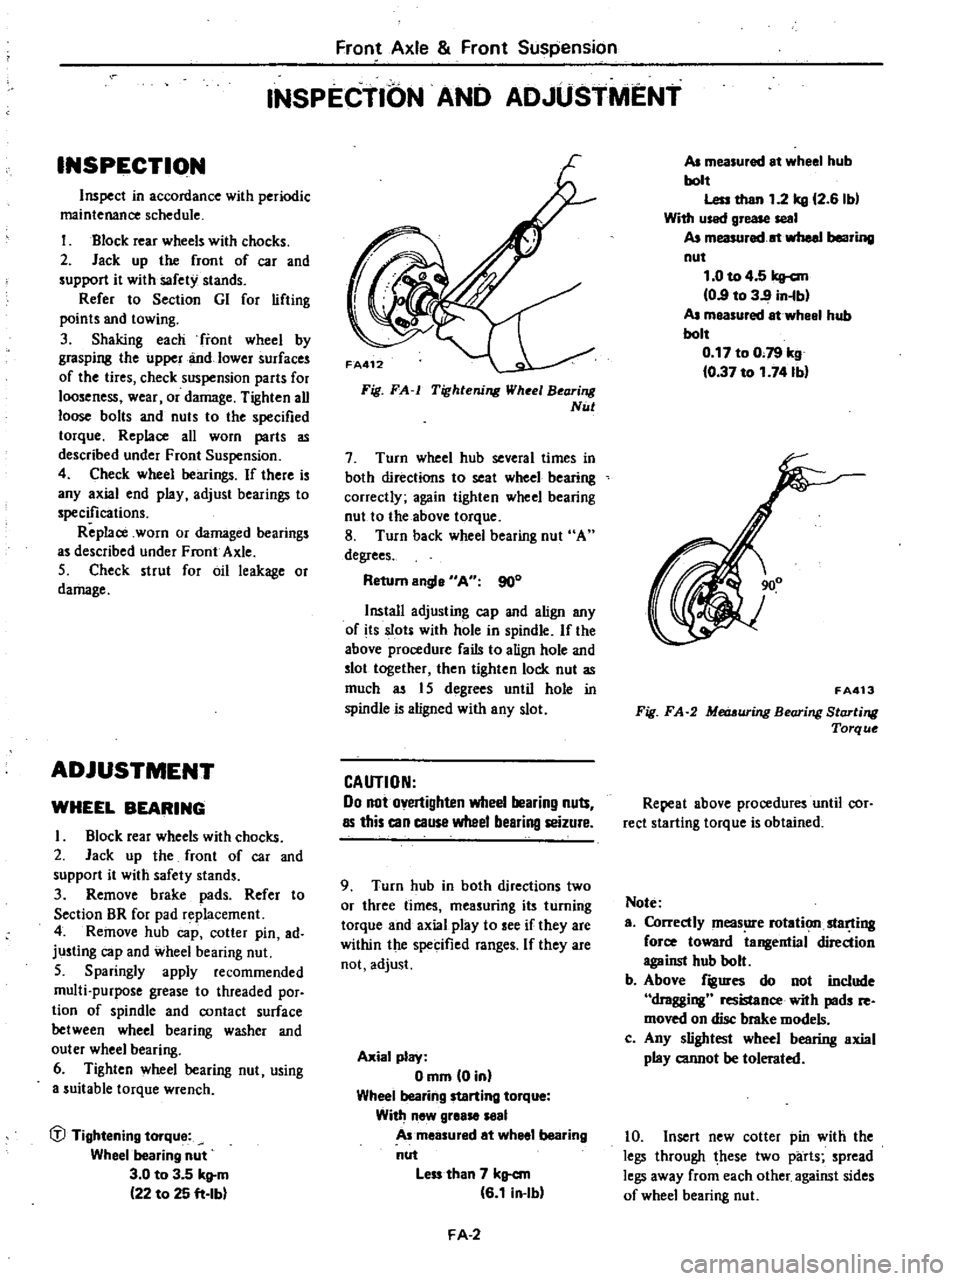
Tighten
wheel
bearing
nut
using
a
suitable
torque
wrench
P
Tightening
torque
Wheel
bearing
nut
3
0
to
3
5
kll
m
22
to
25
ft
Ibl
Fig
FA
Tighlening
Wheel
Bearing
Nul
7
Turn
wheel
hub
several
times
in
both
directions
to
seat
wheel
bearing
correctly
again
tighten
wheel
bearing
nut
to
the
above
torque
8
Turn
back
wheel
bearing
nut
A
degrees
Return
engle
AU
900
Install
adjusting
cap
and
align
any
of
its
slots
with
hole
in
spindle
If
the
above
procedure
fails
to
align
hole
and
slot
together
then
tighten
lock
nut
as
much
as
I
S
degrees
until
hole
in
spindle
is
aligned
with
eny
slot
CAUTION
00
not
overtighten
wheel
bearing
nuts
as
this
can
cause
wheel
bearing
seizure
9
Turn
hub
in
both
directions
two
or
three
times
measuring
its
turning
torque
and
axial
play
to
ee
if
they
are
within
the
specified
range
If
they
are
not
adjust
Axial
play
Omm
Din
Wheel
bealing
starting
torque
With
new
gleaS8
l8al
A
measured
et
wheel
bearing
nut
less
than
7
kg
cm
G
1
in
Ibl
FA
2
AJ
measuled
et
wheel
hub
bolt
Less
then
1
2
kg
12
G
Ibl
With
u
ed
gr
seal
AJ
measured
at
wheel
bealing
nut
1
0
to
4
5
kg
cm
0
9
to
3
9
in
b
AJ
measuled
at
wheel
hub
bolt
0
17
to
0
79
kg
0
37
to
1
741bl
FA413
Fig
FA
2
Metr
uring
Bearing
Starting
Torq
ue
Repeat
above
procedures
until
cor
rect
starting
torque
is
obtained
Note
a
Correctly
meas
e
rotation
slar
ting
force
toward
tangential
direction
against
hub
bolt
b
Above
figures
do
not
include
dragging
resistance
with
pads
re
moved
on
disc
brake
models
c
Any
slightest
wheel
bearing
axial
play
cannot
be
tolerated
10
Insert
new
cotter
pin
with
the
legs
through
hese
two
parts
spread
legs
away
from
each
other
against
sides
of
wheel
bearing
nut
Page 332 of 548

wheels
2
Remove
splaahboard
if
necessary
3
Back
off
nut
securing
tension
rod
to
bracket
and
remove
bolts
which
secure
tension
rod
to
lower
arm
Tension
rod
can
then
be
taken
out
4
Remove
nuts
securing
stabilizer
bar
to
connecting
rod
Note
Two
wrenches
are
n
1
in
this
B
5
Remove
bolts
and
nuts
securing
stabilizer
bar
bracket
in
position
Stabilizer
bar
can
then
be
iaken
o
t
CV
3
@
I
Lower
ann
5
Tension
rod
2
Stabilizer
bar
bracket
connecting
rod
6
Tension
rod
3
Stabilizer
bar
4
Stabilizer
bar
bracket
FA129
Fig
FA
31
Removing
Tension
Rod
and
Stabilizer
Bar
INSPECTION
I
Check
tension
rod
and
stabilizer
bar
for
evidence
of
deformation
or
cracks
if
necessary
replace
2
Check
rubber
parts
such
as
ten
sion
rod
and
stabilizer
bar
bushings
to
be
sure
they
are
not
deteriorated
or
cracked
if
1ecessary
replace
INSTAllATION
Install
tension
rod
and
stabilizer
bar
in
tJ
1e
reverse
order
of
removal
noting
the
following
I
Be
sure
stabilizer
bar
is
not
closer
to
either
side
but
is
located
at
the
middle
If
stabilizer
bar
is
new
use
the
following
procedure
to
center
the
stabilizer
bar
Position
arm
with
white
paipt
mark
toward
left
side
of
car
Front
Axle
Front
Suspension
Set
slabillz
rliar
mount
bushingS
So
that
outer
side
of
stabilizer
bar
bushing
is
brought
into
inner
side
of
marking
e
o
I
19
e
1
Marking
2
Bushing
3
Marking
4
While
painting
5
Marking
0
A
F
A667
Fig
FA
32
Centering
8lDbilize
Bar
2
Chec
to
be
sure
that
tension
rod
bushing
is
propelly
centered
in
its
seat
3
Be
sure
that
tension
rod
bracket
bolt
is
correctly
torqued
Note
a
Noting
direction
of
tension
rod
bushing
properly
center
bushing
in
tension
rod
bushing
washer
Fig
FA
33
Direclion
of
Tension
Rod
BUlhing
b
After
installation
make
sure
mini
mum
clearances
between
tension
rods
end
stabilizer
bar
are
equal
on
both
sides
c
Closely
observe
torq
ue
specification
when
tightening
tension
rod
bracket
retaining
bolts
d
First
tighten
tension
rod
on
bracket
side
to
specified
torque
setting
then
install
the
other
end
on
lower
arm
fJ
Tightening
tOlque
Tension
rod
bushing
installation
nut
4
5
to
5
11rg
33
to
37
ft
lbl
FA
10
Tension
rOd
to
Lower
ann
5
1
to
6
1
kg
m
137
to
44
ft
Ibl
Tension
rod
bracket
to
body
3
2
to
4
3
kg
m
23
to
31
ft
Ibl
Stabilizer
bar
bleck
t
1
6to2
11rg
112
to
15
ft
lbl
Stabilizel
bel
connecting
rod
1
6
to
2
1
kg
m
12
to
15
ft
lbl
LOWER
ARM
AND
LOWER
BALL
JOINT
The
lower
ann
is
connected
to
the
suspension
member
through
a
rubber
bwhing
end
to
the
strut
through
a
ball
joint
The
lower
ball
joint
is
assembled
at
the
factory
and
cannot
be
disassem
bled
REMOVAL
1
Block
rear
wheels
with
chocks
2
Jack
up
front
of
car
and
support
it
with
safety
stands
remove
wheel
3
Remove
splashboard
4
Separate
knuckle
arm
from
strut
5
Pry
colter
pin
off
and
separate
side
rod
fromknilckle
arm
using
Ball
Joint
Remover
HT72520000
FA661
Fig
FA
34
Remoliing8ideRod
Ball
Joint
6
Remove
tension
rod
and
stabilizer
bar
from
lower
ann
7
Remove
bolt
connecting
lower
ann
to
suspension
crossmember
Page 344 of 548

REAR
AXLE
REAR
AXLE
ASSEMBLY
Remove
L
Block
front
wheels
with
chocks
2
Raise
rear
of
car
high
enough
to
pennit
working
underneath
and
place
stands
solidly
under
body
member
on
both
sides
RA544
Fig
RA
2
Supporting
Point
3
Support
under
center
of
dif
ferential
carrier
with
a
garage
jack
4
Remove
rear
wheels
5
Disconnect
propeller
shaft
by
re
moving
bolts
CD
securing
propeller
shaft
flange
to
companion
flange
of
differential
carrier
6
Disconnect
brake
hose
from
brake
tube
at
body
@
and
rear
cable
adjuster
@
Fig
RA
3
Removing
Propeller
Shaft
and
Brohe
Hose
CAUTION
e
When
disconnecting
brake
tube
use
suitable
tube
wrench
Never
use
open
end
or
adjustable
wrench
b
Cover
brake
hose
end
pipe
open
ings
to
prevent
entrance
of
dirt
Rear
Axle
Rear
Suspension
7
Remove
bolts
securing
shock
absorber
lower
ends
on
each
side
RA485
Fig
RA
4
Removing
Bolt
Securing
Shock
Absorber
Lower
End
Note
When
removing
shock
absorber
lower
end
from
bracket
squeeze
shock
absorber
and
lift
it
out
right
above
to
accommodate
em
bossment
inside
bracket
C
AA486
Fig
RA
5
Shock
Absorber
Lower
End
8
Lower
jack
slowly
and
remove
cojI
springs
on
each
side
after
they
are
fully
extended
AA546
Fig
RA
6
Removing
Coil
Spring
9
Raise
jack
to
its
original
position
10
Remove
bolts
CD
and
@
se
curing
upper
and
lower
links
at
axle
case
side
RA
3
Fig
RA
7
Disconnecting
Upper
Link
and
Lower
Link
II
Release
garage
jack
slowly
and
pull
it
out
toward
rear
of
car
In
tenetlon
Install
rear
axle
in
the
reverse
order
of
removal
CAUTION
a
When
installing
brake
tubes
use
Flare
Nut
Torque
Wrench
GG94310000
b
Before
tightening
link
bushing
nuts
temporarily
attach
upper
and
lower
links
to
axle
case
Alter
jacking
up
center
of
differential
carrier
until
upper
Bnd
lower
links
are
almost
horizontal
securely
tighten
link
bushing
nuts
c
When
supporting
car
weight
at
Cl
nter
of
differential
carrier
do
not
put
a
load
in
car
j
Tightening
torque
Brake
tube
flare
nut
1
5
to
1
8
kg
m
11
to
13
ft
lb
Propeller
shaft
to
companion
flange
connecting
nut
2
4
to
3
3
kg
m
17
to
24
ft
Ibl
Shock
absorber
lower
end
nut
7
0
to
8
0
kg
m
51
to
58
ft
Ibl
lower
link
fixing
nut
7
0
to
8
0
kg
m
51
to
58
ft
Ib
Upper
link
fixing
nut
7
0
to
8
0
kg
m
51
to
58
ft
lb
Page 378 of 548
t
MAINTEN
NCE
TIRE
INFLATION
Correct
tire
pressure
is
very
impor
tant
for
steering
ease
and
riding
com
fort
Correct
pressure
also
makes
for
a
quieter
ride
and
extends
tire
life
If
all
tires
are
inspected
frequently
and
maintained
at
correct
pressure
any
sharp
objects
in
tread
can
be
quickiy
detected
nd
abnormal
wear
which
invites
serious
problems
can
be
avoided
After
inflating
tires
valves
should
be
checked
for
leakage
Without
valve
caps
leakage
will
occur
due
to
dirt
and
water
resulting
in
underinflation
Ac
cordingly
whenever
tire
pressure
is
checked
be
sure
to
tighten
vaive
caps
firmly
by
hand
JW
Sri
in
1
II
I
i
I
1
I
1
1
I
I
I
II
I
I
I
i
M
I
l
1
14
nl
01
I
II
Toe
in
or
toe
out
wear
I
J
I
I
p
rt
i
Ilnl
lll
11111
IllIlI
Shoulder
wear
Toe
in
or
toe
out
wear
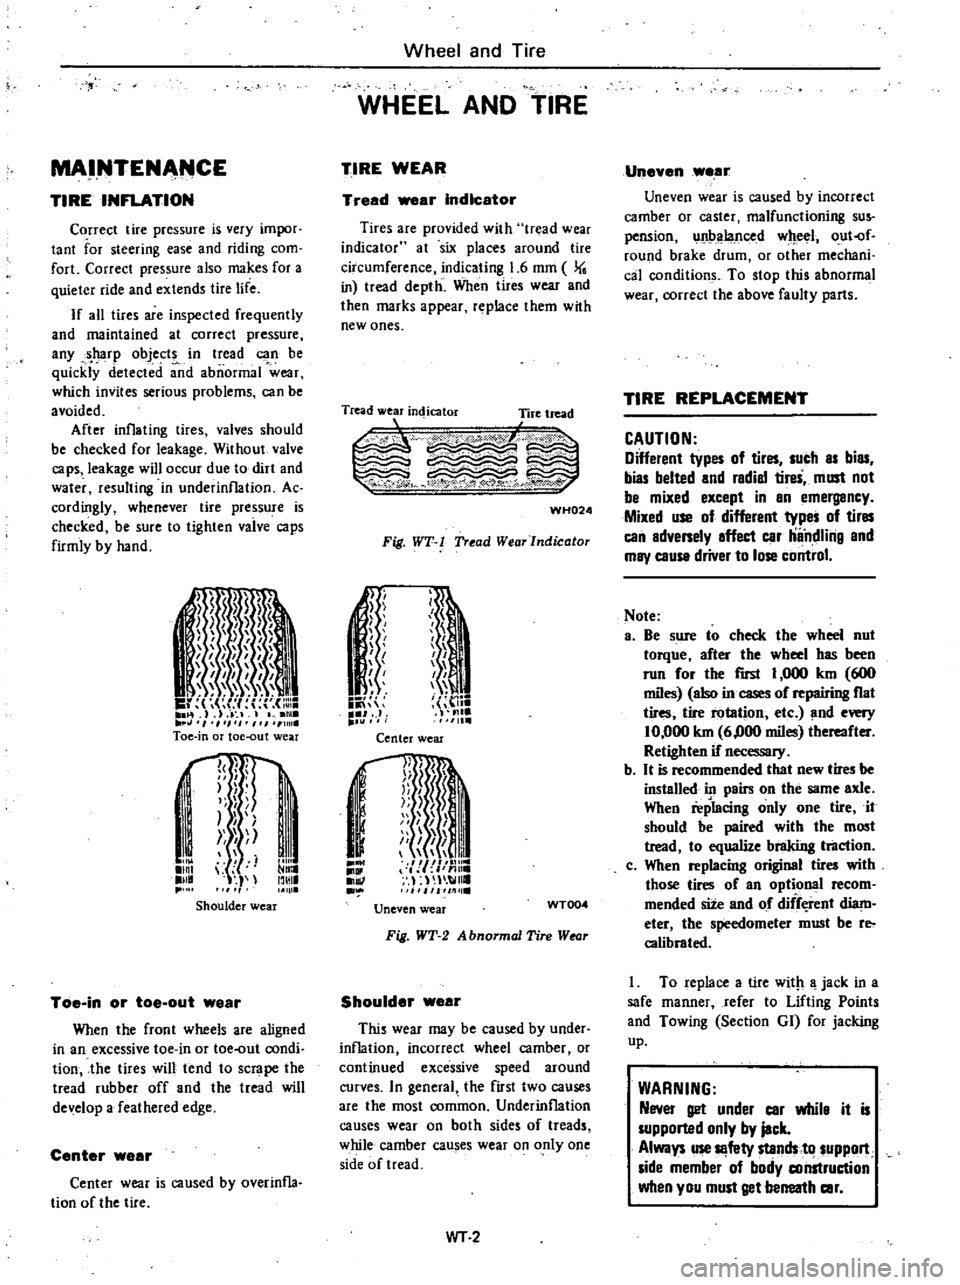
When
the
front
wheels
are
aligned
in
an
excessive
toe
in
or
toe
out
condi
tion
the
tires
will
tend
to
scrape
the
tread
rubber
off
and
the
tread
will
de
elop
a
feathered
edge
Center
wear
Center
wear
is
caused
by
overinfla
tion
of
the
tire
Wheel
and
Tire
WHEEL
AND
TIRE
TIRE
WEAR
Tread
ar
Indicator
Tires
are
provided
with
tr
lad
wear
indicator
at
six
places
around
tire
circumference
indicating
1
6
mm
J
in
tread
depth
When
tires
wear
and
then
marks
appear
replace
them
wtth
new
ones
Tread
wear
indicator
Tire
tread
L
1
c
WH024
Fig
WT
l
Tread
WearJndicator
n
1
ii
J
J
f
J
I
h
I
me
1111
Center
wear
j
I
1II
mnr
I
j
n
Ii
Ii
i
I
Jil
111
lie
Uneven
wear
WT004
Fig
WT
2
A
bnormal
Tire
Wtor
Shoulder
wear
This
wear
may
be
caused
by
under
inflation
incorrect
wheel
camber
or
continued
excessive
speed
around
curves
In
general
the
first
two
causes
are
the
most
common
Underinflation
causes
wear
on
both
sides
of
treads
while
camber
causes
wear
on
only
one
side
of
tread
WT
2
Uneven
wear
Uneven
wear
is
caused
by
incorrect
camber
or
caster
malfunctioning
sus
pension
unbalanced
wheel
out
of
round
brake
drum
or
other
mechani
cal
conditions
To
stop
this
abnormal
wear
correct
the
above
faulty
parts
TIRE
REPLACEMENT
CAUTION
Different
types
of
tires
sucb
as
bias
bias
belted
and
radial
tireS
must
not
be
mixed
except
in
an
emergancy
Mixed
use
of
different
types
of
tires
can
adversely
affect
car
ilndlilig
and
may
cause
driver
to
lose
control
Note
a
Be
sure
to
check
the
wheel
nut
torque
after
the
wheel
has
been
run
for
the
rust
I
000
km
600
miles
also
in
cases
of
repairing
fiat
tires
tire
rotation
etc
and
every
10
000
km
6
000
miles
thereafter
Retighten
if
necessary
b
It
is
recommended
that
new
tires
be
installed
in
pairs
on
the
same
axle
When
replacing
only
one
tire
it
should
be
paired
with
the
most
tread
to
equalize
braking
tl1lction
c
When
replacing
original
tires
with
those
tires
of
an
optional
recom
mended
site
and
of
diff
rent
diam
eter
the
speedometer
must
be
reo
calibrated
I
To
replace
a
tire
with
a
jack
in
a
safe
manner
refer
to
Lifting
Points
and
Towing
Section
GI
for
jacking
up
WARNING
Never
get
under
car
whila
it
is
supported
only
by
jack
Always
use
Il
fety
stands
to
suppon
side
member
of
body
construction
when
you
must
get
berreatb
car
Page 391 of 548
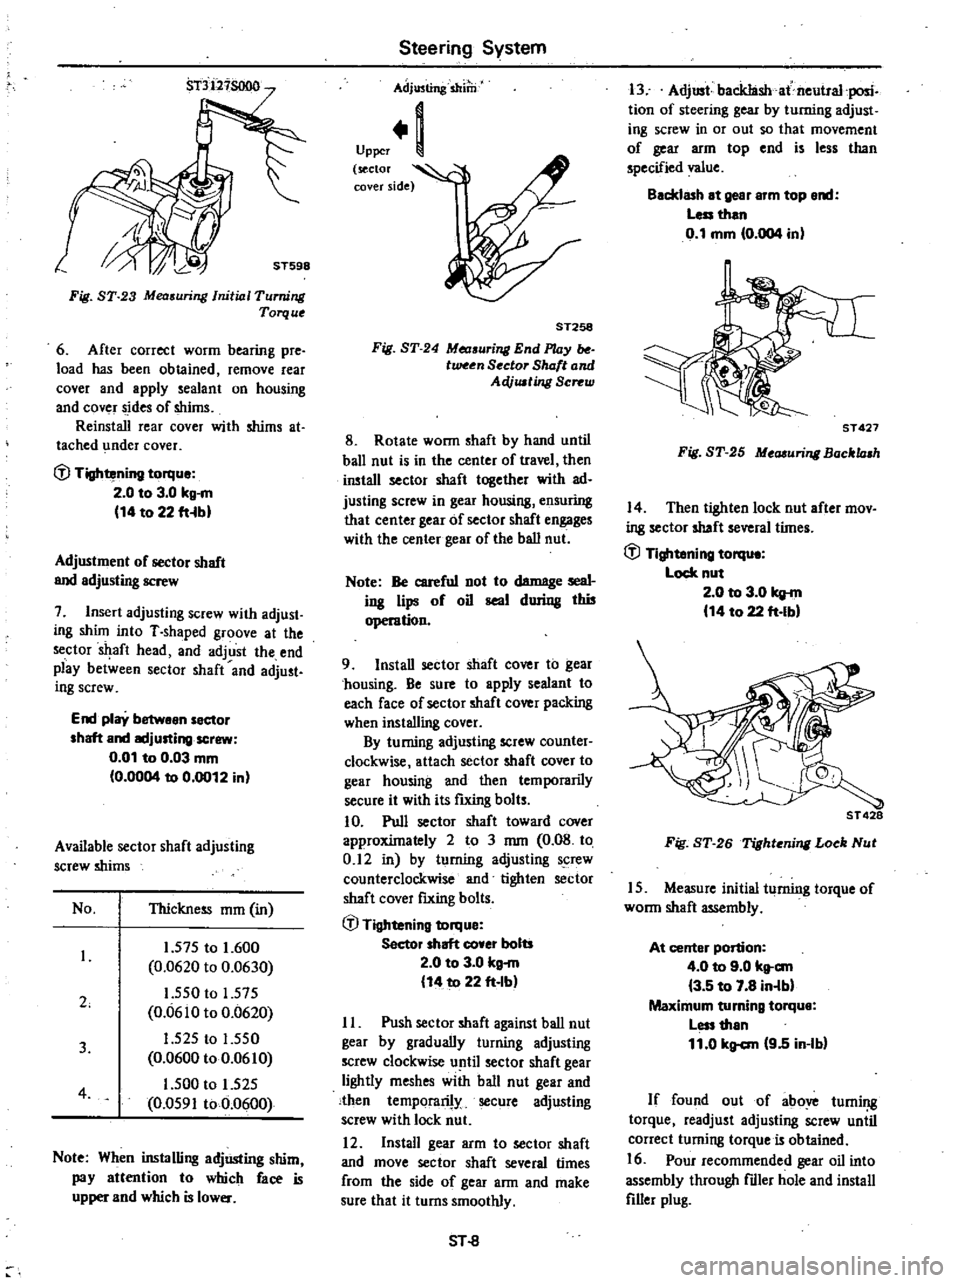
Fig
ST
23
Mea
uring
Initial
Turning
Torque
6
After
correct
worm
bearing
pre
load
has
been
obtained
remove
rear
cover
and
apply
sealant
on
housing
and
cover
sides
of
shims
Reinstall
rear
cover
with
shims
at
tached
under
cover
fJ
Tightening
torque
2
0
to
3
0
kg
m
14
to
22
fHbl
Adjustment
of
sector
shaft
and
adjusting
screw
7
Insert
adjusting
screw
with
adjust
ing
shUn
into
T
shaped
groove
at
the
sector
aft
head
and
adjust
the
end
play
between
sector
shaft
and
adjust
ing
screw
End
play
betwean
sector
shaft
and
IKljusting
screw
0
01
to
0
03
mm
0
0004
to
0
0012
in
Available
sector
shaft
adjusting
screw
shims
No
Thickness
mm
in
2
1
575
to
1
600
0
0620
to
0
0630
1
550
to
1
575
0
0610
to
0
0620
1
525
to
1
550
0
0600
to
0
0610
1
500
to
1
525
0
0591
to
0
0600
3
4
Note
When
installing
adjUsting
shim
pay
attention
to
which
face
is
upper
and
which
is
lower
Steering
System
Adjusting
shilli
Upper
1
sector
l
cover
side
ST258
Fig
ST
24
Measuri
End
l
UJy
tween
Sector
Shaft
and
AeVusting
Screw
8
Rotate
wonn
shaft
by
hand
until
ball
nut
is
in
the
center
of
travel
then
install
sector
shaft
together
with
ad
justing
screw
in
gear
housing
ensuring
that
center
gear
of
sector
shaft
engages
with
the
center
gear
of
the
ball
nut
Note
Be
careful
not
to
damage
seal
ing
lips
of
oil
seal
during
thi5
operation
9
Install
sector
shaft
cover
to
gear
chousing
Be
sure
to
apply
sealant
to
each
face
of
sector
shaft
cover
packing
when
installing
cover
By
turning
adjusting
screw
counter
clockwise
attach
sector
shaft
cover
to
gear
housing
and
then
temporarily
secure
it
with
its
futing
bolts
10
Pull
sector
shaft
toward
cover
approxUnately
2
to
3
mm
0
08
to
0
12
in
by
turning
adjusting
screw
counterclockwise
and
tighten
sector
shaft
cover
fIXing
bolts
fJ
Tightening
torque
Sector
shaft
co
er
bolts
2
0
to
3
0
kg
m
14
to
22
ft
Ib
II
Push
sector
shaft
against
ball
nut
gear
by
gradually
turning
adjusting
screw
clockwise
until
sector
shaft
gear
lightly
meshes
with
ball
nut
gear
and
then
temporarily
secure
adjusting
screw
with
lock
nut
12
Install
gear
arm
to
sector
shaft
and
move
sector
shaft
several
times
from
the
side
of
gear
ann
and
make
sure
that
it
turns
smoothly
SHl
13
Adjust
backIashat
neutral
posic
tion
of
steering
gear
by
turning
adjust
iog
screw
in
or
out
so
that
movement
of
gear
arm
top
end
is
less
than
specified
value
Backlash
at
gear
arm
top
end
Less
than
0
1
mm
0
004
in
ST
427
Fig
ST
25
Measuri
Bocklash
14
Then
tighten
lock
nut
after
mov
ing
sector
shaft
several
tUnes
fJ
Tightening
torqu
Lock
nut
2
0
to
3
0
kg
m
14
to
22
ft
Ibl
ST
428
Fig
ST
26
Tighteni
Loek
Nut
15
Measure
initial
turning
torque
of
wonn
shaft
assembly
At
center
portion
4
0
to
9
0
kt
c
m
3
5
to
7
8
in
lbl
Maximum
turning
torque
Less
than
11
0
kg
c
m
9
5
in
Ib
If
found
out
of
above
turning
torque
readjust
adjusting
screw
uniil
correct
turning
torque
is
obtained
16
Pour
recommended
gear
oil
into
assembly
through
fdler
hole
and
install
filler
plug
Page 404 of 548

Engine
Control
f1lel
Exhaust
Systems
flow
be
directed
toward
atmosphere
side
2
Blow
air
tluough
connector
on
atmosphere
side
Air
flow
should
be
smoothly
directed
toward
fuel
tank
3
If
cbeck
valve
is
suspected
of
not
being
properly
functioning
in
steps
I
and
2
above
replace
To
fuel
tank
FE477
Pressure
valve
Vacuum
valve
Return
spring
Fig
FE
6
Checking
Check
Valve
INSTALLATION
Install
any
parts
of
the
fuel
system
in
the
reverse
order
of
removal
Ob
serve
the
following
notes
Note
a
Install
hose
clamps
securely
Do
not
tighten
excessively
to
avoid
dam
aging
hoses
b
Fasten
clips
holding
fuel
tube
on
underbody
securely
Failure
to
fol
low
this
caution
could
result
in
damage
to
the
surface
of
fuel
tube
c
Do
not
kink
or
twist
hOse
and
tube
when
they
are
routed
d
Run
the
engine
and
check
for
leaks
at
connections
FUEL
TANK
Not
InstaU
fuel
filler
hose
after
fuel
tank
has
been
mounted
in
place
Failure
to
foUow
this
rule
could
result
in
leakage
from
around
hose
connections
Do
not
twist
or
smash
vent
hoses
when
they
are
routed
Be
sure
to
retain
them
with
clips
securely
FE
6
@
Tightening
torque
Drain
plug
1
6
to
2
4
kg
m
112
tn
17
ft
bl
Fuel
tank
0
8
to
1
2
kll
m
15
8
to
8
7
ft
Ibl
FUEL
TANK
GAUGE
UNIT
Note
When
installing
fuel
tank
gauge
unit
aJign
the
projection
of
tank
gauge
unit
with
the
notch
in
fuel
tank
and
tighten
it
securely
Be
sure
to
instaU
tank
gauge
unit
with
O
ring
in
place
CHECK
VALVE
Note
When
installing
check
valve
be
careful
of
its
designated
direction
See
Fig
FE
Page 407 of 548
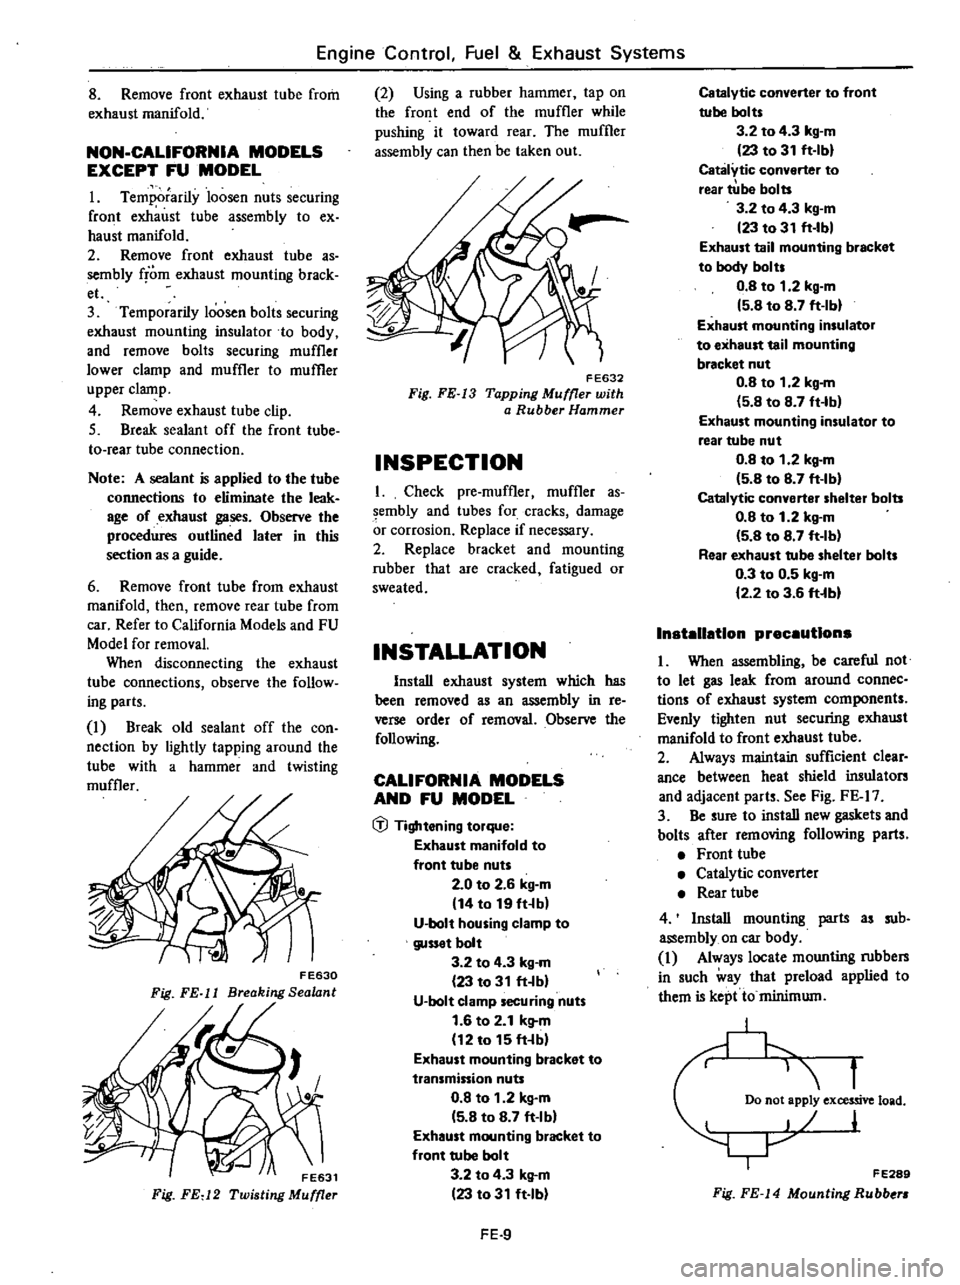
Engine
Control
Fuel
Exhaust
Systems
8
Remove
front
exhaust
tube
from
exhaust
manifold
NON
CALIFORNIA
MODELS
EXCEPT
FU
MODEL
I
Temporarily
loosen
nuts
securing
front
exhaust
tube
assembly
to
ex
haust
manifold
2
Remove
front
exhaust
tube
as
sembly
from
exhaust
mounting
brack
et
3
Temporarily
loosen
bolts
securing
exhaust
mounting
insulator
to
body
and
remove
bolts
securing
muffler
lower
clamp
and
muffler
to
muffler
upper
clamp
4
Remove
exhaust
tube
clip
5
Break
sealant
off
the
front
tube
to
rear
tube
connection
Note
A
sealant
is
applied
to
the
tube
connections
to
eliminate
the
leak
age
of
exhaust
gases
Observe
the
procedures
outlined
later
in
this
section
as
a
guide
6
Remove
front
tube
from
exhaust
manifold
then
remove
rear
tube
from
car
Refer
to
California
Models
and
FU
Model
for
removal
When
disconnecting
the
exhaust
tube
connections
observe
the
follow
ing
parts
I
Break
old
sealant
off
the
con
nection
by
lightly
tapping
around
the
tube
with
a
hammer
and
twisting
muffler
F
E630
Fig
FE
11
Breaking
Sealant
Fig
FEd
2
2
Using
a
rubber
hammer
tap
on
the
front
end
of
the
muffler
while
pushing
it
toward
rear
The
muffler
assembly
can
then
be
taken
out
FE632
Fig
FE
13
Tapping
Muffler
with
a
Rubber
Hammer
INSPECTION
I
Check
pre
muffler
muffler
as
sembly
and
tubes
for
cracks
damage
or
corrosion
Replace
if
necessary
2
Replace
bracket
and
mounting
rubber
that
are
cracked
fatigued
or
sweated
INSTALLATION
Install
exhaust
system
which
has
been
removed
as
an
assembly
in
re
verse
order
of
removal
Observe
the
following
CALIFORNIA
MODELS
AND
FU
MODEL
1Jl
Tightening
torque
Exhaust
manifold
to
front
tube
nuts
2
0
to
2
6
kg
m
14
to
19
fHb
U
bolt
housing
clamp
to
gusset
bolt
3
2
to
4
3
kg
m
23
to
31
ft
bl
U
bolt
clamp
securing
nuts
1
6
to
2
1
k
l
m
12
to
15
ft
bl
Exhaust
mounting
bracket
to
transmission
nuts
0
8
to
1
2
kg
m
5
8
to
8
7
ft
Ibl
Exhaust
mounting
bracket
to
front
tube
bolt
3
2
to
4
3
k
l
m
23
to
31
ft
Ib
FE
9
CatalytiC
converter
to
front
tube
bolts
3
2
to
4
3
kg
m
23
to
31
ft
Ibl
Catalytic
converter
to
rear
tUbe
bolts
3
2
to
4
3
kg
m
23
to
31
ft
Ibl
Exhaust
tail
mounting
bracket
to
body
bolts
0
8
to
1
2
kg
m
5
B
to
8
7
ft
Ibl
Exhaust
mounting
insulator
to
exhaust
tail
mounting
bracket
nut
0
8
to
1
2
kg
m
5
8
to
8
7
ft
Ib
Exhaust
mounting
insulator
to
rear
tube
nut
O
B
to
1
2
kg
m
5
8
to
8
7
ft
Ib
Catalytic
converter
shelter
bolts
O
B
to
1
2
kg
m
5
8
to
B
7
ft
Ib
Rear
exhaust
tube
shelter
bolts
0
3
to
0
5
kg
m
2
2
to
3
6
ft
bl
Installation
precautions
I
When
assembling
be
careful
not
to
let
gas
leak
from
around
connec
tions
of
exhaust
system
components
Evenly
tighten
nut
securing
exhaust
manifold
to
front
exhaust
tube
2
Always
maintain
sufficient
clear
ance
between
heat
shield
insulators
and
adjacent
parts
See
Fig
FE
I7
3
Be
sure
to
install
new
gaskets
and
bolts
after
removing
following
parts
Front
tube
Catalytic
converter
Rear
tube
4
Install
mounting
parts
as
sub
assembly
on
car
body
I
Always
locate
mounting
rubbers
in
such
way
that
preload
applied
to
them
is
kept
to
minimum
f
Do
not
apply
excessive
load
I
F
E289
Fig
FE
J4
Mounting
Rubbe