technical data DATSUN 610 1969 Owner's Manual
[x] Cancel search | Manufacturer: DATSUN, Model Year: 1969, Model line: 610, Model: DATSUN 610 1969Pages: 171, PDF Size: 10.63 MB
Page 74 of 171
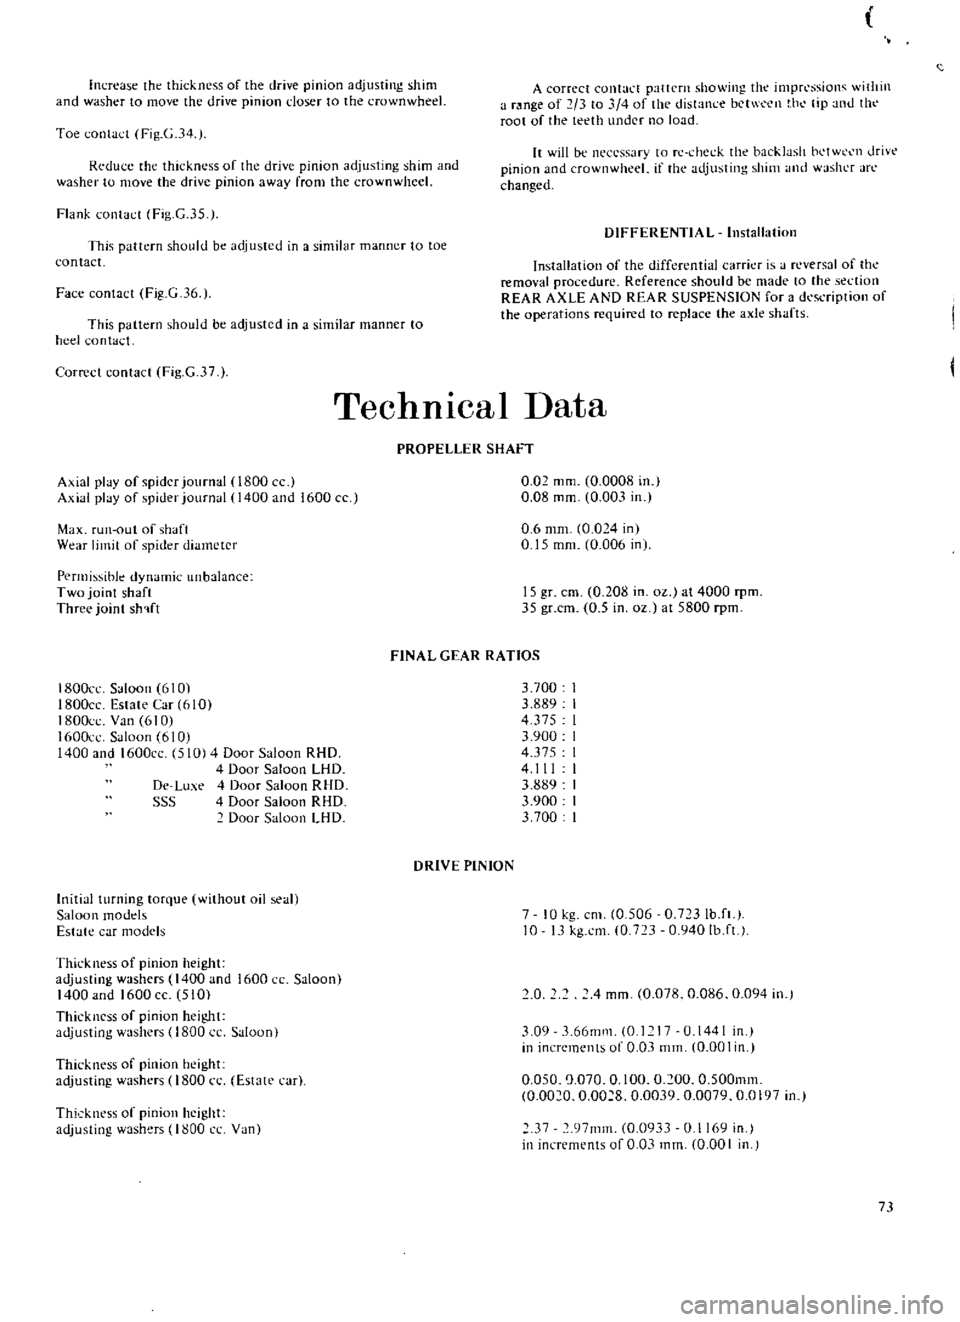
increase
the
thickness
of
the
drive
pinion
adjusting
shim
and
washer
to
move
the
drive
pinion
closer
to
the
crown
wheel
A
correct
contact
pattern
showing
the
impressioll
ithill
a
range
of
2
3
to
4
of
the
distance
bct
l
en
t
h
tip
lllU
till
root
of
the
teeth
under
no
load
Toe
contact
Fig
G
34
Rcdu
e
the
thickness
of
the
drive
pinion
adjusting
shim
and
washer
to
move
the
drive
pinion
away
from
the
crown
wheel
It
will
be
neCL
ssary
to
rc
check
the
backlash
bl
tW
Cl1
drivt
pinion
and
crown
wheel
if
the
adjusting
shim
1l1d
washer
arc
changed
Flank
contact
Fig
G
35
DIFFERENTIAL
Installation
This
pattern
should
be
adjusted
in
a
similar
manner
to
toe
contact
Face
contact
Fig
G
36
Installation
of
the
differential
carrier
is
J
reversal
of
the
removal
procedure
Reference
should
be
made
to
the
section
REAR
AXLE
AND
REAR
SUSPENSION
for
a
dl
saipIion
of
the
operations
required
to
replace
the
axle
shafts
This
pattern
should
be
adjusted
in
a
similar
manner
to
heel
contact
Correct
contact
Fig
G
37
Technical
Data
PROPELLER
SHAFT
Axial
play
of
spider
journal
0800
Axial
play
of
spider
journal
1400
and
1600
cc
0
Q2
mm
0
0008
in
0
08
mm
0
003
in
Max
run
out
of
shaft
Wear
limit
of
spider
diameter
0
6
mm
0
024
in
0
15
mm
0
006
in
Permissible
dynamic
unbalance
Two
joint
shaft
Three
joint
sh
lft
15
gr
em
0
208
in
oz
at
4000
rpm
35
gr
cm
0
5
in
oz
at
5800
rpm
FINAL
GEAR
RATIOS
1800cc
Saloon
6101
ISOOcc
Estate
Car
610
1800cc
Van
610
1600cl
SJloon
610
1400
and
1600cc
510
4
Door
Saloon
RHO
4
Door
Saloon
LHD
De
Lu
e
4
Door
Saloon
RHO
SSS
4
Door
Saloon
RHO
Door
Saloon
LHO
3700
3
889
4
375
3
900
4375
4111
3
889
3
900
3
700
DRIVE
PINION
InitiJI
turning
torque
without
oil
sea
Saloon
modds
Estate
CJr
models
7
10
kg
em
0
506
0
723Ib
ft
10
13
kg
em
0
723
0
940Ib
ft
Thickness
of
pinion
height
adjusting
washers
1400
and
1600
CC
Saloon
1400
and
1600cc
510
Thickncss
of
pinion
height
adjusting
washers
0800
cc
Saloon
0
4
mm
0
078
0
086
0
094
in
3
09
3
66mm
0
1
17
0
1441
in
in
increments
of
0
03
mm
0
00
I
in
Thickness
of
pinion
height
adjusting
washers
0800
n
Estate
car
0
050
0
070
0
100
0
200
0
500mm
0
0020
0
0028
0
0039
0
0079
0
0197
in
Thickness
of
pinion
height
adjusting
washers
1800
CL
Van
37
97111m
0
0933
0
I
69
in
in
increments
of
0
03
mm
0
00
I
in
73
Page 76 of 171
Rear
Axle
Rear
SuspensIon
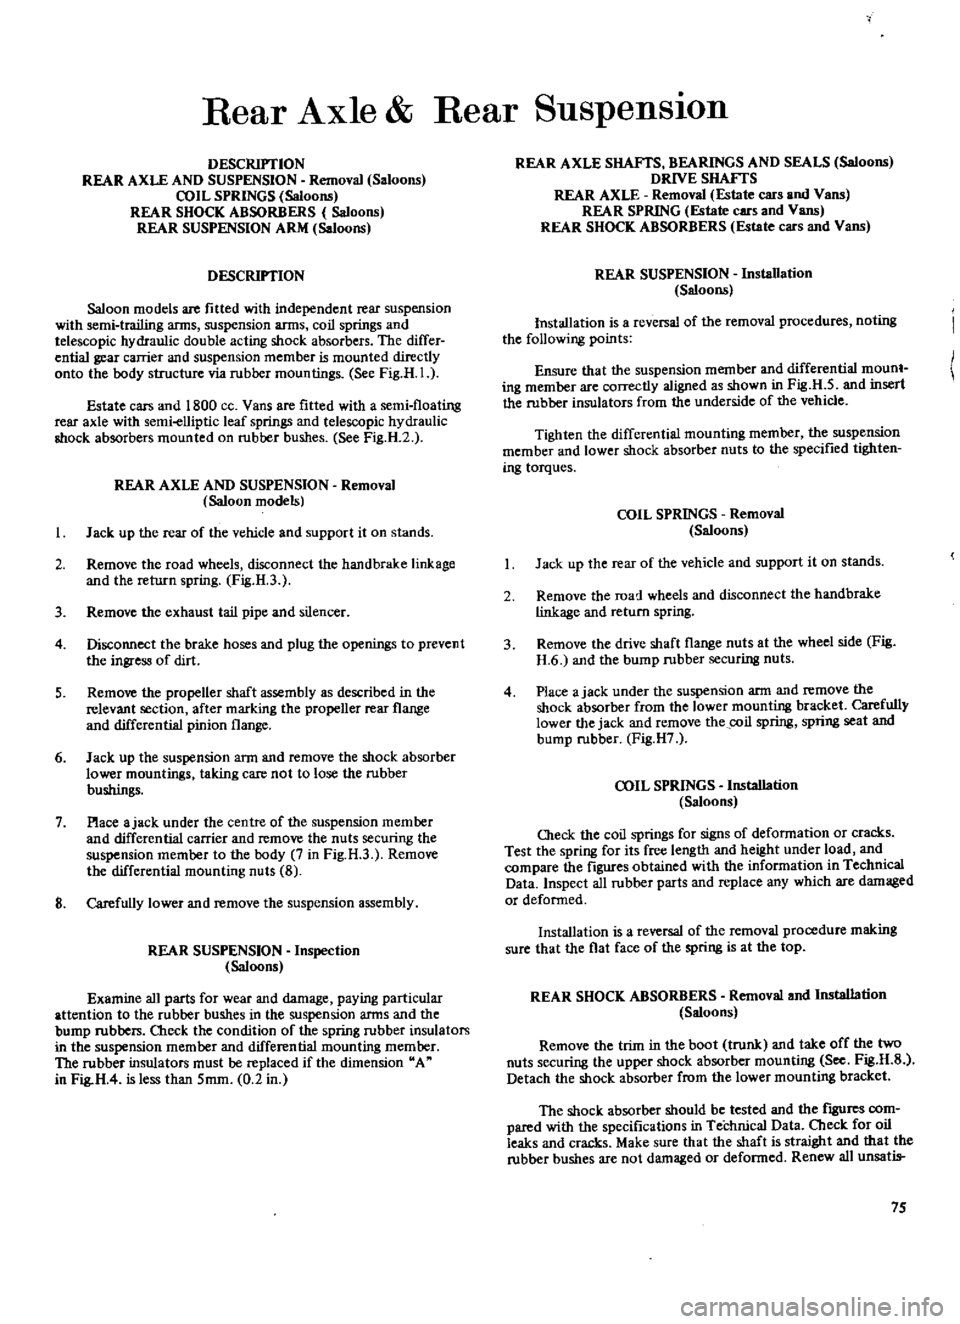
DESCRIPTION
REAR
AXLE
AND
SUSPENSION
Removal
Saloons
COIL
SPRINGS
Saloons
REAR
SHOCK
ABSORBERS
Saloons
REAR
SUSPENSION
ARM
Saloons
DESCRIPTION
Saloon
models
are
fitted
with
independent
rear
suspension
with
semi
trailing
arms
suspension
arms
coil
springs
and
telescopic
hydraulic
double
acting
shock
absorbers
The
differ
ential
gear
carrier
and
suspension
member
is
mounted
directly
onto
the
body
structure
via
rubber
mountings
See
Fig
H
I
Estate
cars
and
1800
ce
Vans
are
fitted
with
a
semi
floating
rear
axle
with
semi
elliptic
leaf
springs
and
telescopic
hydraulic
shock
absorbers
mounted
on
rubrer
bushes
See
Fig
H
2
REAR
AXLE
AND
SUSPENSION
Removal
Saloon
models
I
Jack
up
the
rear
of
the
vehicle
and
support
it
on
stands
2
Remove
the
road
wheels
disconnect
the
hand
brake
linkage
and
the
return
spring
Fig
H
3
3
Remove
the
exhaust
tail
pipe
and
silencer
4
Disconnect
the
brake
hoses
and
plug
the
openings
to
prevent
the
ingress
of
dirt
5
Remove
the
propeller
shaft
assembly
as
described
in
the
relevant
section
after
marking
the
propeller
rear
flange
and
differential
pinion
flange
6
Jack
up
the
suspension
ann
and
remove
the
shock
absorber
lower
mountings
taking
care
not
to
lose
the
rubber
bushings
7
Place
ajack
under
the
centre
of
the
suspension
member
and
differential
carrier
and
remove
the
nuts
securing
the
suspension
member
to
the
body
7
in
Fig
H
3
Remove
the
differential
mounting
nuts
8
8
Carefully
lower
and
remove
the
suspension
assembly
REAR
SUSPENSION
Inspection
Saloons
Examine
all
parts
for
wear
and
damage
paying
particular
attention
to
the
rubber
bushes
in
the
suspension
arms
and
the
bump
rubbers
Check
the
condition
of
the
spring
rubber
insulators
in
the
suspension
member
and
differential
mounting
memrer
The
rubber
insulators
must
be
replaced
if
the
dimension
A
in
Fig
H
4
is
less
than
5mm
0
2
in
REAR
AXLE
SHAFTS
BEARINGS
AND
SEALS
Saloons
DRNE
SHAFTS
REAR
AXLE
Removal
Estate
cars
and
Vans
REAR
SPRING
Estate
cars
and
Vans
REAR
SHOCK
ABSORBERS
Estate
cars
and
Vans
REAR
SUSPENSION
Installation
Saloons
Installation
is
a
reversal
of
the
removal
procedures
noting
the
following
points
Ensure
that
the
suspension
member
and
differential
mount
ing
member
are
correctly
aligned
as
shown
in
Fig
U
5
and
insert
the
rubber
insulators
from
the
underside
of
the
vehicle
Tighten
the
differential
mounting
member
the
suspension
member
and
lower
shock
absorber
nuts
to
the
specified
tighten
ing
torques
COIL
SPRINGS
Removal
Saloons
Jack
up
the
rear
of
the
vehicle
and
support
it
on
stands
2
Remove
the
road
wheels
and
disconnect
the
handbrake
linkage
and
return
spring
3
Remove
the
drive
shaft
flange
nuts
at
the
wheel
side
Fig
H
6
and
the
bump
rubber
securing
nuts
4
Place
ajack
under
the
suspension
ann
and
remove
the
shock
absorber
from
the
lower
mounting
bracket
Carefully
lower
the
jack
and
remove
the
coil
spring
spring
scat
and
bump
rubber
Fig
H7
COIL
SPRINGS
Installation
Saloons
Oleck
the
coil
springs
for
signs
of
deformation
or
cracks
Test
the
spring
for
its
free
length
and
height
under
load
and
compare
the
figures
obtained
with
the
information
in
Technical
Data
Inspect
all
rubber
parts
and
replace
any
which
are
damaged
or
deformed
Installation
is
a
reversal
of
the
removal
procedure
making
sure
that
the
flat
face
of
the
spring
is
at
the
top
REAR
SHOCK
ABSORBERS
Removal
and
Installation
Saloons
Remove
the
trim
in
the
boot
trunk
and
take
off
the
two
nuts
securing
the
upper
shock
absorber
mounting
See
Fig
H
S
Detach
the
shock
absorber
from
the
lower
mounting
bracket
The
shock
absorber
should
be
tested
and
the
fIgUres
com
pared
with
the
specifications
in
Technical
Data
Cbeck
for
oil
leaks
and
cracks
Make
sure
that
the
shaft
is
straight
and
that
the
rubber
bushes
are
not
damaged
or
defonned
Renew
all
unsatis
75
Page 83 of 171

REAR
SHOCK
ABSORBERS
Replacing
Estate
cars
and
Vans
Jack
up
the
reaT
of
the
vehicle
and
place
stands
under
the
rear
axle
housing
Disconnect
the
lower
end
of
the
rear
shock
absorber
from
the
spring
seat
Fig
H
23
Remove
the
shock
absorber
upper
attachment
nuts
and
withdraw
the
shock
absorber
The
upper
attachment
nuts
are
located
behind
the
Tear
seat
backrest
as
shown
in
Fig
H
24
Check
the
shock
absorber
for
leakage
or
cracks
and
make
sure
that
the
shaft
is
straight
Inspect
the
rubber
bushings
for
damage
and
deterioration
Renew
all
defective
components
lnstallation
is
a
reversal
of
the
removal
procedures
Tighten
the
upper
and
lower
shock
absorber
attachment
nuts
to
the
torque
readings
stipulated
in
TIGlITENING
TORQUES
NOTE
The
weight
of
the
vehicle
must
be
resting
on
the
fear
wheels
when
tightening
the
lower
mounting
to
damp
the
rubber
bushes
in
an
unloaded
position
TechnICal
Data
I
Type
Independent
suspension
with
semi
tralllI1g
arms
or
semi
floating
COIL
SPRINGS
14
2mm
0
559
in
14
5mm
0
571
in
90
mm
3
543
in
306
mm
12
047
in
299
mm
II
772
in
290
mm
11417
in
I
1400
and
1600cc
Wire
diameter
Wire
diameter
hard
suspension
Coil
diameter
Free
length
R
H
Free
length
L
H
Free
length
Hard
suspension
1800cc
Wire
diameter
Coil
diameter
Free
length
RHD
R
H
Free
length
RHD
L
H
Free
length
LHD
both
Free
length
Hard
suspension
RHD
R
H
RHD
L
H
LHD
both
14
5
mm
0
571
in
90
3
54
in
321
mm
12
6
in
307
mm
12
1
in
321
mm
12
6
in
306
mm
12
0
in
299
mm
I
1
8
in
306
mm
12
0
in
SHOCK
ABSORBERS
34
56
kg
75
123
lb
21
39
kg
46
86
lb
SHOCK
ABSORBERS
Estate
cars
and
Vans
1400
and
1600cc
estate
cars
and
rigid
axle
sedan
Piston
diameter
2S
mm
0
984
in
Stroke
205
mm
8
071
in
Max
length
518
mm
20
39
in
Damping
force
at
0
3
in
see
Estate
cars
Expansion
Compression
Damping
force
at
0
3m
jsec
Sedan
Expansion
Compression
1400
and
1600
cc
Piston
diameter
Piston
diameter
Hard
suspension
Stroke
Max
length
Damping
force
at
0
3m
sec
Expansion
Compression
1800
cc
Stroke
Max
lengtb
Damping
force
at
0
3
m
sec
Expansion
Compression
82
35
mm
1
378
in
40
mm
1
575
in
206
mm
8
110
in
568
mm
22
362
in
45
kg
99
21b
28
kg
61
7
lb
220
mm
8
60
in
595
mm
23
4
in
90
kg
198
4
lb
50
kg
110
3
lb
75
kg
165
4Ib
40
kg
88
2
lb
1800cc
Estate
cars
Stroke
Max
length
Damping
force
at
O
3m
sec
Estate
cars
Expansion
Compression
205mm
8
071
in
518
mm
20
39
in
63
87
kg
139
192
lb
33
43
kg
73
95
lb
Damping
force
at
0
3
m
sec
Estate
car
and
Van
with
hard
suspension
Expansion
Compression
97
131
kg
214
289
lb
29
43
kg
64
95
lb
REAR
SPRINGS
1400
and
1600cc
Estate
car
Length
Width
Thickness
No
of
leaves
Free
camber
Laden
camber
1200mm
47
2
in
60
mm
f2
362
in
6
mm
0
236
in
4
137
mm
5
394
in
15
mm
265
kg
0
59
in
584
lb
Spring
eye
bolt
diameter
Front
Rear
45
mm
I
772
in
30
mm
U81
in
1400
and
1600
cc
Free
camber
Laden
cam
her
rigid
axle
sedan
100
mm
3
937
in
15mm
250
kg
0
591
in
551
lb
1800cc
Estate
Laden
camber
Turning
torque
15
mm
265
kg
0
591
in
1
584
lb
2
2
kg
mm
123
Ib
in
REAR
AXLE
SHAFT
less
than
4
5
kg
cm
3
91b
in
less
than
0
1
S
mm
0
006
in
DRIVE
SHAFT
AND
JOURNAL
Spring
constant
End
play
Sliding
resistance
1400
and
1600
cc
Sliding
resistance
1800cc
0
15
kg
0
33
lib
less
than
20
kg
44
lb
Radial
play
of
ball
spline
less
than
O
lmm
0
004
in
Page 89 of 171
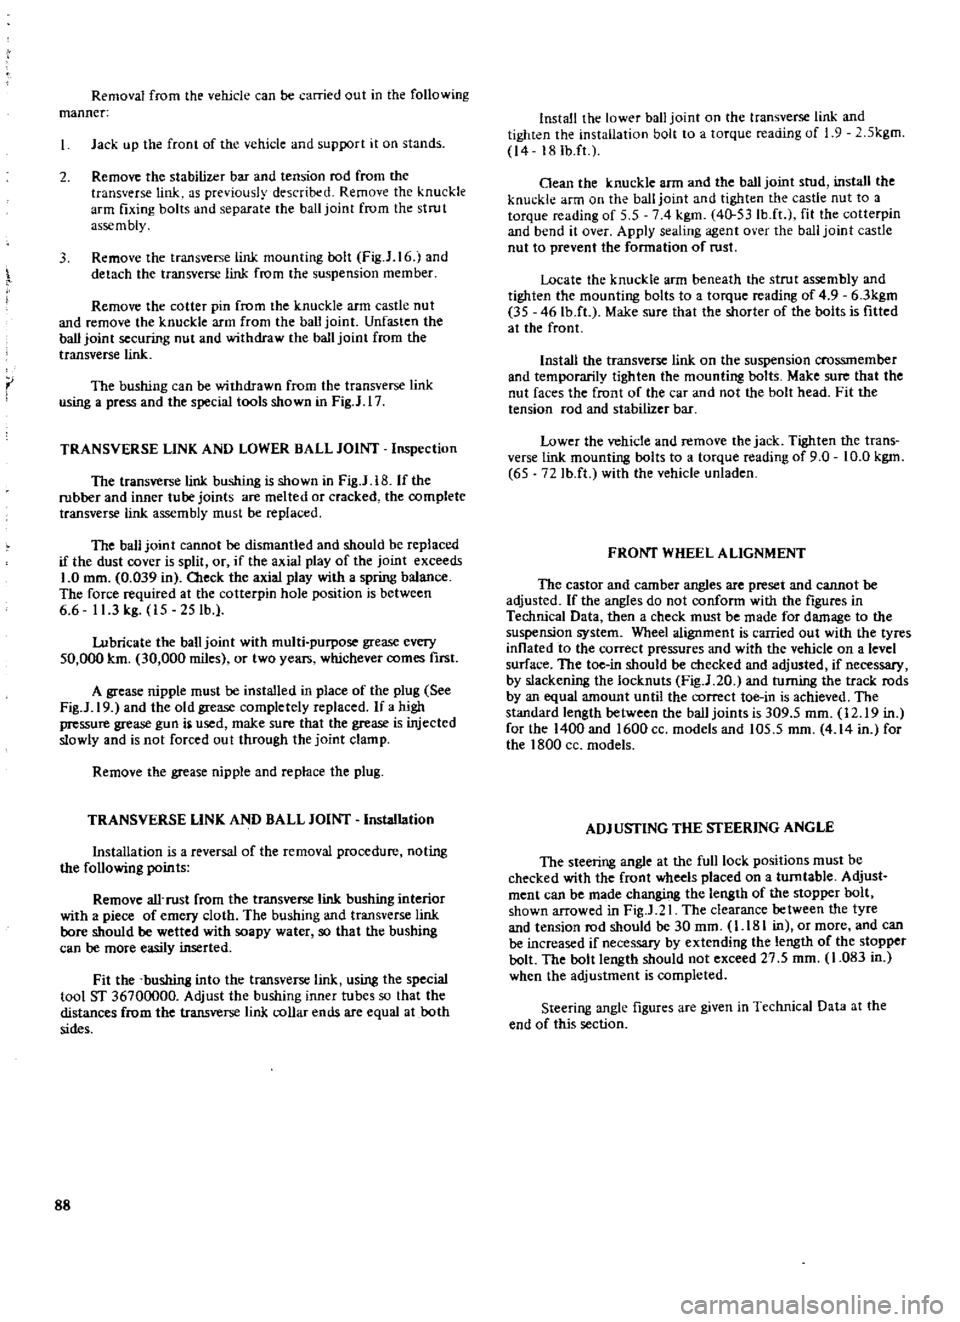
Removal
from
the
vehicle
can
be
carried
out
in
the
following
manner
Jack
up
the
front
of
the
vehicle
and
support
it
on
stands
2
Remove
the
stabilizer
bar
and
tension
rod
from
the
transverse
link
as
previously
described
Remove
the
knuckle
arm
fixing
bolts
and
separate
the
ball
joint
from
the
strut
asse
m
bly
3
Remove
the
transverse
link
mounting
bolt
Fig
J
16
and
detach
the
transverse
link
from
the
suspension
member
Remove
the
cotter
pin
from
the
knuckle
arm
castle
nut
and
remove
the
knuckle
arm
from
the
ban
joint
Unfasten
the
ball
joint
securing
nut
and
withdraw
the
ball
joint
from
the
transverse
link
r
The
bushing
can
be
withdrawn
from
the
transverse
link
using
a
press
and
the
special
tools
shown
in
Fig
J
17
TRANSVERSE
LINK
AND
LOWER
BALL
JOINT
Inspection
The
transverse
link
bushing
is
shown
in
Fig
J
18
If
the
rubber
and
inner
tube
joints
are
melted
or
cracked
the
complete
transverse
link
assembly
must
be
replaced
The
ban
joint
cannot
be
dismantled
and
should
be
replaced
if
the
dust
cover
is
split
or
if
the
axial
play
of
the
joint
exceeds
1
0
mm
0
039
in
Oleck
the
axial
play
with
a
spring
balance
The
force
required
at
the
cotterpin
hole
pOsition
is
between
6
6
1
I
3
kg
15
25
lb
Lubricate
the
ball
joint
with
multi
purpose
grease
every
50
000
km
30
000
miles
or
two
year
whichever
comes
first
A
grease
nipple
must
be
installed
in
place
of
the
plug
See
Fig
J
19
and
the
old
grease
completely
replaced
If
a
high
pressure
grease
gun
j
used
make
sure
that
the
grease
is
injected
slowly
and
is
not
forced
out
through
the
joint
clamp
Remove
the
grease
nipple
and
replace
the
plug
TRANSVERSE
LINK
AND
BALL
JOINT
Installation
Installation
is
a
reversal
of
the
removal
procedure
noting
the
following
points
Remove
all
rust
from
the
transverse
link
bushing
interior
with
a
piece
of
emery
cloth
The
bushing
and
transverse
link
bore
should
be
wetted
with
soapy
water
so
that
the
bushing
can
be
more
easily
inserted
Fit
the
bushing
into
the
transverse
link
using
the
special
tool
ST
36700000
Adjust
the
bushing
inner
tubes
so
that
the
distances
from
the
transverse
link
collar
ends
are
equal
at
both
sides
88
Install
the
lower
ball
joint
on
the
transverse
link
and
tighten
the
installation
bolt
to
a
torque
reading
of
1
9
5kgm
14
18Ib
ft
Oean
the
knuckle
arm
and
the
ball
joint
stud
install
the
knuckle
arm
on
the
ball
joint
and
tighten
the
castle
nut
to
a
torque
reading
of
5
5
74
kgm
4o
53Ib
ft
fit
the
cotterpin
and
bend
it
over
Apply
sealing
agent
over
the
ball
joint
castle
nut
to
prevent
the
formation
of
rust
Locate
the
knuckle
arm
beneath
the
strut
assembly
and
tighten
the
mounting
bolts
to
a
torque
reading
of
4
9
63kgm
35
46Ib
ft
Make
sure
that
the
shorter
of
the
bolts
is
fitted
at
the
front
Install
the
transverse
link
on
the
suspension
crossrnember
and
temporarily
tighten
the
mounting
bolts
Make
sure
that
the
nut
faces
the
front
of
the
car
and
not
the
bolt
head
Fit
the
tension
rod
and
stabilizer
bar
Lower
the
vehicle
and
remove
the
jack
Tighten
the
trans
verse
link
mounting
bolts
to
a
torque
reading
of
9
0
10
0
kgm
65
72
Ib
ft
with
the
vehicle
unladen
FRONT
WHEEL
ALIGNMENT
The
castor
and
camber
angles
are
preset
and
cannot
be
adjusted
If
the
angles
do
not
conform
with
the
fIgures
in
Techni
al
Data
then
a
check
must
be
made
for
damage
to
the
uspenSlon
system
Wheel
alignment
is
carried
out
with
the
tyres
mflated
to
the
correct
pressures
and
with
the
vehicle
on
a
level
surface
The
toe
in
should
be
checked
and
adjusted
if
necessary
by
slackening
the
locknuts
FigJ
20
and
turning
the
track
rods
by
an
equal
amount
until
the
correct
toe
in
is
achieved
The
standard
length
between
the
ball
joints
is
309
5
mm
12
19
in
for
the
1400
and
1600
cc
models
and
105
5
mm
4
14
in
for
the
1800
cc
models
ADJ
USTING
THE
STEERING
ANGLE
The
steering
angle
at
the
full
lock
positions
must
be
checked
with
the
front
wheels
placed
on
a
turntable
Adjust
ment
can
be
made
changing
the
length
of
the
stopper
bolt
shown
arrowed
in
FigJ
21
The
clearance
between
the
tyre
and
tension
rod
should
be
30
mm
1
181
in
or
more
and
can
be
increased
if
necessary
by
extending
the
length
of
the
stopper
bolt
The
bolt
length
should
not
exceed
27
5
mm
1
083
in
when
the
adjustment
is
completed
Steering
angle
figures
are
given
in
Technical
Data
at
the
end
of
this
section
Page 90 of 171
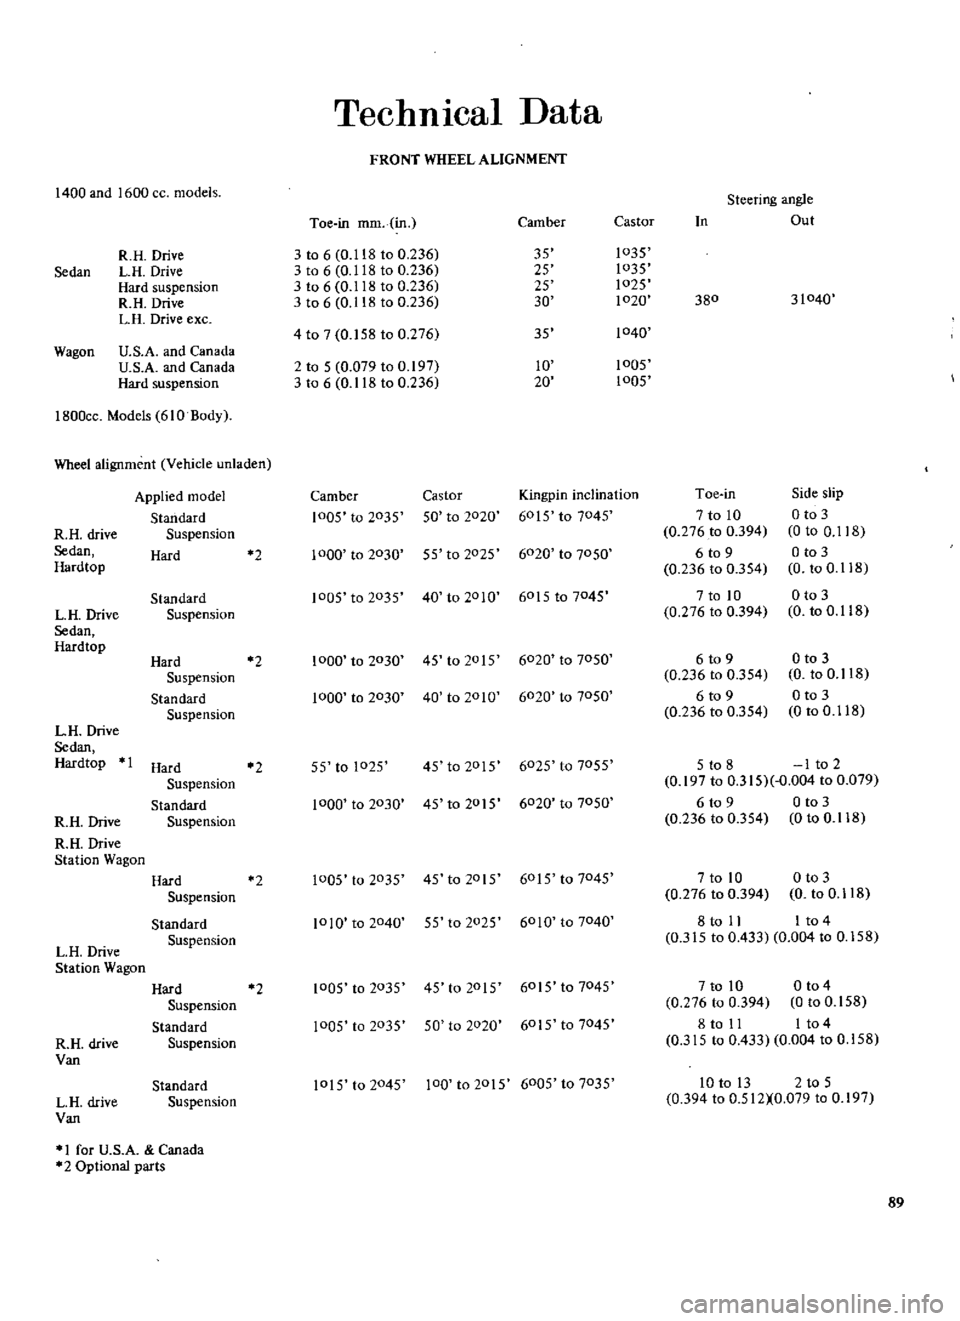
TechnICal
Data
FRONT
WHEEL
ALIGNMENT
1400
and
1600
cc
models
Sedan
Toe
in
mm
in
Camber
Castor
R
H
Drive
3
to
6
0
118
to
0
236
35
1035
LH
Drive
3
to
6
0
118
to
0
236
25
1035
Hard
suspension
3
to
6
0
118
to
0
236
25
1025
R
H
Drive
3
to
6
0
118
to
0
236
30
1020
L
R
Drive
exc
4
to
7
0
158
to
0
276
35
1040
U
S
A
and
Canada
U
S
A
and
Canada
2
to
5
0
079
to
0
197
10
1005
Hard
suspension
3
to
6
0
118
to
0
236
20
1005
Steering
angle
In
Out
380
31040
Wagon
1800cc
Models
610
Body
Wheel
alignment
Vehicle
unladen
Applied
model
Camber
Castor
Kingpin
inclination
Toe
in
Side
slip
Standard
1005
to
2035
50
to
2020
6015
to
7045
7
to
10
o
to
3
R
H
drive
Suspension
0
276
to
0
394
0
to
0
118
Sedan
Hard
2
1000
to
2030
55
to
2025
6020
to
7050
6
to
9
o
to
3
Hardtop
0
236
to
0
354
0
to
0
118
Standard
1005
to
2035
40
to
2010
6015
to
7045
7
to
10
o
to
3
L
H
Drive
Suspension
0
276
to
0
394
0
to
0
118
Sedan
Hardtop
Hard
2
1000
to
2030
45
to
2015
6020
to
7050
6
to
9
o
to
3
Suspension
0
236
to
0
354
0
to
0
118
Standard
1000
to
2030
40
to
2010
6020
to
7050
6
to
9
o
to
3
Suspension
0
236
to
0
354
0
to
0
118
LH
Drive
Sedan
Hardtop
Hard
2
55
to
1025
45
to
2015
6025
to
7055
5
to
8
I
to
2
Suspension
0
197
to
0
315
0
004
to
0
079
Standard
1000
to
2030
45
to
2015
6020
to
7050
6
to
9
o
to
3
R
H
Drive
Suspension
0
236
to
0
354
0
to
0
118
R
H
Drive
Station
Wagon
Hard
2
1005
to
2035
45
to
2015
6015
to
7045
7
to
10
o
to
3
Suspension
0
276
to
0
394
0
to
0
118
Standard
1010
to
2040
55
to
2025
6010
to
7040
8
to
11
I
t04
L
H
Drive
Suspension
0
315
to
0
433
0
004
to
0
158
Station
Wagon
Hard
2
1005
to
2035
45
to
2015
6015
to
7045
7
to
10
o
t04
Suspension
0
276
to
0
394
0
to
0
158
Standard
1005
to
2035
50
to
2020
6015
to
7045
8
to
11
I
t04
R
H
drive
Suspension
0
315
to
0
433
0
004
to
0
158
Van
Standard
1015
to
2045
100
to
2015
6005
to
7035
10
to
I3
2
to
5
L
H
drive
Suspension
0
394
to
0
512XO
079
to
0
197
Van
I
for
U
S
A
Canada
2
Optional
parts
89
Page 98 of 171
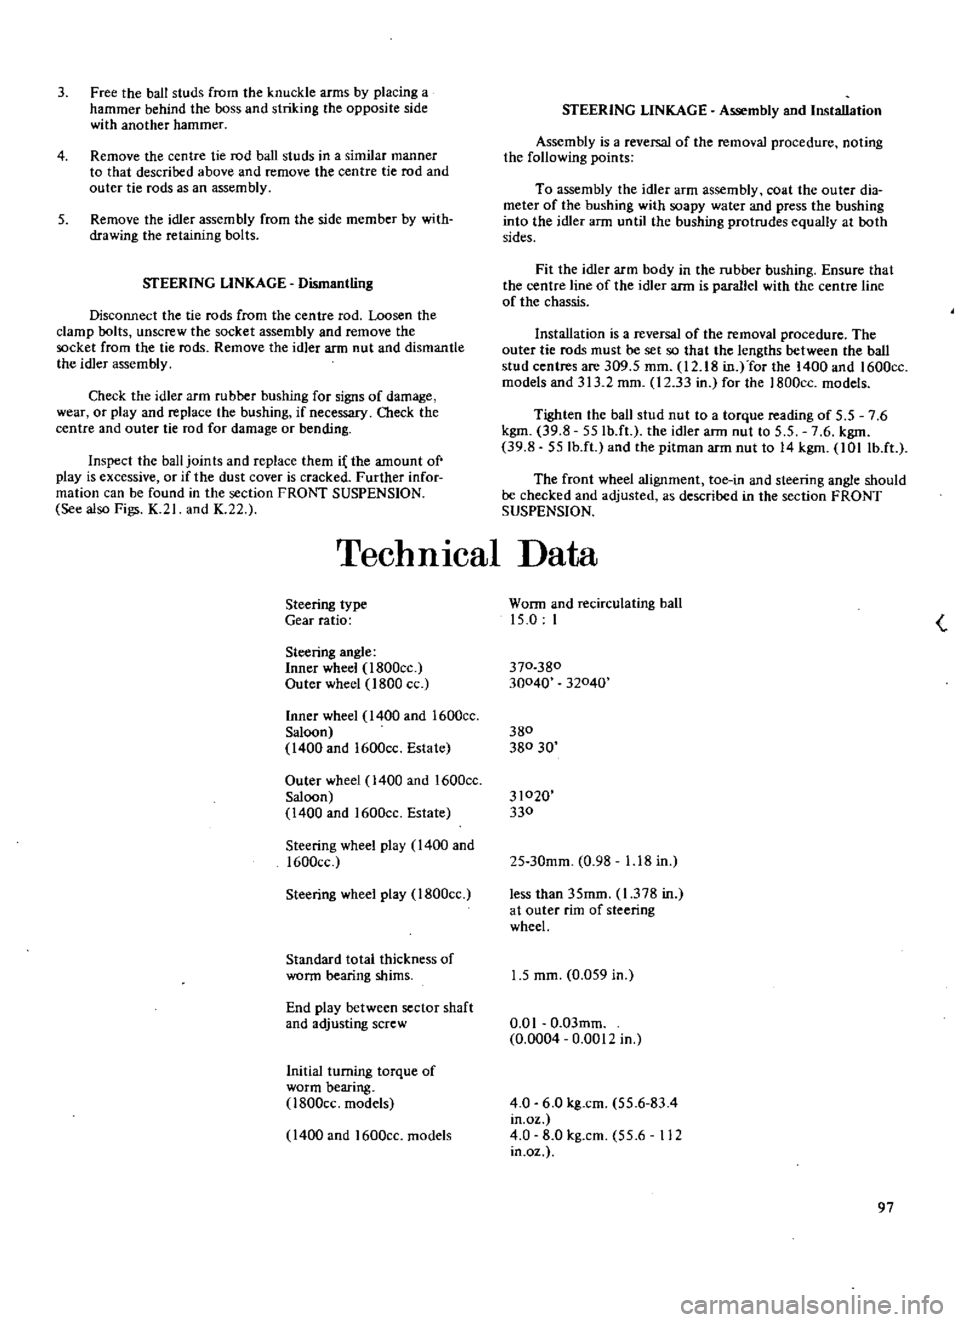
3
Free
the
ball
studs
from
the
knuckle
arms
by
placing
a
hammer
behind
the
boss
and
striking
the
opposite
side
with
another
hammer
4
Remove
the
centre
tie
rod
ball
studs
in
a
similar
manner
to
that
described
above
and
remove
the
centre
tie
rod
and
outer
tie
rods
as
an
assembly
5
Remove
the
idler
assembly
from
the
side
member
by
with
drawing
the
retaining
bolts
SfEERING
LINKAGE
Dismantling
Disconnect
the
tie
rods
from
the
centre
rod
Loosen
the
clamp
bolts
unscrew
the
socket
assembly
and
remove
the
socket
from
the
tie
rods
Remove
the
idler
arm
nut
and
dismantle
the
idler
assembly
Check
the
idler
arm
rubber
bushing
for
signs
of
damage
wear
or
play
and
replace
the
bushing
if
necessary
Oteck
the
centre
and
outer
tie
rod
for
damage
or
bending
Inspect
the
ball
joints
and
replace
them
i
the
amount
of
play
is
excessive
or
if
the
dust
cover
is
cracked
Further
infor
mation
can
be
found
in
the
section
FRONT
SUSPENSION
See
also
Figs
K
21
and
K
22
STEERING
LINKAGE
Assembly
and
Installation
Assembly
is
a
reversal
of
the
removal
procedure
noting
the
following
points
To
assembly
the
idler
arm
assembly
coat
the
outer
dia
meter
of
the
bushing
with
soapy
water
and
press
the
bushing
into
the
idler
arm
until
the
bushing
protrudes
equally
at
both
sides
Fit
the
idler
arm
body
in
the
rubber
bushing
Ensure
that
the
centre
line
of
the
idler
arm
is
parallel
with
the
centre
line
of
the
chassis
Installation
is
a
reversal
of
the
removal
procedure
The
outer
tie
rods
must
be
set
so
that
the
lengths
between
the
ball
stud
centres
are
309
5
mm
12
18
in
for
the
1400
and
1600cc
models
and
313
2
mm
12
33
in
for
the
1800cc
models
Tighten
the
ball
stud
nut
to
a
torque
reading
of
5
5
7
6
kgm
39
8
55Ib
ft
the
idler
ann
nut
to
5
5
7
6
kgm
39
8
55Ib
ft
and
the
pitman
arm
nut
to
14
kgm
lOllb
ft
The
front
wheel
alignment
toe
in
and
steering
angle
should
be
checked
and
adjusted
as
described
in
the
section
FRONT
SUSPENSION
TechnIcal
Data
Steering
type
Gear
ratio
Steering
angle
Inner
wheel
l800cc
Outer
wheel
1800
cc
Inner
wheel
1400
and
1600cc
Saloon
1400
and
1600cc
Estate
Outer
wheel
1400
and
1600cc
Saloon
1400
and
1600cc
Estate
Steering
wheel
play
1400
and
1600cc
Steering
wheel
play
1800cc
Standard
total
thickness
of
worm
bearing
shims
End
play
between
sector
shaft
and
adjusting
screw
Initial
turning
torque
of
worm
bearing
l800cc
models
1400
and
1600cc
models
Worm
and
recirculating
ball
15
0
I
370
380
30040
32040
380
380
30
31020
330
25
30mm
0
98
1
18
in
less
than
35mm
1
378
in
at
outer
rim
of
steering
wheel
1
5
mm
0
059
in
0
0
I
0
03mm
0
0004
0
0012
in
4
0
6
0
kg
cm
55
6
83
4
in
oz
4
0
8
0
kg
cm
55
6
112
in
oz
97
Page 108 of 171
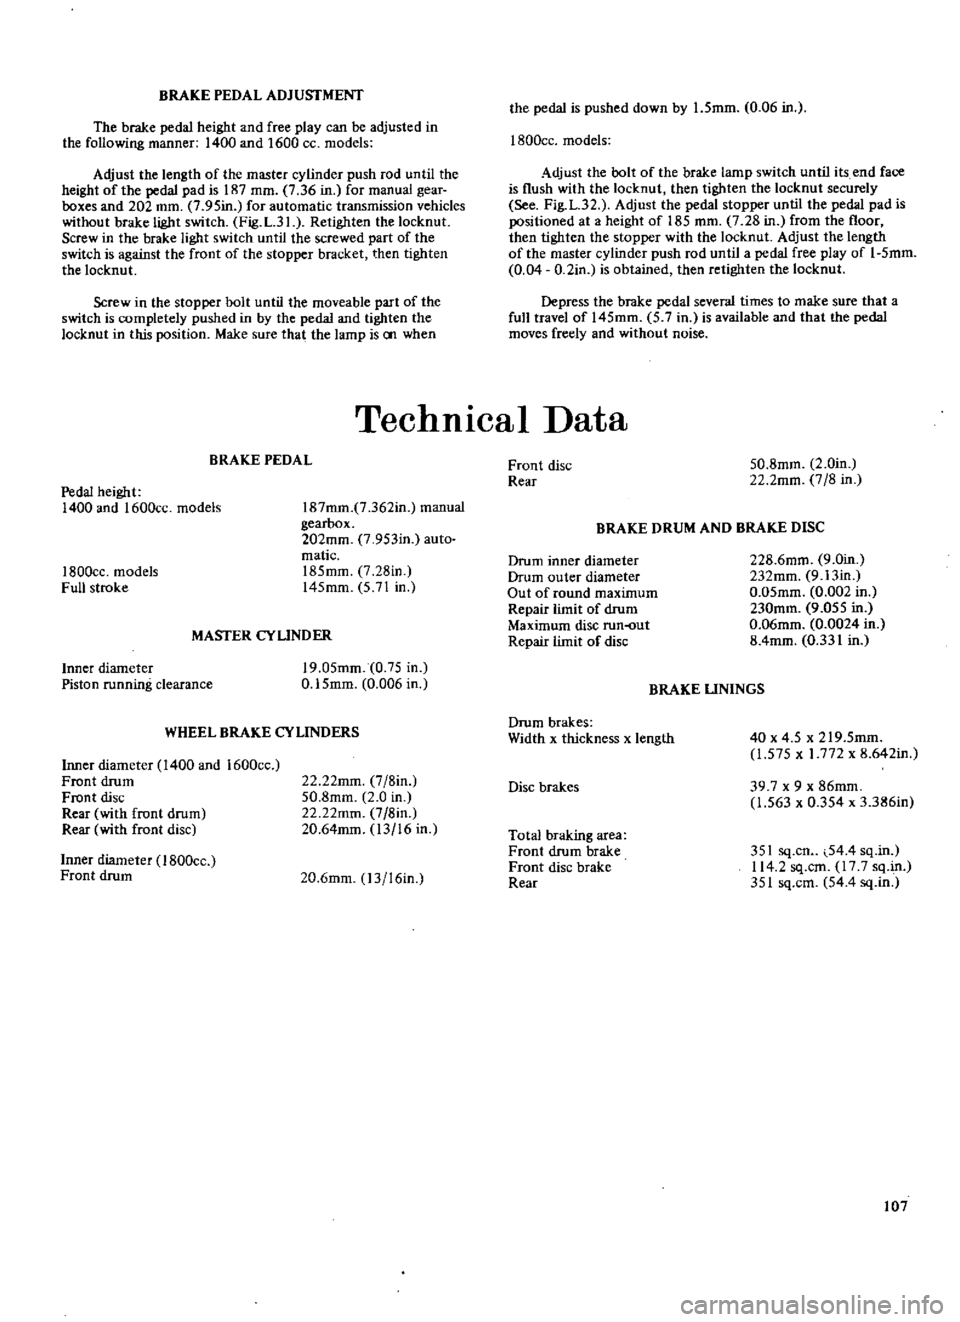
BRAKE
PEDAL
ADJUSTMENT
The
brake
pedal
height
and
free
play
can
be
adjusted
in
the
following
manner
1400
and
1600
CC
models
Adjust
the
length
of
the
master
cylinder
push
rod
until
the
height
of
the
pedal
pad
is
187
mm
7
36
in
for
manual
gear
boxes
and
202
mm
7
95in
for
automatic
transmission
vehicles
without
brake
light
switch
Fig
L
31
Retighten
the
locknut
Screw
in
the
brake
light
switch
until
the
screwed
part
of
the
switch
is
against
the
front
of
the
stopper
bracket
then
tighten
the
locknut
Screw
in
the
stopper
bolt
until
the
moveable
part
of
the
switch
is
completely
pushed
in
by
the
pedal
and
tighten
the
locknut
in
this
position
Make
sure
that
the
lamp
is
00
when
the
pedal
is
pushed
down
by
1
5mm
0
06
in
1800cc
models
Adjust
the
bolt
of
the
brake
lamp
switch
until
its
end
face
is
flush
with
the
locknut
then
tighten
the
locknut
securely
See
Fig
L
32
Adjust
the
pedal
stopper
until
the
pedal
pad
is
positioned
at
a
height
of
185
mrn
7
28
in
from
the
floor
then
tighten
the
stopper
with
the
locknut
Adjust
the
length
of
the
master
cylinder
push
rod
until
a
pedal
free
play
of
I
5mm
0
04
D
2in
is
obtained
then
retighten
the
locknut
Depress
the
brake
pedal
several
times
to
make
sure
that
a
full
travel
of
145mm
5
7
in
is
available
and
that
the
pedal
moves
freely
and
without
noise
Technical
Data
BRAKE
PEDAL
Pedal
height
1400
and
1600cc
models
I
87mm
7
362in
manual
gearbox
202mm
7
953in
auto
matic
185mm
7
28in
145mm
5
71
in
1800cc
models
Full
stroke
MASTER
CYUNDER
Inner
diameter
Piston
running
clearance
19
05mm
0
75
in
0
15mm
0
006
in
WHEEL
BRAKE
CYLINDERS
Inner
diameter
1400
and
1600cc
Front
drum
Front
disc
Rear
with
front
drum
Rear
with
front
disc
22
22mm
7
8in
50
8mm
2
0
in
22
22mm
7
8in
20
64mm
13
16
in
Inner
diameter
I
BOOcc
Front
drum
20
6mm
13
16in
Front
disc
Rear
50
8mm
2
0in
22
2mm
7
8
in
BRAKE
DRUM
AND
BRAKE
DISC
Drum
inner
diameter
Drum
outer
diameter
Out
of
round
maximum
Repair
limit
of
drum
Maximum
disc
run
out
Repair
limit
of
disc
228
6mm
9
0in
232mm
9
13in
0
05mm
0
002
in
230mm
9
055
in
0
06mm
0
0024
in
8
4mm
0
331
in
BRAKE
UNINGS
Drum
brakes
Width
x
thickness
x
length
40
x
4
5
x
219
5mm
1
575
x
1
772
x
8
642in
Disc
brakes
39
7
x
9
x
86mm
1
563
x
0
354
x
3
386in
Total
braking
area
Front
drum
brake
Front
disc
brake
Rear
351
sq
cn
54
4
sq
in
114
2
sq
cm
17
7
sq
in
351
sq
cm
54
4
sq
in
107
Page 118 of 171
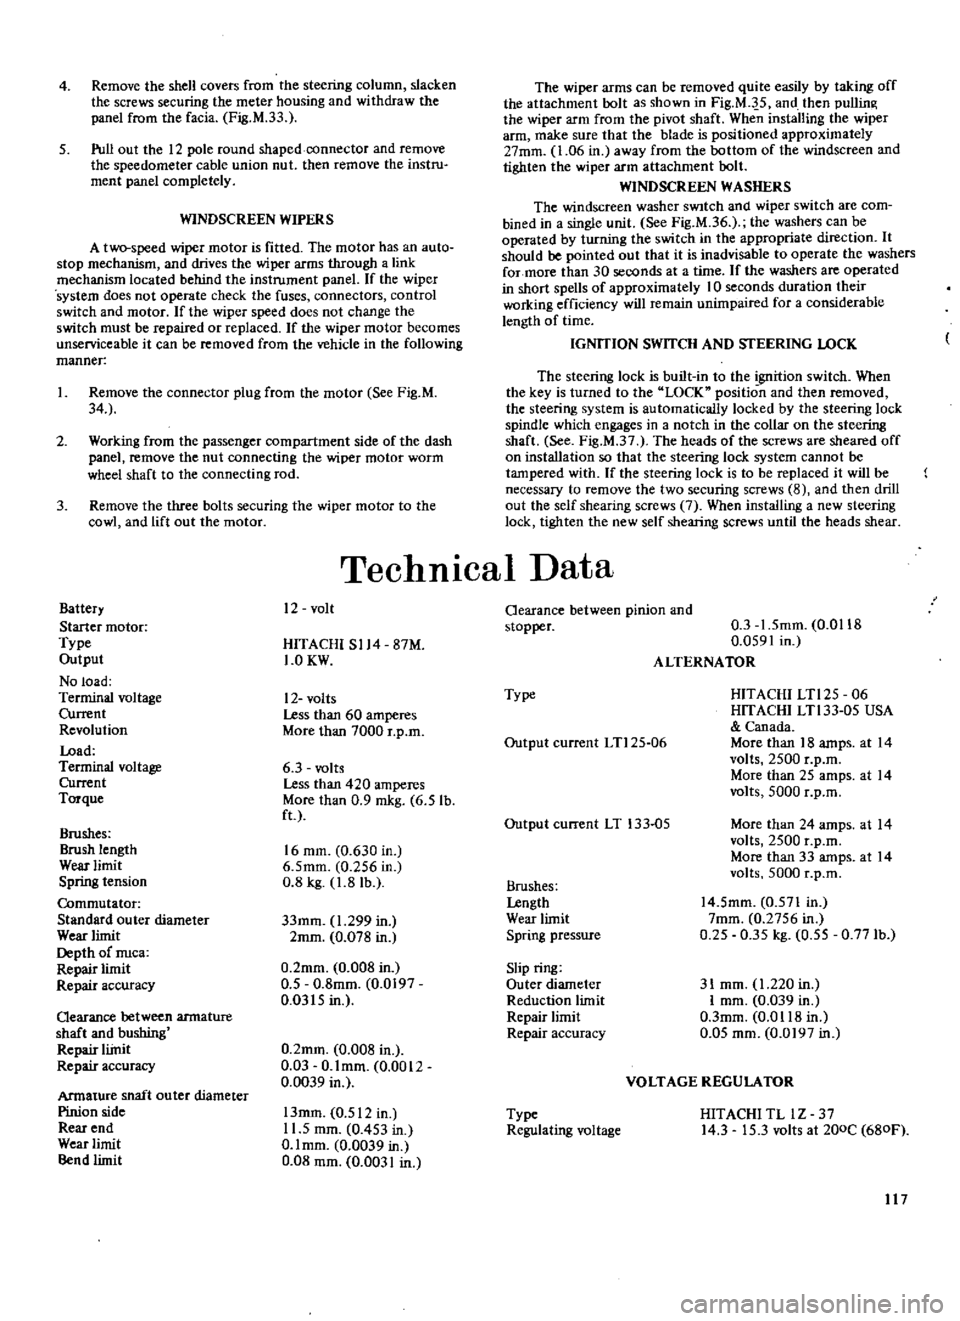
4
Remove
the
shell
covers
from
the
steering
column
slacken
the
screws
securing
the
meter
housing
and
withdraw
the
panel
from
the
facia
Fig
M
33
5
Pull
out
the
12
pole
round
shaped
connector
and
remove
the
speedometer
cable
union
nut
then
remove
the
instru
ment
panel
completely
WINDSCREEN
WIPERS
A
two
speed
wiper
motor
is
fitted
The
motor
has
an
auto
stop
mechanism
and
drives
the
wiper
arms
through
a
link
mechanism
located
behind
the
instrument
panel
If
the
wiper
system
does
not
operate
check
the
fuses
connectors
control
switch
and
motor
If
the
wiper
speed
does
not
change
the
switch
must
be
repaired
or
replaced
If
the
wiper
motor
becomes
unserviceable
it
can
be
removed
from
the
vehicle
in
the
fOllowing
manner
I
Remove
the
connector
plug
from
the
motor
See
Fig
M
34
2
Working
from
the
passenger
compartment
side
of
the
dash
panel
remove
the
nut
connecting
the
wiper
motor
worm
wheel
shaft
to
the
connecting
rod
3
Remove
the
three
bolts
securing
the
wiper
motor
to
the
cowl
and
lift
out
the
motor
Battery
Starter
motor
Type
Output
No
load
Terminal
voltage
Current
Revolution
Load
Terminal
voltage
Current
Torque
Brushes
Brush
length
Wear
limit
Spring
tension
Commutator
Standard
outer
diameter
Wear
limit
Depth
of
nuca
Repair
limit
Repair
accuracy
Qearance
between
armature
shaft
and
bushing
Repair
liinit
Repair
accuracy
Armature
shaft
ou
ter
diameter
Pinion
side
Rear
end
Wear
limit
Bend
limit
The
wiper
arms
can
be
removed
quite
easily
by
taking
off
the
attachment
bolt
as
shown
in
Fig
M
J
5
and
then
pullin
the
wiper
arm
from
the
pivot
shaft
When
installing
the
wiper
arm
make
sure
that
the
blade
is
positioned
approximately
27mm
1
06
in
away
from
the
bottom
of
the
windscreen
and
tighten
the
wiper
arm
attachment
bolt
WINDSCREEN
WASHERS
The
windscreen
washer
SWItch
and
wiper
switch
are
com
bined
in
a
single
unit
See
Fig
M
36
the
washers
can
be
operated
by
turning
the
switch
in
the
appropriate
direction
It
should
be
pointed
out
that
it
is
inadvisable
to
operate
the
washers
for
more
than
30
seconds
at
a
time
If
the
washers
are
operated
in
short
spells
of
approximately
10
seconds
duration
their
working
efficiency
will
remain
unimpaired
for
a
considerable
length
of
time
IGNITION
SWITCH
AND
STEERING
LOCK
The
steering
lock
is
built
in
to
the
goition
switch
When
the
key
is
turned
to
the
LOCK
position
and
then
removed
the
steering
system
is
automatically
locked
by
the
steering
lock
spindle
which
engages
in
a
notch
in
the
collar
on
the
steering
shaft
See
Fig
M
37
The
heads
of
the
screws
are
sheared
off
on
installation
so
that
the
steering
lock
system
cannot
be
tampered
with
If
the
steering
lock
is
to
be
replaced
it
will
be
necessary
to
remove
the
two
securing
screws
8
and
then
drill
out
the
self
shearing
screws
7
When
installing
a
new
steering
lock
tighten
the
new
self
shearing
screws
until
the
heads
shear
TechnICal
Data
12
volt
HITACHI
S114
87M
1
0KW
12
volts
Less
than
60
amperes
More
than
7000
r
p
m
6
3
volts
Less
than
420
amperes
More
than
0
9
mkg
6
5
lb
ft
16
mm
0
630
in
6
5mm
0
256
in
0
8
kg
1
8
lb
33mm
1
299
in
2mm
0
078
in
0
2mm
0
008
in
0
5
0
8mm
0
0197
0
0315
in
0
2mm
0
008
in
0
03
O
lmm
0
0012
0
0039
in
13mm
0
512
in
11
5
mm
0
453
in
O
lmm
0
0039
in
0
08
mm
0
0031
in
Oearance
between
pinion
and
stopper
0
3
1
5mm
0
0118
0
0591
in
ALTERNATOR
Type
HITACHI
LTl25
06
HITACHI
LTl33
05
USA
Canada
More
than
18
amps
at
14
volts
2500
r
p
m
More
than
25
amps
at
14
volts
5000
r
p
m
Output
current
LTl25
06
Output
current
LT
133
05
More
than
24
amps
at
14
volts
2500
r
p
m
More
than
33
amps
at
14
volts
5000
r
p
m
Brushes
Lengtb
Wear
limit
Spring
pressure
14
5mm
0
571
In
7mm
0
2756
in
0
25
0
35
kg
0
55
0
771b
Slip
ring
Outer
diameter
Reduction
limit
Repair
limit
Repair
accuracy
31
mm
1
220
in
I
mm
0
039
in
O
3mm
0
0118
in
0
05
mm
0
0197
in
VOLTAGE
REGULATOR
Type
Regulating
voltage
HITACHI
TL
lZ
37
14
3
15
3
volts
at
200C
680F
117
Page 136 of 171

ENGINE
Dismantling
Remove
the
engine
from
the
vehicle
as
previously
described
and
carefully
clean
the
exterior
surfaces
The
alternator
distribu
tor
and
starter
motor
should
be
removed
before
washing
Plug
the
carhurettor
air
horn
to
prevent
the
ingress
of
foreign
matter
Place
the
engine
and
transmission
on
the
engine
carrier
ST4797
0000
if
available
and
dismantle
as
follows
Remove
the
gearbox
from
the
engine
Disconnect
the
intake
manifold
water
hose
the
vacuum
hose
and
the
intake
manifold
to
oil
separator
hose
Remove
the
intake
manifold
with
the
carburettor
Fit
the
engine
attachment
ST3720OG18
to
the
cylin
der
block
and
place
tre
engine
on
the
stand
ST371
00000
Remove
the
clutch
@
Ssembly
as
described
in
the
section
CLUTCH
Remove
the
exhaust
manifold
and
heat
baffle
plate
Take
off
the
fan
blades
and
remove
the
water
pump
pulley
and
fan
belt
Remove
the
rocker
cover
hose
manifold
heat
hose
and
by
pass
hoses
Remove
the
generator
bracket
and
the
oil
fIlter
Extract
the
engine
breather
assembly
from
above
Note
that
the
breather
is
fitted
to
the
guide
and
is
installed
with
a
O
ring
which
is
pressed
into
the
cylinder
block
Flatten
the
10ckwasher
and
unscrew
the
crankshaft
pulley
nut
Withdraw
the
pulley
with
the
puller
ST44820000
if
available
but
do
not
hook
it
in
the
V
groove
of
the
pulley
Remove
the
rocker
cover
and
take
off
the
rubber
plug
located
on
the
front
of
the
cylinder
head
Straighten
the
lock
ing
washer
and
remove
the
bolt
securing
the
distributor
drive
gear
and
camshaft
sprocket
to
the
camshaft
Remove
the
drive
gear
and
take
off
the
sprocket
See
Fig
A
3
Remove
the
cylinder
head
bolts
in
reverse
order
to
the
tightening
sequence
sOOwn
in
Fig
A
18
and
lift
off
the
cylinder
head
as
an
assembly
See
Fig
A
4
Note
that
in
addition
to
the
ten
cylinder
head
bolts
there
are
also
two
bolts
securing
the
chain
cover
to
the
head
Invert
the
engine
and
remove
the
oil
sump
Remove
the
chain
cover
and
oil
flinger
Take
off
the
nut
securing
the
oil
pump
sprocket
and
withdraw
the
sprocket
with
the
chain
in
position
as
shown
in
Fig
A5
Remove
the
oil
pump
and
stramer
Note
that
two
of
the
pump
mounting
bolts
are
pipe
guides
Remove
the
timing
chain
crankshaft
sprocket
chain
ten
sioner
and
chain
stop
Remove
the
connecting
rod
caps
and
push
the
piston
and
connecting
rod
assemblies
through
the
tops
of
the
bores
Keep
all
parts
in
order
so
they
can
be
assembled
in
their
original
posi
tions
Take
out
the
flywheel
retaining
bolts
and
withdraw
the
flywheel
Remove
the
main
bearing
caps
but
take
care
not
to
damage
the
pipe
guides
Lift
out
the
crankshaft
and
main
bear
ings
noting
that
the
bearings
must
be
reassembled
in
their
original
positions
Remove
the
piston
rings
with
a
suitable
expander
and
take
off
the
gudgeon
pin
clips
The
piston
should
be
heated
to
a
temperature
of
50
to
600
122
to
1400F
before
extracting
the
gudgeon
pin
Keep
the
dismantled
parts
in
order
so
they
can
be
reassembled
in
their
original
positions
Remove
the
camshaft
rocker
ann
shaft
and
rocker
ann
assemblies
from
the
head
by
taking
off
the
cam
bracket
clamp
ing
nuts
It
is
advisable
to
insert
disused
bolts
in
the
No
1
and
No
5
bracket
holes
as
the
cam
bracket
will
fall
from
the
rocker
ann
shaft
when
it
is
removed
Remove
the
valve
cotters
using
the
special
tool
ST47450000
and
dismantle
the
valve
assemblies
Keep
the
parts
together
so
they
can
be
installed
in
their
original
order
ENGINE
Inspection
and
Overhaul
Cylinder
head
and
valves
Inspection
and
overhaul
procedures
can
be
carried
out
by
following
the
instructions
previously
given
for
the
L14
LI6
and
LIB
engines
noting
the
following
points
Measure
the
joint
face
of
the
cylinder
head
using
a
straight
edge
and
feeler
gauge
The
permissible
amount
of
distortion
is
0
03
mm
0
0012
in
or
less
The
surface
of
the
head
must
be
reground
if
the
maximum
limit
of
0
1
mm
0
0039
in
is
exceeded
Oean
each
valve
by
washing
in
petrol
then
carefully
examine
the
stems
and
heads
Discard
any
valves
with
worn
or
damaged
stems
Use
a
micrometer
to
check
the
diameter
of
the
stems
which
should
be
8
0
mm
0
315
in
for
both
intake
and
exhaust
valves
If
the
seating
face
of
the
valve
is
excessively
burned
damaged
or
distorted
the
valve
must
be
discarded
The
valve
seating
face
and
valve
tip
can
be
refaced
if
necessary
but
only
the
minimum
amount
of
metal
should
be
removed
Check
the
free
length
and
tension
of
each
valve
spring
and
compare
the
figures
obtained
with
those
given
in
Technical
Data
at
the
end
of
this
section
Use
a
square
to
check
the
springs
for
deformation
and
replace
any
spring
with
a
deflection
of
1
6
mm
0
0630
in
or
more
Valve
guides
Measure
the
clearance
between
the
valve
guide
and
valve
stern
The
stem
to
guide
clearance
should
be
0
025
0
055
mm
0
0010
0
0022
in
for
the
intake
valves
and
0
04
0
077
mm
0
0016
0
0030
in
for
the
exhaust
valves
The
maximum
clear
ance
limit
is
0
1
mm
0
0039
in
The
valve
guides
are
held
in
position
with
an
interference
fit
of
0
040
0
069
mm
0
0016
0
0027
in
and
can
be
removed
using
a
press
and
valve
guide
replacer
set
ST49730000
under
2
ton
pressure
This
operation
can
be
carried
out
at
room
temperature
but
will
be
more
effec
tively
performed
at
a
higher
temperature
Valve
guides
are
available
with
oversize
diameters
of
0
2
mm
0
0079
in
The
cylinder
head
guide
bore
must
be
reamed
out
at
normal
room
temperature
and
the
new
guides
pressed
in
after
heating
the
cylinder
head
to
a
temperature
of
approximately
800
C
1760F
The
standard
valve
guide
requires
a
bore
of
14
0
14
018
mm
0
551
0
552
in
and
the
oversize
valve
guide
a
bore
of
14
2
14
218
mm
0
559
0
560
in
Ream
out
the
bore
of
the
guides
to
obtain
the
desired
finish
and
clearance
Use
the
reamer
set
ST49710000
to
ream
the
bore
to
8
000
8
015
mm
0
3150
0
3156
in
The
valve
seat
surface
must
be
concentric
with
the
guide
bore
and
must
be
corrected
if
necessary
using
the
new
valve
guide
as
axis
Valve
seat
inserts
Check
the
valve
seat
inserts
for
signs
of
pitting
The
inserts
cannot
be
replaced
but
may
be
corrected
if
necessary
using
a
valve
seat
cutter
ST49720000
Scrape
the
seat
with
the
450
cutter
then
reduce
the
width
of
the
contacting
faces
using
the
150
and
600
cutters
for
the
intake
valve
inserts
and
150
cutter
for
the
exhaust
valve
inserts
Seat
correction
dimensions
are
shown
in
millimeters
in
Fig
A
6
Lap
each
valve
into
its
seat
after
correcting
the
seat
inserts
Place
a
small
quantity
of
fme
grinding
paste
on
the
seating
face
of
the
valve
and
lap
in
as
previously
described
for
the
Ll4
LI6
and
L
18
engines
S5
Page 138 of 171
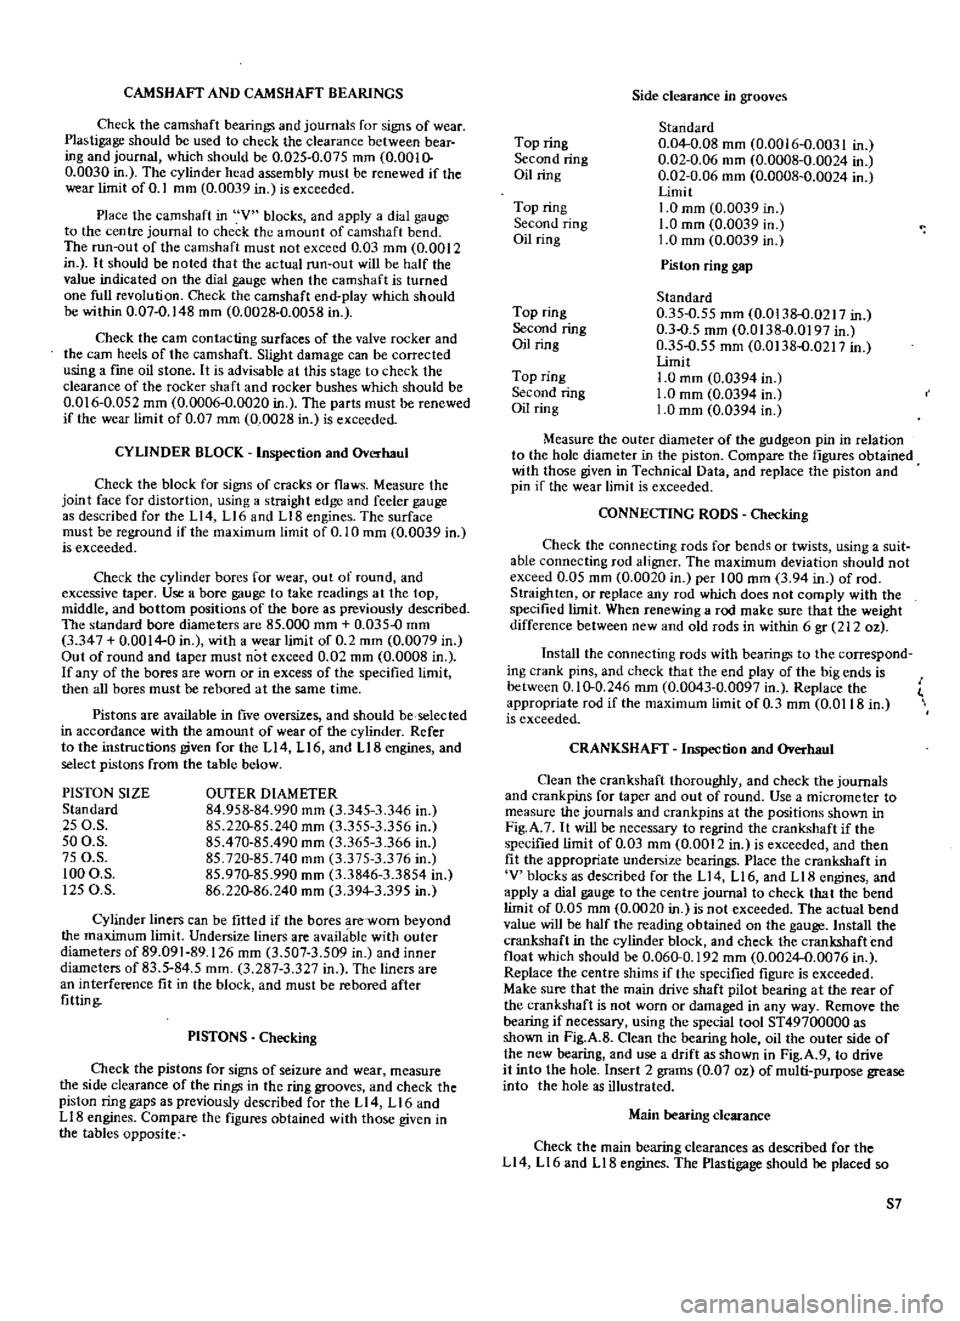
CAMSHAFT
AND
CAMSHAFT
BEARINGS
Check
the
camshaft
bearing
and
journals
for
signs
of
wear
Plastigage
should
be
used
to
check
the
clearance
between
bear
ing
and
journal
which
should
be
0
025
0
075
mm
O
OOl
0
0030
in
The
cylinder
head
assembly
must
be
renewed
if
the
wear
limit
of
0
mm
0
0039
in
is
exceeded
Place
the
camshaft
in
V
blocks
and
apply
a
dial
gauge
to
the
centre
journal
to
check
the
amount
of
camshaft
bend
The
run
out
of
the
camshaft
must
not
exceed
0
03
mm
0
0012
in
It
should
be
noted
that
the
actual
run
out
will
be
half
the
value
indicated
on
the
dial
gauge
when
the
camshaft
is
turned
one
full
revolution
Check
the
camshaft
end
play
which
should
be
within
0
07
0
148
mm
0
0028
0
0058
in
Check
the
earn
contacting
surfaces
of
the
valve
rocker
and
the
earn
heels
of
the
camshaft
Slight
damage
can
be
corrected
using
a
fine
oil
stone
It
is
advisable
at
this
stage
to
check
the
clearance
of
the
rocker
shaft
and
rocker
bushes
which
should
be
0
016
0
052
mm
0
0006
0
0020
in
The
parts
must
be
renewed
if
the
wear
limit
of
0
07
mm
0
0028
in
is
exceeded
CYLINDER
BLOCK
Inspection
and
Overhaul
Check
the
block
for
signs
of
cracks
or
flaws
Measure
the
joint
face
for
distortion
using
a
straight
edge
and
feeler
gauge
as
described
for
the
L14
Ll6
and
L18
engines
The
surface
must
be
reground
if
the
maximum
limit
of
0
10
mm
0
0039
in
is
exceeded
Check
the
cylinder
bores
for
wear
out
of
round
and
excessive
taper
Use
a
bore
gauge
to
take
readings
at
the
top
middle
and
bottom
positions
of
the
bore
as
previously
described
The
standard
bore
diameters
are
85
000
mm
0
035
0
mm
3
347
0
0014
0
in
with
a
wear
limit
of
0
2
mm
0
0079
in
Out
of
round
and
taper
must
not
exceed
0
02
mm
0
0008
in
If
any
of
the
bores
are
worn
or
in
excess
of
the
specified
limi
t
then
all
bores
must
be
rebored
at
the
same
time
Pistons
are
available
in
five
oversizes
and
should
be
selected
in
accordance
with
the
amount
of
wear
of
the
cylinder
Refer
to
the
instructions
given
for
the
Ll4
L16
and
L18
engines
and
select
pistons
from
the
table
below
PISTON
SIZE
Standard
250
5
500
5
750
S
1000
S
1250
S
OUTER
DIAMETER
84
958
84
990
mm
3
345
3
346
in
85
220
85
240
mm
3
355
3
356
in
85
470
85
490
mm
3
365
3
366
in
85720
85
740
mm
3
375
3
376
in
85
970
85
990
mm
3
3846
3
3854
in
86
220
86
240
mm
3
394
3
395
in
Cylinder
liners
can
be
fitted
if
the
bores
areworn
beyond
the
maximum
limit
Undersize
liners
are
available
with
outer
diam
ters
of
89
091
89
126
mm
3
507
3
509
in
and
inner
diameters
of
83
5
84
5
mm
3
287
3
327
in
The
liners
are
an
interference
fit
in
the
block
and
must
be
rebored
after
fitting
PISTONS
Checking
Oteck
the
pistons
for
signs
of
seizure
and
wear
measure
the
side
clearance
of
the
rings
in
the
ring
grooves
and
check
the
piston
ring
gaps
as
previously
described
for
the
L14
Ll6
and
Ll8
engines
Compare
the
figures
obtained
with
those
given
in
the
tables
opposite
Side
clearance
in
grooves
Top
ring
Second
ring
Oil
ring
Standard
0
04
0
08
mm
0
0016
0031
in
0
02
0
06
mm
0
0008
0
0024
in
0
02
0
06
mm
0
0008
0
0024
in
Limit
LO
mm
0
0039
in
LO
mm
0
0039
in
LO
mm
0
0039
in
Piston
ring
gap
Top
ring
Second
ring
Oil
ring
Top
ring
Second
ring
Oil
ring
Standard
0
35
0
55
mm
0
01
38
D
021
7
in
0
3
5
mm
0
0138
0
0197
in
0
35
55
mm
O
oJ38
0217
in
Limit
LO
mm
0
0394
in
LO
mm
0
0394
in
LO
mm
0
0394
in
Top
ring
Second
ring
Oil
ring
Measure
the
outer
diameter
of
the
gudgeon
pin
in
relation
to
the
hole
diameter
in
the
piston
Compare
the
figures
obtained
with
those
given
in
Technical
Data
and
replace
the
piston
and
pin
if
the
wear
limit
is
exceeded
CONNECTING
RODS
Checking
Check
the
connecting
rods
for
bends
or
twists
using
a
suit
able
connecting
rod
aligner
The
maximum
deviation
should
not
exceed
0
05
mm
0
0020
in
per
100
mm
3
94
in
of
rod
Straighten
or
replace
any
rod
which
does
not
comply
with
the
specified
limit
When
renewing
a
rod
make
sure
that
the
weight
difference
between
new
and
old
rods
in
within
6
gr
212
oz
Install
the
connecting
rods
with
bearings
to
the
correspond
ing
crank
pins
and
check
that
the
end
play
of
the
big
ends
is
between
0
10
0
246
mm
0
0043
0
0097
in
Replace
the
appropriate
rod
if
the
maximum
limit
of
0
3
mm
0
0118
in
is
exceeded
CRANKSHAFT
Inspection
and
Overhaul
Clean
the
crankshaft
thoroughly
and
check
the
journals
and
crank
pins
for
taper
and
out
of
round
Use
a
micrometer
to
measure
the
journals
and
crankpins
at
the
positions
shown
in
Fig
A
7
It
will
be
necessary
to
regrind
the
crankshaft
if
the
specified
limit
of
0
03
mm
0
0012
in
is
exceeded
and
then
fit
the
appropriate
undersize
bearings
Place
the
crankshaft
in
V
blocks
as
described
for
the
L14
L16
and
LIB
engines
and
apply
a
dial
gauge
to
the
centre
journal
to
check
that
the
bend
limit
of
0
05
mm
0
0020
in
is
not
exceeded
The
actual
bend
value
will
be
half
the
reading
obtained
on
the
gauge
Install
the
crankshaft
in
the
cylinder
block
and
check
the
crankshaft
end
float
which
should
be
0
060
0
192
mm
0
0024
0
0076
in
Replace
the
centre
shims
if
the
specified
figure
is
exceeded
Make
sure
that
the
main
drive
shaft
pilot
bearing
at
the
rear
of
the
crankshaft
is
not
worn
or
damaged
in
any
way
Remove
the
bearing
if
necessary
using
the
special
tool
ST49700000
as
shown
in
Fig
A
8
Clean
the
bearing
hole
oil
the
outer
side
of
the
new
bearing
and
use
a
drift
as
shown
in
Fig
A
9
to
drive
it
into
the
hole
Insert
2
grams
0
07
oz
of
multi
purpose
grease
into
the
hole
as
illustrated
Main
bearing
clearance
Check
the
main
bearing
clearances
as
described
for
the
Ll4
Ll6
and
Ll8
engines
The
Plastigage
should
be
placed
so
57