technical data DATSUN 610 1969 User Guide
[x] Cancel search | Manufacturer: DATSUN, Model Year: 1969, Model line: 610, Model: DATSUN 610 1969Pages: 171, PDF Size: 10.63 MB
Page 46 of 171
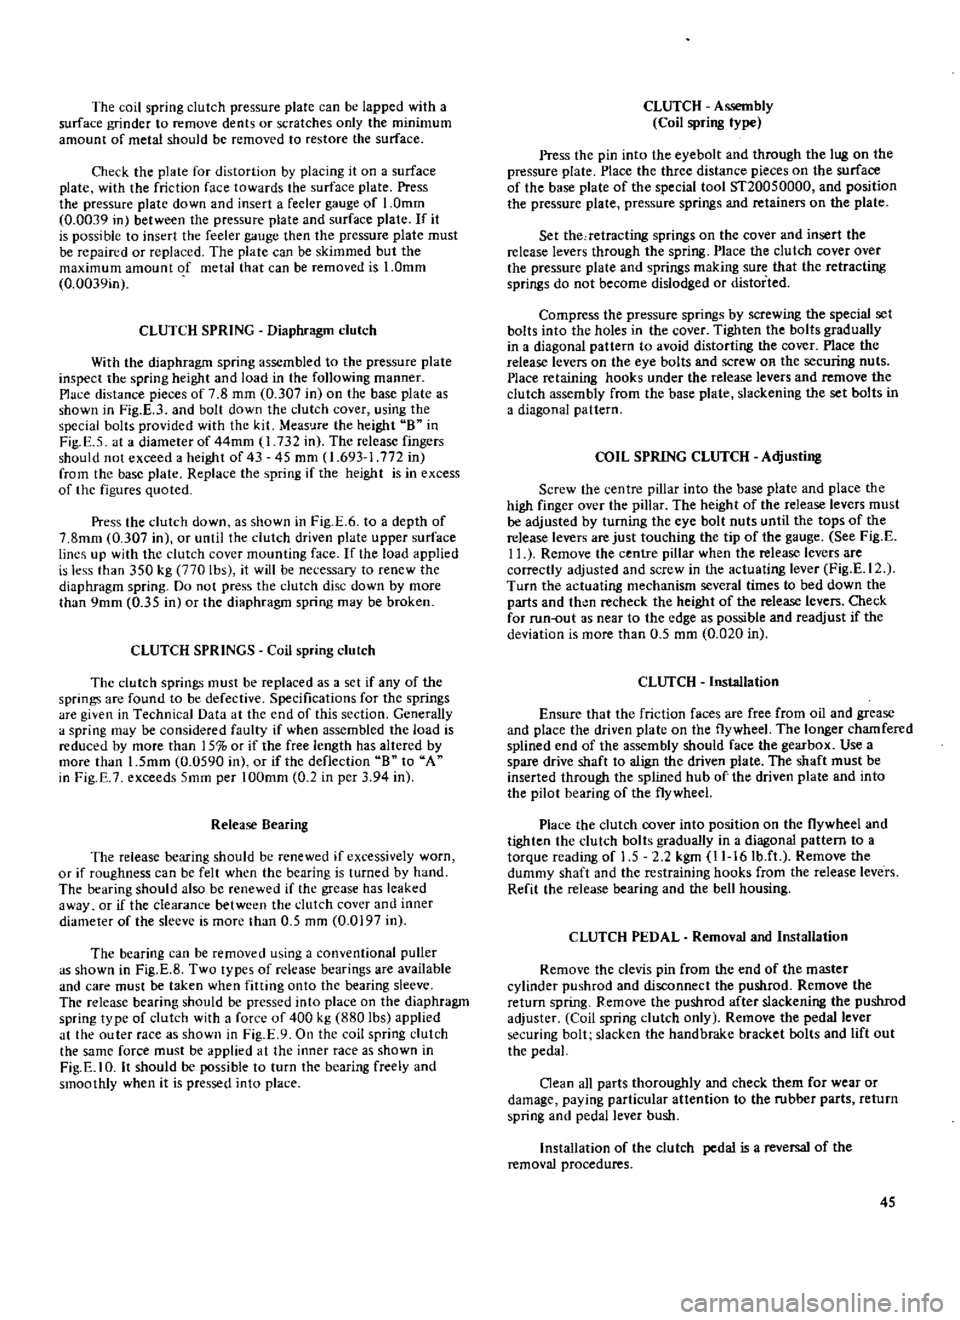
The
coil
spring
clutch
pressure
plate
can
be
lapped
with
a
surface
grinder
to
remove
dents
or
scratches
only
the
minimum
amount
of
metal
should
be
removed
to
restore
the
surface
Check
the
plate
for
distortion
by
placing
it
on
a
surface
plate
with
the
friction
face
towards
the
surface
plate
Press
the
pressure
plate
down
and
insert
a
feeler
gauge
of
1
0mm
0
0039
in
between
the
pressure
plate
and
surface
plate
If
it
is
possible
to
insert
the
feeler
gauge
then
the
pressure
plate
must
be
repaired
or
replaced
The
plate
can
be
skimmed
but
the
maximum
amount
of
metal
that
can
be
removed
is
1
0mm
0
0039in
CLUTCH
SPRING
Diaphragm
clutch
With
the
diaphragm
spring
assembled
to
the
pressure
plate
inspect
the
spring
height
and
load
in
the
following
manner
Place
distance
pieces
of
7
8
mm
0
307
in
on
the
base
plate
as
shown
in
Fig
E
3
and
bolt
down
the
clutch
cover
using
the
special
bolts
provided
with
the
kit
Meas
Jre
the
height
B
in
Fig
E
5
at
a
diameter
of
44mm
1
732
in
The
release
fingers
should
not
exceed
a
height
of
43
45
mm
1
693
1
772
in
from
the
base
plate
Replace
the
spring
if
the
height
is
in
excess
of
the
figures
quoted
Press
the
dutch
down
as
shown
in
Fig
E
6
to
a
depth
of
7
8mm
0
307
in
or
until
the
clutch
driven
plate
upper
surface
lines
up
with
the
clutch
cover
mounting
face
If
the
load
applied
is
less
than
350
kg
770
lbs
it
will
be
necessary
to
renew
the
diaphragm
spring
Do
not
press
the
clutch
disc
down
by
more
than
9mm
0
35
in
or
the
diaphragm
spring
may
be
broken
CLUTCH
SPRINGS
Coil
spring
clutch
The
clutch
springs
must
be
replaced
as
a
set
if
any
of
the
springs
are
found
to
be
defective
Specifications
for
the
springs
are
given
in
Technical
Data
at
the
end
of
this
section
Generally
a
spring
may
be
considered
faulty
if
when
assembled
the
load
is
reduced
by
more
than
15
or
if
the
free
length
has
altered
by
more
than
1
5mm
0
0590
in
or
if
the
deflection
B
to
A
in
Fig
E
7
exceeds
5mm
per
100mm
0
2
in
per
3
94
in
Release
Bearing
The
release
bearing
should
be
renewed
if
excessively
worn
or
if
roughness
can
be
felt
when
the
bearing
is
turned
by
hand
The
bearing
should
also
be
renewed
if
the
grease
has
leaked
away
or
if
the
clearance
between
the
clutch
cover
and
inner
diameter
of
the
sleeve
is
more
than
0
5
mm
0
0197
in
The
bearing
can
be
removed
using
a
conventional
puller
as
shown
in
Fig
E
8
Two
types
of
release
bearings
are
available
and
care
must
be
taken
when
fitting
onto
the
bearing
sleeve
The
release
bearing
should
be
pressed
into
place
on
the
diaphragm
spring
type
of
clutch
with
a
force
of
400
kg
880
lbs
applied
at
the
outer
race
as
shown
in
Fig
E
9
On
the
coil
spring
clutch
the
same
force
must
be
applied
at
the
inner
race
as
shown
in
Fig
E
IO
It
should
be
possible
to
turn
the
bearing
freely
and
smoothly
when
it
is
pressed
into
place
CLUTCH
Assembly
Coil
spring
type
Press
the
pin
into
the
eyebolt
and
through
the
lug
on
the
pressure
plate
Place
the
three
distance
pieces
on
the
surface
of
the
base
plate
of
the
special
tool
ST20050000
and
position
the
pressure
plate
pressure
springs
and
retainers
on
the
plate
Set
the
retracting
springs
on
the
cover
and
insert
the
release
levers
through
the
spring
Place
the
clutch
cover
over
the
pressure
plate
and
springs
making
sure
that
the
retracting
springs
do
not
become
dislodged
or
distorted
Compress
the
pressure
springs
by
screwing
the
special
set
bolts
into
the
holes
in
the
cover
Tighten
the
bolts
gradually
in
a
diagonal
pattern
to
avoid
distorting
the
cover
Place
the
release
levers
on
the
eye
bolts
and
screw
OR
the
securing
nuts
Place
retaining
hooks
under
the
release
levers
and
remove
the
clutch
assembly
from
the
base
plate
slackening
the
set
bolts
in
a
diagonal
pattern
COIL
SPRING
CLUTCH
Adjusting
Screw
the
centre
pillar
into
the
base
plate
and
place
the
high
finger
over
the
pillar
The
height
of
the
release
levers
must
be
adjusted
by
turning
the
eye
bolt
nuts
until
the
tops
of
the
release
levers
are
just
touching
the
tip
of
the
gauge
See
Fig
E
11
Remove
the
centre
pillar
when
the
release
levers
are
correctly
adjusted
and
screw
in
the
actuating
lever
Fig
E
12
Turn
the
actuating
mechanism
several
times
to
bed
down
the
parts
and
then
recheck
the
height
of
the
release
levers
Check
for
run
out
as
near
to
the
edge
as
possible
and
readjust
if
the
deviation
is
more
than
0
5
mrn
0
020
in
CLUTCH
InsWlation
Ensure
that
the
friction
faces
are
free
from
oil
and
grease
and
place
the
driven
plate
on
the
flywheel
The
longer
chamfered
splined
end
of
the
assembly
should
face
the
gearbox
Use
a
spare
drive
shaft
to
align
the
driven
plate
The
shaft
must
be
inserted
through
the
splined
hub
of
the
driven
plate
and
into
the
pilot
bearing
of
the
flywheel
Place
the
clutch
cover
into
position
on
the
flywheel
and
tighten
the
dutch
bolts
gradually
in
a
diagonal
pattern
to
a
torque
reading
of
1
5
2
2
kgm
11
16Ib
ft
Remove
the
dummy
shaft
and
the
restraining
hooks
from
the
release
levers
Refit
the
release
bearing
and
the
bell
housing
CLUTCH
PEDAL
Removal
and
Installation
Remove
the
clevis
pin
from
the
end
of
the
master
cylinder
pushrod
and
disconnect
the
pushrod
Remove
the
return
spring
Remove
the
pushrod
after
slackening
the
pushrod
adjuster
Coil
spring
clutch
only
Remove
the
pedal
lever
securing
bolt
slacken
the
handbrake
bracket
bolts
and
lift
out
the
pedal
Clean
all
parts
thoroughly
and
check
them
for
wear
or
damage
paying
particular
attention
to
the
rubber
parts
return
spring
and
pedal
lever
bush
Installation
of
the
clutch
pedal
is
a
reversal
of
the
removal
procedures
45
Page 48 of 171
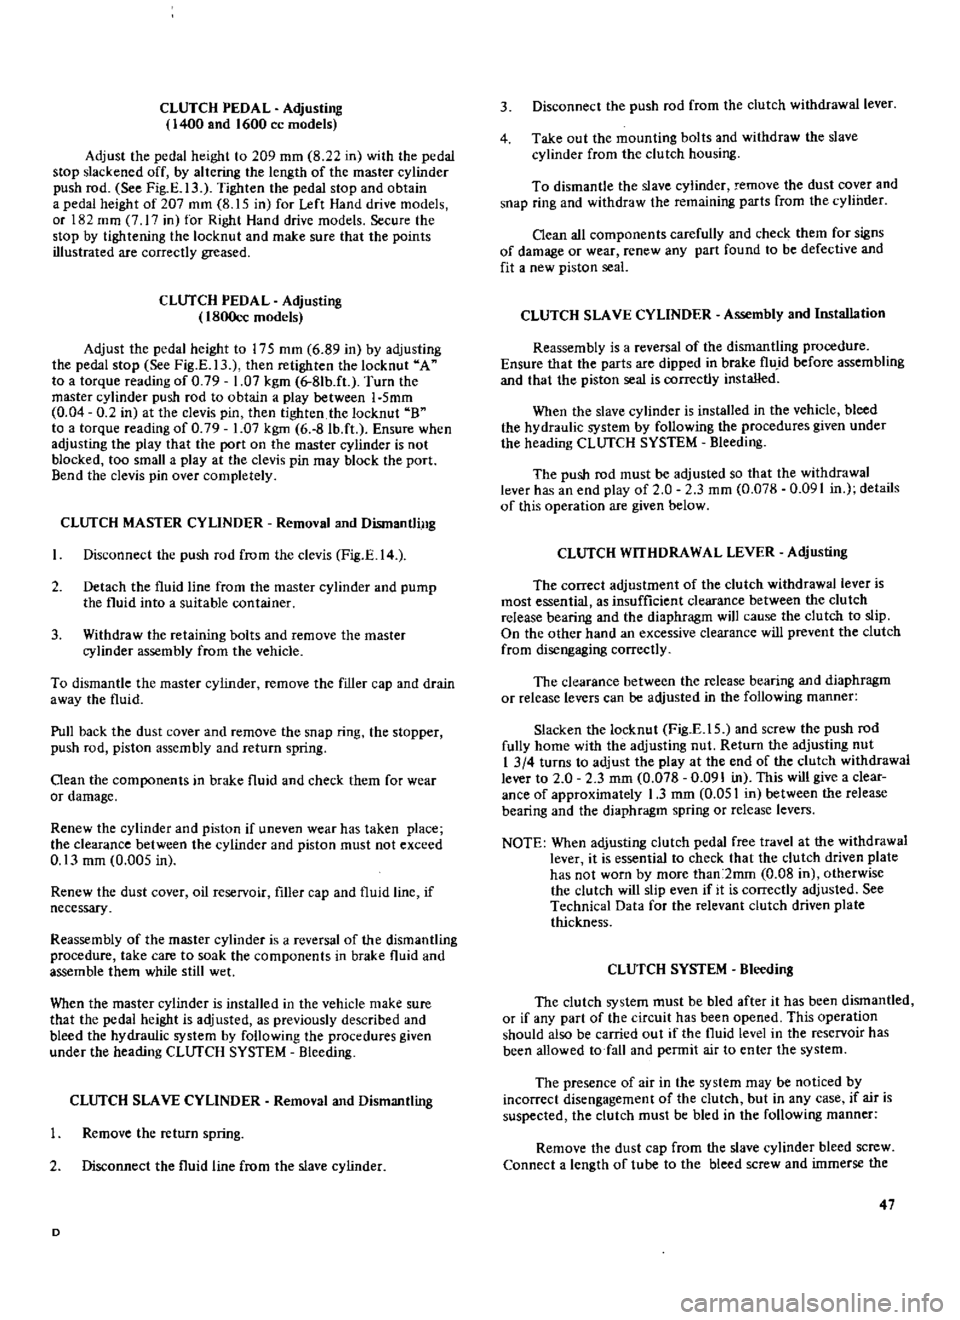
CLUTCH
PEDAL
Adjusting
400
and
1600
cc
models
Adjust
the
pedal
height
to
209
mm
8
22
in
with
the
pedal
stop
slackened
off
by
altering
the
length
of
the
master
cylinder
push
rod
See
Fig
E
13
Tighten
the
pedal
stop
and
obtain
a
pedal
height
of
207
ffim
8
15
in
for
Left
Hand
drive
models
or
182
mID
7
I7
in
for
Right
Hand
drive
models
Secure
the
stop
by
tightening
the
locknut
and
make
sure
that
the
points
illustrated
are
correctly
greased
CLlTfCH
PEDAL
Adjusting
1800cc
models
Adjust
the
pedal
height
to
175
mm
6
89
in
by
adjusting
the
pedal
stop
See
Fig
E
13
then
retighten
the
locknut
A
to
a
torque
reading
of
0
79
1
07
kgm
6
8Ib
ft
Turn
the
master
cylinder
push
rod
to
obtain
a
play
between
1
Smm
0
04
0
2
in
at
the
clevis
pin
then
tighten
the
locknut
B
to
a
torque
reading
of
0
79
1
07
kgm
6
8
Ib
ft
Ensure
when
adjusting
the
play
that
the
port
on
the
master
cylinder
is
not
blocked
too
small
a
play
at
the
clevis
pin
may
block
the
port
Bend
the
clevis
pin
over
completely
CLlTfCH
MASTER
CYLINDER
Removal
and
Dismantling
Disconnect
the
push
rod
from
the
clevis
Fig
E
14
Detach
the
fluid
line
from
the
master
cylinder
and
pump
the
fluid
into
a
suitable
container
3
Withdraw
the
retaining
bolts
and
remove
the
master
cylinder
assembly
from
the
vehicle
To
dismantle
the
master
cylinder
remove
the
filler
cap
and
drain
away
the
fluid
Pull
back
the
dust
cover
and
remove
the
snap
ring
the
stopper
push
rod
piston
assembly
and
return
spring
Oean
the
components
in
brake
fluid
and
check
them
for
wear
or
damage
Renew
the
cylinder
and
piston
if
uneven
wear
has
taken
place
the
clearance
between
the
cylinder
and
piston
must
not
exceed
0
13
mm
0
005
in
Renew
the
dust
cover
oil
reservoir
filler
cap
and
fluid
line
if
necessary
Reassembly
of
the
master
cylinder
is
a
reversal
of
the
dismantling
procedure
take
care
to
soak
the
components
in
brake
fluid
and
assemble
them
while
still
wet
When
the
master
cylinder
is
installed
in
the
vehicle
make
sure
that
the
pedal
height
is
adjusted
as
previously
described
and
bleed
the
hydraulic
system
by
following
the
procedures
given
under
the
heading
CLlTfCH
SYSTEM
Bleeding
CLlTfCH
SLAVE
CYLINDER
Removal
and
Dismantling
Remove
the
return
spring
2
Disconnect
the
fluid
line
from
the
slave
cylinder
D
3
Disconnect
the
push
rod
from
the
clutch
withdrawal
lever
4
Take
out
the
mounting
bolts
and
withdraw
the
slave
cylinder
from
the
clutch
housing
To
dismantle
the
slave
cylinder
remove
the
dust
cover
and
snap
ring
and
withdraw
the
remaining
parts
from
the
cylinder
Oean
all
components
carefully
and
check
them
for
signs
of
damage
or
wear
renew
any
part
found
to
be
defective
and
fit
a
new
piston
seal
CLUTCH
SLAVE
CYLINDER
Assembly
and
Installation
Reassembly
is
a
reversal
of
the
dismantling
procedure
Ensure
that
the
parts
are
dipped
in
brake
flu
d
before
assembling
and
that
the
piston
seal
is
correctly
installed
When
the
slave
cylinder
is
installed
in
the
vehicle
bleed
the
hydraulic
system
by
following
the
procedures
given
under
the
heading
CLlTfCH
SYSTEM
Bleeding
The
push
rod
must
be
adjusted
so
that
the
withdrawal
lever
has
an
end
play
of
2
0
2
3
mm
0
078
0
091
in
details
of
this
operation
are
given
below
CLlTfCH
WITHDRAWAL
LEVER
Adjusting
The
correct
adjustment
of
the
clutch
withdrawal
lever
is
most
essential
as
insufficient
clearance
between
the
clutch
release
bearing
and
the
diaphragm
will
cause
the
clutch
to
slip
On
the
other
hand
an
excessive
clearance
will
prevent
the
clutch
from
disengaging
correctly
The
clearance
between
the
release
bearing
and
diaphragm
or
release
levers
can
be
adjusted
in
the
following
manner
Slacken
the
locknut
Fig
E
IS
and
screw
the
push
rod
fully
home
with
the
adjusting
nut
Return
the
adjusting
nut
I
3
4
turns
to
adjust
the
play
at
the
end
of
the
clutch
withdrawal
lever
to
2
0
2
3
mm
0
078
0
091
in
This
will
give
a
clear
ance
of
approximately
1
3
mm
0
051
in
between
the
release
bearing
and
the
diaphragm
spring
or
release
levers
NOTE
When
adjusting
clutch
pedal
free
travel
at
the
withdrawal
lever
it
is
essential
to
check
that
the
clutch
driven
plate
has
not
worn
by
more
than
2mm
0
08
in
otherwise
the
clutch
will
slip
even
if
it
is
correctly
adjusted
See
Technical
Data
for
the
relevant
clutch
driven
plate
thickness
CLUTCH
SYSTEM
Bleeding
The
clutch
system
must
be
bled
after
it
has
been
dismantled
or
if
any
part
of
the
circuit
has
been
opened
This
operation
should
also
be
carried
out
if
the
fluid
level
in
the
reservoir
has
been
allowed
to
fall
and
pennit
air
to
enter
the
system
The
presence
of
air
in
the
system
may
be
noticed
by
incorrect
disengagement
of
the
clutch
but
in
any
case
if
air
is
suspected
the
clutch
must
be
bled
in
the
following
manner
Remove
the
dust
cap
from
the
slave
cylinder
bleed
screw
Connect
a
length
of
tube
to
the
bleed
screw
and
immerse
the
47
Page 51 of 171
other
end
of
the
tube
into
a
clean
container
partly
filled
with
brake
fluid
Top
up
the
master
cylinder
reservoir
with
recommended
fluid
and
open
the
bleed
screw
approximately
three
quarters
of
a
turn
Depress
the
clutch
pedal
slowly
and
hold
it
completely
down
re
tighten
the
bleed
screw
and
allow
the
pedal
to
return
slowly
Repeat
the
operation
until
the
fluid
emerging
from
the
tube
is
free
from
air
bubbles
It
should
be
noted
that
assistance
will
be
required
when
carrying
out
bleeding
operations
as
not
only
must
the
fluid
entering
the
glass
container
be
watched
but
also
the
clutch
pedal
has
to
be
operated
and
the
reservoir
topped
up
frequently
throughout
the
procedure
When
the
fluid
is
completely
free
from
air
bubbles
the
bleed
screw
should
be
retightened
on
a
down
stroke
of
the
pedal
Finally
remove
the
bleed
tube
and
replace
the
dust
cap
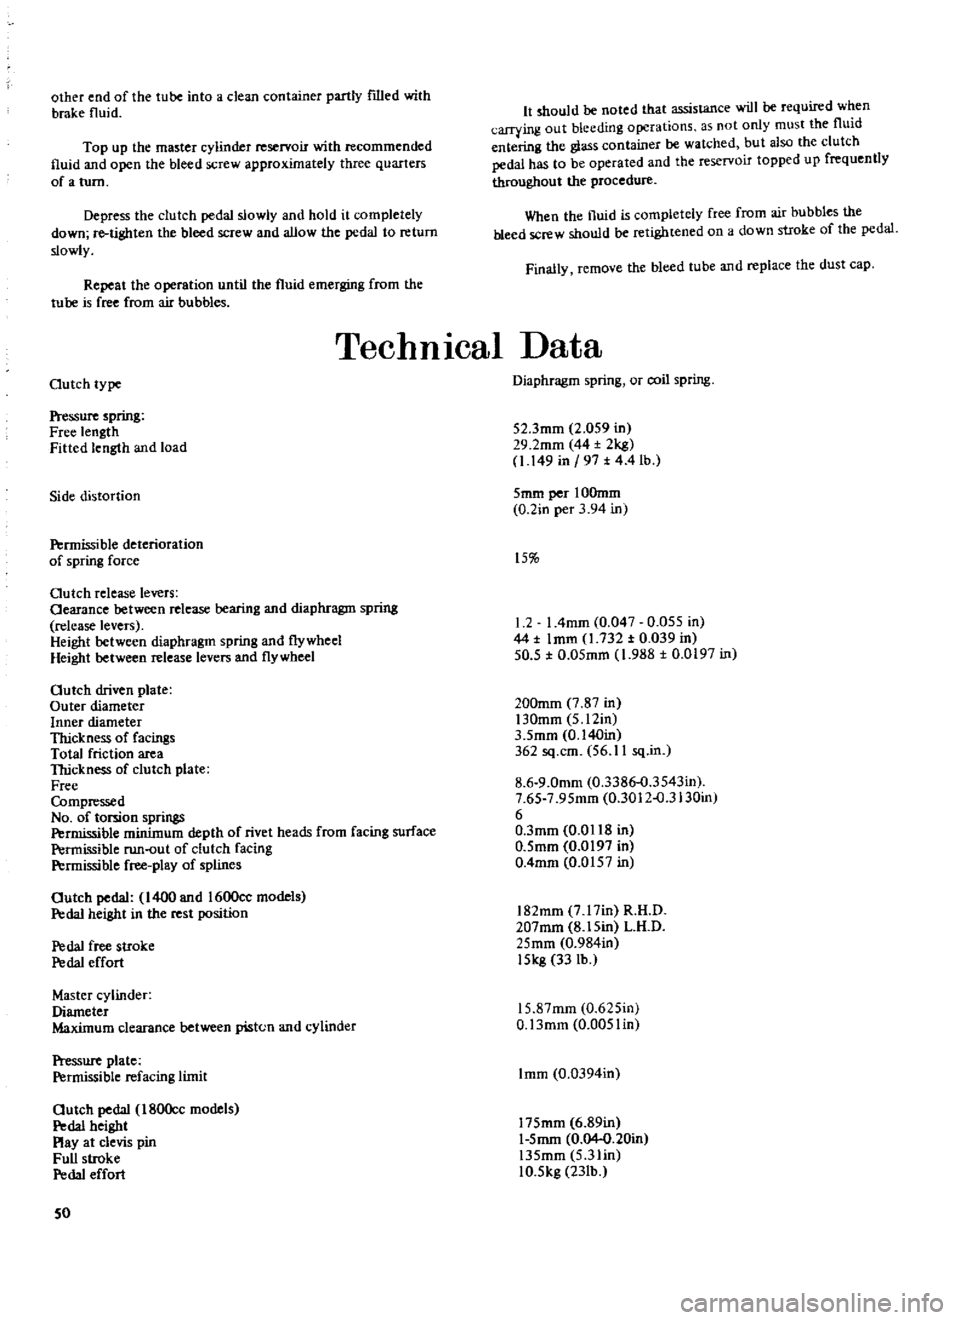
TechnIcal
Data
Outch
type
Pressure
spring
Free
length
Fitted
length
and
load
Side
distortion
Permissible
deterioration
of
spring
force
Outch
release
levers
Oearance
between
release
bearing
and
diaphragm
spring
release
levers
Height
between
diaphragm
spring
and
flywheel
Height
between
release
levers
and
flywheel
Outch
driven
plate
Outer
diameter
Inner
diameter
Thickness
of
facingS
Total
friction
area
TIrickness
of
clutch
plate
Free
Compressed
No
of
torsion
springs
Permissible
minimum
depth
of
rivet
heads
from
facing
surface
Permissible
run
out
of
clutch
facing
P
rmissible
free
play
of
splines
Outch
pedal
1400
and
1600cc
models
Pedal
height
in
the
rest
position
P
da1
free
stroke
P
da1
effort
Master
cylinder
Diameter
Maximum
clearance
between
piston
and
cylinder
Pressure
plate
Permissible
refacing
limit
Outch
pedal
180Occ
models
P
da1
height
Play
at
clevis
pin
Full
stroke
P
da1
effort
50
Diaphragm
spring
or
coil
spring
52
3mm
2
059
in
29
2mm
44
2kg
1
149
in
197
t
4
4
lb
5mm
per
IOOmm
0
2in
per
3
94
in
15
1
2
I
4mm
0
047
0
055
in
44
t
Imm
1
732
t
0
039
in
50
5
t
0
05mm
1
988
t
0
0197
in
200mm
7
87
in
130mm
5
12in
3
5mm
0
140in
362
sq
cm
56
11
sq
in
8
6
9
0mm
0
3386
o
3543in
7
65
7
95mm
0
3012
o
3130in
6
O
3mm
0
0118
in
0
5mm
0
0197
in
0
4mm
0
0157
in
182mm
7
17in
R
H
D
207mm
8
15in
L
H
D
25mm
0
984in
15kg
33
lb
15
87mm
0
625in
O
13mm
0
005lin
Imm
0
0394in
175mm
6
89in
1
5mm
0
04
0
20in
135mm
5
3lin
10
5kg
23Ib
Page 58 of 171
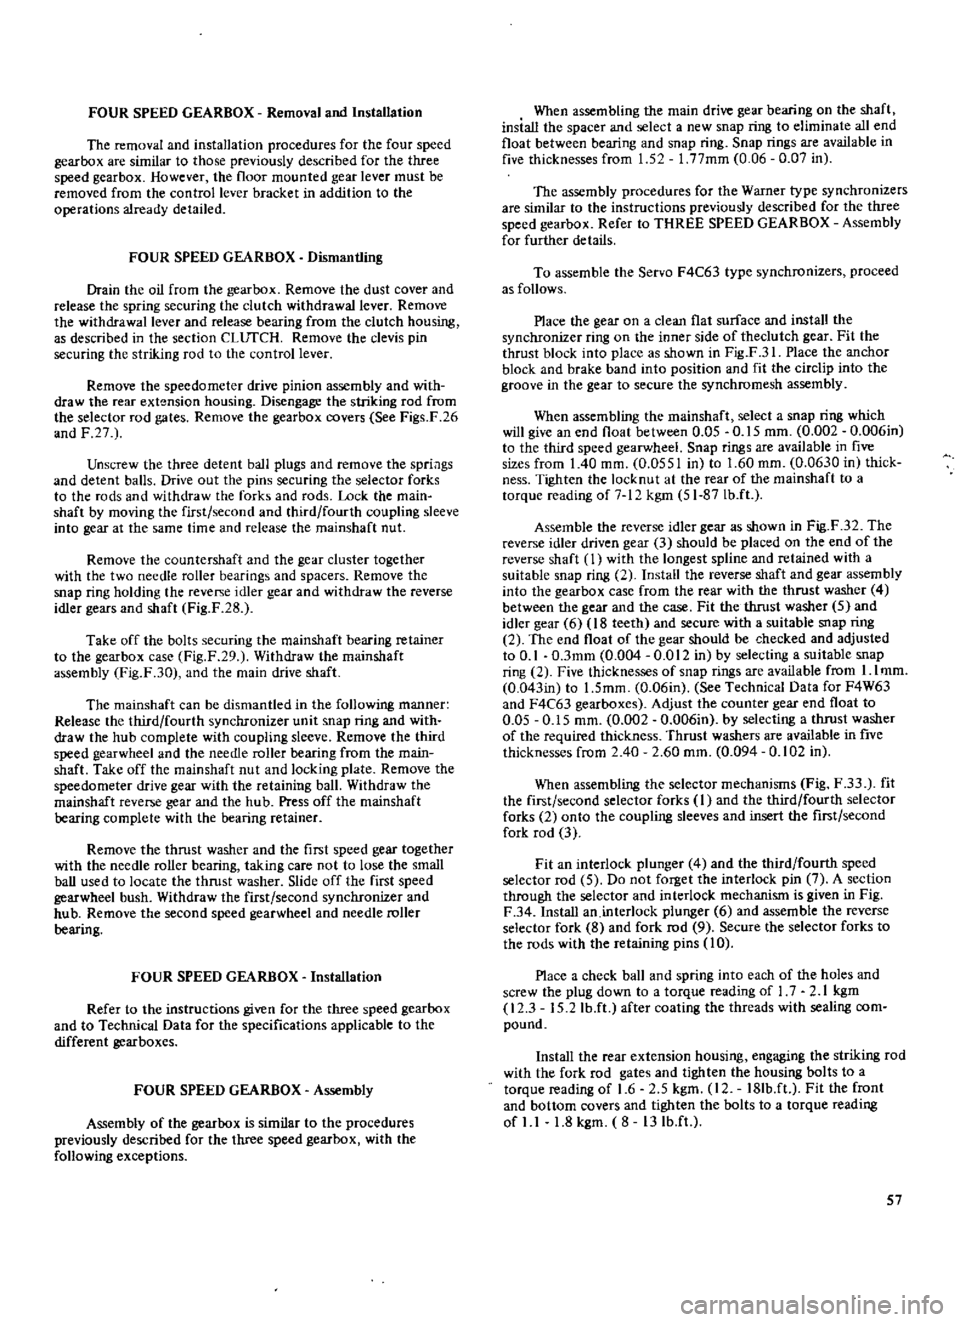
FOUR
SPEED
GEARBOX
Removal
and
Installation
The
removal
and
installation
procedures
for
the
four
speed
gearbox
are
similar
to
those
previously
described
for
the
three
speed
gearbox
However
the
floor
mounted
gear
lever
must
be
removed
from
the
controllevef
bracket
in
addition
to
the
operations
already
detailed
FOUR
SPEED
GEARBOX
Dismantling
Drain
the
oil
from
the
gearbox
Remove
the
dust
coveT
and
release
the
spring
securing
the
clutch
withdrawal
lever
Remove
the
withdrawal
lever
and
release
bearing
from
the
clutch
housing
as
described
in
the
section
CLurCH
Remove
the
clevis
pin
securing
the
striking
rod
to
the
control
lever
Remove
the
speedometer
drive
pinion
assembly
and
with
draw
the
rear
extension
housing
Disengage
the
striking
rod
from
the
selector
rod
gates
Remove
the
gearbox
covers
See
Figs
F
26
and
F
27
Unscrew
the
three
detent
ball
plugs
and
remove
the
spriags
and
detent
balls
Drive
out
the
pins
securing
the
selector
forks
to
the
rods
and
withdraw
the
forks
and
rods
Lock
the
main
shaft
by
moving
the
first
second
and
third
fourth
coupling
sleeve
into
gear
at
the
same
time
and
release
the
ffiainshaft
nut
Remove
the
countershaft
and
the
gear
cluster
together
with
the
two
needle
roller
bearings
and
spacers
Remove
the
snap
ring
holding
the
revep
e
idler
gear
and
withdraw
the
reverse
idler
gears
and
shaft
Fig
F
28
Take
off
the
bolts
securing
the
mainshaft
bearing
retainer
to
the
gearbox
case
Fig
F
29
Withdraw
the
mainshaft
assembly
Fig
F
30
and
the
main
drive
shaft
The
mainshaft
can
be
dismantled
in
the
following
manner
Release
the
third
fourth
synchronizer
unit
snap
ring
and
with
draw
the
hub
complete
with
coupling
sleeve
Remove
the
third
speed
gearwheel
and
the
needle
roller
bearing
from
the
main
shaft
Take
off
the
mainshaft
nut
and
locking
plate
Remove
the
speedometer
drive
gear
with
the
retaining
ball
Withdraw
the
mainshaft
reverse
gear
and
the
hub
Press
off
the
mainshaft
bearing
complete
with
the
bearing
retainer
Remove
the
thrust
washer
and
the
first
speed
gear
together
with
the
needle
roller
bearing
taking
care
not
to
lose
the
small
baU
used
to
locate
the
thrust
washer
Slide
off
the
first
speed
gearwheel
bush
Withdraw
the
first
second
synchronizer
and
hub
Remove
the
second
speed
gearwheel
and
needle
roller
bearing
FOUR
SPEED
GEARBOX
Installation
Refer
to
the
instructions
given
for
the
three
speed
gearbox
and
to
Technical
Data
for
the
specifications
applicable
to
the
different
gearboxes
FOUR
SPEED
GEARBOX
Assembly
Assembly
of
the
gearbox
is
similar
to
the
procedures
previously
described
for
the
three
speed
gearbox
with
the
following
exceptions
When
assembling
the
main
drive
gear
bearing
on
the
shaft
insiall
the
spacer
and
select
a
new
snap
ring
to
eliminate
all
end
float
between
bearing
and
snap
ring
Snap
rings
are
available
in
five
thicknesses
from
1
52
1
77mm
0
06
0
07
in
The
assembly
procedures
for
the
Warner
type
synchronizers
are
similar
to
the
instructions
previously
described
for
the
three
speed
gearbox
Refer
to
THREE
SPEED
GEARBOX
Assembly
for
further
details
To
assemble
the
Servo
F4C63
type
synchronizers
proceed
as
follows
Place
the
gear
on
a
clean
flat
surface
and
install
the
synchronizer
ring
on
the
inner
side
of
theclutch
gear
Fit
the
thrust
block
into
place
as
shown
in
Fig
F
31
Place
the
anchor
block
and
brake
band
into
position
and
fit
the
circlip
into
the
groove
in
the
gear
to
secure
the
synchromesh
assembly
When
assembling
the
mainshaft
select
a
snap
ring
which
will
give
an
end
float
between
0
05
0
15
mm
0
002
0
006in
to
the
third
speed
gearwheel
Snap
rings
are
available
in
five
sizes
from
1
40
mm
0
0551
in
to
1
60
mm
0
0630
in
thick
ness
Tighten
the
locknut
at
the
rear
of
the
mainshaft
to
a
torque
reading
of
7
1
kgm
51
87Ib
ft
Assemble
the
reverse
idler
gear
as
shown
in
Fig
F
32
The
reverse
idler
driven
gear
3
should
be
placed
on
the
end
of
the
reverse
shaft
1
with
the
longest
spline
and
retained
with
a
suitable
snap
ring
2
Install
the
reverse
shaft
and
gear
assembly
into
the
gearbox
case
from
the
rear
with
the
thrust
washer
4
between
the
gear
and
the
case
Fit
the
thrust
washer
5
and
idler
gear
6
18
teeth
and
secure
with
a
suitable
snap
ring
2
The
end
float
of
the
gear
should
be
checked
and
adjusted
to
0
1
O
3mm
0
004
0
012
in
by
selecting
a
suitable
snap
ring
2
Five
thicknesses
of
snap
rings
are
available
from
I
lmm
0
043in
to
1
5mm
0
06in
See
Technical
Data
for
F4W63
and
F4C63
gearboxes
Adjust
the
counter
gear
end
float
to
0
05
0
15
mm
0
002
0
006in
by
selecting
a
thrust
washer
of
the
required
thickness
Thrust
washers
are
available
in
five
thicknesses
from
2
40
2
60
mm
0
094
0
102
in
When
assembling
the
selector
mechanisms
Fig
F
33
fit
the
first
second
selector
forks
I
and
the
third
fourth
selector
forks
2
onto
the
coupling
sleeves
and
insert
the
first
second
fork
rod
3
Fit
an
interlock
plunger
4
and
the
third
fourth
speed
selector
rod
5
Do
not
forget
the
interlock
pin
7
A
section
through
the
selector
and
interlock
mechanism
is
given
in
Fig
F
34
Install
an
interlock
plunger
6
and
assemble
the
reverse
selector
fork
8
and
fork
rod
9
Secure
the
selector
forks
to
the
rods
with
the
retaining
pins
10
Place
a
check
ball
and
spring
into
each
of
the
holes
and
screw
the
plug
down
to
a
torque
reading
of
1
7
2
1
Jegm
12
3
15
2
Ib
ft
after
coating
the
threads
with
sealing
com
pound
Install
the
rear
extension
housing
engaging
the
striking
rod
with
the
fork
rod
gates
and
tighten
the
housing
bolts
to
a
torque
reading
of
1
6
2
5
kgm
12
18Ib
ft
Fit
the
front
and
bottom
covers
and
tighten
the
bolts
to
a
torque
reading
of
1
1
1
8
kgm
8
13Ib
ft
57
Page 62 of 171
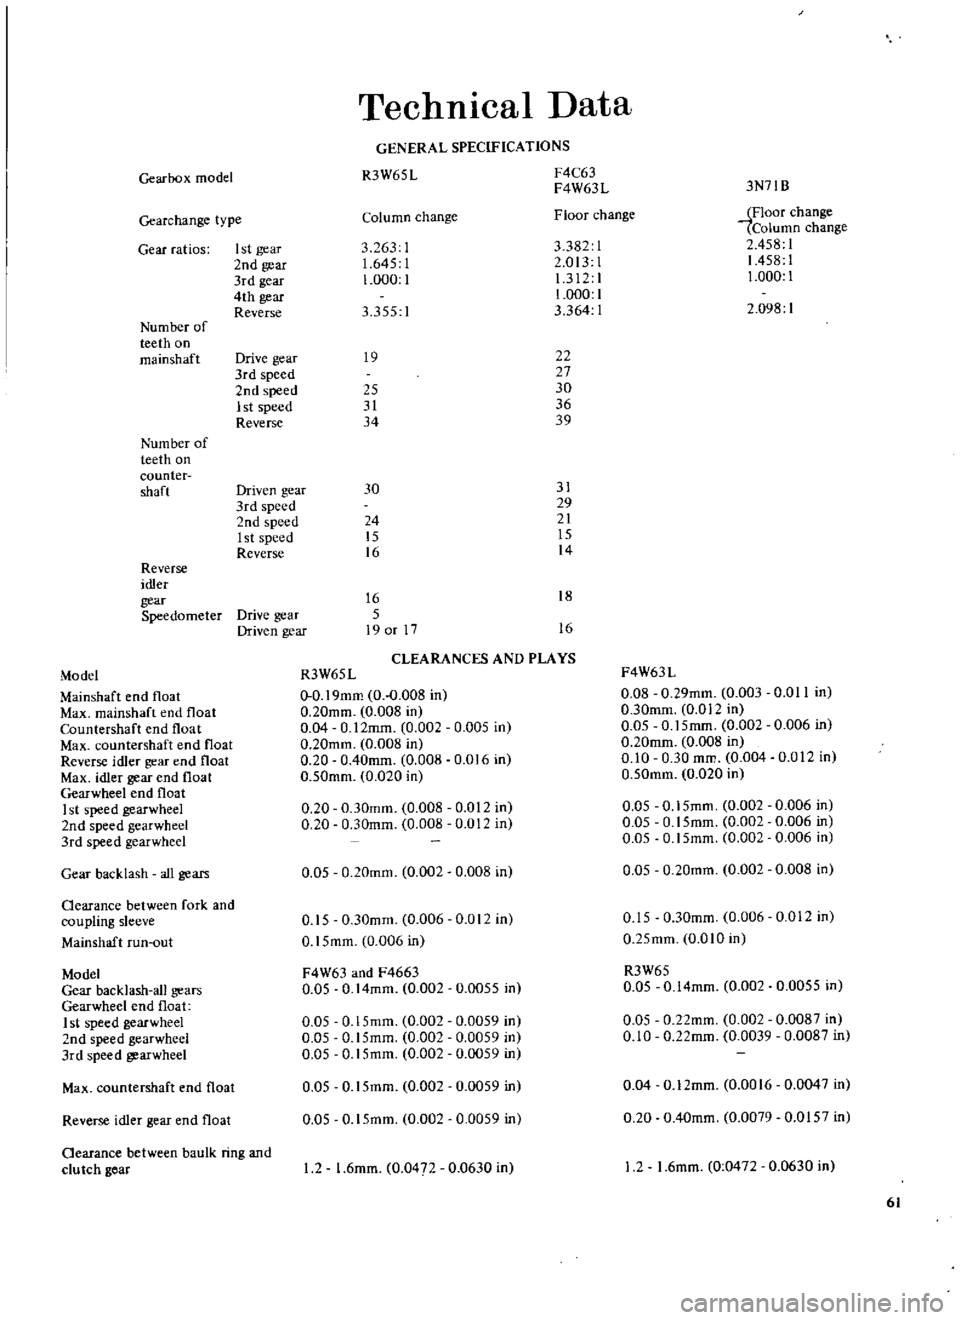
Gearbox
mode
Gearchange
type
Gear
ratios
I
st
gear
2nd
gear
3rd
gear
4th
gear
Reverse
Num
ber
of
teeth
on
mainshaft
Drive
gear
3rd
speed
2nd
speed
1st
speed
Reverse
Num
ber
of
teeth
on
counter
shaft
Driven
gear
3rd
speed
2nd
speed
1st
speed
Reverse
Reverse
idler
gear
Speedometer
Drive
gear
Driven
gear
Technical
Data
GENERAL
SPECIFICATIONS
R3W65
L
F4C63
F4W63L
Column
change
Floor
change
3
263
1
3382
1
1
645
I
2
013
1
1
000
1
1
312
1
1
000
1
3
355
I
3
364
1
19
22
27
25
30
31
36
34
39
3N71B
iFloor
change
Column
change
2
458
1
1458
1
1
000
1
2
098
1
30
31
29
24
21
15
15
16
14
16
18
5
19
or
17
16
CLEARANCES
AND
PLAYS
Model
R3W65L
F4W63L
Mainshaft
end
float
0
0
19mm
0
0
008
in
0
08
0
29mm
0
003
0
0
II
in
Max
mainshaft
end
float
0
20mm
0
008
in
0
30mm
0
012
in
Countershaft
end
float
0
04
0
12mm
0
002
0
005
in
0
05
0
15mm
0
002
0
006
in
Max
countcrshaft
end
float
0
20mm
0
008
in
0
20mm
0
008
in
Reverse
idler
gear
end
float
0
20
0
40mm
0
008
0
016
in
0
10
0
30
mm
0
004
0
012
In
Max
idler
gear
end
float
0
50mm
0
020
in
0
50mm
0
020
in
Gearwheel
end
float
I
st
speed
gearwheel
0
20
0
30mm
0
008
0
012
in
0
05
0
15mm
0
002
0
006
in
2nd
speed
gearwheel
0
20
0
30mm
0
008
0
012
in
0
05
0
15mm
0
002
0
006
in
3rd
speed
gearwheel
0
05
0
15mm
0
002
0
006
in
Gear
backlash
all
gears
0
05
0
20mm
0
002
0
008
in
0
05
0
20mm
0
002
0
008
in
Oearance
between
fork
and
coupling
sleeve
0
15
0
30mm
0
006
0
012
in
0
15
0
30mm
0
006
0
012
in
Mallshaft
run
out
0
15mm
0
006
in
0
25mm
OmO
in
Model
F4W63
and
F4663
R3W65
Gear
backlash
all
gears
0
05
0
14mm
0
002
0
0055
in
0
05
0
14mm
0
002
0
0055
in
Gearwheel
end
float
1
st
speed
gearwheel
0
05
0
15mm
0
002
0
0059
in
0
05
O
22mm
0
002
0
0087
in
2nd
speed
gearwheel
0
05
0
15mm
0
002
0
0059
in
0
10
0
22mm
0
0039
0
0087
in
3rd
speed
gearwheel
0
05
0
15mm
0
002
0
0059
in
Max
countershaft
end
float
0
05
0
15mm
0
002
0
0059
in
0
04
0
12mm
0
0016
0
0047
in
Reverse
idler
gear
end
float
0
05
0
15mm
0
002
0
0059
in
0
20
0
40mm
0
0079
0
0157
in
Oearance
between
baulk
ring
and
clu
tch
gear
I
2
1
6mm
0
047
0
0630
in
12
1
6mm
0
0472
0
0630
in
61
Page 64 of 171
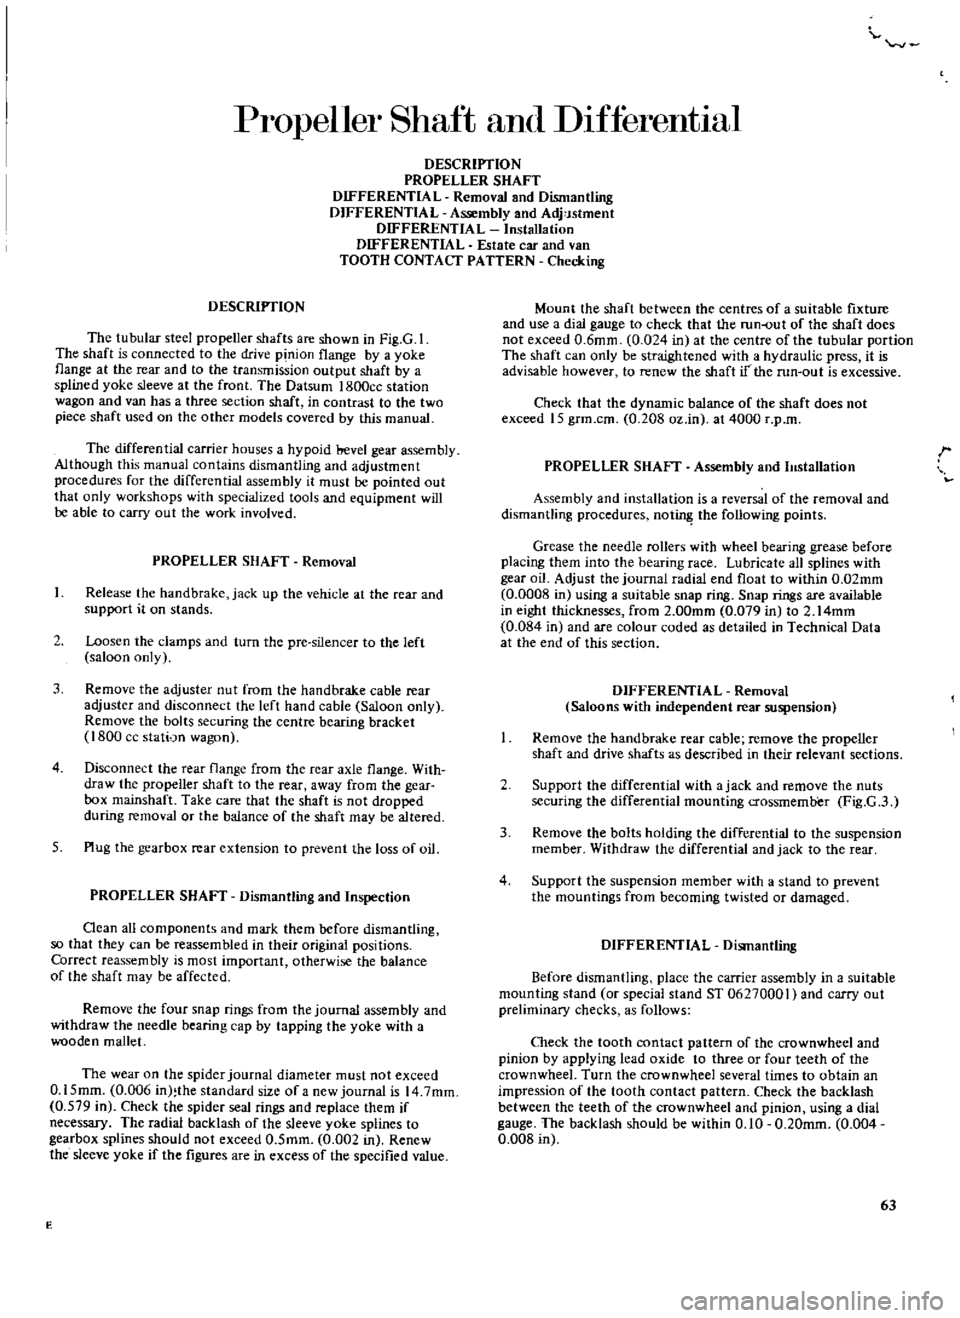
Propeller
Shaft
and
DIfferentIaJ
DESCRIPTION
PROPELLER
SHAFT
DIFFERENTIAL
Removal
and
Dismantling
DIFFERENTIAL
Assembly
and
Adj
Jstment
DIFFERENTIAL
Installation
DIFFERENTIAL
Estate
car
and
van
TOOTH
CONTACT
PATTERN
Checking
DESCRIPTION
The
tubular
steel
propeller
shafts
are
shown
in
Fig
G
1
The
shaft
is
connected
to
the
drive
pinion
flange
by
a
yoke
flange
at
the
rear
and
to
the
transmission
output
shaft
by
a
splined
yoke
sleeve
at
the
front
The
Datsum
I800ce
station
wagon
and
van
has
a
three
section
shaft
in
contrast
to
the
two
piece
shaft
used
on
the
other
models
covered
by
this
manual
The
differential
carrier
houses
a
hypoid
bevel
gear
assembly
Although
this
manual
contains
dismantling
and
adjustment
procedures
for
the
differential
assembly
it
must
be
pointed
out
that
only
workshops
with
specialized
tools
and
equipment
will
be
able
to
carry
out
the
work
involved
PROPELLER
SHAFT
Removal
1
Release
the
hand
brake
jack
up
the
vehicle
at
the
fear
and
support
it
on
stands
2
Loosen
the
clamps
and
turn
the
pre
silencer
to
the
left
saloon
only
3
Remove
the
adjuster
nut
from
the
handbrake
cable
rear
adjuster
and
disconnect
the
left
hand
cable
Saloon
only
Remove
the
bolts
securing
the
centre
bearing
bracket
1800
cc
stati
n
wagon
4
Disconnect
the
fear
flange
from
the
rear
axle
flange
With
draw
the
propeller
shaft
to
the
rear
away
from
the
gear
box
mainshaft
Take
care
that
the
shaft
is
not
dropped
during
removal
or
the
balance
of
the
shaft
may
be
altered
5
Plug
the
gearbox
rear
extension
to
prevent
the
loss
of
oil
PROPELLER
SHAFT
Dismantling
and
Inspection
Oean
all
components
and
mark
them
before
dismantling
so
that
they
can
be
reassembled
in
their
original
positions
Correct
reassembly
is
most
important
otherwise
the
balance
of
the
shaft
may
be
affected
Remove
the
four
snap
rings
from
the
journal
assembly
and
withdraw
the
needle
bearing
cap
by
tapping
the
yoke
with
a
wooden
mallet
The
wear
on
the
spider
journal
diameter
must
not
exceed
0
15mm
0
006
in
the
standard
size
of
a
new
journal
is
14
7mm
0
579
in
Check
the
spider
seal
rings
and
replace
them
if
necessary
The
radial
backlash
of
the
sleeve
yoke
splines
to
gearbox
splines
should
not
exceed
0
5mm
0
002
in
Renew
the
sleeve
yoke
if
the
figures
are
in
excess
of
the
specified
value
E
Mount
the
shaft
between
the
centres
of
a
suitable
fixture
and
use
a
dial
gauge
to
check
that
the
run
out
of
the
shaft
does
not
exceed
0
6mm
0
024
in
at
the
centre
of
the
tubular
portion
The
shaft
can
only
be
straightened
with
a
hydraulic
press
it
is
advisable
however
to
renew
the
shaft
if
the
run
out
is
excessive
Check
that
the
dynamic
balance
of
the
shaft
does
not
exceed
15
grm
cm
0
208
oz
in
at
4000
r
p
m
PROPELLER
SHAFT
Assembly
and
11Istallation
r
Assembly
and
installation
is
a
reversal
of
the
removal
and
dismantling
procedures
not
the
following
points
Grease
the
needle
rollers
with
wheel
bearing
grease
before
placing
them
into
the
bearing
race
Lubricate
all
splines
with
gear
oil
Adjust
the
journal
radial
end
float
to
within
0
02mm
0
0008
in
using
a
suitable
snap
ring
Snap
rings
are
available
in
eight
thicknesses
from
2
00mm
0
079
in
to
2
14mm
0
084
in
and
are
colour
coded
as
detailed
in
Technical
Data
at
the
end
of
this
section
DIFFERENTIAL
Removal
Saloons
with
independent
rear
suspension
Remove
the
hand
brake
rear
cable
remove
the
propeller
shaft
and
drive
shafts
as
described
in
their
relevant
sections
2
Support
the
differential
with
ajack
and
remove
the
nuts
securing
the
differential
mounting
crossmemb
er
Fig
G
3
3
Remove
the
bolts
holding
the
differential
to
the
suspension
member
Withdraw
the
differential
and
jack
to
the
rear
4
Support
the
suspension
member
with
a
stand
to
prevent
the
mountings
from
becoming
twisted
or
damaged
DIFFERENTIAL
Dismantling
Before
dismantling
place
the
carrier
assembly
in
a
suitable
mounting
stand
or
special
stand
ST
06270001
and
carry
out
preliminary
checks
as
follows
Check
the
tooth
contact
pattern
of
the
crownwheel
and
pinion
by
applying
lead
oxide
to
three
or
four
teeth
of
the
crownwheel
Turn
the
crownwheel
several
times
to
obtain
an
impression
of
the
tooth
contact
pattern
Check
the
backlash
between
the
teeth
of
the
crownwheel
and
pinion
using
a
dial
gauge
The
backlash
should
be
within
0
10
0
20mm
0
004
0
008
in
63
Page 66 of 171
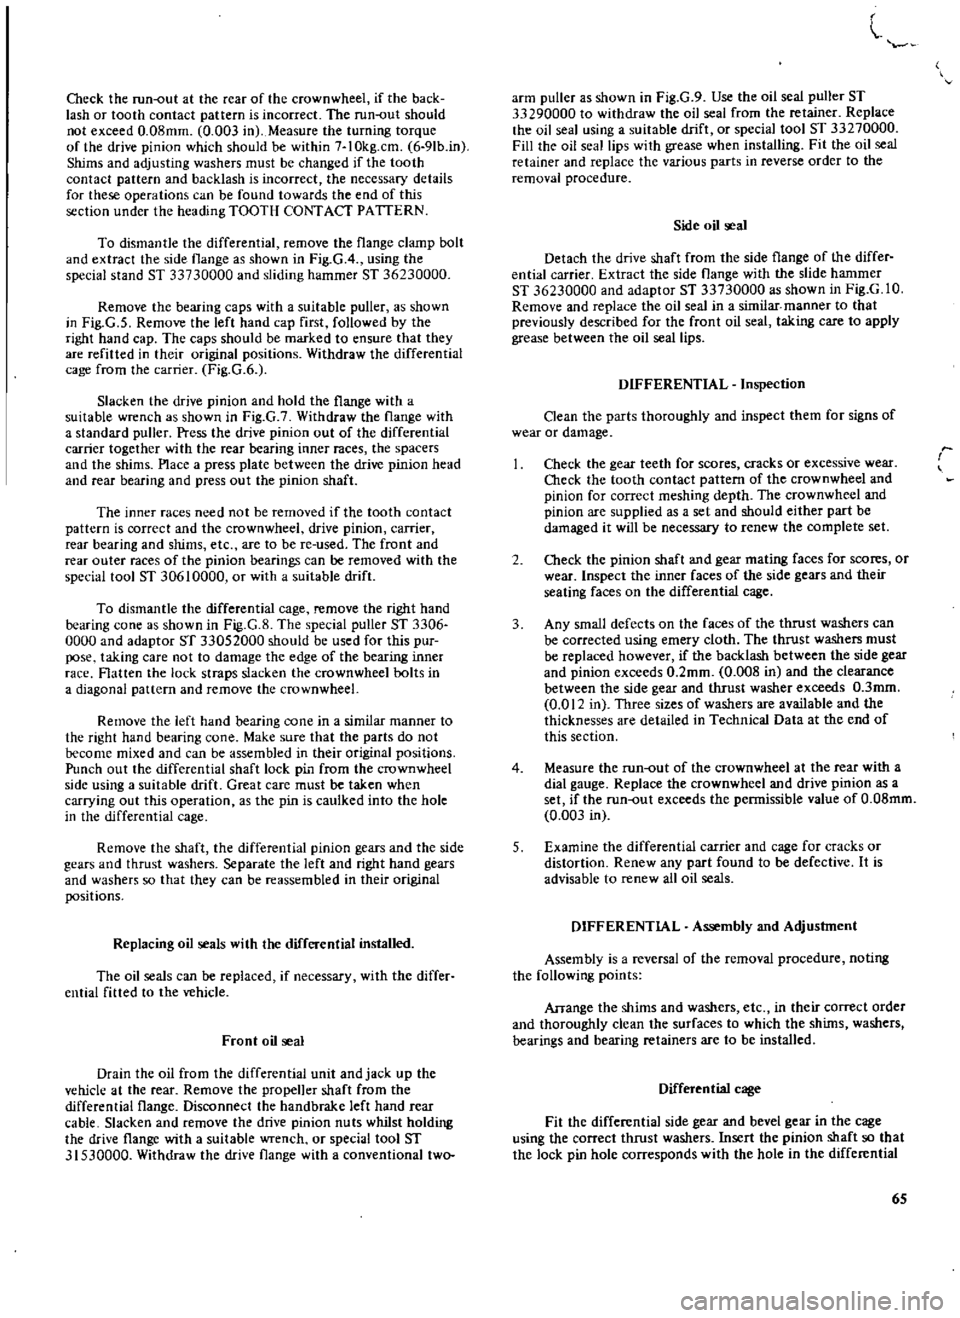
Check
the
run
out
at
the
ceac
of
the
crownwheel
if
the
back
lash
or
tooth
contact
pattern
is
incorrect
The
run
out
should
not
exceed
0
08mm
0
003
in
Measure
the
turning
torque
of
the
drive
pinion
which
should
be
within
7
IOkg
cm
6
9Ib
in
Shims
and
adjusting
washers
must
be
changed
if
the
tooth
contact
pattern
and
backlash
is
incorrect
the
necessary
details
for
these
operations
can
be
found
towacds
the
end
of
this
section
under
the
heading
TOOTH
CONTACT
PATTERN
To
dismantle
the
differential
remove
the
flange
clamp
bolt
and
extract
the
side
flange
as
shown
in
Fig
GA
using
the
special
stand
ST
33730000
and
sliding
hammec
ST
36230000
Remove
the
bearing
caps
with
a
suitable
puller
as
shown
in
Fig
G
5
Remove
the
left
hand
cap
first
followed
by
the
right
hand
cap
The
caps
should
be
marked
to
ensure
that
they
are
refitted
in
their
original
positions
Withdraw
the
differential
cage
from
the
carrier
Fig
G
6
Slacken
the
drive
pinion
and
hold
the
flange
with
a
suitable
wrench
as
shown
in
Fig
G
7
Withdraw
the
flange
with
a
standard
puller
Press
the
drive
pinion
out
of
the
differential
carrier
together
with
the
rear
bearing
inner
races
the
spacers
and
the
shims
Place
a
press
plate
between
the
drive
pinion
head
and
rear
bearing
and
press
out
the
pinion
shaft
The
inner
races
need
not
be
removed
if
the
tooth
contact
pattern
is
correct
and
the
crownwheel
drive
pinion
carrier
rear
bearing
and
shims
etc
are
to
be
re
used
The
front
and
rear
outer
races
of
the
pinion
bearings
can
be
removed
with
the
special
tool
ST
30610000
or
with
a
suitable
drift
To
dismantle
the
differential
cage
remove
the
right
hand
bearing
cone
as
shown
in
Fig
G
8
The
special
puller
ST
3306
0000
and
adaptor
ST
33052000
should
be
used
for
this
pur
pose
taking
care
not
to
damage
the
edge
of
the
bearing
innec
race
Flatten
the
lock
straps
slacken
the
crownwheel
bolts
in
a
diagonal
pattern
and
remove
the
crownwheeL
Remove
the
left
hand
bearing
cone
in
a
similar
manner
to
the
right
hand
bearing
cone
Make
sure
that
the
parts
do
not
become
mixed
and
can
be
assembled
in
their
original
positions
Punch
out
the
differential
shaft
lock
pin
from
the
crownwheel
side
using
a
suitable
drift
Great
care
must
be
taken
when
carrying
out
this
operation
as
the
pin
is
caulked
into
the
hole
in
the
differential
cage
Remove
the
shaft
the
differential
pinion
gears
and
the
side
gears
and
thrust
washers
Separate
the
left
and
right
hand
gears
and
washers
so
that
they
can
be
reassembled
in
their
original
positions
Replacing
oil
seals
with
the
differential
installed
The
oil
seals
can
be
replaced
if
necessary
with
the
differ
ential
fitted
to
the
vehicle
Front
oil
seal
Drain
the
oil
from
the
differential
unit
and
jack
up
the
vehicle
at
the
rear
Remove
the
propeller
shaft
from
the
differential
flange
Disconnect
the
handbrake
left
hand
rear
cable
Slacken
and
remove
the
drive
pinion
nuts
whilst
holding
the
drive
flange
with
a
suitable
wrench
or
special
tool
ST
31530000
Withdraw
the
drive
flange
with
a
conventional
two
l
arm
puller
as
shown
in
Fig
G
9
Use
the
oil
seal
puller
ST
33290000
to
withdraw
the
oil
seal
from
the
retainer
Replace
the
oil
seal
using
a
suitable
drift
or
special
tool
ST
33270000
Fill
the
oil
seal
lips
with
grease
when
installing
Fit
the
oil
seal
retainer
and
replace
the
various
parts
in
reverse
order
to
the
removal
procedure
Side
oil
seal
Detach
the
drive
shaft
from
the
side
flange
of
the
differ
ential
carrier
Extract
the
side
flange
with
the
slide
hammer
ST
36230000
and
adaptor
ST
33730000
as
shown
in
Fig
G
lO
Remove
and
replace
the
oil
seal
in
a
similar
manner
to
that
previously
described
for
the
front
oil
seal
taking
care
to
apply
grease
between
the
oil
seal
lips
DIFFERENTIAL
Inspection
Clean
the
parts
thoroughly
and
inspect
them
for
signs
of
wear
or
damage
Check
the
gear
teeth
for
scores
cracks
or
excessive
wear
Check
the
tooth
contact
pattern
of
the
crownwheel
and
pinion
for
correct
meshing
depth
The
crownwheel
and
pinion
are
supplied
as
a
set
and
should
either
part
be
damaged
it
will
be
necessary
to
renew
the
complete
set
2
Check
the
pinion
shaft
and
gear
mating
faces
for
scores
or
wear
Inspect
the
inner
faces
of
the
side
gears
and
their
seating
faces
on
the
differential
cage
3
Any
small
defects
on
the
faces
of
the
thrust
washers
can
be
corrected
using
emery
cloth
The
thrust
washers
must
be
replaced
however
if
the
backlash
between
the
side
gear
and
pinion
exceeds
0
2mm
0
008
in
and
the
clearance
between
the
side
gear
and
thrust
washer
exceeds
O
3mm
0
012
in
Three
sizes
of
washers
are
available
and
the
thicknesses
are
detailed
in
Technical
Data
at
the
end
of
this
section
4
Measure
the
run
out
of
the
crownwheel
at
the
rear
with
a
dial
gauge
Replace
the
crownwheel
and
drive
pinion
as
a
set
if
the
run
out
exceeds
the
permissible
value
of
O
08mm
0
003
in
5
Examine
the
differential
carrier
and
cage
for
cracks
or
distortion
Renew
any
part
found
to
be
defective
It
is
advisable
to
renew
all
oil
seals
DIFFERENTIAL
Assembly
and
Adjustment
Assembly
is
a
reversal
of
the
removal
procedure
noting
the
following
points
Arrange
the
shims
and
washers
etc
in
their
correct
order
and
thoroughly
clean
the
surfaces
to
which
the
shims
washers
bearings
and
bearing
retainecs
are
to
be
installed
Differential
cage
Fit
the
differential
side
gear
and
bevel
gear
in
the
cage
using
the
correct
thrust
washers
Insert
the
pinion
shaft
so
that
the
lock
pin
hole
corresponds
with
the
hole
in
the
differential
65
Page 70 of 171
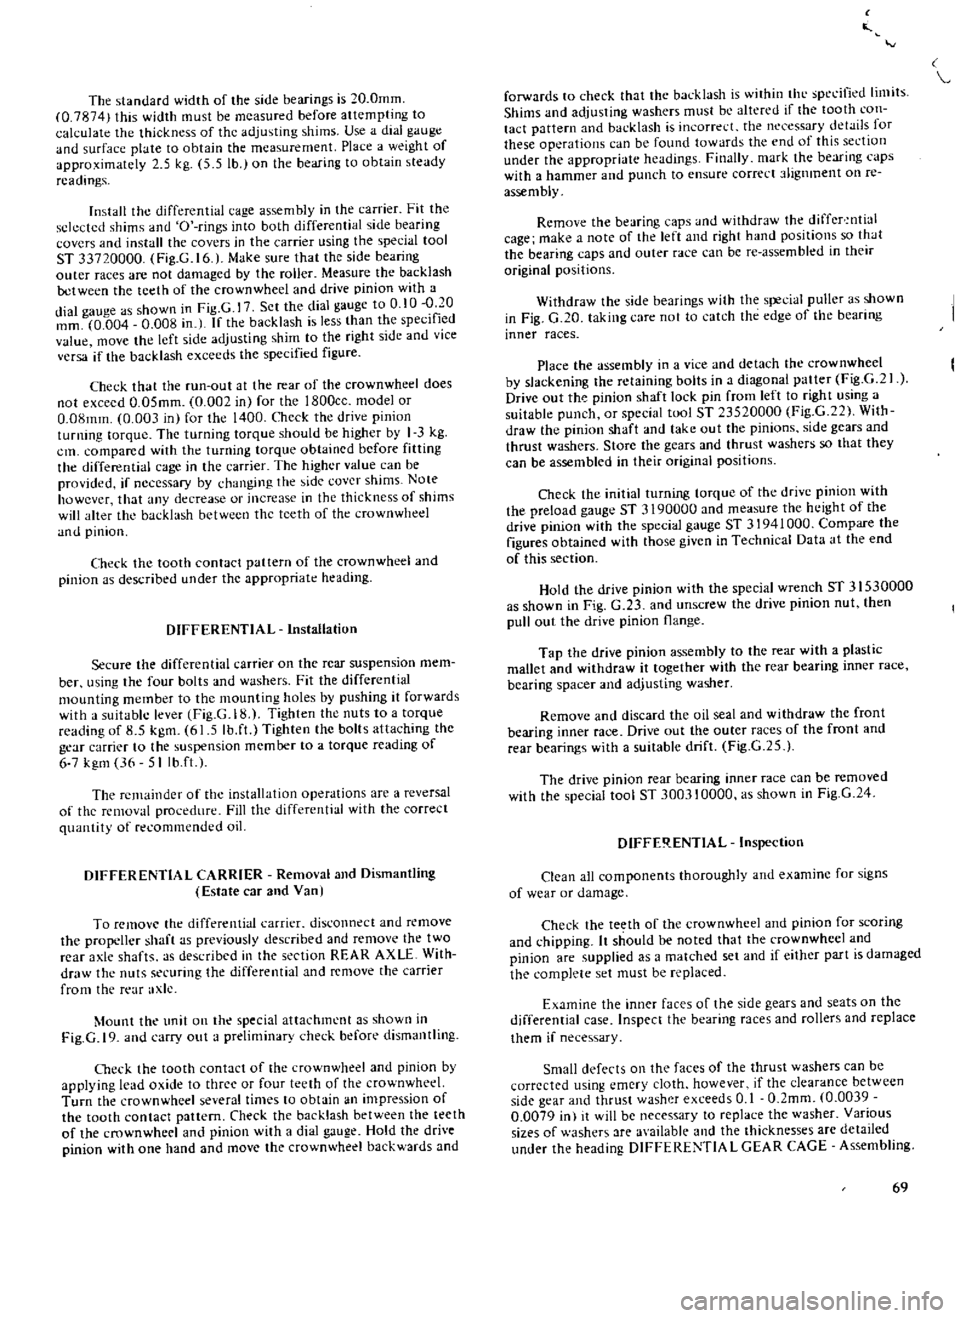
The
standard
width
of
the
side
bearings
is
20
0mm
0
7874
this
width
must
be
measured
before
attempting
to
calculate
the
thickness
of
the
adjusting
shims
Use
a
dial
gauge
and
surface
plate
to
ohtain
the
measurement
Place
a
weight
of
approximately
2
5
kg
5
5
lb
on
the
bearing
to
obtain
steady
readings
Install
the
differential
cage
assembly
in
the
carrier
Fit
the
sckcted
shims
and
O
rings
into
both
differential
side
bearing
covers
and
install
the
covers
in
the
carrier
using
the
special
tool
ST
33720000
Fig
G
16
l
Make
sure
that
the
side
bearing
outer
races
are
not
damaged
by
the
roller
Measure
the
backlash
between
the
teeth
of
the
crown
wheel
and
drive
pinion
with
a
dial
gauge
as
shown
in
Fig
G
I
Sct
the
dial
gauge
to
0
10
f
O
mm
0
004
0
008
in
I
If
the
backlash
is
less
than
the
specifIed
value
move
he
left
side
adjusting
shim
to
the
right
side
and
vice
versa
if
the
backlash
exceeds
the
specified
figure
Check
that
the
run
out
at
the
rear
of
the
crownwheel
does
not
excecd
O
OSmm
0
002
in
for
the
1800ce
model
or
O
08mm
0
003
in
for
the
1400
Check
the
drive
pinion
turning
torque
Thc
turning
torque
should
be
higher
by
I
3
kg
em
compared
with
the
turning
torque
obtained
before
fitting
the
differential
cage
in
the
carrier
The
higher
value
can
be
provided
if
necessary
by
dmnging
the
jde
cover
shims
Note
howcver
that
any
decrease
or
increase
in
the
thickncss
of
shims
wjJl
alter
tht
budlush
between
the
teeth
of
the
crownwhee1
and
pinion
Check
the
tooth
contact
pat
tern
of
the
crown
wheel
and
pinion
as
described
under
the
appropriate
heading
DIFFERENTIAL
Installation
Secure
the
differential
carrier
on
the
rear
suspension
mem
ber
using
the
four
bolts
and
washers
Fit
the
differential
mounting
member
to
thc
mounting
holes
by
pushing
it
forwards
with
a
suitable
lever
Fig
G
18
Tighten
the
nuts
to
a
torque
reading
of
8
5
kgm
61
5
Ib
ft
Tighten
the
bolts
attaching
the
gear
carrier
to
the
suspension
member
to
a
torque
reading
of
6
7
kg
36
5Ilb
ft
t
The
rcmainder
of
the
installation
operations
are
a
reversal
of
thc
removal
procedure
Fill
the
differential
with
the
correct
quantity
of
recommended
oil
DIFFERENTIAL
CARRIER
Removal
and
Dismantling
Estate
car
alld
Vanl
To
remove
the
differential
carrier
disconnect
and
remove
rhe
propeller
shaft
as
previously
described
and
remove
the
two
rear
axle
shafts
as
described
in
the
section
REAR
AXLL
With
draw
the
nuts
securing
the
differential
and
remove
the
carrier
from
the
rear
axle
Mount
the
unit
on
the
special
attachment
as
shown
in
Fig
G
19
and
carry
out
a
preliminary
check
before
dismantling
Oleck
the
tooth
contact
of
the
crownwheel
and
pinion
by
applying
lead
oxide
to
three
or
four
teeth
of
the
crownwheel
Turn
the
crown
wheel
several
times
to
obtain
an
impression
of
the
tooth
contact
pattern
Check
the
backlash
between
the
teeth
of
the
crownwheel
and
pinion
with
a
dial
gauge
Hold
the
drive
pinion
with
one
hand
and
move
the
crown
wheel
backwards
and
forwards
to
check
that
the
backlash
is
Io
ithin
thL
speL
ified
limits
Shims
and
adjusting
washers
must
bL
altered
if
the
tooth
con
tact
pattern
and
backlash
is
incorre
L
the
neL
cssary
details
for
these
operations
can
be
found
towards
the
end
of
this
section
under
the
appropriate
he
Jdjn
s
Fil1JJly
mark
the
bearing
caps
with
a
hammer
and
punch
to
ensure
correct
t1ignment
on
re
assembly
Remove
the
bearing
caps
nd
withdraw
the
differ
ntial
cage
make
a
note
of
the
left
and
right
hand
positions
so
h
Jt
the
bearing
caps
and
outer
race
can
be
re
assembled
in
their
original
positions
Withdraw
the
side
beJrings
with
the
s
cjal
puller
as
shown
in
Fig
G
20
taking
care
not
to
catch
the
edge
of
the
bearing
inner
races
Place
the
assembly
in
a
vice
and
detach
the
crownwheel
by
slackening
the
retaining
bolts
in
a
diagonal
patter
Fig
G
lf
Drive
out
th
pinion
shaft
lock
pin
from
left
to
right
using
a
suitable
punch
or
special
tool
ST
23520000
Fig
C
22
With
draw
the
pinion
shaft
and
take
out
the
pinions
side
gears
and
thrust
washers
Store
the
gears
and
thrust
washers
so
that
they
can
be
assembled
in
their
original
positions
Check
the
initial
turning
torque
of
the
drive
pinion
with
the
preload
gauge
ST
3190000
and
measure
the
height
of
the
drive
pinion
with
the
special
gauge
ST
31941000
Compare
the
figures
obtained
with
those
givcn
in
Technical
Data
at
the
end
of
this
section
Hold
the
drive
pinion
with
the
speciaJ
wrench
ST
3
J
530000
as
shown
in
Fig
C
23
and
unscrew
the
drivc
pinion
nut
then
pull
out
the
drive
pjnion
flange
Tap
the
drive
pinion
assembly
to
the
rear
with
a
plastic
mallet
and
withdraw
it
together
with
the
rear
bearing
inner
race
bearing
spacer
and
adjusting
washer
Remove
and
discard
the
oil
seal
and
withdraw
thc
front
bearing
inner
race
Drive
out
the
outer
races
of
the
front
and
rear
bearings
with
a
suitable
drift
Fig
G
25
The
drive
pinion
rear
bearing
inncr
race
can
be
removed
with
the
special
tool
ST
300310000
as
shown
in
Fig
G
24
DIFFE
l
ENTlAL
Inspection
Clean
all
components
thoroughly
and
examine
for
signs
of
wear
or
damage
Check
the
teeth
of
the
crownwhcel
and
pinion
for
scoring
and
hipping
Ii
should
be
noted
that
the
crownwhecl
and
pinion
are
supplied
as
a
matched
set
and
if
either
part
is
damaged
the
complete
set
must
be
replaced
Examine
the
inner
faces
of
the
side
gears
and
seats
on
the
differential
case
Inspect
the
bearing
races
and
rollers
and
replace
them
if
necessary
Small
defects
on
the
faces
of
the
thrust
washers
can
be
corrected
using
emery
cloth
however
if
the
clearance
between
side
gear
and
thrust
washer
exceeds
0
1
O
2mm
0
0039
0
0079
in
it
ill
be
necessary
to
replace
the
washer
Various
sizes
of
washers
are
available
and
the
thicknesses
arc
detailed
under
the
heading
DIFFERENTIA
L
GEAR
CAGE
Assembling
69
Page 71 of 171
Check
the
run
out
of
the
crownwheel
as
shown
in
Fig
G
15
Position
the
dial
gauge
to
the
rear
of
the
crownwheel
and
check
that
the
run
out
does
not
ceed
0
0
mm
0
0020
10
I
It
the
run
out
limit
is
exceeded
replace
the
crownwheel
and
pinion
as
a
t
Inspect
the
differenti
l
L
arrier
nd
case
for
cracks
or
distortion
and
replace
them
if
necessary
DIFFERENTIAL
GEAR
CAGE
Assembli
g
V
Install
the
differential
side
geaI
5
pinions
and
original
thrust
washers
into
the
cage
and
check
the
clearance
between
side
gears
and
thrust
washers
The
clearance
must
be
adjusted
to
within
0
05
0
20
mm
0
002
0
008
in
for
the
1400
and
1600
cc
models
and
to
within
0
10
0
20
mIT
0
004
0
008
in
for
the
1800
cc
models
Correction
can
be
made
if
necessary
by
replacing
the
thrust
washers
which
are
available
in
the
following
sizes
t
SIDE
GEAR
THRUST
WASHERS
f
1400
and
1600
cc
Estate
car
0
78
0
83
0
88
1
03
1
23
mm
0
0030
0
0327
0
0346
0
0406
0
0484
in
l800cc
Estate
car
0
785
0
835
0
885
1
035
I
185
mm
0
0309
0
0329
0
0348
0
0408
0
0467
in
1800
cc
Van
0
75
0
80
mm
0
80
0
85
mm
0
85
0
90
mm
0
90
0
95
mm
0
0295
0
0315
in
0
0315
0
0335
in
0
0335
in
0
0354
in
0
0354
0
0374
in
Drive
in
the
differential
pinion
lock
pin
from
the
right
hand
side
of
the
case
and
peen
the
rim
of
the
hole
to
prevent
the
pin
from
working
loose
Fit
the
crownwheel
to
the
differential
cage
and
install
the
bolts
and
new
lock
plates
Tap
the
head
of
each
bolt
lightly
and
tighten
the
bolts
in
a
diagonal
pattern
to
the
specified
torque
readings
Press
in
the
side
bearing
inner
race
with
a
suitable
drift
The
crown
wheel
adjusting
shims
must
be
placed
behind
the
bearings
to
obtain
the
correct
pre
load
Press
the
drive
pinion
rear
bearing
outer
race
and
front
bearing
outer
race
into
the
carrier
The
shim
at
the
rear
of
the
outer
race
must
be
increased
or
decreased
to
adjust
the
pinion
height
as
described
below
Adjusting
the
drive
pinion
The
pinion
height
or
distance
from
the
face
of
the
pinion
to
the
axis
of
the
crownwheel
is
adjusted
by
altering
the
thick
ness
of
the
adjusting
shim
between
the
drive
pinion
gear
and
the
rear
bearing
cone
The
drive
pinion
ha
a
tolerance
mark
etched
on
its
face
as
shown
in
Fig
G
26
This
tolerance
is
accompanied
by
a
or
sign
to
show
the
deviation
from
the
nominal
dimension
of
86mm
0
386
in
see
Fig
C
n
The
plus
sign
indicates
that
the
nominal
dimension
must
be
increased
by
the
figure
on
the
pinion
and
the
minus
sign
that
it
must
b
decreased
To
determine
the
thickness
of
the
drive
pinion
shim
press
the
front
and
rear
bearing
outer
races
into
the
carrier
fit
the
70
rear
be
ring
and
dummy
shafr
and
place
the
Ippropriatt
ettil1g
gauge
on
the
carrier
See
Fig
C
2S
l
The
fOllowing
setting
gaUges
and
dUlllmy
shaft
houlJ
bt
llsed
for
th
various
modds
I
OO
and
1600
Estate
c
r
Setting
g
3uge
ST
1941000
Dummy
shaftST
31942000
ISOOce
Estate
car
Setting
gauge
ST
31141000
Dummy
shaftST
1941000
1800cc
V
n
Setting
gauge
5T
3
I
Y41
000
Dummy
sh
ftST
31941000
Measure
the
clearance
N
Fig
C
l8
berween
the
tip
of
the
setting
gauge
and
the
face
of
the
dummy
shaft
with
a
feeler
gauge
Determine
the
thickness
of
shim
required
using
the
following
formula
T
N
H
D
S
x
0
01
0
28
station
wagon
T
N
H
D
S
x
0
01
2
18
Van
Whe
rc
T
The
required
thickness
of
adjusting
shim
mrn
N
The
measured
clearance
mm
H
The
plus
or
minus
figure
on
the
pinion
head
D
The
figure
on
the
dummy
shaft
S
The
figure
on
the
setting
gauge
As
an
example
for
the
Estate
car
N
0
30mm
H
1
D
I
S
O
T
0
30
2
1
0
x
0
01
0
28
0
59
mm
Shims
are
available
in
thicknesses
of
0
050
0
070
0
10
0
20
and
0
50
mID
0
0019
0
0027
0
0039
0
0078
and
0
0196
in
for
the
Estate
cars
and
in
thicknesses
of
2
37
2
97mm
0
0933
0
1169
in
for
the
1800cc
Van
Take
off
the
drive
pinion
and
the
rear
bearing
outer
race
and
adjust
the
position
of
the
drive
pinion
by
installing
shims
of
selected
thicknesses
Fit
the
drive
pinion
and
bearing
spacer
in
the
pinion
housing
and
tighten
the
drive
pinion
nut
to
a
torque
reading
of
14
17
kgm
101
130
Ib
fl
for
the
Estate
cars
or
13
20
kgm
94
145Ib
ft
for
the
1800
cc
Van
Adjusting
the
drive
pinion
preload
The
drive
pinion
preload
on
Estate
car
models
is
adjusted
by
meam
of
the
adjusting
spacer
and
the
shims
between
the
spacer
and
the
front
bearing
inner
race
On
the
1800
cc
van
a
collapsible
pacer
is
u
sed
to
adjust
the
preload
Estate
car
O1eck
the
preload
by
attaching
a
preload
gauge
to
the
pinion
flange
and
adjust
by
selecting
spacers
and
shims
from
the
sizes
given
in
Technical
Data
The
initial
turning
torque
without
the
oil
seal
and
with
the
drive
pinion
nut
tightened
to
a
torque
reading
of
14
17
kgm
101
130
Ib
ft
should
be
10
13
kg
m
138
9
180
5
in
oz
for
new
bearings
If
used
bearings
are
fiued
the
initial
torque
must
be
reduced
by
20
to
40
Cneck
the
pinion
height
as
previously
described
and
re
adjust
if
necessary
Remove
the
pinion
nut
and
nange
Press
the
new
oil
seal
into
the
carrier
ensuring
that
the
lips
of
the
seal
are
thoroughly
Page 72 of 171
greased
Install
the
flange
washer
and
pinion
nut
Tighten
the
nut
to
a
torque
reading
of
14
17
kgm
101
130
Ib
fL
If
the
cotter
pin
hole
is
not
correctly
aligned
a
suitable
washer
should
be
fitted
Do
NOT
adjust
by
overtightening
the
pinion
nul
Van
Lubricate
the
front
bearing
with
oil
and
place
it
in
the
carrier
Grease
the
lip
of
the
oil
seal
and
install
it
to
the
final
drive
housing
Install
the
drive
pinion
the
new
collapsible
spacer
and
the
drive
flange
Fit
the
drive
pinion
nut
and
tighten
temporarily
until
all
slackness
is
eliminated
from
the
front
and
rear
of
the
drive
pinion
NOTE
Ensure
that
oil
and
grease
have
been
completely
removed
from
the
threads
of
the
pinion
gear
the
pinion
nut
and
the
washer
Tighten
the
pinion
nut
and
check
the
preload
with
a
preload
gauge
As
the
nut
is
tightened
to
the
specified
torque
reading
of
13
20
kgm
94
0
144
6Ib
fL
the
preload
must
be
measured
at
every
five
to
ten
degrees
turn
of
the
pinion
nut
As
the
pinion
nut
is
tightened
the
stepped
portion
of
the
spacer
is
deformed
See
Fig
G
29
J
and
the
length
between
the
bearings
adjusted
The
drive
pinion
bearing
preload
with
oil
seal
and
new
bearing
is
7
15
kg
cm
6
1
13
0
lb
in
Turn
the
drive
pinion
to
settle
the
bearing
and
re
check
the
preload
and
tightening
torque
If
the
preload
rate
is
exceeded
it
will
be
necessry
to
fit
a
new
spacer
the
old
spa
cr
cannot
be
reused
and
the
preload
must
not
be
adjusted
by
loosening
the
pinion
nul
Side
bearing
pre
load
adjusting
If
the
original
side
bearings
arc
to
be
used
the
shims
must
be
of
the
same
thickness
as
those
previously
fitted
To
select
shims
for
new
side
bearings
proceed
as
follows
The
standard
width
of
the
side
bearings
is
given
in
Technical
Data
This
width
must
be
measured
before
attempting
to
calculate
the
required
thickness
of
the
adjusting
shims
Place
a
weight
of
approximately
5
kg
5
5
lb
and
of
predetermined
height
onto
the
side
bearing
as
shown
in
Fig
G
30
Mcasure
the
width
of
the
bearing
with
a
dial
gauge
as
illustrated
turning
the
bearing
two
or
three
times
to
gain
an
accurate
meaSurement
Dimensional
variations
from
the
standard
measurements
are
marked
on
the
left
side
bearing
housing
of
the
gear
carrier
on
the
right
side
bearing
housing
of
the
gear
carrier
and
on
the
differential
case
These
variations
are
marked
in
units
of
l
lOOmm
and
are
used
for
the
f
rmula
to
calculate
t1H
thickness
of
the
adjusting
shims
in
the
following
manner
Where
TI
equals
the
left
side
bearing
shim
crownwhecl
side
T2
equals
the
right
side
bearing
shim
pinion
gear
A
equals
the
figure
marked
on
the
left
side
bearing
housing
B
equals
the
figure
marked
on
the
right
side
bearing
housing
C
and
0
equals
the
figure
marked
on
the
differential
case
and
E
and
F
is
the
difference
bctween
the
width
of
the
side
bearings
and
the
standard
bearing
width
H
the
figure
marked
on
the
crownwhcel
Fig
G
31
The
following
formulae
can
now
be
used
to
deter
mine
the
required
shim
thicknessl
s
for
both
side
bearings
I
OOcc
Estate
car
Left
side
bearing
TI
A
C
D
H
x
0
01
0
100
E
Right
side
bearingT2
B
D
H
x
0
01
0
090
F
I800cc
Van
Left
side
bearingTI
A
C
D
H
xO
OI
0
175
E
Right
side
bcaringT2
8
D
H
x
0
01
0
150
F
As
an
example
where
A
1
B
C
2
D
3
E
0
02mm
H
I
The
formula
for
the
left
side
bearing
is
T
I
I
1
3
1
x
0
01
0
175
0
02
0
205mm
1400
and
1600cc
Estate
car
The
required
thickness
of
shim
can
be
found
using
the
following
formula
in
a
similar
manner
to
that
previously
described
for
the
1800cc
models
Left
side
bearing
T
I
A
C
D
E
7
Right
side
bearing
T2
B
D
F
6
Shims
are
available
in
five
thicknesses
of
0
05
0
07
0
10
0
20
and
0
50
mm
0
002
0
0028
0
0039
0
0079
and
0
0197
in
Fit
the
selected
side
bearing
adjusting
shims
on
the
differential
cage
and
press
in
the
side
bearing
inner
races
using
a
suitable
ddfL
nstall
the
differential
cage
into
the
carrier
and
fit
the
bearing
caps
Ensure
that
the
marks
on
the
caps
coincide
with
the
marks
on
the
carrier
Tighten
the
bearing
cap
bolts
to
the
specified
torque
reading
See
Tighte
ing
torques
Measure
the
dimension
between
the
outer
edges
of
the
left
and
right
hand
caps
using
a
large
micrometer
as
shown
in
Fig
G
32
This
dimension
should
be
198
40
198
55
mm
7
8110
7
8169
in
for
the
1400
and
1600
ce
Estate
cars
and
1800
ce
Van
and
173
23
17329
mm
6
8201
6
8244
inl
for
the
1800
cc
Estate
cars
Measure
the
backlash
of
the
crownwhcel
and
pinion
with
a
dial
gauge
The
backlash
must
be
adjusted
to
0
13
0
18
mm
0
005
0
007
in
on
the
1800
CC
models
and
to
0
15
0
20mm
0
006
0
008
in
on
the
1400
and
1600
cc
models
Adjustment
can
be
carried
out
by
moving
side
bearing
shims
from
the
right
hand
side
to
the
left
hand
side
if
the
backlash
is
too
high
or
vice
verca
if
the
backlash
is
too
low
Tighten
the
bearing
cap
bolts
to
the
specified
torque
reading
after
adjusting
Ensure
that
the
run
out
at
the
rear
of
the
crown
wheel
does
not
exceed
O
05mm
0
002
in
Finally
heck
the
tooth
contact
pattern
as
described
below
TOOTH
CONTACT
PATTERN
Checking
The
final
check
on
reassembly
is
an
inspection
of
the
tooth
contact
markings
of
the
crownwhed
and
pinion
Apply
a
coal
of
red
lead
in
oil
to
4
or
5
teeth
of
the
crown
wheel
Turn
the
crownwheel
backwards
and
forwards
several
times
to
obtain
a
clear
impression
of
the
contact
areas
Heel
contact
Fig
G
3
1
71