automatic transmission DATSUN PICK-UP 1977 Service Manual
[x] Cancel search | Manufacturer: DATSUN, Model Year: 1977, Model line: PICK-UP, Model: DATSUN PICK-UP 1977Pages: 537, PDF Size: 35.48 MB
Page 418 of 537

Engine
Control
Fuel
Exhaust
Systems
REMOVAL
AND
INSTALLATION
Accelerator
wire
I
Remove
air
cleaner
assembly
2
Disconnect
accelerator
wire
from
carburetor
3
Loosen
lock
nut
and
disconnect
accelerator
wire
outer
case
from
wire
holder
See
Figure
FE
I
4
Remove
spring
clamp
and
discon
nect
accelerator
wire
from
accelerator
pedal
arm
S
Remove
two
screws
securing
ac
celerator
wire
outer
case
to
body
and
detach
accelerator
wire
6
To
install
reverse
the
order
of
removal
Apply
recommended
multi
purpose
grease
slightly
to
portion
MG
shown
in
Figure
FE
I
Accelerator
pedal
assembly
I
Remove
spring
clamp
then
dis
connect
accelerator
wire
from
tip
of
pedal
ann
2
Remove
two
screws
securing
ac
celerator
pedal
bracket
to
body
3
Remove
accelerator
pedal
from
dash
panel
See
Figure
FE
I
4
To
install
reverse
the
order
of
removal
INSPECTION
I
Check
accelerator
pedal
return
spring
for
rust
fatigue
or
damage
Replace
if
necessary
2
Check
accelerator
wire
cases
and
fastening
locations
for
rust
damage
or
looseness
Repair
or
replace
if
necessary
ADJUSTMENT
Accelerstor
pedal
and
wire
Adjust
pedal
stopper
bolt
Section
A
so
as
to
obtain
specifi
ed
height
E
as
shown
in
Figure
FE
I
Secure
pedal
stopper
bolt
with
stopper
lock
nut
Refer
to
Figure
FE
I
E
78
mOl
3
07
in
Tightening
torque
01
nut
0
38
to
0
4S
kg
m
2
7
to
3
2
ft
b
2
Release
auto
choke
effect
since
throttle
lever
is
opened
by
fast
idle
earn
until
engine
warms
up
I
Keep
choke
valve
fully
open
with
fingers
2
Pull
throttle
lever
up
by
hand
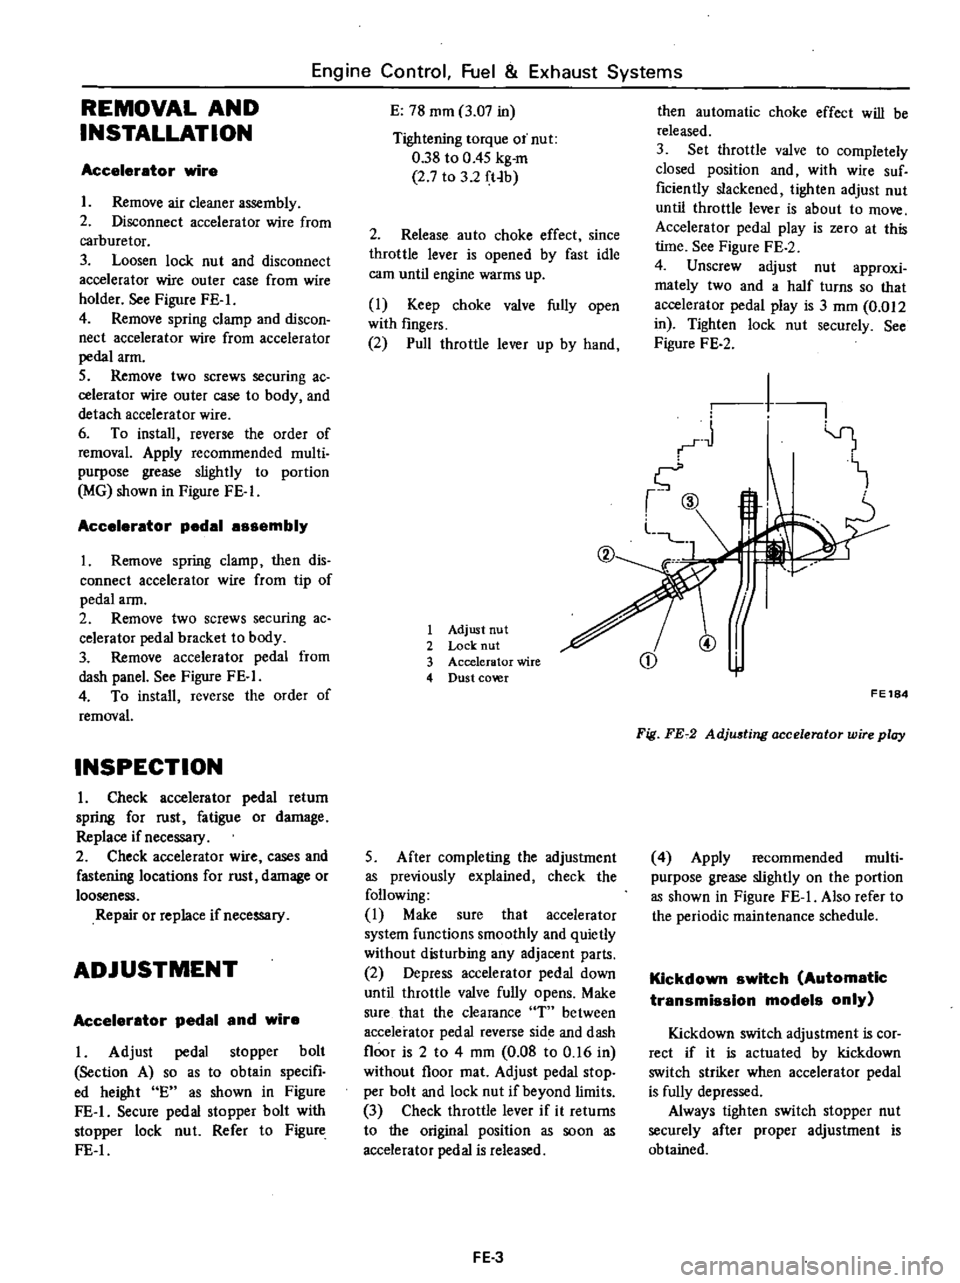
1
Adjust
nut
2
Lock
nut
3
Accelerator
wire
4
Dust
co
r
5
After
completing
the
adjustment
as
previously
explained
check
the
following
I
Make
sure
that
accelerator
system
functions
smoothly
and
quietly
without
disturbing
any
adjacent
parts
2
Depress
accelerator
pedal
down
until
throttle
valve
fully
opens
Make
sure
that
the
clearance
T
between
accelerator
pedal
reverse
side
and
dash
floor
is
2
to
4
mm
0
08
to
0
16
in
without
floor
mat
Adjust
pedal
stop
per
bolt
and
lock
nut
if
beyond
limits
3
Check
throttle
lever
if
it
returns
to
the
original
position
as
soon
as
accelerator
pedal
is
released
FE
3
then
automatic
choke
effect
will
be
released
3
Set
throttle
valve
to
completely
closed
position
and
with
wire
suf
ficiently
slackened
lighten
adjust
nut
until
throttle
lever
is
about
to
move
Accelerator
pedal
play
is
zero
at
this
lime
See
Figure
FE
2
4
Unscrew
adjust
nut
approxi
mately
two
and
a
half
turns
so
that
accelerator
pedal
play
is
3
mOl
0
012
in
Tighten
lock
nut
securely
See
Figure
FE
2
1
I
1
CD
@
FE184
Fig
FE72
AdjU6ting
accelerator
wire
play
4
Apply
recommended
multi
purpose
grease
slightly
on
the
portion
as
shown
in
Figure
FE
I
Also
refer
to
the
periodic
maintenance
schedule
Kickdown
switch
Automatic
transmission
models
only
Kickdown
switch
adjustment
is
cor
rect
if
it
is
actuated
by
kickdown
switch
striker
when
accelerator
pedal
is
fully
depressed
Always
tighten
switch
stopper
nut
securely
after
proper
adjustment
is
obtained
Page 428 of 537

CAB
BODY
Body
Frame
Ist
mounting
2nd
mounting
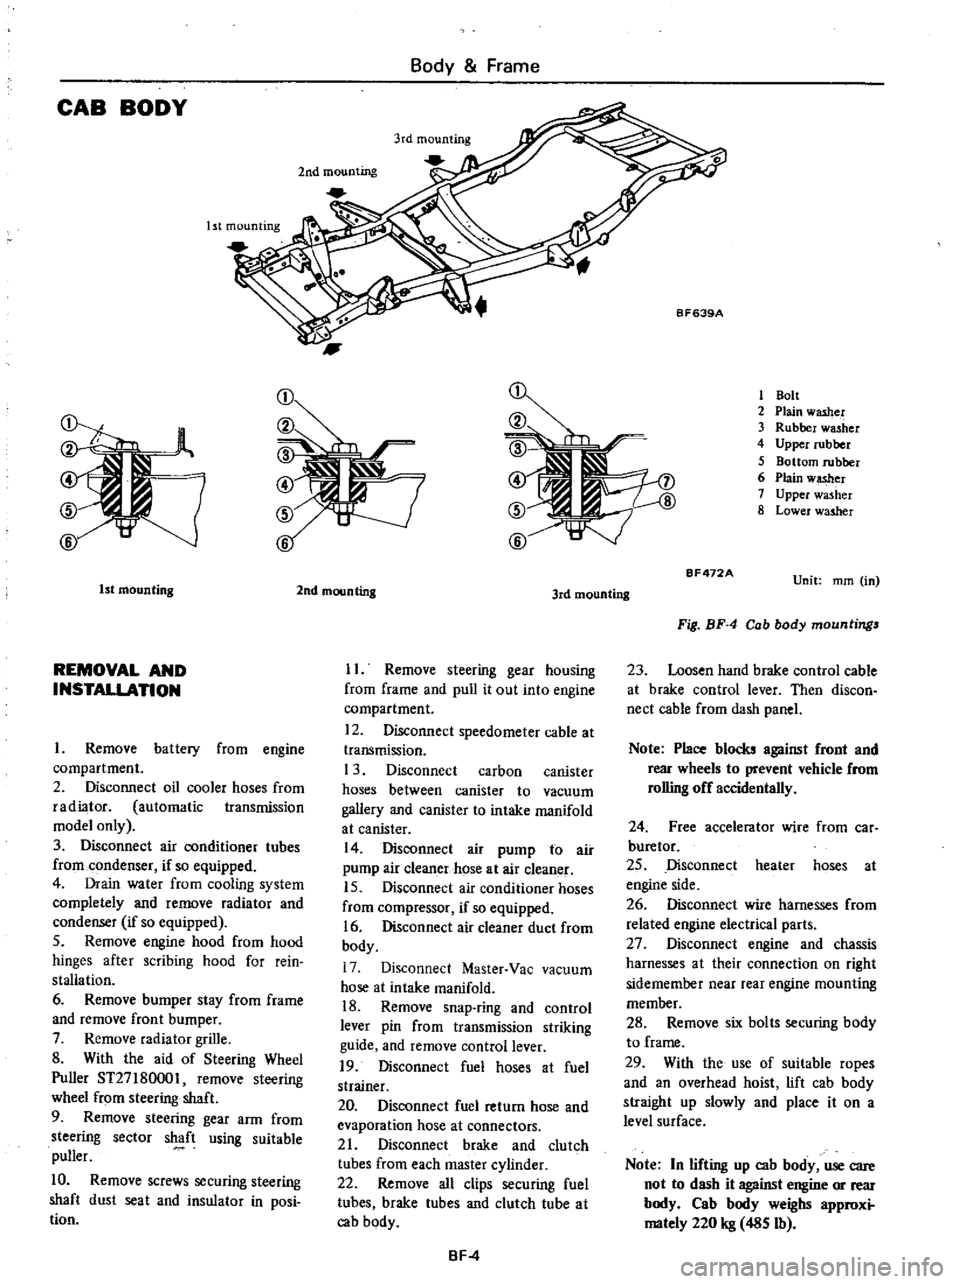
1
Bolt
2
Plain
washer
3
Rubber
washer
4
Upper
rubber
5
Bottom
rubber
6
Plain
w
er
7
Upper
washer
8
Lower
washer
1st
mounting
REMOVAL
AND
INSTALLATION
Remove
battery
from
engine
compartment
2
Disconnect
oil
cooler
hoses
from
radiator
automatic
transmission
model
only
3
Disconnect
air
conditioner
tubes
from
condenser
if
so
equipped
4
Drain
water
from
cooling
system
completely
and
remove
radiator
and
condenser
if
so
equipped
5
Remove
engine
hood
from
hood
hinges
after
scribing
hood
for
rein
stallation
6
Remove
bumper
stay
from
frame
and
remove
front
bumper
7
Remove
radiator
grille
8
With
the
aid
of
Steering
Wheel
Puller
ST27
180001
remove
steering
wheel
from
steering
shaft
9
Remove
steering
gear
arm
from
steering
sector
shaft
using
suitable
puller
10
Remove
screws
securing
steering
shaft
dust
seat
and
insulator
in
posi
tion
2nd
mounting
3rd
mounting
II
Remove
steering
gear
housing
from
frame
and
pull
it
out
into
engine
compartment
12
Disconnect
speedometer
cable
at
transmission
1
3
Disconnect
carbon
canister
hoses
between
canister
to
vacuum
gallery
and
canister
to
intake
manifold
at
canister
14
Disconnect
air
pump
to
air
pump
air
cleaner
hose
at
air
cleaner
15
Disconnect
air
conditioner
hoses
from
compressor
if
so
equipped
16
Disconnect
air
cleaner
duct
from
body
17
Disconnect
Master
Vac
vacuum
hose
at
intake
manifold
18
Remove
snap
ring
and
control
lever
pin
from
transmission
striking
guide
and
remove
control
lever
19
Disconnect
fuel
hoses
at
fuel
strainer
20
Disconnect
fuel
return
hose
and
evaporation
hose
at
connectors
21
Disconnect
brake
and
clutch
tubes
from
each
master
cylinder
22
Remove
all
clips
securing
fuel
tubes
brake
tubes
and
clutch
tube
at
cab
body
BF
4
BF472A
Unit
mm
in
Fig
BF
4
Cab
body
mountings
23
Loosen
hand
brake
control
cable
at
brake
control
lever
Then
discon
nect
cable
from
dash
panel
Note
Place
blocks
against
front
and
rear
wheels
to
prevent
vehicle
from
rolling
off
accidentally
24
Free
accelerator
wire
from
car
buretor
25
Disconnect
heater
hoses
at
engine
side
26
Disconnect
wire
harnesses
from
related
engine
electrical
parts
27
Disconnect
engine
and
chassis
harnesses
at
their
connection
on
right
sidemember
near
rear
engine
mounting
member
28
Remove
six
bolts
securing
body
to
frame
29
With
the
use
of
suitable
ropes
and
an
overhead
hoist
lift
cab
body
straight
up
slowly
and
place
it
on
a
level
surface
Note
In
lifting
up
cab
body
use
care
not
to
dash
it
against
engine
or
rear
body
Cab
body
weighs
approxi
mately
220
kg
485
Ib
Page 484 of 537

m
W
D
to
l
l
0
c
l
l
s
Q
3
For
Automatic
Transmission
LB
B
For
Manual
Transmission
m
For
Automatic
Transmission
COLOR
CODE
B
Black
BI
Brown
G
Green
L
Blue
Lg
Light
green
R
Red
W
White
Y
Yellow
BW
Black
with
white
stripe
LgR
Light
green
with
red
stripe
BY
RB
RB
B
WB
RB
YB
2
RB
I
B
1
BW
r
BY
LB
For
Automatic
Transmission
to
o
c
m
r0
O
O
Dl
For
Manual
Transmission
@
CJ
lti
3
RB
fB
BY
YB
RB@RB
YB
BY
1
To
kickdown
solenoid
fOT
Automatic
Transmission
2
To
reverse
switch
for
Manual
Tranmission
3
To
inhibitor
switch
for
Automatic
Transmission
4
To
oil
pressure
switch
5
To
starter
motor
6
To
engine
room
harness
for
Manual
Transmission
7
To
engine
room
harness
for
Automatic
Transmission
Page 518 of 537

INSPECTION
Evaporator
Check
evaporator
for
leakage
or
damage
If
damaged
replace
Expansion
valve
Check
expansion
valve
for
leakage
or
clogging
If
clogged
clean
filter
in
expansion
valve
If
damaged
replace
RECEIVER
DRYER
AND
PIPING
REMOVAL
AND
INSTAUATION
Receiver
dryer
I
Disconnect
battery
ground
cable
2
Discharge
system
Refer
to
Dis
charging
System
under
General
Service
section
3
Disconnect
compressor
lead
wire
at
connector
4
Disconnect
cooling
pipes
at
joints
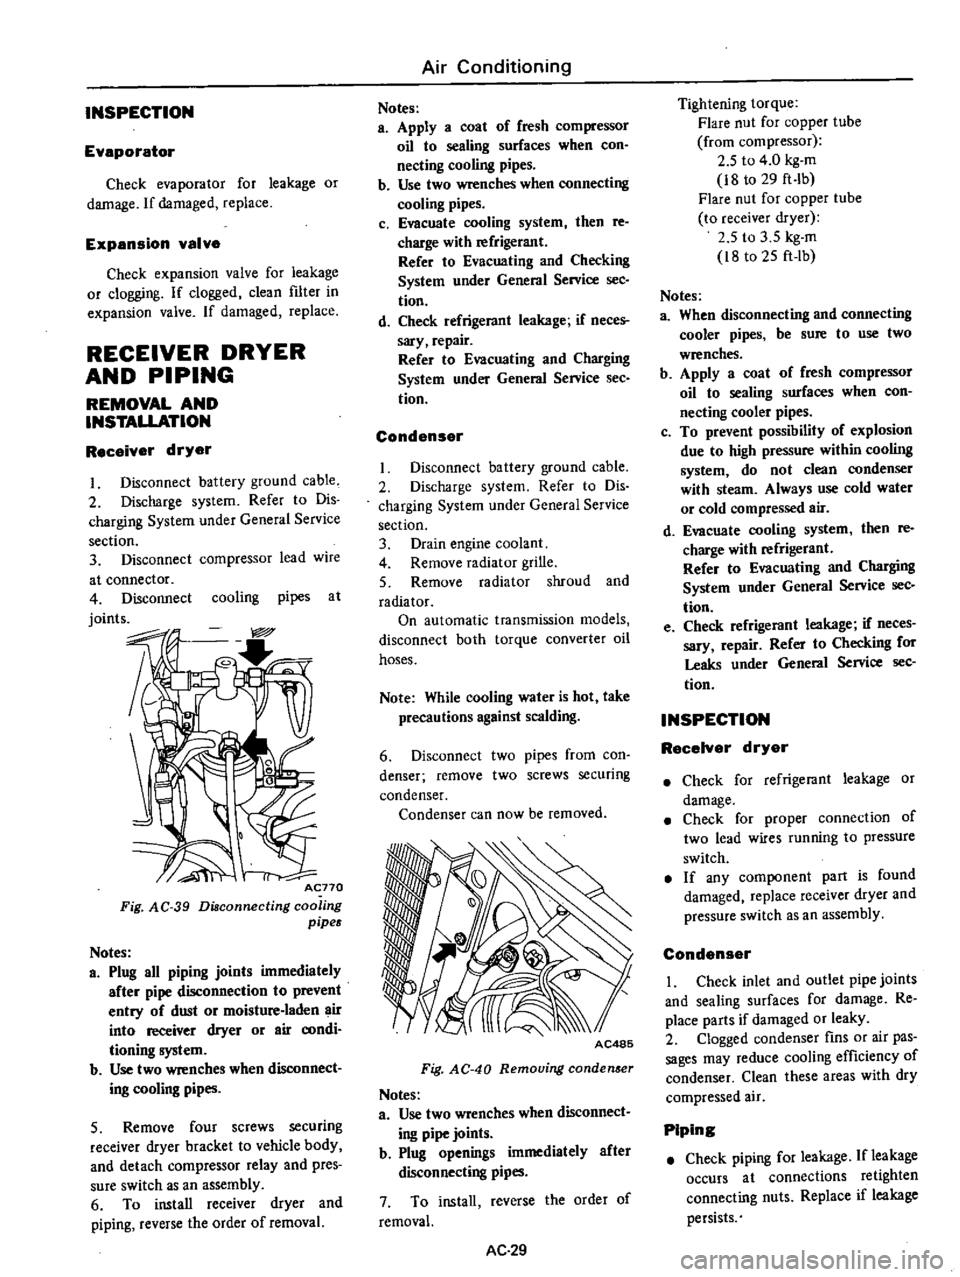
Acno
Fig
AC
39
Diaconnecting
coo
ing
pipes
Notes
a
Plug
all
piping
joints
immediately
after
pipe
disconnection
to
prevent
entry
of
dust
or
moisture
laden
air
into
receiver
dryer
or
air
aJOdi
tioning
system
b
Use
two
wrenches
when
dIsconnect
ing
cooling
pipes
5
Remove
four
screws
securing
receiver
dryer
bracket
to
vehicle
body
and
detach
compressor
relay
and
pres
sure
switch
as
an
assembly
6
To
install
receiver
dryer
and
piping
reverse
the
order
of
removal
Air
Conditioning
Notes
a
Apply
a
coat
of
fresh
compressor
oil
to
sealing
surfaces
when
con
necting
cooling
pipes
b
Use
two
wrenches
when
connecting
cooling
pipes
c
Evacuate
cooling
system
then
re
charge
with
refrigerant
Refer
to
Evacuating
and
Checking
System
under
General
Service
sec
tion
d
Check
refrigerant
leakage
if
neces
sary
repair
Refer
to
Evacuating
and
Charging
System
under
General
Service
See
tion
Condenser
Disconnect
battery
ground
cable
2
Discharge
system
Refer
to
Dis
charging
System
under
General
Service
section
3
Drain
engine
coolant
4
Remove
radiator
grille
5
Remove
radiator
shroud
and
radiator
On
automatic
transmission
models
disconnect
both
torque
converter
oil
hoses
Note
While
cooling
water
is
hot
take
precautions
against
scalding
6
Disconnect
two
pipes
from
con
denser
remove
two
screws
securing
condenser
Condenser
can
now
be
removed
AC485
Fig
AC
40
Removing
conden
er
Notes
a
Use
two
wrenches
when
disconnect
ing
pipe
joints
b
Plug
openings
immediately
after
disconnecting
pipes
7
To
install
reverse
the
order
of
removal
AC
29
Tightening
torque
Flare
nut
for
copper
tube
from
compressor
2
5
to
4
0
kg
m
i8
to
29
ft
Ib
Flare
nut
for
copper
tube
to
receiver
dryer
2
5
to
3
5
kg
m
i8
to
25
ft
lb
Notes
a
When
disconnecting
and
connecting
cooler
pipes
be
sure
to
use
two
wrenches
b
Apply
a
coat
of
fresh
compressor
oil
to
sealing
surfaces
when
con
necting
cooler
pipes
c
To
prevent
possibility
of
explosion
due
to
high
pressure
within
cooling
system
do
not
clean
condenser
with
steam
Always
use
cold
water
or
cold
compressed
air
d
Evacuate
cooling
system
then
re
charge
with
refrigerant
Refer
to
Evacuating
and
Charging
System
under
General
Service
sec
tion
e
Check
refrigerant
leakage
if
neces
sary
repair
Refer
to
Checking
for
Leaks
under
General
Service
sec
tion
INSPECTION
RecelYer
dryer
Check
for
refrigerant
leakage
or
damage
Check
for
proper
connection
of
two
lead
wires
running
to
pressure
switch
If
any
component
part
is
found
damaged
replace
receiver
dryer
and
pressure
switch
as
an
assembly
Condenser
I
Check
inlet
and
outlet
pipe
joints
and
sealing
surfaces
for
damage
Re
place
parts
if
damaged
or
leaky
2
Clogged
condenser
fins
or
air
pas
sages
may
reduce
cooling
efficiency
of
condenser
Clean
these
areas
with
dry
compressed
air
Piping
Check
piping
for
leakage
If
leakage
occurs
at
connections
retighten
connecting
nuts
Replace
if
leakage
persists
Page 531 of 537

GENERAL
DESCRI
PTION
Special
Tools
play
very
important
role
in
the
maintenance
of
vehicles
These
are
essential
to
the
safe
accu
rate
and
speedy
servicing
The
working
times
listed
in
the
col
umn
under
FLAT
RATE
TIME
in
FLAT
RATE
SCHEDULE
are
com
puted
based
on
the
use
of
Special
Tools
The
identification
code
of
mainte
nance
tools
is
made
up
of
2
alpha
betical
letters
and
8
digital
figures
The
heading
two
letters
roughly
classify
tools
or
equipment
as
fol
lows
STOOOOOOOO
KVOOOOOOOO
Special
Tool
Special
Tool
Recently
established
Engine
Overhauling
Machine
General
Gauge
Hand
Tool
EMOOOOOOOO
GGOOOOOOOO
HTOOOOOOOO
HOW
TO
READ
SPECIAL
TOOL
LIST
APPLIED
VEHICLE
OR
UNIT
In
this
column
word
All
is
given
for
tools
applicable
to
all
vehicle
mod
els
and
unit
types
treated
in
this
manu
al
for
tools
applicable
only
to
particu
lar
models
or
units
those
vehicle
models
or
unit
types
are
indicated
NEWLY
ADDED
X
put
in
this
column
shows
newly
added
tools
Service
Equipment
SERVICE
EQUIPMENT
CLASS
Indicated
in
this
column
are
classi
fication
ftg1ll
es
in
accordance
with
Classification
of
Speciai
Tool
REMARKS
As
regards
special
tools
which
are
also
applicable
to
models
other
than
those
dealt
ith
U
this
m
inual
this
coluITUl
names
those
other
models
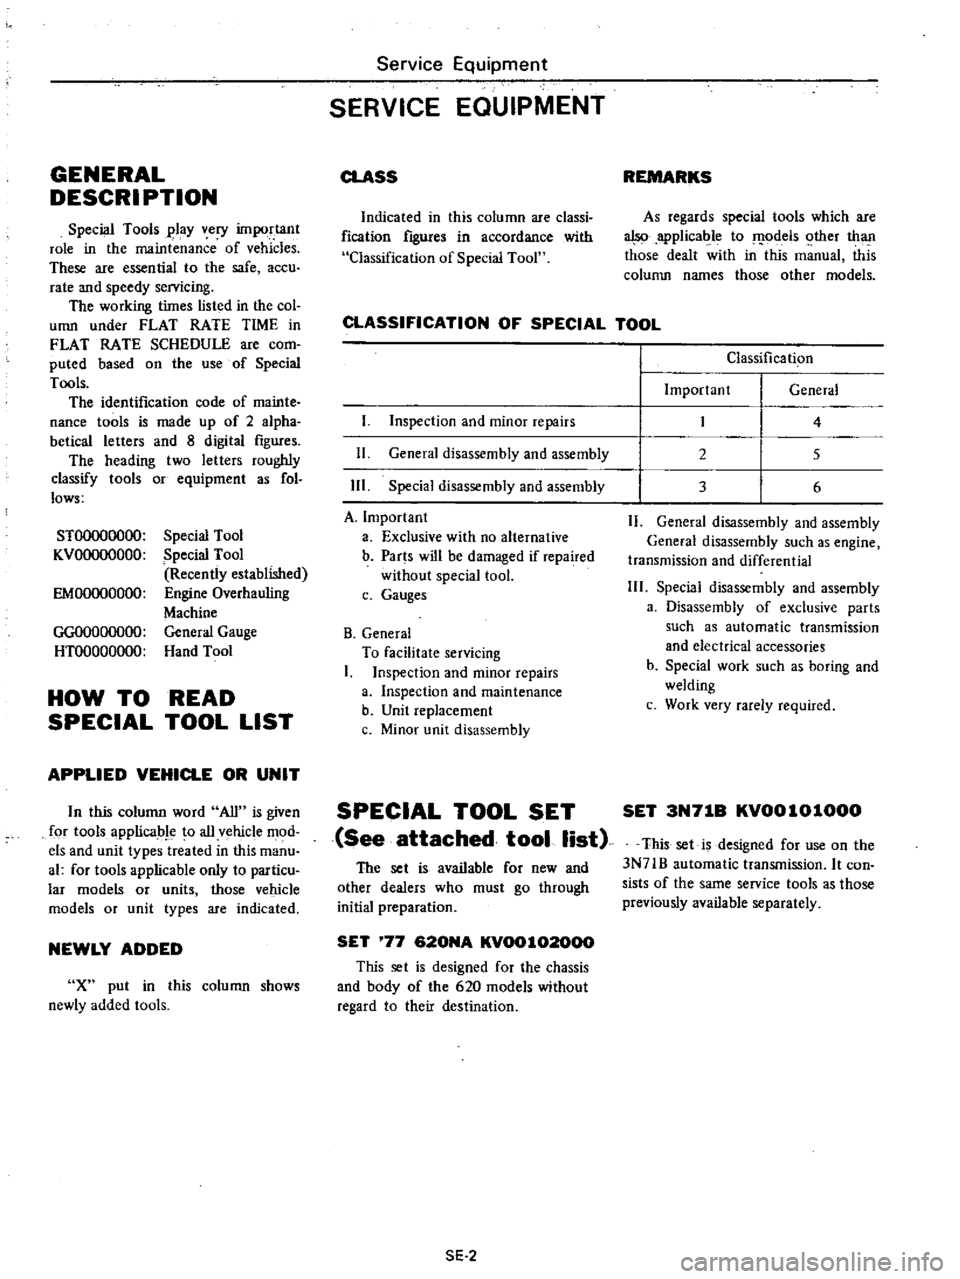
CLASSIFICATION
OF
SPECIAL
TOOL
I
Inspection
and
minor
repairs
11
General
disassembly
and
assembly
Ill
Special
disassembly
and
assembly
A
Important
a
Exclusive
with
no
alternative
b
Parts
will
be
damaged
if
repaired
without
special
tool
c
Gauges
B
General
To
facilitate
servicing
I
Inspection
and
minor
repairs
a
Inspection
and
maintenance
b
Unit
replacement
c
Minor
unit
disassembly
SPECIAL
TOOL
SET
See
attached
tool
list
The
set
is
available
for
new
and
other
dealers
who
must
go
through
initial
preparation
SET
77
620NA
KV00102000
This
set
is
designed
for
the
chassis
and
body
of
the
620
models
without
regard
to
their
destination
SE
2
Classification
Important
General
2
3
4
5
6
11
General
disassembly
and
assembly
General
disassembly
such
as
engine
transmission
and
differential
111
Special
disassembly
and
assembly
a
Disassembly
of
exclusive
parts
such
as
automatic
transmission
and
electrical
accessories
b
Special
work
such
as
boring
and
welding
c
Work
very
rarely
required
SET
3N71B
KV0010l000
This
set
is
designed
for
use
on
the
3N71B
automatic
transmission
It
con
sists
of
the
same
service
tools
as
those
previously
available
separately
Page 535 of 537

Service
Equipment
AUTOMATIC
TRANSMISSION
TOOL
Applied
Set
3N71B
Newly
Tool
Number
Tool
Name
vehicle
Class
Remarks
added
or
unit
KVOOlO1OOO
ST07870000
Transmission
case
stand
All
X
3
ST2505S001
Oil
pressure
gauge
set
All
X
I
ST25
I
60000
Torque
driver
All
X
3
ST2532000l
Snap
ring
remover
All
X
3
ST25420001
Clutch
spring
compressor
All
X
3
ST25490000
Socket
extension
All
X
3
ST2557000l
Hex
head
extension
All
X
3
8210
610
710
S30
ST25580000
Oil
pump
assembling
gauge
All
X
3
ST25850000
Sliding
hammers
All
X
3
GG930
I
0000
Torque
wrench
All
X
3
HT6
I
000800
Hexagon
wrench
All
X
3
HT62350000
Spinner
handle
All
X
6
HT69860000
Snap
ring
remover
All
X
3
SE
6