check engine DATSUN PICK-UP 1977 Service Manual
[x] Cancel search | Manufacturer: DATSUN, Model Year: 1977, Model line: PICK-UP, Model: DATSUN PICK-UP 1977Pages: 537, PDF Size: 35.48 MB
Page 518 of 537

INSPECTION
Evaporator
Check
evaporator
for
leakage
or
damage
If
damaged
replace
Expansion
valve
Check
expansion
valve
for
leakage
or
clogging
If
clogged
clean
filter
in
expansion
valve
If
damaged
replace
RECEIVER
DRYER
AND
PIPING
REMOVAL
AND
INSTAUATION
Receiver
dryer
I
Disconnect
battery
ground
cable
2
Discharge
system
Refer
to
Dis
charging
System
under
General
Service
section
3
Disconnect
compressor
lead
wire
at
connector
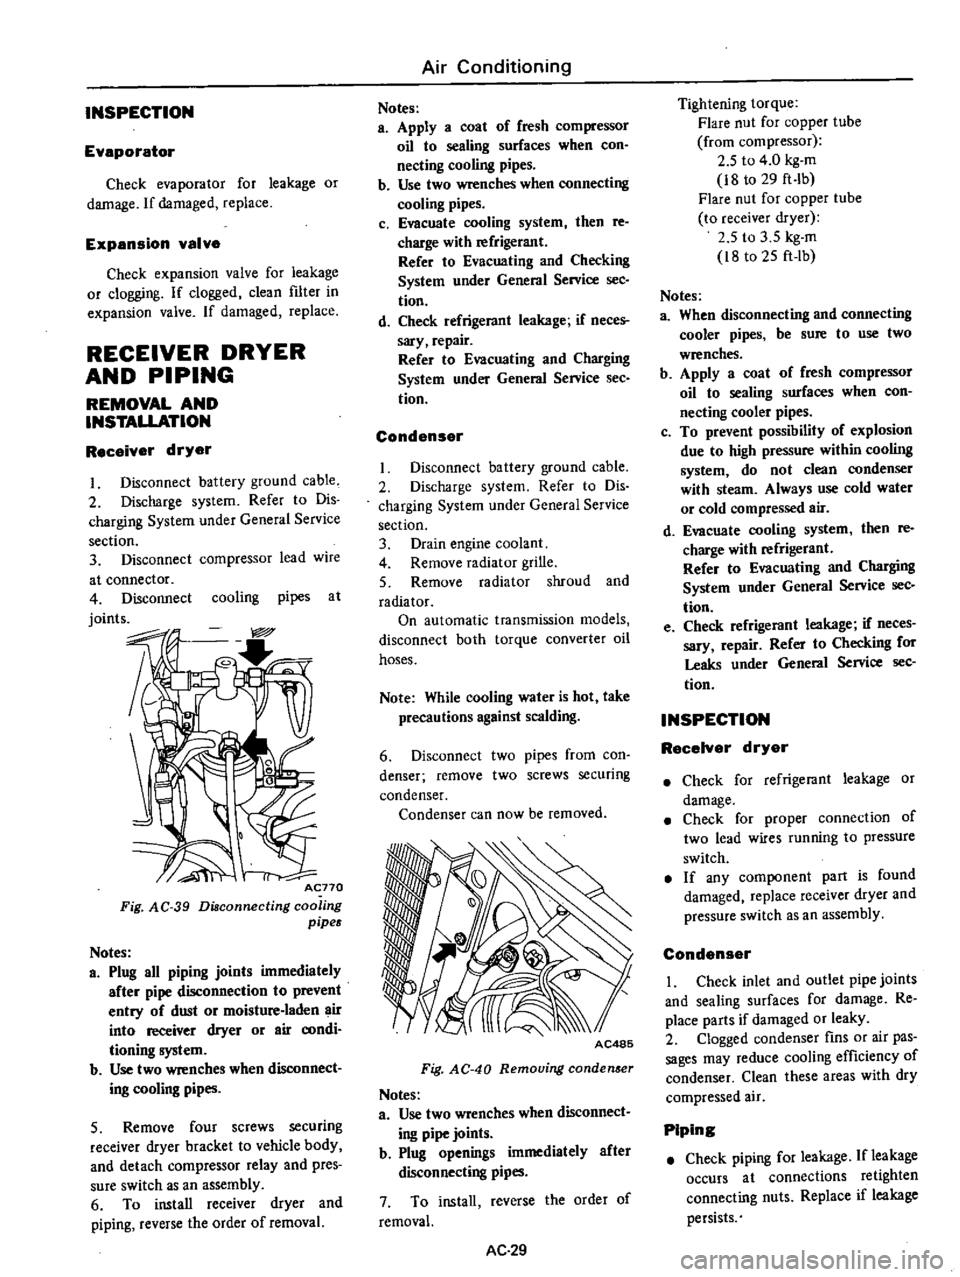
4
Disconnect
cooling
pipes
at
joints
Acno
Fig
AC
39
Diaconnecting
coo
ing
pipes
Notes
a
Plug
all
piping
joints
immediately
after
pipe
disconnection
to
prevent
entry
of
dust
or
moisture
laden
air
into
receiver
dryer
or
air
aJOdi
tioning
system
b
Use
two
wrenches
when
dIsconnect
ing
cooling
pipes
5
Remove
four
screws
securing
receiver
dryer
bracket
to
vehicle
body
and
detach
compressor
relay
and
pres
sure
switch
as
an
assembly
6
To
install
receiver
dryer
and
piping
reverse
the
order
of
removal
Air
Conditioning
Notes
a
Apply
a
coat
of
fresh
compressor
oil
to
sealing
surfaces
when
con
necting
cooling
pipes
b
Use
two
wrenches
when
connecting
cooling
pipes
c
Evacuate
cooling
system
then
re
charge
with
refrigerant
Refer
to
Evacuating
and
Checking
System
under
General
Service
sec
tion
d
Check
refrigerant
leakage
if
neces
sary
repair
Refer
to
Evacuating
and
Charging
System
under
General
Service
See
tion
Condenser
Disconnect
battery
ground
cable
2
Discharge
system
Refer
to
Dis
charging
System
under
General
Service
section
3
Drain
engine
coolant
4
Remove
radiator
grille
5
Remove
radiator
shroud
and
radiator
On
automatic
transmission
models
disconnect
both
torque
converter
oil
hoses
Note
While
cooling
water
is
hot
take
precautions
against
scalding
6
Disconnect
two
pipes
from
con
denser
remove
two
screws
securing
condenser
Condenser
can
now
be
removed
AC485
Fig
AC
40
Removing
conden
er
Notes
a
Use
two
wrenches
when
disconnect
ing
pipe
joints
b
Plug
openings
immediately
after
disconnecting
pipes
7
To
install
reverse
the
order
of
removal
AC
29
Tightening
torque
Flare
nut
for
copper
tube
from
compressor
2
5
to
4
0
kg
m
i8
to
29
ft
Ib
Flare
nut
for
copper
tube
to
receiver
dryer
2
5
to
3
5
kg
m
i8
to
25
ft
lb
Notes
a
When
disconnecting
and
connecting
cooler
pipes
be
sure
to
use
two
wrenches
b
Apply
a
coat
of
fresh
compressor
oil
to
sealing
surfaces
when
con
necting
cooler
pipes
c
To
prevent
possibility
of
explosion
due
to
high
pressure
within
cooling
system
do
not
clean
condenser
with
steam
Always
use
cold
water
or
cold
compressed
air
d
Evacuate
cooling
system
then
re
charge
with
refrigerant
Refer
to
Evacuating
and
Charging
System
under
General
Service
sec
tion
e
Check
refrigerant
leakage
if
neces
sary
repair
Refer
to
Checking
for
Leaks
under
General
Service
sec
tion
INSPECTION
RecelYer
dryer
Check
for
refrigerant
leakage
or
damage
Check
for
proper
connection
of
two
lead
wires
running
to
pressure
switch
If
any
component
part
is
found
damaged
replace
receiver
dryer
and
pressure
switch
as
an
assembly
Condenser
I
Check
inlet
and
outlet
pipe
joints
and
sealing
surfaces
for
damage
Re
place
parts
if
damaged
or
leaky
2
Clogged
condenser
fins
or
air
pas
sages
may
reduce
cooling
efficiency
of
condenser
Clean
these
areas
with
dry
compressed
air
Piping
Check
piping
for
leakage
If
leakage
occurs
at
connections
retighten
connecting
nuts
Replace
if
leakage
persists
Page 521 of 537

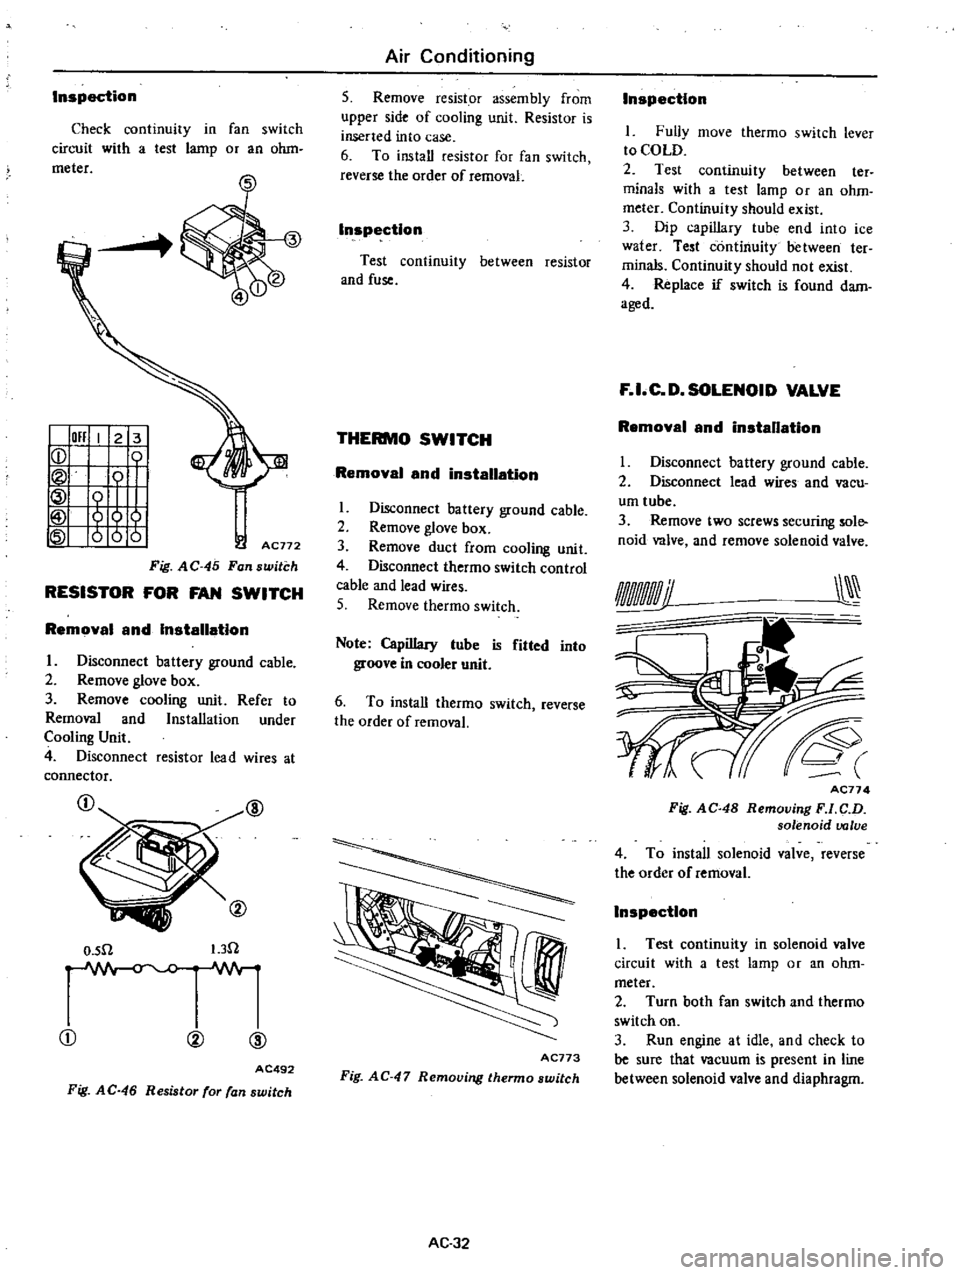
Inspection
Check
continuiry
in
fan
switch
circuit
with
a
test
lamp
or
an
ohm
meter
I
011
I
2
3
ICD
Tt
tt
AC772
Fig
AC
45
Fan
switch
RESISTOR
FOR
FAN
SWITCH
Removal
and
Installation
I
Disconnect
battery
ground
cable
2
Remove
glove
box
3
Remove
cooling
unit
Refer
to
Removal
and
Installation
under
Cooling
Unit
4
Disconnect
resistor
lead
wires
at
connector
@
O
sn
I
3n
CD
00
@
AC492
Fig
AC
46
Resistor
for
fan
switch
Air
Conditioning
5
Remove
resistor
assembly
from
upper
side
of
cooling
unit
Resistor
is
inserted
into
case
6
To
install
res
istor
for
fan
switch
reverse
the
order
of
removaL
Inspection
Test
continuity
between
resistor
and
fuse
THERMO
SWITCH
Removal
and
installation
1
Disconnect
battery
ground
cable
2
Remove
glove
box
3
Remove
duct
from
cooling
unit
4
Disconnect
thermo
switch
control
cable
and
lead
wires
5
Remove
thermo
switch
Note
Capillary
lube
is
fitted
into
groove
in
cooler
unit
6
To
install
thermo
switch
reverse
the
order
of
removal
I
I
AC773
Fig
AC
47
Removing
thermo
switch
AC
32
Inspection
I
Fully
move
thermo
swirch
lever
to
COLD
2
Test
continuity
between
ter
minals
with
a
test
tamp
or
an
ohm
meter
Continuity
should
exist
3
Dip
capillary
tube
end
into
ice
water
Test
continuity
between
ter
minals
Continuity
should
not
exist
4
Replace
if
switch
is
found
dam
aged
F
I
C
D
SOLENOID
VALVE
Removal
and
installation
I
Disconnect
battery
ground
cable
2
Disconnect
lead
wires
and
vacu
um
tube
3
Remove
two
screws
securing
sole
noid
valve
and
remove
solenoid
valve
AC77
4
Fig
AC
48
Removing
F
l
C
D
solenoid
valve
4
To
install
solenoid
valve
reverse
the
order
of
removal
Inspection
1
Test
continuity
in
solenoid
valve
circuit
with
a
test
lamp
or
an
ohm
meter
2
Turn
both
fan
switch
and
thermo
switch
on
3
Run
engine
at
idle
and
check
to
be
sure
that
vacuum
is
present
in
line
between
solenoid
valve
and
diaphragm