DODGE CALIBER SRT 2008 1.G Owners Manual
CALIBER SRT 2008 1.G
DODGE
DODGE
https://www.carmanualsonline.info/img/12/5519/w960_5519-0.png
DODGE CALIBER SRT 2008 1.G Owners Manual
Trending: battery, brake pads replacement, horn, fog light, oil pressure, jump start, gas type
Page 101 of 373
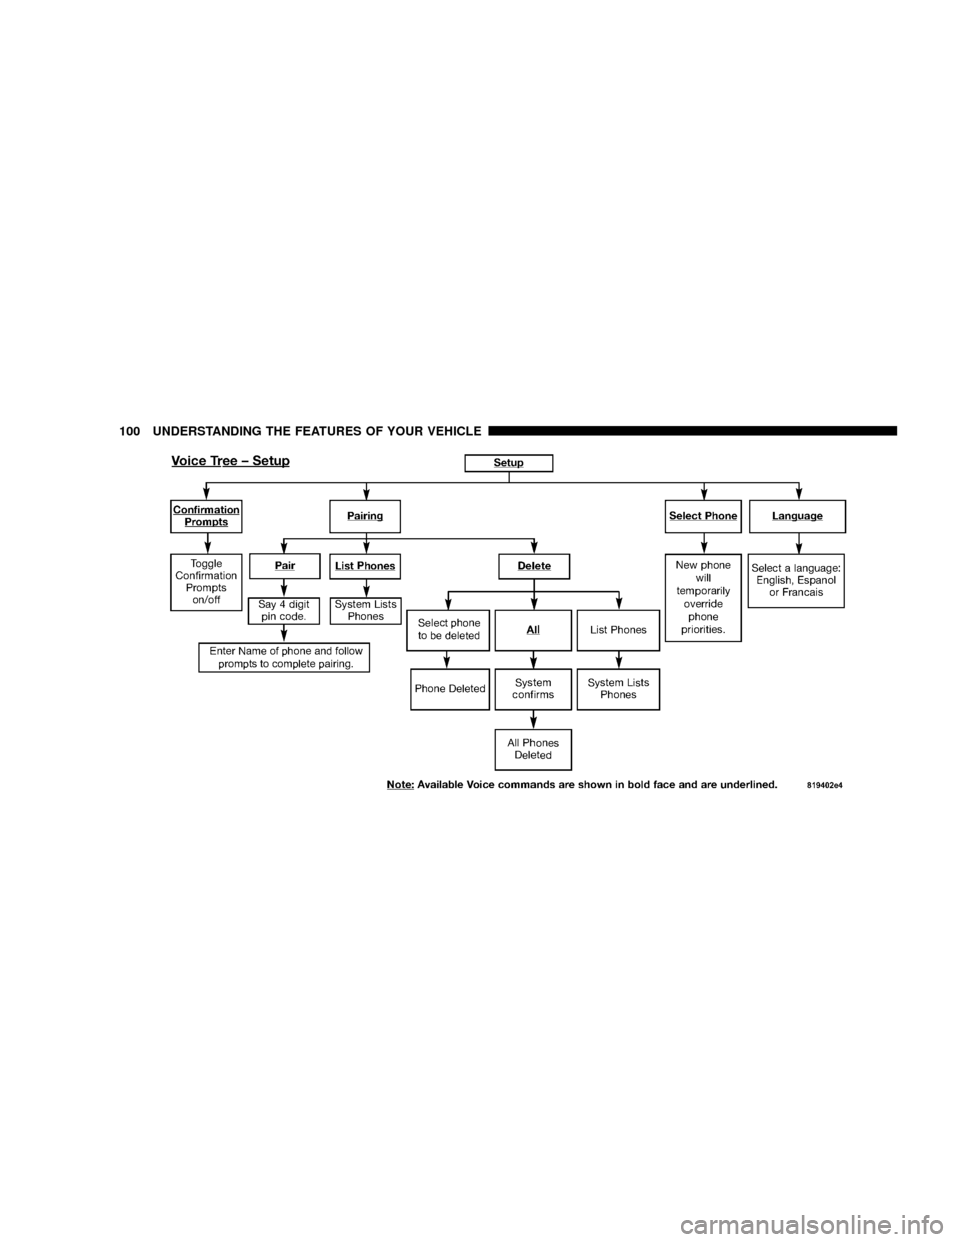
100 UNDERSTANDING THE FEATURES OF YOUR VEHICLE
Page 102 of 373
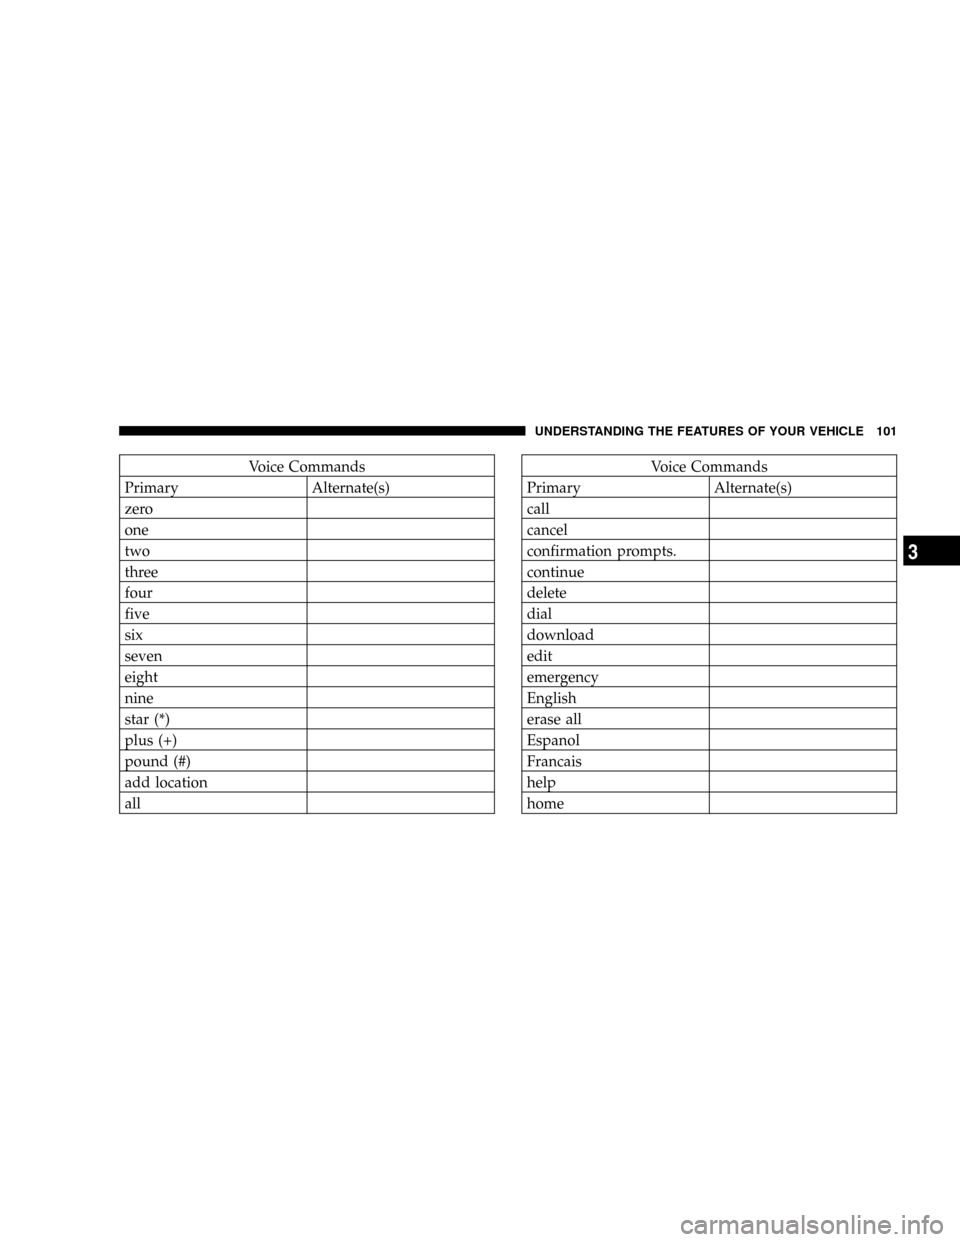
Voice Commands
Primary Alternate(s)
zero
one
two
three
four
five
six
seven
eight
nine
star (*)
plus (+)
pound (#)
add location
allVoice Commands
Primary Alternate(s)
call
cancel
confirmation prompts.
continue
delete
dial
download
edit
emergency
English
erase all
Espanol
Francais
help
home
UNDERSTANDING THE FEATURES OF YOUR VEHICLE 101
3
Page 103 of 373
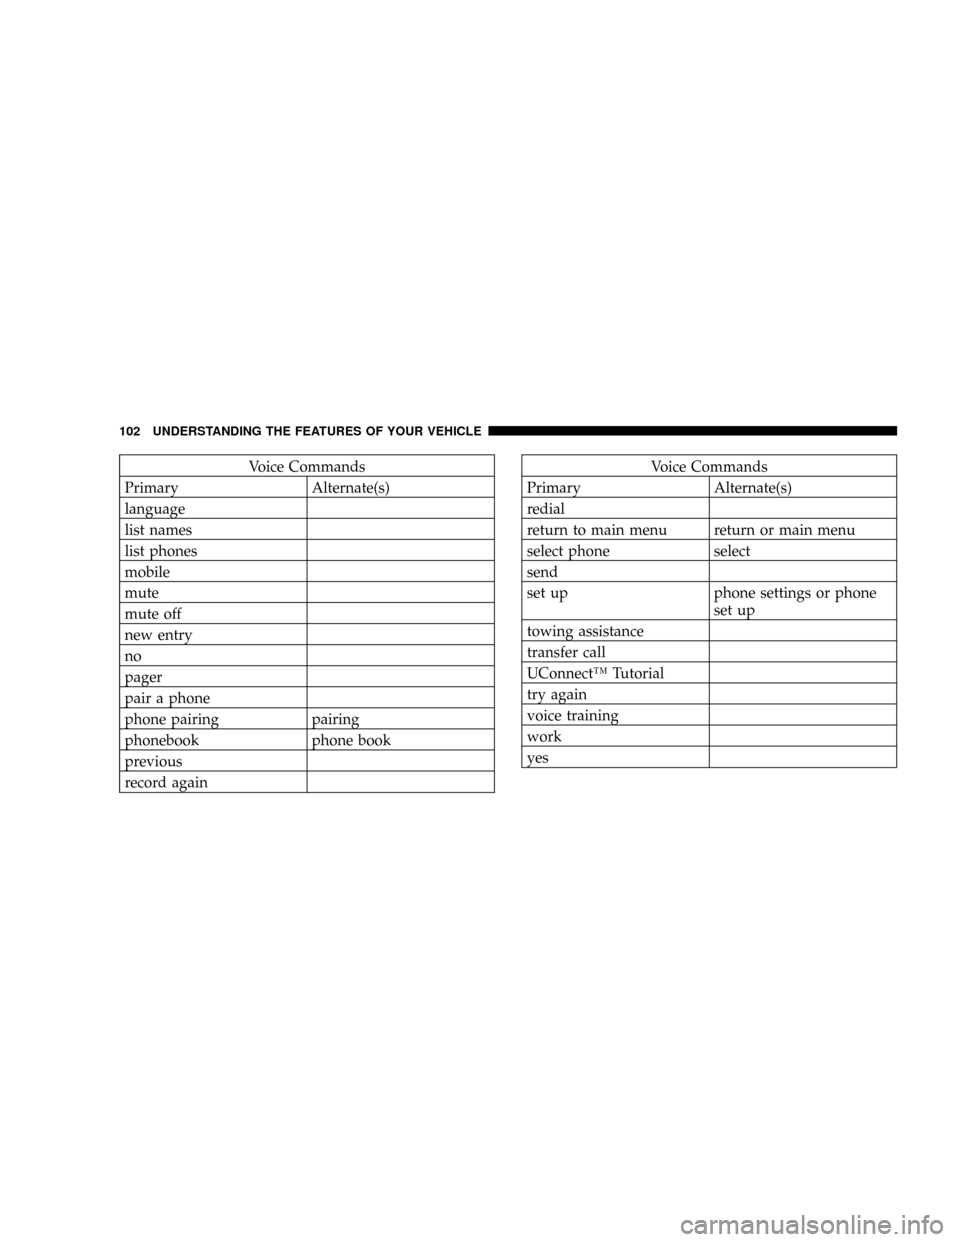
Voice Commands
Primary Alternate(s)
language
list names
list phones
mobile
mute
mute off
new entry
no
pager
pair a phone
phone pairing pairing
phonebook phone book
previous
record againVoice Commands
Primary Alternate(s)
redial
return to main menu return or main menu
select phone select
send
set up phone settings or phone
set up
towing assistance
transfer call
UConnectŸ Tutorial
try again
voice training
work
yes
102 UNDERSTANDING THE FEATURES OF YOUR VEHICLE
Page 104 of 373
General Information
This device complies with part 15 of the FCC rules and
RSS 210 of Industry Canada. Operation is subject to the
following conditions:
²This device may not cause harmful interference.
²This device must accept any interference received,
including interference that may cause undesired op-
eration.
SEATS
Front Seat Adjustment
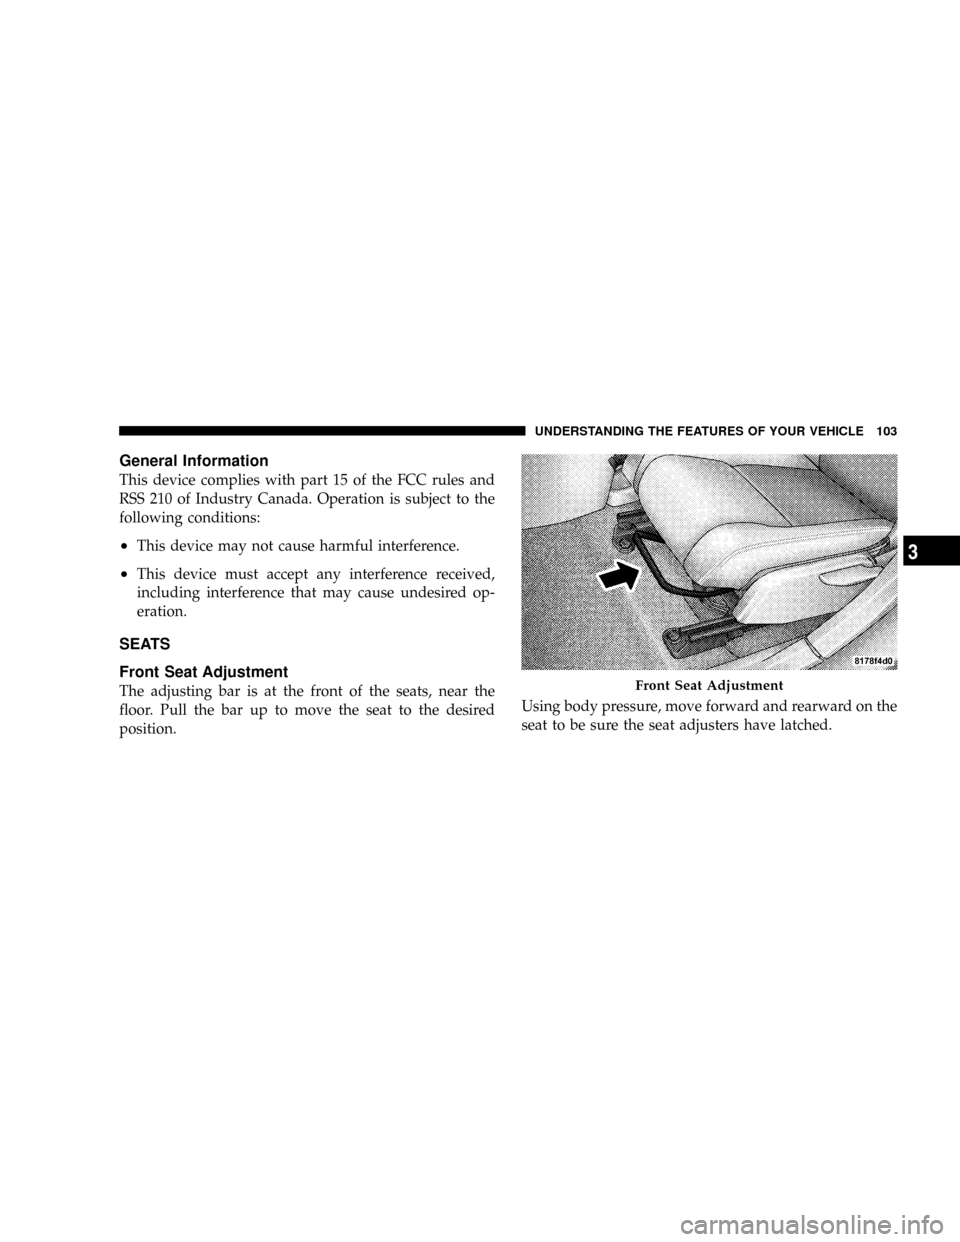
The adjusting bar is at the front of the seats, near the
floor. Pull the bar up to move the seat to the desired
position.Using body pressure, move forward and rearward on the
seat to be sure the seat adjusters have latched.Front Seat Adjustment
UNDERSTANDING THE FEATURES OF YOUR VEHICLE 103
3
Page 105 of 373
WARNING!
²Adjusting a seat while the vehicle is moving is
dangerous. The sudden movement of the seat
could cause you to lose control. The seat belt might
not be properly adjusted and you could be injured.
Adjust the seat only while the vehicle is parked.
²Do not ride with the seatback reclined so that the
shoulder belt is no longer resting against your
chest. In a collision you could slide under the seat
belt and be seriously or even fatally injured. Use
the recliner only when the vehicle is parked.
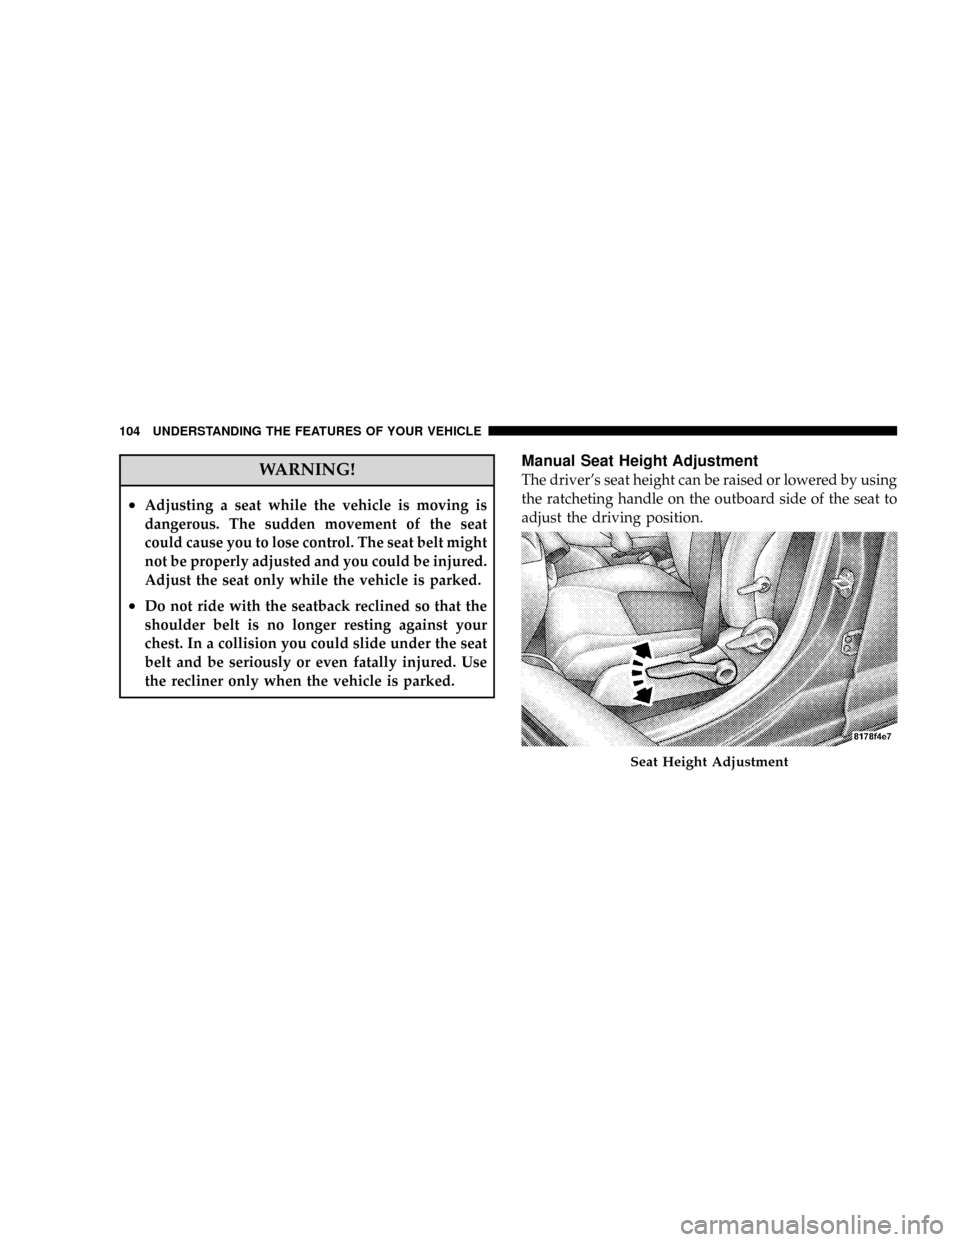
Manual Seat Height Adjustment
The driver's seat height can be raised or lowered by using
the ratcheting handle on the outboard side of the seat to
adjust the driving position.
Seat Height Adjustment
104 UNDERSTANDING THE FEATURES OF YOUR VEHICLE
Page 106 of 373
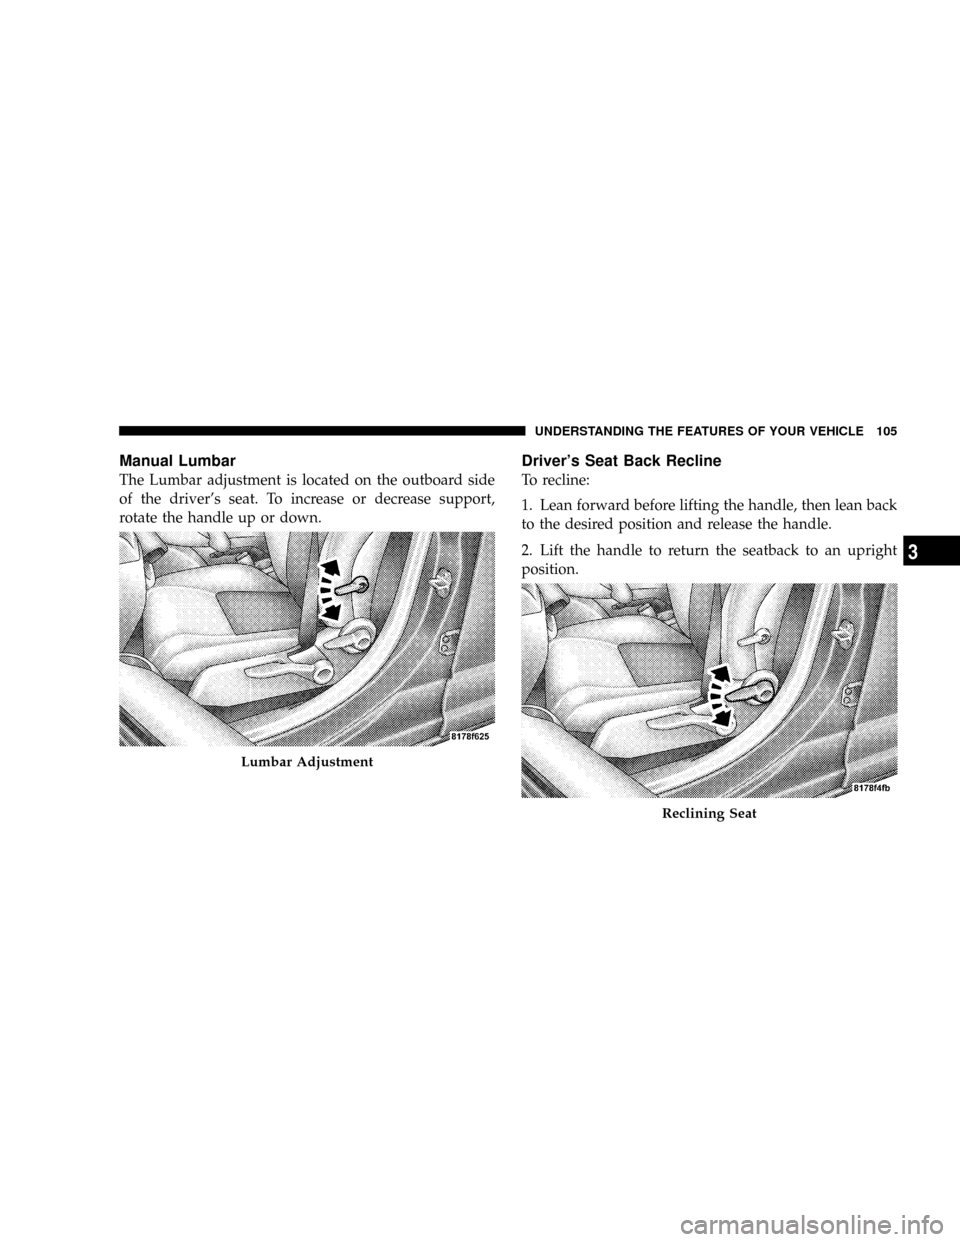
Manual Lumbar
The Lumbar adjustment is located on the outboard side
of the driver's seat. To increase or decrease support,
rotate the handle up or down.
Driver's Seat Back Recline
To recline:
1. Lean forward before lifting the handle, then lean back
to the desired position and release the handle.
2. Lift the handle to return the seatback to an upright
position.
Lumbar Adjustment
Reclining Seat
UNDERSTANDING THE FEATURES OF YOUR VEHICLE 105
3
Page 107 of 373
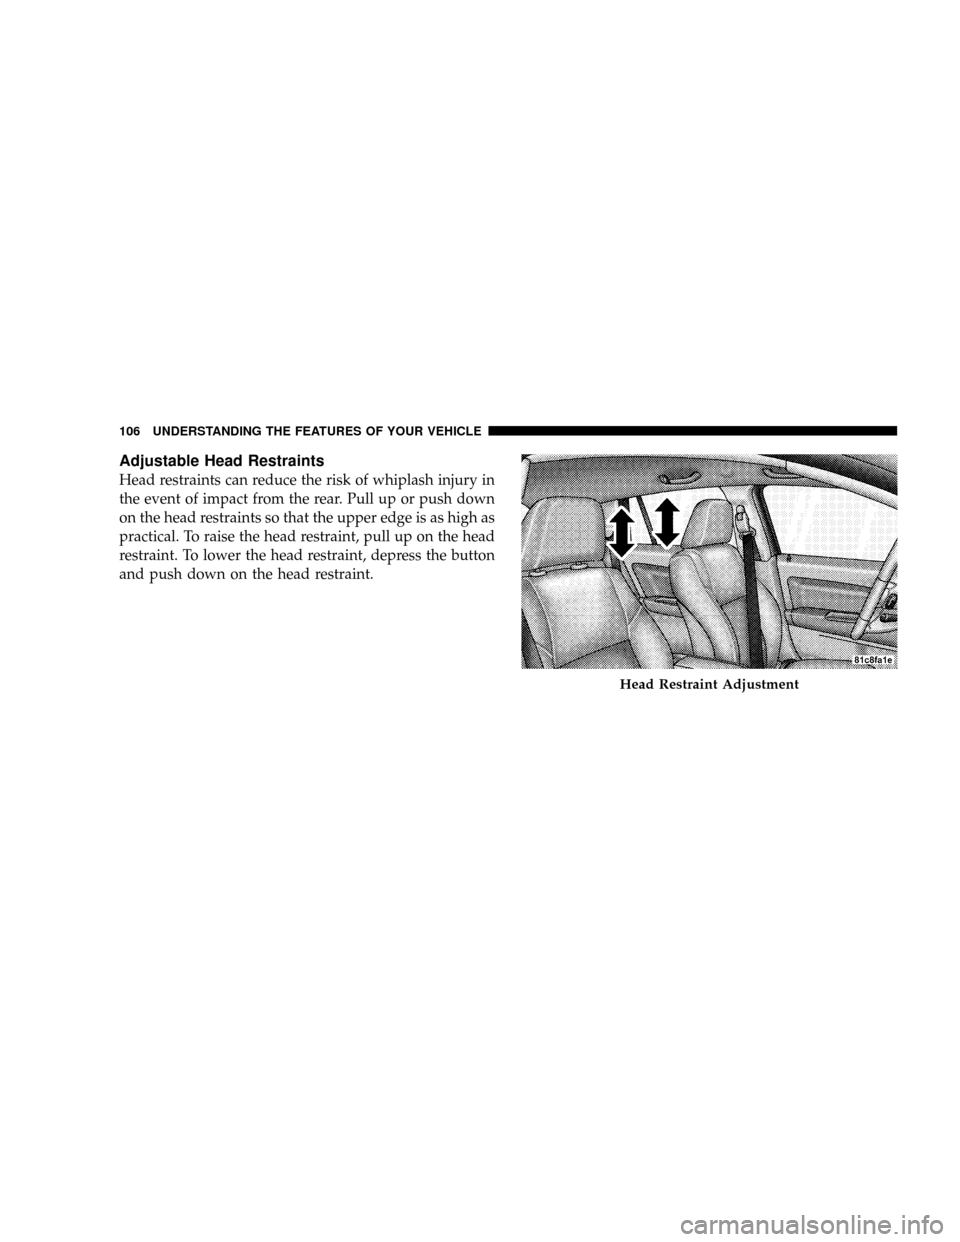
Adjustable Head Restraints
Head restraints can reduce the risk of whiplash injury in
the event of impact from the rear. Pull up or push down
on the head restraints so that the upper edge is as high as
practical. To raise the head restraint, pull up on the head
restraint. To lower the head restraint, depress the button
and push down on the head restraint.
Head Restraint Adjustment
106 UNDERSTANDING THE FEATURES OF YOUR VEHICLE
Page 108 of 373
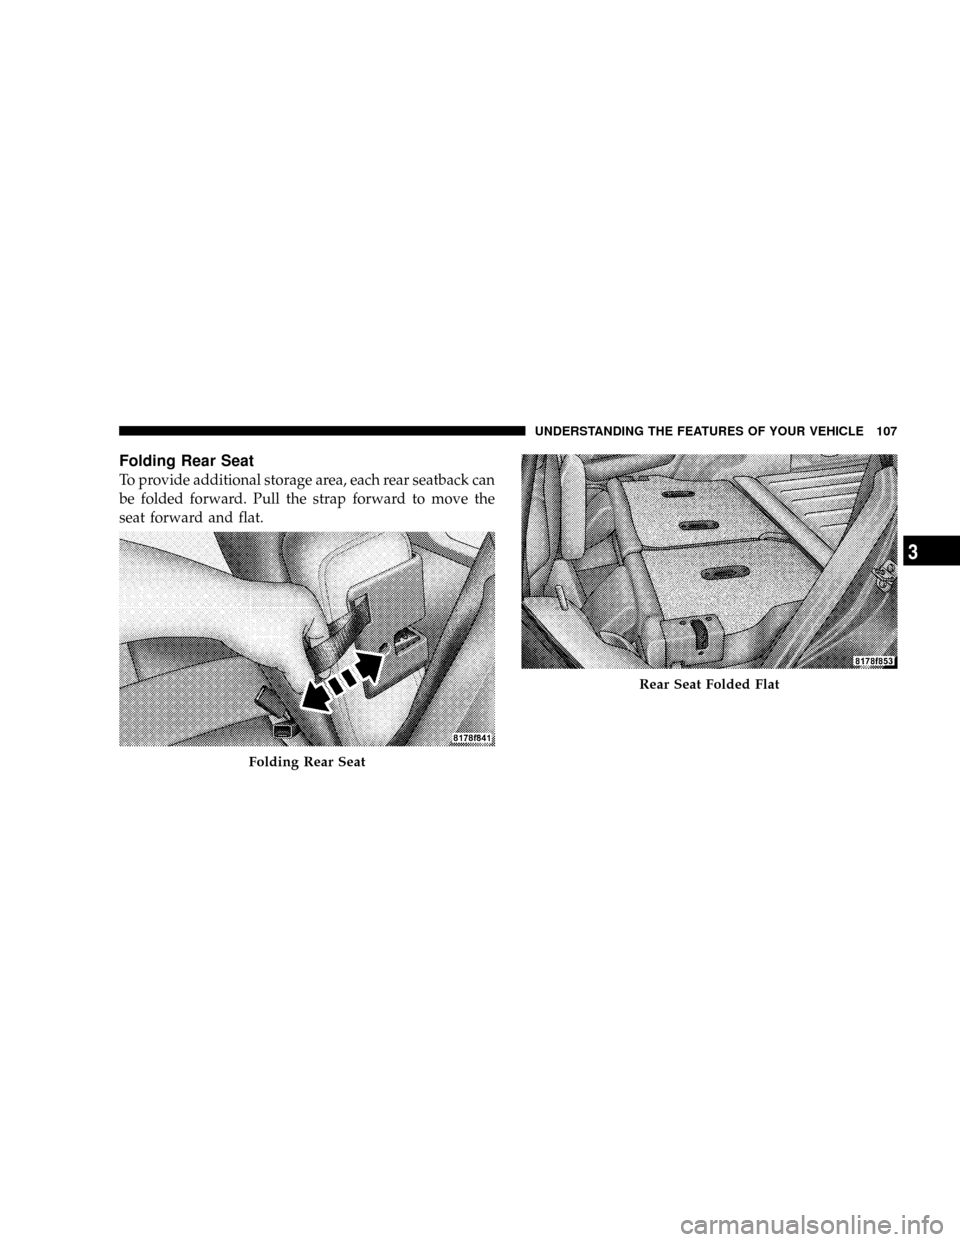
Folding Rear Seat
To provide additional storage area, each rear seatback can
be folded forward. Pull the strap forward to move the
seat forward and flat.
Folding Rear Seat
Rear Seat Folded Flat
UNDERSTANDING THE FEATURES OF YOUR VEHICLE 107
3
Page 109 of 373
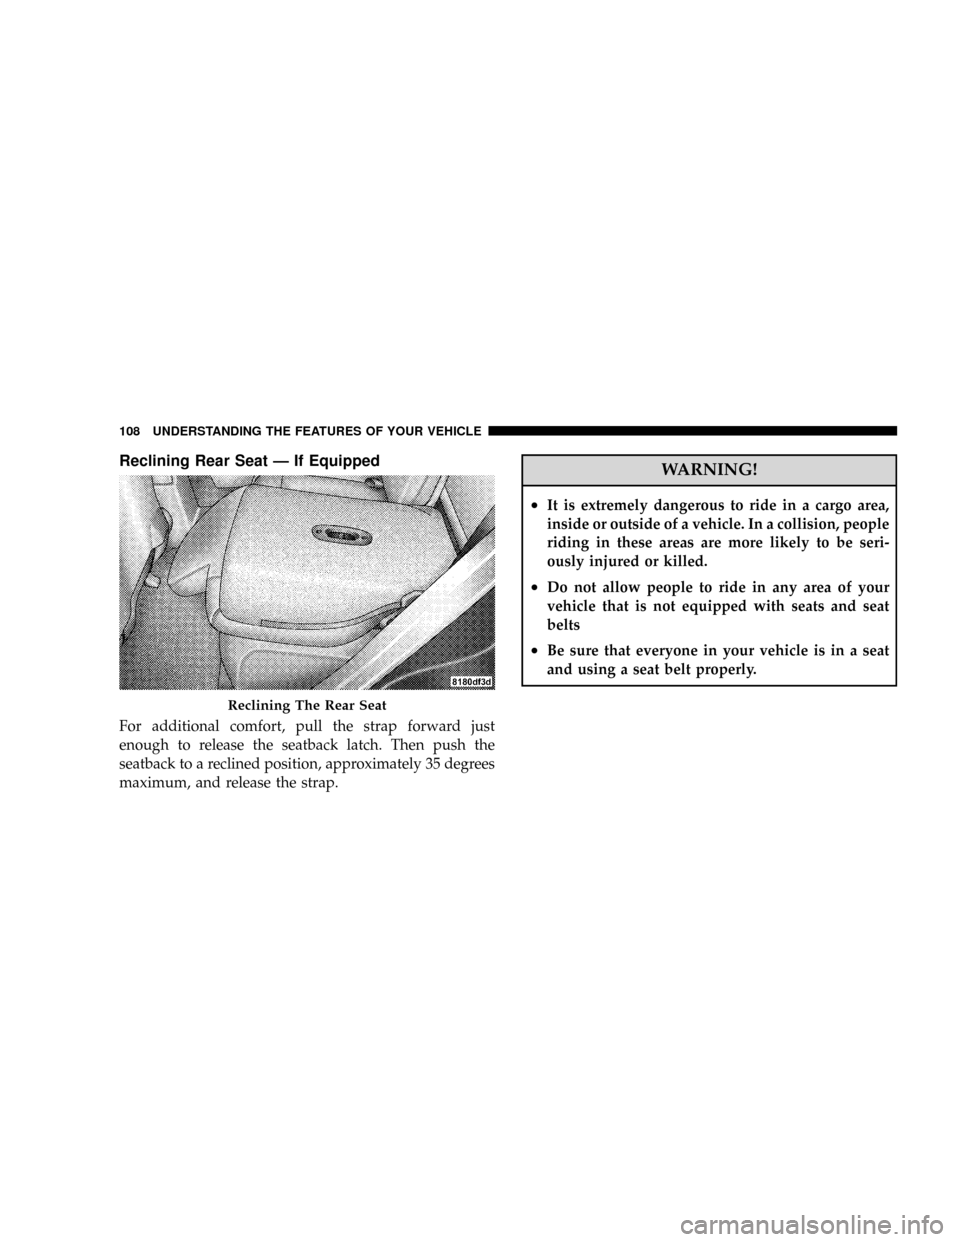
Reclining Rear Seat Ð If Equipped
For additional comfort, pull the strap forward just
enough to release the seatback latch. Then push the
seatback to a reclined position, approximately 35 degrees
maximum, and release the strap.
WARNING!
²It is extremely dangerous to ride in a cargo area,
inside or outside of a vehicle. In a collision, people
riding in these areas are more likely to be seri-
ously injured or killed.
²Do not allow people to ride in any area of your
vehicle that is not equipped with seats and seat
belts
²Be sure that everyone in your vehicle is in a seat
and using a seat belt properly.
Reclining The Rear Seat
108 UNDERSTANDING THE FEATURES OF YOUR VEHICLE
Page 110 of 373
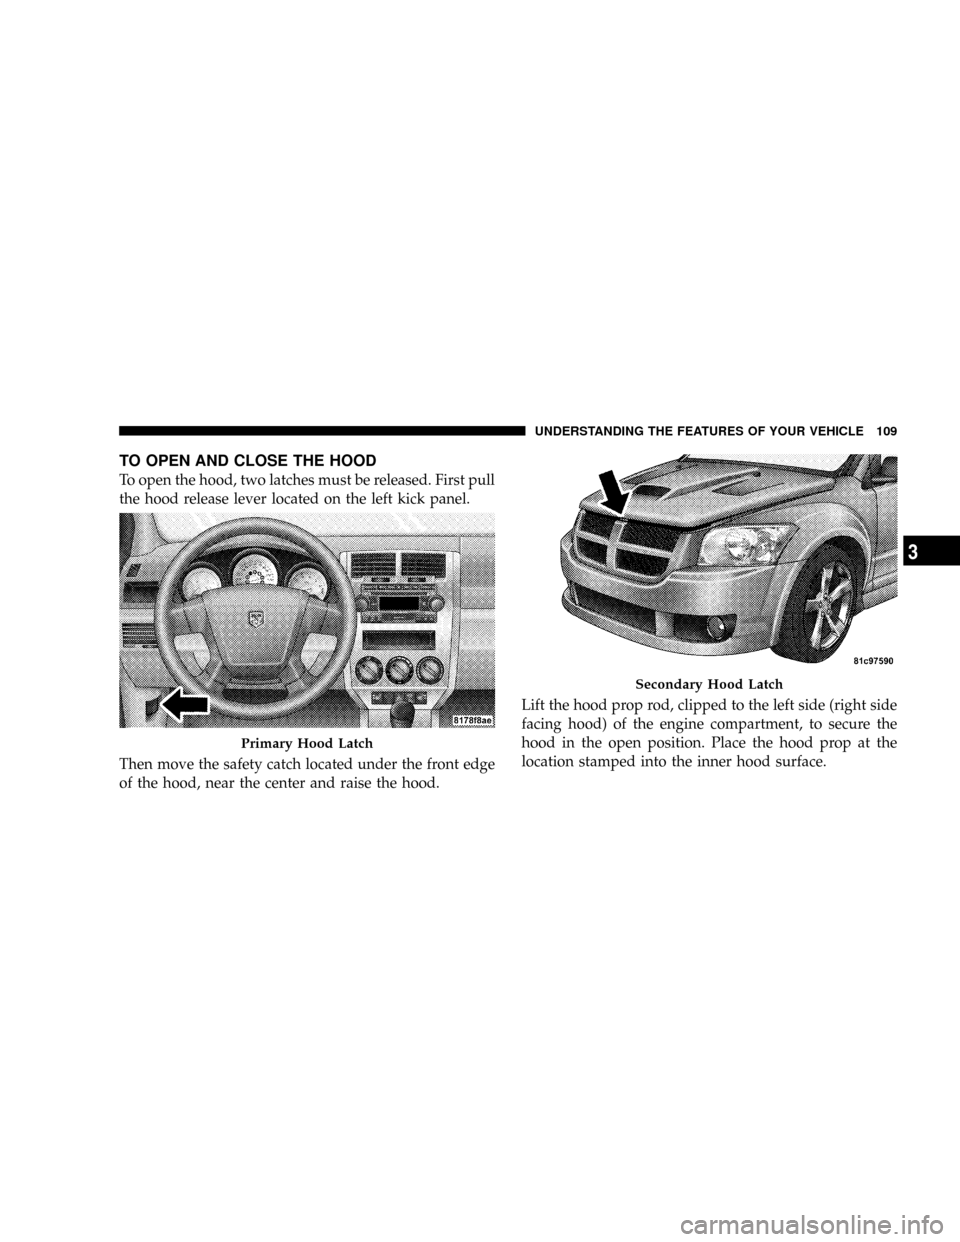
TO OPEN AND CLOSE THE HOOD
To open the hood, two latches must be released. First pull
the hood release lever located on the left kick panel.
Then move the safety catch located under the front edge
of the hood, near the center and raise the hood.Lift the hood prop rod, clipped to the left side (right side
facing hood) of the engine compartment, to secure the
hood in the open position. Place the hood prop at the
location stamped into the inner hood surface.
Primary Hood Latch
Secondary Hood Latch
UNDERSTANDING THE FEATURES OF YOUR VEHICLE 109
3
Trending: fuel pressure, lock, recommended oil, spark plugs, lumbar support, coolant temperature, warning
