audio DODGE CARAVAN 2004 4.G Owners Manual
[x] Cancel search | Manufacturer: DODGE, Model Year: 2004, Model line: CARAVAN, Model: DODGE CARAVAN 2004 4.GPages: 397, PDF Size: 6.83 MB
Page 170 of 397

Time Button
Press this button to change the display from elapsed CD
playing time to time of day.
Scan Button
Press this button to play the first 10 seconds of each track.
To stop the scan function, press the button a second time.
CD Changer Control Capability Ð If Equipped
This radio is compatible with a remote mounted CD
changer available through Mopar Accessories. The fol-
lowing instructions are for the radio controls that operate
this CD changer.
Mode Button
To activate the CD changer, press the MODE button until
CD information appears on the display.
Push-Button
While the CD changer is playing, press the NUMBER 1
push-button or the NUMBER 5 push-button to select a
disc numbered higher or lower than the one currently
being played.
Seek Button
Press the SEEK up or down to select another track on the
same disc. A SEEK symbol will appear on the display.
Fast Forward And Rewind Buttons
Press and hold the FF button for fast forward. Press and
hold the RW button for fast reverse.
The audio output can be heard when fast forward and
fast reverse are activated.
Random Play (RND)
Press the Random button to play the tracks on the
selected disc in random order for an interesting change of
pace.
Random can be cancelled by pressing the button a second
time or by ejecting the CD from the changer.
170 UNDERSTANDING YOUR INSTRUMENT PANEL
Page 182 of 397

Mode
Press the MODE button repeatedly to select between the
CD player, the optional remote CD changer and the
Satellite Radio (if equipped). When Satellite Radio (if
equipped) is selected ªSAº will appear in your radio
display.
A CD or tape may remain in the player while in the
Satellite mode.
Time
Press the TIME button to change the display from
elapsed CD playing time to time of day.
CD Changer Control Capability Ð If Equipped
This radio is compatible with a remote mounted CD
changer available through Mopar Accessories. The fol-
lowing instructions are for the radio controls that operate
this CD changer.
Mode Button
To activate the CD changer, press the MODE button until
CD information appears on the display.
Push-Button
While the CD changer is playing, press the NUMBER 1
push-button or the NUMBER 5 push-button to select a
disc numbered higher or lower than the one currently
being played.
Seek Button
Press the SEEK up or down to select another track on the
same disc. A SEEK symbol will appear on the display.
Fast Forward And Rewind Buttons
Press and hold the FF button for fast forward. Press and
hold the RW button for fast reverse.
The audio output can be heard when fast forward and
fast reverse are activated.
182 UNDERSTANDING YOUR INSTRUMENT PANEL
Page 187 of 397

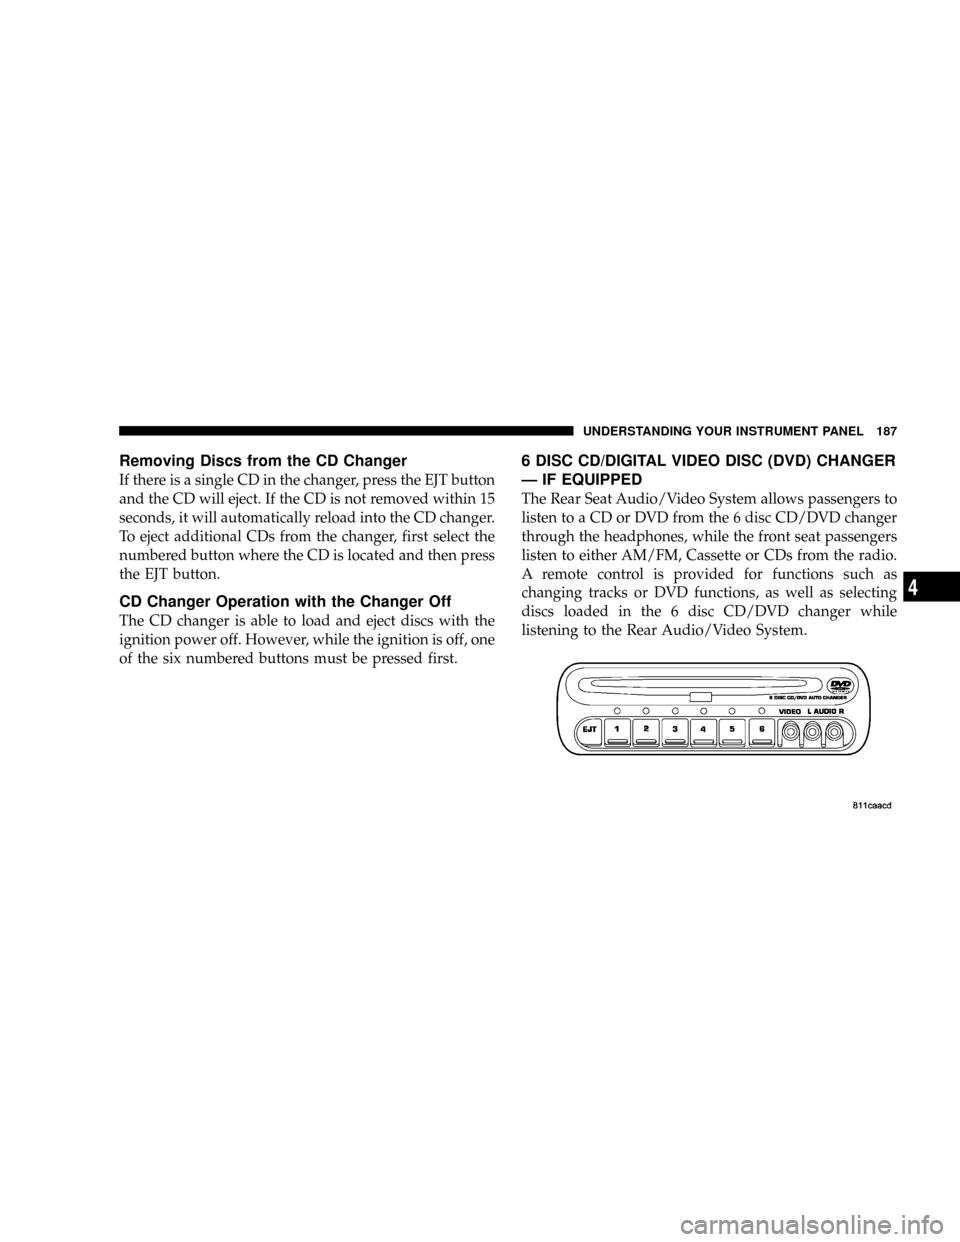
Removing Discs from the CD Changer
If there is a single CD in the changer, press the EJT button
and the CD will eject. If the CD is not removed within 15
seconds, it will automatically reload into the CD changer.
To eject additional CDs from the changer, first select the
numbered button where the CD is located and then press
the EJT button.
CD Changer Operation with the Changer Off
The CD changer is able to load and eject discs with the
ignition power off. However, while the ignition is off, one
of the six numbered buttons must be pressed first.
6 DISC CD/DIGITAL VIDEO DISC (DVD) CHANGER
Ð IF EQUIPPED
The Rear Seat Audio/Video System allows passengers to
listen to a CD or DVD from the 6 disc CD/DVD changer
through the headphones, while the front seat passengers
listen to either AM/FM, Cassette or CDs from the radio.
A remote control is provided for functions such as
changing tracks or DVD functions, as well as selecting
discs loaded in the 6 disc CD/DVD changer while
listening to the Rear Audio/Video System.
UNDERSTANDING YOUR INSTRUMENT PANEL 187
4
Page 189 of 397

²If you insert a disc with the ignition ON and the radio
OFF, the DVD will automatically be pulled into the
DVD changer and the display will show the time of
day.
EJECT (EJT) Button
If there is a single disc in the changer, press the EJT
button and the disc will eject. The unit will switch to the
radio mode. If you do not remove the disc within 10
seconds, it will be reloaded and the display will show
PAUSE. The radio mode will continue to operate.
To eject additional discs from the changer, first select the
numbered button where the disc is located and then press
the EJT button.
The disc can be ejected with the radio OFF.
Operating Instructions Ð Remote Control
Power Button (PWR)
Pressing the ªPOWERº button will turn the rear audio/
video system ON/OFF. The headphone symbol will flash
for approximately 5 seconds in the radio display and
sound can be heard from the headphones.
NOTE:
²The power button on the headphones must be turned
ON before sound can be heard from the headphones.
²When the rear audio/video system is ON, sound can
only be heard from the front speakers. The rear
speakers will turn back on when the rear audio/video
system is turned OFF.
UNDERSTANDING YOUR INSTRUMENT PANEL 189
4
Page 193 of 397

Power Button
Pressing the power button will turn the headphones
ON/OFF.
NOTE:
²The headphones will turn off automatically and the
red LED will illuminate for approximately 2 minutes
when the radio or rear audio/video system is turned
off.
²The rear audio/video system must be turned ON
before sound can be heard from the headphones.
Volume Control
Rotate the volume control upward to increase the vol-
ume.
Scan Button
Pressing the scan button will automatically find the
audio signal that is transmitted from the CD/DVD
changer when the rear audio/video system and the
headphones are on. This button is used only if the
headphones are locked on to a source other than the
vehicle's radio.
NOTE:When the ªGREEN LEDº is showing the head-
phones are receiving the audio signal. When the ªRED
LEDº is showing the headphones are searching for the
audio signal
UNDERSTANDING YOUR INSTRUMENT PANEL 193
4
Page 194 of 397

Headphone Battery Service
²Using a key or similar flat object insert into the slot.
²Pry on the release tab to open the cover.
²Replace the batteries and reinstall the cover.
The replacement batteries for the headphones are three
AAA batteries.
General Information
This device complies with part 15 of the FCC rules and
RSS 210 of Industry Canada. Operation is subject to the
following two conditions: (1) This device may not cause
harmful interference and (2) This device must accept any
interference received, including interference that may
cause undesired operation.
If you experience static or the headphones will not hold
a channel, check for these two conditions:
1. A weak battery in the headphones.
2. Closeness to a radio transmitter such as a radio station
tower, airport transmitter, and some mobile or CB radios.
Operating Instructions Ð MP3 Player
An MP3 player can be connected to the audio system.
Connect the cables to the RCA jacks located on the front
of the CD/DVD changer.
194 UNDERSTANDING YOUR INSTRUMENT PANEL
Page 195 of 397

NOTE:Follow the manufactures instructions for the
correct colors when connecting the RCA cables.
Operating Instructions Ð Video
Games/Camcorders
A video game unit or camcorder can be connected to the
rear audio/video system. Connect the cables to the RCA
jacks located on the front of the CD/DVD changer.
NOTE:To operate a video game unit a DC to AC
adapter may be required, plug the adapter into any
power outlet.
Follow the manufactures instructions for the correct
colors when connecting the RCA cables.
NOTE:MP3 player's, video game systems, camcorders
connected to the RCA jacks and CD's or DVD's inserted
into the CD/DVD changer can be heard through the
headphones.
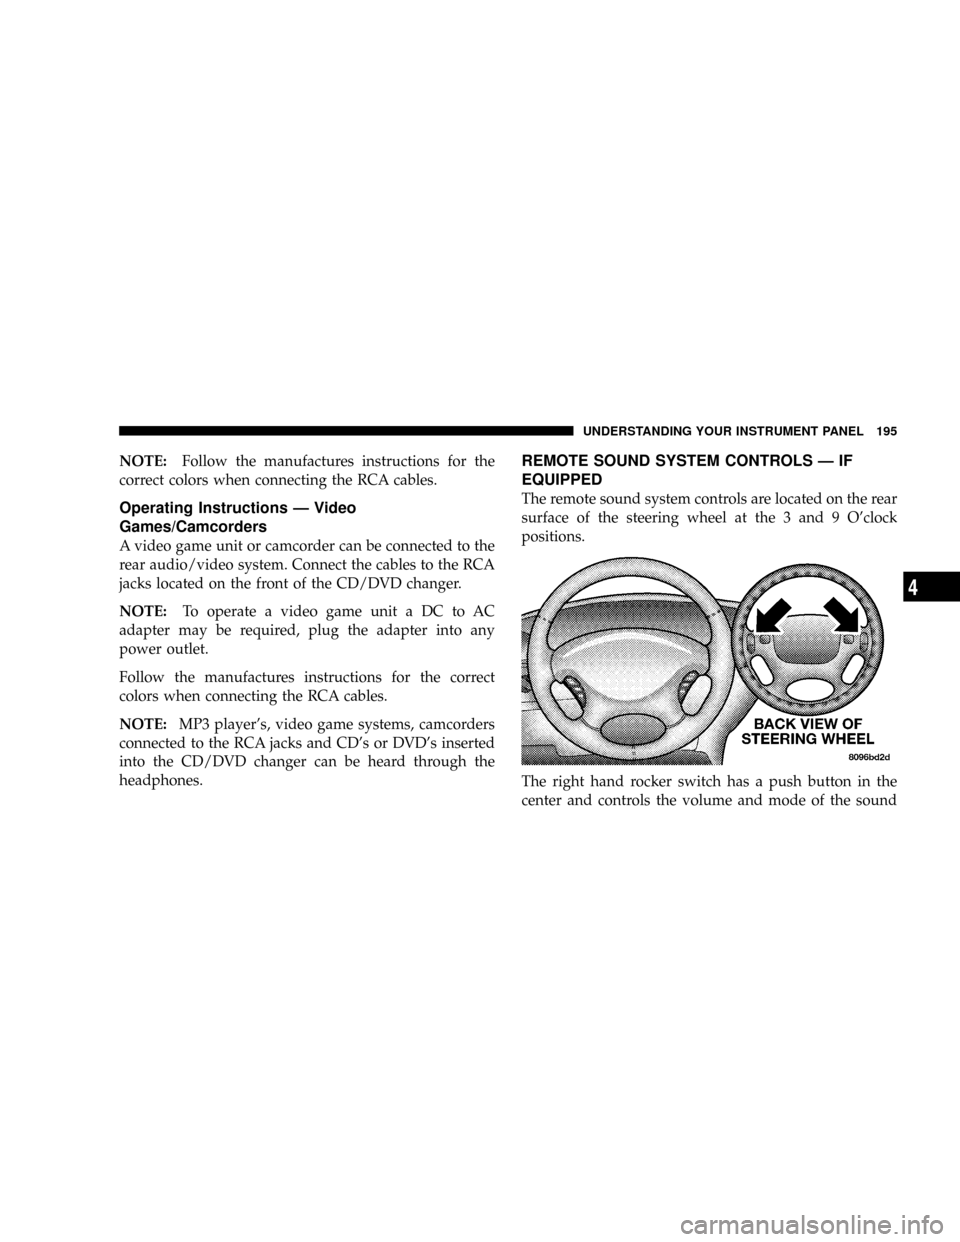
REMOTE SOUND SYSTEM CONTROLS Ð IF
EQUIPPED
The remote sound system controls are located on the rear
surface of the steering wheel at the 3 and 9 O'clock
positions.
The right hand rocker switch has a push button in the
center and controls the volume and mode of the sound
UNDERSTANDING YOUR INSTRUMENT PANEL 195
4