fuel DODGE CHALLENGER 2015 3.G Owners Manual
[x] Cancel search | Manufacturer: DODGE, Model Year: 2015, Model line: CHALLENGER, Model: DODGE CHALLENGER 2015 3.GPages: 603, PDF Size: 14.97 MB
Page 31 of 603
Cancel Remote Start
Remote Starting will also cancel if any of the following
occur:
•The engine stalls or engine speed exceeds 2500 rpm
•Any engine warning lights come on
•Low Fuel Light turns on
•The hood is opened
•The hazard switch is pushed
•The shift lever is moved out of PARK
•The brake pedal is pushed
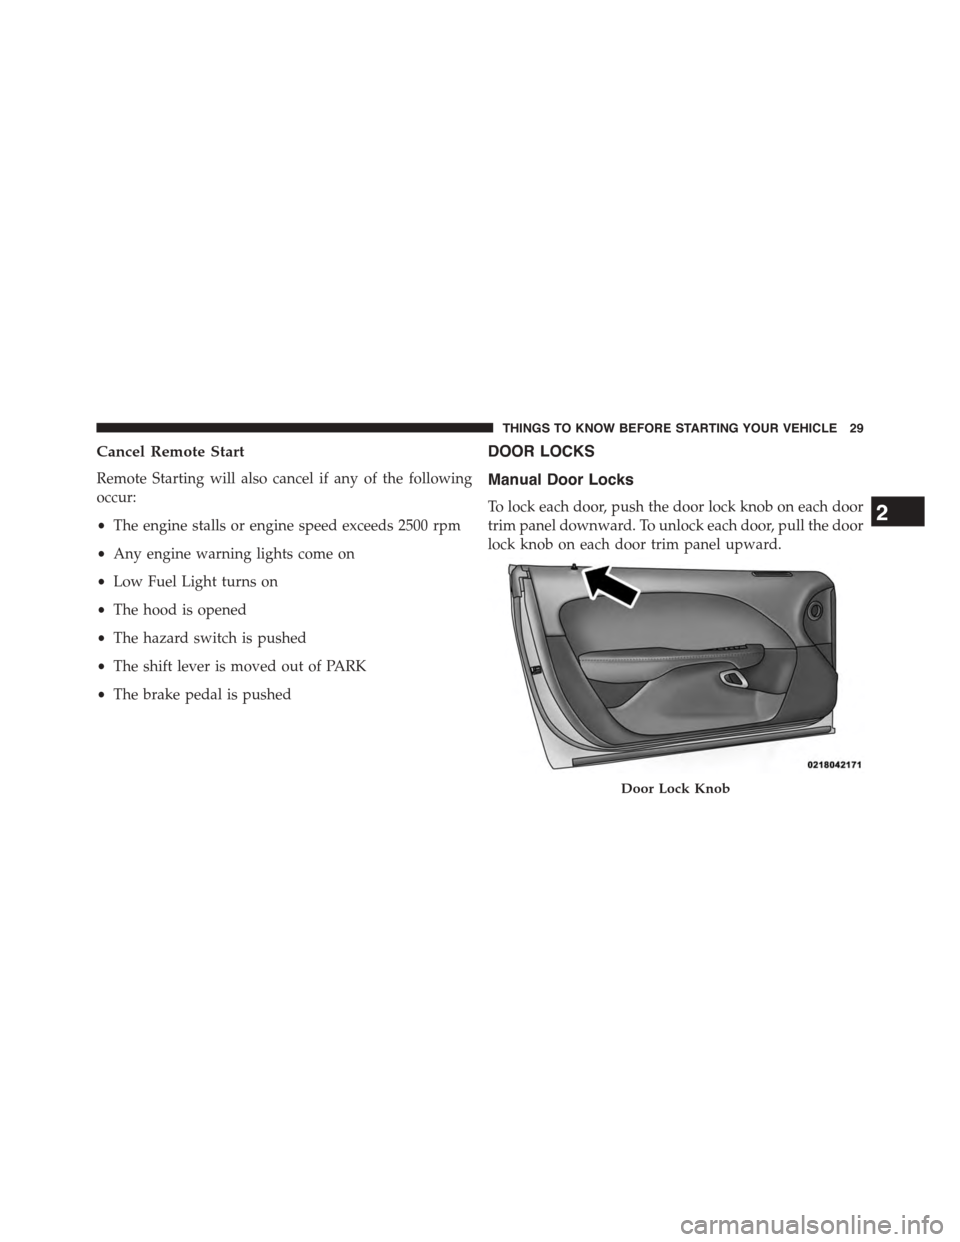
DOOR LOCKS
Manual Door Locks
To lock each door, push the door lock knob on each door
trim panel downward. To unlock each door, pull the door
lock knob on each door trim panel upward.
Door Lock Knob
2
THINGS TO KNOW BEFORE STARTING YOUR VEHICLE 29
Page 66 of 603
Do not drive your vehicle after the air bags have de-
ployed. If you are involved in another collision, the air
bags will not be in place to protect you.
WARNING!
Deployed air bags and seat belt pretensioners cannot
protect you in another collision. Have the air bags,
seat belt pretensioners, and the seat belt retractor
assemblies replaced by an authorized dealer imme-
diately. Also, have the Occupant Restraint Controller
System serviced as well.
NOTE:
•Air bag covers may not be obvious in the interior trim,
but they will open during air bag deployment.
•After any collision, the vehicle should be taken to an
authorized dealer immediately.
Enhanced Accident Response System
In the event of an impact, if the communication network
remains intact, and the power remains intact, depending
on the nature of the event, the ORC will determine
whether to have the Enhanced Accident Response Sys-
tem perform the following functions:
•Cut off fuel to the engine.
•Flash hazard lights as long as the battery has power or
until the ignition switch is turned to the “OFF” posi-
tion.
•Turn on the interior lights, which remain on as long as
the battery has power or until the ignition switch is
turned to the “OFF” position.
•Unlock the doors automatically.
64 THINGS TO KNOW BEFORE STARTING YOUR VEHICLE
Page 95 of 603
For the first 1500 mi (2414 km):
•Do not participate in track events, sport driving
schools, or similar activities during the first 1500 mi
(2414 km).
NOTE:Check engine oil with every refueling and add if
necessary. Oil and fuel consumption may be higher
through the first oil change interval.
SAFETY TIPS
Transporting Passengers
NEVER TRANSPORT PASSENGERS IN THE CARGO
AREA.
WARNING!
•Do not leave children or animals inside parked
vehicles in hot weather. Interior heat build-up may
cause serious injury or death.
•It is extremely dangerous to ride in a cargo area,
inside or outside of a vehicle. In a collision, people
riding in these areas are more likely to be seriously
injured or killed.
•Do not allow people to ride in any area of your
vehicle that is not equipped with seats and seat
belts.
•Be sure everyone in your vehicle is in a seat and
using a seat belt properly.
2
THINGS TO KNOW BEFORE STARTING YOUR VEHICLE 93
Page 99 of 603
Periodic Safety Checks You Should Make Outside
The Vehicle
Tires
Examine tires for excessive tread wear and uneven wear
patterns. Check for stones, nails, glass, or other objects
lodged in the tread or sidewall. Inspect the tread for cuts
and cracks. Inspect sidewalls for cuts, cracks and bulges.
Check the wheel nuts for tightness. Check the tires
(including spare) for proper cold inflation pressure.
Lights
Have someone observe the operation of brake lights and
exterior lights while you work the controls. Check turn
signal and high beam indicator lights on the instrument
panel.
Door Latches
Check for positive closing, latching, and locking.
Fluid Leaks
Check area under vehicle after overnight parking for fuel,
engine coolant, oil, or other fluid leaks. Also, if gasoline
fumes are detected or if fuel, power steering fluid (if
equipped), or brake fluid leaks are suspected, the cause
should be located and corrected immediately.
2
THINGS TO KNOW BEFORE STARTING YOUR VEHICLE 97
Page 226 of 603
INSTRUMENT CLUSTER DESCRIPTIONS
1. Tachometer
The red segments indicate the maximum permissible
engine revolutions per minute (RPM x 1000) for each gear
range. Ease up on the accelerator before reaching the red
area.
2. Malfunction Indicator Light (MIL)
The Malfunction Indicator Light (MIL) is part of
an onboard diagnostic system called OBD. The
OBD system monitors engine and automatic
transmission control systems. The MIL will turn on when
the ignition is in the ON/RUN position before engine
start. If the MIL does not come on when turning the key
from OFF to ON/RUN, have the condition checked
promptly.
Certain conditions, such as a loose or missing gas cap,
poor fuel quality, etc., may illuminate the MIL after
engine start. The vehicle should be serviced if the MIL
stays on through several of your typical driving cycles. In
most situations, the vehicle will drive normally and will
not require towing.
CAUTION!
Prolonged driving with the Malfunction Indicator
Light (MIL) on could cause damage to the engine
control system. It also could affect fuel economy and
driveability. If the MIL is flashing, severe catalytic
converter damage and power loss will soon occur.
Immediate service is required.
WARNING!
A malfunctioning catalytic converter, as referenced
above, can reach higher temperatures than in normal
(Continued)
224 UNDERSTANDING YOUR INSTRUMENT PANEL
Page 231 of 603
10. Air Bag Warning Light
This light will turn on for four to eight seconds
as a bulb check when the ignition switch is first
turned to the ON/RUN position. If the light is
either not on during starting, stays on, or turns
on while driving, have the system inspected at an autho-
rized dealer as soon as possible. Refer to “Occupant
Restraints” in “Things To Know Before Starting Your
Vehicle” for further information.
11. Speedometer
Indicates vehicle speed.
12. Front Fog Light Indicator — If Equipped
This indicator will illuminate when the front fog
lights are on.
13. High Beam Indicator
This indicator will turn on when the high beam
headlights are on. Push the multifunction lever
away from the steering wheel to switch the headlights to
high beam.
14. Park/Headlight ON Indicator
This indicator will illuminate when the park
lights or headlights are turned on.
15. Fuel Gauge
The pointer shows the level of fuel in the fuel tank when
the ignition switch is placed in the ON/RUN position.
16. Temperature Gauge
The temperature gauge shows engine coolant tempera-
ture. Any reading within the normal range for a fully
warm vehicle should be 200 F - 230 F which indicates that
the engine cooling system is operating satisfactorily.
4
UNDERSTANDING YOUR INSTRUMENT PANEL 229
Page 233 of 603
As an added safety feature, your vehicle has been
equipped with a Tire Pressure Monitoring System
(TPMS) that illuminates a low tire pressure telltale when
one or more of your tires is significantly under-inflated.
Accordingly, when the low tire pressure telltale illumi-
nates, you should stop and check your tires as soon as
possible, and inflate them to the proper pressure. Driving
on a significantly under-inflated tire causes the tire to
overheat and can lead to tire failure. Under-inflation also
reduces fuel efficiency and tire tread life, and may affect
the vehicle’s handling and stopping ability.
Please note that the TPMS is not a substitute for proper
tire maintenance, and it is the driver ’s responsibility to
maintain correct tire pressure, even if under-inflation has
not reached the level to trigger illumination of the TPMS
low tire pressure telltale.
Your vehicle has also been equipped with a TPMS
malfunction indicator to indicate when the system is not
operating properly. The TPMS malfunction indicator is
combined with the low tire pressure telltale. When the
system detects a malfunction, the telltale will flash for
approximately one minute and then remain continuously
illuminated. This sequence will continue upon subse-
quent vehicle start-ups as long as the malfunction exists.
When the malfunction indicator is illuminated, the sys-
tem may not be able to detect or signal low tire pressure
as intended. TPMS malfunctions may occur for a variety
of reasons, including the installation of replacement or
alternate tires or wheels on the vehicle that prevent the
TPMS from functioning properly. Always check the
TPMS malfunction telltale after replacing one or more
tires or wheels on your vehicle, to ensure that the
replacement or alternate tires and wheels allow the TPMS
to continue to function properly.
4
UNDERSTANDING YOUR INSTRUMENT PANEL 231
Page 236 of 603
DRIVER INFORMATION DISPLAY (DID)
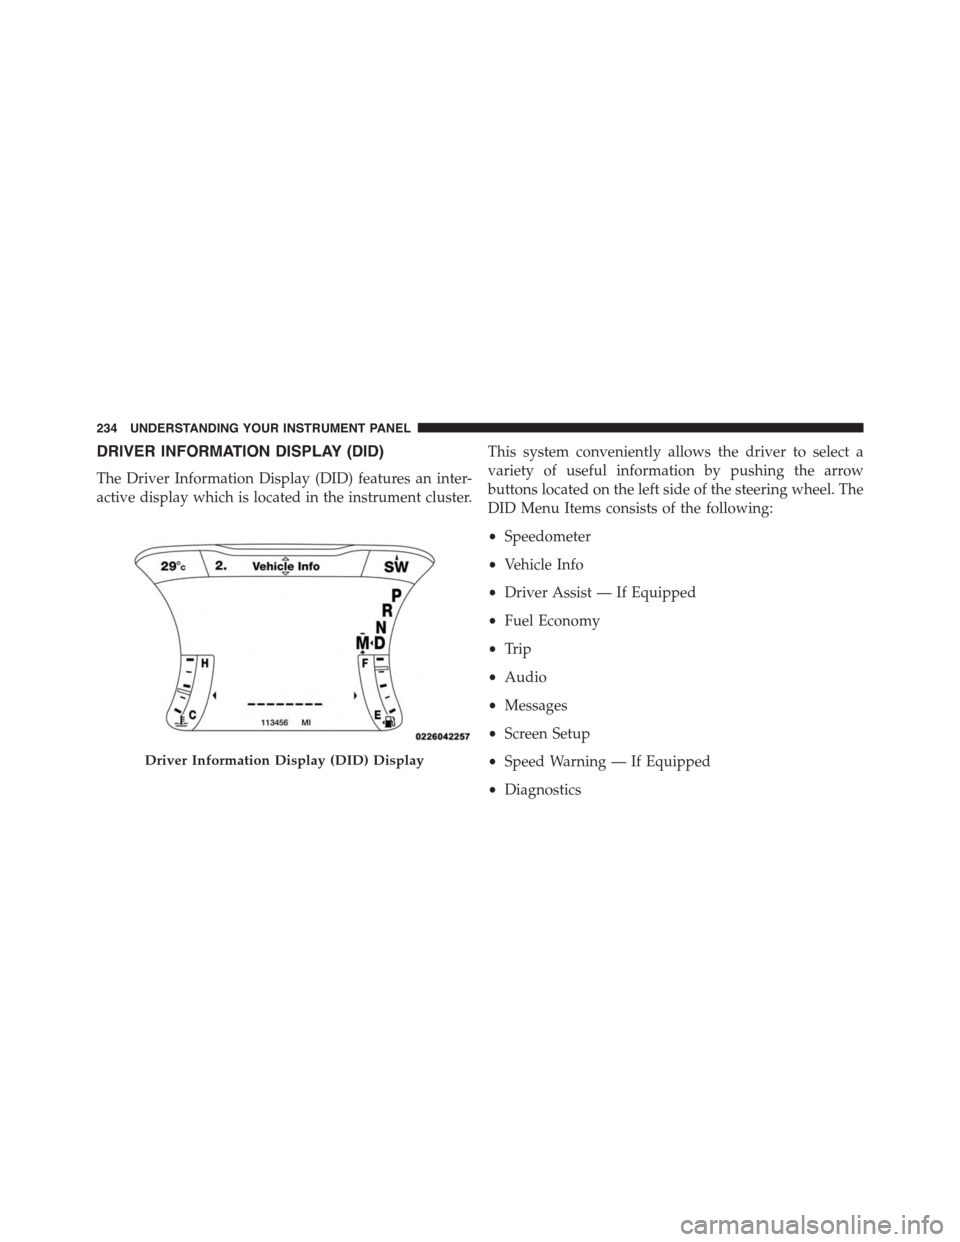
The Driver Information Display (DID) features an inter-
active display which is located in the instrument cluster.
This system conveniently allows the driver to select a
variety of useful information by pushing the arrow
buttons located on the left side of the steering wheel. The
DID Menu Items consists of the following:
•Speedometer
•Vehicle Info
•Driver Assist — If Equipped
•Fuel Economy
•Trip
•Audio
•Messages
•Screen Setup
•Speed Warning — If Equipped
•Diagnostics
Driver Information Display (DID) Display
234 UNDERSTANDING YOUR INSTRUMENT PANEL
Page 238 of 603
NOTE:
•Holding the Up/Down or Left/Right arrow buttons
will loop the user through the currently selected menu
or options presented on the screen.
•Main menu and submenu’s wrap for continuous
scrolling.
•Upon returning to a main menu, the last submenu
screen viewed within that main menu will be dis-
played.
OK Button:
For Digital Speedometer
•Pushing the OK button changes units (MPH or km/h).
For Screen Setup and Vehicle Settings:
•OK button allows user to enter menu and submenus.
•Within each submenu layer, the up/down arrows will
allow the user to select the item of interest.
•Pushing the OK button makes the selection and a
confirmation screen will appear (returning the user to
the 1st page of the submenu).
•Pushing the left arrow button will exit each submenu
layer and return to the main menu.
For the Trip and Fuel Economy menus (and new Perfor-
mance Timers):
•Information is reset by pushing and holding the OK
button.
Engine Oil Life Reset
Oil Change Required
Your vehicle is equipped with an engine oil change
indicator system. The “Oil Change Required” message
will display in the DID for five seconds after a single
236 UNDERSTANDING YOUR INSTRUMENT PANEL
Page 249 of 603
•System Cancel
•Driver Override
•System Off
•ACC Proximity Warning
•ACC Unavailable Warning
•The DID will return to the last display selected after
five seconds of no ACC display activity.
For further information, refer to “Adaptive Cruise Con-
trol (ACC) — If Equipped” in “Understanding The
Features Of Your Vehicle”.
Fuel Economy
Push and release the UP or DOWN arrow button until
the Fuel Economy Menu item is highlighted in the DID.
•Two sub menu pages one with Current value dis-
played and one without the Current Value displayed:
– Current MPG (or L/100 km)
– Range (miles or km)
– Average MPG (or L/100 km)
– The Max and Min values will correspond to the
particular engine requirements
•Lower end of gauge will be displayed in an amber
color and turn green as Fuel Economy improves.
•MPG will have the gauge fill from the left (clockwise).
•L/100 km will have the gauge fill from the right
(counter clockwise).
•HoldOKto reset average fuel economy information.
4
UNDERSTANDING YOUR INSTRUMENT PANEL 247