display DODGE CHARGER 2013 7.G User Guide
[x] Cancel search | Manufacturer: DODGE, Model Year: 2013, Model line: CHARGER, Model: DODGE CHARGER 2013 7.GPages: 132, PDF Size: 4.77 MB
Page 9 of 132
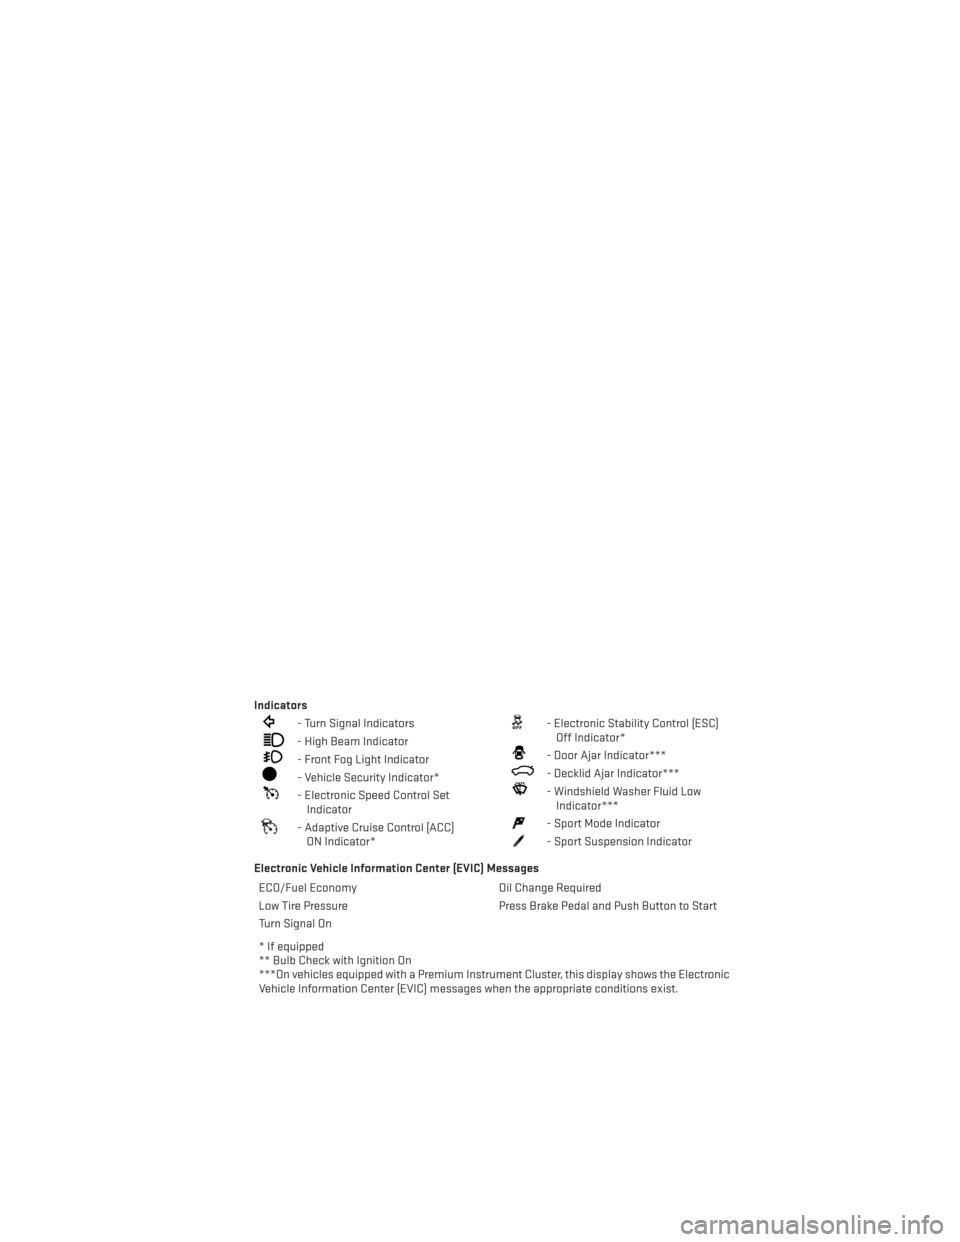
Indicators
- Turn Signal Indicators
- High Beam Indicator
- Front Fog Light Indicator
- Vehicle Security Indicator*
- Electronic Speed Control SetIndicator
- Adaptive Cruise Control (ACC)ON Indicator*
- Electronic Stability Control (ESC)Off Indicator*
- Door Ajar Indicator***
- Decklid Ajar Indicator***
- Windshield Washer Fluid LowIndicator***
- Sport Mode Indicator
- Sport Suspension Indicator
Electronic Vehicle Information Center (EVIC) Messages ECO/Fuel Economy Oil Change Required
Low Tire Pressure Press Brake Pedal and Push Button to Start
Turn Signal On
* If equipped
** Bulb Check with Ignition On
***On vehicles equipped with a Premium Instrument Cluster, this display shows the Electronic
Vehicle Information Center (EVIC) messages when the appropriate conditions exist.
CONTROLS AT A GLANCE
7
Page 20 of 132
• To program your Key Fobs, perform the following:• Change the ignition to OFF.
• Select desired memory profile 1 or 2.
• Once the profile has been recalled, press and release the SET (S) button on the memory
switch, then press and release the side of the rocker switch labeled 1 or 2 accordingly.
• A (1 or 2) will display in the instrument cluster if the vehicle is equipped with the Electronic Vehicle Information Center (EVIC).
• Press and release the LOCK button on the Key Fob within 10 seconds.
NOTE:
Your Key Fob can be unlinked to your memory settings by pressing the SET (S) button
followed by the UNLOCK button on the Key Fob in the fourth step.
• Press 1 or 2 to recall the saved positions, or press UNLOCK on the programmed Key Fob.
• Refer to the Owner's Manual on the DVD for further details.
Manual Seat
Forward/Rearward
• Lift up on the adjusting bar located at the front of the seat near the floor and release
it when the seat is at the desired position.
Then, using body pressure, move forward
and backward on the seat to be sure that
the seat adjusters have latched.
Recliner
• Lean forward in the seat and lift the re-cliner lever, then lean back to the desired
position and release the lever.
• Lift the lever to return the seatback to an upright position.
CAUTION!
Do not place any article under a power seat or impede its ability to move as it may cause
damage to the seat controls. Seat travel may become limited if movement is stopped by
an obstruction in the seat’s path.
WARNING!
•Adjusting a seat while the vehicle is moving is dangerous. The sudden movement of the
seat could cause you to lose control. The seat belt might not be properly adjusted, and
you could be severely injured or killed. Only adjust a seat while the vehicle is parked.
• Do not ride with the seatback reclined so that the seat belt is no longer resting against
your chest. In a collision, you could slide under the seat belt and be severely injured
or killed. Use the recliner only when the vehicle is parked.
GETTING STARTED
18
Page 21 of 132
REAR SEATS
Folding Rear Seatback
•
Pull on the loops, located near the outer
top of the seatbacks, to fold down either or
both seatbacks. These loops can be tucked
away when not in use.
•When the seatback is raised to the upright
position, make sure it is latched by strongly
pulling on the top of the seatback above the
seat loop.
WARNING!
• Be certain that the seatback is securely locked into position. If the seatback is not
securely locked into position, the seat will not provide the proper stability for child
seats and/or passengers. An improperly latched seat could cause you and others to
severely injured or killed.
• The cargo area in the rear of the vehicle (with the rear seatbacks in the locked-up or
folded-down position) should not be used as a play area by children when the vehicle
is in motion. They could be severely injured or killed in a collision. Children should be
seated and using the proper restraint system.
HEATED SEATS
Front Heated Seats
• The heated seats are operated using the Uconnect® System.
Uconnect® 8.4
• Press the Controls soft-key located on the Uconnect® display.
• Press the Driver or Passenger seat soft-key once to select HI-level heating. Press
the soft-key a second time to select LO-
level heating. Press the soft-key a third
time to shut the heating elements OFF.
• If the High-level setting is selected, the system will automatically switch to Low-
level after approximately 60 minutes. The
Low-level setting will turn Off automati-
cally after approximately 45 minutes.
GETTING STARTED
19
Page 27 of 132
High Beam Operation
•
Push the lever forward to activate the high beams. Pull the lever toward you for flash to pass.
NOTE:
For safe driving, turn off the high beams when oncoming traffic is present to prevent headlight
glare and as a courtesy to other motorists.
HEADLIGHT SWITCH
Automatic Headlights/Parking Lights/Headlights
• Rotate the headlight switch, located onthe instrument panel to the left of the
steering wheel, to the first detent from the
off position for parking light
and to
the second detent for headlight
.
• With the parking lights or low beam head- lights on, press the headlight switch for
front fog lights. Pressing the switch a
second time will deactivate the front fog
lights. Turning the headlight switch off
will also deactivate the front fog lights.
• Rotate the headlight switch to “AUTO” for AUTO headlights.
• When set to AUTO, the system automati- cally turns the headlights on or off based
on ambient light levels.
SmartBeams™
• This system automatically controls the use of the headlight high beams. Refer to Programmable Features in Electronics for further details.
Instrument Panel Dimmer
• Rotate the dimmer control to the extreme bottom position to fully dim the instrument panel lights and prevent the interior lights from illuminating when a door is opened.
• Rotate the dimmer control up to increase the brightness of the instrument panel and cupholders when the parking lights or headlights are on.
• Rotate the dimmer control up to the next detent position to fully brighten the odometer and radio when the parking lights or headlights are on. Refer to your Uconnect®/Radio
User Manual on the DVD for display dimming.
• Rotate the dimmer control up to the last detent position to turn on the interior lighting.
Ambient Light Dimmer
• Rotate the ambient light control up or down to increase or decrease the brightness of the release handle, map pocket (if equipped), overhead and floor lighting when the parking
lights or headlights are on.
OPERATING YOUR VEHICLE
25
Page 29 of 132
Adaptive Cruise Control (ACC)
• If your vehicle is equipped with adaptive cruise control the controls operate exactly thesame as the standard cruise control with one difference. You can set a specified distance
you would like to maintain between you and the vehicle in front of you.
• If the ACC sensor detects a vehicle ahead, ACC will apply limited braking or acceleration automatically to maintain a preset following distance, while matching the speed of the
vehicle ahead.
• If the sensor does not detect a vehicle directly ahead of you, it functions like a standard cruise control system, maintaining the speed you set.
Distance Setting (ACC Only)
• The specified following distance for ACC can be set by varying the distance setting between 3 (long), 2 (medium), and 1 (short). Using this distance setting and the vehicle
speed, ACC calculates and sets the distance to the vehicle ahead. This distance setting
displays in the EVIC.
• To set or change the distance setting, press the Distance button and release. Each time the button is pressed, the distance setting adjusts between long (3), medium (2), and
short (1). The distance setting will default to the last set mode the next time the vehicle is
restarted and the ACC system is turned on.
Mode (ACC Only)
• If desired, the Adaptive Cruise Control mode can be turned off and the system can be operated as a standard (fixed speed) Cruise Control. When in the standard (fixed speed)
Cruise Control mode the distance setting feature will be disabled and the system will
maintain the speed you set.
• To change modes, press the MODE button when the system is in either the OFF, READY, or SET position. “Cruise Ready” will be displayed if the system was in ACC READY or ACC
SET position. “Cruise Off” will be displayed if the system was in the ACC OFF position. To
switch back to Adaptive Cruise Control mode, press the MODE button a second time.
• Refer to your Owner's Manual on the DVD for further information.
Forward Collision Warning
• The Forward Collision Warning (FCW) system provides the driver with audible and visual warnings (within the EVIC) when it detects a potential frontal collision. The warnings are
intended to provide the driver with enough time to react and avoid the potential collision.
OPERATING YOUR VEHICLE
27
Page 30 of 132

Changing FCW Status
• The FCW feature has three settings and can be changed within the Uconnect® System:•Far
• Near
• Off
NOTE:
The FCW settings can only be changed when the vehicle is in PARK.
Far
• The default status of FCW is the “Far” setting.
• The far setting provides warnings for potential collisions more distant in front of the vehicle, allowing the driver to have the most reaction time to avoid a collision.
• This setting is designed to provide early warnings per NHTSA (National Highway Traffic Safety Administration) recommendations.
• More cautious drivers that do not mind frequent warnings may prefer this setting.
NOTE:
This setting gives you the most reaction time.
Near
• Changing the FCW status to the “Near” setting, allows the system to warn you of a potential frontal collision when you are much closer.
• This setting provides less reaction time than the “Far” setting, which allows for a more dynamic driving experience.
• More dynamic or aggressive drivers that want to avoid frequent warnings may prefer this setting.
Off
• Changing the FCW status to “Off” prevents the system from warning you of a potential frontal collision.
NOTE:
• If FCW is set to “Off”, “FCW OFF” will be displayed in the EVIC.
• Refer to the Owner's Manual on the DVD for further details.
OPERATING YOUR VEHICLE
28
Page 32 of 132
ELECTRONIC SHIFTER – 3.6L ENGINE
• Your new vehicle is equipped with a stateof the art, fuel efficient 8 speed transmis-
sion. The electronic shift lever in this ve-
hicle does not slide like a conventional
shifter. Instead, the shift lever is spring
loaded and moves forward and rearward,
always returning to the center position
after each gear is selected.
•
The transmission gear (PRND) is displayed
both on the shift lever and in the Electronic
Vehicle Information Center (EVIC).
Shifting From PARK to DRIVE
• Firmly depress the brake pedal, press the lock button on the shift lever, then pull
and hold the shift lever fully rearward until
“D” is displayed in the EVIC.
• To shift back into PARK from DRIVE, bring the vehicle to a complete stop, fully de-
press the brake pedal, press the lock but-
ton on the shift lever, then push and hold
the shift lever fully forward until “P” is
displayed in the EVIC.
Shifting From REVERSE to NEUTRAL
• Pull the shift lever rearward to the first detent and release. “N” will display in the
EVIC.
• To shift back into REVERSE from NEU- TRAL, firmly depress the brake pedal, press the lock button on the shift lever, then push
the shift lever forward to the first detent and release. “R” will display in the EVIC.
OPERATING YOUR VEHICLE
30
Page 33 of 132
Shifting From NEUTRAL to DRIVE
• Firmly depress the brake pedal, press the lock button on the shift lever, then pull the shiftlever rearward and release. “D” will display in the EVIC.
• To shift back into NEUTRAL from DRIVE, firmly depress the brake pedal, press the lock button on the shift lever, then push the shift lever forward and release. “N” will display in
the EVIC.
Shifting From REVERSE to DRIVE
•
Bring the vehicle to a complete stop, firmly depress the brake pedal, press the lock button
on the shift lever, then pull the shift lever rearward and release when “D” is displayed in the
EVIC.
• To shift back into REVERSE from DRIVE, bring the vehicle to a complete stop, firmly depress the brake pedal, press the lock button on the shift lever, then push the shift lever
forward and release when “R” is displayed in the EVIC.
Shifting From DRIVE to SPORT/LOW
Vehicles Equipped with SPORT Mode
• To shift from DRIVE to SPORT, pull the shift lever rearward until “S” is displayed in the EVIC.
• To shift back into DRIVE from SPORT, pull the shift lever rearward until “D” is displayed in the EVIC.
Vehicles Equipped with LOW Mode
• To shift from DRIVE to LOW, pull the shift lever rearward until “L” is displayed in the EVIC.
• To shift back into DRIVE from LOW, pull the shift lever rearward until “D” is displayed in the EVIC.
OPERATING YOUR VEHICLE
31
Page 34 of 132
TRANSMISSION MODES/AUTOSTICK®
• AUTOSTICK® is only available on sport equipped vehicles.
For Vehicles Equipped With Sport Mode
• This mode is driver selectable and will provide more aggressive shifting and is intendedfor spirited driving.
• Shifting into SPORT mode can be done anytime the vehicle is in the “D” Drive position. Simply pull the shift lever and release when “S” is displayed in the EVIC. Pulling the shift
lever rearward a second time will return the vehicle to the “D” Drive position.
NOTE:
When the vehicle is in SPORT mode, there is a green “SPORT” message attached with a flag
illuminated in the instrument cluster.
For Vehicles Equipped With Low Mode
• This range should be used for engine braking when descending very steep grades. In this range, the transmission will downshift for increased engine braking. To switch between
DRIVE and LOW mode, pull the shift lever rearward and release when “L” is displayed in
the EVIC.
• Shifting into LOW can be done anytime the vehicle is in “D” DRIVE position.
OPERATING YOUR VEHICLE
32
Page 35 of 132
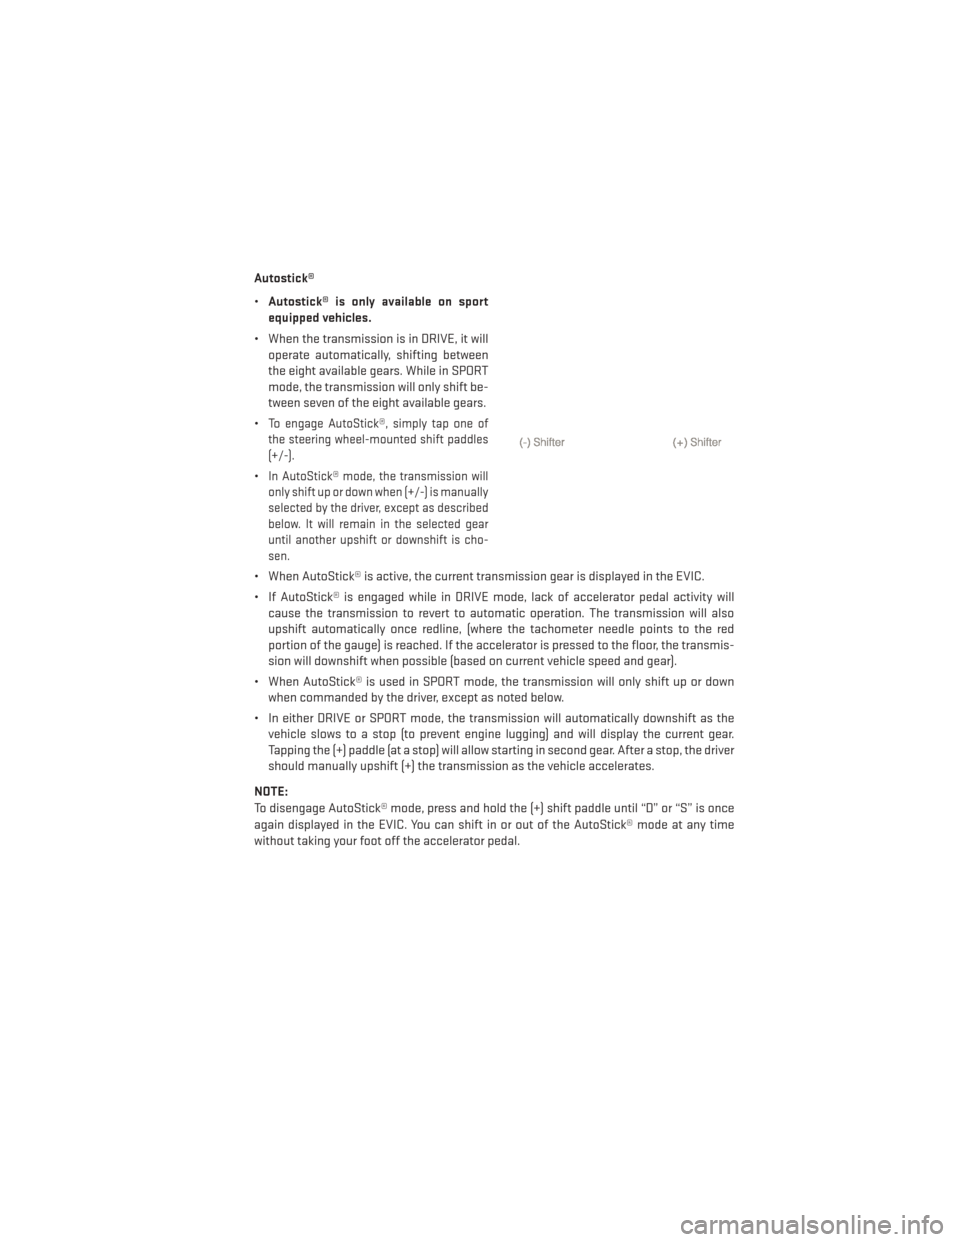
Autostick®
•Autostick® is only available on sport
equipped vehicles.
• When the transmission is in DRIVE, it will operate automatically, shifting between
the eight available gears. While in SPORT
mode, the transmission will only shift be-
tween seven of the eight available gears.
•
To engage AutoStick®, simply tap one of
the steering wheel-mounted shift paddles
(+/-).
•In AutoStick® mode, the transmission will
only shift up or down when (+/-) is manually
selected by the driver, except as described
below. It will remain in the selected gear
until another upshift or downshift is cho-
sen.
• When AutoStick® is active, the current transmission gear is displayed in the EVIC.
• If AutoStick® is engaged while in DRIVE mode, lack of accelerator pedal activity will cause the transmission to revert to automatic operation. The transmission will also
upshift automatically once redline, (where the tachometer needle points to the red
portion of the gauge) is reached. If the accelerator is pressed to the floor, the transmis-
sion will downshift when possible (based on current vehicle speed and gear).
• When AutoStick® is used in SPORT mode, the transmission will only shift up or down when commanded by the driver, except as noted below.
• In either DRIVE or SPORT mode, the transmission will automatically downshift as the vehicle slows to a stop (to prevent engine lugging) and will display the current gear.
Tapping the (+) paddle (at a stop) will allow starting in second gear. After a stop, the driver
should manually upshift (+) the transmission as the vehicle accelerates.
NOTE:
To disengage AutoStick® mode, press and hold the (+) shift paddle until “D” or “S” is once
again displayed in the EVIC. You can shift in or out of the AutoStick® mode at any time
without taking your foot off the accelerator pedal.
OPERATING YOUR VEHICLE
33