lock DODGE CHARGER 2013 7.G User Guide
[x] Cancel search | Manufacturer: DODGE, Model Year: 2013, Model line: CHARGER, Model: DODGE CHARGER 2013 7.GPages: 132, PDF Size: 4.77 MB
Page 7 of 132
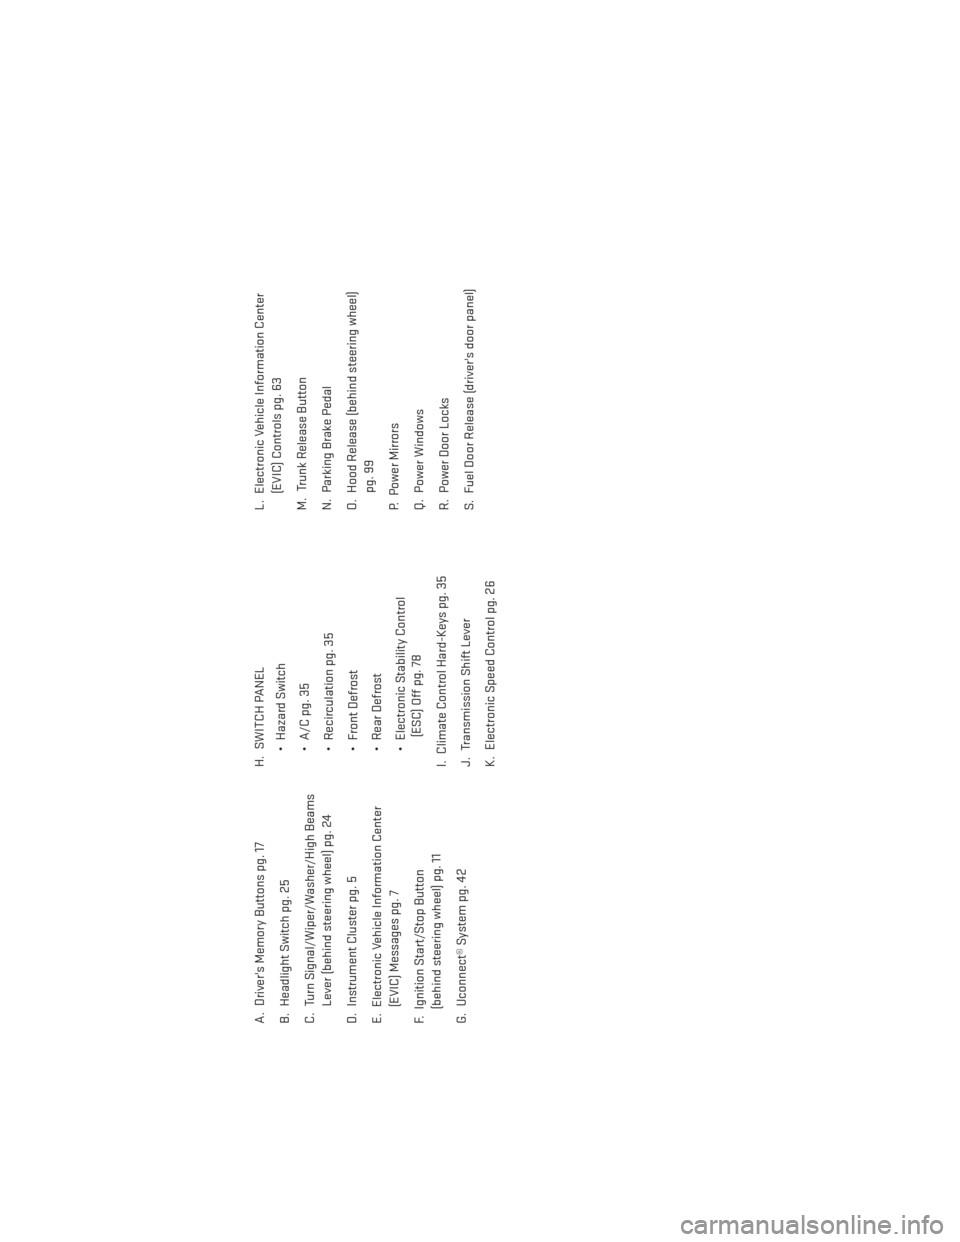
A. Driver's Memory Buttons pg. 17
B. Headlight Switch pg. 25
C. Turn Signal/Wiper/Washer/High BeamsLever (behind steering wheel) pg. 24
D. Instrument Cluster pg. 5
E. Electronic Vehicle Information Center (EVIC) Messages pg. 7
F. Ignition Start/Stop Button (behind steering wheel) pg. 11
G. Uconnect® System pg. 42 H. SWITCH PANEL
• Hazard Switch
• A/C pg. 35
• Recirculation pg. 35
• Front Defrost
• Rear Defrost
• Electronic Stability Control(ESC) Off pg. 78
I. Climate Control Hard-Keys pg. 35
J. Transmission Shift Lever
K. Electronic Speed Control pg. 26 L. Electronic Vehicle Information Center
(EVIC) Controls pg. 63
M. Trunk Release Button
N. Parking Brake Pedal
O. Hood Release (behind steering wheel) pg. 99
P. Power Mirrors
Q. Power Windows
R. Power Door Locks
S. Fuel Door Release (driver's door panel)
CONTROLS AT A GLANCE
5
Page 8 of 132
INSTRUMENT CLUSTER
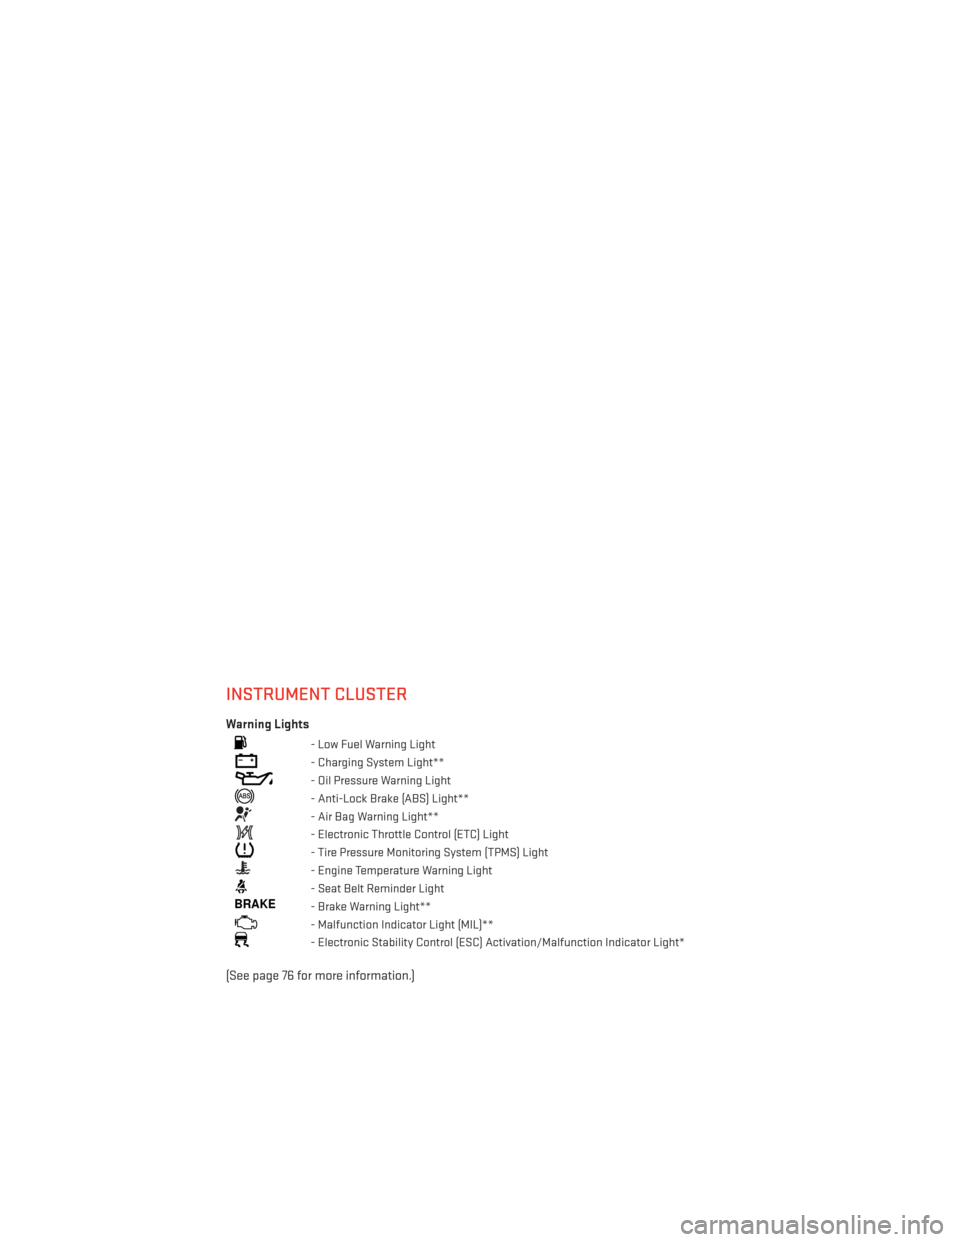
Warning Lights
- Low Fuel Warning Light
- Charging System Light**
- Oil Pressure Warning Light
- Anti-Lock Brake (ABS) Light**
- Air Bag Warning Light**
- Electronic Throttle Control (ETC) Light
- Tire Pressure Monitoring System (TPMS) Light
- Engine Temperature Warning Light
- Seat Belt Reminder Light
BRAKE- Brake Warning Light**
- Malfunction Indicator Light (MIL)**
- Electronic Stability Control (ESC) Activation/Malfunction Indicator Light*
(See page 76 for more information.)
CONTROLS AT A GLANCE
6
Page 10 of 132
KEY FOB
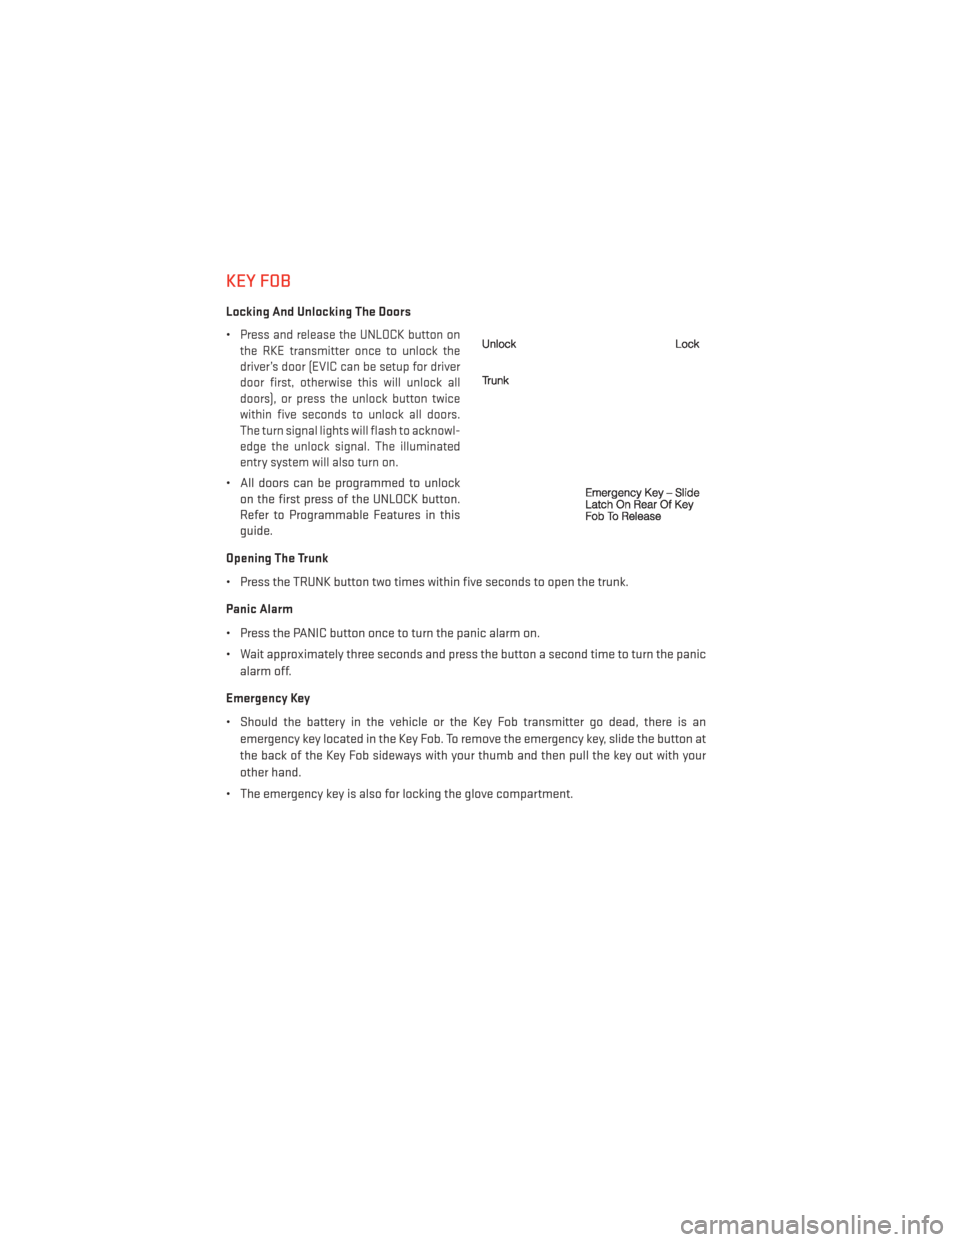
Locking And Unlocking The Doors
•
Press and release the UNLOCK button on
the RKE transmitter once to unlock the
driver’s door (EVIC can be setup for driver
door first, otherwise this will unlock all
doors), or press the unlock button twice
within five seconds to unlock all doors.
The turn signal lights will flash to acknowl-
edge the unlock signal. The illuminated
entry system will also turn on.
• All doors can be programmed to unlock on the first press of the UNLOCK button.
Refer to Programmable Features in this
guide.
Opening The Trunk
• Press the TRUNK button two times within five seconds to open the trunk.
Panic Alarm
• Press the PANIC button once to turn the panic alarm on.
• Wait approximately three seconds and press the button a second time to turn the panic alarm off.
Emergency Key
• Should the battery in the vehicle or the Key Fob transmitter go dead, there is an emergency key located in the Key Fob. To remove the emergency key, slide the button at
the back of the Key Fob sideways with your thumb and then pull the key out with your
other hand.
• The emergency key is also for locking the glove compartment.
GETTING STARTED
8
Page 11 of 132
WARNING!
• Never use the PARK position as a substitute for the parking brake. Always apply theparking brake fully when parked to guard against vehicle movement and possible
injury or damage.
• When leaving the vehicle, always remove the key fob from the ignition and lock your vehicle.
• Never leave children alone in a vehicle, or with access to an unlocked vehicle. Allowing children to be in a vehicle unattended is dangerous for a number of reasons.
A child or others could be seriously or fatally injured. Children should be warned not
to touch the parking brake, brake pedal or the shift lever.
• Do not leave the key fob in or near the vehicle, or in a location accessible to children,
and do not leave a vehicle equipped with Keyless Enter-N-Go™ in the ACC or ON/RUN
mode. A child could operate power windows, other controls, or move the vehicle.
REMOTE START
• Press the REMOTE START buttonx2on the Key Fob twice within five seconds. Pressing
the REMOTE START button a third time shuts the engine off.
•
To drive the vehicle, press the UNLOCK button and cycle the ignition to the ON/RUN position.
• With remote start, the engine will only run for 15 minutes (timeout) unless the ignition is cycled to the ON/RUN position.
• The vehicle must be cycled to the ON/RUN position after two consecutive timeouts.
WARNING!
• Do not start or run an engine in a closed garage or confined area. Exhaust gas contains Carbon Monoxide (CO) which is odorless and colorless. Carbon Monoxide is
poisonous and can cause you or others to be severely injured or killed when inhaled.
• Keep Key Fob transmitters away from children. Operation of the Remote Start
System, windows, door locks or other controls could cause you and others to be
severely injured or killed.
KEYLESS ENTER-N-GO™
• The Keyless Enter-N-Go™ system is an enhancement to the vehicle's Key Fob. Thisfeature allows you to lock and unlock the vehicle's door(s) and trunk without having to
press the Key Fob lock or unlock buttons, as well as starting and stopping the vehicle with
the press of a button.
GETTING STARTED
9
Page 12 of 132
To Unlock From The Driver or Passenger Side:
• With a valid Keyless Enter-N-Go™ Key Foblocated outside the vehicle and within 5 ft
(1.5 m) of the driver or passenger side door
handle, grab either front door handle to
unlock the door automatically.
To Lock the Vehicle
• Both front door handles have LOCK but- tons located on the outside of the handle.
With one of the vehicle's Keyless Enter-N-
Go™ Key Fobs located outside the vehicle
and within 5 ft (1.5 m) of the driver's or
passenger front door handle, press the
door handle LOCK button to lock all four doors and trunk.
• DO NOT grab the door handle, when pressing the door handle lock button. This could unlock the door(s).
NOTE:
• If “Unlock All Doors 1st Press” is programmed all doors will unlock when you grab hold of the front driver's door handle. To select between “Unlock Driver Door 1st Press” and
“Unlock All Doors 1st Press”, refer to the Uconnect® Settings in your vehicle's Owner's
Manual on the DVD or Programmable Features in this guide for further information.
• If a Key Fob is detected in the vehicle when locking the vehicle using the power door lock switch, the doors will unlock and the horn will chirp three times. On the third attempt, your
Key Fob can be locked inside the vehicle.
• After pressing the Keyless Enter-N-Go™ LOCK button, you must wait two seconds before you can lock or unlock the vehicle using the door handle. This is done to allow you to
check if the vehicle is locked by pulling the door handle, without the vehicle reacting and
unlocking.
• If a Keyless Enter-N-Go™ door handle has not been used for 72 hours, the Keyless Enter-N-Go™ feature for that handle may time out. Pulling the deactivated front door
handle will reactivate the door handle's Keyless Enter-N-Go™ feature.
GETTING STARTED
10
Page 13 of 132
To Enter the Trunk
• With a valid Keyless Enter-N-Go™ Key Fob located outside the vehicle and within 5 ft(1.5 m) of the deck lid, press the button on
the right side of Center High Mounted
Stop Light (CHMSL) which is located on
the deck lid.
• Whenever the vehicle is unlocked, you can enter the trunk by pressing the button
on the right side of the CHMSl.
NOTE:
Refer to your Owner's Manual on the DVD for
further information.
Engine Starting/Stopping
Starting
• With a valid Keyless Enter-N-Go™ Key Fob inside the vehicle.
• Place the shift lever in PARK or NEUTRAL.
• While pressing the brake pedal, press the ENGINE START/STOP button once. If the
engine fails to start, the starter will disen-
gage automatically after 10 seconds.
•
To stop the cranking of the engine prior to
the engine starting, press the button again.
NOTE:
In case the ignition switch does not change with the push of a button, the RKE transmitter
(Key Fob) may have a low or dead battery. In this situation a back up method can be used to
operate the ignition switch. Put the nose side of the Key Fob (side opposite of the Emer-
gency Key) against the ENGINE START/STOP button and push to operate the ignition switch.
Stopping
• Bring the vehicle to a complete stop.
• Place the shift lever in the PARK position.
• Press the ENGINE START/STOP button once. The ignition switch will return to the OFF
position.
NOTE:
If the shift lever is not in PARK and the vehicle is in motion, the ENGINE START/STOP
button must be held for two seconds with the vehicle speed above 5 mph (8 km/h) before
the engine will shut off.
GETTING STARTED
11
Page 14 of 132
Accessory Positions with Engine Off
NOTE:
The following functions are with the driver’s foot OFF the Brake Pedal (transmission in PARK
or NEUTRAL).
Starting With The Ignition Switch In The OFF Position:
• Press the ENGINE START/STOP button once to change the ignition switch to the ACCposition.
• Press the ENGINE START/STOP button a second time to change the ignition switch to the ON/RUN position.
• Press the ENGINE START/STOP button a third time to return the ignition switch to the OFF position.
NOTE:
If the ignition switch is left in the ACC or
ON/RUN (engine not running) position and
the transmission is in PARK, the system will
automatically time out after 30 minutes of
inactivity and the ignition will switch to the
OFF position.
THEFT ALARM
To Arm:
• Press the Keyless Enter-N-Go™ Start/Stop button until the Electronic Vehicle Informa- tion Center (EVIC) indicates that the vehicle ignition is “OFF”. Press the power door lock
switch while the door is open, press the Key Fob LOCK button, or with one of the Key Fobs
located outside the vehicle and within 5 ft (1.5 m) of the driver's and passenger front door
handles, press the Keyless Enter-N-Go™ LOCK button located on the door handle.
NOTE:
After pressing the Keyless Enter-N-Go™ LOCK button, you must wait two seconds before
you can lock or unlock the vehicle via the door handle.
To Disarm:
• Press the Key Fob UNLOCK button or with one of the Key Fobs located outside the vehicle and within 5 ft (1.5 m) of the driver's and passenger front door handles, grab the Keyless
Enter-N-Go™ door handle and enter the vehicle, then press the Keyless Enter-N-Go™
Start/Stop button (requires at least one valid Key Fob in the vehicle).
GETTING STARTED
12
Page 19 of 132
FRONT SEATS
Power Seats
•
The power seat switches are located on the
outboard side of the front seat cushions.
• The power seat switch controls forward/ back, up/down and tilt adjustment.
• The recline switch controls the angle of the seatback. Press the switch forward or
rearward and the seatback will move in
either direction.
Power Lumbar
• Push the switch forward to increase the lumbar support. Push the switch rearward
to decrease the lumbar support.
• Pushing upward or downward on the switch will raise and lower the position of
the support.
Memory Seat
• The memory seat feature allows you to save two different driver seating posi-
tions, driver's outside mirror, adjustable
brake and accelerator pedals, power tilt
and telescopic steering column and radio
station preset settings. The memory seat
buttons are located on the driver's door
panel.
• Adjust all memory profile settings, press the SET (S) button then press 1 or 2 within
five seconds.
• Your Key Fob can be programmed to recall one of two pre-programmed memory profiles by pressing the UNLOCK button on the
Key Fob.
GETTING STARTED
17
Page 20 of 132
• To program your Key Fobs, perform the following:• Change the ignition to OFF.
• Select desired memory profile 1 or 2.
• Once the profile has been recalled, press and release the SET (S) button on the memory
switch, then press and release the side of the rocker switch labeled 1 or 2 accordingly.
• A (1 or 2) will display in the instrument cluster if the vehicle is equipped with the Electronic Vehicle Information Center (EVIC).
• Press and release the LOCK button on the Key Fob within 10 seconds.
NOTE:
Your Key Fob can be unlinked to your memory settings by pressing the SET (S) button
followed by the UNLOCK button on the Key Fob in the fourth step.
• Press 1 or 2 to recall the saved positions, or press UNLOCK on the programmed Key Fob.
• Refer to the Owner's Manual on the DVD for further details.
Manual Seat
Forward/Rearward
• Lift up on the adjusting bar located at the front of the seat near the floor and release
it when the seat is at the desired position.
Then, using body pressure, move forward
and backward on the seat to be sure that
the seat adjusters have latched.
Recliner
• Lean forward in the seat and lift the re-cliner lever, then lean back to the desired
position and release the lever.
• Lift the lever to return the seatback to an upright position.
CAUTION!
Do not place any article under a power seat or impede its ability to move as it may cause
damage to the seat controls. Seat travel may become limited if movement is stopped by
an obstruction in the seat’s path.
WARNING!
•Adjusting a seat while the vehicle is moving is dangerous. The sudden movement of the
seat could cause you to lose control. The seat belt might not be properly adjusted, and
you could be severely injured or killed. Only adjust a seat while the vehicle is parked.
• Do not ride with the seatback reclined so that the seat belt is no longer resting against
your chest. In a collision, you could slide under the seat belt and be severely injured
or killed. Use the recliner only when the vehicle is parked.
GETTING STARTED
18
Page 21 of 132
REAR SEATS
Folding Rear Seatback
•
Pull on the loops, located near the outer
top of the seatbacks, to fold down either or
both seatbacks. These loops can be tucked
away when not in use.
•When the seatback is raised to the upright
position, make sure it is latched by strongly
pulling on the top of the seatback above the
seat loop.
WARNING!
• Be certain that the seatback is securely locked into position. If the seatback is not
securely locked into position, the seat will not provide the proper stability for child
seats and/or passengers. An improperly latched seat could cause you and others to
severely injured or killed.
• The cargo area in the rear of the vehicle (with the rear seatbacks in the locked-up or
folded-down position) should not be used as a play area by children when the vehicle
is in motion. They could be severely injured or killed in a collision. Children should be
seated and using the proper restraint system.
HEATED SEATS
Front Heated Seats
• The heated seats are operated using the Uconnect® System.
Uconnect® 8.4
• Press the Controls soft-key located on the Uconnect® display.
• Press the Driver or Passenger seat soft-key once to select HI-level heating. Press
the soft-key a second time to select LO-
level heating. Press the soft-key a third
time to shut the heating elements OFF.
• If the High-level setting is selected, the system will automatically switch to Low-
level after approximately 60 minutes. The
Low-level setting will turn Off automati-
cally after approximately 45 minutes.
GETTING STARTED
19