steering wheel DODGE CHARGER 2022 Owners Manual
[x] Cancel search | Manufacturer: DODGE, Model Year: 2022, Model line: CHARGER, Model: DODGE CHARGER 2022Pages: 312, PDF Size: 18.99 MB
Page 4 of 312
2
INTRODUCTION
SYMBOLS KEY ...........................................................9
VEHICLE MODIFICATIONS/ALTERATIONS .............9
SYMBOL GLOSSARY.................................................9
GETTING TO KNOW YOUR VEHICLE
KEYS ....................................................................... 13 Key Fob .............................................................13
SENTRY KEY ........................................................... 15
IGNITION SWITCH .................................................. 16
Keyless Enter ‘n Go™ Ignition .........................16
REMOTE START — IF EQUIPPED .......................... 17
How To Use Remote Start ................................18
To Exit Remote Start Mode .............................18
Remote Start Front Defrost Activation —
If Equipped........................................................19
Remote Start Comfort Systems —
If Equipped........................................................19
Remote Start Windshield Wiper De–Icer
Activation — If Equipped ..................................20
Remote Start Cancel Message —
If Equipped........................................................20
VEHICLE SECURITY SYSTEM — IF EQUIPPED .... 20
To Arm The System ..........................................20
To Disarm The System .....................................20
Rearming Of The System .................................21
Security System Manual Override ...................21
Tamper Alert .....................................................21 DELUXE VEHICLE SECURITY SYSTEM —
IF EQUIPPED ...........................................................21
To Arm The System ..........................................21
To Disarm The System .....................................22
Security System Manual Override ...................22
DOORS ....................................................................22
Manual Door Locks ..........................................22
Power Door Locks ...........................................23
Keyless Enter ‘n Go™ — Passive Entry ...........24
Automatic Unlock Doors On Exit......................25
Automatic Door Locks —
If Equipped........................................................26
Child-Protection Door Lock System —
Rear Doors .......................................................26
STEERING WHEEL ..................................................26
Manual Tilt/Telescoping Steering Column —
If Equipped .......................................................26
Power Tilt/Telescoping Steering Column —
If Equipped .......................................................27
Heated Steering Wheel —If Equipped .............27
UCONNECT VOICE RECOGNITION ........................28
Introducing Voice Recognition.........................28
Basic Voice Commands ...................................28
Get Started .......................................................28
Additional Information .....................................29 DRIVER MEMORY SETTINGS — IF EQUIPPED ... 29
Programming The Memory Feature ................30
Linking And Unlinking The Key Fob
To Memory ........................................................ 30
Memory Position Recall ................................... 30
SEATS ...................................................................... 31
Manual Adjustment (Front Seats) —
If Equipped .......................................................31
Manual Adjustment (Rear Seats).................... 32
Power Adjustment (Front Seats) —
If Equipped .......................................................33
Heated Seats — If Equipped ............................ 34
Front Ventilated Seats — If Equipped ............. 36
Head Restraints .............................................. 36
MIRRORS ............................................................... 38
Inside Rearview Mirror..................................... 38
Illuminated Vanity Mirrors ............................... 38
Outside Mirrors.................................................39
Driver's Outside Automatic Dimming Mirror —
If Equipped .......................................................39
Power Mirrors ................................................... 39
Heated Mirrors — If Equipped ......................... 40
Tilt Side Mirrors In Reverse —
If Equipped .......................................................40
22_LD_OM_EN_USC_t.book Page 2
Page 7 of 312
5
TRAILER TOWING ................................................ 115 Common Towing Definitions ......................... 115Trailer Hitch Classification ............................ 117
Trailer Towing Weights (Maximum Trailer
Weight Ratings) ............................................. 117
Trailer And Tongue Weight ........................... 118
Towing Requirements ................................... 118Towing Tips ................................................... 120
RECREATIONAL TOWING
(BEHIND MOTORHOME) ..................................... 121
DRIVING TIPS ....................................................... 121
Driving On Slippery Surfaces ........................ 121
Driving Through Water ................................. 122
MULTIMEDIA
UCONNECT SYSTEMS ......................................... 123
CYBERSECURITY ................................................. 123
UCONNECT SETTINGS ........................................ 123Customer Programmable Features .............. 124
UCONNECT INTRODUCTION................................ 137
System Overview .......................................... 137
Drag & Drop Menu Bar ................................. 140Safety And General Information ................... 140 UCONNECT MODES ............................................. 141
Steering Wheel Audio Controls —
If Equipped..................................................... 141Radio Mode .................................................. 142
Media Mode .................................................. 150
Phone Mode ................................................. 152
ANDROID AUTO™ & APPLE CARPLAY® —
IF EQUIPPED ........................................................ 162
Android Auto™ .............................................. 162
Apple CarPlay® ............................................. 165Android Auto™ And Apple CarPlay® Tips
And Tricks ...................................................... 167
RADIO OPERATION AND MOBILE PHONES ..... 167
Regulatory And Safety Information .............. 167SAFETY
SAFETY FEATURES .............................................. 168 Anti-Lock Brake System (ABS) ..................... 168
Electronic Brake Control (EBC) System ....... 169
AUXILIARY DRIVING SYSTEMS.......................... 174
Blind Spot Monitoring (BSM) —
If Equipped..................................................... 174Forward Collision Warning (FCW) With
Mitigation Operation ..................................... 177
Tire Pressure Monitoring System (TPMS) .... 179 OCCUPANT RESTRAINT SYSTEMS ................... 183
Occupant Restraint Systems Features ....... 183
Important Safety Precautions ...................... 183
Seat Belt Systems ........................................ 184
Supplemental Restraint Systems (SRS) ...... 190Child Restraints ............................................. 198
SAFETY TIPS ........................................................ 209
Transporting Passengers.............................. 209
Transporting Pets ......................................... 209
Connected Vehicles ...................................... 209
Safety Checks You Should Make Inside
The Vehicle ................................................... 210
Periodic Safety Checks You Should Make
Outside The Vehicle ...................................... 211
Exhaust Gas................................................... 211
Carbon Monoxide Warnings ......................... 212
22_LD_OM_EN_USC_t.book Page 5
Page 21 of 312
GETTING TO KNOW YOUR VEHICLE19
Security system (if equipped). Then, prior to the
end of the 15 minute cycle, push and release the
START/STOP ignition button.
The Remote Start system will turn the engine off if
the Remote Start button is pushed again, or if the
engine is allowed to run for the entire 15 minute
cycle. Once the ignition is placed in the ON/RUN
position, the climate controls will resume
previously set operations (temperature, blower
control, etc.).
NOTE:
To avoid unintentional shutdowns, the system
will disable for two seconds after receiving a
valid Remote Start request.
For vehicles equipped with the Keyless
Enter ‘n Go™ — Passive Entry feature, the
message “Remote Start Active — Push Start
Button” will display in the instrument cluster
display until you push the START/STOP Ignition
button.
REMOTE START FRONT DEFROST
A
CTIVATION — IF EQUIPPED
When Remote Start is active, and the outside
ambient temperature is 40°F (4.5°C) or below, the
system will automatically activate front defrost for
15 minutes or less. The time is dependent on the
ambient temperature. Once the timer expires, the system will automatically adjust the settings
depending on ambient conditions. See “Remote
Start Comfort Systems — If Equipped” in the next
section for detailed operation.
REMOTE START COMFORT SYSTEMS —
I
F EQUIPPED
When Remote Start is activated, the front and rear
defrost will automatically turn on in cold weather.
The heated steering wheel and driver heated seat
feature will turn on if selected in the comfort menu
screen within Uconnect Settings Ú page 123. In
warm weather, the driver vented seat feature will
automatically turn on when the Remote Start is
activated, if programmed in the comfort menu
screen. The vehicle will adjust the climate control
settings depending on the outside ambient
temperature.
Automatic Temperature Control (ATC) —
If Equipped
The climate controls will be automatically adjusted
to the optimal temperature and mode settings
depending on the outside ambient temperature.
This will occur until the ignition is placed in the ON/
RUN position where the climate controls will
resume their previous settings. Manual Temperature Control (MTC) — If Equipped
In ambient temperatures at 40°F (4.5°C) or
below, the climate settings will default to
maximum heat, with fresh air entering the
cabin. If the front defrost timer expires, the
vehicle will enter Mix mode.
In ambient temperatures from 40°F (4.5°C) to
78°F (26°C), the climate settings will be based
on the last settings selected by the driver.
In ambient temperatures at 78°F (26°C) or
above, the climate settings will default to MAX
A/C, Bi-Level mode, with Recirculation on.
For more information on ATC, MTC, and climate
control settings, see Ú page 51.
NOTE:These features will stay on through the duration of
Remote Start until the ignition is placed in the ON/
RUN position. The climate control settings will
change if manually adjusted by the driver while the
vehicle is in Remote Start mode, and exit auto -
matic override. This includes the OFF button on the
climate controls, which will turn the system off.
2
22_LD_OM_EN_USC_t.book Page 19
Page 28 of 312
26GETTING TO KNOW YOUR VEHICLE
3. The gear selector was not in PARK, then is placed in PARK.
4. The driver door is opened.
5. The doors were not previously unlocked.
AUTOMATIC DOOR LOCKS —
I
F EQUIPPED
The auto door lock feature default condition is
enabled. When enabled, the door locks will lock
automatically when the vehicle's speed exceeds
15 mph (24 km/h). The auto door lock feature is
enabled/disabled within Uconnect Settings
Ú page 123.
CHILD-PROTECTION DOOR LOCK
S
YSTEM — REAR DOORS
To provide a safer environment for small children
riding in the rear seats, the rear doors are
equipped with a Child-Protection Door Lock
system.
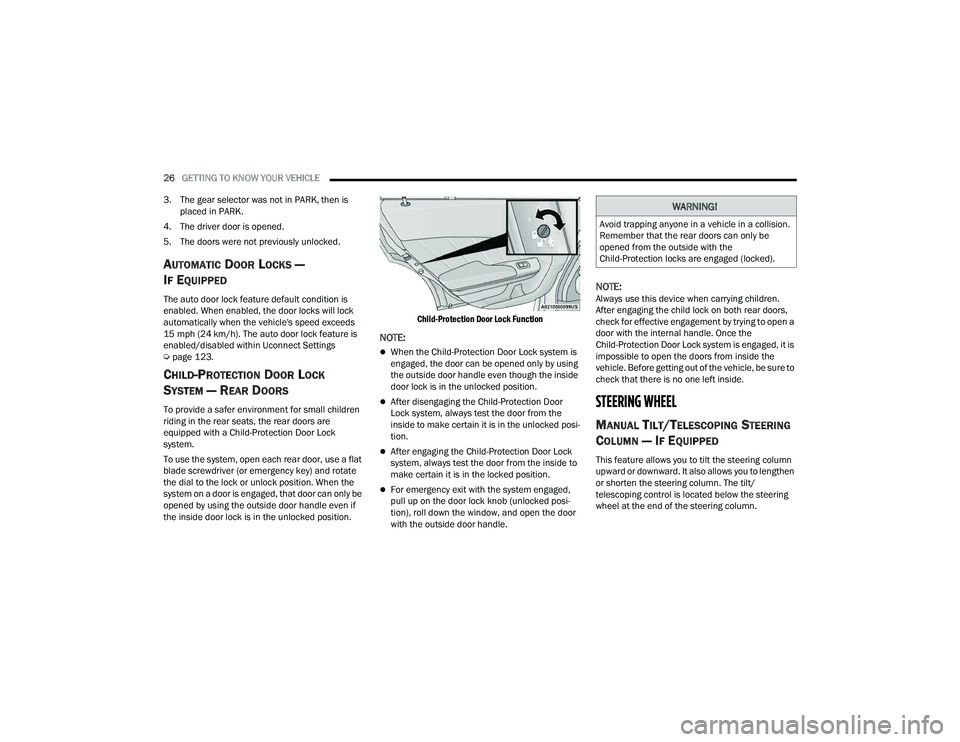
To use the system, open each rear door, use a flat
blade screwdriver (or emergency key) and rotate
the dial to the lock or unlock position. When the
system on a door is engaged, that door can only be
opened by using the outside door handle even if
the inside door lock is in the unlocked position.
Child-Protection Door Lock Function
NOTE:
When the Child-Protection Door Lock system is
engaged, the door can be opened only by using
the outside door handle even though the inside
door lock is in the unlocked position.
After disengaging the Child-Protection Door
Lock system, always test the door from the
inside to make certain it is in the unlocked posi
-
tion.
After engaging the Child-Protection Door Lock
system, always test the door from the inside to
make certain it is in the locked position.
For emergency exit with the system engaged,
pull up on the door lock knob (unlocked posi -
tion), roll down the window, and open the door
with the outside door handle.
NOTE:Always use this device when carrying children.
After engaging the child lock on both rear doors,
check for effective engagement by trying to open a
door with the internal handle. Once the
Child-Protection Door Lock system is engaged, it is
impossible to open the doors from inside the
vehicle. Before getting out of the vehicle, be sure to
check that there is no one left inside.
STEERING WHEEL
MANUAL TILT/TELESCOPING STEERING
C
OLUMN — IF EQUIPPED
This feature allows you to tilt the steering column
upward or downward. It also allows you to lengthen
or shorten the steering column. The tilt/
telescoping control is located below the steering
wheel at the end of the steering column.
WARNING!
Avoid trapping anyone in a vehicle in a collision.
Remember that the rear doors can only be
opened from the outside with the
Child-Protection locks are engaged (locked).
22_LD_OM_EN_USC_t.book Page 26
Page 29 of 312
GETTING TO KNOW YOUR VEHICLE27
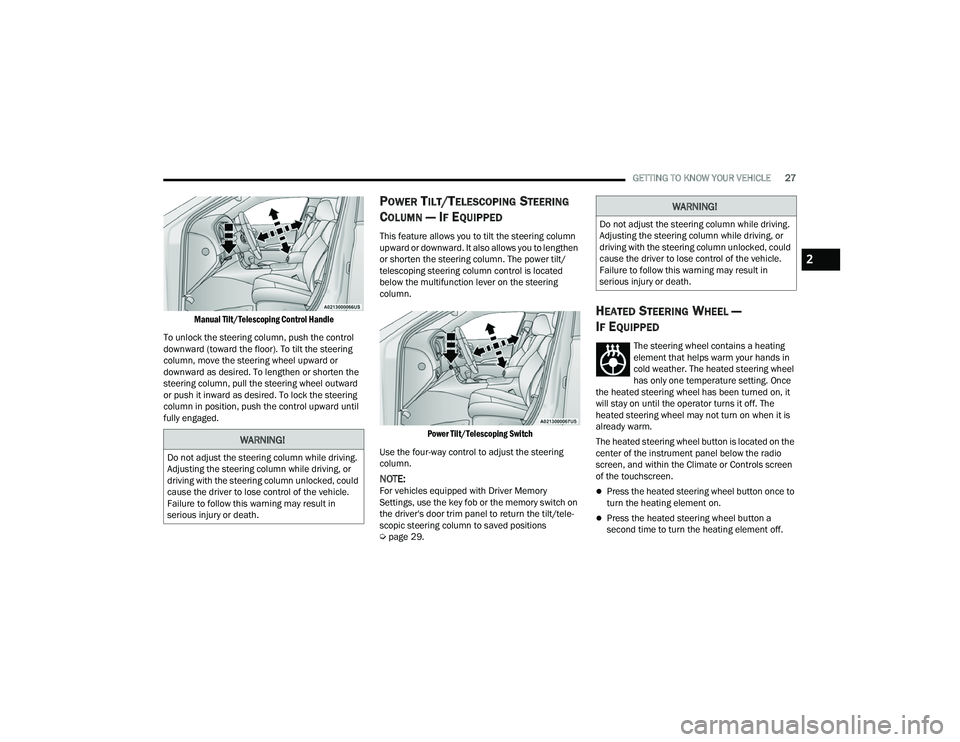
Manual Tilt/Telescoping Control Handle
To unlock the steering column, push the control
downward (toward the floor). To tilt the steering
column, move the steering wheel upward or
downward as desired. To lengthen or shorten the
steering column, pull the steering wheel outward
or push it inward as desired. To lock the steering
column in position, push the control upward until
fully engaged.
POWER TILT/TELESCOPING STEERING
C
OLUMN — IF EQUIPPED
This feature allows you to tilt the steering column
upward or downward. It also allows you to lengthen
or shorten the steering column. The power tilt/
telescoping steering column control is located
below the multifunction lever on the steering
column.
Power Tilt/Telescoping Switch
Use the four-way control to adjust the steering
column.
NOTE:For vehicles equipped with Driver Memory
Settings, use the key fob or the memory switch on
the driver's door trim panel to return the tilt/tele -
scopic steering column to saved positions
Ú page 29.
HEATED STEERING WHEEL —
I
F EQUIPPED
The steering wheel contains a heating
element that helps warm your hands in
cold weather. The heated steering wheel
has only one temperature setting. Once
the heated steering wheel has been turned on, it
will stay on until the operator turns it off. The
heated steering wheel may not turn on when it is
already warm.
The heated steering wheel button is located on the
center of the instrument panel below the radio
screen, and within the Climate or Controls screen
of the touchscreen.
Press the heated steering wheel button once to
turn the heating element on.
Press the heated steering wheel button a
second time to turn the heating element off.
WARNING!
Do not adjust the steering column while driving.
Adjusting the steering column while driving, or
driving with the steering column unlocked, could
cause the driver to lose control of the vehicle.
Failure to follow this warning may result in
serious injury or death.
WARNING!
Do not adjust the steering column while driving.
Adjusting the steering column while driving, or
driving with the steering column unlocked, could
cause the driver to lose control of the vehicle.
Failure to follow this warning may result in
serious injury or death.
2
22_LD_OM_EN_USC_t.book Page 27
Page 30 of 312
28GETTING TO KNOW YOUR VEHICLE
NOTE:The engine must be running for the heated
steering wheel to operate.
For information on use with the Remote Start
system, see Úpage 19.
UCONNECT VOICE RECOGNITION
INTRODUCING VOICE RECOGNITION
Start using Uconnect Voice Recognition with these
helpful quick tips. It provides the key Voice
Commands and tips you need to know to control
your vehicle’s Voice Recognition (VR) system.
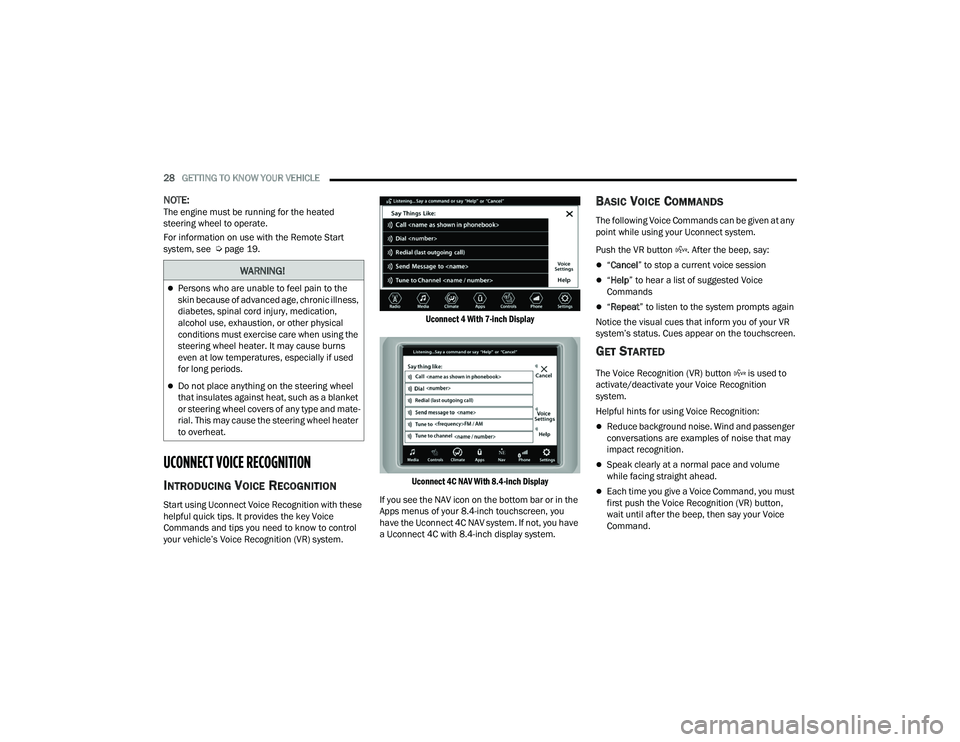
Uconnect 4 With 7-inch Display
Uconnect 4C NAV With 8.4-inch Display
If you see the NAV icon on the bottom bar or in the
Apps menus of your 8.4-inch touchscreen, you
have the Uconnect 4C NAV system. If not, you have
a Uconnect 4C with 8.4-inch display system.
BASIC VOICE COMMANDS
The following Voice Commands can be given at any
point while using your Uconnect system.
Push the VR button . After the beep, say:
“ Cancel ” to stop a current voice session
“Help ” to hear a list of suggested Voice
Commands
“ Repeat ” to listen to the system prompts again
Notice the visual cues that inform you of your VR
system’s status. Cues appear on the touchscreen.
GET STARTED
The Voice Recognition (VR) button is used to
activate/deactivate your Voice Recognition
system.
Helpful hints for using Voice Recognition:
Reduce background noise. Wind and passenger
conversations are examples of noise that may
impact recognition.
Speak clearly at a normal pace and volume
while facing straight ahead.
Each time you give a Voice Command, you must
first push the Voice Recognition (VR) button,
wait until after the beep, then say your Voice
Command.
WARNING!
Persons who are unable to feel pain to the
skin because of advanced age, chronic illness,
diabetes, spinal cord injury, medication,
alcohol use, exhaustion, or other physical
conditions must exercise care when using the
steering wheel heater. It may cause burns
even at low temperatures, especially if used
for long periods.
Do not place anything on the steering wheel
that insulates against heat, such as a blanket
or steering wheel covers of any type and mate -
rial. This may cause the steering wheel heater
to overheat.
22_LD_OM_EN_USC_t.book Page 28
Page 52 of 312
50GETTING TO KNOW YOUR VEHICLE
Intermittent Wipers
Use one of the four intermittent wiper settings
when weather conditions permit. At driving speeds
above 10 mph (16 km/h), the delay can be
regulated from a maximum of approximately 36
seconds between cycles (first detent), to a cycle
every one second (fourth detent). If the vehicle is
moving less than 10 mph (16 km/h), delay times
will be doubled.
Windshield Washers
To use the washer, push on the end of the lever
(toward the steering wheel) and hold. If the lever is
pushed while in the intermittent setting, the wipers
will turn on and operate for several cycles after the
end of the lever is released, and then resume the
intermittent interval previously selected.
If the end of the lever is pushed while the wipers
are in the off position, the wipers will operate for
several cycles, then turn off. Mist
Rotate the end of the lever downward to the MIST
position and release for a single wiping cycle.
NOTE:The Mist feature does not activate the washer
pump; therefore, no washer fluid will be sprayed on
the windshield. The wash function must be used in
order to spray the windshield with washer fluid.
For information on wiper care and replacement,
see Ú
page 245.
RAIN SENSING WIPERS — IF EQUIPPED
This feature senses rain or snowfall on the
windshield and automatically activates the wipers.
Rotate the end of the multifunction lever to one of
four detent positions to activate this feature.
The sensitivity of the system can be adjusted with
the multifunction lever. Wiper delay position one is
the least sensitive, and wiper delay detent position
four is the most sensitive. Wiper delay position three should be used for
normal rain conditions.
NOTE:
The Rain Sensing feature will not operate when
the wiper switch is in the low or high-speed posi
-
tion.
The Rain Sensing feature may not function prop -
erly when ice, or dried salt water is present on
the windshield.
Use of Rain-X or products containing wax or sili-
cone may reduce Rain Sensing performance.
The Rain Sensing feature can be turned on and
off using the Uconnect system Ú page 123.
The Rain Sensing system has protection features
for the wiper blades and arms, and will not operate
under the following conditions:
Low Ambient Temperature — When the ignition
is first placed in the ON position, the Rain
Sensing system will not operate until the wiper
switch is moved, vehicle speed is greater than
3 mph (5 km/h), or the outside temperature is
greater than 32°F (0°C).
Transmission In NEUTRAL Position — When the
ignition is ON, and the automatic transmission
is in the NEUTRAL position, the Rain Sensing
system will not operate until the wiper switch is
moved, vehicle speed is greater than 3 mph
(5 km/h), or the gear selector is moved out of
the NEUTRAL position.
CAUTION!
Always remove any buildup of snow that
prevents the windshield wiper blades from
returning to the “park” position. If the windshield
wiper switch is turned off, and the blades cannot
return to the “park” position, damage to the
wiper motor may occur.
WARNING!
Sudden loss of visibility through the windshield
could lead to a collision. You might not see other
vehicles or other obstacles. To avoid sudden
icing of the windshield during freezing weather,
warm the windshield with the defroster before
and during windshield washer use.
22_LD_OM_EN_USC_t.book Page 50
Page 58 of 312
56GETTING TO KNOW YOUR VEHICLE
Mix Mode
Air is directed through the floor, defrost,
and side window demister outlets. This
setting works best in cold or snowy
conditions that require extra heat to the
windshield. This setting is good for maintaining
comfort while reducing moisture on the
windshield.
Climate Control OFF Button
Press and release the OFF button on the
touchscreen, or push the OFF button on
the faceplate to turn the Climate Control
ON/OFF.
AUTOMATIC TEMPERATURE CONTROL
(ATC)
Automatic Operation
1. Push the AUTO button on the faceplate, or the
AUTO button on the touchscreen on the
Automatic Temperature Control (ATC) Panel.
2. Next, adjust the temperature that you would like the system to maintain by adjusting the
driver and passenger temperature control
buttons. Once the desired temperature is
displayed, the system will achieve and
automatically maintain that comfort level. 3. When the system is set up for your comfort
level, it is not necessary to change the
settings. You will experience the greatest
efficiency by simply allowing the system to
function automatically.
NOTE:
It is not necessary to move the temperature
settings for cold or hot vehicles. The system
automatically adjusts the temperature, mode,
and blower speed to provide comfort as quickly
as possible.
The temperature can be displayed in U.S. or
Metric units within Uconnect Settings
Úpage 123.
To provide you with maximum comfort in the
Automatic mode during cold start-ups, the blower
fan will remain on low until the engine warms up.
The blower will increase in speed and transition
into Auto mode.
Manual Operation Override
This system offers a full complement of manual
override features. The AUTO symbol in the front
ATC display will be turned off when the system is
being used in the manual mode.
CLIMATE VOICE COMMANDS
Adjust vehicle temperatures hands-free and keep
everyone comfortable while you keep moving
ahead.
Push the VR button. After the beep, say one of the
following commands:
“ Set the driver temperature to 70 degrees ”
“Set the passenger temperature to 70 degrees ”
TIP:Voice Command for Climate may only be used to
adjust the interior temperature of your vehicle.
Voice Command will not work to adjust the heated
seats or steering wheel if equipped.
OPERATING TIPS
Refer to the chart at the end of this section for
suggested control settings for various weather
conditions.
Summer Operation
The engine cooling system must be protected with
a high-quality antifreeze coolant to provide proper
corrosion protection and to protect against engine
overheating. OAT coolant (conforming to
MS.90032) is recommended.
22_LD_OM_EN_USC_t.book Page 56
Page 68 of 312
66GETTING TO KNOW YOUR VEHICLE
Power Trunk Release Button The trunk can be opened from inside the
vehicle using the power trunk release
button located on the instrument panel
to the left of the steering wheel.
NOTE:The gear selector must be in PARK before the
button will operate.
Key Fob Trunk Release ButtonPush the power trunk button on the key
fob twice within five seconds to release
the trunk.
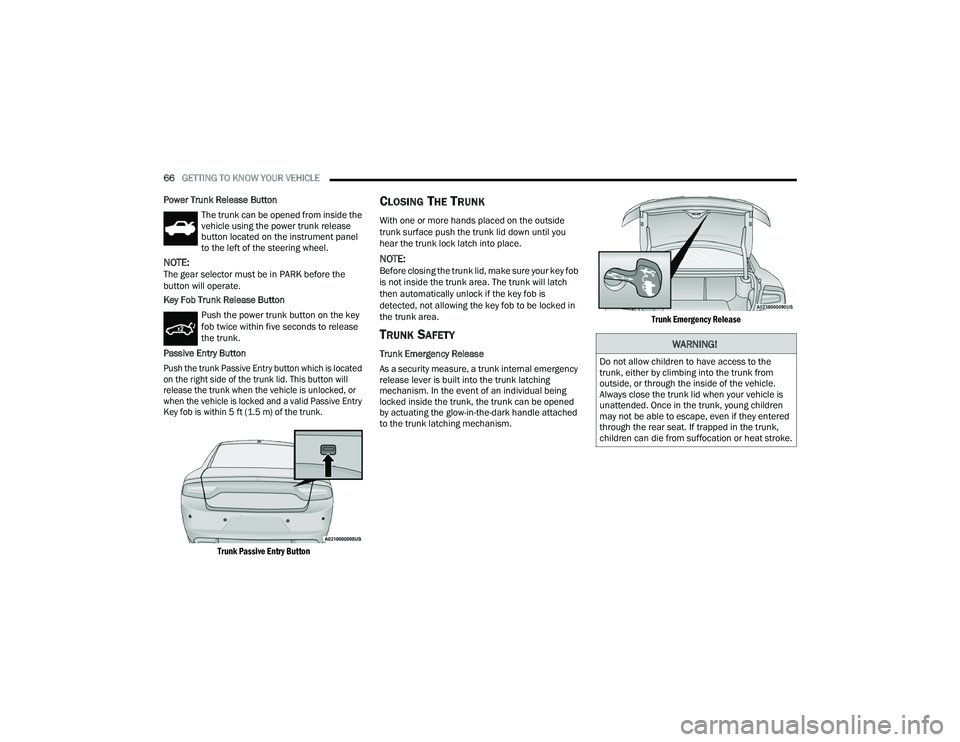
Passive Entry Button
Push the trunk Passive Entry button which is located
on the right side of the trunk lid. This button will
release the trunk when the vehicle is unlocked, or
when the vehicle is locked and a valid Passive Entry
Key fob is within 5 ft (1.5 m) of the trunk.
Trunk Passive Entry Button
CLOSING THE TRUNK
With one or more hands placed on the outside
trunk surface push the trunk lid down until you
hear the trunk lock latch into place.
NOTE:Before closing the trunk lid, make sure your key fob
is not inside the trunk area. The trunk will latch
then automatically unlock if the key fob is
detected, not allowing the key fob to be locked in
the trunk area.
TRUNK SAFETY
Trunk Emergency Release
As a security measure, a trunk internal emergency
release lever is built into the trunk latching
mechanism. In the event of an individual being
locked inside the trunk, the trunk can be opened
by actuating the glow-in-the-dark handle attached
to the trunk latching mechanism.
Trunk Emergency Release
WARNING!
Do not allow children to have access to the
trunk, either by climbing into the trunk from
outside, or through the inside of the vehicle.
Always close the trunk lid when your vehicle is
unattended. Once in the trunk, young children
may not be able to escape, even if they entered
through the rear seat. If trapped in the trunk,
children can die from suffocation or heat stroke.
22_LD_OM_EN_USC_t.book Page 66
Page 71 of 312
GETTING TO KNOW YOUR INSTRUMENT PANEL69
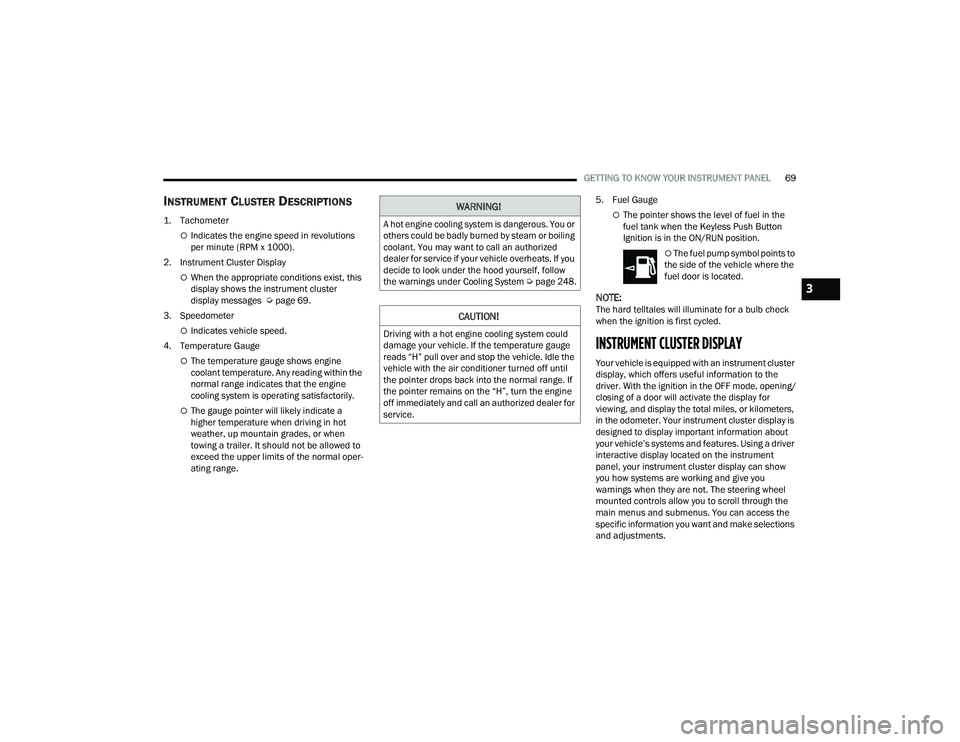
INSTRUMENT CLUSTER DESCRIPTIONS
1. Tachometer
Indicates the engine speed in revolutions
per minute (RPM x 1000).
2. Instrument Cluster Display
When the appropriate conditions exist, this
display shows the instrument cluster
display messages Ú page 69.
3. Speedometer
Indicates vehicle speed.
4. Temperature Gauge
The temperature gauge shows engine
coolant temperature. Any reading within the
normal range indicates that the engine
cooling system is operating satisfactorily.
The gauge pointer will likely indicate a
higher temperature when driving in hot
weather, up mountain grades, or when
towing a trailer. It should not be allowed to
exceed the upper limits of the normal oper -
ating range. 5. Fuel Gauge
The pointer shows the level of fuel in the
fuel tank when the Keyless Push Button
Ignition is in the ON/RUN position.
The fuel pump symbol points to
the side of the vehicle where the
fuel door is located.
NOTE:The hard telltales will illuminate for a bulb check
when the ignition is first cycled.
INSTRUMENT CLUSTER DISPLAY
Your vehicle is equipped with an instrument cluster
display, which offers useful information to the
driver. With the ignition in the OFF mode, opening/
closing of a door will activate the display for
viewing, and display the total miles, or kilometers,
in the odometer. Your instrument cluster display is
designed to display important information about
your vehicle’s systems and features. Using a driver
interactive display located on the instrument
panel, your instrument cluster display can show
you how systems are working and give you
warnings when they are not. The steering wheel
mounted controls allow you to scroll through the
main menus and submenus. You can access the
specific information you want and make selections
and adjustments.
WARNING!
A hot engine cooling system is dangerous. You or
others could be badly burned by steam or boiling
coolant. You may want to call an authorized
dealer for service if your vehicle overheats. If you
decide to look under the hood yourself, follow
the warnings under Cooling System Úpage 248.
CAUTION!
Driving with a hot engine cooling system could
damage your vehicle. If the temperature gauge
reads “H” pull over and stop the vehicle. Idle the
vehicle with the air conditioner turned off until
the pointer drops back into the normal range. If
the pointer remains on the “H”, turn the engine
off immediately and call an authorized dealer for
service.
3
22_LD_OM_EN_USC_t.book Page 69