DODGE CHARGER SRT 2015 7.G Owners Manual
Manufacturer: DODGE, Model Year: 2015, Model line: CHARGER SRT, Model: DODGE CHARGER SRT 2015 7.GPages: 595, PDF Size: 16.43 MB
Page 201 of 595
To turn the FCW system OFF, push the forward collision
button once to turn the system OFF (led turns on).
To turn the FCW system back ON, push the forward
collision button again to turn the system ON (led turns
off).
Changing the FCW status to “Off” prevents the system
from warning you of a possible collision with the vehicle
in front of you.
Changing the Active Braking status to “Off” prevents the
system from providing limited autonomous braking, or
additional brake support if the driver is not braking
adequately in the event of a potential frontal collision.
NOTE:The FCW system state is kept in memory from
one ignition cycle to the next. If the system is turned OFF,
it will remain off when the vehicle is restarted.
Changing FCW And Active Braking Status
The FCW Sensitivity And Active Braking Settings are
programmable through the Uconnect® System. Refer to
“Uconnect® Settings” in “Understanding Your Instru-
ment Panel” for further information.
The default status of FCW is the “Far” setting and the
Active Braking is the “On” setting, this allows the system
to warn you of a possible collision with the vehicle in
front of you when you are farther away and it applies
limited braking. This gives you the most reaction time to
avoid a possible collision.
Changing the FCW status to the “Near” setting, allows
the system to warn you of a possible collision with the
vehicle in front of you when you are much closer. This
setting provides less reaction time than the “Far” setting,
which allows for a more dynamic driving experience.
3
UNDERSTANDING THE FEATURES OF YOUR VEHICLE 199
Page 202 of 595
NOTE:
•The system will retain the last setting selected by the
driver after ignition shut down.
•FCW may not react to irrelevant objects such as
overhead objects, ground reflections, objects not in the
path of the car, stationary objects that are far away,
oncoming traffic, or leading vehicles with the same or
higher rate of speed.
•FCW will be disabled like ACC, with the unavailable
screens.
FCW Limited Warning
If the DID displays “ACC/FCW Limited Functionality”
or “ACC/FCW Limited Functionality Clean Front Wind-
shield” momentarily, there may be a condition that limits
FCW functionality. Although the vehicle is still drivable
under normal conditions, the active braking may not be
fully available. Once the condition that limited the sys-
tem performance is no longer present, the system will
return to its full performance state. If the problem per-
sists, see your authorized dealer.
Service FCW Warning
If the system turns off, and the DID displays:
•ACC/FCW Unavailable Service Required
•Cruise/FCW Unavailable Service Required
This indicates there is an internal system fault. Although
the vehicle is still drivable under normal conditions, have
the system checked by an authorized dealer.
200 UNDERSTANDING THE FEATURES OF YOUR VEHICLE
Page 203 of 595
LANESENSE — IF EQUIPPED
LaneSense Operation
The LaneSense system is operational at speeds above
37 mph (60 km/h) and below 112 mph (180 km/h). The
LaneSense system uses a forward looking camera to
detect lane markings and measure vehicle position
within the lane boundaries.
When both lane markings are detected and the driver
unintentionally drifts out of the lane (no turn signal
applied), the LaneSense system provides a haptic warn-
ing in the form of torque applied to the steering wheel to
prompt the driver to remain within the lane boundaries.
If the driver continues to unintentionally drift out of the
lane, the LaneSense system provides a visual warning
through the Driver Information Display (DID) to prompt
the driver to remain within the lane boundaries.
The driver may manually override the haptic warning by
applying torque into the steering wheel at any time.
When only a single lane marking is detected and the
driver unintentionally drifts across the lane marking (no
turn signal applied), the LaneSense system provides a
visual warning through the DID to prompt the driver to
remain within the lane. When only a single lane marking
is detected, a haptic (torque) warning will not be pro-
vided.
NOTE:When operating conditions have been met, the
LaneSense system will monitor if the driver ’s hands are
on the steering wheel and provides an audible warning
to the driver when the driver ’s hands are not detected on
the steering wheel. The system will cancel if the driver
does not return their hands to the wheel.
3
UNDERSTANDING THE FEATURES OF YOUR VEHICLE 201
Page 204 of 595
Turning LaneSense ON Or OFF
The default status of LaneSense is “OFF”.
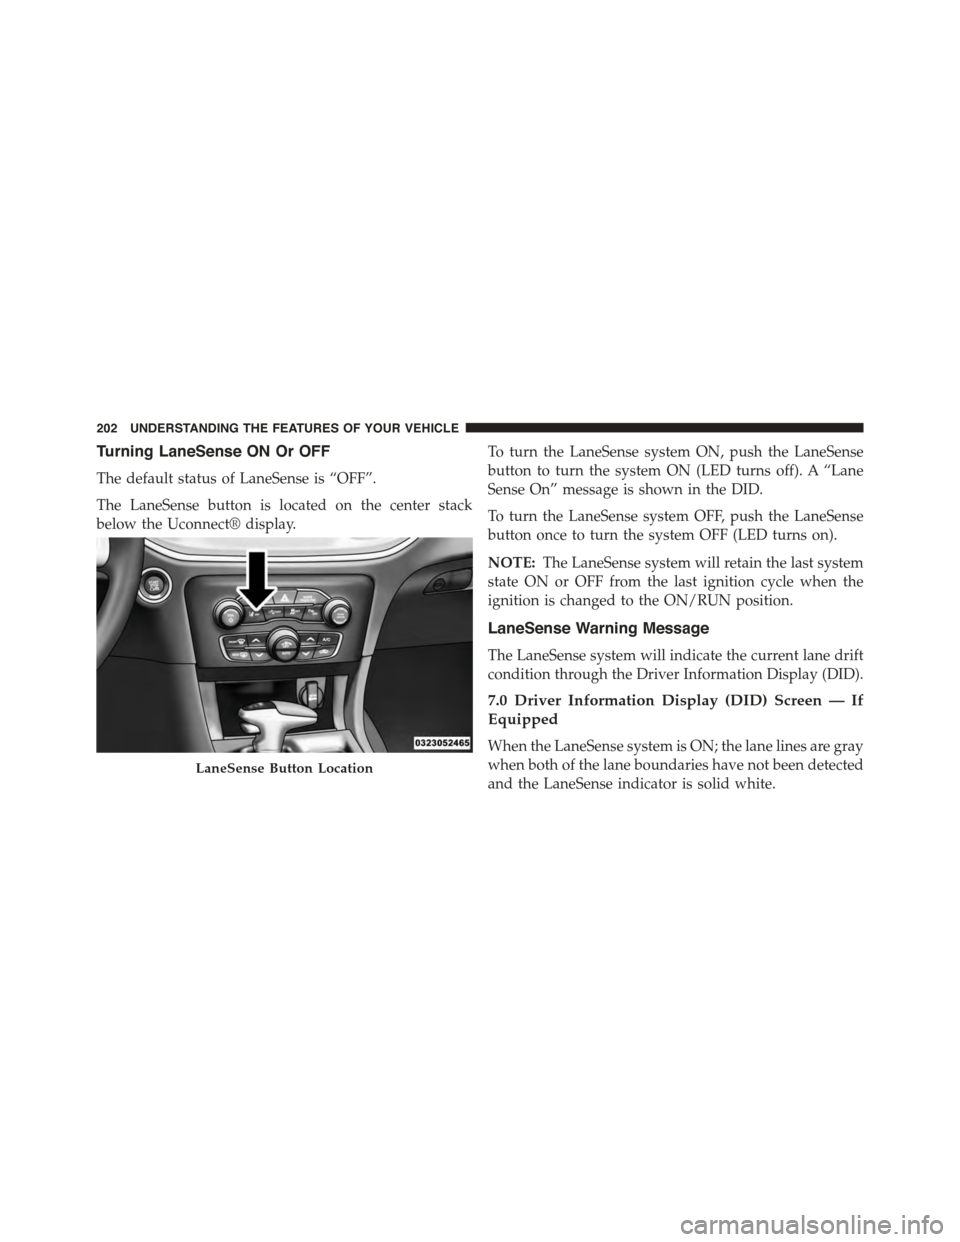
The LaneSense button is located on the center stack
below the Uconnect® display.
To turn the LaneSense system ON, push the LaneSense
button to turn the system ON (LED turns off). A “Lane
Sense On” message is shown in the DID.
To turn the LaneSense system OFF, push the LaneSense
button once to turn the system OFF (LED turns on).
NOTE:The LaneSense system will retain the last system
state ON or OFF from the last ignition cycle when the
ignition is changed to the ON/RUN position.
LaneSense Warning Message
The LaneSense system will indicate the current lane drift
condition through the Driver Information Display (DID).
7.0 Driver Information Display (DID) Screen — If
Equipped
When the LaneSense system is ON; the lane lines are gray
when both of the lane boundaries have not been detected
and the LaneSense indicator is solid white.
LaneSense Button Location
202 UNDERSTANDING THE FEATURES OF YOUR VEHICLE
Page 205 of 595
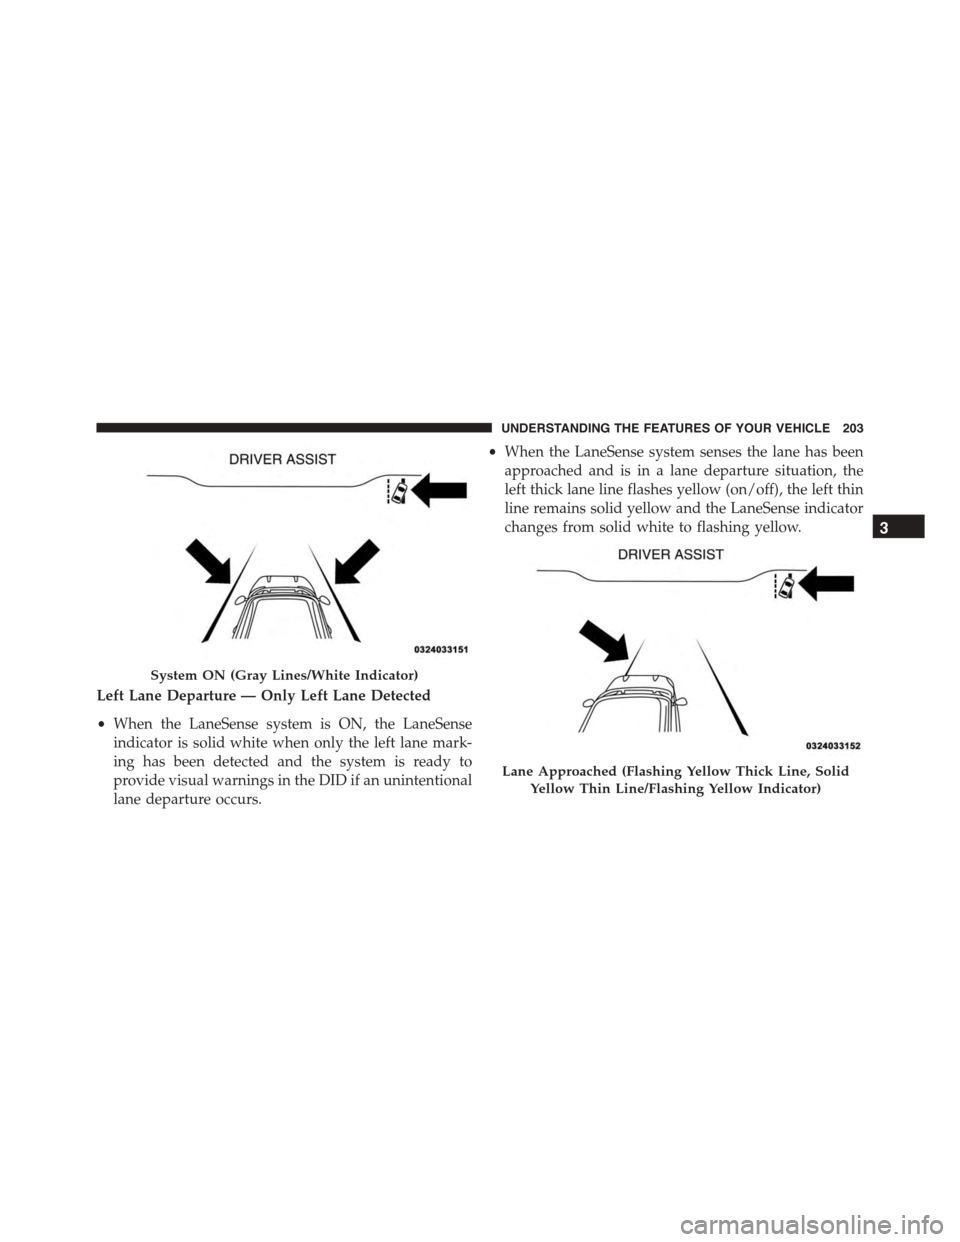
Left Lane Departure — Only Left Lane Detected
•When the LaneSense system is ON, the LaneSense
indicator is solid white when only the left lane mark-
ing has been detected and the system is ready to
provide visual warnings in the DID if an unintentional
lane departure occurs.
•When the LaneSense system senses the lane has been
approached and is in a lane departure situation, the
left thick lane line flashes yellow (on/off), the left thin
line remains solid yellow and the LaneSense indicator
changes from solid white to flashing yellow.
System ON (Gray Lines/White Indicator)
Lane Approached (Flashing Yellow Thick Line, Solid
Yellow Thin Line/Flashing Yellow Indicator)
3
UNDERSTANDING THE FEATURES OF YOUR VEHICLE 203
Page 206 of 595
NOTE:The LaneSense system operates with the similar
behavior for a right lane departure when only the right
lane marking has been detected.
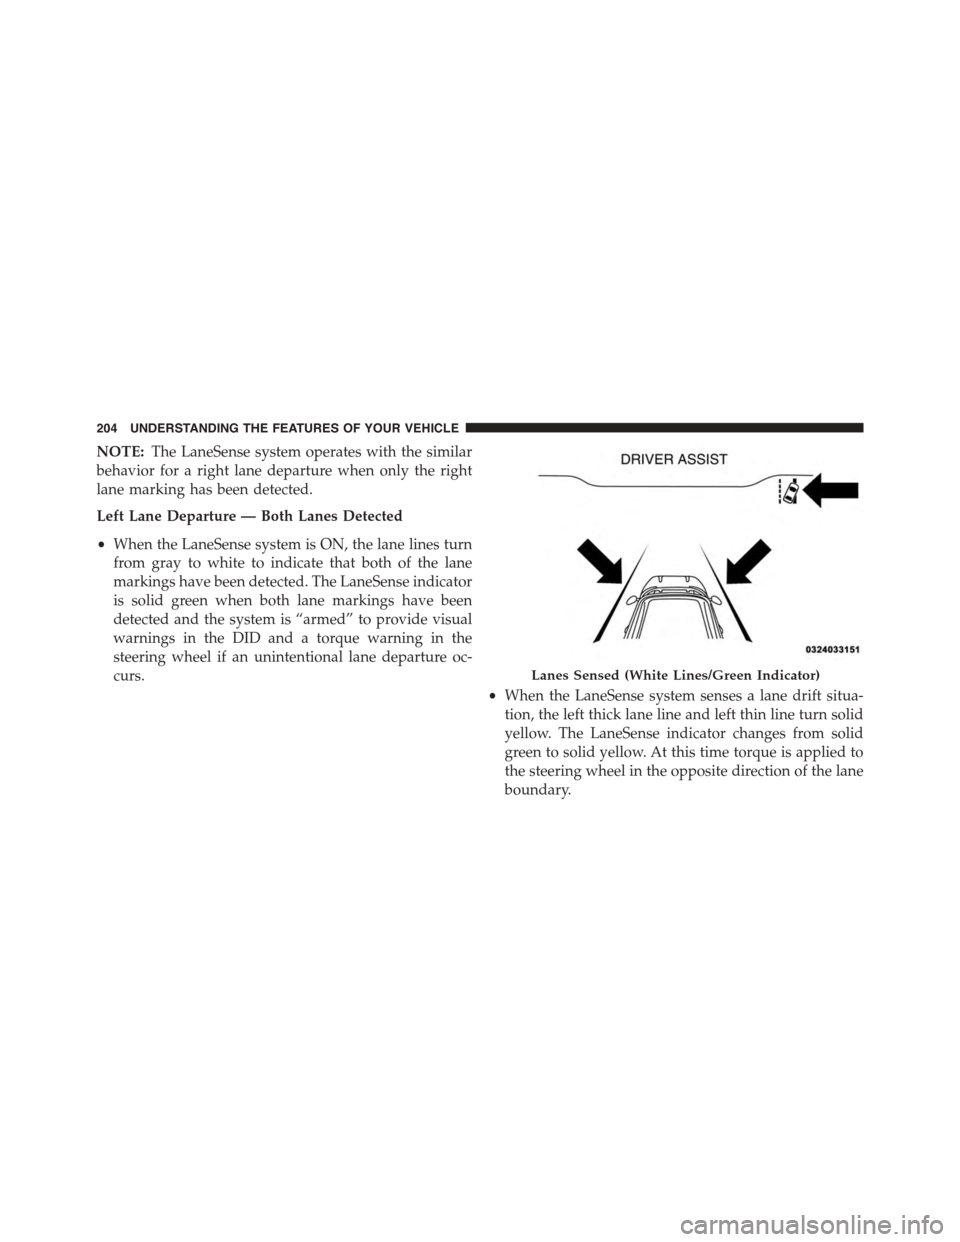
Left Lane Departure — Both Lanes Detected
•When the LaneSense system is ON, the lane lines turn
from gray to white to indicate that both of the lane
markings have been detected. The LaneSense indicator
is solid green when both lane markings have been
detected and the system is “armed” to provide visual
warnings in the DID and a torque warning in the
steering wheel if an unintentional lane departure oc-
curs.
•When the LaneSense system senses a lane drift situa-
tion, the left thick lane line and left thin line turn solid
yellow. The LaneSense indicator changes from solid
green to solid yellow. At this time torque is applied to
the steering wheel in the opposite direction of the lane
boundary.
Lanes Sensed (White Lines/Green Indicator)
204 UNDERSTANDING THE FEATURES OF YOUR VEHICLE
Page 207 of 595
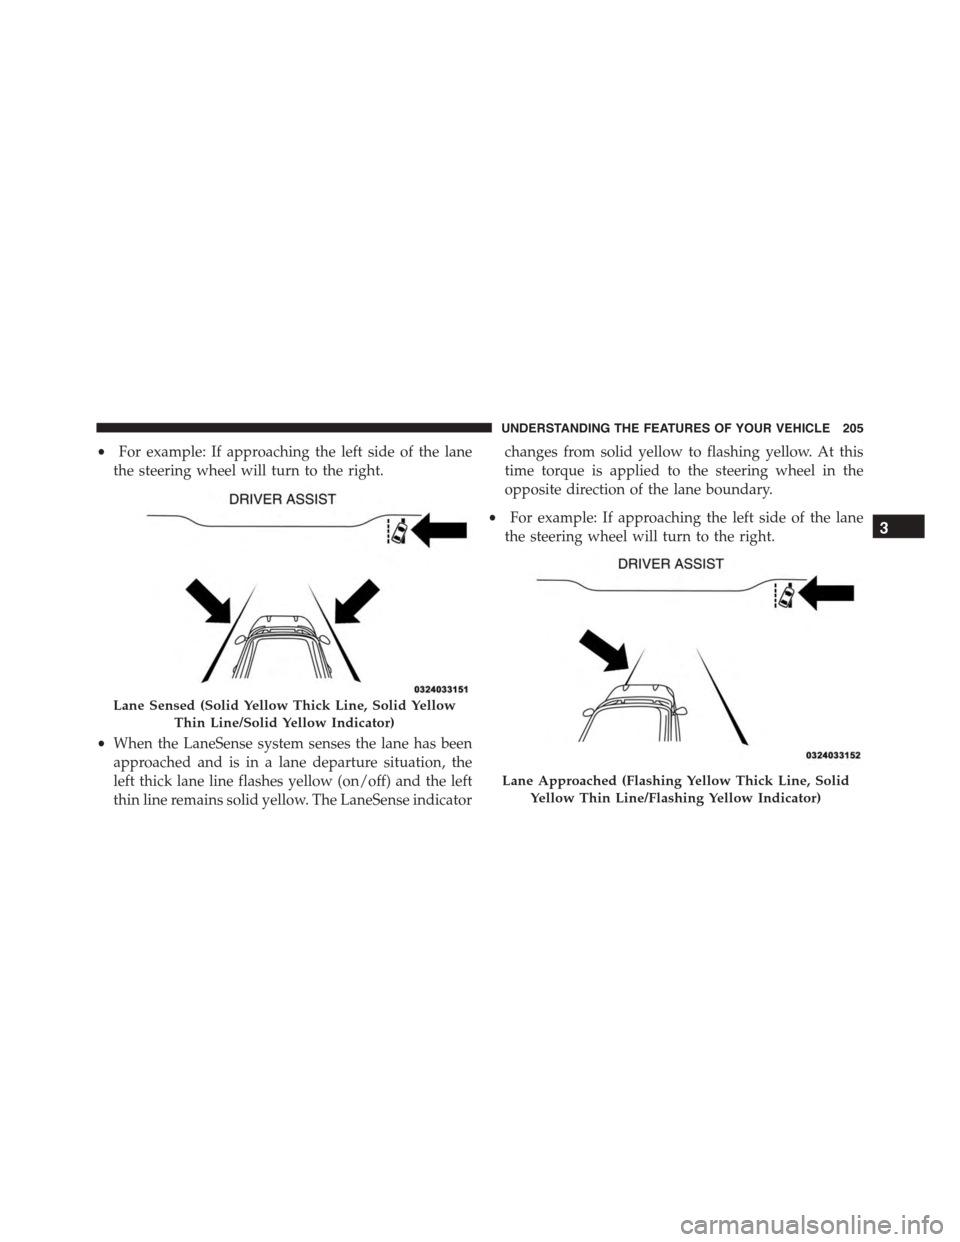
•For example: If approaching the left side of the lane
the steering wheel will turn to the right.
•When the LaneSense system senses the lane has been
approached and is in a lane departure situation, the
left thick lane line flashes yellow (on/off) and the left
thin line remains solid yellow. The LaneSense indicator
changes from solid yellow to flashing yellow. At this
time torque is applied to the steering wheel in the
opposite direction of the lane boundary.
•For example: If approaching the left side of the lane
the steering wheel will turn to the right.
Lane Sensed (Solid Yellow Thick Line, Solid Yellow
Thin Line/Solid Yellow Indicator)
Lane Approached (Flashing Yellow Thick Line, Solid
Yellow Thin Line/Flashing Yellow Indicator)
3
UNDERSTANDING THE FEATURES OF YOUR VEHICLE 205
Page 208 of 595
NOTE:The LaneSense system operates with the similar
behavior for a right lane departure.
Changing LaneSense Status
The LaneSense system settings can be configured
through the Uconnect® system screen.
Follow these steps to change the LaneSense settings:
1. Push the “Controls” button on touchscreen located on
the bottom of the Uconnect® display.
2. Push the “Settings” button.
3. Push the “Safety & Driving Assistance” button.
When in the Safety & Driving Assistance screen, you can
configure the intensity of the torque warning and the
warning zone sensitivity (early/late) through the person-
alization settings.
NOTE:
•When enabled the system operates above 37 mph
(60 km/h) and below 112 mph (180 km/h).
•Use of the turn signal suppresses the warnings.
•The system will not apply torque to the steering wheel
whenever a safety system engages. (anti-lock brakes,
traction control system, electronic stability control,
forward collision warning, etc.)
PARKSENSE® REAR PARK ASSIST — IF
EQUIPPED
The ParkSense® Rear Park Assist system provides visual
and audible indications of the distance between the rear
fascia and a detected obstacle when backing up, e.g.
during a parking maneuver. Refer to “ParkSense® Sys-
tem Usage Precautions” in this section for limitations of
this system and recommendations.
206 UNDERSTANDING THE FEATURES OF YOUR VEHICLE
Page 209 of 595
ParkSense® will retain the last system state (enabled or
disabled) from the last ignition cycle when the ignition is
changed to the ON/RUN position.
ParkSense® can be active only when the shift lever is in
REVERSE. If ParkSense® is enabled at this shift lever
position, the system will remain active until the vehicle
speed is increased to approximately 7 mph (11 km/h) or
above. The system will become active again if the vehicle
speed is decreased to speeds less than approximately
6 mph (9 km/h).
ParkSense® Sensors
The four ParkSense® sensors, located in the rear fascia/
bumper, monitor the area behind the vehicle that is
within the sensors’ field of view. The sensors can detect
obstacles from approximately 12 in (30 cm) up to 79 in
(200 cm) from the rear fascia/bumper in the horizontal
direction, depending on the location, type and orienta-
tion of the obstacle.
ParkSense® Warning Display
The ParkSense® Warning screen will only be displayed if
Sound and Display is selected from the Uconnect®
System. Refer to#Uconnect® Settings” in “Understand-
ing Your Instrument Panel” for further information.
The ParkSense® Warning screen is located within the
Driver Information Display (DID). It provides visual
warnings to indicate the distance between the rear
fascia/bumper and the detected obstacle. Refer to
“Driver Information Display (DID)” in “Understanding
Your Instrument Panel” for further information.
ParkSense® Display
When the vehicle is in REVERSE, the warning display
will turn ON indicating the system status.
The system will indicate a detected obstacle by showing
a single arc in one or more regions based on the obstacle’s
distance and location relative to the vehicle.
3
UNDERSTANDING THE FEATURES OF YOUR VEHICLE 207
Page 210 of 595
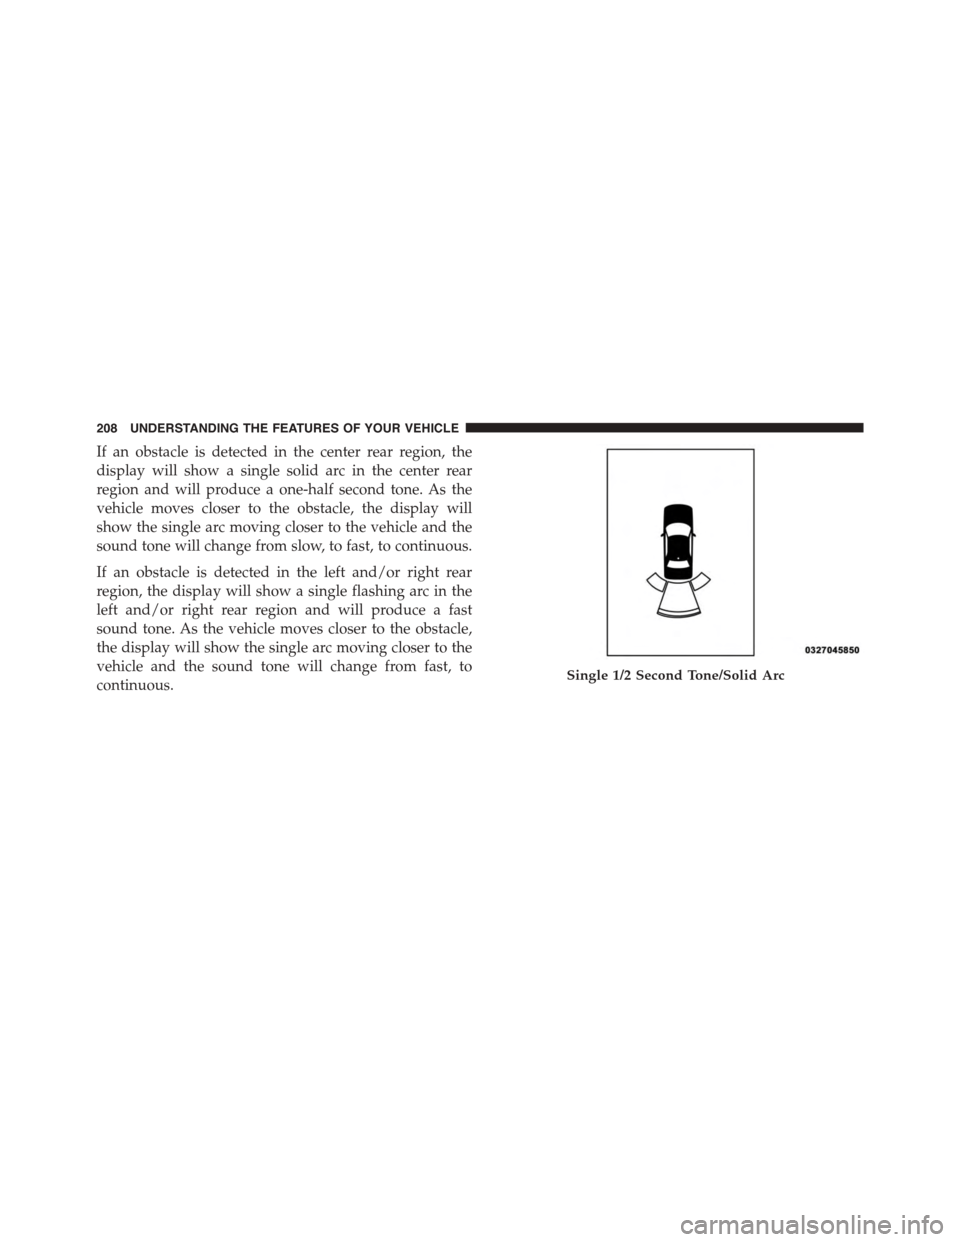
If an obstacle is detected in the center rear region, the
display will show a single solid arc in the center rear
region and will produce a one-half second tone. As the
vehicle moves closer to the obstacle, the display will
show the single arc moving closer to the vehicle and the
sound tone will change from slow, to fast, to continuous.
If an obstacle is detected in the left and/or right rear
region, the display will show a single flashing arc in the
left and/or right rear region and will produce a fast
sound tone. As the vehicle moves closer to the obstacle,
the display will show the single arc moving closer to the
vehicle and the sound tone will change from fast, to
continuous.Single 1/2 Second Tone/Solid Arc
208 UNDERSTANDING THE FEATURES OF YOUR VEHICLE