tow DODGE CHARGER SRT 2015 7.G Owners Manual
[x] Cancel search | Manufacturer: DODGE, Model Year: 2015, Model line: CHARGER SRT, Model: DODGE CHARGER SRT 2015 7.GPages: 595, PDF Size: 16.43 MB
Page 8 of 595
WARNINGS AND CAUTIONS
This Owners Manual containsWARNINGSagainst op-
erating procedures that could result in a collision or
bodily injury. It also containsCAUTIONSagainst proce-
dures that could result in damage to your vehicle. If you
do not read this entire Owner ’s Manual, you may miss
important information. Observe all Warnings and Cau-
tions.
VEHICLE IDENTIFICATION NUMBER
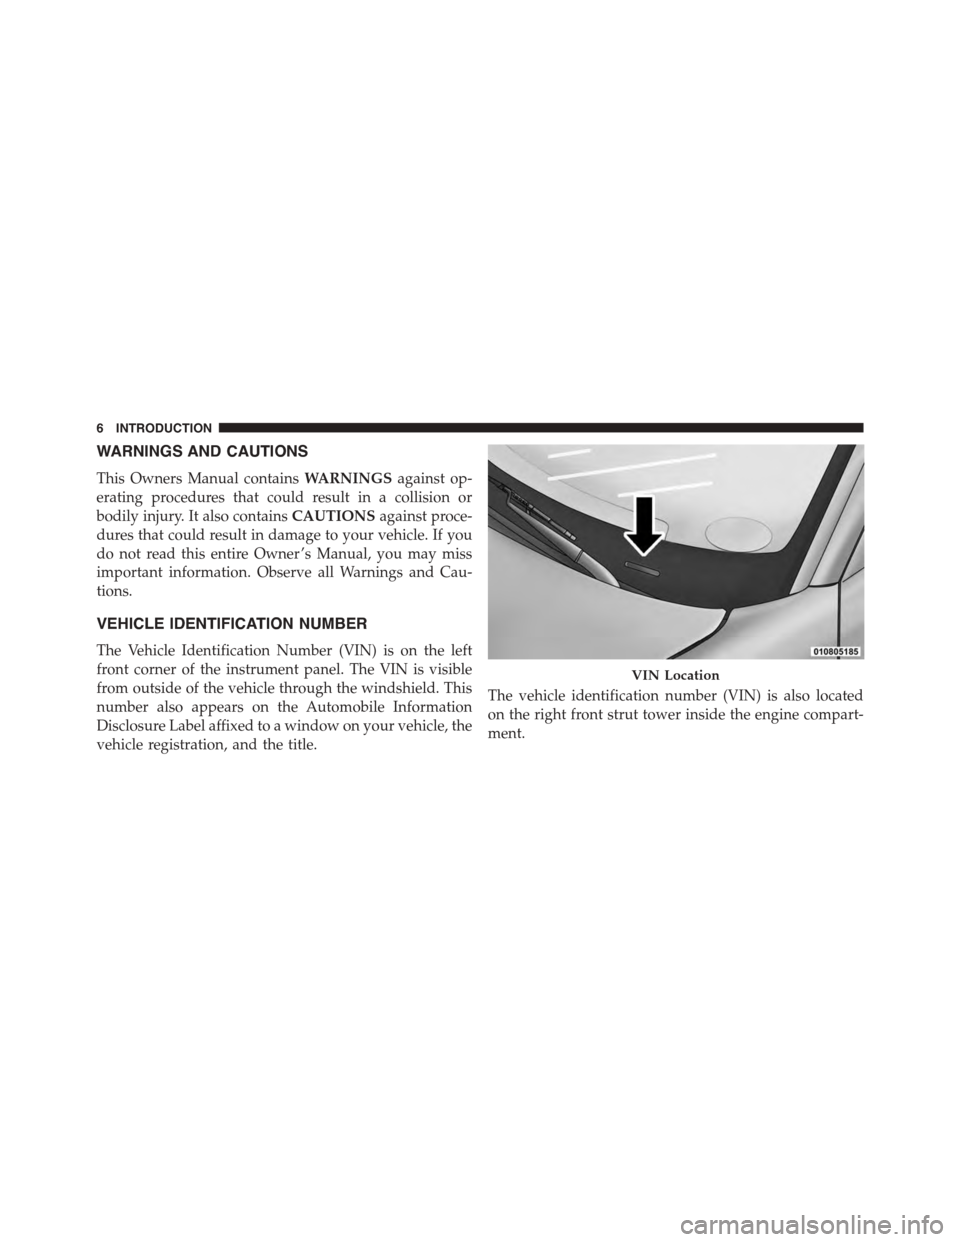
The Vehicle Identification Number (VIN) is on the left
front corner of the instrument panel. The VIN is visible
from outside of the vehicle through the windshield. This
number also appears on the Automobile Information
Disclosure Label affixed to a window on your vehicle, the
vehicle registration, and the title.
The vehicle identification number (VIN) is also located
on the right front strut tower inside the engine compart-
ment.
VIN Location
6INTRODUCTION
Page 28 of 595
•This device must accept any interference received,
including interference that may cause undesired op-
eration.
NOTE:Changes or modifications not expressly approved
by the party responsible for compliance could void the
user’s authority to operate the equipment.
If your RKE transmitter fails to operate from a normal
distance, check for these two conditions:
1. A weak battery in the transmitter. The expected life of
the battery is a minimum of three years.
2. Closeness to a radio transmitter such as a radio station
tower, airport transmitter, and some mobile or CB
radios.
REMOTE STARTING SYSTEM — IF EQUIPPED
This system uses the Remote Keyless Entry
(RKE) transmitter to start the engine conve-
niently from outside the vehicle while still
maintaining security. The system has a range of
approximately 300 ft (91 m).
NOTE:
•The vehicle must be equipped with an automatic
transmission to be equipped with Remote Start.
•Obstructions between the vehicle and the Key Fob may
reduce this range.
26 THINGS TO KNOW BEFORE STARTING YOUR VEHICLE
Page 49 of 595
After the sequence completes, the Seat Belt Reminder
Light remains illuminated until the respective seat belts
are buckled. The driver should instruct all other occu-
pants to buckle their seat belts. If an outboard front seat
belt is unbuckled while traveling at speeds greater than 5
MPH (8 km/h), BeltAlert will provide both audio and
visual notification.
The outboard front passenger seat BeltAlert is not active
when the outboard front passenger seat is unoccupied.
BeltAlert may be triggered when an animal or heavy
object is on the outboard front passenger seat or when the
seat is folded flat (if equipped). It is recommended that
pets be restrained in the rear seat (if equipped) in pet
harnesses or pet carriers that are secured by seat belts,
and cargo is properly stowed.
BeltAlert can be activated or deactivated by your autho-
rized dealer. Chrysler Group LLC does not recommend
deactivating BeltAlert.
NOTE:If BeltAlert has been deactivated, the Seat Belt
Reminder Light will continue to illuminate while the
driver ’s or outboard front passenger ’s (if equipped with
BeltAlert) seat belt remains unbuckled.
Lap/Shoulder Belts
All seating positions in your vehicle are equipped with
lap/shoulder belts.
The seat belt webbing retractor will lock only during very
sudden stops or collisions. This feature allows the shoul-
der part of the seat belt to move freely with you under
normal conditions. However, in a collision the seat belt
will lock and reduce your risk of striking the inside of the
vehicle or being thrown out of the vehicle.
2
THINGS TO KNOW BEFORE STARTING YOUR VEHICLE 47
Page 54 of 595
5. Position the shoulder belt across the shoulder and
chest with minimal, if any slack so that it is comfort-
able and not resting on your neck. The retractor will
withdraw any slack in the shoulder belt.
6. To release the belt, push the red button on the buckle.
The seat belt will automatically retract to its stowed
position. If necessary, slide the latch plate down the
webbing to allow the seat belt to retract fully.
Lap/Shoulder Belt Untwisting Procedure
Use the following procedure to untwist a twisted lap/
shoulder belt.
1. Position the latch plate as close as possible to the
anchor point.
2. At about 6 to 12 inches (15 to 30 cm) above the latch
plate, grasp and twist the seat belt webbing 180° to
create a fold that begins immediately above the latch
plate.
3. Slide the latch plate upward over the folded webbing.
The folded webbing must enter the slot at the top of
the latch plate.
4. Continue to slide the latch plate up until it clears the
folded webbing and the seat belt is no longer twisted.
Adjustable Upper Shoulder Belt Anchorage
In the driver and front passenger seats, the top of the
shoulder belt can be adjusted upward or downward to
position the seat belt away from your neck. Push or
squeeze the anchorage button to release the anchorage,
and move it up or down to the position that serves you
best.
52 THINGS TO KNOW BEFORE STARTING YOUR VEHICLE
Page 88 of 595
WARNING!
Never use the same lower anchorage to attach more
than one child restraint. Please refer to “Installing
The LATCH-Compatible Child Restraint System” for
typical installation instructions.
Always follow the directions of the child restraint
manufacturer when installing your child restraint. Not
all child restraint systems will be installed as described
here.
To Install A LATCH-Compatible Child Restraint
If the selected seating position has a Switchable Auto-
matic Locking Retractor (ALR) seat belt, stow the seat
belt, following the instructions below. See the section
“Installing Child Restraints Using the Vehicle Seat Belt”
to check what type of seat belt each seating position has.
1. Loosen the adjusters on the lower straps and on the
tether strap of the child seat so that you can more
easily attach the hooks or connectors to the vehicle
anchorages.
2. Place the child seat between the lower anchorages for
that seating position. For some second row seats, you
may need to recline the seat and/or raise the head
restraint to get a better fit. If the rear seat can be moved
forward and rearward in the vehicle, you may wish to
move it to its rear-most position to make room for the
child seat. You may also move the front seat forward
to allow more room for the child seat.
3. Attach the lower hooks or connectors of the child
restraint to the lower anchorages in the selected seat-
ing position.
86 THINGS TO KNOW BEFORE STARTING YOUR VEHICLE
Page 89 of 595
4. If the child restraint has a tether strap, connect it to the
top tether anchorage. See the section “Installing Child
Restraints Using the Top Tether Anchorage” for direc-
tions to attach a tether anchor.
5. Tighten all of the straps as you push the child restraint
rearward and downward into the seat. Remove slack
in the straps according to the child restraint manufac-
turer ’s instructions.
6. Test that the child restraint is installed tightly by
pulling back and forth on the child seat at the belt
path. It should not move more than 1 inch (25.4 mm)
in any direction.
How To Stow An Unused ALR Seat Belt:
When using the LATCH attaching system to install a
child restraint, stow all ALR seat belts that are not being
used by other occupants or being used to secure child
restraints. An unused belt could injure a child if they play
with it and accidentally lock the seat belt retractor. Before
installing a child restraint using the LATCH system,
buckle the seat belt behind the child restraint and out of
the child’s reach. If the buckled seat belt interferes with
the child restraint installation, instead of buckling it
behind the child restraint, route the seat belt through the
child restraint belt path and then buckle it. Do not lock
the seat belt. Remind all children in the vehicle that the
seat belts are not toys and that they should not play with
them.
2
THINGS TO KNOW BEFORE STARTING YOUR VEHICLE 87
Page 110 of 595
MIRRORS
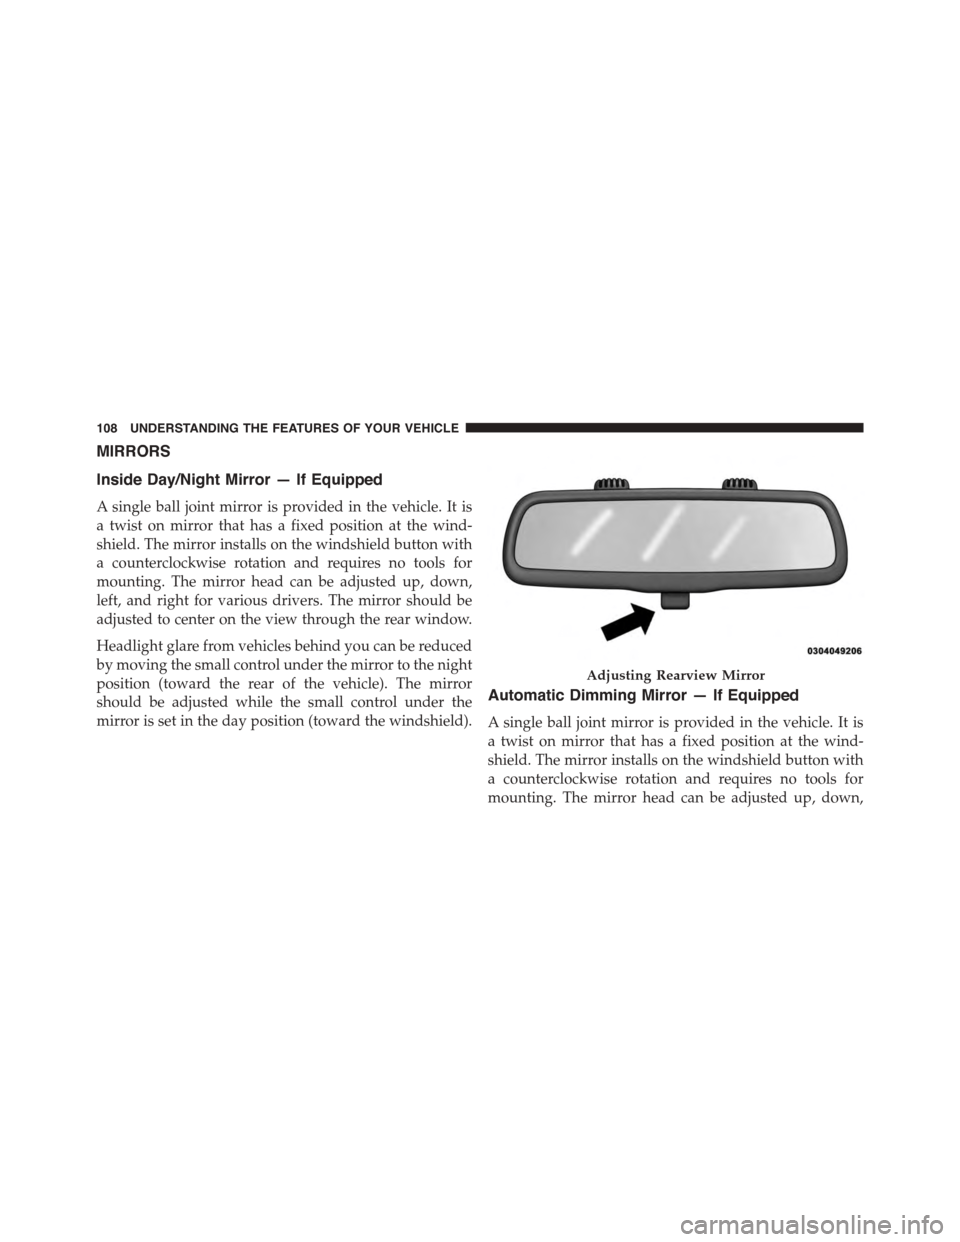
Inside Day/Night Mirror — If Equipped
A single ball joint mirror is provided in the vehicle. It is
a twist on mirror that has a fixed position at the wind-
shield. The mirror installs on the windshield button with
a counterclockwise rotation and requires no tools for
mounting. The mirror head can be adjusted up, down,
left, and right for various drivers. The mirror should be
adjusted to center on the view through the rear window.
Headlight glare from vehicles behind you can be reduced
by moving the small control under the mirror to the night
position (toward the rear of the vehicle). The mirror
should be adjusted while the small control under the
mirror is set in the day position (toward the windshield).
Automatic Dimming Mirror — If Equipped
A single ball joint mirror is provided in the vehicle. It is
a twist on mirror that has a fixed position at the wind-
shield. The mirror installs on the windshield button with
a counterclockwise rotation and requires no tools for
mounting. The mirror head can be adjusted up, down,
Adjusting Rearview Mirror
108 UNDERSTANDING THE FEATURES OF YOUR VEHICLE
Page 112 of 595
NOTE:The ASSIST and 9–1–1 features operate through
the Uconnect® Access service. These buttons will only
operate as long as your Uconnect® Access service is
active. Refer to your “Uconnect® System supplement
manual” for further information.
ASSIST Call
The ASSIST Button is used to automatically connect you
to any one of the following support centers:
•Roadside Assistance – If you get a flat tire, or need a
tow, just push the Assist button and you’ll be con-
nected to someone who can help. Roadside Assistance
will know what vehicle you’re driving and its location.
Additional fees may apply for roadside Assistance.
•Uconnect® Access Customer Care – In-vehicle support
for Uconnect® Access and Uconnect® Access Via
Mobile features.
•Vehicle Customer Care – Total support for all other
vehicle issues.
9-1-1 Call
1. Push the 9-1-1 Call button on the Rearview Mirror.
NOTE:In case the 9-1-1 Call button is pushed in error,
there will be a 10 second delay before the 9-1-1 Call
system initiates a call to a 9-1-1 operator. To cancel the
9-1-1 Call connection, push the 9-1-1 Call button on the
Rearview Mirror or push the cancellation button on the
Phone Screen. Termination of the 9-1-1 Call will turn the
green LED light on the Rearview Mirror off.
2. The LED light located between the Assist and 9-1-1
buttons on the Rearview Mirror will turn green once a
connection to a 9-1-1 operator has been made.
11 0 U N D E R S TA N D I N G T H E F E AT U R E S O F Y O U R V E H I C L E
Page 123 of 595
The BSM detection zone covers approximately one lane
width on both sides of the vehicle 12 ft (3.8 m). The zone
length starts at the outside rear view mirror and extends
approximately 10 ft (3 m) beyond the rear bumper of the
vehicle. The BSM system monitors the detection zones on
both sides of the vehicle when the vehicle speed reaches
approximately 6 mph (10 km/h) or higher and will alert
the driver of vehicles in these areas.
NOTE:
•The BSM system does NOT alert the driver about
rapidly approaching vehicles that are outside the de-
tection zones.
•The BSM system detection zone DOES NOT change if
your vehicle is towing a trailer. Therefore, visually
verify the adjacent lane is clear for both your vehicle
and trailer before making a lane change. If the trailer or
other object (i.e., bicycle, sports equipment) extends
beyond the side of your vehicle, this may result in the
BSM warning light remaining illuminated the entire
time the vehicle is in a forward gear.
The area on the rear fascia where the radar sensors are
located must remain free of snow, ice, and dirt/road
contamination so that the BSM system can function
properly. Do not block the area of the rear fascia where
the radar sensors are located with foreign objects (bum-
per stickers, bicycle racks, etc.).
The BSM system notifies the driver of objects in the
detection zones by illuminating the BSM warning light
located in the outside mirrors in addition to sounding an
audible (chime) alert and reducing the radio volume.
Refer to “Modes Of Operation” for further information.
The BSM system monitors the detection zone from three
different entry points (side, rear, front) while driving to
see if an alert is necessary. The BSM system will issue an
alert during these types of zone entries.
3
UNDERSTANDING THE FEATURES OF YOUR VEHICLE 121
Page 127 of 595
WARNING!
The Blind Spot Monitoring system is only an aid to
help detect objects in the blind spot zones. The BSM
system is not designed to detect pedestrians, bicy-
clists, or animals. Even if your vehicle is equipped
with the BSM system, always check your vehicle’s
mirrors, glance over your shoulder, and use your turn
signal before changing lanes. Failure to do so can
result in serious injury or death.
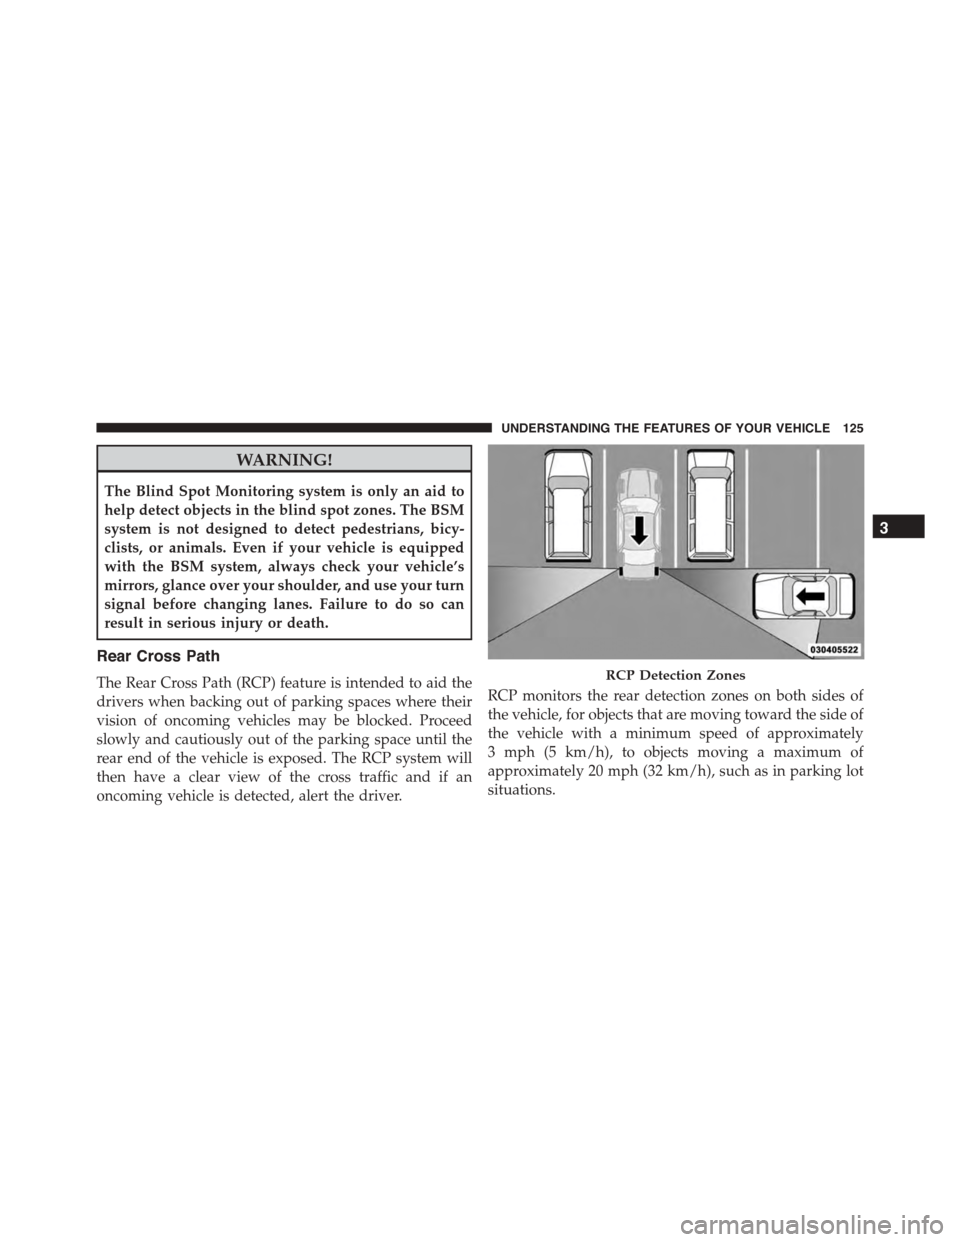
Rear Cross Path
The Rear Cross Path (RCP) feature is intended to aid the
drivers when backing out of parking spaces where their
vision of oncoming vehicles may be blocked. Proceed
slowly and cautiously out of the parking space until the
rear end of the vehicle is exposed. The RCP system will
then have a clear view of the cross traffic and if an
oncoming vehicle is detected, alert the driver.
RCP monitors the rear detection zones on both sides of
the vehicle, for objects that are moving toward the side of
the vehicle with a minimum speed of approximately
3 mph (5 km/h), to objects moving a maximum of
approximately 20 mph (32 km/h), such as in parking lot
situations.
RCP Detection Zones
3
UNDERSTANDING THE FEATURES OF YOUR VEHICLE 125