transmission DODGE DAKOTA 2009 3.G Owners Manual
[x] Cancel search | Manufacturer: DODGE, Model Year: 2009, Model line: DAKOTA, Model: DODGE DAKOTA 2009 3.GPages: 449, PDF Size: 10.96 MB
Page 11 of 449
THINGS TO KNOW BEFORE STARTING YOUR VEHICLE
CONTENTS
mA Word About Your Keys................. 12
NIgnition Key Removal.................. 12
NLocking Doors With The Key............. 15
mSteering Wheel Lock Ð If Equipped......... 15
NIf You Wish To Manually Lock The Steering
Wheel.............................. 15
NTo Release The Steering Wheel Lock........ 15
NAutomatic Transmission Ignition Interlock
System............................. 15mSentry KeytImmobilizer System Ð If
Equipped............................. 16
NReplacement Keys..................... 17
NCustomer Key Programming............. 17
mVehicle Security Alarm System Ð If Equipped . . 19
NTo Set The Alarm...................... 19
NTo Disarm The System.................. 19
mIlluminated Entry....................... 20
NVehicles Equipped With Power Door Locks . . . 20
2
Page 14 of 449
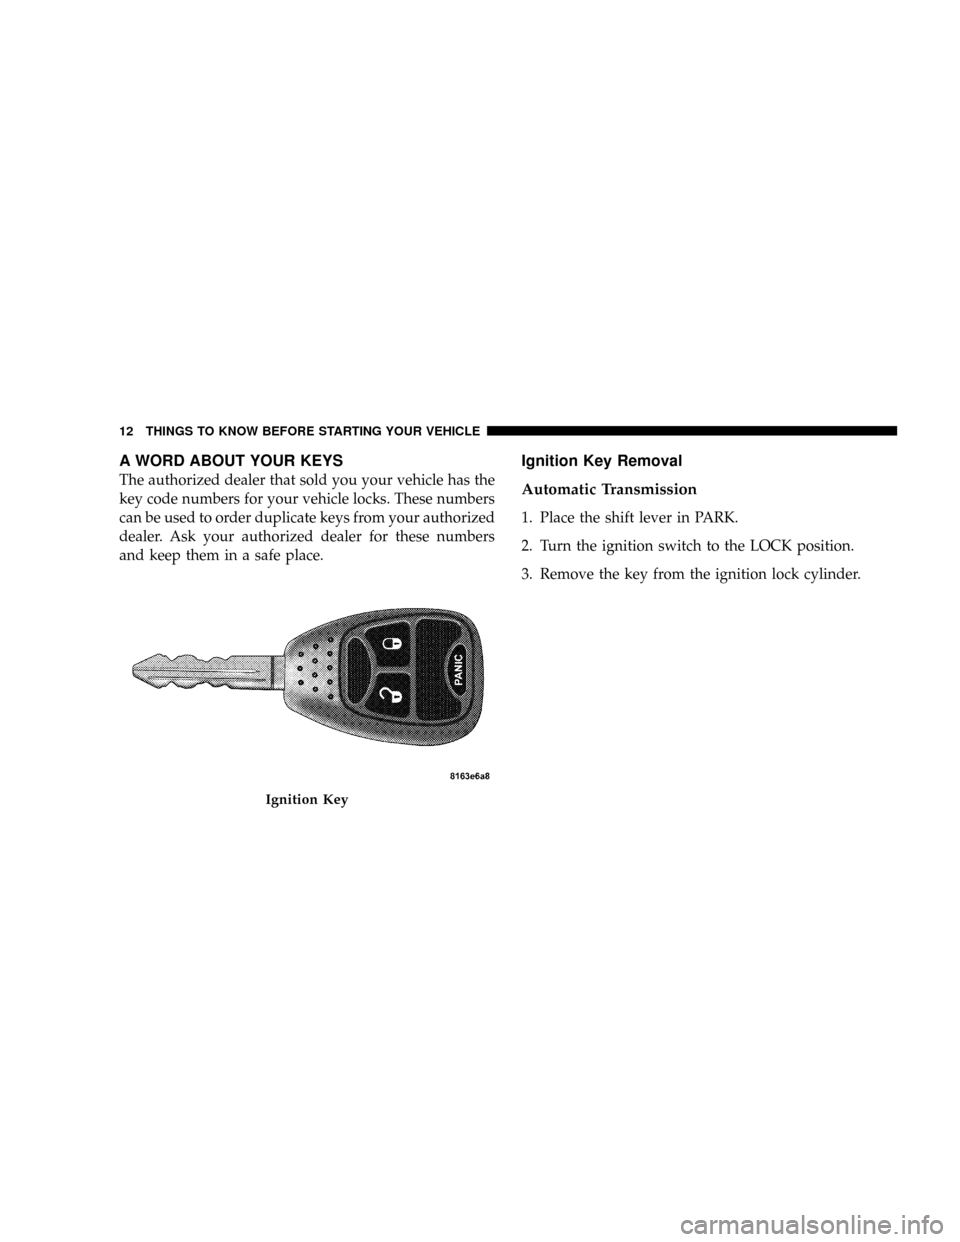
A WORD ABOUT YOUR KEYS
The authorized dealer that sold you your vehicle has the
key code numbers for your vehicle locks. These numbers
can be used to order duplicate keys from your authorized
dealer. Ask your authorized dealer for these numbers
and keep them in a safe place.
Ignition Key Removal
Automatic Transmission
1. Place the shift lever in PARK.
2. Turn the ignition switch to the LOCK position.
3. Remove the key from the ignition lock cylinder.
Ignition Key
12 THINGS TO KNOW BEFORE STARTING YOUR VEHICLE
Page 16 of 449
CAUTION!
An unlocked car is an invitation to thieves. Always
remove the key from the ignition and lock all the
doors when leaving the vehicle unattended.
Manual Transmission Ð If Equipped
When the steering wheel is in the LOCK position, the
steering and ignition systems are locked to provide
antitheft protection for your vehicle. It may be difficult to
turn the key from the LOCK position when starting your
vehicle. Move the steering wheel left and right while
turning the key until it turns easily. To remove the key,
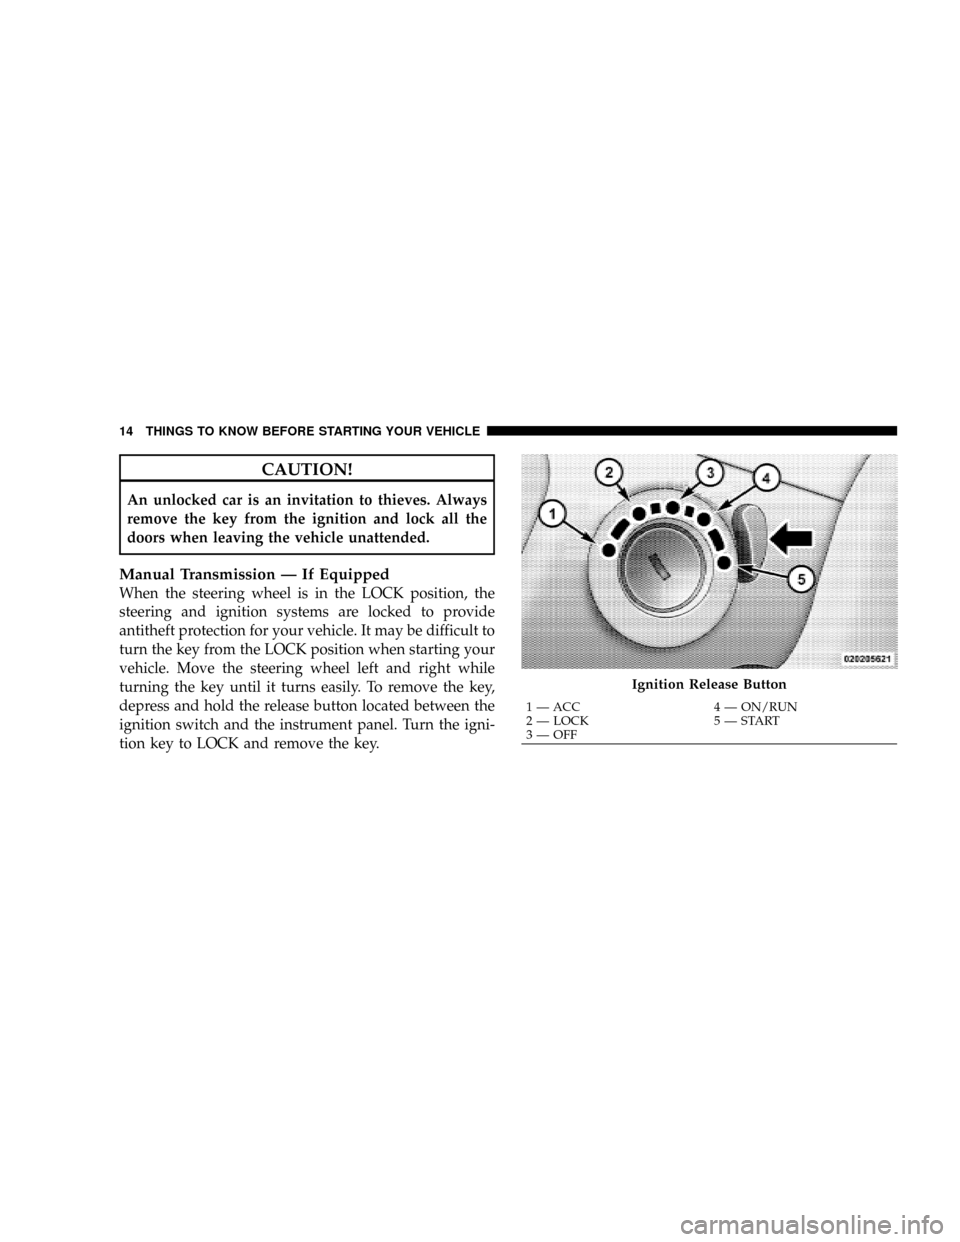
depress and hold the release button located between the
ignition switch and the instrument panel. Turn the igni-
tion key to LOCK and remove the key.
Ignition Release Button
1 Ð ACC 4 Ð ON/RUN
2 Ð LOCK 5 Ð START
3 Ð OFF 14 THINGS TO KNOW BEFORE STARTING YOUR VEHICLE
Page 17 of 449
Locking Doors With The Key
You can insert the key into the door lock cylinder with
either side up. To lock the driver's door, turn the key
rearward. To unlock the driver's door, turn the key
forward. For external door lock lubrication, refer to
ªBody Lubricationº in Section 7.
STEERING WHEEL LOCK Ð IF EQUIPPED
Your vehicle may be equipped with a passive steering
wheel lock. This lock prevents steering the vehicle with-
out the ignition key. If the steering wheel is moved no
more than 1/2 turn in either direction, and the key is not
in the ignition switch, the steering wheel will lock.
If You Wish To Manually Lock The Steering
Wheel:
With the engine running, turn the steering wheel upside
down, turn off the engine and remove the key. Turn the
steering wheel slightly in either direction until the lock
engages.
To Release The Steering Wheel Lock:
Insert the key in the ignition switch and start the engine.
If the key is difficult to turn, move the wheel slightly to
the right or left to disengage the lock.
NOTE:If you turned the wheel to the right to engage
the lock, you must turn the wheel slightly to the right to
disengage it. If you turned the wheel to the left to engage
the lock, turn the wheel slightly to the left to disengage it.
Automatic Transmission Ignition Interlock System
This system prevents the key from being removed unless
the shift lever is in PARK. It also prevents shifting out of
PARK unless the key is in the ACC, or ON position, and
the brake pedal is pressed.
THINGS TO KNOW BEFORE STARTING YOUR VEHICLE 15
2
Page 23 of 449
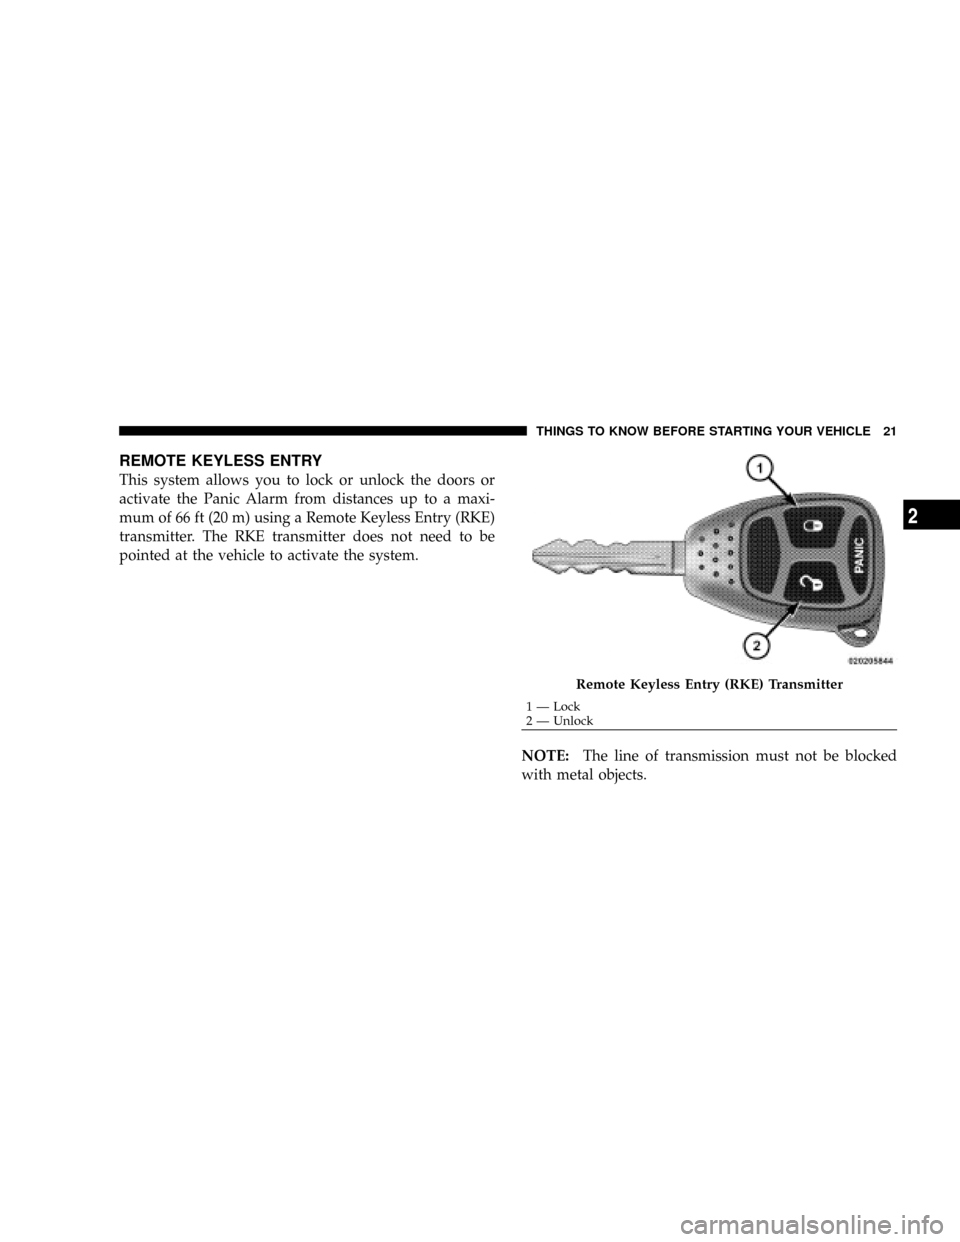
REMOTE KEYLESS ENTRY
This system allows you to lock or unlock the doors or
activate the Panic Alarm from distances up to a maxi-
mum of 66 ft (20 m) using a Remote Keyless Entry (RKE)
transmitter. The RKE transmitter does not need to be
pointed at the vehicle to activate the system.
NOTE:The line of transmission must not be blocked
with metal objects.
Remote Keyless Entry (RKE) Transmitter
1 Ð Lock
2 Ð UnlockTHINGS TO KNOW BEFORE STARTING YOUR VEHICLE 21
2
Page 30 of 449
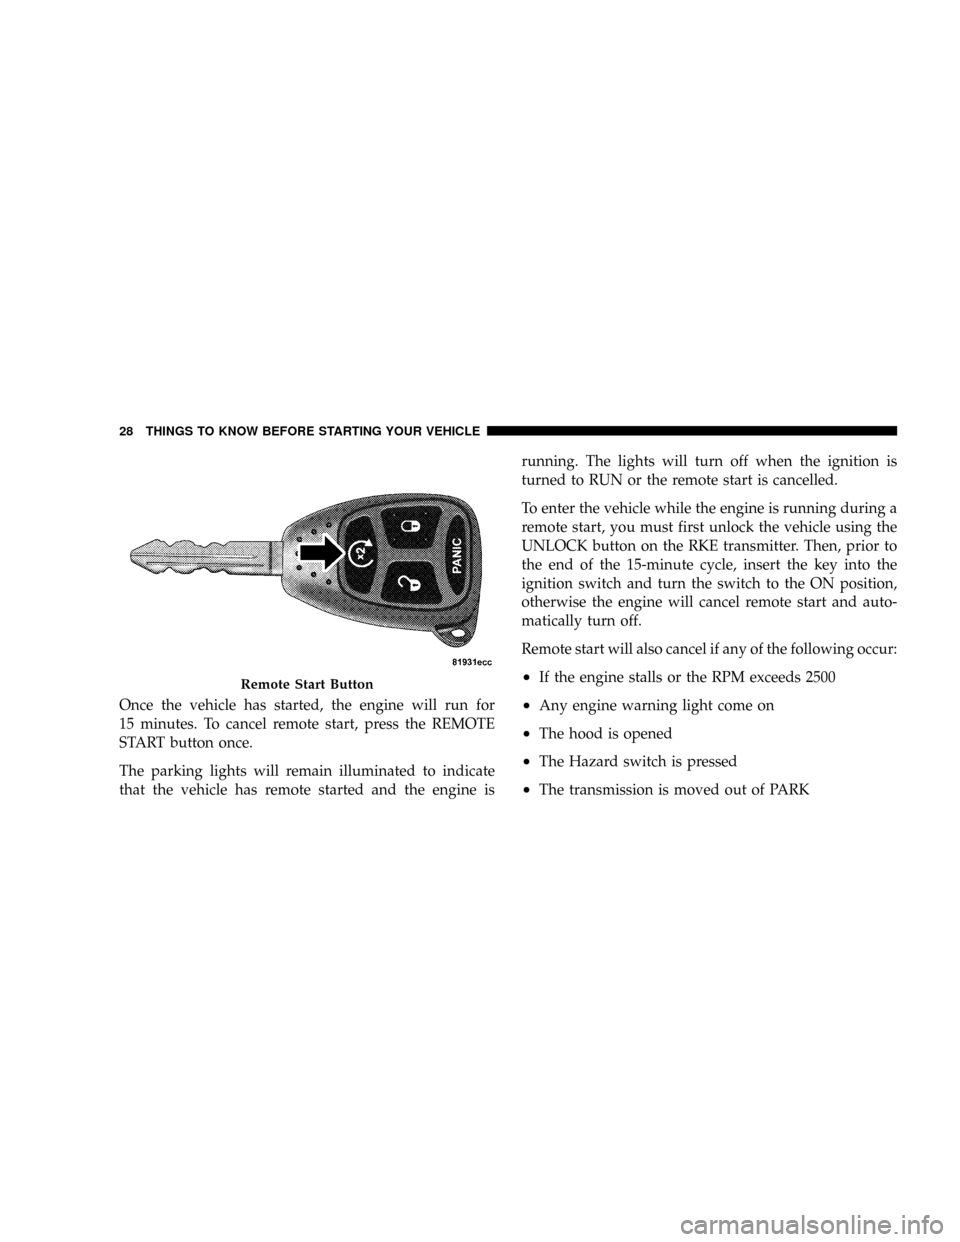
Once the vehicle has started, the engine will run for
15 minutes. To cancel remote start, press the REMOTE
START button once.
The parking lights will remain illuminated to indicate
that the vehicle has remote started and the engine isrunning. The lights will turn off when the ignition is
turned to RUN or the remote start is cancelled.
To enter the vehicle while the engine is running during a
remote start, you must first unlock the vehicle using the
UNLOCK button on the RKE transmitter. Then, prior to
the end of the 15-minute cycle, insert the key into the
ignition switch and turn the switch to the ON position,
otherwise the engine will cancel remote start and auto-
matically turn off.
Remote start will also cancel if any of the following occur:
²If the engine stalls or the RPM exceeds 2500
²Any engine warning light come on
²The hood is opened
²The Hazard switch is pressed
²The transmission is moved out of PARK
Remote Start Button
28 THINGS TO KNOW BEFORE STARTING YOUR VEHICLE
Page 59 of 449
court with legal jurisdiction (i.e., pursuant to a warrant).
A copy of the data will be provided to the custodial entity
upon request. General data, that does not identify par-
ticular vehicles or crashes, may be released for incorpo-
ration in aggregate crash databases, such as those main-
tained by the U.S. government and various states. Data of
a potentially sensitive nature, such as would identify a
particular driver, vehicle, or crash, will be treated confi-
dentially. Confidential data will not be disclosed by
Chrylser LLC to any third party, except when:
1. Used for research purposes, such as to match data
with a particular crash record in an aggregate database,
provided confidentiality of personal data is thereafter
preserved
2. Used in defense of litigation involving a Chrylser LLC
product
3. Requested by police under a legal warrant4. Otherwise required by law.
Data Parameters that May Be Recorded:
²Diagnostic trouble code(s) and warning lamp status
for electronically-controlled safety systems, including
the airbag system
²9Time9of airbag deployment (in terms of ignition
cycles and vehicle mileage)
²Airbag deployment level (if applicable)
²Impact acceleration and angle
²Seat belt status
²Brake status (service and parking brakes)
²Accelerator status (including vehicle speed)
²Engine control status (including engine speed)
²Transmission gear selection
THINGS TO KNOW BEFORE STARTING YOUR VEHICLE 57
2
Page 128 of 449
Plastic is not as scratch resistant as glass and therefore
different lens cleaning procedures must be followed.
To minimize the possibility of scratching the lenses and
reducing light output, avoid wiping with a dry cloth. To
remove road dirt, wash with a mild soap solution fol-
lowed by rinsing.
Do not use abrasive cleaning components, solvents, steel
wool or other abrasive materials to clean the lenses.
Daytime Running Lights (Canada ± Standard and
U.S. Fleet Vehicles) Ð If Equipped
The headlights on your vehicle will illuminate when the
engine is started, the transmission is out of the PARK
position and the parking brake is released. This provides
a constant9lights on9condition until the ignition is
turned OFF. The lights illuminate at less than normal
intensity. If the parking brake is applied or the transmis-
sion is in the PARK position, the Daytime Running Lights
(DRL) will turn off.
Lights-on Reminder
If the headlights, parking lights, courtesy lights or cargo
lights are left on, after the ignition is turned OFF, a chime
will sound when the driver's door is opened.
Fog Lights Ð If Equipped
The Fog Lights are turned on by placing the
headlight rotary control in the parking light or
headlight position and pushing on the headlight
rotary control. The fog lights will operate only when the
parking lights are on, or when the vehicle headlights are
on low beam. An indicator light located in the instrument
cluster will illuminate when the fog lights are on. The fog
lights will turn off when the switch is pushed a second
time, also when the headlight switch is rotated to the off
position, or the high beam is selected.
Cargo Light Ð If Equipped
The cargo lights are turned on by pressing on the
CARGO button. The cargo lights will also turn on for
126 UNDERSTANDING THE FEATURES OF YOUR VEHICLE
Page 136 of 449
To Vary The Speed Setting
When the Electronic Speed Control System is ON, the
speed can be increased by pressing and holding the
RESUME/ACCEL button. When the button is released, a
new set speed will be established.
Tapping the ACCEL button once will result in a speed
increase of 1 mph (2 km/h). Each time the button is
tapped, speed increases so that tapping the button three
times will increase speed by 3 mph (4.8 km/h).
Tapping the DECEL button once will result in a speed
decrease of 1 mph (2 km/h). Each time the button is
tapped, speed will decrease. For example, tapping the
button three times will decrease the speed by 3 mph
(4.8 km/h).
To decrease the speed while the Electronic Speed Control
is on, press and hold the DECEL button. Release the
button when the desired speed is reached, and the new
speed will be set.
To Accelerate For Passing
Depress the accelerator as you would normally. When the
pedal is released, the vehicle will return to the set speed.
NOTE:When driving uphill, at elevations above 2,000 ft
(610 m), or when the vehicle is heavily loaded (especially
when towing) the vehicle may slow below the SET speed.
If the vehicle speed drops below 25 mph (40 km/h), the
Electronic Speed Control will automatically disengage. If
this happens, you can push down on the accelerator
pedal to maintain the desired speed.
Vehicles equipped with an automatic transmission may
exhibit several downshifts under the above conditions.
To reduce the frequency of the downshifts and to im-
prove vehicle performance, it is advisable to lock out
OVERDRIVE by pressing the TOW/HAUL button lo-
cated at the end of the shift lever.
134 UNDERSTANDING THE FEATURES OF YOUR VEHICLE
Page 146 of 449
WARNING!
Vehicle exhaust contains carbon monoxide, a danger-
ous gas. Do not run your vehicle in the garage while
training the transceiver. Exhaust gas can cause seri-
ous injury or death.
Programming HomeLinkT
Before You Begin
The Compass Mini-Trip Computer (CMTC) illuminates
the HomeLinktsymbol (a house with an arrow inside it)
along with 1, 2 or 3 indicators under it, when a
HomeLinktbutton is pressed.
Pay attention to the indicator(s), as they will flash at
different rates, or remain solid during training.
If you have not trained any of the HomeLinktbuttons,
erase all channels before you begin training.To do this, press and hold the two outside buttons for
20 seconds. Release the buttons when the indicators start
to flash.
It is recommended that anew batterybe placed in the
hand-held transmitter of the device being programmed
to HomeLinkt, for more efficient training and accurate
transmission of the radio-frequency signal.
Your vehicle should be parked outside of the garage
while training.
1. Turn the ignition switch to the ON/RUN position.
2. Place the hand-held transmitter 1 to 3 inches (3 to
8 cm) from the HomeLinktbuttons, while keeping the
HomeLinktdisplay in view.
For optimal training, point the battery end of the hand-
held transmitter away from the HomeLinkt.
144 UNDERSTANDING THE FEATURES OF YOUR VEHICLE