check engine DODGE DART 2015 PF / 1.G Owners Manual
[x] Cancel search | Manufacturer: DODGE, Model Year: 2015, Model line: DART, Model: DODGE DART 2015 PF / 1.GPages: 664, PDF Size: 16.96 MB
Page 13 of 664

!ENGINE BREAK-IN RECOMMENDATIONS . . .109
!SAFETY TIPS.........................110
▫Transporting Passengers.................110
▫Exhaust Gas.........................111
▫Safety Checks You Should Make Inside The
Vehicle.............................112
▫Periodic Safety Checks You Should Make Outside
The Vehicle.........................1142
THINGS TO KNOW BEFORE STARTING YOUR VEHICLE 11
Page 20 of 664

The system uses a Key or Key Fob with Remote Keyless
Entry (RKE) transmitter, an RF receiver, and either an
Ignition Node Module (IGNM) or a Keyless Ignition
Node (KIN) to prevent unauthorized vehicle operation.
Therefore, only Keys or Key Fobs that are programmed to
the vehicle can be used to start and operate the vehicle.
After placing the ignition in the ON/RUN position, the
Vehicle Security Light will turn on for three seconds for a
bulb check. If the light remains on after the bulb check, it
indicates that there is a problem with the electronics. In
addition, if the light begins to flash after the bulb check,
it indicates that someone used an invalid Key Fob to start
the engine. Either of these conditions will result in the
engine being shut off after two seconds.
If the Vehicle Security Light turns on during normal
vehicle operation (vehicle running for longer than 10
seconds), it indicates that there is a fault in the electron-
ics. Should this occur, have the vehicle serviced as soon
as possible by an authorized dealer.
CAUTION!
The Sentry Key® Immobilizer system is not compat-
ible with some aftermarket remote starting systems.
Use of these systems may result in vehicle starting
problems and loss of security protection.
All of the Key Fobs provided with your new vehicle have
been programmed to the vehicle electronics.
Replacement Keys
NOTE:Only Keys or Key Fobs that are programmed to
the vehicle electronics can be used to start and operate
the vehicle. Once a Key or Key Fob is programmed to a
vehicle, it cannot be programmed to any other vehicle.
18 THINGS TO KNOW BEFORE STARTING YOUR VEHICLE
Page 32 of 664
clip, located on the back cover. Avoid touching the
new battery with your fingers. Skin oils may cause
battery deterioration. If you touch a battery, clean it
with rubbing alcohol.
4. To assemble the RKE transmitter case, snap the two
halves together, reposition and secure the screw as
shown in step #2 for removal.
General Information
This device complies with Part 15 of the FCC rules and
RSS 210 of Industry Canada. Operation is subject to the
following conditions:
•This device may not cause harmful interference.
•This device must accept any interference received,
including interference that may cause undesired op-
eration.
NOTE:Changes or modifications not expressly approved
by the party responsible for compliance could void the
user’s authority to operate the equipment.
If your RKE transmitter fails to operate from a normal
distance, check for these two conditions:
1. A weak battery in the transmitter. The expected life of
the battery is a minimum of three years.
2. Closeness to a radio transmitter such as a radio station
tower, airport transmitter, and some mobile or CB
radios.
REMOTE STARTING SYSTEM — IF EQUIPPED
This system uses the Key Fob with Remote
Keyless Entry (RKE) transmitter to start the
engine conveniently from outside the vehicle
while still maintaining security. The system has
a range of approximately 300 ft (91 m).
30 THINGS TO KNOW BEFORE STARTING YOUR VEHICLE
Page 86 of 664
•Cut off fuel to the engine.
•Flash hazard lights as long as the battery has power or
until the ignition switch is turned to the “OFF” posi-
tion.
•Turn on the interior lights, which remain on as long as
the battery has power or until the ignition switch is
turned to the “OFF” position.
•Unlock the doors automatically.
System Reset Procedure
In order to reset the Enhanced Accident Response System
functions after an event, the ignition switch must be
changed from ignition START or ON/RUN to ignition
OFF.
Air Bag Warning Light
The air bags must be ready to inflate for your protection
in a collision. The Occupant Restraint Control-
ler (ORC) monitors the internal circuits and
interconnecting wiring associated with air bag
system electrical components.
The ORC monitors the readiness of the electronic parts of
the air bag system whenever the ignition switch is in the
START or ON/RUN position. If the ignition switch is in
the OFF position or in the ACC position, the air bag
system is not on and the air bags will not inflate.
The ORC contains a backup power supply system that
may deploy the air bags even if the battery loses power or
it becomes disconnected prior to deployment.
The ORC turns on the Air Bag Warning Light in the
instrument panel for approximately four to eight seconds
for a self-check when the ignition switch is first turned to
84 THINGS TO KNOW BEFORE STARTING YOUR VEHICLE
Page 87 of 664
the ON/RUN position. After the self-check, the Air Bag
Warning Light will turn off. If the ORC detects a mal-
function in any part of the system, it turns on the Air Bag
Warning Light, either momentarily or continuously. A
single chime will sound to alert you if the light comes on
again after initial startup.
The ORC also includes diagnostics that will illuminate
the instrument panel Air Bag Warning Light if a malfunc-
tion is detected that could affect the air bag system. The
diagnostics also record the nature of the malfunction.
While the air bag system is designed to be maintenance
free, if any of the following occurs, have an authorized
dealer service the air bag system immediately.
•The Air Bag Warning Light does not come on during
the four to eight seconds when the ignition switch is
first turned to the ON/RUN position.
•The Air Bag Warning Light remains on after the four to
eight-second interval.
•The Air Bag Warning Light comes on intermittently or
remains on while driving.
NOTE:If the speedometer, tachometer, or any engine
related gauges are not working, the Occupant Restraint
Controller (ORC) may also be disabled. In this condition
the air bags may not be ready to inflate for your protec-
tion. Have an authorized dealer service the air bag
system immediately.
WARNING!
Ignoring the Air Bag Warning Light in your instru-
ment panel could mean you won’t have the air bags
to protect you in a collision. If the light does not come
on as a bulb check when the ignition is first turned
on, stays on after you start the vehicle, or if it comes
on as you drive, have an authorized dealer service the
air bag system immediately.
2
THINGS TO KNOW BEFORE STARTING YOUR VEHICLE 85
Page 116 of 664
WARNING!(Continued)
•Always make sure that objects cannot fall into the
driver footwell while the vehicle is moving. Ob-
jects can become trapped under the brake pedal
and accelerator pedal causing a loss of vehicle
control.
•If required, mounting posts must be properly in-
stalled, if not equipped from the factory.
Failure to properly follow floor mat installation or
mounting can cause interference with the brake
pedal and accelerator pedal operation causing loss of
control of the vehicle.
Periodic Safety Checks You Should Make Outside
The Vehicle
Tires
Examine tires for excessive tread wear and uneven wear
patterns. Check for stones, nails, glass, or other objects
lodged in the tread or sidewall. Inspect the tread for cuts
and cracks. Inspect sidewalls for cuts, cracks and bulges.
Check the wheel nuts for tightness. Check the tires
(including spare) for proper cold inflation pressure.
Lights
Have someone observe the operation of brake lights and
exterior lights while you work the controls. Check turn
signal and high beam indicator lights on the instrument
panel.
Door Latches
Check for positive closing, latching, and locking.
Fluid Leaks
Check area under vehicle after overnight parking for fuel,
engine coolant, oil, or other fluid leaks. Also, if gasoline
fumes are detected or if fuel, power steering fluid (if
equipped), or brake fluid leaks are suspected, the cause
should be located and corrected immediately.
11 4 T H I N G S TO K N O W B E F O R E S TA R T I N G Y O U R V E H I C L E
Page 310 of 664

INSTRUMENT CLUSTER DESCRIPTIONS
1. Tachometer
This gauge measures engine revolutions-per-minute
(RPM x 1000).
2. Tire Pressure Monitoring Telltale Light — If Equipped
Each tire, including the spare (if provided),
should be checked monthly when cold and
inflated to the inflation pressure recommended
by the vehicle manufacturer on the vehicle
placard or tire inflation pressure label. (If your vehicle
has tires of a different size than the size indicated on the
vehicle placard or tire inflation pressure label, you should
determine the proper tire inflation pressure for those
tires.)
As an added safety feature, your vehicle has been
equipped with a Tire Pressure Monitoring System
(TPMS) that illuminates a low tire pressure telltale when
one or more of your tires is significantly under-inflated.
Accordingly, when the low tire pressure telltale illumi-
nates, you should stop and check your tires as soon as
possible, and inflate them to the proper pressure. Driving
on a significantly under-inflated tire causes the tire to
overheat and can lead to tire failure. Under-inflation also
reduces fuel efficiency and tire tread life, and may affect
the vehicle’s handling and stopping ability.
Please note that the TPMS is not a substitute for proper
tire maintenance, and it is the driver ’s responsibility to
maintain correct tire pressure, even if under-inflation has
not reached the level to trigger illumination of the TPMS
low tire pressure telltale.
Your vehicle has also been equipped with a TPMS
malfunction indicator to indicate when the system is not
operating properly. The TPMS malfunction indicator is
combined with the low tire pressure telltale. When the
system detects a malfunction, the telltale will flash for
308 UNDERSTANDING YOUR INSTRUMENT PANEL
Page 319 of 664

instrument cluster. For further information, refer to
“Electronic Vehicle Information Center (EVIC)”.
NOTE:You must apply the brakes before shifting from
PARK.
Driver Information Display (DID)
The Driver Information Display (DID) features a driver-
interactive display that is located in the instrument
cluster. For further information, refer to “Driver Informa-
tion Display (DID)”.
23. Charging System Warning Light
This light shows the status of the electrical charg-
ing system. The light should turn on when the
ignition switch is first placed in ON/RUN and remain on
briefly as a bulb check. If the light stays on or turns on
while driving, turn off some of the vehicle’s non-essential
electrical devices (i.e., radio) or slightly increase engine
speed (if at idle). If the light remains on, it means that the
charging system is experiencing a problem. See your
local authorized dealer to obtain service immediately.
If jump starting is required, refer to “Jump Starting
Procedures” in “What To Do In Emergencies”.
24. Oil Pressure Warning Light
This light indicates low engine oil pressure. The
light should turn on momentarily when the engine is
started. If the light turns on while driving, stop the
vehicle and shut off the engine as soon as possible. A
chime will sound when this light turns on.
Do not operate the vehicle until the cause is corrected.
This light does not indicate how much oil is in the engine.
The engine oil level must be checked under the hood.
4
UNDERSTANDING YOUR INSTRUMENT PANEL 317
Page 320 of 664
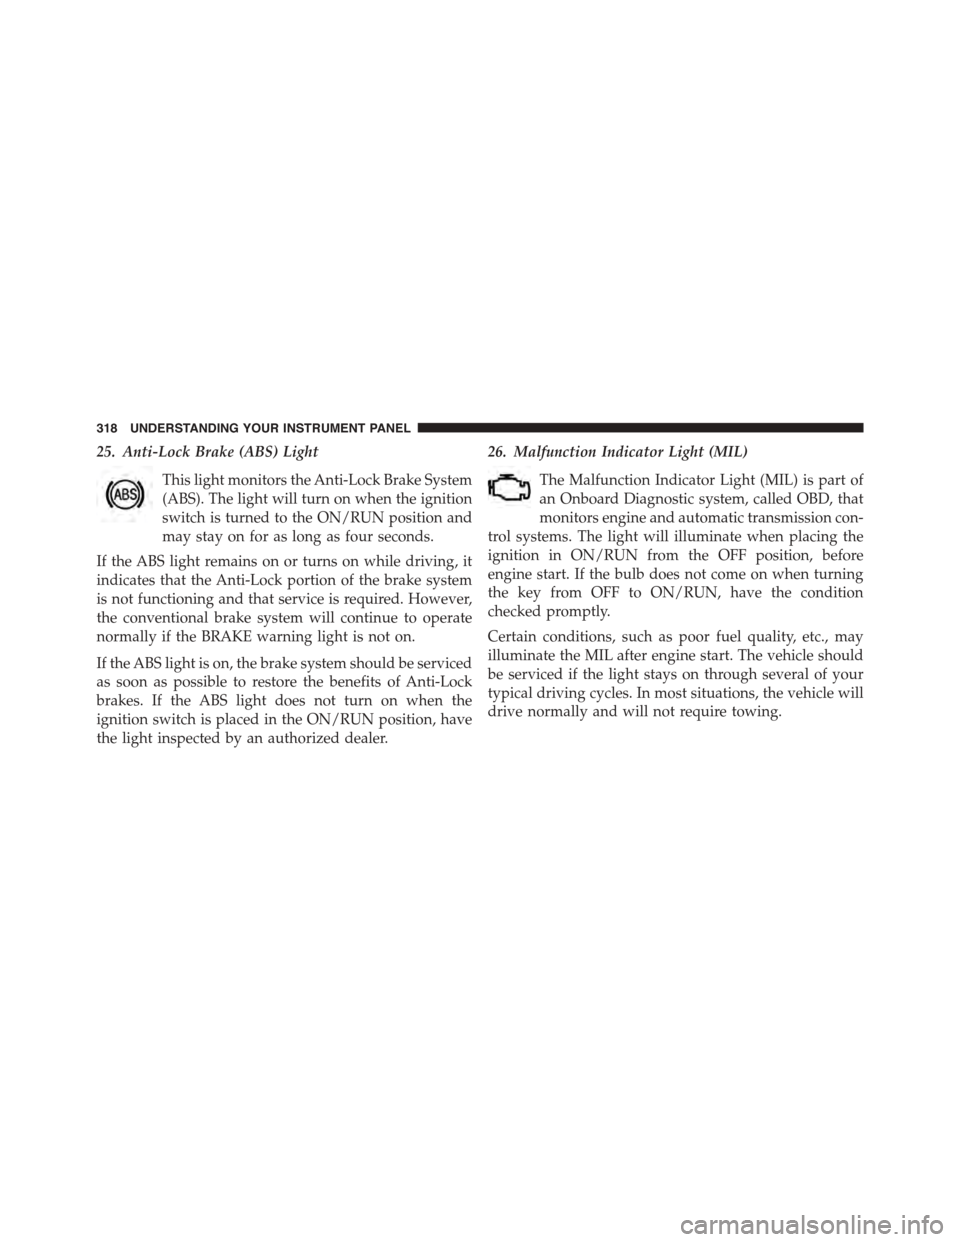
25. Anti-Lock Brake (ABS) Light
This light monitors the Anti-Lock Brake System
(ABS). The light will turn on when the ignition
switch is turned to the ON/RUN position and
may stay on for as long as four seconds.
If the ABS light remains on or turns on while driving, it
indicates that the Anti-Lock portion of the brake system
is not functioning and that service is required. However,
the conventional brake system will continue to operate
normally if the BRAKE warning light is not on.
If the ABS light is on, the brake system should be serviced
as soon as possible to restore the benefits of Anti-Lock
brakes. If the ABS light does not turn on when the
ignition switch is placed in the ON/RUN position, have
the light inspected by an authorized dealer.
26. Malfunction Indicator Light (MIL)
The Malfunction Indicator Light (MIL) is part of
an Onboard Diagnostic system, called OBD, that
monitors engine and automatic transmission con-
trol systems. The light will illuminate when placing the
ignition in ON/RUN from the OFF position, before
engine start. If the bulb does not come on when turning
the key from OFF to ON/RUN, have the condition
checked promptly.
Certain conditions, such as poor fuel quality, etc., may
illuminate the MIL after engine start. The vehicle should
be serviced if the light stays on through several of your
typical driving cycles. In most situations, the vehicle will
drive normally and will not require towing.
318 UNDERSTANDING YOUR INSTRUMENT PANEL
Page 327 of 664
•Service Air Bag Warning Light
•Washer Fluid Low
•Parking Brake Engaged
•Brake Fluid Low
•Service Electronic Braking System
•Engine Temperature Hot
•Battery Voltage Low
•Oil Pressure Low
•Fuel Low
•Service Antilock Brake System
•Service Electronic Throttle Control
•Transmission Too Hot
•Service Power Steering
•Oil Temperature Hot
•Check Fuel Cap
•Oil Change Due
•Service Tire Pressure System
•Inflate Tire to XX
•Coolant Low
•Rain Sensor Fail
•Traction Control Off
•Engine Warming Wait To Start
•Too Cold Plug In Heater
•Cruise Off
•Cruise Ready
•Cruise Set To XXX MPH
4
UNDERSTANDING YOUR INSTRUMENT PANEL 325