DODGE DURANGO 2005 2.G Owners Manual
Manufacturer: DODGE, Model Year: 2005, Model line: DURANGO, Model: DODGE DURANGO 2005 2.GPages: 416, PDF Size: 14.25 MB
Page 101 of 416
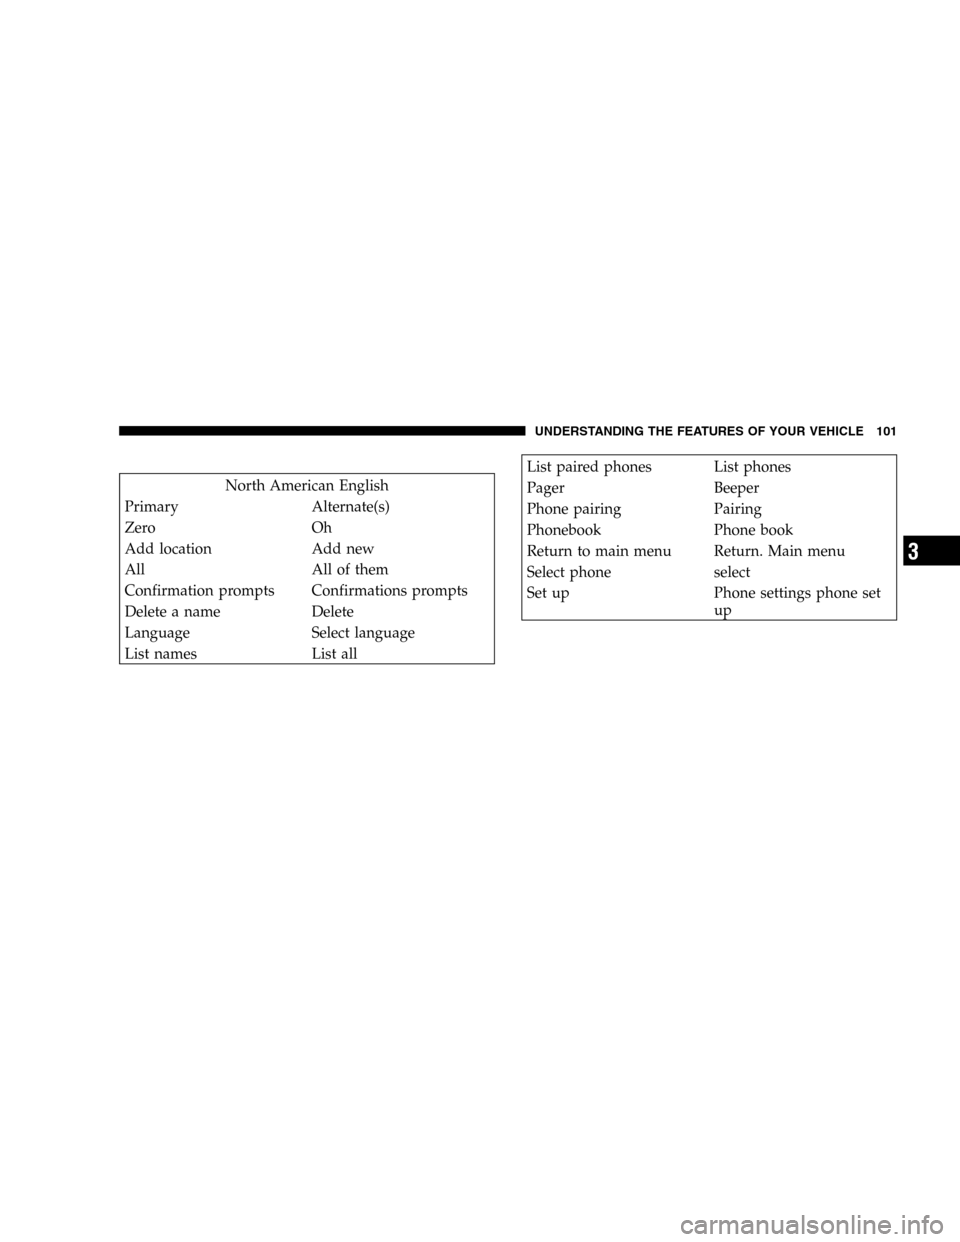
North American English
Primary Alternate(s)
Zero Oh
Add location Add new
All All of them
Confirmation prompts Confirmations prompts
Delete a name Delete
Language Select language
List names List all
List paired phones List phones
Pager Beeper
Phone pairing Pairing
Phonebook Phone book
Return to main menu Return. Main menu
Select phone select
Set up Phone settings phone set
up
UNDERSTANDING THE FEATURES OF YOUR VEHICLE 101
3
Page 102 of 416
SEATS
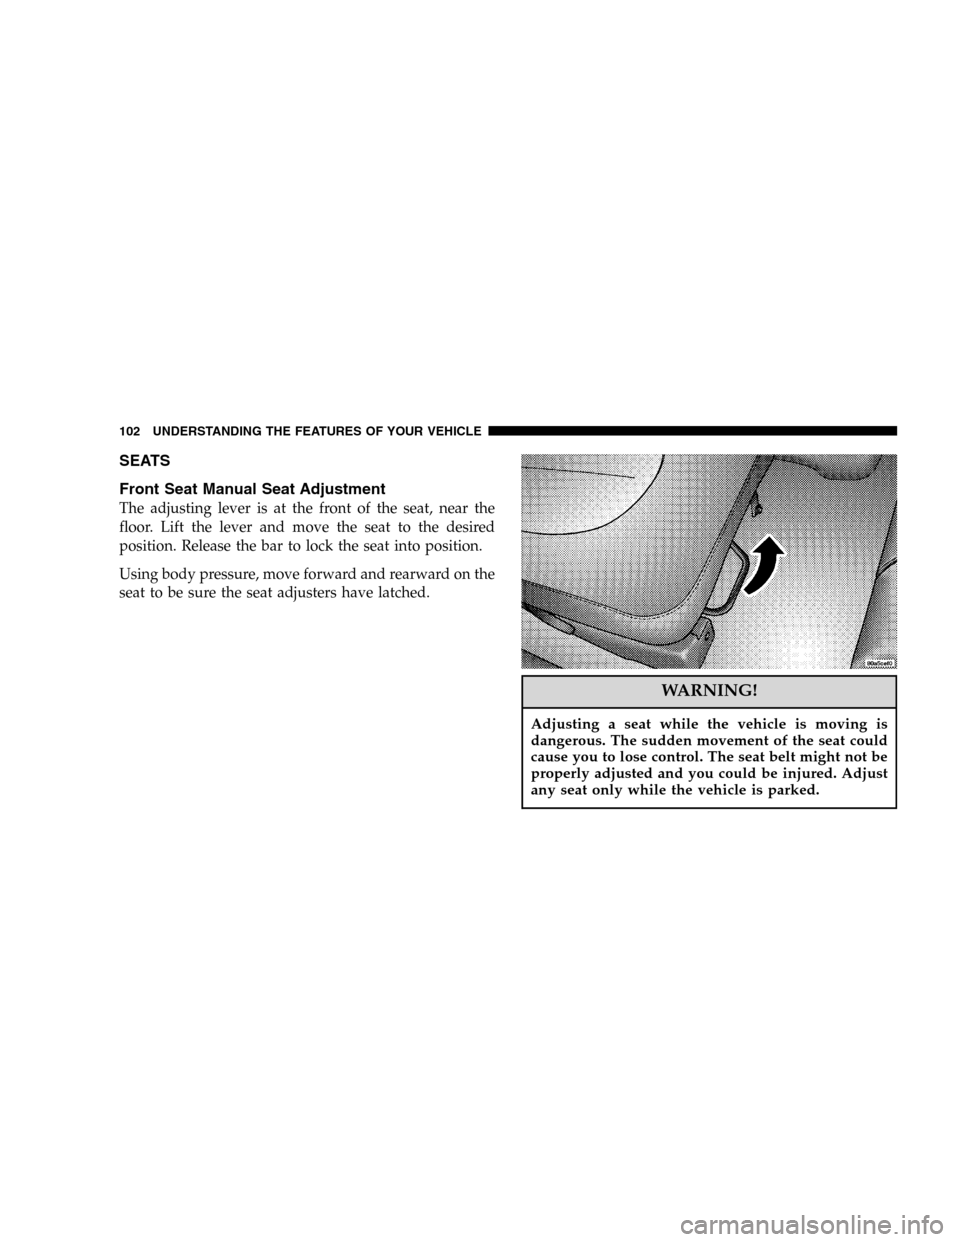
Front Seat Manual Seat Adjustment
The adjusting lever is at the front of the seat, near the
floor. Lift the lever and move the seat to the desired
position. Release the bar to lock the seat into position.
Using body pressure, move forward and rearward on the
seat to be sure the seat adjusters have latched.
WARNING!
Adjusting a seat while the vehicle is moving is
dangerous. The sudden movement of the seat could
cause you to lose control. The seat belt might not be
properly adjusted and you could be injured. Adjust
any seat only while the vehicle is parked.
102 UNDERSTANDING THE FEATURES OF YOUR VEHICLE
Page 103 of 416
Front Seats Manual Seat Recliners
The bucket seats are equipped with recliners. The reclin-
ing mechanism is operated by a lever located on the right
side of the passenger’s seat and the left side of the
driver’s seat. To recline, lean forward slightly before
lifting the lever, then push back to the desired position
and release the lever. Lean forward and lift the lever to
return the seatback to its normal position. Using body
pressure, lean forward and rearward on the seat to be
sure the seatback is locked.
WARNING!
Do not ride with the seatback reclined so that the
shoulder belt is no longer resting against your chest.
In a collision you could slide under the seat belt and
be seriously or even fatally injured. Use the recliner
only when the vehicle is parked.
Manual Lumbar Support Adjustment — If
Equipped
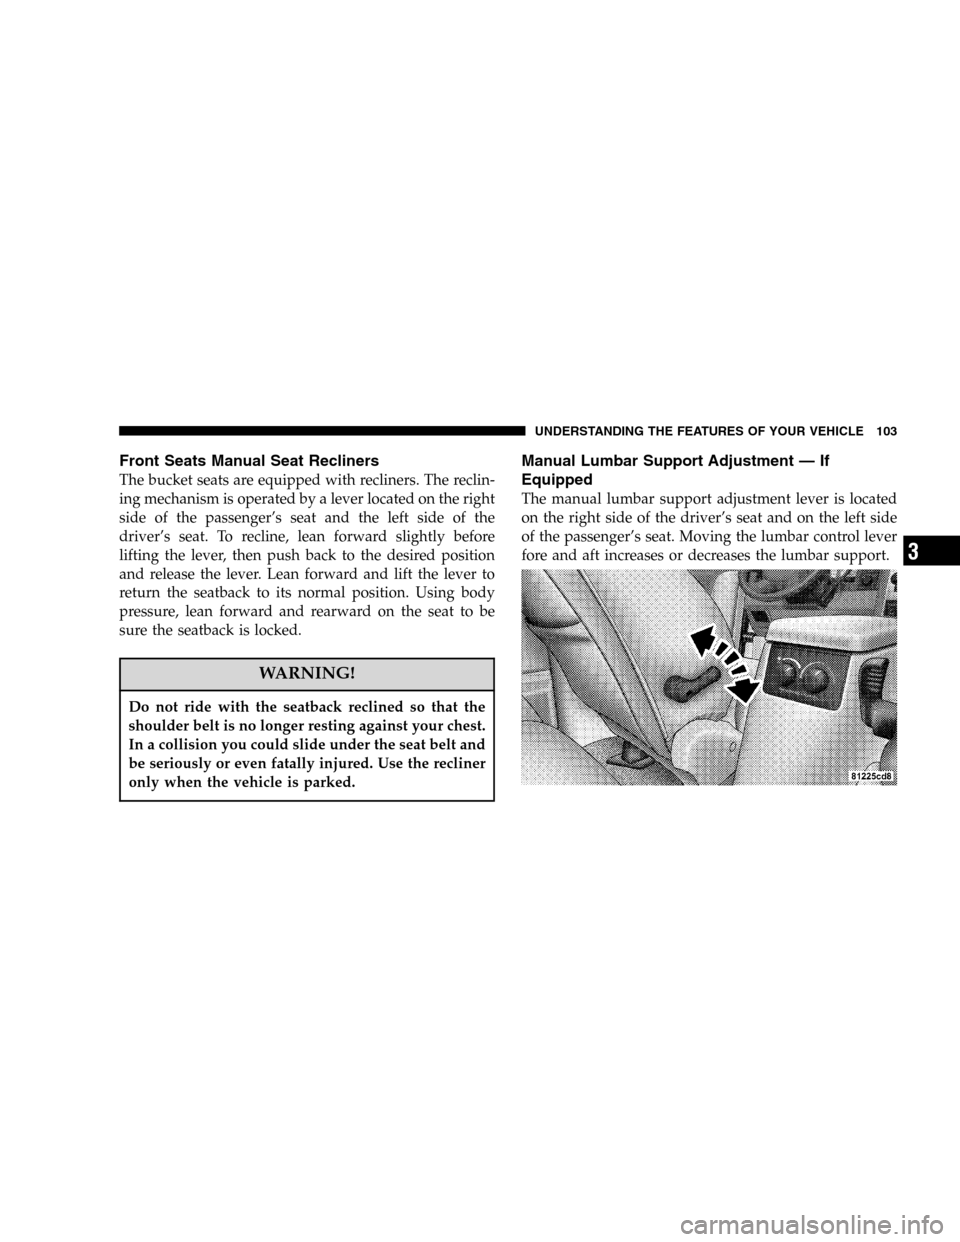
The manual lumbar support adjustment lever is located
on the right side of the driver’s seat and on the left side
of the passenger’s seat. Moving the lumbar control lever
fore and aft increases or decreases the lumbar support.
UNDERSTANDING THE FEATURES OF YOUR VEHICLE 103
3
Page 104 of 416
Adjustable Head Restraints — All Seating
Positions
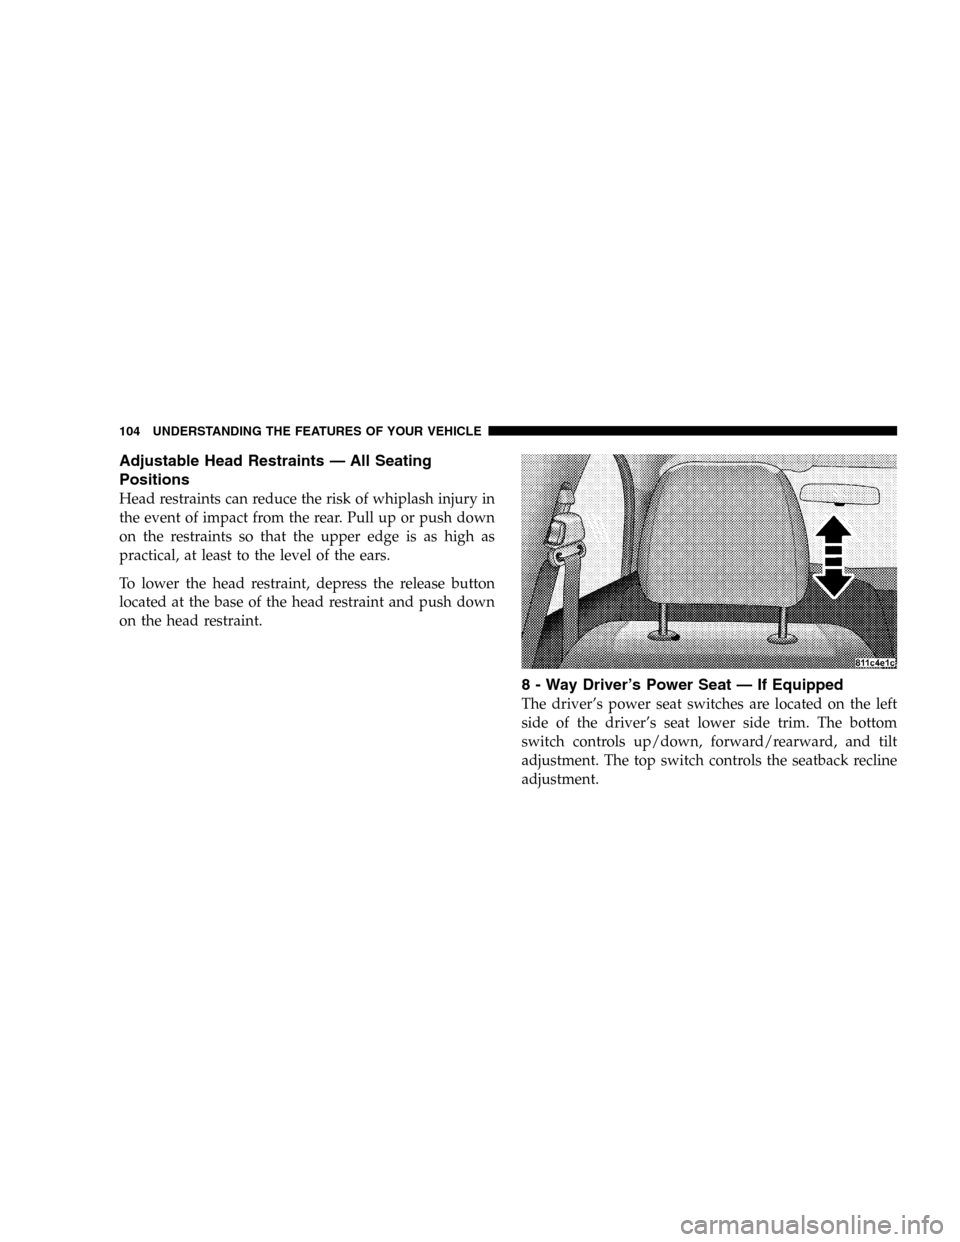
Head restraints can reduce the risk of whiplash injury in
the event of impact from the rear. Pull up or push down
on the restraints so that the upper edge is as high as
practical, at least to the level of the ears.
To lower the head restraint, depress the release button
located at the base of the head restraint and push down
on the head restraint.
8 - Way Driver’s Power Seat — If Equipped
The driver’s power seat switches are located on the left
side of the driver’s seat lower side trim. The bottom
switch controls up/down, forward/rearward, and tilt
adjustment. The top switch controls the seatback recline
adjustment.
104 UNDERSTANDING THE FEATURES OF YOUR VEHICLE
Page 105 of 416
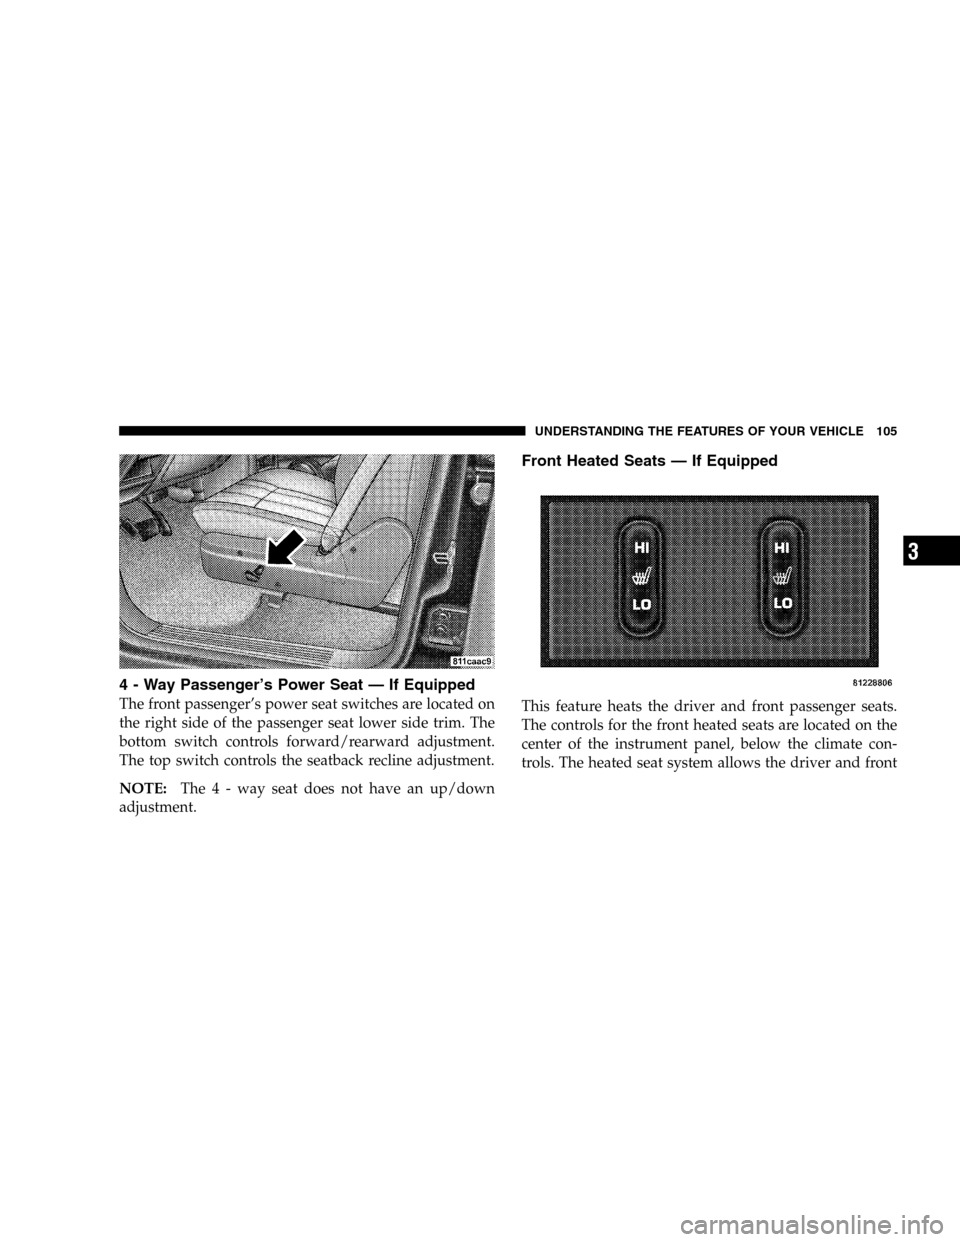
4 - Way Passenger’s Power Seat — If Equipped
The front passenger’s power seat switches are located on
the right side of the passenger seat lower side trim. The
bottom switch controls forward/rearward adjustment.
The top switch controls the seatback recline adjustment.
NOTE:The 4 - way seat does not have an up/down
adjustment.
Front Heated Seats — If Equipped
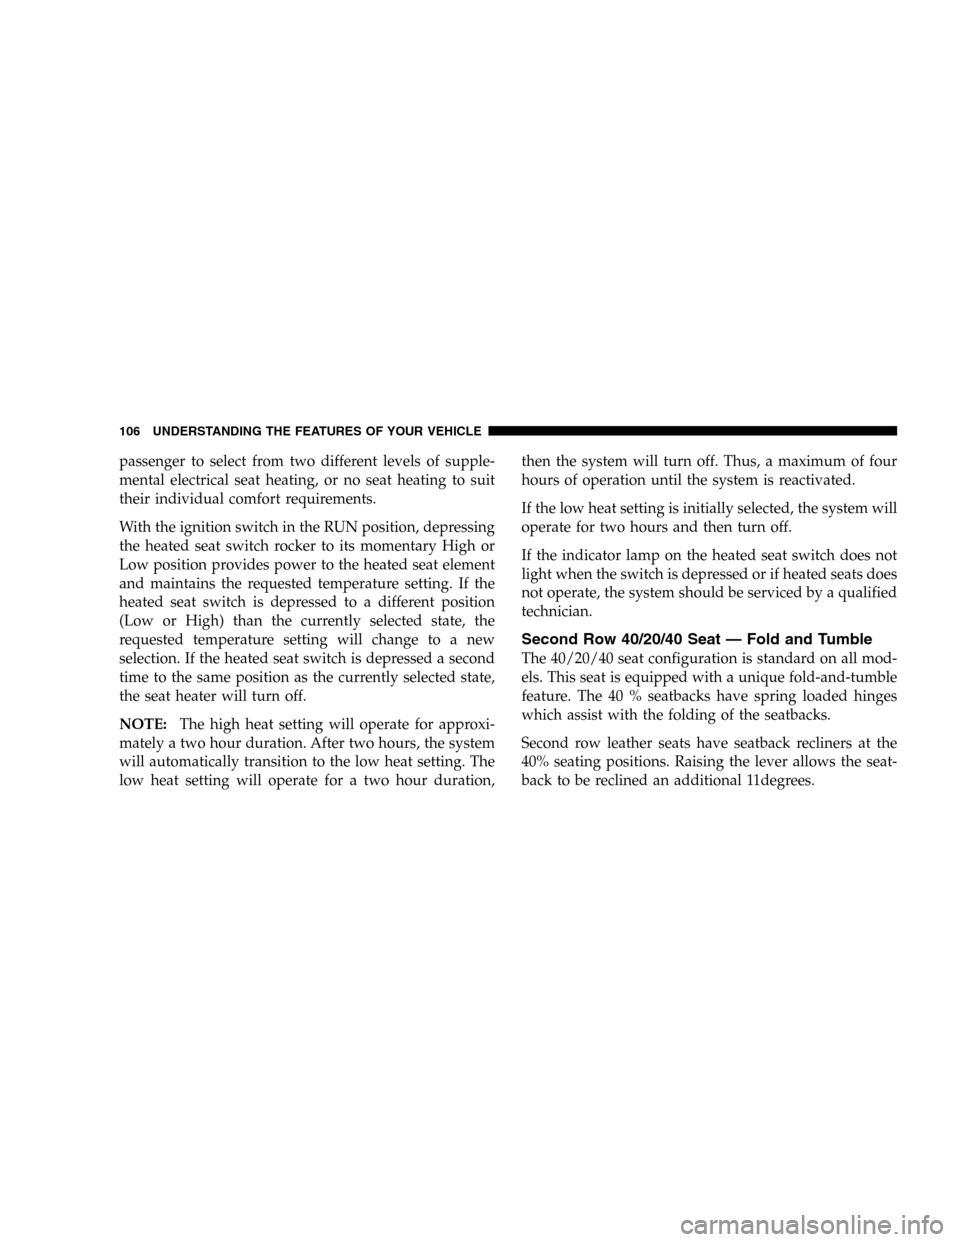
This feature heats the driver and front passenger seats.
The controls for the front heated seats are located on the
center of the instrument panel, below the climate con-
trols. The heated seat system allows the driver and front
UNDERSTANDING THE FEATURES OF YOUR VEHICLE 105
3
Page 106 of 416
passenger to select from two different levels of supple-
mental electrical seat heating, or no seat heating to suit
their individual comfort requirements.
With the ignition switch in the RUN position, depressing
the heated seat switch rocker to its momentary High or
Low position provides power to the heated seat element
and maintains the requested temperature setting. If the
heated seat switch is depressed to a different position
(Low or High) than the currently selected state, the
requested temperature setting will change to a new
selection. If the heated seat switch is depressed a second
time to the same position as the currently selected state,
the seat heater will turn off.
NOTE:The high heat setting will operate for approxi-
mately a two hour duration. After two hours, the system
will automatically transition to the low heat setting. The
low heat setting will operate for a two hour duration,then the system will turn off. Thus, a maximum of four
hours of operation until the system is reactivated.
If the low heat setting is initially selected, the system will
operate for two hours and then turn off.
If the indicator lamp on the heated seat switch does not
light when the switch is depressed or if heated seats does
not operate, the system should be serviced by a qualified
technician.
Second Row 40/20/40 Seat — Fold and Tumble
The 40/20/40 seat configuration is standard on all mod-
els. This seat is equipped with a unique fold-and-tumble
feature. The 40 % seatbacks have spring loaded hinges
which assist with the folding of the seatbacks.
Second row leather seats have seatback recliners at the
40% seating positions. Raising the lever allows the seat-
back to be reclined an additional 11degrees.
106 UNDERSTANDING THE FEATURES OF YOUR VEHICLE
Page 107 of 416
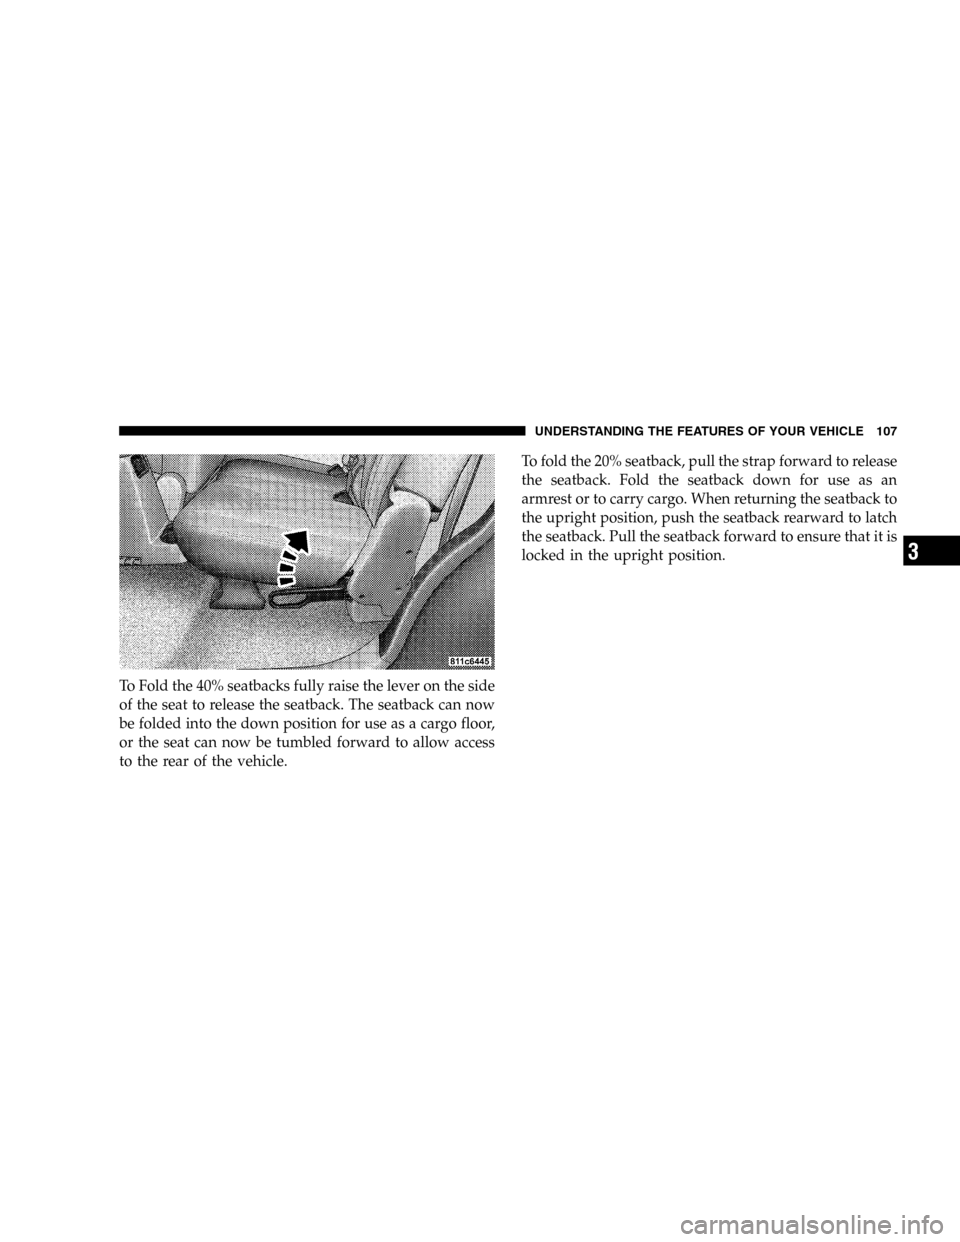
To Fold the 40% seatbacks fully raise the lever on the side
of the seat to release the seatback. The seatback can now
be folded into the down position for use as a cargo floor,
or the seat can now be tumbled forward to allow access
to the rear of the vehicle.To fold the 20% seatback, pull the strap forward to release
the seatback. Fold the seatback down for use as an
armrest or to carry cargo. When returning the seatback to
the upright position, push the seatback rearward to latch
the seatback. Pull the seatback forward to ensure that it is
locked in the upright position.
UNDERSTANDING THE FEATURES OF YOUR VEHICLE 107
3
Page 108 of 416
WARNING!
The 20% seatback contains the center shoulder belt.
A 20% seatback that is not fully latched in the
upright position will not protect you properly.
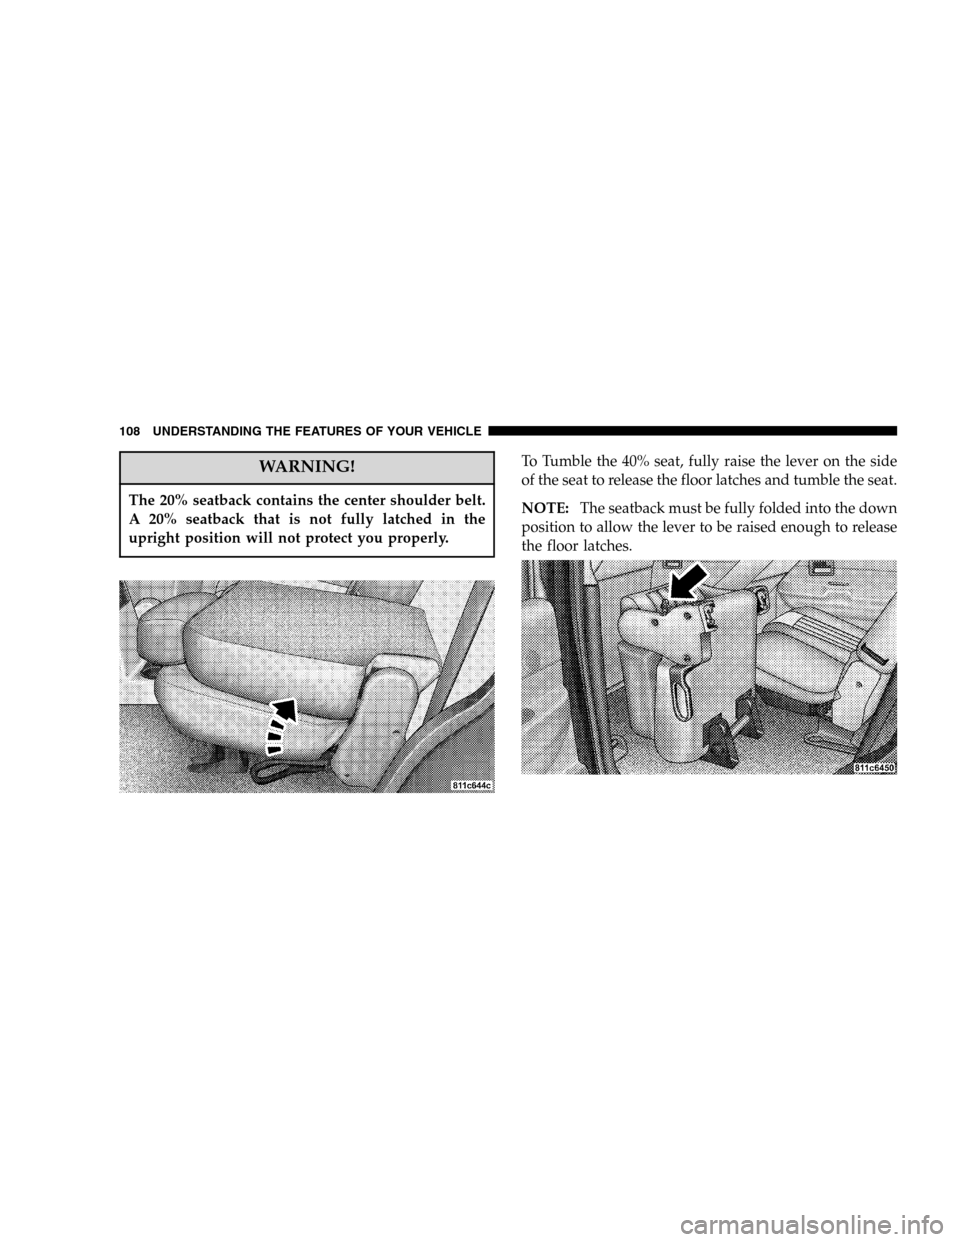
To Tumble the 40% seat, fully raise the lever on the side
of the seat to release the floor latches and tumble the seat.
NOTE:The seatback must be fully folded into the down
position to allow the lever to be raised enough to release
the floor latches.
108 UNDERSTANDING THE FEATURES OF YOUR VEHICLE
Page 109 of 416
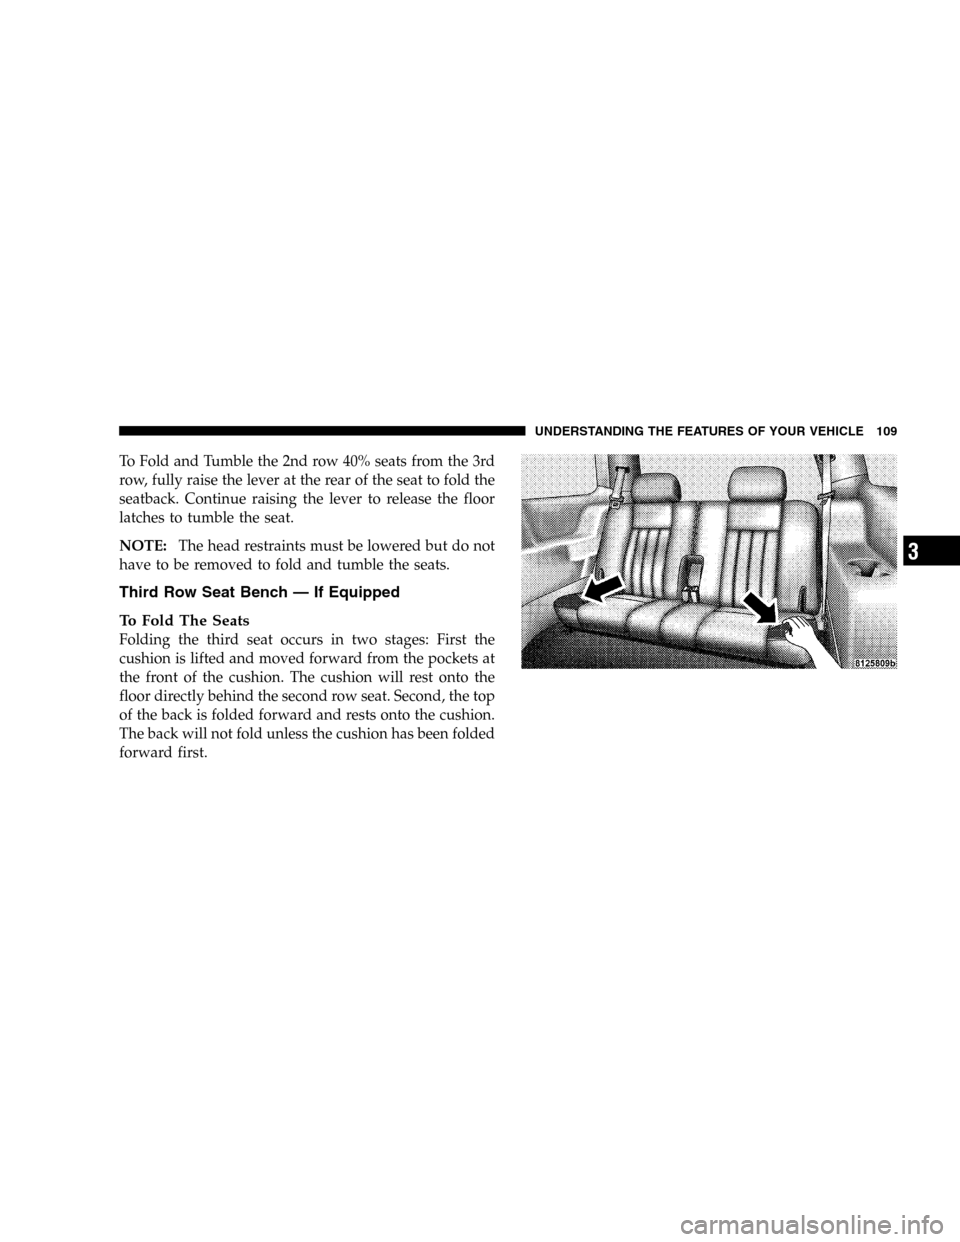
To Fold and Tumble the 2nd row 40% seats from the 3rd
row, fully raise the lever at the rear of the seat to fold the
seatback. Continue raising the lever to release the floor
latches to tumble the seat.
NOTE:The head restraints must be lowered but do not
have to be removed to fold and tumble the seats.
Third Row Seat Bench — If Equipped
To Fold The Seats
Folding the third seat occurs in two stages: First the
cushion is lifted and moved forward from the pockets at
the front of the cushion. The cushion will rest onto the
floor directly behind the second row seat. Second, the top
of the back is folded forward and rests onto the cushion.
The back will not fold unless the cushion has been folded
forward first.
UNDERSTANDING THE FEATURES OF YOUR VEHICLE 109
3
Page 110 of 416
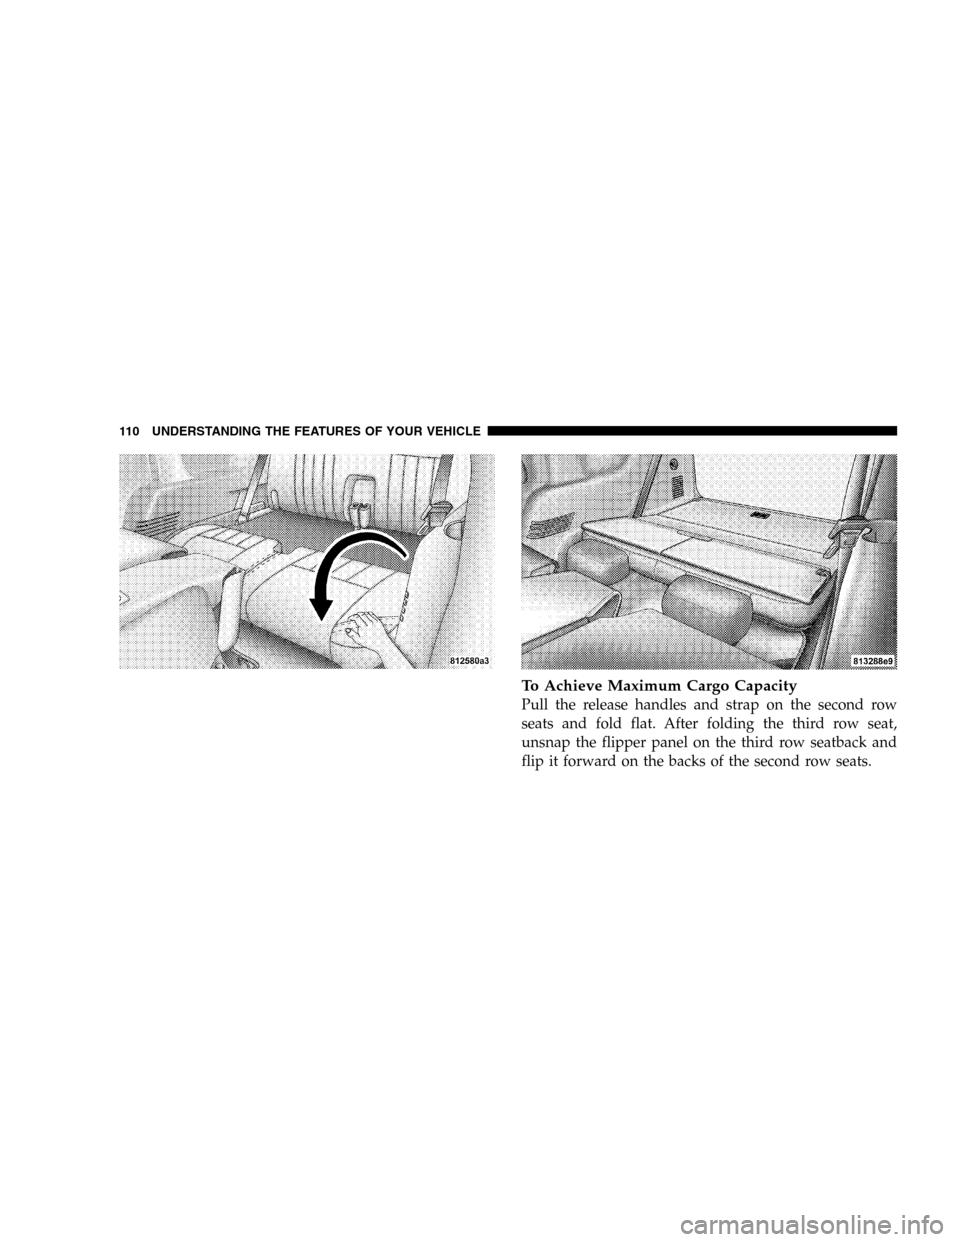
To Achieve Maximum Cargo Capacity
Pull the release handles and strap on the second row
seats and fold flat. After folding the third row seat,
unsnap the flipper panel on the third row seatback and
flip it forward on the backs of the second row seats.
110 UNDERSTANDING THE FEATURES OF YOUR VEHICLE