navigation DODGE DURANGO 2020 Owners Manual
[x] Cancel search | Manufacturer: DODGE, Model Year: 2020, Model line: DURANGO, Model: DODGE DURANGO 2020Pages: 464, PDF Size: 22.14 MB
Page 2 of 464

WARNING: Operating, servicing and maintaining a passenger vehicle or off-highway \
motor vehicle can expose you to
chemicals including engine exhaust, carbon monoxide, phthalates, and lea\
d, which are known to the State of California to
cause cancer and birth defects or other reproductive harm. To minimize exposure, avoid breathing exhaust, do not idle the
engine except as necessary, service your vehicle in a well-ventilated area and wear gloves or wash\
your hands frequently
when servicing your vehicle. For more information go to
www.P65Warnings.ca.gov/passenger-vehicle.
This Owner’s Manual illustrates and describes the operation of features and equipme\
nt that are either standard or optional on this vehicle. This manual may also include
a description of features and equipment that are no longer available or \
were not ordered on this vehicle. Please disregard any features and equipment described in this
manual that are not on this vehicle. FCA US LLC reserves the right to make changes in design and specificat\
ions, and/or make additions to or improvements to its
products without imposing any obligation upon itself to install them on \
products previously manufactured.
With respect to any vehicles sold in Canada, the name FCA US LLC shall b\
e deemed to be deleted and the name FCA Canada Inc. used in substitution therefore.
If you are the first registered retail owner of your vehicle, you may \
obtain a complimentary printed copy of the Warranty Booklet by calling 1-800-423-6343 (U.S.) or
1-800-387-1143 (Canada) or by contacting your dealer.
This Owner’s Manual is intended to familiarize you with the important features of y\
our vehicle. Your most up-to-date Owner’s Manual, Navigation/Uconnect manuals and
Warranty Booklet can be found by visiting the website on the back cover. U.S. residents can purchase replacement kits by visiting www.techauthority.com and Canadian
residents can purchase replacement kits by calling 1-800-387-1143.The driver’s primary responsibility is the safe operation of the vehicle. Driving w\
hile distracted can result in loss of vehicle control, resulting in an accident and
personal injury. FCA US LLC strongly recommends that the driver use extreme caution whe\
n using any device or feature that may take their attention off the road.
Use of any electrical devices, such as cellular telephones, computers, p\
ortable radios, vehicle navigation or other devices, by the driver while the vehicle is moving
is dangerous and could lead to a serious accident. Texting while driving is also dangerous and should never be done while th\
e vehicle is moving. If you find yourself
unable to devote your full attention to vehicle operation, pull off the \
road to a safe location and stop your vehicle. Some states or provinces prohibit the use of
cellular telephones or texting while driving. It is always the driver’\
s responsibility to comply with all local laws.
This Owner’s Manual has been prepared to help you get acquainted with your new Dodg\
e brand vehicle and to provide a convenient reference source
for common questions.
Not all features shown in this manual may apply to your vehicle. For add\
itional information, visit www.mopar.com (U.S.), www.mopar.ca (Canada) or your local
Dodge brand dealer.
Drunk driving is one of the most frequent causes of accidents. Your driving ability can be seriously impaired with blood alcohol levels
far below the legal minimum. If you are drinking, don’t drive. Ride with a designated non-drinking driver, call a cab, a friend or use
public transportation.
DRIVING AND ALCOHOL
Driving after drinking can lead to an accident. Your perceptions are less sharp, your reflexes are slower and your judg\
ment is impaired
when you have been drinking. Never drink and then drive.
WARNING!
Page 10 of 464

8
UCONNECT REAR SEAT ENTERTAINMENT
(RSE) SYSTEM — IF EQUIPPED......................... 425 Getting Started........................................... 425
Dual Video Screen ..................................... 426Blu-ray™ Disc Player ..................................427Play Video Games ......................................428
Play A DVD/Blu-ray™ Disc Using The
Touchscreen Radio ....................................428 Important Notes For Dual Video Screen
System ........................................................ 430 Blu-ray™ Disc Player Remote Control —
If Equipped .................................................430 Headphones Operation .............................431Controls ......................................................431
Replacing The Headphone Batteries........432Accessibility — If Equipped ........................ 432Stereo Headphone Lifetime Limited
Warranty .....................................................432
RADIO OPERATION AND MOBILE PHONES.... 436
Regulatory And Safety Information........... 436 UCONNECT VOICE RECOGNITION
QUICK TIPS ..........................................................438
Introducing Uconnect ................................ 438
Get Started ................................................. 438
Basic Voice Commands............................. 439Radio .......................................................... 439
Media.......................................................... 439
Phone ......................................................... 439Voice Text Reply — If Equipped ................. 440
Climate ....................................................... 440Navigation (4C NAV) .................................. 441Siri® Eyes Free — If Equipped ................. 441
Do Not Disturb .......................................... 441Android Auto™ — If Equipped ................... 442
Apple CarPlay® — If Equipped ................. 442
General Information .................................. 443Additional Information ............................... 443
CUSTOMER ASSISTANCE
SUGGESTIONS FOR OBTAINING SERVICE
FOR YOUR VEHICLE .......................................... 444
Prepare For The Appointment................... 444
Prepare A List............................................. 444
Be Reasonable With Requests ................. 444 IF YOU NEED ASSISTANCE ............................... 444
FCA US LLC Customer Center ................... 445
FCA Canada Inc. Customer Center ........... 445
In Mexico Contact ...................................... 445
Puerto Rico And US Virgin Islands ............ 445
Customer Assistance For The Hearing
Or Speech Impaired
(TDD/TTY) ................................................... 445 Service Contract ....................................... 445
WARRANTY INFORMATION .............................. 446
MOPAR PARTS................................................... 446
REPORTING SAFETY DEFECTS ........................ 446
In The 50 United States And
Washington, D.C. ....................................... 446 In Canada ................................................... 447
PUBLICATION ORDER FORMS ......................... 447
20_WD_OM_EN_USC_t.book Page 8
Page 239 of 464
STARTING AND OPERATING237
CHANGING LANESENSE STATUS
The LaneSense system has settings to adjust
the intensity of the torque warning and the
warning zone sensitivity (early/late) that you
can configure through the Uconnect system
screen. Refer to “Uconnect Settings” in
“Multimedia” for further information.
NOTE:
When enabled the system operates above
37 mph (60 km/h) and below 112 mph
(180 km/h).
Use of the turn signal suppresses the
warnings.
The system will not apply torque to the
steering wheel whenever a safety system
engages (Anti-Lock Brakes, Traction Control
System, Electronic Stability Control, Forward
Collision Warning, etc.).
PARKVIEW REAR BACK UP CAMERA
Your vehicle is equipped with the ParkView Rear
Back Up Camera that allows you to see an
on-screen image of the rear surroundings of
your vehicle whenever the gear selector is put
into REVERSE. The image will be displayed on
the Navigation/Multimedia radio display screen
along with a caution note to “check entire
surroundings” across the top of the screen.
After five seconds this note will disappear. The
ParkView camera is located on the rear of the
vehicle above the rear license plate.
When the vehicle is shifted out of REVERSE
(with camera delay turned off), the rear camera
mode is exited and the navigation or audio
screen appears again.
Manual Activation Of The Backup Camera
1. Press the “Controls” button located on the
bottom of the Uconnect display.
2. Press the “Backup Camera” button to turn the Rear View Camera system on. NOTE:
The ParkView Rear Back Up Camera has
programmable modes of operation that may be
selected through the Uconnect System.
Refer to “Uconnect Settings” in “Multimedia”
for further information.
When the vehicle is shifted out of REVERSE
(with camera delay turned off), the rear camera
mode is exited and the previous screen appears
again. When the vehicle is shifted out of
REVERSE (with camera delay turned on), the
camera image will continue to be displayed for
up to ten seconds, unless the vehicle speed
exceeds 8 mph (13 km/h), the vehicle is shifted
into PARK, the vehicle’s ignition is placed in the
OFF position, or the user presses image defeat
“X” to exit out of the camera video display.
When enabled, active guidelines are overlaid on
the image to illustrate the width of the vehicle
and its projected backup path based on the
steering wheel position. A dashed center line
overlay indicates the center of the vehicle to
assist with parking or aligning to a hitch/
receiver. Different colored zones indicate the
distance to the rear of the vehicle.
5
20_WD_OM_EN_USC_t.book Page 237
Page 366 of 464

364MULTIMEDIA
Language
After pressing the Language button on the touchscreen, the following setting will be available:
Display
After pressing the Display button on the touchscreen, the following settings will be available:
Setting Name Selectable Options
Set LanguageEnglishFrançais Español
NOTE:
When the “Set Language” feature is selected, you may select one of multiple languages (English / Français / Español) for all display nomenclature,
including the trip functions and the navigation system (if equipped). Press the Set Language button on the touchscreen, and then press the desired
language button on the touchscreen until a check mark appears next to the language, showing that setting has been selected.
Setting Name Selectable Options
Display ModeManual Auto
Display Brightness With Headlights ON +
-
NOTE:
To make changes to the "Display Brightness With Headlights ON" setting, the headlights must be on and the interior dimmer switch must not be in
the "party" or "parade" position.
20_WD_OM_EN_USC_t.book Page 364
Page 380 of 464

378MULTIMEDIA
Language
After pressing the Language button on the touchscreen, the following setting will be available:
Display
After pressing the Display button on the touchscreen, the following settings will be available:
Setting Name Selectable Options
LanguageEnglishFrançaisEspañol
NOTE:
When the “Language” feature is selected, you may select one of multiple languages (English / Français / Español) for all display nomenclature,
including the trip functions and the navigation system (if equipped). Press the Language button on the touchscreen, then press the desired language
button on the touchscreen until a check mark appears next to the language, showing that setting has been selected.
Setting Name Selectable Options
Display ModeAutoManual
Display Brightness With Headlights On +-
NOTE:
To make changes to the "Display Brightness With Headlights On" setting, the headlights must be on and the interior dimmer switch must not be in the
"party" or "parade" position. Display Brightness With Headlights Off +-
NOTE:
To make changes to the "Display Brightness With Headlights Off" setting, the headlights must be off and the interior dimmer switch must not be in
the "party" or "parade" position.
20_WD_OM_EN_USC_t.book Page 378
Page 381 of 464
MULTIMEDIA379
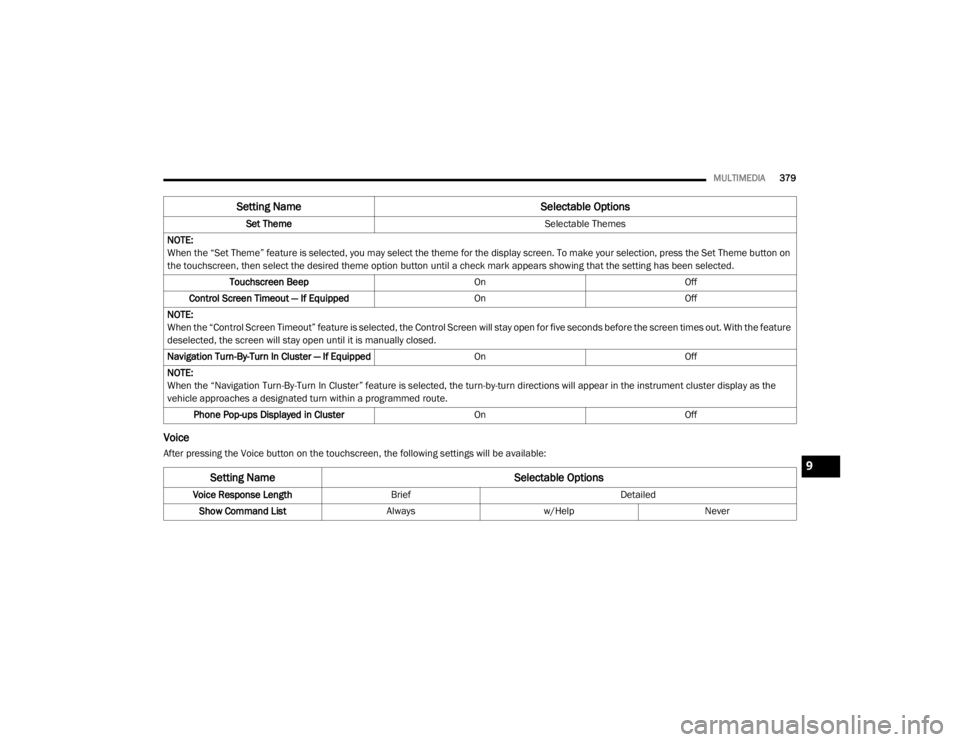
Voice
After pressing the Voice button on the touchscreen, the following settings will be available: Set Theme
Selectable Themes
NOTE:
When the “Set Theme” feature is selected, you may select the theme for the display screen. To make your selection, press the Set Theme button on
the touchscreen, then select the desired theme option button until a check mark appears showing that the setting has been selected. Touchscreen Beep OnOff
Control Screen Timeout — If Equipped OnOff
NOTE:
When the “Control Screen Timeout” feature is selected, the Control Screen will stay open for five seconds before the screen times out. With the feature
deselected, the screen will stay open until it is manually closed.
Navigation Turn-By-Turn In Cluster — If Equipped OnOff
NOTE:
When the “Navigation Turn-By-Turn In Cluster” feature is selected, the turn-by-turn directions will appear in the instrument cluster display as the
vehicle approaches a designated turn within a programmed route. Phone Pop-ups Displayed in Cluster OnOff
Setting Name Selectable Options
Setting NameSelectable Options
Voice Response LengthBrief Detailed
Show Command List Alwaysw/Help Never
9
20_WD_OM_EN_USC_t.book Page 379
Page 409 of 464
MULTIMEDIA407
Android Auto™ is a feature of your Uconnect
system, and your Android™ 5.0 or higher
powered smartphone with a data plan, that
allows you to project your smartphone and a
number of its apps onto the touchscreen radio
display. Android Auto™ automatically brings you
useful information, and organizes it into simple
cards that appear just when they are needed.
Android Auto™ can be used with Google's
best-in-class speech technology, the steering
wheel controls, the knobs and buttons on your
radio faceplate, and the radio display’s
touchscreen to control many of your apps. To
use Android Auto™, follow the following
procedure:
1. Download the Android Auto™ app from the
Google Play store on your
Android™-powered smartphone.
2. Connect your Android™-powered smartphone to one of the media USB ports
in your vehicle. If the Android Auto™ app
was not downloaded, the first time you plug
your device in, the app will begin to
download. NOTE:
Be sure to use the factory-provided USB cable
that came with your phone, as aftermarket
cables may not work.
3. Once the device is connected and recognized, the “Phone” icon on the drag &
drop menu bar changes to the Android
Auto™ Icon.
Once Android Auto™ is up and running on your
Uconnect system, the following features can be
utilized using your smartphone’s data plan:
Google Maps™ for navigation
Google Play Music, Spotify, iHeart Radio, etc.
for music
Hands-free Calling and Texting for communi
-
cation
Hundred of compatible apps NOTE:
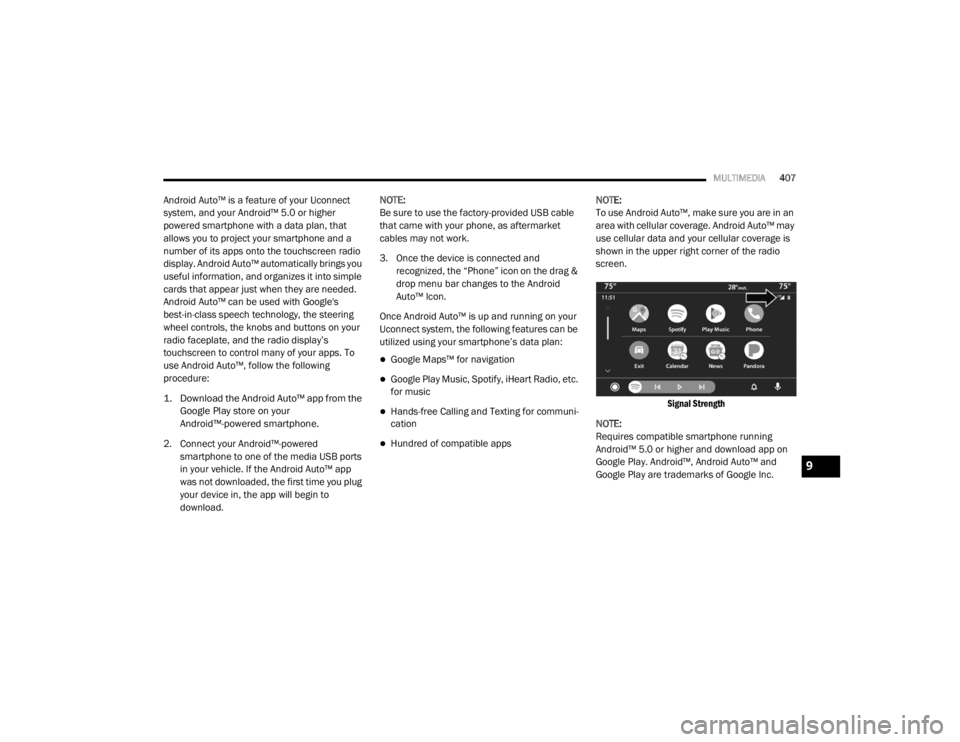
To use Android Auto™, make sure you are in an
area with cellular coverage. Android Auto™ may
use cellular data and your cellular coverage is
shown in the upper right corner of the radio
screen.
Signal Strength
NOTE:
Requires compatible smartphone running
Android™ 5.0 or higher and download app on
Google Play. Android™, Android Auto™ and
Google Play are trademarks of Google Inc.
9
20_WD_OM_EN_USC_t.book Page 407
Page 410 of 464
408MULTIMEDIA
Android Auto™ Maps
Push and hold the VR button on the
steering wheel or tap the microphone
icon to ask Google to take you to a
desired destination by voice. You can
also touch the Navigation icon in Android Auto™
to access Google Maps™.
NOTE:
If the VR button is not held, and is only pushed,
the built-in Uconnect VR prompts you and any
navigation command said launches the built-in
Uconnect navigation system.
While using Android Auto™, Google Maps™
provides voice-guided:
Navigation
Live traffic information
Lane guidance
For further information, refer to
www.android.com/auto/ (US Residents) https:/
/www.android.com/intl/en_ca/auto (Canadian
Residents). For further information on the navigation
function, please refer to https://
support.google.com/android or https://
support.google.com/androidauto/.
Android Auto™ Music
Android Auto™ allows you to access
and stream your favorite music with
apps like Google Play Music,
iHeartRadio, and Spotify. Using your
smartphone’s data plan, you can stream
endless music on the road.
NOTE:
Music apps, playlists, and stations must be set
up on your smartphone prior to using Android
Auto™, for them to work with Android Auto™.
NOTE:
To see the metadata for the music playing
through Android Auto™, select the Uconnect
System’s media screen.
For further information refer to https://
support.google.com/androidauto. Android Auto™ Communication
With Android Auto™ connected, push
and hold the VR button on the
steering wheel to activate voice
recognition specific to the Android
Auto™. This will allow you to send and reply to
text messages, have incoming text messages
read out loud, and place and receive hands-free
calls.
Android Auto™ Apps
The Android Auto™ App will display all the
compatible apps that are available to use with
Android Auto™, every time it is launched. You
must have the compatible app downloaded,
and you must be signed in to the app for it to
work with Android Auto™.
Apple CarPlay® Integration
NOTE:
Feature availability depends on your carrier and
mobile phone manufacturer. Some Apple
CarPlay® features may or may not be available
in every region and/or language.
20_WD_OM_EN_USC_t.book Page 408
Page 412 of 464
410MULTIMEDIA
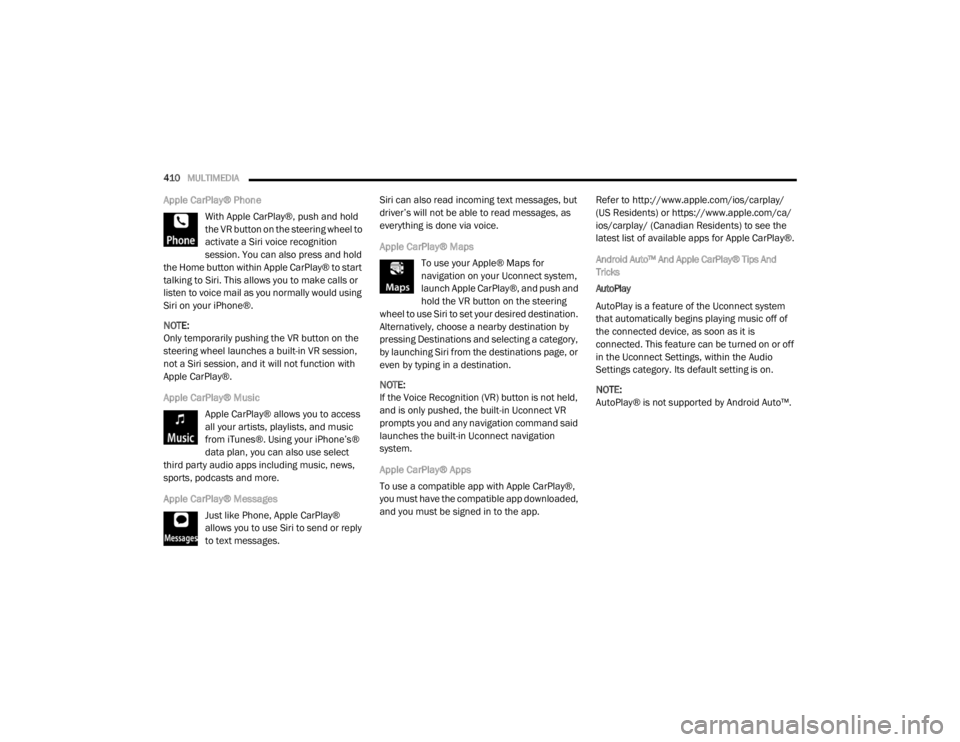
Apple CarPlay® Phone
With Apple CarPlay®, push and hold
the VR button on the steering wheel to
activate a Siri voice recognition
session. You can also press and hold
the Home button within Apple CarPlay® to start
talking to Siri. This allows you to make calls or
listen to voice mail as you normally would using
Siri on your iPhone®.
NOTE:
Only temporarily pushing the VR button on the
steering wheel launches a built-in VR session,
not a Siri session, and it will not function with
Apple CarPlay®.
Apple CarPlay® Music
Apple CarPlay® allows you to access
all your artists, playlists, and music
from iTunes®. Using your iPhone’s®
data plan, you can also use select
third party audio apps including music, news,
sports, podcasts and more.
Apple CarPlay® Messages
Just like Phone, Apple CarPlay®
allows you to use Siri to send or reply
to text messages. Siri can also read incoming text messages, but
driver’s will not be able to read messages, as
everything is done via voice.
Apple CarPlay® Maps
To use your Apple® Maps for
navigation on your Uconnect system,
launch Apple CarPlay®, and push and
hold the VR button on the steering
wheel to use Siri to set your desired destination.
Alternatively, choose a nearby destination by
pressing Destinations and selecting a category,
by launching Siri from the destinations page, or
even by typing in a destination.
NOTE:
If the Voice Recognition (VR) button is not held,
and is only pushed, the built-in Uconnect VR
prompts you and any navigation command said
launches the built-in Uconnect navigation
system.
Apple CarPlay® Apps
To use a compatible app with Apple CarPlay®,
you must have the compatible app downloaded,
and you must be signed in to the app. Refer to http://www.apple.com/ios/carplay/
(US Residents) or https://www.apple.com/ca/
ios/carplay/
(Canadian Residents) to see the
latest list of available apps for Apple CarPlay®.
Android Auto™ And Apple CarPlay® Tips And
Tricks
AutoPlay
AutoPlay is a feature of the Uconnect system
that automatically begins playing music off of
the connected device, as soon as it is
connected. This feature can be turned on or off
in the Uconnect Settings, within the Audio
Settings category. Its default setting is on.
NOTE:
AutoPlay® is not supported by Android Auto™.
20_WD_OM_EN_USC_t.book Page 410
Page 435 of 464
MULTIMEDIA433
Foam earpieces, which will wear over time
through normal use, are specifically not covered
(replacement foam is available for a nominal
charge). APTIV IS NOT LIABLE FOR ANY
INJURIES OR DAMAGES TO PERSONS OR
PROPERTY RESULTING FROM THE USE OF, OR
ANY FAILURE OR DEFECT IN, THE PRODUCT,
NOR IS APTIV LIABLE FOR ANY GENERAL,
SPECIAL, DIRECT, INDIRECT, INCIDENTAL,
CONSEQUENTIAL, EXEMPLARY, PUNITIVE OR
OTHER DAMAGES OF ANY KIND OR NATURE
WHATSOEVER. Some states and jurisdictions
may not allow the exclusion or limitation of
incidental or consequential damages, so the
above limitation may not apply to you. This
warranty gives you specific legal rights. You may
also have other rights, which vary from
jurisdiction to jurisdiction.
What Will Aptiv Do? Aptiv, at its option, will
repair or replace any defective Product. Aptiv
reserves the right to replace any discontinued
Product with a comparable model. THIS
WARRANTY IS THE SOLE WARRANTY FOR THIS
PRODUCT, SETS FORTH YOUR EXCLUSIVE
REMEDY REGARDING DEFECTIVE PRODUCTS,
AND IS IN LIEU OF ALL OTHER WARRANTIES
(EXPRESS OR IMPLIED), INCLUDING ANY WARRANTY FOR MERCHANTABILITY OR
FITNESS FOR A PARTICULAR PURPOSE.
If you have any questions or comments
regarding your Aptiv wireless headphones,
please email [email protected] or phone:
888-293-3332
System Information
Disc Menu
When listening to a CD Audio or CD Data disc,
pushing the remote control’s POPUP/MENU
button displays a list of all commands which
control playback of the disc.
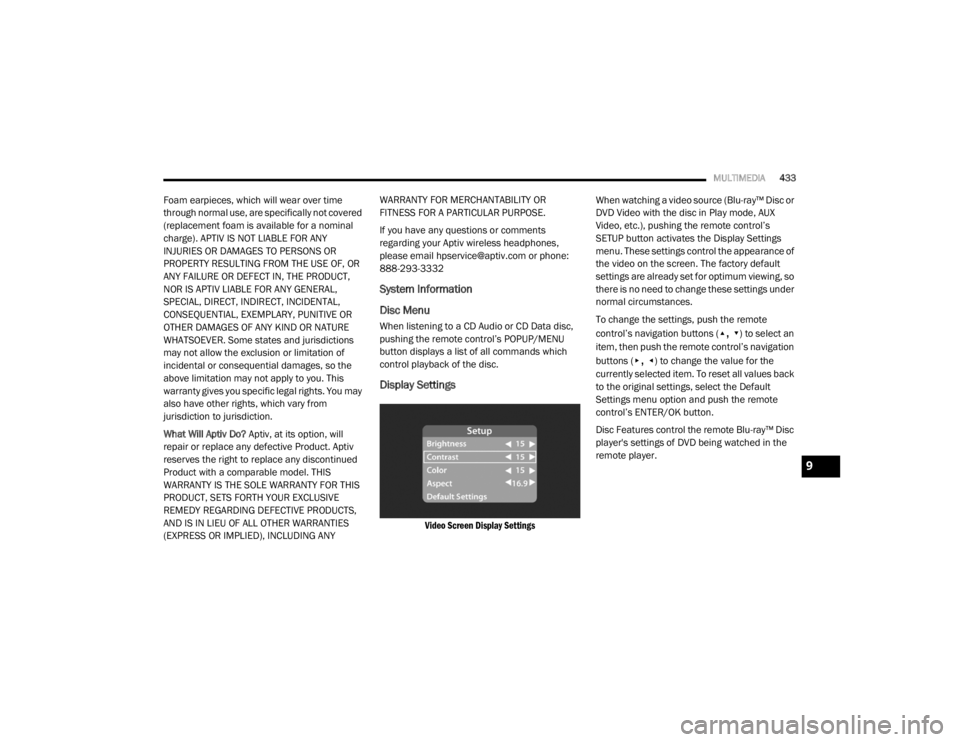
Display Settings
Video Screen Display Settings
When watching a video source (Blu-ray™ Disc or
DVD Video with the disc in Play mode, AUX
Video, etc.), pushing the remote control’s
SETUP button activates the Display Settings
menu. These settings control the appearance of
the video on the screen. The factory default
settings are already set for optimum viewing, so
there is no need to change these settings under
normal circumstances.
To change the settings, push the remote
control’s navigation buttons (
▴, ▾) to select an
item, then push the remote control’s navigation
buttons (
▸, ◂) to change the value for the
currently selected item. To reset all values back
to the original settings, select the Default
Settings menu option and push the remote
control’s ENTER/OK button.
Disc Features control the remote Blu-ray™ Disc
player's settings of DVD being watched in the
remote player.
9
20_WD_OM_EN_USC_t.book Page 433