ECO mode DODGE DURANGO 2021 User Guide
[x] Cancel search | Manufacturer: DODGE, Model Year: 2021, Model line: DURANGO, Model: DODGE DURANGO 2021Pages: 340, PDF Size: 20.38 MB
Page 52 of 340
50GETTING TO KNOW YOUR VEHICLE
AUTOMATIC HIGH BEAM — IF EQUIPPED
The Automatic High Beam Headlamp Control
system provides increased forward lighting at night
by automatically controlling the high beams
through the use of a camera mounted on the
inside rearview mirror. This camera detects vehicle
specific light and automatically switches from high
beams to low beams until the approaching vehicle
is out of view.
NOTE:
The Automatic High Beam Headlamp Control
can be turned on or off by selecting or dese -
lecting “Auto Dim High Beams” within your
Uconnect Settings Ú page 159, as well as
turning the headlight switch to the AUTO posi -
tion.
Broken, muddy, or obstructed headlights and
taillights of vehicles in the field of view will
cause headlights to remain on longer (closer to
the vehicle). Also, dirt, film, and other obstruc -
tions on the windshield or camera lens will
cause the system to function improperly.
If the windshield or Automatic High Beam Head -
lamp Control mirror is replaced, the mirror must
be re-aimed to ensure proper performance. See
a local authorized dealer.
FLASH-TO-PASS
You can signal another vehicle with your headlights
by lightly pulling the multifunction lever toward you.
This will cause the high beam headlights to turn on,
and remain on, until the lever is released.
AUTOMATIC HEADLIGHTS
This system automatically turns the headlights on
or off according to ambient light levels. To turn the
system on, rotate the headlight switch
counterclockwise to the AUTO position. When the
system is on, the headlight time delay feature is
also on. This means the headlights will stay on for
up to 90 seconds after you place the ignition into
the OFF position. The headlight time delay can be
programmed 0/30/60/90 seconds within
Uconnect Settings Ú page 159.
To turn the automatic system off, move the
headlight switch out of the AUTO position.
NOTE:The engine must be running before the headlights
will come on in the automatic mode.
PARKING LIGHTS AND PANEL LIGHTS
To turn on the parking lights and instrument panel
lights, rotate the headlight switch clockwise. To
turn off the parking lights, rotate the headlight
switch back to the O (off) position.
AUTOMATIC HEADLIGHTS WITH WIPERS
If your vehicle is equipped with Automatic
Headlights, it also has this customer-
programmable feature. When your headlights are
in the automatic mode and the engine is running,
they will automatically turn on when the wiper
system is on. This feature is programmable
through the Uconnect system Ú page 159.
NOTE:When your headlights come on during the daytime,
the vehicle will monitor outside brightness and
decide if the instrument panel needs to be dimmed
or not.
21_WD_OM_EN_USC_t.book Page 50
Page 54 of 340
52GETTING TO KNOW YOUR VEHICLE
AUTOMATIC HEADLIGHT LEVELING —
I
F EQUIPPED
This feature prevents the headlights from
interfering with the vision of oncoming drivers.
Headlight leveling automatically adjusts the height
of the headlight beam in reaction to changes in
vehicle pitch.
BATTERY SAVER
Timers are set to both the interior and exterior
lights to protect the life of your vehicle’s battery.
After 10 minutes, if the ignition is OFF and any door
is left open or the dimmer control is rotated all the
way up to the dome light on position, the interior
lights will automatically turn off.
NOTE:Battery saver mode is canceled if the ignition is ON.
If the headlights remain on while the ignition is
placed in the OFF position, the exterior lights will
automatically turn off after eight minutes. If the
headlights are turned on and left on for eight
minutes while the ignition is OFF, the exterior lights
will automatically turn off.
INTERIOR LIGHTS
COURTESY LIGHTS
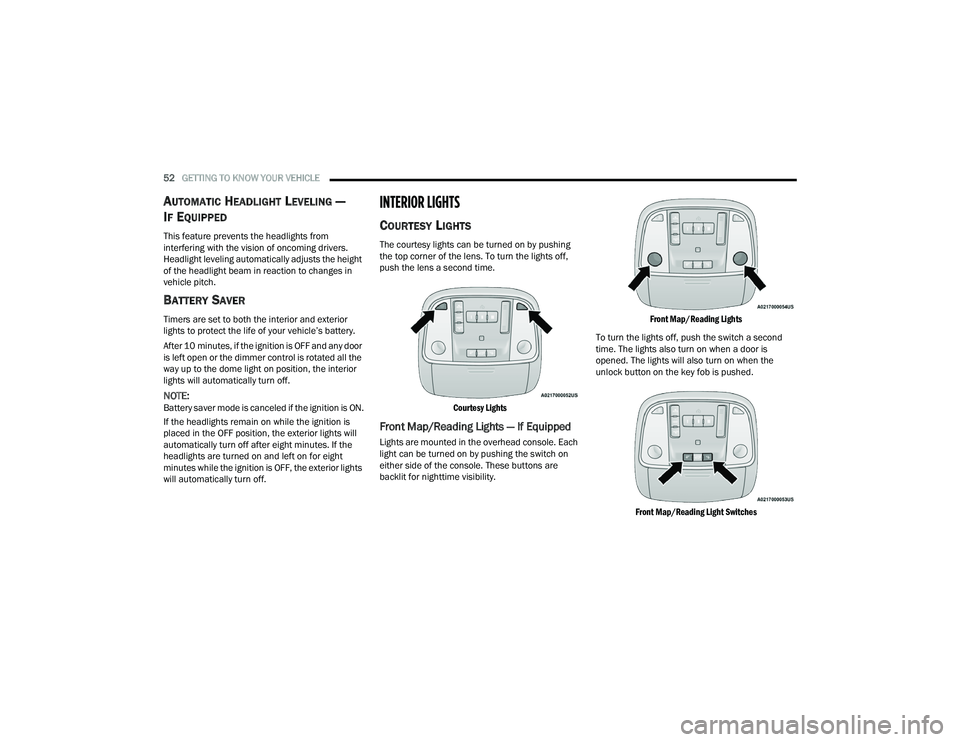
The courtesy lights can be turned on by pushing
the top corner of the lens. To turn the lights off,
push the lens a second time.
Courtesy Lights
Front Map/Reading Lights — If Equipped
Lights are mounted in the overhead console. Each
light can be turned on by pushing the switch on
either side of the console. These buttons are
backlit for nighttime visibility.
Front Map/Reading Lights
To turn the lights off, push the switch a second
time. The lights also turn on when a door is
opened. The lights will also turn on when the
unlock button on the key fob is pushed.
Front Map/Reading Light Switches
21_WD_OM_EN_USC_t.book Page 52
Page 58 of 340
56GETTING TO KNOW YOUR VEHICLE
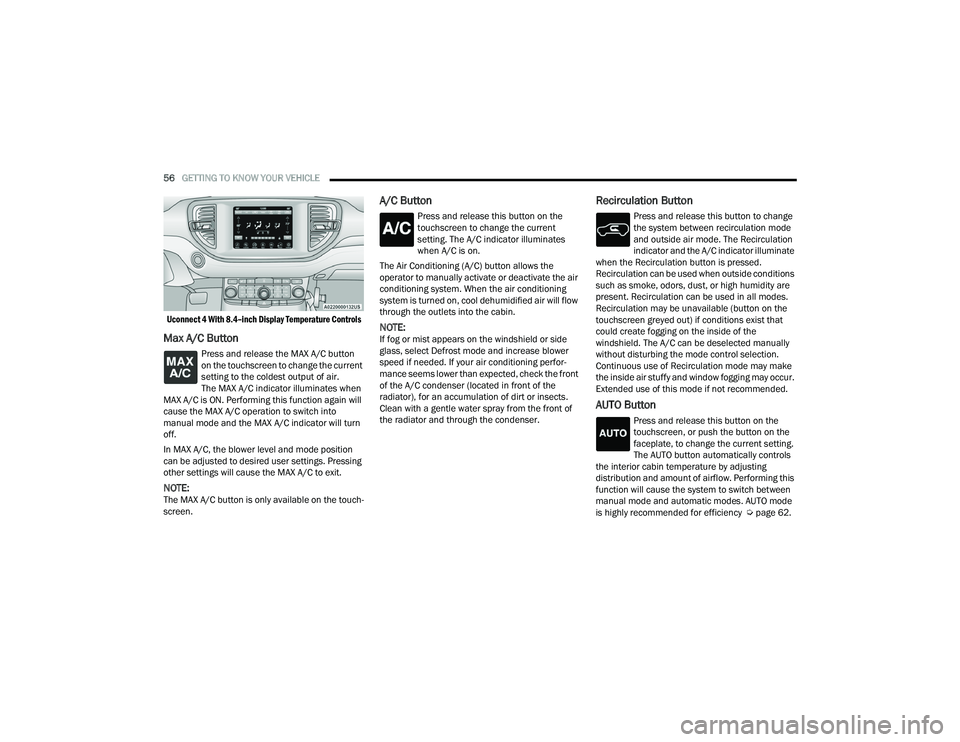
Uconnect 4 With 8.4–inch Display Temperature Controls
Max A/C Button
Press and release the MAX A/C button
on the touchscreen to change the current
setting to the coldest output of air.
The MAX A/C indicator illuminates when
MAX A/C is ON. Performing this function again will
cause the MAX A/C operation to switch into
manual mode and the MAX A/C indicator will turn
off.
In MAX A/C, the blower level and mode position
can be adjusted to desired user settings. Pressing
other settings will cause the MAX A/C to exit.
NOTE:The MAX A/C button is only available on the touch -
screen.
A/C Button
Press and release this button on the
touchscreen to change the current
setting. The A/C indicator illuminates
when A/C is on.
The Air Conditioning (A/C) button allows the
operator to manually activate or deactivate the air
conditioning system. When the air conditioning
system is turned on, cool dehumidified air will flow
through the outlets into the cabin.
NOTE:If fog or mist appears on the windshield or side
glass, select Defrost mode and increase blower
speed if needed. If your air conditioning perfor -
mance seems lower than expected, check the front
of the A/C condenser (located in front of the
radiator), for an accumulation of dirt or insects.
Clean with a gentle water spray from the front of
the radiator and through the condenser.
Recirculation Button
Press and release this button to change
the system between recirculation mode
and outside air mode. The Recirculation
indicator and the A/C indicator illuminate
when the Recirculation button is pressed.
Recirculation can be used when outside conditions
such as smoke, odors, dust, or high humidity are
present. Recirculation can be used in all modes.
Recirculation may be unavailable (button on the
touchscreen greyed out) if conditions exist that
could create fogging on the inside of the
windshield. The A/C can be deselected manually
without disturbing the mode control selection.
Continuous use of Recirculation mode may make
the inside air stuffy and window fogging may occur.
Extended use of this mode if not recommended.
AUTO Button
Press and release this button on the
touchscreen, or push the button on the
faceplate, to change the current setting.
The AUTO button automatically controls
the interior cabin temperature by adjusting
distribution and amount of airflow. Performing this
function will cause the system to switch between
manual mode and automatic modes. AUTO mode
is highly recommended for efficiency Ú page 62.
21_WD_OM_EN_USC_t.book Page 56
Page 63 of 340
GETTING TO KNOW YOUR VEHICLE61
REAR BLOWER CONTROL
Turn the rear blower knob to regulate the
amount of air forced through the system
in any mode you select. The blower speed
increases as you move the knob
clockwise from the off position. The rear blower
setting is displayed in the control head.
REAR MODE CONTROL
Turn the rear mode knob to adjust airflow
distribution. The rear mode settings are
displayed in the control head. The rear
airflow distribution mode can be
adjusted so air comes from the headliner outlets,
the floor outlets, or both.
HEADLINER MODE
Air comes from the outlets in the
headliner. Each of these outlets can be
individually adjusted to direct the flow of
air. Moving the air vanes of the outlets to
one side will shut off the airflow.
BI-LEVEL MODE
Air comes from both the headliner outlets
and the floor outlets.
NOTE:In many temperature positions, the Bi-Level mode
is designed to provide cooler air out of the head -
liner outlets and warmer air from the floor outlets.
FLOOR MODE
Air comes from the floor outlets.
REAR TEMPERATURE LOCK
The Rear Temperature Lock symbol on
the control head is illuminated when the
rear controls are locked by the front
system.
Rear Lock
Pressing the Rear Temperature Lock button on the
Uconnect touchscreen, illuminates a lock symbol
in the rear display. The rear temperature and air
source are controlled from the front Uconnect
system.
Rear second row occupants can only adjust the
rear ATC control when the Rear Temperature Lock
button is turned off. The rear ATC is located in the headliner, near the
center of the vehicle.
Press the Rear Temperature Lock button on the
Uconnect touchscreen. This turns off the Rear
Temperature Lock icon in the rear temperature
knob.
Rotate the Rear Blower, Rear Temperature and
the Rear Mode Control knobs to suit your
comfort needs.
ATC is selected by adjusting the rear blower
knob counterclockwise to AUTO.
Once the desired temperature is displayed, the
ATC System will automatically achieve and
maintain that comfort level. When the system is
set up for your comfort level, it is not necessary to
change the settings. You will experience the
greatest efficiency by simply allowing the system to
function automatically.
2
21_WD_OM_EN_USC_t.book Page 61
Page 64 of 340
62GETTING TO KNOW YOUR VEHICLE
AUTOMATIC TEMPERATURE CONTROL
(ATC)
Automatic Operation
1. Push the AUTO button on the front Automatic
Temperature Control (ATC) Panel and the
word “AUTO” will illuminate in the front ATC
display, along with two temperatures for the
driver and front passenger. The system will
then automatically regulate the amount of
airflow.
2. Adjust the temperature you would like the system to maintain, by adjusting the driver,
passenger, and rear temperatures. Once the
desired temperature is displayed, the system
will achieve and automatically maintain that
comfort level.
3. When the system is set up for your comfort level, it is not necessary to change the
settings. You will experience the greatest
efficiency by simply allowing the system to
function automatically.
NOTE:It is not necessary to move the temperature
settings. The system automatically adjusts the
temperature, mode and fan speed to provide
comfort as quickly as possible. To provide you with maximum comfort in the
automatic mode, during cold start-ups, the blower
fan will remain on low until the engine warms up.
The fan will engage immediately if the Defrost
mode is selected, or by changing the front blower
knob setting.
Manual Operation Override
This system offers a full complement of manual
override features. The AUTO symbol in the front
ATC display will be turned off when the system is
being used in the manual mode.
NOTE:The system will not automatically sense the
presence of fog, mist or ice on the windshield.
Defrost mode must be manually selected to clear
the windshield and side glass.
CLIMATE VOICE RECOGNITION
Adjust vehicle temperatures hands-free and keep
everyone comfortable while you keep moving
ahead.
Push the VR button on the steering wheel. After the
beep, say one of the following commands:
“Set driver temperature to 70 degrees”
“Set passenger temperature to 70 degrees”
Did you know: Voice Command for Climate may
only be used to adjust the interior temperature of
your vehicle. Voice Command will not work to
adjust the heated seats or steering wheel if
equipped.
OPERATING TIPS
NOTE:Refer to the chart at the end of this section for
suggested control settings for various weather
conditions.
CAUTION!
Interior air enters the Rear Automatic
Temperature Control system through an intake
grille, located in the right side trim panel behind
the third row seats. The heater outlets are
located in the right side trim panel, just behind
the passenger second row door. Do not block or
place objects directly in front of the inlet grille or
heater outlets. The electrical system could
overload causing damage to the blower motor.
21_WD_OM_EN_USC_t.book Page 62
Page 65 of 340
GETTING TO KNOW YOUR VEHICLE63
Summer Operation
The engine cooling system must be protected with
a high-quality antifreeze coolant to provide proper
corrosion protection and to protect against engine
overheating. A solution of 50% OAT (Organic
Additive Technology) coolant that meets the
requirements of FCA Material Standard MS.90032
and 50% water is recommended Úpage 322.
Winter Operation
To ensure the best possible heater and defroster
performance, make sure the engine cooling
system is functioning properly and the proper
amount, type, and concentration of coolant is
used. Use of the Air Recirculation mode during
Winter months is not recommended, because it
may cause window fogging.
Vacation/Storage
For information on maintaining the Climate Control
system when the vehicle is being stored for an
extended period of time, see Úpage 313.
Window Fogging
Interior fogging on the windshield can be quickly
removed by turning the mode selector to Defrost.
The Defrost/Floor mode can be used to maintain a
clear windshield and provide sufficient heating. If
side window fogging becomes objectionable, increase blower speed to improve airflow and
clearing of the side windows. Vehicle windows tend
to fog on the inside in mild but rainy or humid
weather.
NOTE:
Recirculate without A/C should not be used for
long periods, as fogging may occur.
Automatic Temperature Controls (ATC) will auto
-
matically adjust the climate control settings to
reduce or eliminate window fogging on the front
windshield. When this occurs, recirculation will
be unavailable.
Outside Air Intake
Make sure the air intake, located directly in front of
the windshield, is free of obstructions, such as
leaves. Leaves collected in the air intake may
reduce airflow, and if they enter the air distribution
box, they could plug the water drains. In Winter
months, make sure the air intake is clear of ice,
slush, and snow.
Cabin Air Filter
The Climate Control system filters out dust and
pollen from the air. Contact an authorized dealer to
service your cabin air filter, and to have it replaced
when needed Ú page 271.
Stop/Start System — If Equipped
While in an Autostop, the Climate Control system
may automatically adjust airflow to maintain cabin
comfort. Customer settings will be maintained
upon return to an engine running condition.
Windshield Wiper De-Icer — If Equipped
The Windshield Wiper De-Icer is a heating element
located at the base of the windshield.
It operates automatically once the following
conditions are met:
Activation By Front Defrost
The Windshield Wiper De-Icer activates auto -
matically during a cold weather manual start
with full defrost, and when the ambient
temperature is below 33°F (0.6°C) .
Activation By Rear Defrost
The Windshield Wiper De-Icer activates auto -
matically when the Rear Defrost is operating
and the ambient temperature is below 33°F
(0.6°C) .
Activation By Remote Start Operation
When the Remote Start is activated and the
outside ambient temperature is less than 33°F
(0.6°C) the Windshield Wiper De-Icer is acti-
vated. Exiting Remote Start will resume its
previous operation. If the Windshield Wiper
De-Icer was active, the timer and operation will
continue.
2
21_WD_OM_EN_USC_t.book Page 63
Page 76 of 340
74GETTING TO KNOW YOUR VEHICLE
PINCH PROTECT FEATURE
This feature will detect an obstruction in the
closing of the sunroof during the Express Close
operation. If an obstruction in the path of the
sunroof is detected, the sunroof will automatically
retract. Remove the obstruction if this occurs.
NOTE:If three consecutive sunroof close attempts result
in Pinch Protect reversals, Pinch Protect will
disable and the sunroof must be closed in Manual
Mode.
VENTING SUNROOF
Push and release the "Vent" button within one-half
second and the sunroof will open to the vent
position. This is called “Express Vent”, and it will
occur regardless of sunroof position. During
Express Vent operation, any movement of the
switch will stop the sunroof.
SUNROOF MAINTENANCE
Use only a non-abrasive cleaner and a soft cloth to
clean the glass panel. Periodically check for and
clear out any debris that may have collected in the
tracks.
IGNITION OFF OPERATION
NOTE:
The power sunroof switch can remain active in
Accessory Delay for up to approximately
10 minutes after the vehicle’s ignition is placed
to the OFF position. Opening either front door
will cancel this feature.
This feature is programmable using the Ucon -
nect system Ú page 159.
HOOD
OPENING THE HOOD
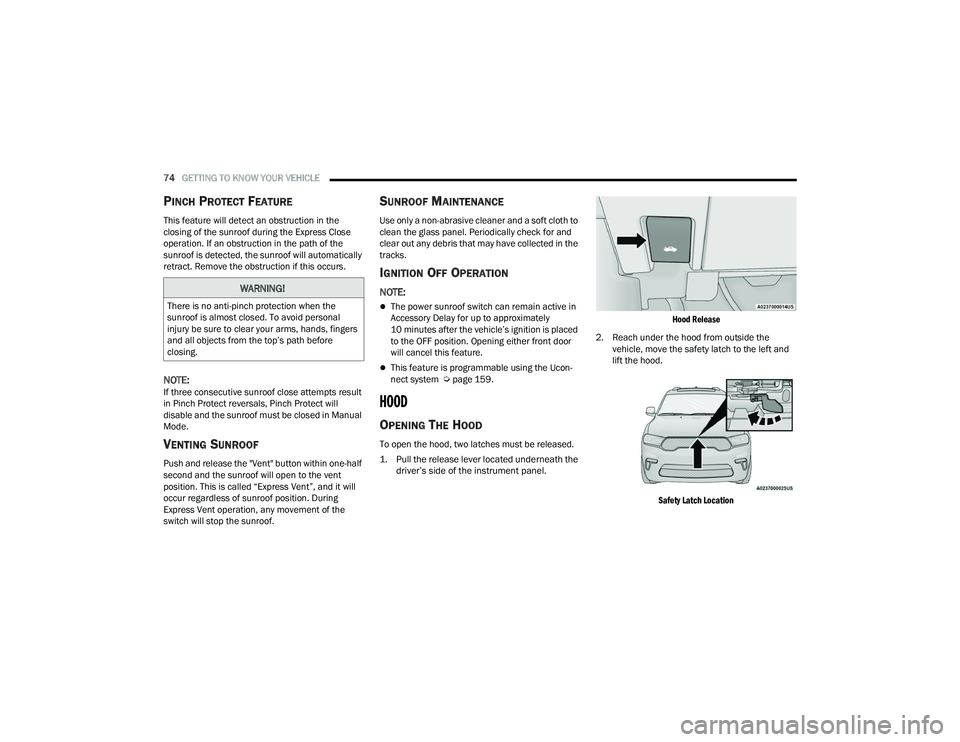
To open the hood, two latches must be released.
1. Pull the release lever located underneath the
driver’s side of the instrument panel.
Hood Release
2. Reach under the hood from outside the vehicle, move the safety latch to the left and
lift the hood.
Safety Latch Location
WARNING!
There is no anti-pinch protection when the
sunroof is almost closed. To avoid personal
injury be sure to clear your arms, hands, fingers
and all objects from the top’s path before
closing.
21_WD_OM_EN_USC_t.book Page 74
Page 90 of 340
88GETTING TO KNOW YOUR INSTRUMENT PANEL
Battery Voltage
Displays the current voltage level of the battery.
Storage Mode (SRT) — If Equipped
• Through this option, the vehicle can be placed into Storage Mode.
Driver Assist — If Equipped
Push and release the up or down arrow
button until the Driver Assist display icon/title is
highlighted in the instrument cluster display
Ú page 121.
Fuel Economy
Push and release the up or down arrow
button until the Fuel Economy Menu icon/title is
highlighted. Push the left or right arrow
button to scroll the submenus, one with current
fuel economy display and one without it.
Range
Current MPG, L/100 km, or km/L
Average MPG, L/100 km, or km/L
Press the OK button to reset the average fuel
economy
NOTE:The Range feature is not able to be reset through
the instrument cluster display controls.
Trip
Push and release the up or down arrow
button until the Trip icon/title is highlighted in the
instrument cluster display, then push and release
the left or right arrow button to select Trip A
or Trip B.
The Trip A and Trip B information will display the
following:
Distance
Average Fuel Economy
Elapsed Time
Hold the OK button to reset all the information.
Trailer Tow — If Equipped
Push and release the up or down arrow
button until the Trailer Tow Menu icon/title is
highlighted in the instrument cluster display. Push
and release the left or right arrow button to
select Trailer Trip or Trailer Brake.
Trailer Trip will display the following:
Distance
NOTE:Press and hold the OK button to reset all the infor -
mation. Trailer Brake will display the following:
Output
Type
Gain
Stop/Start – If Equipped
Push and release the
up or
down arrow button on the steering
wheel to scroll to the Stop/Start menu in
the driver interactive display Ú page 117.
Audio
Push and release the up or down arrow
button until the Audio Menu icon/title is
highlighted in the instrument cluster display. This
menu will display the audio source information,
including the Song name, Artist name, and audio
source with an accompanying graphic.
Messages
Push and release the up or down arrow
button until the Messages Menu item is
highlighted. This feature shows the number of
stored warning messages. Pushing the left or
right arrow button will allow you to see what the
stored messages are.
When no messages are present, main menu icon
will be a closed envelope.
21_WD_OM_EN_USC_t.book Page 88
Page 103 of 340
101
(Continued)
(Continued)
STARTING AND OPERATING
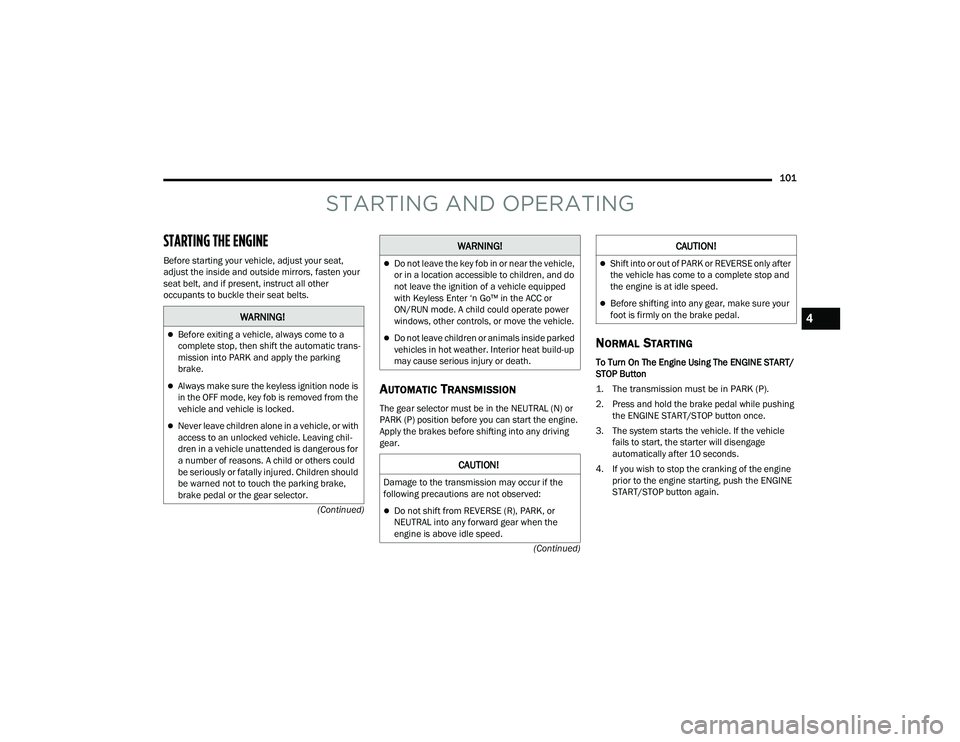
STARTING THE ENGINE
Before starting your vehicle, adjust your seat,
adjust the inside and outside mirrors, fasten your
seat belt, and if present, instruct all other
occupants to buckle their seat belts.
AUTOMATIC TRANSMISSION
The gear selector must be in the NEUTRAL (N) or
PARK (P) position before you can start the engine.
Apply the brakes before shifting into any driving
gear.
NORMAL STARTING
To Turn On The Engine Using The ENGINE START/
STOP Button
1. The transmission must be in PARK (P).
2. Press and hold the brake pedal while pushing
the ENGINE START/STOP button once.
3. The system starts the vehicle. If the vehicle fails to start, the starter will disengage
automatically after 10 seconds.
4. If you wish to stop the cranking of the engine prior to the engine starting, push the ENGINE
START/STOP button again.
WARNING!
Before exiting a vehicle, always come to a
complete stop, then shift the automatic trans -
mission into PARK and apply the parking
brake.
Always make sure the keyless ignition node is
in the OFF mode, key fob is removed from the
vehicle and vehicle is locked.
Never leave children alone in a vehicle, or with
access to an unlocked vehicle. Leaving chil -
dren in a vehicle unattended is dangerous for
a number of reasons. A child or others could
be seriously or fatally injured. Children should
be warned not to touch the parking brake,
brake pedal or the gear selector.
Do not leave the key fob in or near the vehicle,
or in a location accessible to children, and do
not leave the ignition of a vehicle equipped
with Keyless Enter ‘n Go™ in the ACC or
ON/RUN mode. A child could operate power
windows, other controls, or move the vehicle.
Do not leave children or animals inside parked
vehicles in hot weather. Interior heat build-up
may cause serious injury or death.
CAUTION!
Damage to the transmission may occur if the
following precautions are not observed:
Do not shift from REVERSE (R), PARK, or
NEUTRAL into any forward gear when the
engine is above idle speed.
WARNING!
Shift into or out of PARK or REVERSE only after
the vehicle has come to a complete stop and
the engine is at idle speed.
Before shifting into any gear, make sure your
foot is firmly on the brake pedal.
CAUTION!
4
21_WD_OM_EN_USC_t.book Page 101
Page 104 of 340
102STARTING AND OPERATING
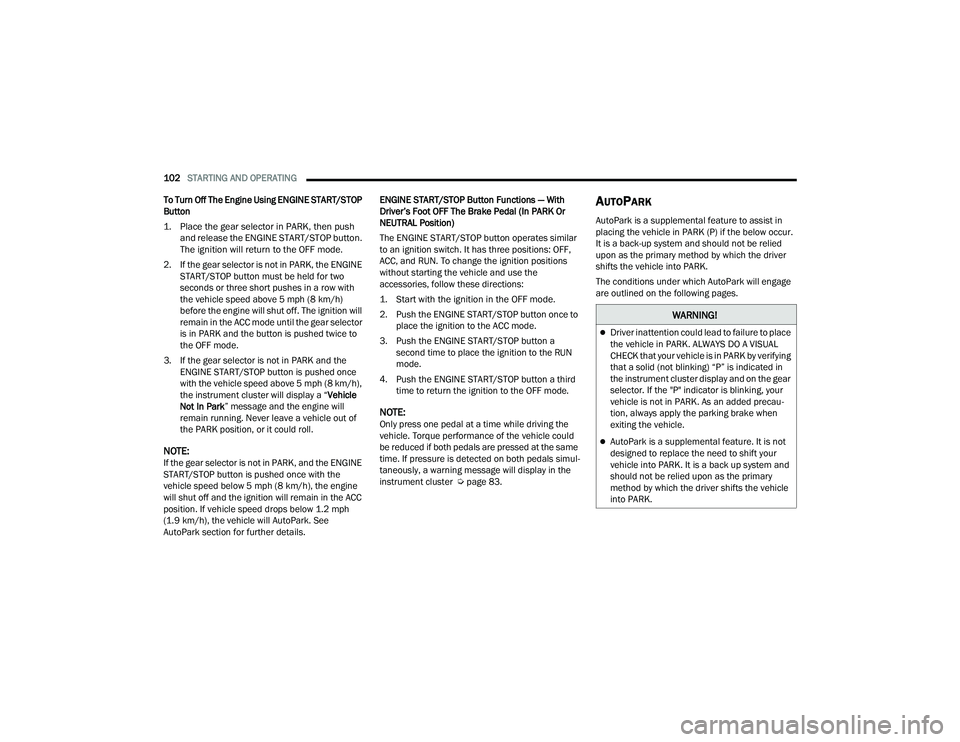
To Turn Off The Engine Using ENGINE START/STOP
Button
1. Place the gear selector in PARK, then push and release the ENGINE START/STOP button.
The ignition will return to the OFF mode.
2. If the gear selector is not in PARK, the ENGINE START/STOP button must be held for two
seconds or three short pushes in a row with
the vehicle speed above 5 mph (8 km/h) before the engine will shut off. The ignition will
remain in the ACC mode until the gear selector
is in PARK and the button is pushed twice to
the OFF mode.
3. If the gear selector is not in PARK and the ENGINE START/STOP button is pushed once
with the vehicle speed above 5 mph (8 km/h), the instrument cluster will display a “ Vehicle
Not In Park ” message and the engine will
remain running. Never leave a vehicle out of
the PARK position, or it could roll.
NOTE:If the gear selector is not in PARK, and the ENGINE
START/STOP button is pushed once with the
vehicle speed below 5 mph (8 km/h), the engine
will shut off and the ignition will remain in the ACC
position. If vehicle speed drops below 1.2 mph
(1.9 km/h), the vehicle will AutoPark. See
AutoPark section for further details. ENGINE START/STOP Button Functions — With
Driver’s Foot OFF The Brake Pedal (In PARK Or
NEUTRAL Position)
The ENGINE START/STOP button operates similar
to an ignition switch. It has three positions: OFF,
ACC, and RUN. To change the ignition positions
without starting the vehicle and use the
accessories, follow these directions:
1. Start with the ignition in the OFF mode.
2. Push the ENGINE START/STOP button once to
place the ignition to the ACC mode.
3. Push the ENGINE START/STOP button a second time to place the ignition to the RUN
mode.
4. Push the ENGINE START/STOP button a third time to return the ignition to the OFF mode.
NOTE:Only press one pedal at a time while driving the
vehicle. Torque performance of the vehicle could
be reduced if both pedals are pressed at the same
time. If pressure is detected on both pedals simul -
taneously, a warning message will display in the
instrument cluster Ú page 83.
AUTOPARK
AutoPark is a supplemental feature to assist in
placing the vehicle in PARK (P) if the below occur.
It is a back-up system and should not be relied
upon as the primary method by which the driver
shifts the vehicle into PARK.
The conditions under which AutoPark will engage
are outlined on the following pages.
WARNING!
Driver inattention could lead to failure to place
the vehicle in PARK. ALWAYS DO A VISUAL
CHECK that your vehicle is in PARK by verifying
that a solid (not blinking) “P” is indicated in
the instrument cluster display and on the gear
selector. If the "P" indicator is blinking, your
vehicle is not in PARK. As an added precau -
tion, always apply the parking brake when
exiting the vehicle.
AutoPark is a supplemental feature. It is not
designed to replace the need to shift your
vehicle into PARK. It is a back up system and
should not be relied upon as the primary
method by which the driver shifts the vehicle
into PARK.
21_WD_OM_EN_USC_t.book Page 102