ECO mode DODGE DURANGO 2021 Owners Manual
[x] Cancel search | Manufacturer: DODGE, Model Year: 2021, Model line: DURANGO, Model: DODGE DURANGO 2021Pages: 340, PDF Size: 20.38 MB
Page 4 of 340
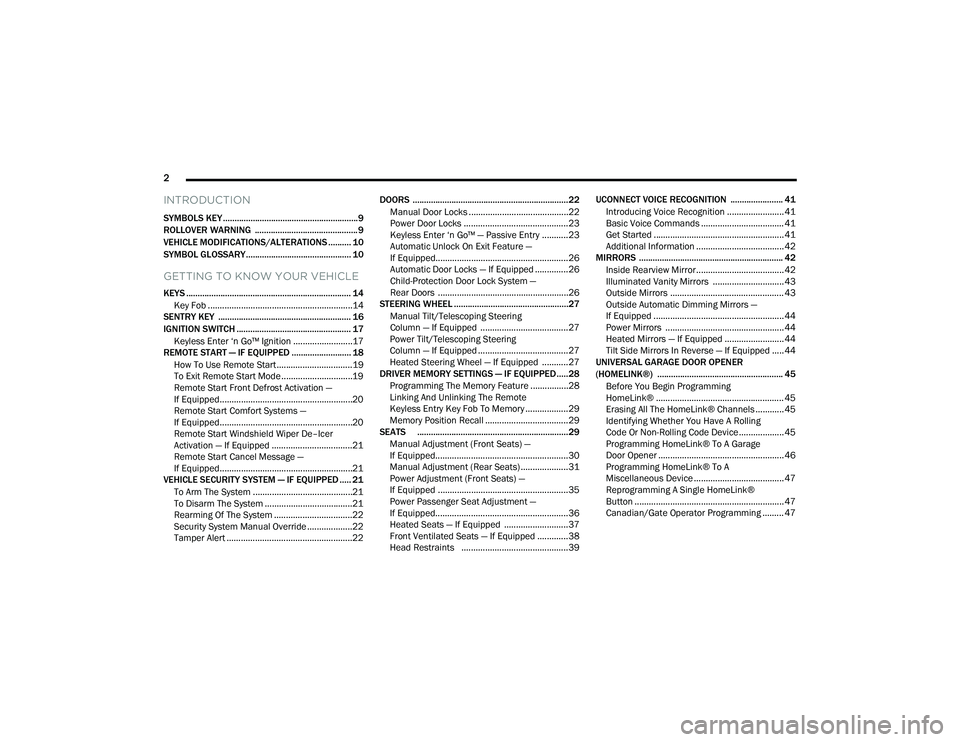
2
INTRODUCTION
SYMBOLS KEY ...........................................................9
ROLLOVER WARNING ............................................. 9
VEHICLE MODIFICATIONS/ALTERATIONS .......... 10
SYMBOL GLOSSARY.............................................. 10
GETTING TO KNOW YOUR VEHICLE
KEYS ........................................................................ 14 Key Fob .............................................................14
SENTRY KEY .......................................................... 16
IGNITION SWITCH .................................................. 17
Keyless Enter ‘n Go™ Ignition .........................17
REMOTE START — IF EQUIPPED .......................... 18
How To Use Remote Start ................................19
To Exit Remote Start Mode ..............................19
Remote Start Front Defrost Activation —
If Equipped........................................................20
Remote Start Comfort Systems —
If Equipped........................................................20
Remote Start Windshield Wiper De–Icer
Activation — If Equipped ..................................21
Remote Start Cancel Message —
If Equipped........................................................21
VEHICLE SECURITY SYSTEM — IF EQUIPPED ..... 21
To Arm The System ..........................................21
To Disarm The System .....................................21
Rearming Of The System .................................22
Security System Manual Override ...................22
Tamper Alert .....................................................22 DOORS ....................................................................22
Manual Door Locks ..........................................22
Power Door Locks ............................................23
Keyless Enter ‘n Go™ — Passive Entry ...........23
Automatic Unlock On Exit Feature —
If Equipped........................................................26
Automatic Door Locks — If Equipped ..............26
Child-Protection Door Lock System —
Rear Doors .......................................................26
STEERING WHEEL ..................................................27
Manual Tilt/Telescoping Steering
Column — If Equipped .....................................27
Power Tilt/Telescoping Steering
Column — If Equipped ......................................27
Heated Steering Wheel — If Equipped ...........27
DRIVER MEMORY SETTINGS — IF EQUIPPED .....28
Programming The Memory Feature ................28
Linking And Unlinking The Remote
Keyless Entry Key Fob To Memory ..................29
Memory Position Recall ...................................29
SEATS ..................................................................29
Manual Adjustment (Front Seats) —
If Equipped........................................................30
Manual Adjustment (Rear Seats) ....................31
Power Adjustment (Front Seats) —
If Equipped .......................................................35
Power Passenger Seat Adjustment —
If Equipped........................................................36
Heated Seats — If Equipped ...........................37
Front Ventilated Seats — If Equipped .............38
Head Restraints .............................................39 UCONNECT VOICE RECOGNITION ....................... 41
Introducing Voice Recognition ........................ 41
Basic Voice Commands ................................... 41
Get Started .......................................................41
Additional Information ..................................... 42
MIRRORS ............................................................... 42
Inside Rearview Mirror..................................... 42
Illuminated Vanity Mirrors .............................. 43
Outside Mirrors ................................................ 43
Outside Automatic Dimming Mirrors —
If Equipped .......................................................44
Power Mirrors .................................................. 44
Heated Mirrors — If Equipped ......................... 44
Tilt Side Mirrors In Reverse — If Equipped ..... 44
UNIVERSAL GARAGE DOOR OPENER
(HOMELINK®) ....................................................... 45
Before You Begin Programming
HomeLink® ...................................................... 45
Erasing All The HomeLink® Channels ............ 45
Identifying Whether You Have A Rolling
Code Or Non-Rolling Code Device ................... 45
Programming HomeLink® To A Garage
Door Opener ..................................................... 46
Programming HomeLink® To A
Miscellaneous Device ...................................... 47
Reprogramming A Single HomeLink®
Button ............................................................... 47
Canadian/Gate Operator Programming ......... 47
21_WD_OM_EN_USC_t.book Page 2
Page 5 of 340
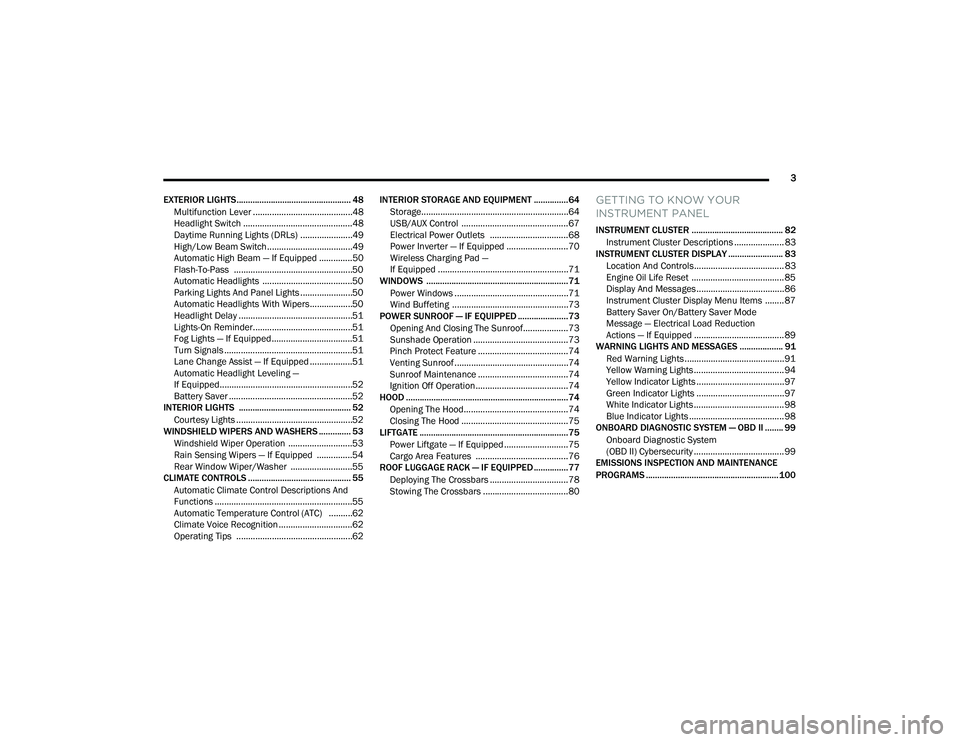
3
EXTERIOR LIGHTS.................................................. 48 Multifunction Lever ..........................................48
Headlight Switch ..............................................48
Daytime Running Lights (DRLs) ......................49
High/Low Beam Switch....................................49
Automatic High Beam — If Equipped ..............50
Flash-To-Pass ..................................................50
Automatic Headlights ......................................50
Parking Lights And Panel Lights ......................50
Automatic Headlights With Wipers..................50
Headlight Delay ................................................51
Lights-On Reminder..........................................51
Fog Lights — If Equipped ..................................51
Turn Signals ......................................................51
Lane Change Assist — If Equipped ..................51
Automatic Headlight Leveling —
If Equipped........................................................52
Battery Saver ....................................................52
INTERIOR LIGHTS ................................................. 52
Courtesy Lights .................................................52
WINDSHIELD WIPERS AND WASHERS .............. 53
Windshield Wiper Operation ...........................53
Rain Sensing Wipers — If Equipped ...............54
Rear Window Wiper/Washer ..........................55
CLIMATE CONTROLS ............................................. 55
Automatic Climate Control Descriptions And
Functions ..........................................................55
Automatic Temperature Control (ATC) ..........62
Climate Voice Recognition ...............................62
Operating Tips .................................................62 INTERIOR STORAGE AND EQUIPMENT ............... 64
Storage..............................................................64
USB/AUX Control .............................................67
Electrical Power Outlets .................................68
Power Inverter — If Equipped ..........................70
Wireless Charging Pad —
If Equipped .......................................................71
WINDOWS ..............................................................71
Power Windows ................................................71
Wind Buffeting .................................................73
POWER SUNROOF — IF EQUIPPED ...................... 73
Opening And Closing The Sunroof...................73
Sunshade Operation ........................................73
Pinch Protect Feature ......................................74
Venting Sunroof................................................74
Sunroof Maintenance ......................................74
Ignition Off Operation.......................................74
HOOD .......................................................................74
Opening The Hood............................................74
Closing The Hood .............................................75
LIFTGATE ................................................................. 75
Power Liftgate — If Equipped ...........................75
Cargo Area Features .......................................76
ROOF LUGGAGE RACK — IF EQUIPPED ............... 77
Deploying The Crossbars .................................78
Stowing The Crossbars ....................................80
GETTING TO KNOW YOUR
INSTRUMENT PANEL
INSTRUMENT CLUSTER ........................................ 82Instrument Cluster Descriptions ..................... 83
INSTRUMENT CLUSTER DISPLAY ........................ 83
Location And Controls...................................... 83
Engine Oil Life Reset ....................................... 85
Display And Messages ..................................... 86
Instrument Cluster Display Menu Items ........ 87
Battery Saver On/Battery Saver Mode
Message — Electrical Load Reduction
Actions — If Equipped ...................................... 89
WARNING LIGHTS AND MESSAGES ................... 91
Red Warning Lights ..........................................91
Yellow Warning Lights ...................................... 94
Yellow Indicator Lights ..................................... 97
Green Indicator Lights ..................................... 97
White Indicator Lights ...................................... 98
Blue Indicator Lights ........................................ 98
ONBOARD DIAGNOSTIC SYSTEM — OBD II ........ 99
Onboard Diagnostic System
(OBD II) Cybersecurity ...................................... 99
EMISSIONS INSPECTION AND MAINTENANCE
PROGRAMS .......................................................... 100
21_WD_OM_EN_USC_t.book Page 3
Page 6 of 340
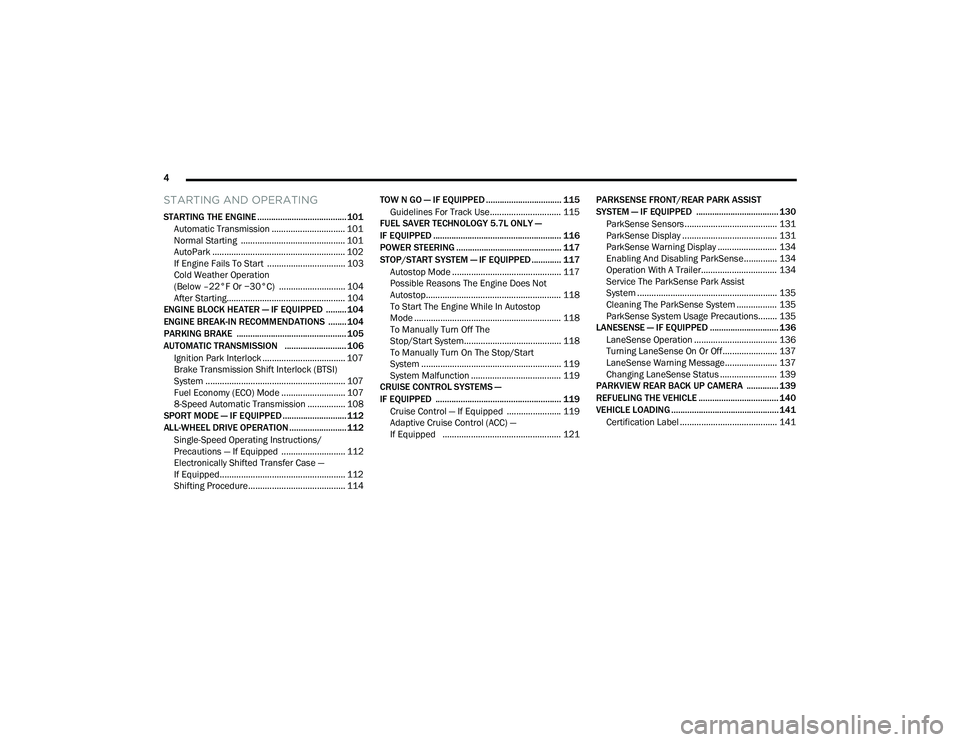
4
STARTING AND OPERATING
STARTING THE ENGINE ....................................... 101
Automatic Transmission ............................... 101
Normal Starting ............................................ 101
AutoPark ........................................................ 102If Engine Fails To Start ................................. 103Cold Weather Operation
(Below –22°F Or −30°C) ............................ 104
After Starting.................................................. 104
ENGINE BLOCK HEATER — IF EQUIPPED ......... 104
ENGINE BREAK-IN RECOMMENDATIONS ........ 104
PARKING BRAKE ................................................ 105
AUTOMATIC TRANSMISSION ........................... 106 Ignition Park Interlock ................................... 107Brake Transmission Shift Interlock (BTSI)
System ........................................................... 107Fuel Economy (ECO) Mode ........................... 107
8-Speed Automatic Transmission ................ 108
SPORT MODE — IF EQUIPPED ............................ 112
ALL-WHEEL DRIVE OPERATION .........................112
Single-Speed Operating Instructions/
Precautions — If Equipped ........................... 112
Electronically Shifted Transfer Case —
If Equipped..................................................... 112
Shifting Procedure......................................... 114 TOW N GO — IF EQUIPPED ................................. 115
Guidelines For Track Use.............................. 115
FUEL SAVER TECHNOLOGY 5.7L ONLY —
IF EQUIPPED ........................................................ 116
POWER STEERING .............................................. 117
STOP/START SYSTEM — IF EQUIPPED ............. 117
Autostop Mode .............................................. 117
Possible Reasons The Engine Does Not
Autostop......................................................... 118
To Start The Engine While In Autostop
Mode .............................................................. 118
To Manually Turn Off The
Stop/Start System......................................... 118
To Manually Turn On The Stop/Start
System ........................................................... 119
System Malfunction ...................................... 119
CRUISE CONTROL SYSTEMS —
IF EQUIPPED ....................................................... 119
Cruise Control — If Equipped ....................... 119
Adaptive Cruise Control (ACC) —
If Equipped .................................................. 121 PARKSENSE FRONT/REAR PARK ASSIST
SYSTEM — IF EQUIPPED .................................... 130
ParkSense Sensors ....................................... 131
ParkSense Display ........................................ 131
ParkSense Warning Display ......................... 134
Enabling And Disabling ParkSense.............. 134
Operation With A Trailer................................ 134Service The ParkSense Park Assist
System ........................................................... 135
Cleaning The ParkSense System ................. 135
ParkSense System Usage Precautions........ 135
LANESENSE — IF EQUIPPED .............................. 136
LaneSense Operation ................................... 136
Turning LaneSense On Or Off....................... 137
LaneSense Warning Message...................... 137
Changing LaneSense Status ........................ 139
PARKVIEW REAR BACK UP CAMERA .............. 139
REFUELING THE VEHICLE ................................... 140
VEHICLE LOADING ............................................... 141
Certification Label ......................................... 141
21_WD_OM_EN_USC_t.book Page 4
Page 8 of 340
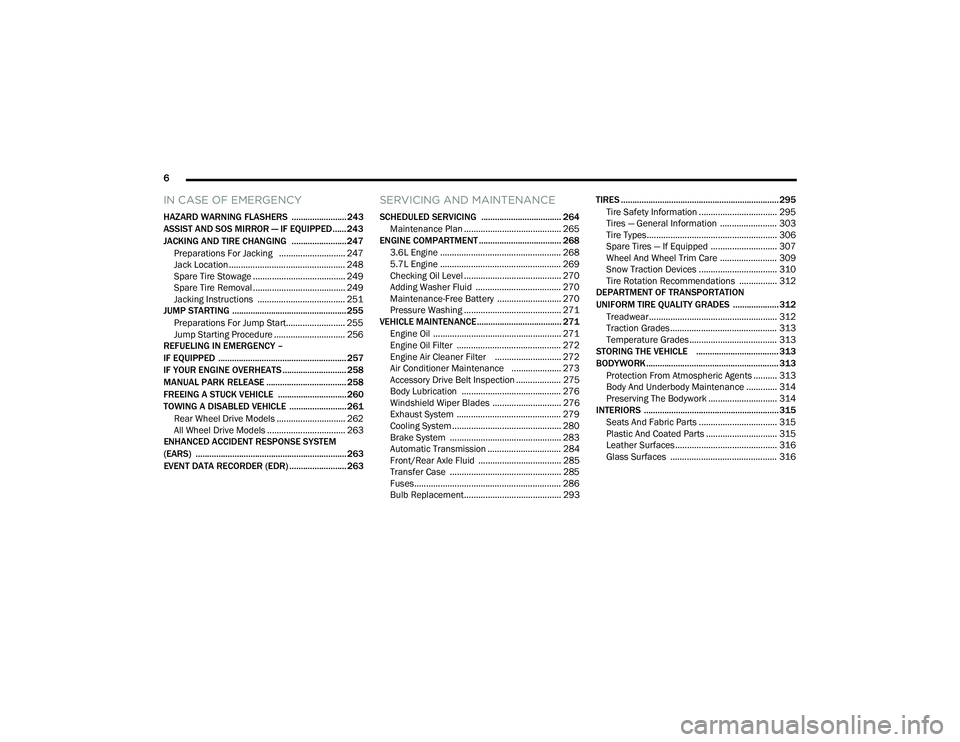
6
IN CASE OF EMERGENCY
HAZARD WARNING FLASHERS ........................ 243
ASSIST AND SOS MIRROR — IF EQUIPPED...... 243
JACKING AND TIRE CHANGING ........................ 247 Preparations For Jacking ............................ 247
Jack Location ................................................. 248
Spare Tire Stowage ....................................... 249
Spare Tire Removal ....................................... 249
Jacking Instructions ..................................... 251
JUMP STARTING .................................................. 255
Preparations For Jump Start......................... 255Jump Starting Procedure .............................. 256
REFUELING IN EMERGENCY –
IF EQUIPPED ........................................................ 257
IF YOUR ENGINE OVERHEATS ............................ 258
MANUAL PARK RELEASE ................................... 258
FREEING A STUCK VEHICLE .............................. 260
TOWING A DISABLED VEHICLE .........................261
Rear Wheel Drive Models ............................. 262
All Wheel Drive Models ................................. 263
ENHANCED ACCIDENT RESPONSE SYSTEM
(EARS) .................................................................. 263
EVENT DATA RECORDER (EDR) ......................... 263
SERVICING AND MAINTENANCE
SCHEDULED SERVICING ................................... 264
Maintenance Plan ......................................... 265
ENGINE COMPARTMENT .................................... 268
3.6L Engine ................................................... 268
5.7L Engine ................................................... 269
Checking Oil Level ......................................... 270
Adding Washer Fluid .................................... 270
Maintenance-Free Battery ........................... 270Pressure Washing ......................................... 271
VEHICLE MAINTENANCE..................................... 271
Engine Oil ...................................................... 271
Engine Oil Filter ............................................ 272
Engine Air Cleaner Filter ............................ 272
Air Conditioner Maintenance ..................... 273
Accessory Drive Belt Inspection ................... 275Body Lubrication .......................................... 276
Windshield Wiper Blades ............................. 276
Exhaust System ............................................ 279
Cooling System .............................................. 280
Brake System ............................................... 283
Automatic Transmission ............................... 284
Front/Rear Axle Fluid ................................... 285Transfer Case ............................................... 285
Fuses.............................................................. 286
Bulb Replacement......................................... 293 TIRES ..................................................................... 295
Tire Safety Information ................................. 295
Tires — General Information ........................ 303Tire Types....................................................... 306Spare Tires — If Equipped ............................ 307
Wheel And Wheel Trim Care ........................ 309Snow Traction Devices ................................. 310
Tire Rotation Recommendations ................ 312
DEPARTMENT OF TRANSPORTATION
UNIFORM TIRE QUALITY GRADES .................... 312
Treadwear...................................................... 312
Traction Grades ............................................. 313Temperature Grades..................................... 313
STORING THE VEHICLE .................................... 313
BODYWORK .......................................................... 313 Protection From Atmospheric Agents .......... 313
Body And Underbody Maintenance ............. 314
Preserving The Bodywork ............................. 314
INTERIORS ........................................................... 315
Seats And Fabric Parts ................................. 315
Plastic And Coated Parts .............................. 315
Leather Surfaces........................................... 316
Glass Surfaces ............................................. 316
21_WD_OM_EN_USC_t.book Page 6
Page 10 of 340
8
INTRODUCTION
Dear Customer,
Congratulations on the purchase of your new Dodge vehicle. Be assured that it represents precision workmanship, distinctive styling, and high quality.
This is a specialized utility vehicle. It can go places and perform tasks that are not intended for conventional passenger vehicles. It handles and maneuvers
differently from many passenger vehicles both on-road and off-road, so take time to become familiar with your vehicle. If equipped, the two-wheel drive version
of this vehicle was designed for on-road use only. It is not intended for off-road driving or use in other severe conditions suited for a four-wheel drive vehicle.
Before you start to drive this vehicle, read the Owner’s Manual. Be sure you are familiar with all vehicle controls, particularly those used for braking, steering,
transmission, and transfer case shifting. Learn how your vehicle handles on different road surfaces. Your driving skills will improve with experience. When driving
off-road, or working the vehicle, don’t overload the vehicle or expect the vehicle to overcome the natural laws of physics. Always observe federal, state, provincial
and local laws wherever you drive. As with other vehicles of this type, failure to operate this vehicle correctly may result in loss of control or a collision Úpage 156.
This Owner's Manual has been prepared with the assistance of service and engineering specialists to acquaint you with the operation and maintenance of your
vehicle. It is supplemented by customer-oriented documents. Within this information, you will find a description of the services that FCA US LLC offers to its
customers as well as the details of the terms and conditions for maintaining its validity. Please take the time to read all of these publications carefully before
driving your vehicle for the first time. Following the instructions, recommendations, tips, and important warnings in this manual will help ensure safe and
enjoyable operation of your vehicle.
This Owner's Manual describes all versions of this vehicle. Options and equipment dedicated to specific markets or versions are not expressly indicated in the
text. Therefore, you should only consider the information that is related to the trim level, engine, and version that you have purchased. Any content introduced
throughout the Owner's Information, which may or may not be applicable to your vehicle, will be identified with the wording "If Equipped". All data contained in
this publication are intended to help you use your vehicle in the best possible way. FCA US LLC aims at a constant improvement of the vehicles produced. For
this reason, it reserves the right to make changes to the model described for technical and/or commercial reasons. For further information, contact an authorized
dealer.
When it comes to service, remember that authorized dealers know your Dodge best, have factory-trained technicians, genuine Mopar® parts, and care about
your satisfaction.
21_WD_OM_EN_USC_t.book Page 8
Page 19 of 340
GETTING TO KNOW YOUR VEHICLE17
The system uses a key fob, keyless push button
ignition and a Radio Frequency (RF) receiver to
prevent unauthorized vehicle operation. Therefore,
only key fobs that are programmed to the vehicle
can be used to start and operate the vehicle. The
system will shut the engine off in two seconds if an
incorrect key fob is used to start the engine.
After placing the ignition in the ON/RUN position,
the Vehicle Security Light will turn on for three
seconds for a bulb check. If the light remains on
after the bulb check, it indicates that there is a
problem with the electronics. In addition, if the light
begins to flash after the bulb check, it indicates
that someone used an invalid key fob to start the
engine. Either of these conditions will result in the
engine being shut off after two seconds.
If the Vehicle Security Light turns on during normal
vehicle operation (vehicle running for longer than
10 seconds), it indicates that there is a fault in the
electronics. Should this occur, have the vehicle
serviced as soon as possible by an authorized
dealer. All of the key fobs provided with your new vehicle
have been programmed to the vehicle electronics
Ú
page 327.
IGNITION SWITCH
KEYLESS ENTER ‘N GO™ IGNITION
This feature allows the driver to operate the
ignition switch with the push of a button as long as
the key fob is in the passenger compartment.
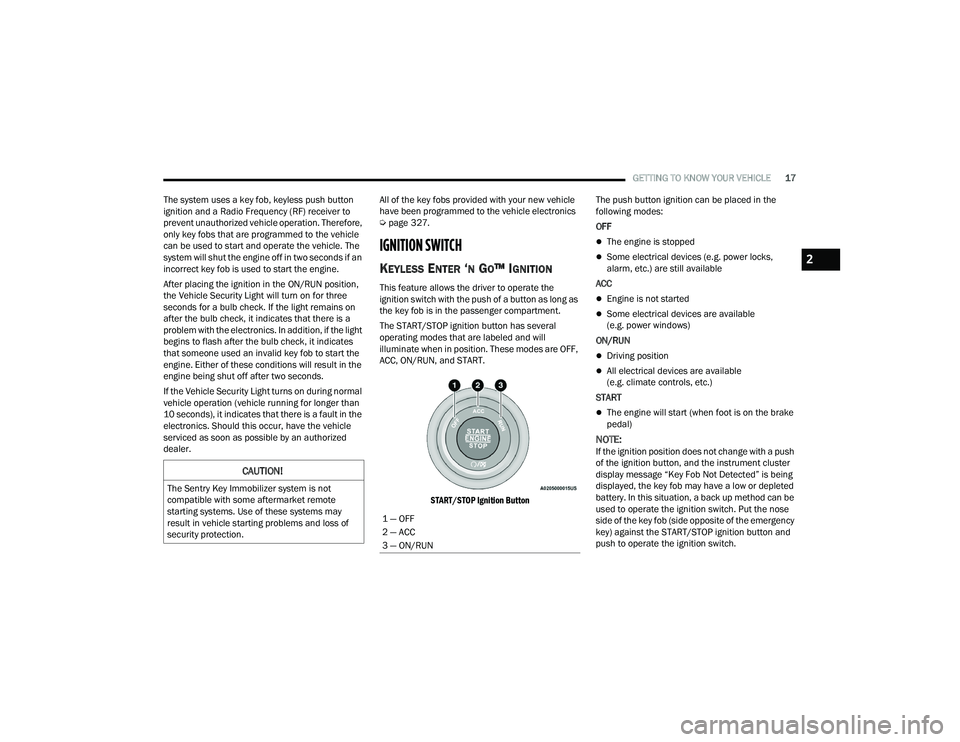
The START/STOP ignition button has several
operating modes that are labeled and will
illuminate when in position. These modes are OFF,
ACC, ON/RUN, and START.
START/STOP Ignition Button
The push button ignition can be placed in the
following modes:
OFF
The engine is stopped
Some electrical devices (e.g. power locks,
alarm, etc.) are still available
ACC
Engine is not started
Some electrical devices are available
(e.g. power windows)
ON/RUN
Driving position
All electrical devices are available
(e.g. climate controls, etc.)
START
The engine will start (when foot is on the brake
pedal)
NOTE:If the ignition position does not change with a push
of the ignition button, and the instrument cluster
display message “Key Fob Not Detected” is being
displayed, the key fob may have a low or depleted
battery. In this situation, a back up method can be
used to operate the ignition switch. Put the nose
side of the key fob (side opposite of the emergency
key) against the START/STOP ignition button and
push to operate the ignition switch.
CAUTION!
The Sentry Key Immobilizer system is not
compatible with some aftermarket remote
starting systems. Use of these systems may
result in vehicle starting problems and loss of
security protection.
1 — OFF
2 — ACC
3 — ON/RUN
2
21_WD_OM_EN_USC_t.book Page 17
Page 21 of 340
GETTING TO KNOW YOUR VEHICLE19
HOW TO USE REMOTE START
Push and release the Remote Start button on the
key fob twice within five seconds. The vehicle
doors will lock, the parking lights will flash, and the
horn will chirp twice (if programmed). Then, the
engine will start, and the vehicle will remain in the
Remote Start mode for a 15 minute cycle. Pushing
the Remote Start button a third time shuts the
engine off.
To drive the vehicle, push the unlock button, and
with a valid Keyless Enter ‘n Go™ key fob in the
vehicle, place the ignition in the ON/RUN position.
NOTE:
With Remote Start, the engine will only run for
15 minutes.
Remote Start can only be used twice.
If an engine fault is present or fuel level is
low, the vehicle will start and then shut down in
10 seconds.
The park lamps will turn on and remain on
during Remote Start mode.
For security, power window operation is
disabled when the vehicle is in the Remote Start
mode.
The ignition must be placed in the ON/RUN posi -
tion before the Remote Start sequence can be
repeated for a third cycle. All of the following conditions must be met before
the engine will remote start:
Gear selector in PARK
Doors closed
Hood closed
Liftgate closed
Hazard switch off
Brake switch inactive (brake pedal not pressed)
Battery at an acceptable charge level
PANIC button not pushed
System not disabled from previous remote start
event
Vehicle Security system indicator flashing
Ignition in OFF position
Fuel level meets minimum requirement
Vehicle Security system is not signaling an
intrusion
Malfunction Indicator Light (MIL) is not
illuminated
TO EXIT REMOTE START MODE
To drive the vehicle after starting the Remote Start
system, either push and release the unlock button
on the key fob to unlock the doors, or unlock the
vehicle using Keyless Enter ‘n Go™ — Passive Entry
via the door handles, and disarm the Vehicle
Security system (if equipped). Then, prior to the
end of the 15 minute cycle, push and release the
START/STOP ignition button.
WARNING!
Do not start or run an engine in a closed
garage or confined area. Exhaust gas contains
Carbon Monoxide (CO) which is odorless and
colorless. Carbon Monoxide is poisonous and
can cause serious injury or death when
inhaled.
Keep key fobs away from children. Operation
of the Remote Start system, windows, door
locks or other controls could cause serious
injury or death.
2
21_WD_OM_EN_USC_t.book Page 19
Page 22 of 340
20GETTING TO KNOW YOUR VEHICLE
The Remote Start system will turn the engine off
with another push and release of the Remote Start
button on the key fob, or if the engine is allowed to
run for the entire 15 minute cycle. Once the
ignition is placed in the ON/RUN position, the
climate controls will resume the previously set
operations (temperature, blower control, etc.).
NOTE:
To avoid unintentional shutdowns, the system
will disable for two seconds after receiving a
valid Remote Start request.
For vehicles equipped with the Keyless Enter ‘n
Go™ — Passive Entry feature, the message
“Remote Start Active — Push Start Button” will
display in the instrument cluster display until
you push the START/STOP ignition button.
REMOTE START FRONT DEFROST
A
CTIVATION — IF EQUIPPED
When Remote Start is active, and the outside
ambient temperature is 40°F (4.5°C) or below, the
system will automatically activate front defrost for
15 minutes or less. The time is dependent on the
ambient temperature. Once the timer expires, the
system will automatically adjust the settings
depending on ambient conditions. See “Remote
Start Comfort Systems — If Equipped” in the next
section for detailed operation.
REMOTE START COMFORT SYSTEMS —
I
F EQUIPPED
When Remote Start is activated, the front and rear
defrost will automatically turn on in cold weather.
The heated steering wheel and driver heated seat
feature will turn on if selected in the comfort menu
screen within Uconnect Settings Ú page 159. In
warm weather, the driver vented seat feature will
automatically turn on when Remote Start is
activated, if programmed in the comfort menu
screen. The vehicle will adjust the climate control
settings depending on the outside ambient
temperature.
Automatic Temperature Control (ATC) —
If Equipped
The climate controls will automatically adjust to
the optimal temperature and mode settings
depending on the outside ambient temperature.
This will occur until the ignition is placed in the
ON/RUN position, where the climate controls will
resume their previous settings. Manual Temperature Control (MTC) — If Equipped
In ambient temperatures at 40°F (4.5°C) or
below, the climate settings will default to
maximum heat, with fresh air entering the
cabin. If the front defrost timer expires, the
vehicle will enter Mix Mode.
In ambient temperatures from 40°F (4.5°C) to
78°F (26°C), the climate settings will be based
on the last settings selected by the driver.
In ambient temperatures at 78°F (26°C)
or above, the climate settings will default to
MAX A/C, Bi-Level Mode, and Recirculation on.
For more information on ATC, MTC, and climate
control settings, see Ú page 55.
NOTE:These features will stay on through the duration of
Remote Start until the ignition is placed in the
ON/RUN position. The climate control settings will
change if manually adjusted by the driver while the
vehicle is in Remote Start mode, and exit auto -
matic override. This includes the OFF button on the
climate controls, which will turn the system off.
21_WD_OM_EN_USC_t.book Page 20
Page 37 of 340
GETTING TO KNOW YOUR VEHICLE35
NOTE:The second row seats must be in their full upright
position, folded flat or tumbled when folding the
third row seats.
To raise the seat, pull the seat toward you using
the strap located on the back of the seat. Then lift
the head restraint until it locks into place.
NOTE:You may experience deformation in the seat
cushion from the seat belt buckles if the seats are
left folded for an extended period of time. This is
normal and by simply unfolding the seats to the
open position, over time the seat cushion will
return to its normal shape.
POWER ADJUSTMENT (FRONT SEATS) —
I
F EQUIPPED
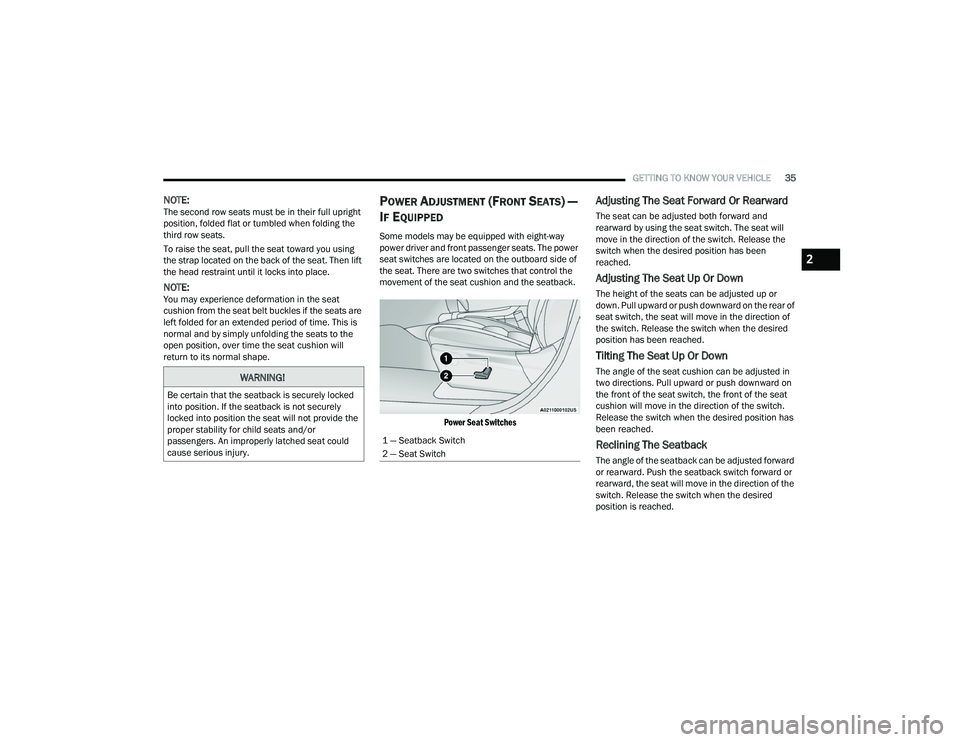
Some models may be equipped with eight-way
power driver and front passenger seats. The power
seat switches are located on the outboard side of
the seat. There are two switches that control the
movement of the seat cushion and the seatback.
Power Seat Switches
Adjusting The Seat Forward Or Rearward
The seat can be adjusted both forward and
rearward by using the seat switch. The seat will
move in the direction of the switch. Release the
switch when the desired position has been
reached.
Adjusting The Seat Up Or Down
The height of the seats can be adjusted up or
down. Pull upward or push downward on the rear of
seat switch, the seat will move in the direction of
the switch. Release the switch when the desired
position has been reached.
Tilting The Seat Up Or Down
The angle of the seat cushion can be adjusted in
two directions. Pull upward or push downward on
the front of the seat switch, the front of the seat
cushion will move in the direction of the switch.
Release the switch when the desired position has
been reached.
Reclining The Seatback
The angle of the seatback can be adjusted forward
or rearward. Push the seatback switch forward or
rearward, the seat will move in the direction of the
switch. Release the switch when the desired
position is reached.
WARNING!
Be certain that the seatback is securely locked
into position. If the seatback is not securely
locked into position the seat will not provide the
proper stability for child seats and/or
passengers. An improperly latched seat could
cause serious injury.
1 — Seatback Switch
2 — Seat Switch
2
21_WD_OM_EN_USC_t.book Page 35
Page 38 of 340
36GETTING TO KNOW YOUR VEHICLE
Power Lumbar — If Equipped
Vehicles equipped with power driver or passenger
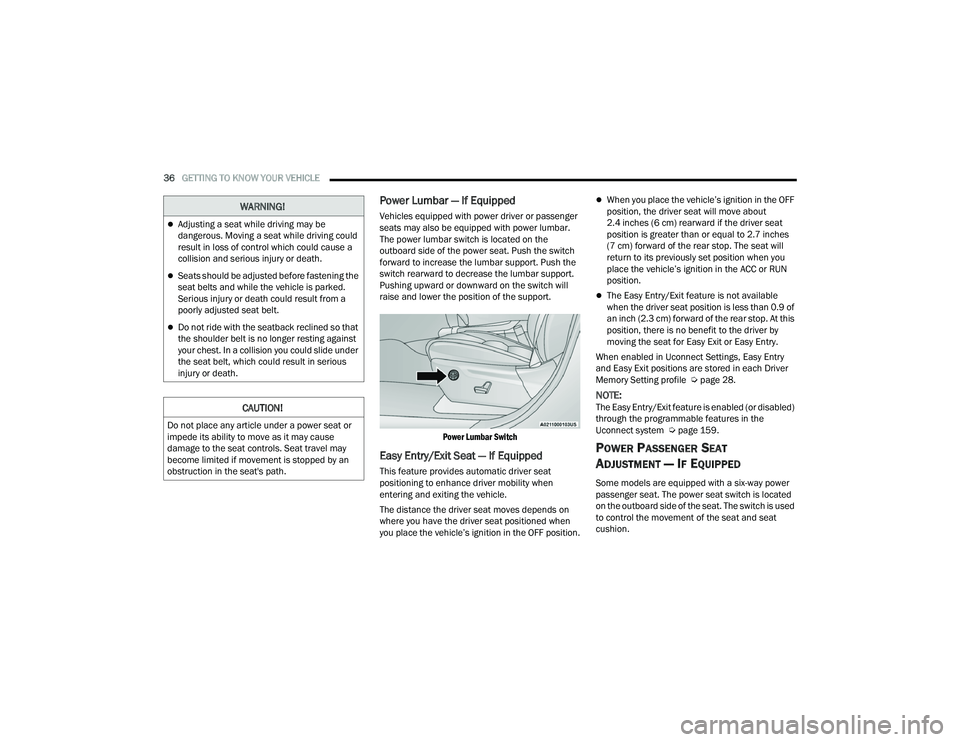
seats may also be equipped with power lumbar.
The power lumbar switch is located on the
outboard side of the power seat. Push the switch
forward to increase the lumbar support. Push the
switch rearward to decrease the lumbar support.
Pushing upward or downward on the switch will
raise and lower the position of the support.
Power Lumbar Switch
Easy Entry/Exit Seat — If Equipped
This feature provides automatic driver seat
positioning to enhance driver mobility when
entering and exiting the vehicle.
The distance the driver seat moves depends on
where you have the driver seat positioned when
you place the vehicle’s ignition in the OFF position.
When you place the vehicle’s ignition in the OFF
position, the driver seat will move about
2.4 inches (6 cm) rearward if the driver seat
position is greater than or equal to 2.7 inches
(7 cm) forward of the rear stop. The seat will
return to its previously set position when you
place the vehicle’s ignition in the ACC or RUN
position.
The Easy Entry/Exit feature is not available
when the driver seat position is less than 0.9 of
an inch (2.3 cm) forward of the rear stop. At this
position, there is no benefit to the driver by
moving the seat for Easy Exit or Easy Entry.
When enabled in Uconnect Settings, Easy Entry
and Easy Exit positions are stored in each Driver
Memory Setting profile Ú page 28.
NOTE:The Easy Entry/Exit feature is enabled (or disabled)
through the programmable features in the
Uconnect system Úpage 159.
POWER PASSENGER SEAT
A
DJUSTMENT — IF EQUIPPED
Some models are equipped with a six-way power
passenger seat. The power seat switch is located
on the outboard side of the seat. The switch is used
to control the movement of the seat and seat
cushion.
WARNING!
Adjusting a seat while driving may be
dangerous. Moving a seat while driving could
result in loss of control which could cause a
collision and serious injury or death.
Seats should be adjusted before fastening the
seat belts and while the vehicle is parked.
Serious injury or death could result from a
poorly adjusted seat belt.
Do not ride with the seatback reclined so that
the shoulder belt is no longer resting against
your chest. In a collision you could slide under
the seat belt, which could result in serious
injury or death.
CAUTION!
Do not place any article under a power seat or
impede its ability to move as it may cause
damage to the seat controls. Seat travel may
become limited if movement is stopped by an
obstruction in the seat's path.
21_WD_OM_EN_USC_t.book Page 36