keyless DODGE DURANGO 2021 User Guide
[x] Cancel search | Manufacturer: DODGE, Model Year: 2021, Model line: DURANGO, Model: DODGE DURANGO 2021Pages: 340, PDF Size: 20.38 MB
Page 74 of 340
72GETTING TO KNOW YOUR VEHICLE
Automatic Window Features
Auto-Down Feature
Both the driver and front passenger window
switches have an Auto-Down feature. Push the
window switch past the first detent, release, and
the window will go down automatically.
To cancel the Auto-Down movement, operate the
switch in either the up or down direction and
release the switch.
Auto-Up Feature With Anti-Pinch Protection —
Driver And Front Passenger Door Only
Lift the window switch fully upward to the second
detent, release, and the window will go up
automatically. To stop the window from going all the way up
during the Auto-Up operation, push down on the
switch briefly.
If the window runs into any obstacle during
Auto-Up, it will reverse direction and then go back
down. Remove the obstacle and use the window
switch again to close the window.
NOTE:Any impact due to rough road conditions may
trigger the auto reverse function unexpectedly
during Auto-Up. If this happens, pull the switch
lightly to the first detent and hold it to close the
window manually.
Reset Auto-Up
Should the Auto-Up feature stop working, the
window may need to be reset. To reset Auto-Up:
1. Make sure the door is fully closed.
2. Pull the window switch up to close the window
completely and continue to hold the switch up
for an additional two seconds after the window
is closed. 3. Push the window switch down firmly to the
second detent to open the window completely
and continue to hold the switch down for an
additional two seconds after the window is
fully open.
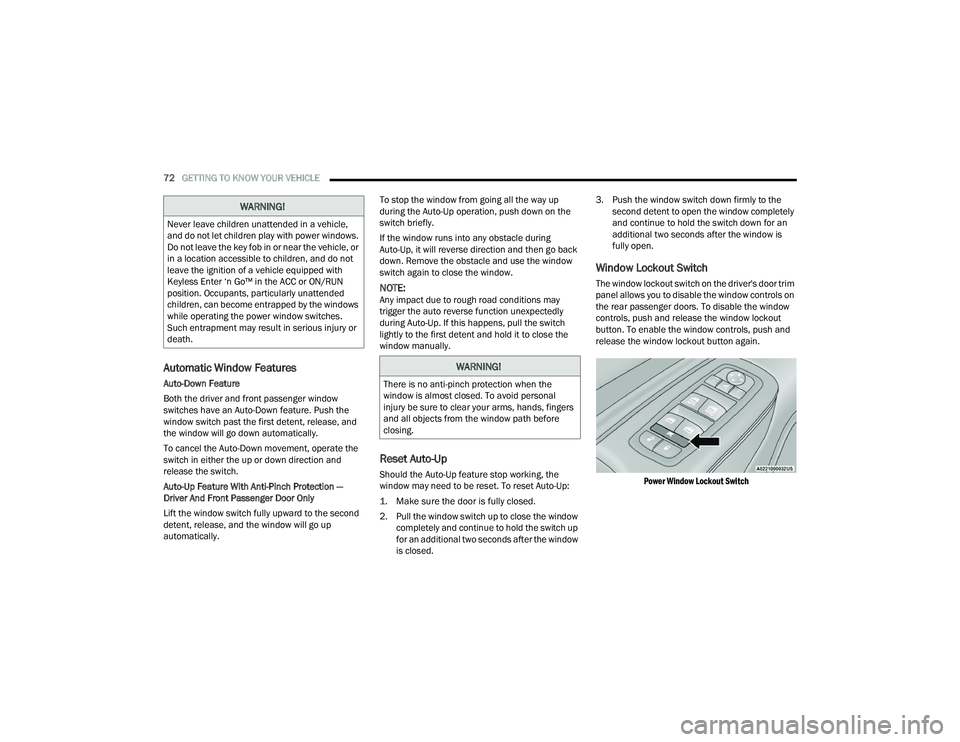
Window Lockout Switch
The window lockout switch on the driver's door trim
panel allows you to disable the window controls on
the rear passenger doors. To disable the window
controls, push and release the window lockout
button. To enable the window controls, push and
release the window lockout button again.
Power Window Lockout Switch
WARNING!
Never leave children unattended in a vehicle,
and do not let children play with power windows.
Do not leave the key fob in or near the vehicle, or
in a location accessible to children, and do not
leave the ignition of a vehicle equipped with
Keyless Enter ‘n Go™ in the ACC or ON/RUN
position. Occupants, particularly unattended
children, can become entrapped by the windows
while operating the power window switches.
Such entrapment may result in serious injury or
death.
WARNING!
There is no anti-pinch protection when the
window is almost closed. To avoid personal
injury be sure to clear your arms, hands, fingers
and all objects from the window path before
closing.
21_WD_OM_EN_USC_t.book Page 72
Page 75 of 340
GETTING TO KNOW YOUR VEHICLE73
WIND BUFFETING
Wind buffeting can be described as the perception
of pressure on the ears or a helicopter-type sound
in the ears. Your vehicle may exhibit wind buffeting
with the windows down, or the sunroof (if
equipped) in certain open or partially open
positions. This is a normal occurrence and can be
minimized. If the buffeting occurs with the rear
windows open, open the front and rear windows
together to minimize the buffeting. If the buffeting
occurs with the sunroof open, adjust the sunroof
opening to minimize the buffeting or open any
window.
POWER SUNROOF — IF EQUIPPED
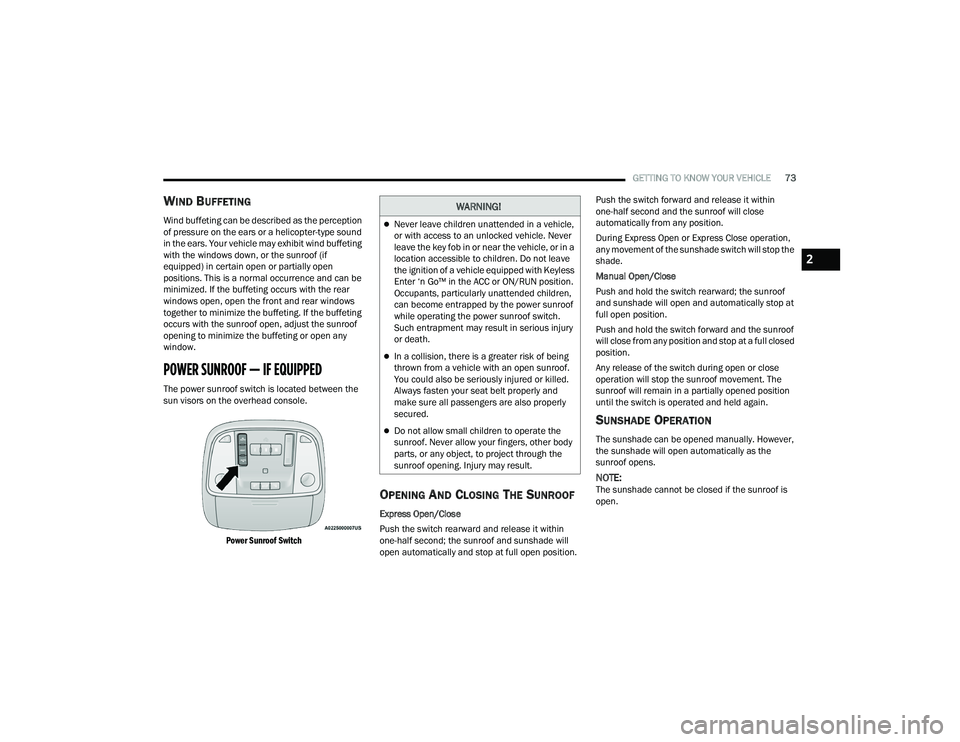
The power sunroof switch is located between the
sun visors on the overhead console.
Power Sunroof Switch
OPENING AND CLOSING THE SUNROOF
Express Open/Close
Push the switch rearward and release it within
one-half second; the sunroof and sunshade will
open automatically and stop at full open position. Push the switch forward and release it within
one-half second and the sunroof will close
automatically from any position.
During Express Open or Express Close operation,
any movement of the sunshade switch will stop the
shade.
Manual Open/Close
Push and hold the switch rearward; the sunroof
and sunshade will open and automatically stop at
full open position.
Push and hold the switch forward and the sunroof
will close from any position and stop at a full closed
position.
Any release of the switch during open or close
operation will stop the sunroof movement. The
sunroof will remain in a partially opened position
until the switch is operated and held again.
SUNSHADE OPERATION
The sunshade can be opened manually. However,
the sunshade will open automatically as the
sunroof opens.
NOTE:The sunshade cannot be closed if the sunroof is
open.
WARNING!
Never leave children unattended in a vehicle,
or with access to an unlocked vehicle. Never
leave the key fob in or near the vehicle, or in a
location accessible to children. Do not leave
the ignition of a vehicle equipped with Keyless
Enter ‘n Go™ in the ACC or ON/RUN position.
Occupants, particularly unattended children,
can become entrapped by the power sunroof
while operating the power sunroof switch.
Such entrapment may result in serious injury
or death.
In a collision, there is a greater risk of being
thrown from a vehicle with an open sunroof.
You could also be seriously injured or killed.
Always fasten your seat belt properly and
make sure all passengers are also properly
secured.
Do not allow small children to operate the
sunroof. Never allow your fingers, other body
parts, or any object, to project through the
sunroof opening. Injury may result.
2
21_WD_OM_EN_USC_t.book Page 73
Page 85 of 340
GETTING TO KNOW YOUR INSTRUMENT PANEL83
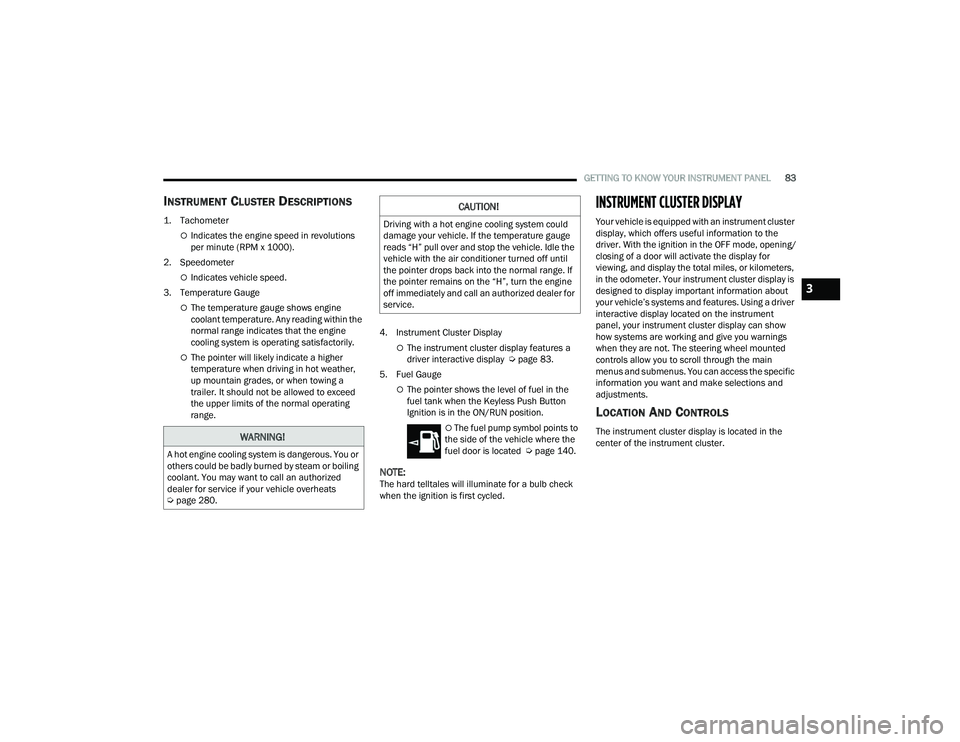
INSTRUMENT CLUSTER DESCRIPTIONS
1. Tachometer
Indicates the engine speed in revolutions
per minute (RPM x 1000).
2. Speedometer
Indicates vehicle speed.
3. Temperature Gauge
The temperature gauge shows engine
coolant temperature. Any reading within the
normal range indicates that the engine
cooling system is operating satisfactorily.
The pointer will likely indicate a higher
temperature when driving in hot weather,
up mountain grades, or when towing a
trailer. It should not be allowed to exceed
the upper limits of the normal operating
range. 4. Instrument Cluster DisplayThe instrument cluster display features a
driver interactive display Ú
page 83.
5. Fuel Gauge
The pointer shows the level of fuel in the
fuel tank when the Keyless Push Button
Ignition is in the ON/RUN position.
The fuel pump symbol points to
the side of the vehicle where the
fuel door is located Ú page 140.
NOTE:The hard telltales will illuminate for a bulb check
when the ignition is first cycled.
INSTRUMENT CLUSTER DISPLAY
Your vehicle is equipped with an instrument cluster
display, which offers useful information to the
driver. With the ignition in the OFF mode, opening/
closing of a door will activate the display for
viewing, and display the total miles, or kilometers,
in the odometer. Your instrument cluster display is
designed to display important information about
your vehicle’s systems and features. Using a driver
interactive display located on the instrument
panel, your instrument cluster display can show
how systems are working and give you warnings
when they are not. The steering wheel mounted
controls allow you to scroll through the main
menus and submenus. You can access the specific
information you want and make selections and
adjustments.
LOCATION AND CONTROLS
The instrument cluster display is located in the
center of the instrument cluster.WARNING!
A hot engine cooling system is dangerous. You or
others could be badly burned by steam or boiling
coolant. You may want to call an authorized
dealer for service if your vehicle overheats
Úpage 280.
CAUTION!
Driving with a hot engine cooling system could
damage your vehicle. If the temperature gauge
reads “H” pull over and stop the vehicle. Idle the
vehicle with the air conditioner turned off until
the pointer drops back into the normal range. If
the pointer remains on the “H”, turn the engine
off immediately and call an authorized dealer for
service.
3
21_WD_OM_EN_USC_t.book Page 83
Page 88 of 340
86GETTING TO KNOW YOUR INSTRUMENT PANEL
Vehicles Equipped With Keyless Enter ‘n Go —
Ignition
Use the steering wheel instrument cluster display
controls for the following procedure(s):
1. Without pressing the brake pedal, push the ENGINE START/STOP button and place the
ignition in the ON/RUN position (do not start
the engine).
2. Push and release the down arrow button to
scroll downward through the main menu to
“Vehicle Info.”
3. Push and release the right arrow button to access the ”Oil Life” screen.
4. Push and hold the OK button to reset oil life. If
conditions are met, the gauge and numeric
display will update to show 100%. If conditions
are not met a pop-up message of “To reset oil
life engine must be off with ignition in run” will
be displayed (for five seconds), and the user
will remain at the Oil Life screen.
5. Push and release the up or down arrow
button to exit the submenu screen.
NOTE:If the indicator message illuminates when you start
the vehicle, the oil change indicator system did not
reset. If necessary, repeat this procedure. Secondary Method Of Resetting Engine Oil Life
1. Without pressing the brake pedal, push the
ENGINE START/STOP button and place the
ignition to the ON/RUN position (do not start
the engine).
2. Fully press the accelerator pedal, slowly, three times within 10 seconds.
3. Without pushing the brake pedal, push the ENGINE START/STOP button once to return the
ignition to the OFF position.
NOTE:If the indicator message illuminates when you start
the vehicle, the oil change indicator system did not
reset. If necessary, repeat this procedure.
DISPLAY AND MESSAGES
Includes the following, but not limited to:
Front Seat Belts Unbuckled
Driver Seat Belt Unbuckled
Passenger Seat Belt Unbuckled
Traction Control Off
Washer Fluid Low
Oil Pressure Low
Oil Change Due
Fuel Low
Service Anti-lock Brake System
Service Electronic Throttle Control
Service Power Steering
Cruise Off
Cruise Ready
ACC Override
Cruise Set To XXX mph or km/h
Tire Pressure Screen With Low Tire(s)
Service Tire Pressure System
Park Brake Engaged
Brake Fluid Low
Engine Temperature Hot
Lights On
Right Front Turn Signal Light Out
Right Rear Turn Signal Light Out
Left Front Turn Signal Light Out
Left Rear Turn Signal Light Out
Ignition or Accessory On
Vehicle Not In Park
Remote Start Active Push Start Button
Remote Start Canceled Fuel Low
Remote Start Canceled Door Open
Remote Start Canceled Hood Open
21_WD_OM_EN_USC_t.book Page 86
Page 103 of 340
101
(Continued)
(Continued)
STARTING AND OPERATING
STARTING THE ENGINE
Before starting your vehicle, adjust your seat,
adjust the inside and outside mirrors, fasten your
seat belt, and if present, instruct all other
occupants to buckle their seat belts.
AUTOMATIC TRANSMISSION
The gear selector must be in the NEUTRAL (N) or
PARK (P) position before you can start the engine.
Apply the brakes before shifting into any driving
gear.
NORMAL STARTING
To Turn On The Engine Using The ENGINE START/
STOP Button
1. The transmission must be in PARK (P).
2. Press and hold the brake pedal while pushing
the ENGINE START/STOP button once.
3. The system starts the vehicle. If the vehicle fails to start, the starter will disengage
automatically after 10 seconds.
4. If you wish to stop the cranking of the engine prior to the engine starting, push the ENGINE
START/STOP button again.
WARNING!
Before exiting a vehicle, always come to a
complete stop, then shift the automatic trans -
mission into PARK and apply the parking
brake.
Always make sure the keyless ignition node is
in the OFF mode, key fob is removed from the
vehicle and vehicle is locked.
Never leave children alone in a vehicle, or with
access to an unlocked vehicle. Leaving chil -
dren in a vehicle unattended is dangerous for
a number of reasons. A child or others could
be seriously or fatally injured. Children should
be warned not to touch the parking brake,
brake pedal or the gear selector.
Do not leave the key fob in or near the vehicle,
or in a location accessible to children, and do
not leave the ignition of a vehicle equipped
with Keyless Enter ‘n Go™ in the ACC or
ON/RUN mode. A child could operate power
windows, other controls, or move the vehicle.
Do not leave children or animals inside parked
vehicles in hot weather. Interior heat build-up
may cause serious injury or death.
CAUTION!
Damage to the transmission may occur if the
following precautions are not observed:
Do not shift from REVERSE (R), PARK, or
NEUTRAL into any forward gear when the
engine is above idle speed.
WARNING!
Shift into or out of PARK or REVERSE only after
the vehicle has come to a complete stop and
the engine is at idle speed.
Before shifting into any gear, make sure your
foot is firmly on the brake pedal.
CAUTION!
4
21_WD_OM_EN_USC_t.book Page 101
Page 105 of 340
STARTING AND OPERATING103
If the vehicle is not in PARK and the driver turns off
the engine, the vehicle may AutoPark.
AutoPark will engage when all of these conditions
are met:
Vehicle is equipped with an 8-speed transmis -
sion
Vehicle is not in PARK
Vehicle speed is 1.2 mph (1.9 km/h) or less
Ignition is switched from RUN to ACC
NOTE:For Keyless Enter ‘n Go™ equipped vehicles, the
engine will turn off and the ignition switch will
change to ACC mode.
If the vehicle is not in PARK and the driver exits the
vehicle with the engine running, the vehicle may
AutoPark.
AutoPark will engage when all of these conditions
are met:
Vehicle is equipped with an 8-speed
transmission
Vehicle is not in PARK
Vehicle speed is 1.2 mph (1.9 km/h) or less
Driver’s seat belt is unbuckled
Driver’s door is ajar
Brake pedal is not pressed The message “
AutoPark Engaged Shift to P then
Shift to Gear ” will display in the instrument cluster.
NOTE:In some cases the ParkSense graphic will be
displayed in the instrument cluster. In these cases,
the gear selector must be returned to “P” to select
desired gear.
If the driver shifts into PARK while moving, the
vehicle may AutoPark.
AutoPark will engage ONLY when vehicle speed is
1.2 mph (1.9 km/h) or less.
The message “ Vehicle Speed is Too High to Shift to
P” will be displayed in the instrument cluster if
vehicle speed is above 1.2 mph (1.9 km/h). 4WD LOW — If Equipped
AutoPark will be disabled when operating the
vehicle in 4WD LOW.
The message “
AutoPark Disabled ” will be
displayed in the instrument cluster.
Additional customer warnings will be given when
both of these conditions are met:
Vehicle is not in PARK
Driver’s door is ajar
The message “ AutoPark Not Engaged” will be
displayed in the instrument cluster. A warning
chime will continue until you shift the vehicle into
PARK or the driver’s door is closed.
ALWAYS DO A VISUAL CHECK
that your vehicle is in
PARK by looking for the "P" in the instrument
cluster display and on the gear selector. As an
added precaution, always apply the parking brake
when exiting the vehicle.
IF ENGINE FAILS TO START
If the engine fails to start after you have followed
the "Normal Starting" or "Extreme Cold Weather"
procedure, it may be flooded. Push the accelerator
pedal all the way to the floor and hold it there.
Crank the engine for no more than 15 seconds.
This should clear any excess fuel in case the
engine is flooded. Leave the ignition key in the RUN
position, release the accelerator pedal and repeat
the “Normal Starting” procedure.
WARNING!
If vehicle speed is above 1.2 mph (1.9 km/h),
the transmission will default to NEUTRAL until
the vehicle speed drops below 1.2 mph
(1.9 km/h). A vehicle left in the NEUTRAL
position can roll. As an added precaution, always
apply the parking brake when exiting the vehicle.
4
21_WD_OM_EN_USC_t.book Page 103
Page 107 of 340
STARTING AND OPERATING105
(Continued)
The engine oil installed in the engine at the factory
is a high-quality energy conserving type lubricant.
Oil changes should be consistent with anticipated
climate conditions under which vehicle operations
will occur. For the recommended viscosity and
quality grades see Ú
page 322.
NOTE:A new engine may consume some oil during its first
few thousand miles (kilometers) of operation. This
should be considered a normal part of the break-in
and not interpreted as a problem. Please check
your oil level with the engine oil indicator often
during the break-in period. Add oil as required.
PARKING BRAKE
Before leaving the vehicle, make sure that the
parking brake is fully applied and place the gear
selector in the PARK (P) position.
The foot operated parking brake is located below
the lower left corner of the instrument panel. To
apply the parking brake, firmly push the parking
brake pedal fully. To release the parking brake,
press the parking brake pedal a second time and
let your foot up as you feel the brake disengage.
Parking Brake
When the parking brake is applied with the ignition
switch in the ON/RUN mode, the Brake Warning
Light in the instrument cluster will illuminate.
NOTE:
When the parking brake is applied and the
transmission is placed in gear, the Brake
Warning Light will flash. If vehicle speed is
detected, a chime will sound to alert the driver.
Fully release the parking brake before
attempting to move the vehicle.
This light only shows that the parking brake is
applied. It does not show the degree of brake
application. When parking on a hill, it is important to turn the
front wheels toward the curb on a downhill grade
and away from the curb on an uphill grade. Apply
the parking brake before placing the gear selector
in PARK, otherwise the load on the transmission
locking mechanism may make it difficult to move
the gear selector out of PARK.
CAUTION!
Never use Non-Detergent Oil or Straight Mineral
Oil in the engine or damage may result.WARNING!
Never use the PARK position as a substitute
for the parking brake. Always apply the
parking brake fully when parked to guard
against vehicle movement and possible injury
or damage.
When leaving the vehicle, always remove the
key fob from the ignition and lock your vehicle.
Never leave children alone in a vehicle, or with
access to an unlocked vehicle. Allowing chil
-
dren to be in a vehicle unattended is
dangerous for a number of reasons. A child or
others could be seriously or fatally injured.
Children should be warned not to touch the
parking brake, brake pedal or the gear
selector.
When leaving the vehicle, always make sure
the keyless ignition node is in the OFF mode,
remove the key fob from the vehicle and lock
the vehicle.
4
21_WD_OM_EN_USC_t.book Page 105
Page 108 of 340
106STARTING AND OPERATING
(Continued)
(Continued)
AUTOMATIC TRANSMISSION
You must press and hold the brake pedal while
shifting out of PARK.Do not leave the key fob in or near the vehicle
or in a location accessible to children, and do
not leave the ignition of a vehicle equipped
with Keyless Enter ‘n Go™ in the ACC or
ON/RUN mode. A child could operate power
windows, other controls, or move the vehicle.
Be sure the parking brake is fully disengaged
before driving; failure to do so can lead to
brake failure and a collision.
Always fully apply the parking brake when
leaving your vehicle, or it may roll and cause
damage or injury. Also be certain to leave the
transmission in PARK. Failure to do so may
allow the vehicle to roll and cause damage or
injury.
CAUTION!
If the Brake Warning Light remains on with the
parking brake released, a brake system
malfunction is indicated. Have the brake system
serviced by an authorized dealer immediately.
WARNING!
WARNING!
Never use the PARK (P) position as a substi -
tute for the parking brake. Always apply the
parking brake fully when exiting the vehicle to
guard against vehicle movement and possible
injury or damage.
Your vehicle could move and injure you and
others if it is not in PARK. Check by trying to
move the transmission gear selector out of
PARK with the brake pedal released. Make
sure the transmission is in PARK before
exiting the vehicle.
The transmission may not engage PARK if the
vehicle is moving. Always bring the vehicle to a
complete stop before shifting to PARK, and
verify that the transmission gear position indi -
cator solidly indicates PARK without blinking.
Ensure that the vehicle is completely stopped,
and the PARK position is properly indicated,
before exiting the vehicle.
It is dangerous to shift out of PARK or
NEUTRAL (N) if the engine speed is higher
than idle speed. If your foot is not firmly
pressing the brake pedal, the vehicle could
accelerate quickly forward or in reverse. You
could lose control of the vehicle and hit
someone or something. Only shift into gear
when the engine is idling normally and your
foot is firmly pressing the brake pedal.
Unintended movement of a vehicle could
injure those in or near the vehicle. As with all
vehicles, you should never exit a vehicle while
the engine is running. Before exiting a vehicle,
always come to a complete stop, then apply
the parking brake, shift the transmission into
PARK, and turn the ignition OFF. When the
ignition is in the OFF mode, the transmission
is locked in PARK, securing the vehicle against
unwanted movement.
When exiting the vehicle, always make sure
the ignition is in the OFF mode, remove the
key fob from the vehicle, and lock the vehicle.
WARNING!
21_WD_OM_EN_USC_t.book Page 106
Page 174 of 340
172MULTIMEDIA
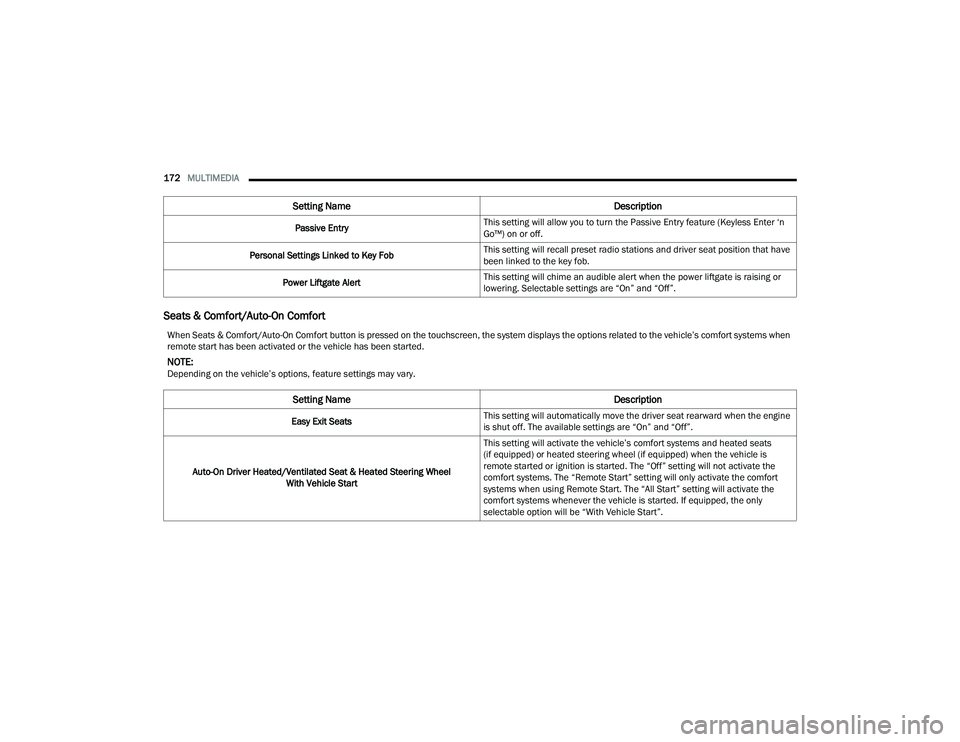
Seats & Comfort/Auto-On Comfort
Passive Entry This setting will allow you to turn the Passive Entry feature (Keyless Enter ‘n
Go™) on or off.
Personal Settings Linked to Key Fob This setting will recall preset radio stations and driver seat position that have
been linked to the key fob.
Power Liftgate Alert This setting will chime an audible alert when the power liftgate is raising or
lowering. Selectable settings are “On” and “Off”.
Setting Name
Description
When Seats & Comfort/Auto-On Comfort button is pressed on the touchscreen, the system displays the options related to the vehicle’s comfort systems when
remote start has been activated or the vehicle has been started.
NOTE:Depending on the vehicle’s options, feature settings may vary.
Setting NameDescription
Easy Exit SeatsThis setting will automatically move the driver seat rearward when the engine
is shut off. The available settings are “On” and “Off”.
Auto-On Driver Heated/Ventilated Seat & Heated Steering Wheel With Vehicle Start This setting will activate the vehicle’s comfort systems and heated seats
(if equipped) or heated steering wheel (if equipped) when the vehicle is
remote started or ignition is started. The “Off” setting will not activate the
comfort systems. The “Remote Start” setting will only activate the comfort
systems when using Remote Start. The “All Start” setting will activate the
comfort systems whenever the vehicle is started. If equipped, the only
selectable option will be “With Vehicle Start”.
21_WD_OM_EN_USC_t.book Page 172
Page 331 of 340
329
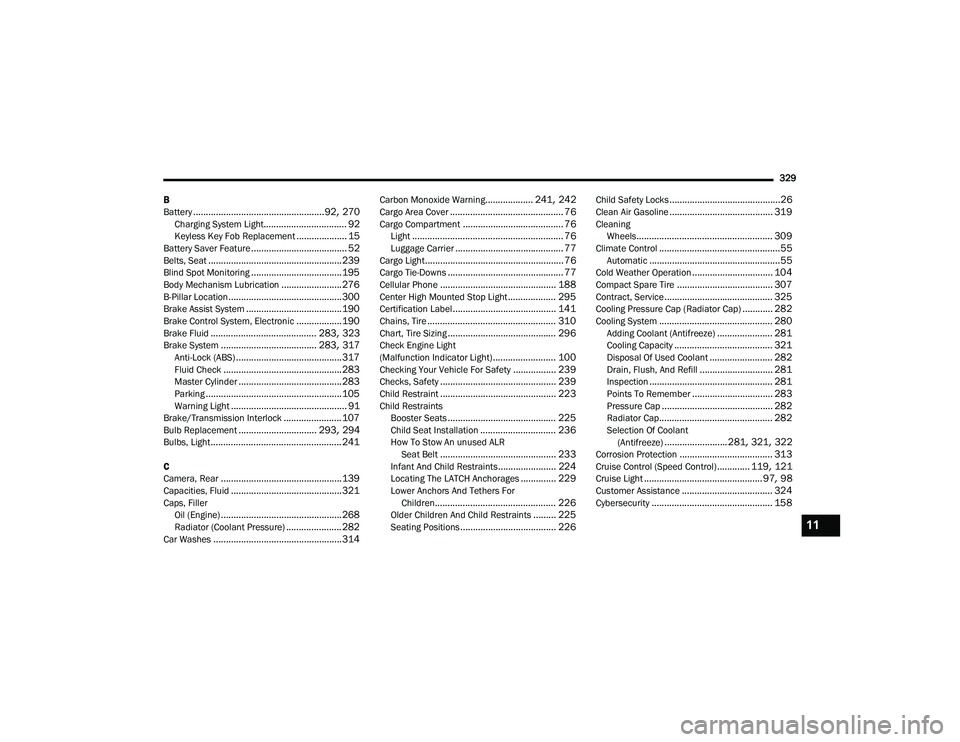
B
Battery
.................................................... 92, 270Charging System Light................................. 92Keyless Key Fob Replacement.................... 15Battery Saver Feature...................................... 52Belts, Seat..................................................... 239Blind Spot Monitoring.................................... 195Body Mechanism Lubrication........................ 276B-Pillar Location............................................. 300Brake Assist System...................................... 190Brake Control System, Electronic.................. 190Brake Fluid.......................................... 283, 323Brake System...................................... 283, 317Anti-Lock (ABS).......................................... 317Fluid Check............................................... 283Master Cylinder......................................... 283Parking...................................................... 105Warning Light.............................................. 91Brake/Transmission Interlock....................... 107Bulb Replacement............................... 293, 294Bulbs, Light.................................................... 241
C
Camera, Rear................................................ 139Capacities, Fluid............................................ 321Caps, Filler Oil (Engine)................................................ 268Radiator (Coolant Pressure)...................... 282Car Washes................................................... 314
Carbon Monoxide Warning................... 241, 242Cargo Area Cover............................................. 76Cargo Compartment........................................ 76Light............................................................ 76Luggage Carrier........................................... 77Cargo Light....................................................... 76Cargo Tie-Downs.............................................. 77Cellular Phone.............................................. 188Center High Mounted Stop Light................... 295Certification Label......................................... 141Chains, Tire................................................... 310Chart, Tire Sizing........................................... 296Check Engine Light
(Malfunction Indicator Light)......................... 100Checking Your Vehicle For Safety................. 239Checks, Safety.............................................. 239Child Restraint.............................................. 223Child RestraintsBooster Seats........................................... 225Child Seat Installation.............................. 236How To Stow An unused ALR Seat Belt.............................................. 233Infant And Child Restraints....................... 224Locating The LATCH Anchorages.............. 229Lower Anchors And Tethers For Children................................................ 226Older Children And Child Restraints......... 225Seating Positions...................................... 226
Child Safety Locks............................................26Clean Air Gasoline......................................... 319CleaningWheels...................................................... 309Climate Control................................................55Automatic....................................................55Cold Weather Operation................................ 104Compact Spare Tire...................................... 307Contract, Service........................................... 325Cooling Pressure Cap (Radiator Cap)............ 282Cooling System............................................. 280Adding Coolant (Antifreeze)...................... 281Cooling Capacity....................................... 321Disposal Of Used Coolant......................... 282Drain, Flush, And Refill............................. 281Inspection................................................. 281Points To Remember................................ 283Pressure Cap............................................ 282Radiator Cap............................................. 282Selection Of Coolant (Antifreeze)......................... 281, 321, 322Corrosion Protection..................................... 313Cruise Control (Speed Control)............. 119, 121Cruise Light............................................... 97, 98Customer Assistance.................................... 324Cybersecurity................................................ 158
11
21_WD_OM_EN_USC_t.book Page 329