tow DODGE DURANGO 2021 Owners Manual
[x] Cancel search | Manufacturer: DODGE, Model Year: 2021, Model line: DURANGO, Model: DODGE DURANGO 2021Pages: 340, PDF Size: 20.38 MB
Page 5 of 340
3
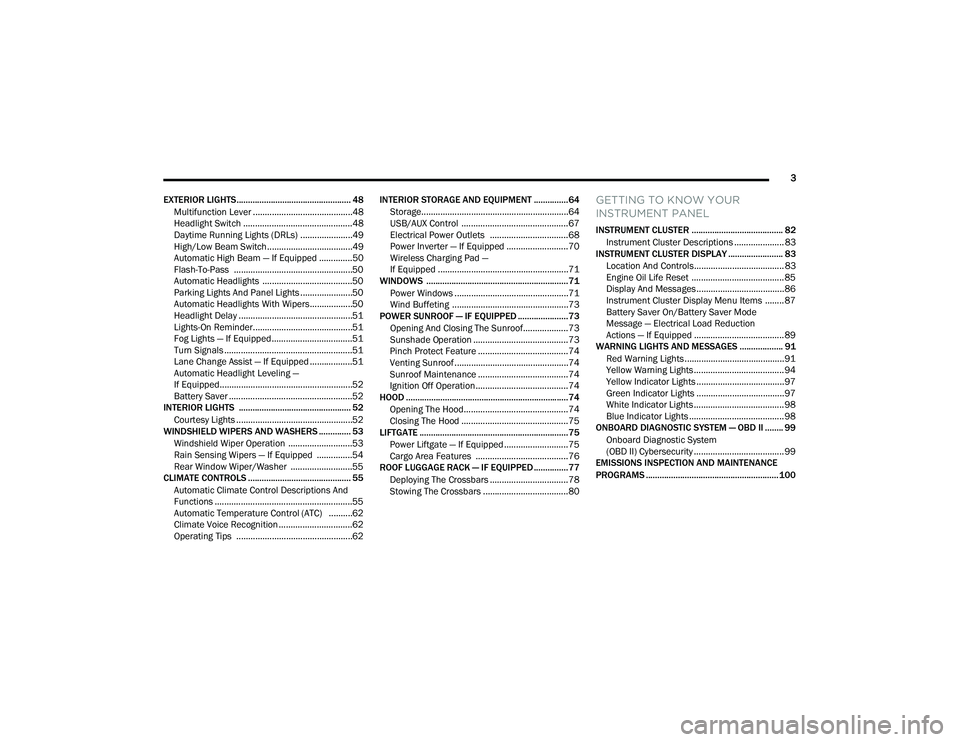
EXTERIOR LIGHTS.................................................. 48 Multifunction Lever ..........................................48
Headlight Switch ..............................................48
Daytime Running Lights (DRLs) ......................49
High/Low Beam Switch....................................49
Automatic High Beam — If Equipped ..............50
Flash-To-Pass ..................................................50
Automatic Headlights ......................................50
Parking Lights And Panel Lights ......................50
Automatic Headlights With Wipers..................50
Headlight Delay ................................................51
Lights-On Reminder..........................................51
Fog Lights — If Equipped ..................................51
Turn Signals ......................................................51
Lane Change Assist — If Equipped ..................51
Automatic Headlight Leveling —
If Equipped........................................................52
Battery Saver ....................................................52
INTERIOR LIGHTS ................................................. 52
Courtesy Lights .................................................52
WINDSHIELD WIPERS AND WASHERS .............. 53
Windshield Wiper Operation ...........................53
Rain Sensing Wipers — If Equipped ...............54
Rear Window Wiper/Washer ..........................55
CLIMATE CONTROLS ............................................. 55
Automatic Climate Control Descriptions And
Functions ..........................................................55
Automatic Temperature Control (ATC) ..........62
Climate Voice Recognition ...............................62
Operating Tips .................................................62 INTERIOR STORAGE AND EQUIPMENT ............... 64
Storage..............................................................64
USB/AUX Control .............................................67
Electrical Power Outlets .................................68
Power Inverter — If Equipped ..........................70
Wireless Charging Pad —
If Equipped .......................................................71
WINDOWS ..............................................................71
Power Windows ................................................71
Wind Buffeting .................................................73
POWER SUNROOF — IF EQUIPPED ...................... 73
Opening And Closing The Sunroof...................73
Sunshade Operation ........................................73
Pinch Protect Feature ......................................74
Venting Sunroof................................................74
Sunroof Maintenance ......................................74
Ignition Off Operation.......................................74
HOOD .......................................................................74
Opening The Hood............................................74
Closing The Hood .............................................75
LIFTGATE ................................................................. 75
Power Liftgate — If Equipped ...........................75
Cargo Area Features .......................................76
ROOF LUGGAGE RACK — IF EQUIPPED ............... 77
Deploying The Crossbars .................................78
Stowing The Crossbars ....................................80
GETTING TO KNOW YOUR
INSTRUMENT PANEL
INSTRUMENT CLUSTER ........................................ 82Instrument Cluster Descriptions ..................... 83
INSTRUMENT CLUSTER DISPLAY ........................ 83
Location And Controls...................................... 83
Engine Oil Life Reset ....................................... 85
Display And Messages ..................................... 86
Instrument Cluster Display Menu Items ........ 87
Battery Saver On/Battery Saver Mode
Message — Electrical Load Reduction
Actions — If Equipped ...................................... 89
WARNING LIGHTS AND MESSAGES ................... 91
Red Warning Lights ..........................................91
Yellow Warning Lights ...................................... 94
Yellow Indicator Lights ..................................... 97
Green Indicator Lights ..................................... 97
White Indicator Lights ...................................... 98
Blue Indicator Lights ........................................ 98
ONBOARD DIAGNOSTIC SYSTEM — OBD II ........ 99
Onboard Diagnostic System
(OBD II) Cybersecurity ...................................... 99
EMISSIONS INSPECTION AND MAINTENANCE
PROGRAMS .......................................................... 100
21_WD_OM_EN_USC_t.book Page 3
Page 6 of 340
4
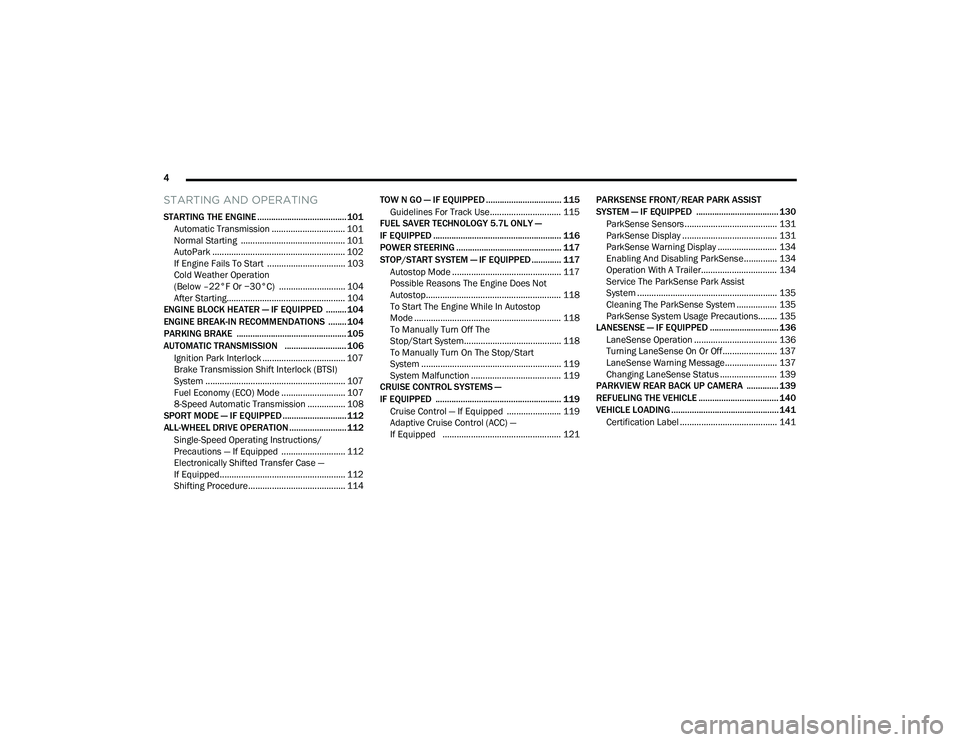
STARTING AND OPERATING
STARTING THE ENGINE ....................................... 101
Automatic Transmission ............................... 101
Normal Starting ............................................ 101
AutoPark ........................................................ 102If Engine Fails To Start ................................. 103Cold Weather Operation
(Below –22°F Or −30°C) ............................ 104
After Starting.................................................. 104
ENGINE BLOCK HEATER — IF EQUIPPED ......... 104
ENGINE BREAK-IN RECOMMENDATIONS ........ 104
PARKING BRAKE ................................................ 105
AUTOMATIC TRANSMISSION ........................... 106 Ignition Park Interlock ................................... 107Brake Transmission Shift Interlock (BTSI)
System ........................................................... 107Fuel Economy (ECO) Mode ........................... 107
8-Speed Automatic Transmission ................ 108
SPORT MODE — IF EQUIPPED ............................ 112
ALL-WHEEL DRIVE OPERATION .........................112
Single-Speed Operating Instructions/
Precautions — If Equipped ........................... 112
Electronically Shifted Transfer Case —
If Equipped..................................................... 112
Shifting Procedure......................................... 114 TOW N GO — IF EQUIPPED ................................. 115
Guidelines For Track Use.............................. 115
FUEL SAVER TECHNOLOGY 5.7L ONLY —
IF EQUIPPED ........................................................ 116
POWER STEERING .............................................. 117
STOP/START SYSTEM — IF EQUIPPED ............. 117
Autostop Mode .............................................. 117
Possible Reasons The Engine Does Not
Autostop......................................................... 118
To Start The Engine While In Autostop
Mode .............................................................. 118
To Manually Turn Off The
Stop/Start System......................................... 118
To Manually Turn On The Stop/Start
System ........................................................... 119
System Malfunction ...................................... 119
CRUISE CONTROL SYSTEMS —
IF EQUIPPED ....................................................... 119
Cruise Control — If Equipped ....................... 119
Adaptive Cruise Control (ACC) —
If Equipped .................................................. 121 PARKSENSE FRONT/REAR PARK ASSIST
SYSTEM — IF EQUIPPED .................................... 130
ParkSense Sensors ....................................... 131
ParkSense Display ........................................ 131
ParkSense Warning Display ......................... 134
Enabling And Disabling ParkSense.............. 134
Operation With A Trailer................................ 134Service The ParkSense Park Assist
System ........................................................... 135
Cleaning The ParkSense System ................. 135
ParkSense System Usage Precautions........ 135
LANESENSE — IF EQUIPPED .............................. 136
LaneSense Operation ................................... 136
Turning LaneSense On Or Off....................... 137
LaneSense Warning Message...................... 137
Changing LaneSense Status ........................ 139
PARKVIEW REAR BACK UP CAMERA .............. 139
REFUELING THE VEHICLE ................................... 140
VEHICLE LOADING ............................................... 141
Certification Label ......................................... 141
21_WD_OM_EN_USC_t.book Page 4
Page 7 of 340
5
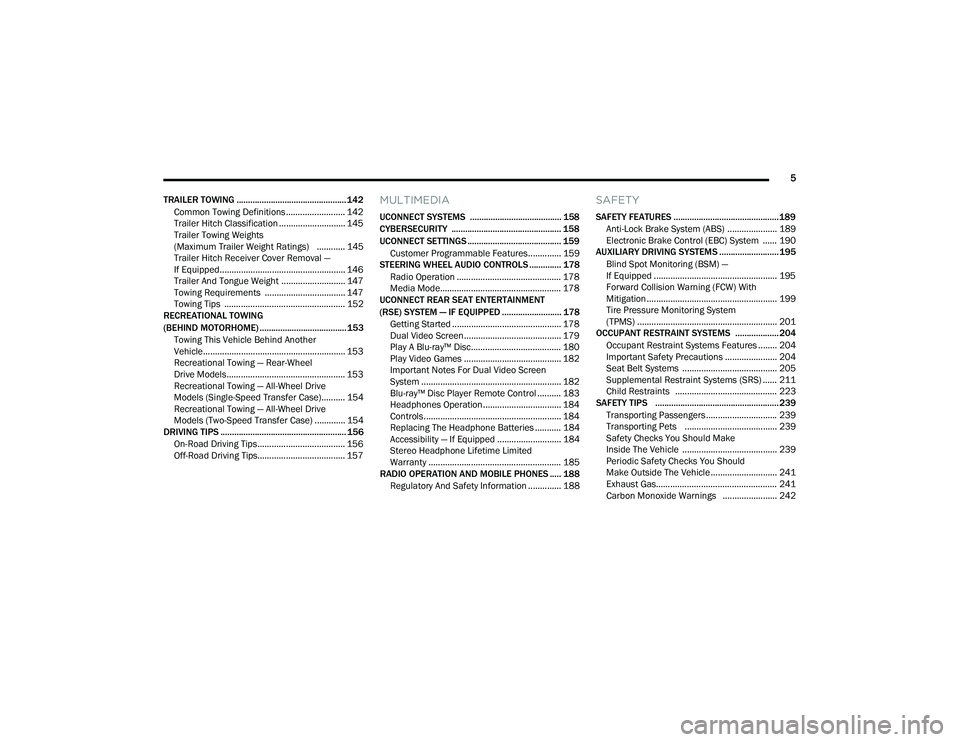
TRAILER TOWING ................................................ 142 Common Towing Definitions ......................... 142Trailer Hitch Classification ............................ 145
Trailer Towing Weights
(Maximum Trailer Weight Ratings) ............ 145Trailer Hitch Receiver Cover Removal —
If Equipped..................................................... 146
Trailer And Tongue Weight ........................... 147
Towing Requirements .................................. 147
Towing Tips ................................................... 152
RECREATIONAL TOWING
(BEHIND MOTORHOME) ...................................... 153
Towing This Vehicle Behind Another
Vehicle............................................................ 153
Recreational Towing — Rear-Wheel
Drive Models.................................................. 153
Recreational Towing — All-Wheel Drive
Models (Single-Speed Transfer Case).......... 154
Recreational Towing — All-Wheel Drive
Models (Two-Speed Transfer Case) ............. 154
DRIVING TIPS ....................................................... 156
On-Road Driving Tips..................................... 156
Off-Road Driving Tips..................................... 157
MULTIMEDIA
UCONNECT SYSTEMS ........................................ 158
CYBERSECURITY ................................................ 158
UCONNECT SETTINGS ......................................... 159Customer Programmable Features.............. 159
STEERING WHEEL AUDIO CONTROLS .............. 178
Radio Operation ............................................ 178
Media Mode................................................... 178
UCONNECT REAR SEAT ENTERTAINMENT
(RSE) SYSTEM — IF EQUIPPED .......................... 178
Getting Started .............................................. 178
Dual Video Screen......................................... 179
Play A Blu-ray™ Disc...................................... 180
Play Video Games ......................................... 182
Important Notes For Dual Video Screen
System ........................................................... 182
Blu-ray™ Disc Player Remote Control .......... 183
Headphones Operation................................. 184
Controls.......................................................... 184Replacing The Headphone Batteries ........... 184Accessibility — If Equipped ........................... 184Stereo Headphone Lifetime Limited
Warranty ........................................................ 185
RADIO OPERATION AND MOBILE PHONES ..... 188
Regulatory And Safety Information .............. 188
SAFETY
SAFETY FEATURES .............................................. 189 Anti-Lock Brake System (ABS) ..................... 189Electronic Brake Control (EBC) System ...... 190
AUXILIARY DRIVING SYSTEMS .......................... 195
Blind Spot Monitoring (BSM) —
If Equipped .................................................... 195
Forward Collision Warning (FCW) With
Mitigation ....................................................... 199Tire Pressure Monitoring System
(TPMS) ........................................................... 201
OCCUPANT RESTRAINT SYSTEMS ................... 204
Occupant Restraint Systems Features ........ 204Important Safety Precautions ...................... 204
Seat Belt Systems ........................................ 205
Supplemental Restraint Systems (SRS) ...... 211Child Restraints ........................................... 223
SAFETY TIPS ...................................................... 239
Transporting Passengers.............................. 239
Transporting Pets ....................................... 239
Safety Checks You Should Make
Inside The Vehicle ........................................ 239
Periodic Safety Checks You Should
Make Outside The Vehicle ............................ 241
Exhaust Gas................................................... 241
Carbon Monoxide Warnings ....................... 242
21_WD_OM_EN_USC_t.book Page 5
Page 8 of 340
6
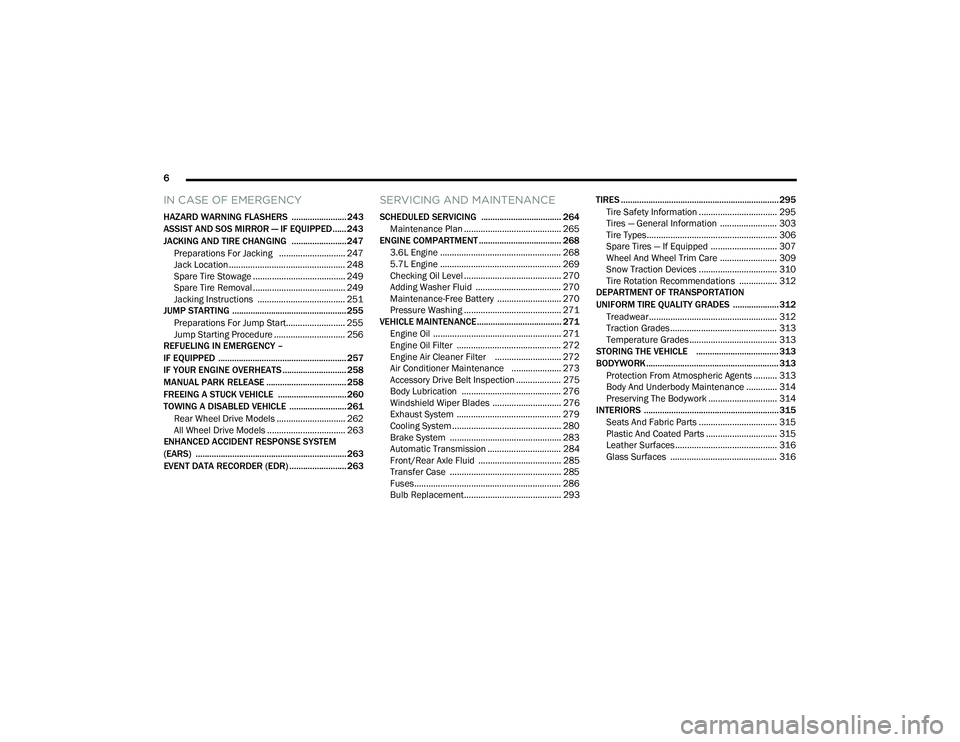
IN CASE OF EMERGENCY
HAZARD WARNING FLASHERS ........................ 243
ASSIST AND SOS MIRROR — IF EQUIPPED...... 243
JACKING AND TIRE CHANGING ........................ 247 Preparations For Jacking ............................ 247
Jack Location ................................................. 248
Spare Tire Stowage ....................................... 249
Spare Tire Removal ....................................... 249
Jacking Instructions ..................................... 251
JUMP STARTING .................................................. 255
Preparations For Jump Start......................... 255Jump Starting Procedure .............................. 256
REFUELING IN EMERGENCY –
IF EQUIPPED ........................................................ 257
IF YOUR ENGINE OVERHEATS ............................ 258
MANUAL PARK RELEASE ................................... 258
FREEING A STUCK VEHICLE .............................. 260
TOWING A DISABLED VEHICLE .........................261
Rear Wheel Drive Models ............................. 262
All Wheel Drive Models ................................. 263
ENHANCED ACCIDENT RESPONSE SYSTEM
(EARS) .................................................................. 263
EVENT DATA RECORDER (EDR) ......................... 263
SERVICING AND MAINTENANCE
SCHEDULED SERVICING ................................... 264
Maintenance Plan ......................................... 265
ENGINE COMPARTMENT .................................... 268
3.6L Engine ................................................... 268
5.7L Engine ................................................... 269
Checking Oil Level ......................................... 270
Adding Washer Fluid .................................... 270
Maintenance-Free Battery ........................... 270Pressure Washing ......................................... 271
VEHICLE MAINTENANCE..................................... 271
Engine Oil ...................................................... 271
Engine Oil Filter ............................................ 272
Engine Air Cleaner Filter ............................ 272
Air Conditioner Maintenance ..................... 273
Accessory Drive Belt Inspection ................... 275Body Lubrication .......................................... 276
Windshield Wiper Blades ............................. 276
Exhaust System ............................................ 279
Cooling System .............................................. 280
Brake System ............................................... 283
Automatic Transmission ............................... 284
Front/Rear Axle Fluid ................................... 285Transfer Case ............................................... 285
Fuses.............................................................. 286
Bulb Replacement......................................... 293 TIRES ..................................................................... 295
Tire Safety Information ................................. 295
Tires — General Information ........................ 303Tire Types....................................................... 306Spare Tires — If Equipped ............................ 307
Wheel And Wheel Trim Care ........................ 309Snow Traction Devices ................................. 310
Tire Rotation Recommendations ................ 312
DEPARTMENT OF TRANSPORTATION
UNIFORM TIRE QUALITY GRADES .................... 312
Treadwear...................................................... 312
Traction Grades ............................................. 313Temperature Grades..................................... 313
STORING THE VEHICLE .................................... 313
BODYWORK .......................................................... 313 Protection From Atmospheric Agents .......... 313
Body And Underbody Maintenance ............. 314
Preserving The Bodywork ............................. 314
INTERIORS ........................................................... 315
Seats And Fabric Parts ................................. 315
Plastic And Coated Parts .............................. 315
Leather Surfaces........................................... 316
Glass Surfaces ............................................. 316
21_WD_OM_EN_USC_t.book Page 6
Page 15 of 340
13
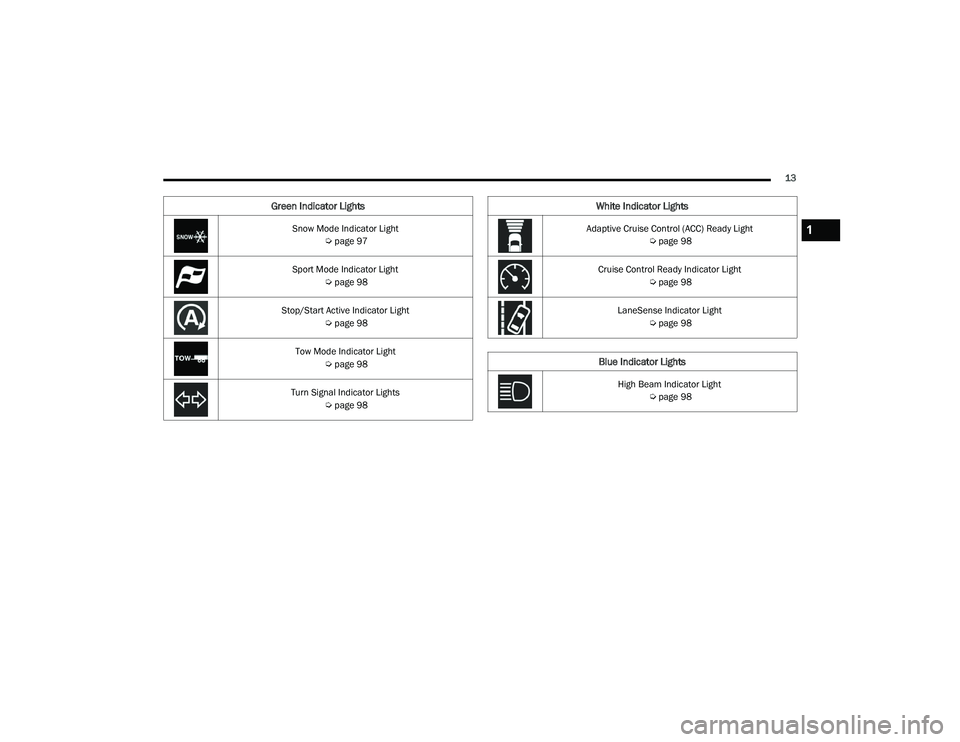
Snow Mode Indicator Light Úpage 97
Sport Mode Indicator Light Úpage 98
Stop/Start Active Indicator Light Úpage 98
Tow Mode Indicator Light Úpage 98
Turn Signal Indicator Lights Úpage 98
Green Indicator LightsWhite Indicator Lights
Adaptive Cruise Control (ACC) Ready Light
Úpage 98
Cruise Control Ready Indicator Light Úpage 98
LaneSense Indicator Light Úpage 98
Blue Indicator Lights
High Beam Indicator Light
Úpage 98
1
21_WD_OM_EN_USC_t.book Page 13
Page 29 of 340
GETTING TO KNOW YOUR VEHICLE27
STEERING WHEEL
MANUAL TILT/TELESCOPING STEERING
C
OLUMN — IF EQUIPPED
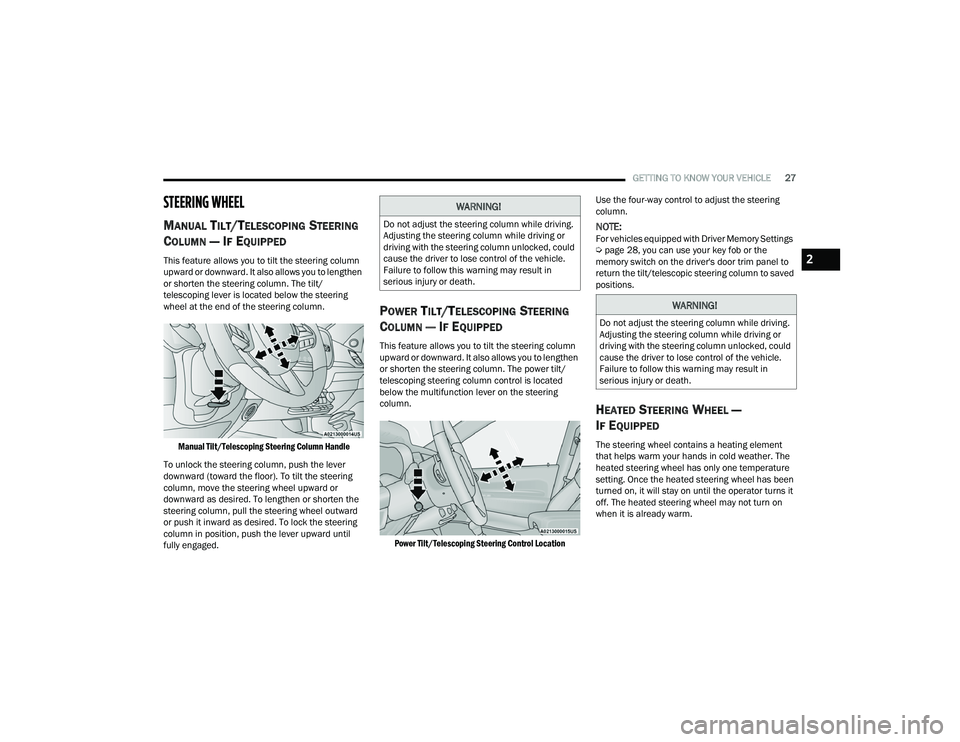
This feature allows you to tilt the steering column
upward or downward. It also allows you to lengthen
or shorten the steering column. The tilt/
telescoping lever is located below the steering
wheel at the end of the steering column.
Manual Tilt/Telescoping Steering Column Handle
To unlock the steering column, push the lever
downward (toward the floor). To tilt the steering
column, move the steering wheel upward or
downward as desired. To lengthen or shorten the
steering column, pull the steering wheel outward
or push it inward as desired. To lock the steering
column in position, push the lever upward until
fully engaged.
POWER TILT/TELESCOPING STEERING
C
OLUMN — IF EQUIPPED
This feature allows you to tilt the steering column
upward or downward. It also allows you to lengthen
or shorten the steering column. The power tilt/
telescoping steering column control is located
below the multifunction lever on the steering
column.
Power Tilt/Telescoping Steering Control Location
Use the four-way control to adjust the steering
column.
NOTE:For vehicles equipped with Driver Memory Settings
Ú
page 28, you can use your key fob or the
memory switch on the driver's door trim panel to
return the tilt/telescopic steering column to saved
positions.
HEATED STEERING WHEEL —
I
F EQUIPPED
The steering wheel contains a heating element
that helps warm your hands in cold weather. The
heated steering wheel has only one temperature
setting. Once the heated steering wheel has been
turned on, it will stay on until the operator turns it
off. The heated steering wheel may not turn on
when it is already warm.
WARNING!
Do not adjust the steering column while driving.
Adjusting the steering column while driving or
driving with the steering column unlocked, could
cause the driver to lose control of the vehicle.
Failure to follow this warning may result in
serious injury or death.
WARNING!
Do not adjust the steering column while driving.
Adjusting the steering column while driving or
driving with the steering column unlocked, could
cause the driver to lose control of the vehicle.
Failure to follow this warning may result in
serious injury or death.
2
21_WD_OM_EN_USC_t.book Page 27
Page 37 of 340
GETTING TO KNOW YOUR VEHICLE35
NOTE:The second row seats must be in their full upright
position, folded flat or tumbled when folding the
third row seats.
To raise the seat, pull the seat toward you using
the strap located on the back of the seat. Then lift
the head restraint until it locks into place.
NOTE:You may experience deformation in the seat
cushion from the seat belt buckles if the seats are
left folded for an extended period of time. This is
normal and by simply unfolding the seats to the
open position, over time the seat cushion will
return to its normal shape.
POWER ADJUSTMENT (FRONT SEATS) —
I
F EQUIPPED
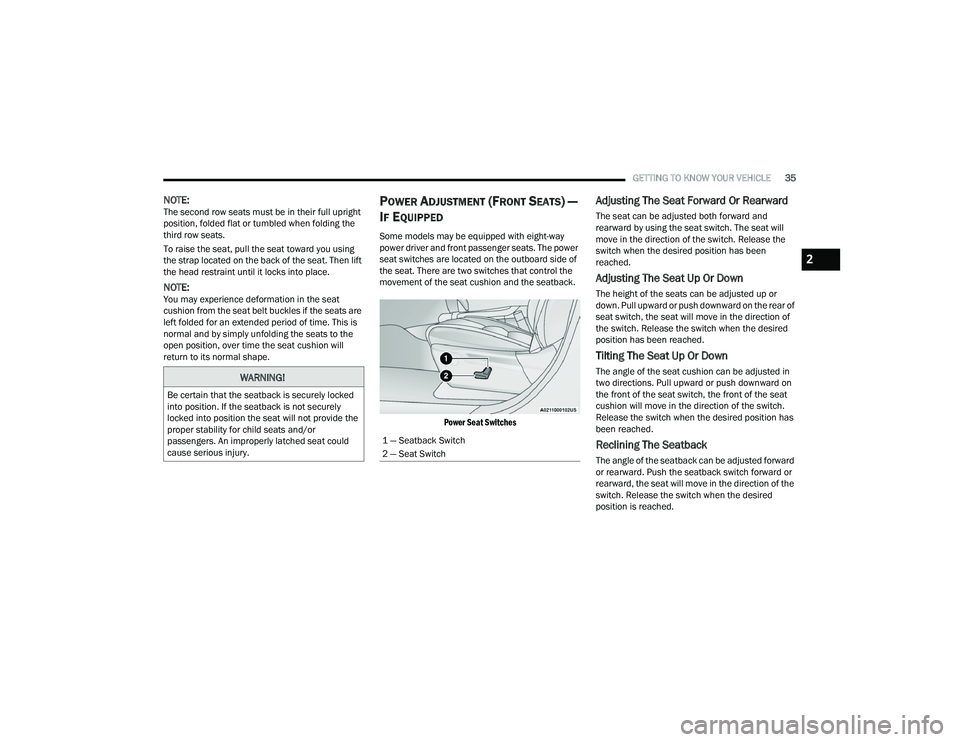
Some models may be equipped with eight-way
power driver and front passenger seats. The power
seat switches are located on the outboard side of
the seat. There are two switches that control the
movement of the seat cushion and the seatback.
Power Seat Switches
Adjusting The Seat Forward Or Rearward
The seat can be adjusted both forward and
rearward by using the seat switch. The seat will
move in the direction of the switch. Release the
switch when the desired position has been
reached.
Adjusting The Seat Up Or Down
The height of the seats can be adjusted up or
down. Pull upward or push downward on the rear of
seat switch, the seat will move in the direction of
the switch. Release the switch when the desired
position has been reached.
Tilting The Seat Up Or Down
The angle of the seat cushion can be adjusted in
two directions. Pull upward or push downward on
the front of the seat switch, the front of the seat
cushion will move in the direction of the switch.
Release the switch when the desired position has
been reached.
Reclining The Seatback
The angle of the seatback can be adjusted forward
or rearward. Push the seatback switch forward or
rearward, the seat will move in the direction of the
switch. Release the switch when the desired
position is reached.
WARNING!
Be certain that the seatback is securely locked
into position. If the seatback is not securely
locked into position the seat will not provide the
proper stability for child seats and/or
passengers. An improperly latched seat could
cause serious injury.
1 — Seatback Switch
2 — Seat Switch
2
21_WD_OM_EN_USC_t.book Page 35
Page 41 of 340
GETTING TO KNOW YOUR VEHICLE39
HEAD RESTRAINTS
Head restraints are designed to reduce the risk of
injury by restricting head movement in the event of
a rear impact. Head restraints should be adjusted
so that the top of the head restraint is located
above the top of your ear.
Front Head Restraints
Your vehicle is equipped with front four-way driver
and passenger head restraints.
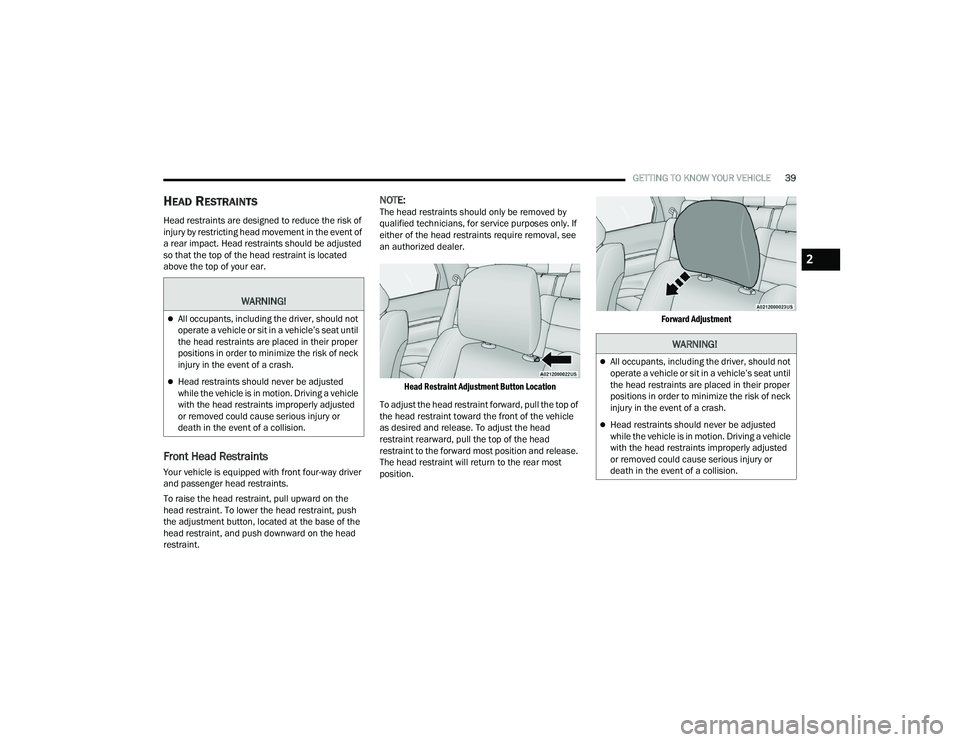
To raise the head restraint, pull upward on the
head restraint. To lower the head restraint, push
the adjustment button, located at the base of the
head restraint, and push downward on the head
restraint.
NOTE:The head restraints should only be removed by
qualified technicians, for service purposes only. If
either of the head restraints require removal, see
an authorized dealer.
Head Restraint Adjustment Button Location
To adjust the head restraint forward, pull the top of
the head restraint toward the front of the vehicle
as desired and release. To adjust the head
restraint rearward, pull the top of the head
restraint to the forward most position and release.
The head restraint will return to the rear most
position.
Forward Adjustment
WARNING!
All occupants, including the driver, should not
operate a vehicle or sit in a vehicle’s seat until
the head restraints are placed in their proper
positions in order to minimize the risk of neck
injury in the event of a crash.
Head restraints should never be adjusted
while the vehicle is in motion. Driving a vehicle
with the head restraints improperly adjusted
or removed could cause serious injury or
death in the event of a collision.
2
21_WD_OM_EN_USC_t.book Page 39
Page 43 of 340
GETTING TO KNOW YOUR VEHICLE41
Power Folding Third Row Head Restraints
For improved visibility when in REVERSE, the third
row head restraints can be folded using the
Uconnect system.
Press the “Controls” button located on the bottom
of the Uconnect display.
Press the Headrest Fold button to power
fold the third row head restraints.
NOTE:
The head restraints can only be folded down -
ward using the Headrest Fold button. The head
restraints must be raised manually when occu -
pying the third row.
Do not fold if there are passengers seated in the
third row seats.
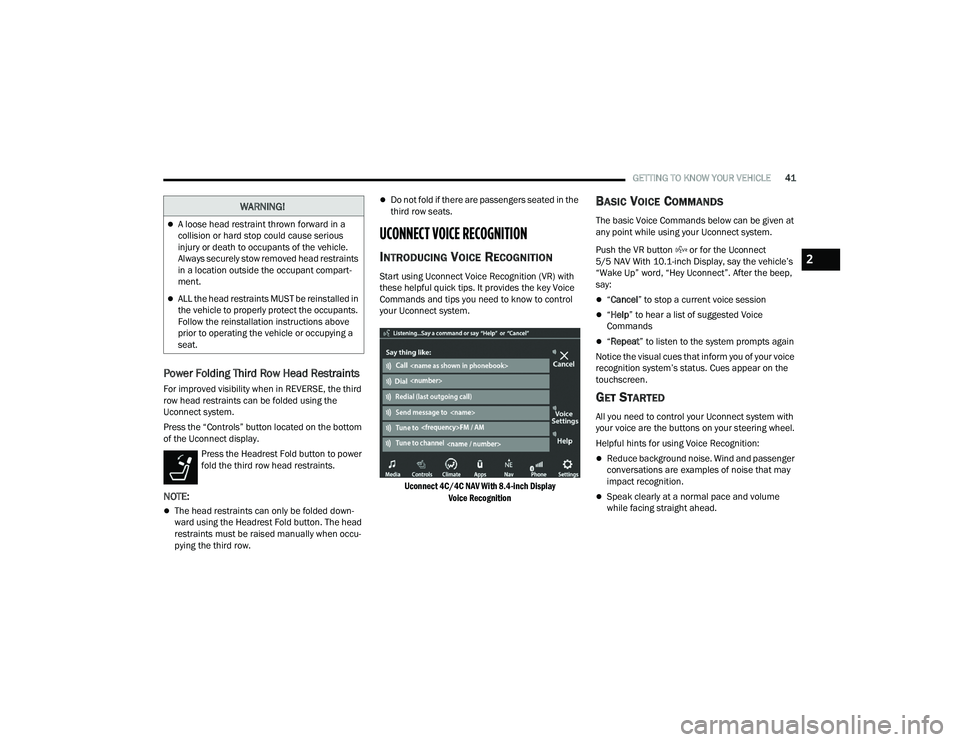
UCONNECT VOICE RECOGNITION
INTRODUCING VOICE RECOGNITION
Start using Uconnect Voice Recognition (VR) with
these helpful quick tips. It provides the key Voice
Commands and tips you need to know to control
your Uconnect system.
Uconnect 4C/4C NAV With 8.4-inch Display Voice Recognition
BASIC VOICE COMMANDS
The basic Voice Commands below can be given at
any point while using your Uconnect system.
Push the VR button or for the Uconnect
5/5 NAV With 10.1-inch Display, say the vehicle’s
“Wake Up” word, “Hey Uconnect”. After the beep,
say:
“Cancel ” to stop a current voice session
“Help ” to hear a list of suggested Voice
Commands
“ Repeat ” to listen to the system prompts again
Notice the visual cues that inform you of your voice
recognition system’s status. Cues appear on the
touchscreen.
GET STARTED
All you need to control your Uconnect system with
your voice are the buttons on your steering wheel.
Helpful hints for using Voice Recognition:
Reduce background noise. Wind and passenger
conversations are examples of noise that may
impact recognition.
Speak clearly at a normal pace and volume
while facing straight ahead.
WARNING!
A loose head restraint thrown forward in a
collision or hard stop could cause serious
injury or death to occupants of the vehicle.
Always securely stow removed head restraints
in a location outside the occupant compart -
ment.
ALL the head restraints MUST be reinstalled in
the vehicle to properly protect the occupants.
Follow the reinstallation instructions above
prior to operating the vehicle or occupying a
seat.
2
21_WD_OM_EN_USC_t.book Page 41
Page 44 of 340
42GETTING TO KNOW YOUR VEHICLE
Each time you give a Voice Command, first push
the VR button, wait until after the beep, then say
your Voice Command. You can also say the
vehicle “Wake Up” word and state your
command. Some examples of “Wake Up” words
include “Hey Uconnect” or “Hey Dodge”.
A passenger can press the VR button shortcut
on the radio status bar to also issue a
command.
You can interrupt the help message or system
prompts by pushing the VR button and saying a
Voice Command from the current category.
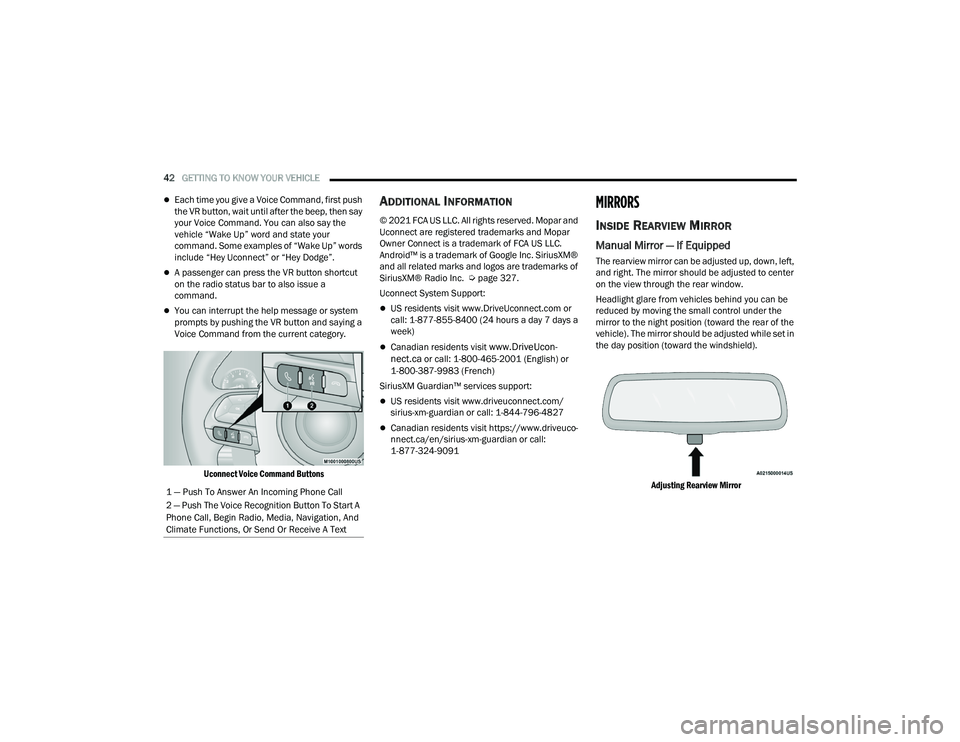
Uconnect Voice Command Buttons
ADDITIONAL INFORMATION
© 2021 FCA US LLC. All rights reserved. Mopar and
Uconnect are registered trademarks and Mopar
Owner Connect is a trademark of FCA US LLC.
Android™ is a trademark of Google Inc. SiriusXM®
and all related marks and logos are trademarks of
SiriusXM® Radio Inc. Ú page 327.
Uconnect System Support:
US residents visit www.DriveUconnect.com or
call: 1-877-855-8400 (24 hours a day 7 days a
week)
Canadian residents visit www.DriveUcon -
nect.ca or call: 1-800-465-2001 (English) or
1-800-387-9983 (French)
SiriusXM Guardian™ services support:
US residents visit www.driveuconnect.com/
sirius-xm-guardian or call: 1-844-796-4827
Canadian residents visit https://www.driveuco -
nnect.ca/en/sirius-xm-guardian or call:
1-877-324-9091
MIRRORS
INSIDE REARVIEW MIRROR
Manual Mirror — If Equipped
The rearview mirror can be adjusted up, down, left,
and right. The mirror should be adjusted to center
on the view through the rear window.
Headlight glare from vehicles behind you can be
reduced by moving the small control under the
mirror to the night position (toward the rear of the
vehicle). The mirror should be adjusted while set in
the day position (toward the windshield).
Adjusting Rearview Mirror
1 — Push To Answer An Incoming Phone Call
2 — Push The Voice Recognition Button To Start A
Phone Call, Begin Radio, Media, Navigation, And
Climate Functions, Or Send Or Receive A Text
21_WD_OM_EN_USC_t.book Page 42