open hood DODGE DURANGO 2022 Owners Manual
[x] Cancel search | Manufacturer: DODGE, Model Year: 2022, Model line: DURANGO, Model: DODGE DURANGO 2022Pages: 332, PDF Size: 19.82 MB
Page 5 of 332
3
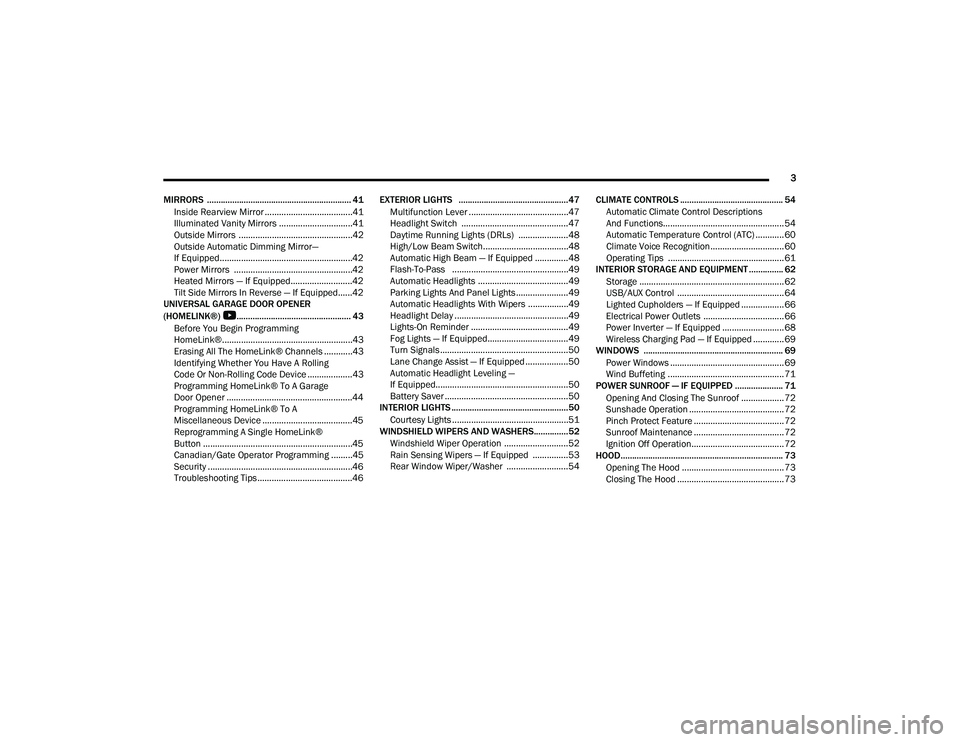
MIRRORS ............................................................... 41 Inside Rearview Mirror .....................................41
Illuminated Vanity Mirrors ...............................41
Outside Mirrors ................................................42
Outside Automatic Dimming Mirror—
If Equipped........................................................42
Power Mirrors ..................................................42
Heated Mirrors — If Equipped..........................42
Tilt Side Mirrors In Reverse — If Equipped......42
UNIVERSAL GARAGE DOOR OPENER
(HOMELINK®)
b
.................................................. 43
Before You Begin Programming
HomeLink®.......................................................43
Erasing All The HomeLink® Channels ............43
Identifying Whether You Have A Rolling
Code Or Non-Rolling Code Device ...................43
Programming HomeLink® To A Garage
Door Opener .....................................................44
Programming HomeLink® To A
Miscellaneous Device ......................................45
Reprogramming A Single HomeLink®
Button ...............................................................45
Canadian/Gate Operator Programming .........45
Security .............................................................46
Troubleshooting Tips ........................................46 EXTERIOR LIGHTS ................................................47
Multifunction Lever ..........................................47
Headlight Switch .............................................47
Daytime Running Lights (DRLs) .....................48
High/Low Beam Switch....................................48
Automatic High Beam — If Equipped ..............48
Flash-To-Pass .................................................49
Automatic Headlights ......................................49
Parking Lights And Panel Lights ......................49
Automatic Headlights With Wipers .................49
Headlight Delay ................................................49
Lights-On Reminder .........................................49
Fog Lights — If Equipped..................................49
Turn Signals ......................................................50
Lane Change Assist — If Equipped ..................50
Automatic Headlight Leveling —
If Equipped........................................................50
Battery Saver ....................................................50
INTERIOR LIGHTS ................................................... 50
Courtesy Lights .................................................51
WINDSHIELD WIPERS AND WASHERS............... 52
Windshield Wiper Operation ...........................52
Rain Sensing Wipers — If Equipped ...............53
Rear Window Wiper/Washer ..........................54 CLIMATE CONTROLS ............................................. 54
Automatic Climate Control Descriptions
And Functions................................................... 54
Automatic Temperature Control (ATC) ............ 60
Climate Voice Recognition............................... 60
Operating Tips .................................................61
INTERIOR STORAGE AND EQUIPMENT ............... 62
Storage ............................................................. 62
USB/AUX Control ............................................. 64
Lighted Cupholders — If Equipped .................. 66
Electrical Power Outlets .................................. 66
Power Inverter — If Equipped .......................... 68
Wireless Charging Pad — If Equipped ............. 69
WINDOWS ............................................................. 69
Power Windows ................................................ 69
Wind Buffeting .................................................71
POWER SUNROOF — IF EQUIPPED ..................... 71
Opening And Closing The Sunroof .................. 72
Sunshade Operation ........................................ 72
Pinch Protect Feature ...................................... 72
Sunroof Maintenance ...................................... 72
Ignition Off Operation....................................... 72
HOOD....................................................................... 73
Opening The Hood ........................................... 73
Closing The Hood ............................................. 73
22_WD_OM_EN_USC_t.book Page 3
Page 12 of 332
10
VEHICLE MODIFICATIONS/ALTERATIONS
SYMBOL GLOSSARY
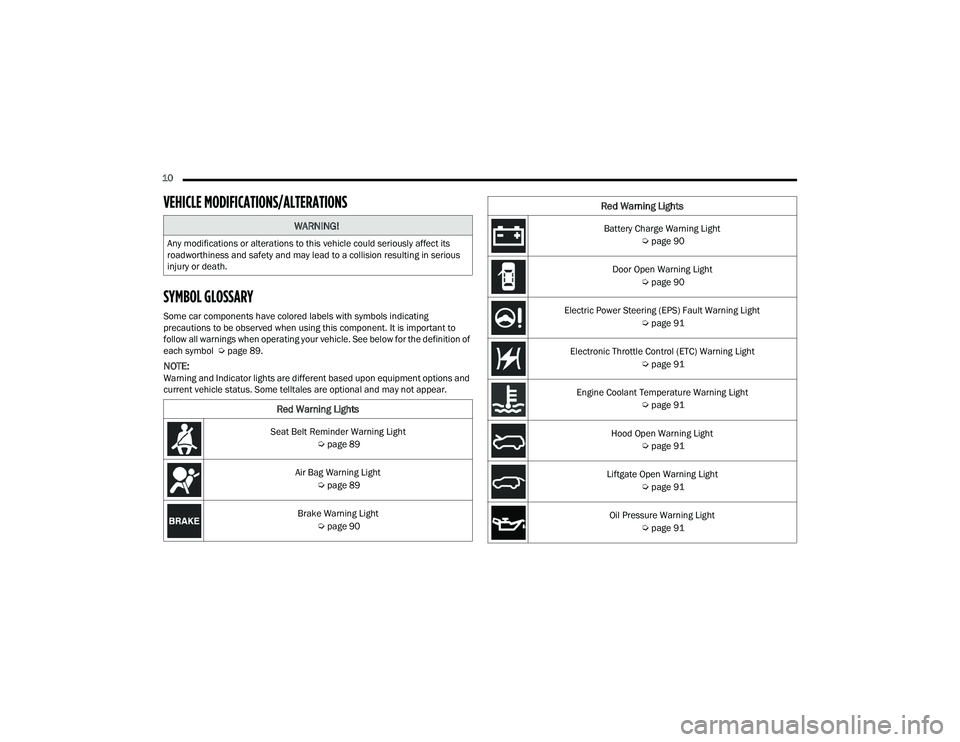
Some car components have colored labels with symbols indicating
precautions to be observed when using this component. It is important to
follow all warnings when operating your vehicle. See below for the definition of
each symbol Úpage 89.
NOTE:Warning and Indicator lights are different based upon equipment options and
current vehicle status. Some telltales are optional and may not appear.
WARNING!
Any modifications or alterations to this vehicle could seriously affect its
roadworthiness and safety and may lead to a collision resulting in serious
injury or death.
Red Warning Lights
Seat Belt Reminder Warning Light
Úpage 89
Air Bag Warning Light Úpage 89
Brake Warning Light Úpage 90
Battery Charge Warning Light
Úpage 90
Door Open Warning Light Úpage 90
Electric Power Steering (EPS) Fault Warning Light Úpage 91
Electronic Throttle Control (ETC) Warning Light Úpage 91
Engine Coolant Temperature Warning Light Úpage 91
Hood Open Warning Light Úpage 91
Liftgate Open Warning Light Úpage 91
Oil Pressure Warning Light Úpage 91
Red Warning Lights
22_WD_OM_EN_USC_t.book Page 10
Page 23 of 332
GETTING TO KNOW YOUR VEHICLE21
REMOTE START CANCEL MESSAGE —
I
F EQUIPPED
The following messages will display in the
instrument cluster display if the vehicle fails to
remote start or exits Remote Start prematurely:
Remote Start Cancelled — Door Open
Remote Start Cancelled — Hood Open
Remote Start Cancelled — Fuel Low
Remote Start Cancelled — Liftgate Open
Remote Start Cancelled — Timer Expired
Remote Start Disabled — Start Vehicle To Reset
The instrument cluster display message stays
active until the ignition is placed in the ON/RUN
position.
VEHICLE SECURITY SYSTEM — IF EQUIPPED
The Vehicle Security system monitors the vehicle
doors for unauthorized entry and the Keyless
Enter ‘n Go™ Ignition for unauthorized operation.
While the Vehicle Security system is armed, interior
switches for door locks and liftgate release are
disabled. If something triggers the alarm, the
Vehicle Security system will provide the following
audible and visible signals:
The horn will pulse
The parking lights and/or turn signals will flash
The Vehicle Security Light in the instrument
cluster will flash
TO ARM THE SYSTEM
Follow these steps to arm the Vehicle Security
system:
1. Make sure the vehicle’s ignition is placed in the OFF position.
For vehicles equipped with Keyless Entry,
make sure the vehicle’s keyless ignition
system is OFF.
2. Perform one of the following methods to lock the vehicle:
Push lock on the interior power door lock
switch with the driver and/or passenger
door open.
Push the lock button on the exterior Passive
Entry door handle with a valid key fob avail -
able in the same exterior zone Ú page 23.
Push the lock button on the key fob.
3. If any doors are open, close them.
TO DISARM THE SYSTEM
The Vehicle Security system can be disarmed using
any of the following methods:
Push the unlock button on the key fob.
Grab the Passive Entry unlock door handle
(if equipped) Ú page 23.
Cycle the vehicle ignition system out of the
OFF position.
NOTE:
The driver's door key cylinder cannot arm or
disarm the Vehicle Security system. Use of the
door key cylinder when the alarm is armed will
sound the alarm when the door is opened.
The Vehicle Security system remains armed
when the power liftgate is opened using the
liftgate button on the key fob. If someone enters
the vehicle through the opened liftgate, then
opens any door from the inside, the alarm will
sound.
If Passive Entry (if equipped) is used to unlock
the liftgate, the Vehicle Security system is
disarmed and the rest of the vehicle doors will
remain locked unless all doors are set to unlock
on first press within Uconnect Settings.
When the Vehicle Security system is armed, the
interior power door lock switches will not unlock
the doors.
2
22_WD_OM_EN_USC_t.book Page 21
Page 75 of 332
GETTING TO KNOW YOUR VEHICLE73
HOOD
OPENING THE HOOD
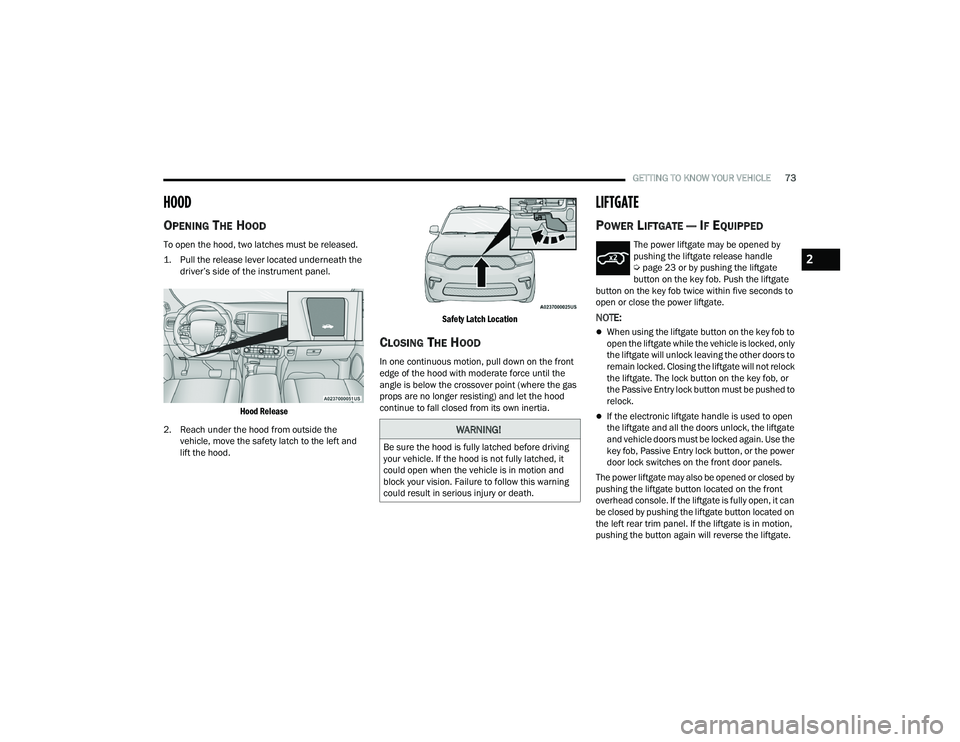
To open the hood, two latches must be released.
1. Pull the release lever located underneath the
driver’s side of the instrument panel.
Hood Release
2. Reach under the hood from outside the vehicle, move the safety latch to the left and
lift the hood.
Safety Latch Location
CLOSING THE HOOD
In one continuous motion, pull down on the front
edge of the hood with moderate force until the
angle is below the crossover point (where the gas
props are no longer resisting) and let the hood
continue to fall closed from its own inertia.
LIFTGATE
POWER LIFTGATE — IF EQUIPPED
The power liftgate may be opened by
pushing the liftgate release handle
Ú
page 23 or by pushing the liftgate
button on the key fob. Push the liftgate
button on the key fob twice within five seconds to
open or close the power liftgate.
NOTE:
When using the liftgate button on the key fob to
open the liftgate while the vehicle is locked, only
the liftgate will unlock leaving the other doors to
remain locked. Closing the liftgate will not relock
the liftgate. The lock button on the key fob, or
the Passive Entry lock button must be pushed to
relock.
If the electronic liftgate handle is used to open
the liftgate and all the doors unlock, the liftgate
and vehicle doors must be locked again. Use the
key fob, Passive Entry lock button, or the power
door lock switches on the front door panels.
The power liftgate may also be opened or closed by
pushing the liftgate button located on the front
overhead console. If the liftgate is fully open, it can
be closed by pushing the liftgate button located on
the left rear trim panel. If the liftgate is in motion,
pushing the button again will reverse the liftgate.
WARNING!
Be sure the hood is fully latched before driving
your vehicle. If the hood is not fully latched, it
could open when the vehicle is in motion and
block your vision. Failure to follow this warning
could result in serious injury or death.
2
22_WD_OM_EN_USC_t.book Page 73
Page 87 of 332
GETTING TO KNOW YOUR INSTRUMENT PANEL85
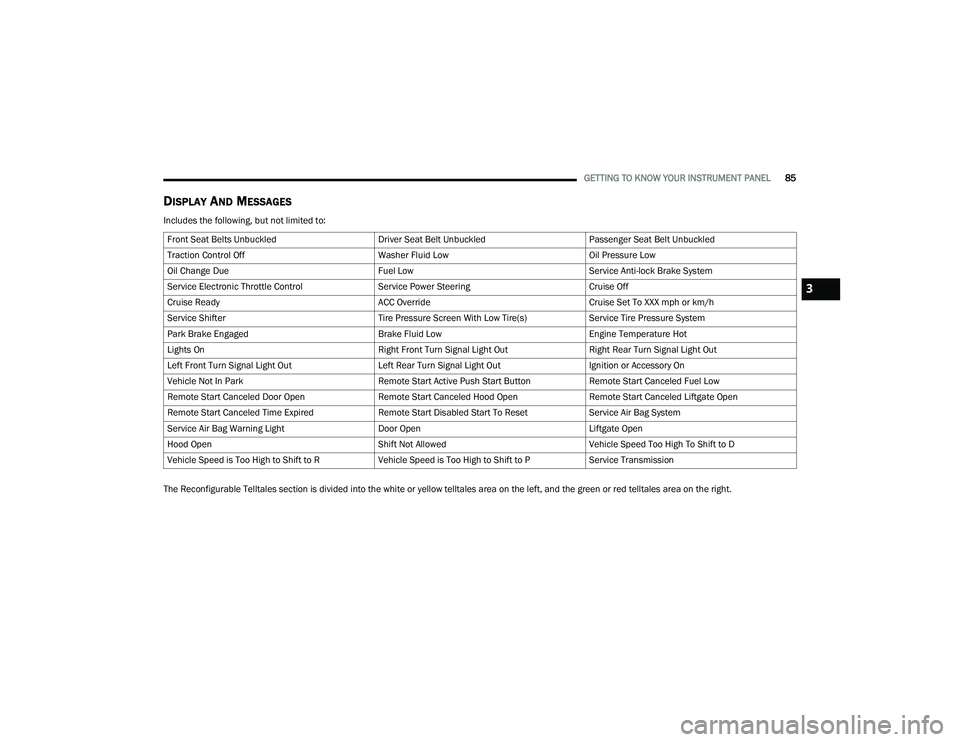
DISPLAY AND MESSAGES
Includes the following, but not limited to:
The Reconfigurable Telltales section is divided into the white or yellow telltales area on the left, and the green or red telltales area on the right.Front Seat Belts Unbuckled
Driver Seat Belt UnbuckledPassenger Seat Belt Unbuckled
Traction Control Off Washer Fluid LowOil Pressure Low
Oil Change Due Fuel LowService Anti-lock Brake System
Service Electronic Throttle Control Service Power SteeringCruise Off
Cruise Ready ACC OverrideCruise Set To XXX mph or km/h
Service Shifter Tire Pressure Screen With Low Tire(s)Service Tire Pressure System
Park Brake Engaged Brake Fluid LowEngine Temperature Hot
Lights On Right Front Turn Signal Light OutRight Rear Turn Signal Light Out
Left Front Turn Signal Light Out Left Rear Turn Signal Light OutIgnition or Accessory On
Vehicle Not In Park Remote Start Active Push Start ButtonRemote Start Canceled Fuel Low
Remote Start Canceled Door Open Remote Start Canceled Hood OpenRemote Start Canceled Liftgate Open
Remote Start Canceled Time Expired Remote Start Disabled Start To ResetService Air Bag System
Service Air Bag Warning Light Door OpenLiftgate Open
Hood Open Shift Not AllowedVehicle Speed Too High To Shift to D
Vehicle Speed is Too High to Shift to R Vehicle Speed is Too High to Shift to PService Transmission
3
22_WD_OM_EN_USC_t.book Page 85
Page 93 of 332
GETTING TO KNOW YOUR INSTRUMENT PANEL91
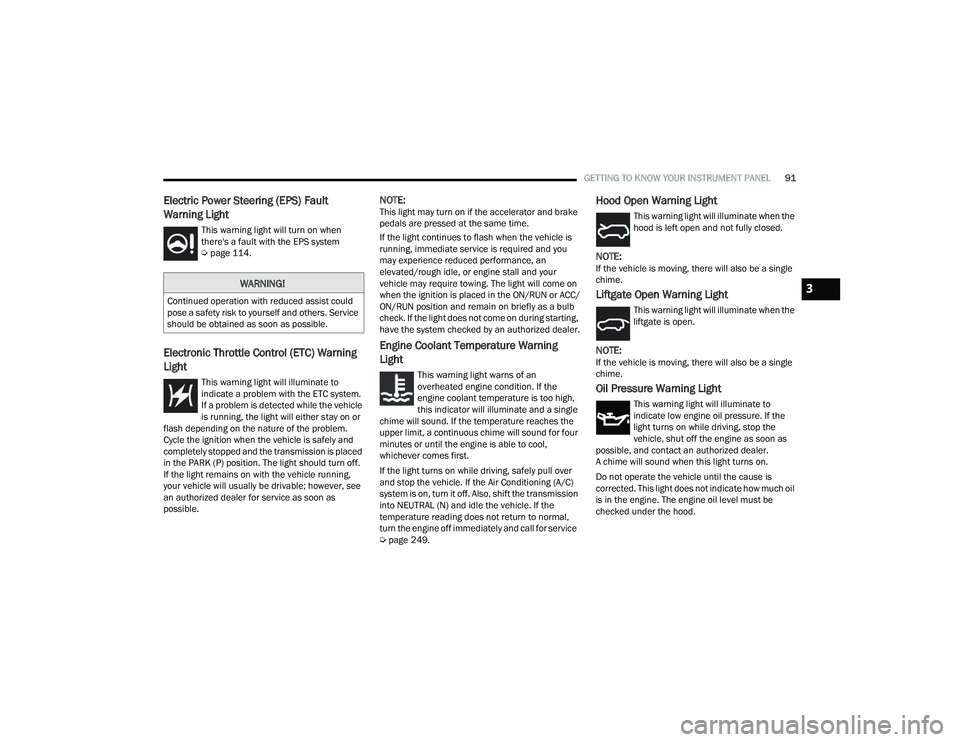
Electric Power Steering (EPS) Fault
Warning Light
This warning light will turn on when
there's a fault with the EPS system
Úpage 114.
Electronic Throttle Control (ETC) Warning
Light
This warning light will illuminate to
indicate a problem with the ETC system.
If a problem is detected while the vehicle
is running, the light will either stay on or
flash depending on the nature of the problem.
Cycle the ignition when the vehicle is safely and
completely stopped and the transmission is placed
in the PARK (P) position. The light should turn off.
If the light remains on with the vehicle running,
your vehicle will usually be drivable; however, see
an authorized dealer for service as soon as
possible.
NOTE:This light may turn on if the accelerator and brake
pedals are pressed at the same time.
If the light continues to flash when the vehicle is
running, immediate service is required and you
may experience reduced performance, an
elevated/rough idle, or engine stall and your
vehicle may require towing. The light will come on
when the ignition is placed in the ON/RUN or ACC/
ON/RUN position and remain on briefly as a bulb
check. If the light does not come on during starting,
have the system checked by an authorized dealer.
Engine Coolant Temperature Warning
Light
This warning light warns of an
overheated engine condition. If the
engine coolant temperature is too high,
this indicator will illuminate and a single
chime will sound. If the temperature reaches the
upper limit, a continuous chime will sound for four
minutes or until the engine is able to cool,
whichever comes first.
If the light turns on while driving, safely pull over
and stop the vehicle. If the Air Conditioning (A/C)
system is on, turn it off. Also, shift the transmission
into NEUTRAL (N) and idle the vehicle. If the
temperature reading does not return to normal,
turn the engine off immediately and call for service
Ú page 249.
Hood Open Warning Light
This warning light will illuminate when the
hood is left open and not fully closed.
NOTE:If the vehicle is moving, there will also be a single
chime.
Liftgate Open Warning Light
This warning light will illuminate when the
liftgate is open.
NOTE:If the vehicle is moving, there will also be a single
chime.
Oil Pressure Warning Light
This warning light will illuminate to
indicate low engine oil pressure. If the
light turns on while driving, stop the
vehicle, shut off the engine as soon as
possible, and contact an authorized dealer.
A chime will sound when this light turns on.
Do not operate the vehicle until the cause is
corrected. This light does not indicate how much oil
is in the engine. The engine oil level must be
checked under the hood.
WARNING!
Continued operation with reduced assist could
pose a safety risk to yourself and others. Service
should be obtained as soon as possible.3
22_WD_OM_EN_USC_t.book Page 91
Page 117 of 332
STARTING AND OPERATING115
AUTOSTOP MODE
The Stop/Start feature is enabled after every
normal customer engine start. At that time, the
system will go into STOP/START READY.
To Activate The Autostop Mode, The Following
Must Occur:
The system must be in STOP/START READY
state. A STOP/START READY message will be
displayed in the instrument cluster display
within the Stop/Start section Ú page 81.
The vehicle must be completely stopped.
The gear selector must be in a forward gear and
the brake pedal pressed.
The engine will shut down, the tachometer will
move to the zero position and the Stop/Start
telltale will illuminate indicating you are in
Autostop. Customer settings will be maintained
upon return to an engine running condition.
POSSIBLE REASONS THE ENGINE DOES
N
OT AUTOSTOP
Prior to engine shut down, the system will check
many safety and comfort conditions to see if they
are fulfilled. Detailed information about the
operation of the Stop/Start system may be viewed
in the instrument cluster display Stop/Start Screen. In the following situations, the engine will
not stop:
Driver’s seat belt is not buckled.
Driver’s door is not closed.
Battery temperature is too warm or cold.
Battery charge is low.
The vehicle is on a steep grade.
Cabin heating or cooling is in process and an
acceptable cabin temperature has not been
achieved.
HVAC is set to full defrost mode at a high blower
speed.
HVAC is set to MAX A/C.
Engine has not reached normal operating
temperature.
The transmission is not in a forward gear.
Hood is open.
Brake pedal is not pressed with sufficient pres
-
sure.
Accelerator pedal input.
Engine temp is too high.
5 mph (8 km/h) threshold has not been
achieved from previous Autostop.
Steering angle is beyond threshold.
ACC is on and speed is set.
It may be possible for the vehicle to be driven
several times without the Stop/Start system going
into a STOP/START READY state under more
extreme conditions of the items listed above.
TO START THE ENGINE WHILE IN
A
UTOSTOP MODE
While in a forward gear, the engine will start when
the brake pedal is released or the throttle pedal is
pressed. The transmission will automatically
re-engage upon engine restart.
Conditions That Will Cause The Engine To Start
Automatically While In Autostop Mode:
The transmission selector is moved out of
DRIVE.
To maintain cabin temperature comfort.
HVAC is set to full defrost mode.
HVAC system temperature or fan speed is
manually adjusted.
Battery voltage drops too low.
Stop/Start OFF switch is pushed.
A Stop/Start system error occurs.
Steering angle is beyond threshold.
4
22_WD_OM_EN_USC_t.book Page 115
Page 249 of 332
IN CASE OF EMERGENCY247
See the following steps to prepare for jump
starting:
1. Apply the parking brake, shift the automatic transmission into PARK (P) and turn the
ignition OFF.
2. Turn off the heater, radio, and all electrical accessories.
3. Remove the protective cover over the remote positive (+) battery post. Pull upward on the
cover to remove it.
4. Remove the protective cover over the remote negative (-) battery post.
5. If using another vehicle to jump start the battery, park the vehicle within the jumper
cable’s reach, apply the parking brake and
make sure the ignition is OFF.
JUMP STARTING PROCEDURE
NOTE:Make sure at all times that unused ends of jumper
cables are not contacting each other or either
vehicle while making connections.
Connecting The Jumper Cables
1. Connect the positive
(+) end of the jumper
cable to the remote positive (+)
post of the
discharged vehicle.
2. Connect the opposite end of the positive (+)
jumper cable to the positive (+) post of the
booster battery.
3. Connect the negative (-) end of the jumper
cable to the negative (-) post of the booster
battery.
4. Connect the opposite end of the negative (-)
jumper cable to the remote negative (-) post
(exposed metallic/unpainted post of the
discharge vehicle) located on the right hand
side next to the underhood fuse box.
WARNING!
Do not allow vehicles to touch each other as this
could establish a ground connection and
personal injury could result.
WARNING!
Take care to avoid the radiator cooling fan
whenever the hood is raised. It can start
anytime the ignition switch is ON. You can be
injured by moving fan blades.
Remove any metal jewelry such as rings,
watch bands and bracelets that could make
an inadvertent electrical contact. You could be
seriously injured.
Batteries contain sulfuric acid that can burn
your skin or eyes and generate hydrogen gas
which is flammable and explosive. Keep open
flames or sparks away from the battery.
WARNING!
Failure to follow this jump starting procedure
could result in personal injury or property
damage due to battery explosion.
CAUTION!
Failure to follow these procedures could result in
damage to the charging system of the booster
vehicle or the discharged vehicle.
WARNING!
Do not connect the jumper cable to the
negative (-) post of the discharged battery.
The resulting electrical spark could cause the
battery to explode and could result in personal
injury.
7
22_WD_OM_EN_USC_t.book Page 247
Page 252 of 332
250IN CASE OF EMERGENCY
In the event it is observed that the temperature
gauge is moving towards or close to the HOT (H)
position, you can reduce the potential for
overheating by taking the appropriate action.
On the highways — slow down.
In city traffic — while stopped, place the trans -
mission in NEUTRAL (N), but do not increase the
engine idle speed while preventing vehicle
motion with the brakes.
If your Air Conditioner (A/C) is on, turn it off. The
A/C system adds heat to the engine cooling
system and turning the A/C off can help remove
this heat.
You can also turn the temperature control to
maximum heat, the mode control to floor and
the blower control to high. This allows the heater
core to act as a supplement to the radiator and
aids in removing heat from the engine cooling
system.
MANUAL PARK RELEASE
In order to move the vehicle in cases where the
transmission will not shift out of PARK (P) (such as
a depleted battery), a Manual Park Release is
available. Follow these steps to use the Manual Park
Release:
1. Firmly apply the parking brake.
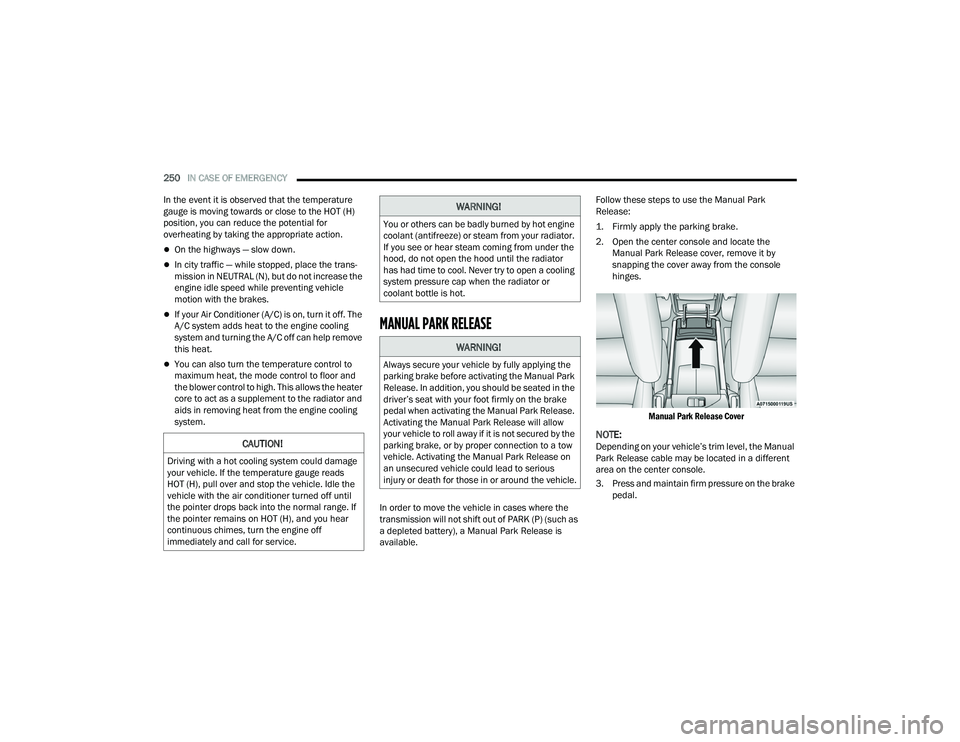
2. Open the center console and locate the
Manual Park Release cover, remove it by
snapping the cover away from the console
hinges.
Manual Park Release Cover
NOTE:Depending on your vehicle’s trim level, the Manual
Park Release cable may be located in a different
area on the center console.
3. Press and maintain firm pressure on the brake pedal.CAUTION!
Driving with a hot cooling system could damage
your vehicle. If the temperature gauge reads
HOT (H), pull over and stop the vehicle. Idle the
vehicle with the air conditioner turned off until
the pointer drops back into the normal range. If
the pointer remains on HOT (H), and you hear
continuous chimes, turn the engine off
immediately and call for service.
WARNING!
You or others can be badly burned by hot engine
coolant (antifreeze) or steam from your radiator.
If you see or hear steam coming from under the
hood, do not open the hood until the radiator
has had time to cool. Never try to open a cooling
system pressure cap when the radiator or
coolant bottle is hot.
WARNING!
Always secure your vehicle by fully applying the
parking brake before activating the Manual Park
Release. In addition, you should be seated in the
driver’s seat with your foot firmly on the brake
pedal when activating the Manual Park Release.
Activating the Manual Park Release will allow
your vehicle to roll away if it is not secured by the
parking brake, or by proper connection to a tow
vehicle. Activating the Manual Park Release on
an unsecured vehicle could lead to serious
injury or death for those in or around the vehicle.
22_WD_OM_EN_USC_t.book Page 250
Page 274 of 332
272SERVICING AND MAINTENANCE
COOLING SYSTEM
Engine Coolant Checks
Check the engine coolant (antifreeze) protection
every 12 months (before the onset of freezing
weather, where applicable). If the engine coolant is
dirty, the system should be drained, flushed, and
refilled with fresh Organic Additive Technology
(OAT) coolant (conforming to MS.90032) by an authorized dealer. Check the front of the A/C
condenser for any accumulation of bugs, leaves,
etc. If dirty, clean by gently spraying water from a
garden hose vertically down the face of the
condenser.
Check the engine cooling system hoses for brittle
rubber, cracking, tears, cuts, and tightness of the
connection at the coolant recovery bottle and
radiator. Inspect the entire system for leaks.
DO NOT REMOVE THE COOLANT PRESSURE CAP
WHEN THE COOLING SYSTEM IS HOT.
Cooling System — Drain, Flush And Refill
NOTE:Some vehicles require special tools to add coolant
properly. Failure to fill these systems properly
could lead to severe internal engine damage. If any
coolant is needed to be added to the system
please contact an authorized dealer.
If the engine coolant (antifreeze) is dirty or
contains visible sediment, have an authorized
dealer clean and flush with OAT coolant
(conforming to MS.90032).
For the proper maintenance intervals
Úpage 256.
Selection Of Coolant
For further information Ú page 312.
NOTE:
Mixing of engine coolant (antifreeze) other than
specified Organic Additive Technology (OAT)
engine coolant, may result in engine damage
and may decrease corrosion protection. OAT
engine coolant is different and should not be
mixed with Hybrid Organic Additive Technology
(HOAT) engine coolant or any “globally compat -
ible” coolant. If a non-OAT engine coolant is
introduced into the cooling system in an emer -
gency, the cooling system will need to be
drained, flushed, and refilled with fresh OAT
coolant (conforming to MS.90032), by an autho -
rized dealer as soon as possible.
Do not use water alone or alcohol-based engine
coolant products. Do not use additional rust
inhibitors or antirust products, as they may not
be compatible with the radiator engine coolant
and may plug the radiator.
This vehicle has not been designed for use with
propylene glycol-based engine coolant. Use of
propylene glycol-based engine coolant is not
recommended.
Some vehicles require special tools to add
coolant properly. Failure to fill these systems
properly could lead to severe internal engine
damage. If any coolant is needed to be added to
the system please contact an authorized dealer.
WARNING!
You or others can be badly burned by hot
engine coolant (antifreeze) or steam from your
radiator. If you see or hear steam coming from
under the hood, do not open the hood until the
radiator has had time to cool. Never open a
cooling system pressure cap when the radi -
ator or coolant bottle is hot.
Keep hands, tools, clothing, and jewelry away
from the radiator cooling fan when the hood is
raised. The fan starts automatically and may
start at any time, whether the engine is
running or not.
When working near the radiator cooling fan,
disconnect the fan motor lead or turn the igni -
tion to the OFF mode. The fan is temperature
controlled and can start at any time the igni -
tion is in the ON mode.
22_WD_OM_EN_USC_t.book Page 272