turn signal DODGE DURANGO 2022 Owners Manual
[x] Cancel search | Manufacturer: DODGE, Model Year: 2022, Model line: DURANGO, Model: DODGE DURANGO 2022Pages: 332, PDF Size: 19.82 MB
Page 5 of 332
3
MIRRORS ............................................................... 41 Inside Rearview Mirror .....................................41
Illuminated Vanity Mirrors ...............................41
Outside Mirrors ................................................42
Outside Automatic Dimming Mirror—
If Equipped........................................................42
Power Mirrors ..................................................42
Heated Mirrors — If Equipped..........................42
Tilt Side Mirrors In Reverse — If Equipped......42
UNIVERSAL GARAGE DOOR OPENER
(HOMELINK®)
b
.................................................. 43
Before You Begin Programming
HomeLink®.......................................................43
Erasing All The HomeLink® Channels ............43
Identifying Whether You Have A Rolling
Code Or Non-Rolling Code Device ...................43
Programming HomeLink® To A Garage
Door Opener .....................................................44
Programming HomeLink® To A
Miscellaneous Device ......................................45
Reprogramming A Single HomeLink®
Button ...............................................................45
Canadian/Gate Operator Programming .........45
Security .............................................................46
Troubleshooting Tips ........................................46 EXTERIOR LIGHTS ................................................47
Multifunction Lever ..........................................47
Headlight Switch .............................................47
Daytime Running Lights (DRLs) .....................48
High/Low Beam Switch....................................48
Automatic High Beam — If Equipped ..............48
Flash-To-Pass .................................................49
Automatic Headlights ......................................49
Parking Lights And Panel Lights ......................49
Automatic Headlights With Wipers .................49
Headlight Delay ................................................49
Lights-On Reminder .........................................49
Fog Lights — If Equipped..................................49
Turn Signals ......................................................50
Lane Change Assist — If Equipped ..................50
Automatic Headlight Leveling —
If Equipped........................................................50
Battery Saver ....................................................50
INTERIOR LIGHTS ................................................... 50
Courtesy Lights .................................................51
WINDSHIELD WIPERS AND WASHERS............... 52
Windshield Wiper Operation ...........................52
Rain Sensing Wipers — If Equipped ...............53
Rear Window Wiper/Washer ..........................54 CLIMATE CONTROLS ............................................. 54
Automatic Climate Control Descriptions
And Functions................................................... 54
Automatic Temperature Control (ATC) ............ 60
Climate Voice Recognition............................... 60
Operating Tips .................................................61
INTERIOR STORAGE AND EQUIPMENT ............... 62
Storage ............................................................. 62
USB/AUX Control ............................................. 64
Lighted Cupholders — If Equipped .................. 66
Electrical Power Outlets .................................. 66
Power Inverter — If Equipped .......................... 68
Wireless Charging Pad — If Equipped ............. 69
WINDOWS ............................................................. 69
Power Windows ................................................ 69
Wind Buffeting .................................................71
POWER SUNROOF — IF EQUIPPED ..................... 71
Opening And Closing The Sunroof .................. 72
Sunshade Operation ........................................ 72
Pinch Protect Feature ...................................... 72
Sunroof Maintenance ...................................... 72
Ignition Off Operation....................................... 72
HOOD....................................................................... 73
Opening The Hood ........................................... 73
Closing The Hood ............................................. 73
22_WD_OM_EN_USC_t.book Page 3
Page 15 of 332
13
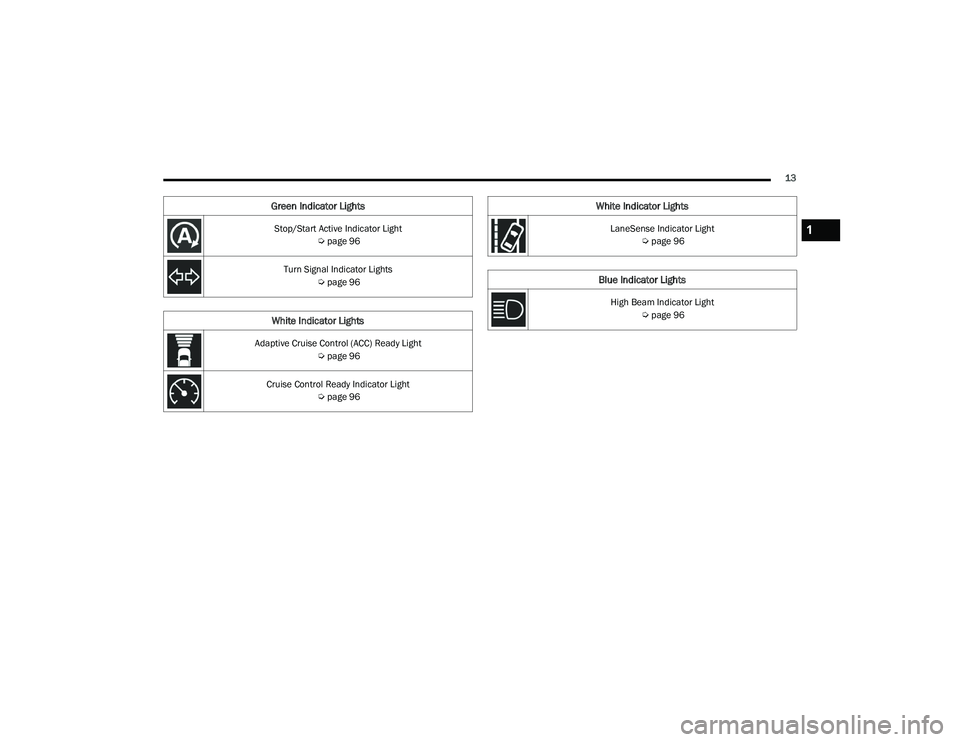
Stop/Start Active Indicator Light Úpage 96
Turn Signal Indicator Lights Úpage 96
White Indicator Lights
Adaptive Cruise Control (ACC) Ready Light
Úpage 96
Cruise Control Ready Indicator Light Úpage 96
Green Indicator Lights
LaneSense Indicator Light
Úpage 96
Blue Indicator Lights
High Beam Indicator Light
Úpage 96
White Indicator Lights
1
22_WD_OM_EN_USC_t.book Page 13
Page 16 of 332
14
GETTING TO KNOW YOUR VEHICLE
KEYS
KEY FOB
Your vehicle is equipped with a key fob which
supports Passive Entry, Remote Keyless Entry
(RKE), Keyless Enter ‘n Go™ (if equipped), Remote
Start (if equipped), and remote power liftgate
operation. The key fob allows you to lock or unlock
the doors and liftgate from distances up to
approximately 66 ft (20 m). The key fob does not need to be pointed at the vehicle to activate the
system. The key fob also contains an emergency
key, which is stored in the rear of the key fob.
NOTE:
The key fob’s wireless signal may be blocked if
the key fob is located next to a mobile phone,
laptop, or other electronic device. This may
result in poor performance.
With ignition in the ON position and the vehicle
moving at 2 mph (4 km/h), all RKE commands are disabled.
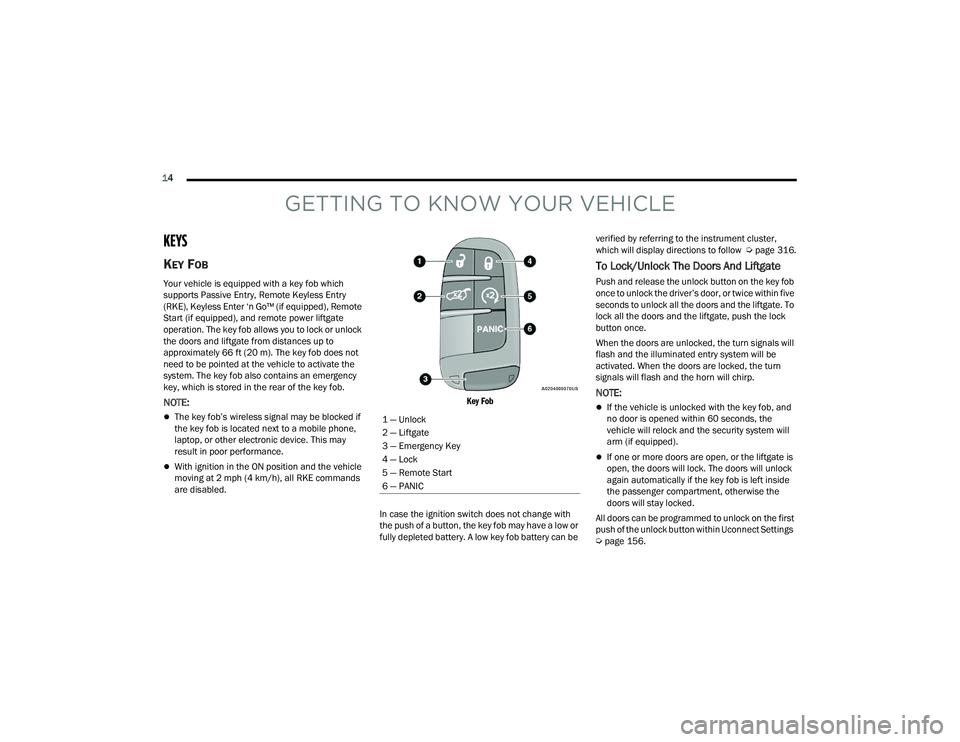
Key Fob
In case the ignition switch does not change with
the push of a button, the key fob may have a low or
fully depleted battery. A low key fob battery can be verified by referring to the instrument cluster,
which will display directions to follow
Úpage 316.
To Lock/Unlock The Doors And Liftgate
Push and release the unlock button on the key fob
once to unlock the driver’s door, or twice within five
seconds to unlock all the doors and the liftgate. To
lock all the doors and the liftgate, push the lock
button once.
When the doors are unlocked, the turn signals will
flash and the illuminated entry system will be
activated. When the doors are locked, the turn
signals will flash and the horn will chirp.
NOTE:
If the vehicle is unlocked with the key fob, and
no door is opened within 60 seconds, the
vehicle will relock and the security system will
arm (if equipped).
If one or more doors are open, or the liftgate is
open, the doors will lock. The doors will unlock
again automatically if the key fob is left inside
the passenger compartment, otherwise the
doors will stay locked.
All doors can be programmed to unlock on the first
push of the unlock button within Uconnect Settings
Ú page 156.
1 — Unlock
2 — Liftgate
3 — Emergency Key
4 — Lock
5 — Remote Start
6 — PANIC
22_WD_OM_EN_USC_t.book Page 14
Page 21 of 332
GETTING TO KNOW YOUR VEHICLE19
NOTE:Obstructions between the vehicle and key fob may
reduce this range Úpage 316.
HOW TO USE REMOTE START
Push and release the Remote Start button on the
key fob twice within five seconds. The vehicle
doors will lock, the parking lights will flash, and the
horn will chirp twice (if programmed). Then, the
engine will start, and the vehicle will remain in the
Remote Start mode for a 15 minute cycle. Pushing
the Remote Start button a third time shuts the
engine off.
To drive the vehicle, push the unlock button, and
with a valid Keyless Enter ‘n Go™ key fob in the
vehicle, place the ignition in the ON/RUN position.
NOTE:
With Remote Start, the engine will only run for
15 minutes.
Remote Start can only be used twice.
If an engine fault is present or fuel level is low,
the vehicle will start and then shut down in
10 seconds.
The parking lights will turn on and remain on
during Remote Start mode.
For security, power window and sunroof
(if equipped) operation is disabled when the
vehicle is in the Remote Start mode.
The ignition must be placed in the ON/RUN posi -
tion before the Remote Start sequence can be
repeated for a third cycle.
All of the following conditions must be met before
the engine will remote start:
Gear selector in PARK
Doors closed
Hood closed
Liftgate closed
Hazard switch off
Brake pedal not pressed
Battery at an acceptable charge level
PANIC button not pressed
System not disabled from previous remote start
event
Vehicle Security system indicator flashing
Ignition in OFF position
Fuel level meets minimum requirement
Vehicle Security system is not signaling an intru -
sion
Malfunction Indicator Light (MIL) is not illumi -
nated
TO EXIT REMOTE START MODE
To drive the vehicle after starting the Remote Start
system, either push and release the unlock button
on the key fob to unlock the doors, or unlock the
vehicle using Keyless Enter ‘n Go™ — Passive
Entry via the door handles, and disarm the
WARNING!
Do not start or run an engine in a closed
garage or confined area. Exhaust gas contains
Carbon Monoxide (CO) which is odorless and
colorless. Carbon Monoxide is poisonous and
can cause serious injury or death when
inhaled.
Keep key fobs away from children. Operation
of the Remote Start system, windows, door
locks or other controls could cause serious
injury or death.WARNING!
Do not start or run an engine in a closed garage
or confined area. Exhaust gas contains Carbon
Monoxide (CO) which is odorless and colorless.
Carbon Monoxide is poisonous and can cause
serious injury or death when inhaled.
Keep key fobs away from children. Operation
of the Remote Start system, windows, door
locks or other controls could cause serious
injury or death.
2
22_WD_OM_EN_USC_t.book Page 19
Page 23 of 332
GETTING TO KNOW YOUR VEHICLE21
REMOTE START CANCEL MESSAGE —
I
F EQUIPPED
The following messages will display in the
instrument cluster display if the vehicle fails to
remote start or exits Remote Start prematurely:
Remote Start Cancelled — Door Open
Remote Start Cancelled — Hood Open
Remote Start Cancelled — Fuel Low
Remote Start Cancelled — Liftgate Open
Remote Start Cancelled — Timer Expired
Remote Start Disabled — Start Vehicle To Reset
The instrument cluster display message stays
active until the ignition is placed in the ON/RUN
position.
VEHICLE SECURITY SYSTEM — IF EQUIPPED
The Vehicle Security system monitors the vehicle
doors for unauthorized entry and the Keyless
Enter ‘n Go™ Ignition for unauthorized operation.
While the Vehicle Security system is armed, interior
switches for door locks and liftgate release are
disabled. If something triggers the alarm, the
Vehicle Security system will provide the following
audible and visible signals:
The horn will pulse
The parking lights and/or turn signals will flash
The Vehicle Security Light in the instrument
cluster will flash
TO ARM THE SYSTEM
Follow these steps to arm the Vehicle Security
system:
1. Make sure the vehicle’s ignition is placed in the OFF position.
For vehicles equipped with Keyless Entry,
make sure the vehicle’s keyless ignition
system is OFF.
2. Perform one of the following methods to lock the vehicle:
Push lock on the interior power door lock
switch with the driver and/or passenger
door open.
Push the lock button on the exterior Passive
Entry door handle with a valid key fob avail -
able in the same exterior zone Ú page 23.
Push the lock button on the key fob.
3. If any doors are open, close them.
TO DISARM THE SYSTEM
The Vehicle Security system can be disarmed using
any of the following methods:
Push the unlock button on the key fob.
Grab the Passive Entry unlock door handle
(if equipped) Ú page 23.
Cycle the vehicle ignition system out of the
OFF position.
NOTE:
The driver's door key cylinder cannot arm or
disarm the Vehicle Security system. Use of the
door key cylinder when the alarm is armed will
sound the alarm when the door is opened.
The Vehicle Security system remains armed
when the power liftgate is opened using the
liftgate button on the key fob. If someone enters
the vehicle through the opened liftgate, then
opens any door from the inside, the alarm will
sound.
If Passive Entry (if equipped) is used to unlock
the liftgate, the Vehicle Security system is
disarmed and the rest of the vehicle doors will
remain locked unless all doors are set to unlock
on first press within Uconnect Settings.
When the Vehicle Security system is armed, the
interior power door lock switches will not unlock
the doors.
2
22_WD_OM_EN_USC_t.book Page 21
Page 25 of 332
GETTING TO KNOW YOUR VEHICLE23
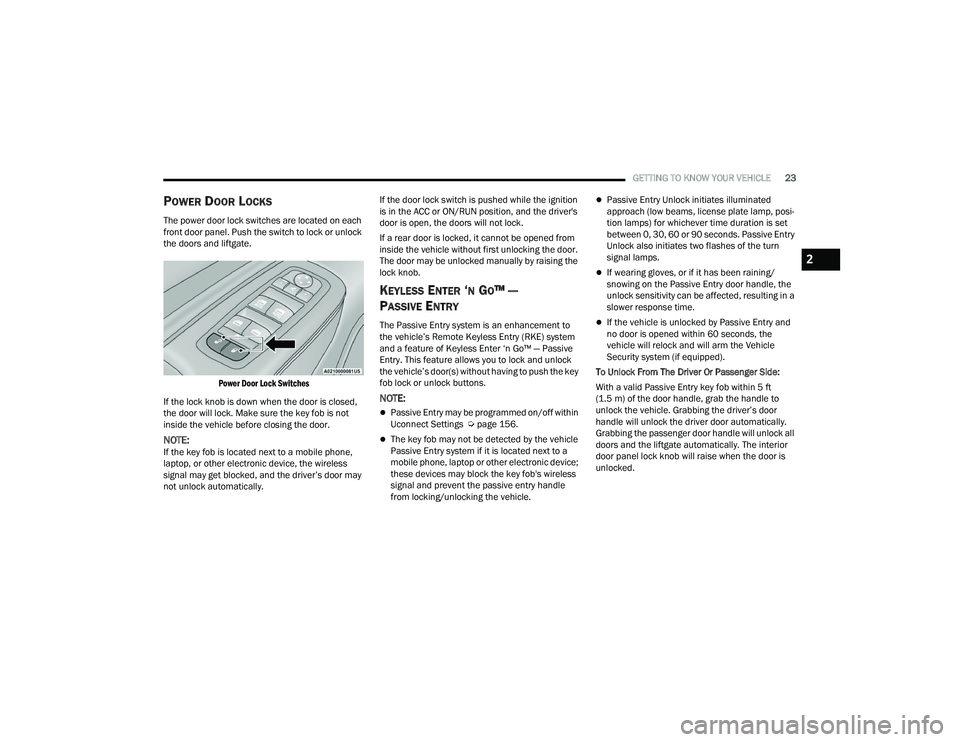
POWER DOOR LOCKS
The power door lock switches are located on each
front door panel. Push the switch to lock or unlock
the doors and liftgate.
Power Door Lock Switches
If the lock knob is down when the door is closed,
the door will lock. Make sure the key fob is not
inside the vehicle before closing the door.
NOTE:If the key fob is located next to a mobile phone,
laptop, or other electronic device, the wireless
signal may get blocked, and the driver’s door may
not unlock automatically. If the door lock switch is pushed while the ignition
is in the ACC or ON/RUN position, and the driver's
door is open, the doors will not lock.
If a rear door is locked, it cannot be opened from
inside the vehicle without first unlocking the door.
The door may be unlocked manually by raising the
lock knob.
KEYLESS ENTER ‘N GO™ —
P
ASSIVE ENTRY
The Passive Entry system is an enhancement to
the vehicle’s Remote Keyless Entry (RKE) system
and a feature of Keyless Enter ‘n Go™ — Passive
Entry. This feature allows you to lock and unlock
the vehicle’s door(s) without having to push the key
fob lock or unlock buttons.
NOTE:
Passive Entry may be programmed on/off within
Uconnect Settings Ú page 156.
The key fob may not be detected by the vehicle
Passive Entry system if it is located next to a
mobile phone, laptop or other electronic device;
these devices may block the key fob's wireless
signal and prevent the passive entry handle
from locking/unlocking the vehicle.
Passive Entry Unlock initiates illuminated
approach (low beams, license plate lamp, posi -
tion lamps) for whichever time duration is set
between 0, 30, 60 or 90 seconds. Passive Entry
Unlock also initiates two flashes of the turn
signal lamps.
If wearing gloves, or if it has been raining/
snowing on the Passive Entry door handle, the
unlock sensitivity can be affected, resulting in a
slower response time.
If the vehicle is unlocked by Passive Entry and
no door is opened within 60 seconds, the
vehicle will relock and will arm the Vehicle
Security system (if equipped).
To Unlock From The Driver Or Passenger Side:
With a valid Passive Entry key fob within 5 ft
(1.5 m) of the door handle, grab the handle to
unlock the vehicle. Grabbing the driver’s door
handle will unlock the driver door automatically.
Grabbing the passenger door handle will unlock all
doors and the liftgate automatically. The interior
door panel lock knob will raise when the door is
unlocked.
2
22_WD_OM_EN_USC_t.book Page 23
Page 50 of 332
48GETTING TO KNOW YOUR VEHICLE
To turn off the headlights, rotate the headlight
switch back to the O (off) position.
NOTE:For vehicles sold in Canada, rotate the headlight
switch clockwise from the parking lights and
instrument panel lights position to the first detent
to turn on headlights, parking lights, and
instrument panel lights. Rotate the headlight
switch to the second detent for the AUTO position.
NOTE:
Your vehicle is equipped with plastic headlight
and fog light (if equipped) lenses that are lighter
and less susceptible to stone breakage than
glass lights. Plastic is not as scratch resistant as
glass and therefore different lens cleaning
procedures must be followed.
To minimize the possibility of scratching the
lenses and reducing light output, avoid wiping
with a dry cloth. To remove road dirt, wash with
a mild soap solution followed by rinsing.
DAYTIME RUNNING LIGHTS (DRLS)
The Daytime Running Lights (DRLs) come on
whenever the engine is running. The lights will
remain on until the ignition is placed in the OFF
position, or the parking brake is engaged. The
headlight switch must be used during normal
nighttime driving.
NOTE:
For vehicles sold in Canada, the Daytime
Running Lights will automatically deactivate
when the front fog lights are turned on.
If allowed by law in the country in which the
vehicle was purchased, the Daytime Running
Lights can be turned on and off using the
Uconnect system Ú page 156.
On some vehicles, the Daytime Running Lights
may deactivate or reduce intensity on one side
of the vehicle (when a turn signal is activated on
that side), or on both sides of the vehicle (when
the hazard warning lights are activated).
HIGH/LOW BEAM SWITCH
Push the multifunction lever toward the instrument
panel to switch the headlights to high beams. Pulling
the multifunction back will turn the low beams on.
AUTOMATIC HIGH BEAM — IF EQUIPPED
The Automatic High Beam Headlamp Control
system provides increased forward lighting at night
by automatically controlling the high beams
through the use of a camera mounted on the
inside rearview mirror. This camera detects vehicle
specific light and automatically switches from high
beams to low beams until the approaching vehicle
is out of view.
NOTE:
The Automatic High Beam Headlamp Control can
be turned on or off by selecting or deselecting
“Auto Dim High Beams” within your Uconnect
Settings
Ú
page 156, as well as turning the
headlight switch to the AUTO position.
Broken, muddy, or obstructed headlights and
taillights of vehicles in the field of view will
cause headlights to remain on longer (closer to
the vehicle). Also, dirt, film, and other obstruc -
tions on the windshield or camera lens will
cause the system to function improperly.
If the windshield or Automatic High Beam Head -
lamp Control mirror is replaced, the mirror must
be re-aimed to ensure proper performance.
See a local authorized dealer.CAUTION!
Do not use abrasive cleaning components,
solvents, steel wool or other abrasive materials
to clean the lenses.
22_WD_OM_EN_USC_t.book Page 48
Page 51 of 332
GETTING TO KNOW YOUR VEHICLE49
To opt out of the Advanced Auto High-Beam
Sensitivity Control (default) and enter Reduced
High-Beam Sensitivity Control (not recom -
mended), toggle high beam lever six full on/off
cycles within 10 seconds of ignition ON. System
will return to default setting upon ignition off.
FLASH-TO-PASS
You can signal another vehicle with your headlights
by lightly pulling the multifunction lever toward you.
This will cause the high beam headlights to turn on,
and remain on, until the lever is released.
AUTOMATIC HEADLIGHTS
This system automatically turns the headlights on
or off according to ambient light levels. To turn the
system on, rotate the headlight switch
counterclockwise to the AUTO position. When the
system is on, the headlight time delay feature is
also on. This means the headlights will stay on for
up to 90 seconds after you place the ignition into
the OFF position. The headlight time delay can be
programmed 0/30/60/90 seconds within
Uconnect Settings Ú page 156.
To turn the automatic system off, move the
headlight switch out of the AUTO position.
NOTE:The engine must be running before the headlights
will come on in the automatic mode.
PARKING LIGHTS AND PANEL LIGHTS
To turn on the parking lights and instrument panel
lights, rotate the headlight switch clockwise. To
turn off the parking lights, rotate the headlight
switch back to the O (off) position.
NOTE:Vehicles sold in Canada are equipped with a head -
light switch with an AUTO and ON detent but
without an OFF detent. Headlights will be deacti -
vated when the headlight switch is placed in the
parking lights position. However, the Daytime
Running Lights (DRLs) will be activated along with
the front and rear marker lights. The DRLs may be
deactivated when the parking brake is engaged.
AUTOMATIC HEADLIGHTS WITH WIPERS
If your vehicle is equipped with Automatic
Headlights, it also has this
customer-programmable feature. When your
headlights are in the automatic mode and the
engine is running, they will automatically turn on
when the wiper system is on. This feature is
programmable through the Uconnect system
Ú page 156.
NOTE:When your headlights come on during the daytime,
the vehicle will monitor outside brightness and
decide if the instrument panel needs to be dimmed
or not Ú page 51.
HEADLIGHT DELAY
To assist when exiting the vehicle, the headlight
delay feature will leave the headlights on for up to
90 seconds. This delay is initiated when the
ignition is placed in the OFF position while the
headlight switch is on, and then the headlight
switch is cycled off. Headlight delay can be
canceled by either turning the headlight switch on
then off, or by placing the ignition in the ON
position.
NOTE:The headlight delay time is programmable through
the Uconnect system Ú page 156.
LIGHTS-ON REMINDER
If the headlights, parking lights, or cargo lights are
left on after the ignition is placed in the OFF
position, the vehicle will chime when the driver’s
door is opened.
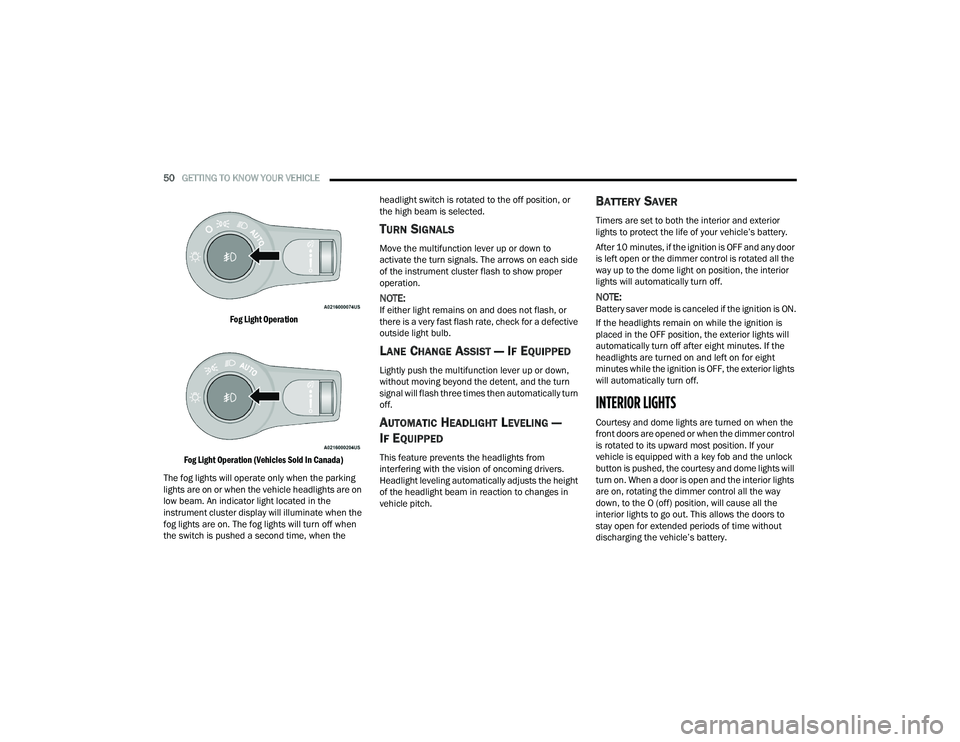
FOG LIGHTS — IF EQUIPPED
The fog lights are turned on by pushing fog light
button on the headlight switch.
2
22_WD_OM_EN_USC_t.book Page 49
Page 52 of 332
50GETTING TO KNOW YOUR VEHICLE
Fog Light Operation
Fog Light Operation (Vehicles Sold In Canada)
The fog lights will operate only when the parking
lights are on or when the vehicle headlights are on
low beam. An indicator light located in the
instrument cluster display will illuminate when the
fog lights are on. The fog lights will turn off when
the switch is pushed a second time, when the headlight switch is rotated to the off position, or
the high beam is selected.
TURN SIGNALS
Move the multifunction lever up or down to
activate the turn signals. The arrows on each side
of the instrument cluster flash to show proper
operation.
NOTE:If either light remains on and does not flash, or
there is a very fast flash rate, check for a defective
outside light bulb.
LANE CHANGE ASSIST — IF EQUIPPED
Lightly push the multifunction lever up or down,
without moving beyond the detent, and the turn
signal will flash three times then automatically turn
off.
AUTOMATIC HEADLIGHT LEVELING —
I
F EQUIPPED
This feature prevents the headlights from
interfering with the vision of oncoming drivers.
Headlight leveling automatically adjusts the height
of the headlight beam in reaction to changes in
vehicle pitch.
BATTERY SAVER
Timers are set to both the interior and exterior
lights to protect the life of your vehicle’s battery.
After 10 minutes, if the ignition is OFF and any door
is left open or the dimmer control is rotated all the
way up to the dome light on position, the interior
lights will automatically turn off.
NOTE:Battery saver mode is canceled if the ignition is ON.
If the headlights remain on while the ignition is
placed in the OFF position, the exterior lights will
automatically turn off after eight minutes. If the
headlights are turned on and left on for eight
minutes while the ignition is OFF, the exterior lights
will automatically turn off.
INTERIOR LIGHTS
Courtesy and dome lights are turned on when the
front doors are opened or when the dimmer control
is rotated to its upward most position. If your
vehicle is equipped with a key fob and the unlock
button is pushed, the courtesy and dome lights will
turn on. When a door is open and the interior lights
are on, rotating the dimmer control all the way
down, to the O (off) position, will cause all the
interior lights to go out. This allows the doors to
stay open for extended periods of time without
discharging the vehicle’s battery.
22_WD_OM_EN_USC_t.book Page 50
Page 76 of 332
74GETTING TO KNOW YOUR VEHICLE
(Continued)
When the liftgate button on the key fob is pushed
two times, the turn signals will flash to signal that
the liftgate is opening or closing (if Flash Lamps
with Lock is enabled in the Uconnect settings), and
the liftgate chime will be audible. The chime can be
turned on or off through the Uconnect Settings
Ú
page 156.
NOTE:
In the event of a power malfunction to the lift -
gate, an emergency liftgate latch release can be
used to open the liftgate. The emergency liftgate
latch release can be accessed through a snap-in
cover located on the liftgate trim panel.
If liftgate is left open for an extended period of
time, the liftgate may need to be closed manu -
ally to reset power liftgate functionality.
NOTE:
The power liftgate buttons will not operate if the
vehicle is in gear or the vehicle speed is above
0 mph (0 km/h).
The power liftgate will not operate in tempera -
tures below −22°F (−30°C) or temperatures
above 150°F (65°C). Be sure to remove any
buildup of snow or ice from the liftgate before
pushing any of the power liftgate switches.
If anything obstructs the power liftgate while it is
closing or opening, the liftgate will automatically
reverse to the closed or open position. After
multiple obstructions in the same cycle, the lift -
gate will automatically stop and must be opened
or closed manually.
There are also pinch sensors attached to the
side of the liftgate. Light pressure anywhere
along these strips will cause the liftgate to
return to the open position.
If the liftgate is only partially open, push the lift -
gate button on the key fob twice to operate the
liftgate.
If the liftgate release handle is pushed while the
power liftgate is opening, the liftgate motor will
disengage to allow manual operation.
CARGO AREA FEATURES
Cargo Storage
There is a removable storage bin located on the
left side of the rear cargo area.
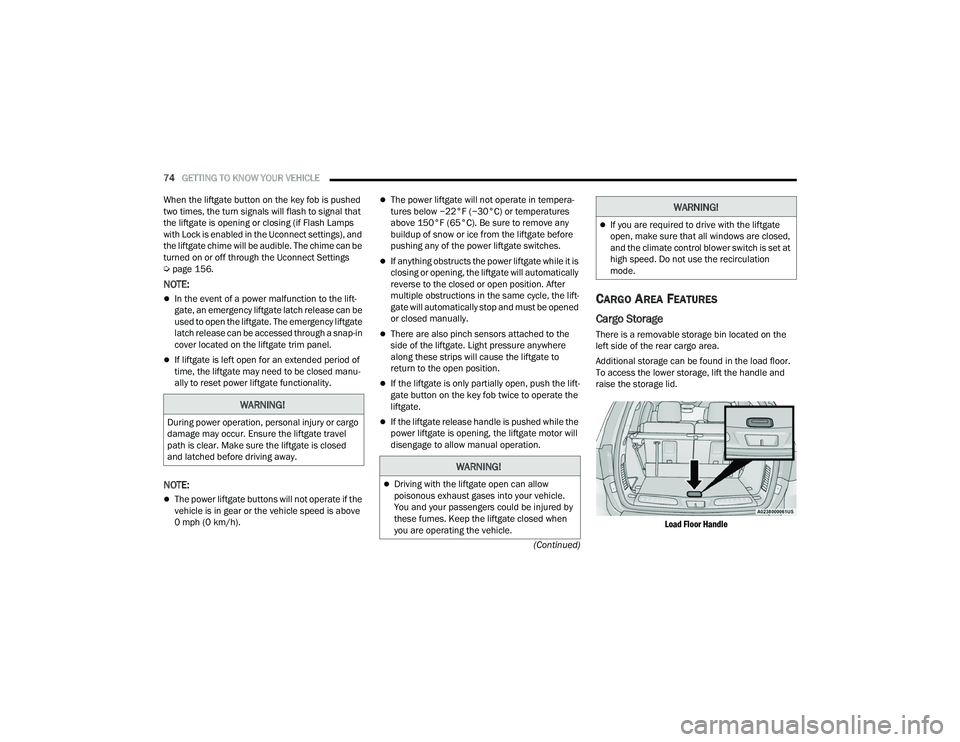
Additional storage can be found in the load floor.
To access the lower storage, lift the handle and
raise the storage lid.
Load Floor Handle
WARNING!
During power operation, personal injury or cargo
damage may occur. Ensure the liftgate travel
path is clear. Make sure the liftgate is closed
and latched before driving away.
WARNING!
Driving with the liftgate open can allow
poisonous exhaust gases into your vehicle.
You and your passengers could be injured by
these fumes. Keep the liftgate closed when
you are operating the vehicle.
If you are required to drive with the liftgate
open, make sure that all windows are closed,
and the climate control blower switch is set at
high speed. Do not use the recirculation
mode.
WARNING!
22_WD_OM_EN_USC_t.book Page 74